 Dallon Avery
Serpentshrine Cavern Raid Guide Quick Overview:
- This raid requires an attunement.
- Serpentshrine Cavern has 6 bosses, 5 of which can be done in any order
- The bosses drop Tier 5 tokens for Gloves, Legs, and Helm slots
- Some bosses require 300-level fishing, and over 300 in Frost, Nature, and Fire resistances
Do you want to get those Tier 5 tokens right now? Buy WoW TBC Classic Anniversary Serpentshrine Cavern service at Skycoach and enjoy the raid rewards delivered by professional gamers.


Read closely 
Browse our hottest TBC Anniversary Boosting services


Serpentshrine Cavern Overview
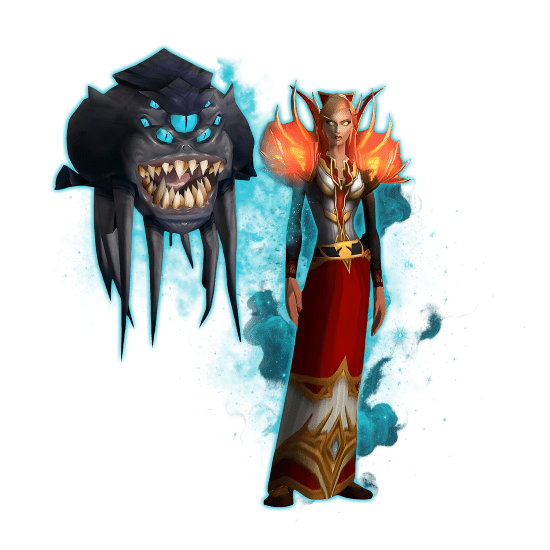
Serpentshrine Cavern is a 6-boss raid coming to TBC Anniversary with Phase 2 on May 14th. Your goal is to defeat a naga by the name of Lady Vashj, who is a loyal follower of Lord Illidan Stormrage. This is one of the raids that requires attunement and has no linear boss order, meaning that before facing Lady Vashj, you can approach any of the other 5 bosses in any order you like.
Serpentshrine Cavern Attunement Guide
To unlock Serpentshrine Cavern, you first need to enter the Slave Pens dungeon and defeat the first boss, Mennu the Betrayer, and locate a naga by the name of Skar'this the Heretic, who is being kept in one of the cells. He will have a quest for you, The Cudgel of Kar'desh, which basically asks you to kill two bosses in two different raids:
- Gruul the Dragonkiller in Gruul's Lair
- Nightbane in Karazhan
Both of them will drop Earthen Signet and Blazing Signet on death, which you will need to take back to the naga to complete the quest. Once the quest is done, you will receive The Mark of Vashj, which means you’re ready for the raid.
This attunement is account-wide - complete it once on any character and all alts gain access.
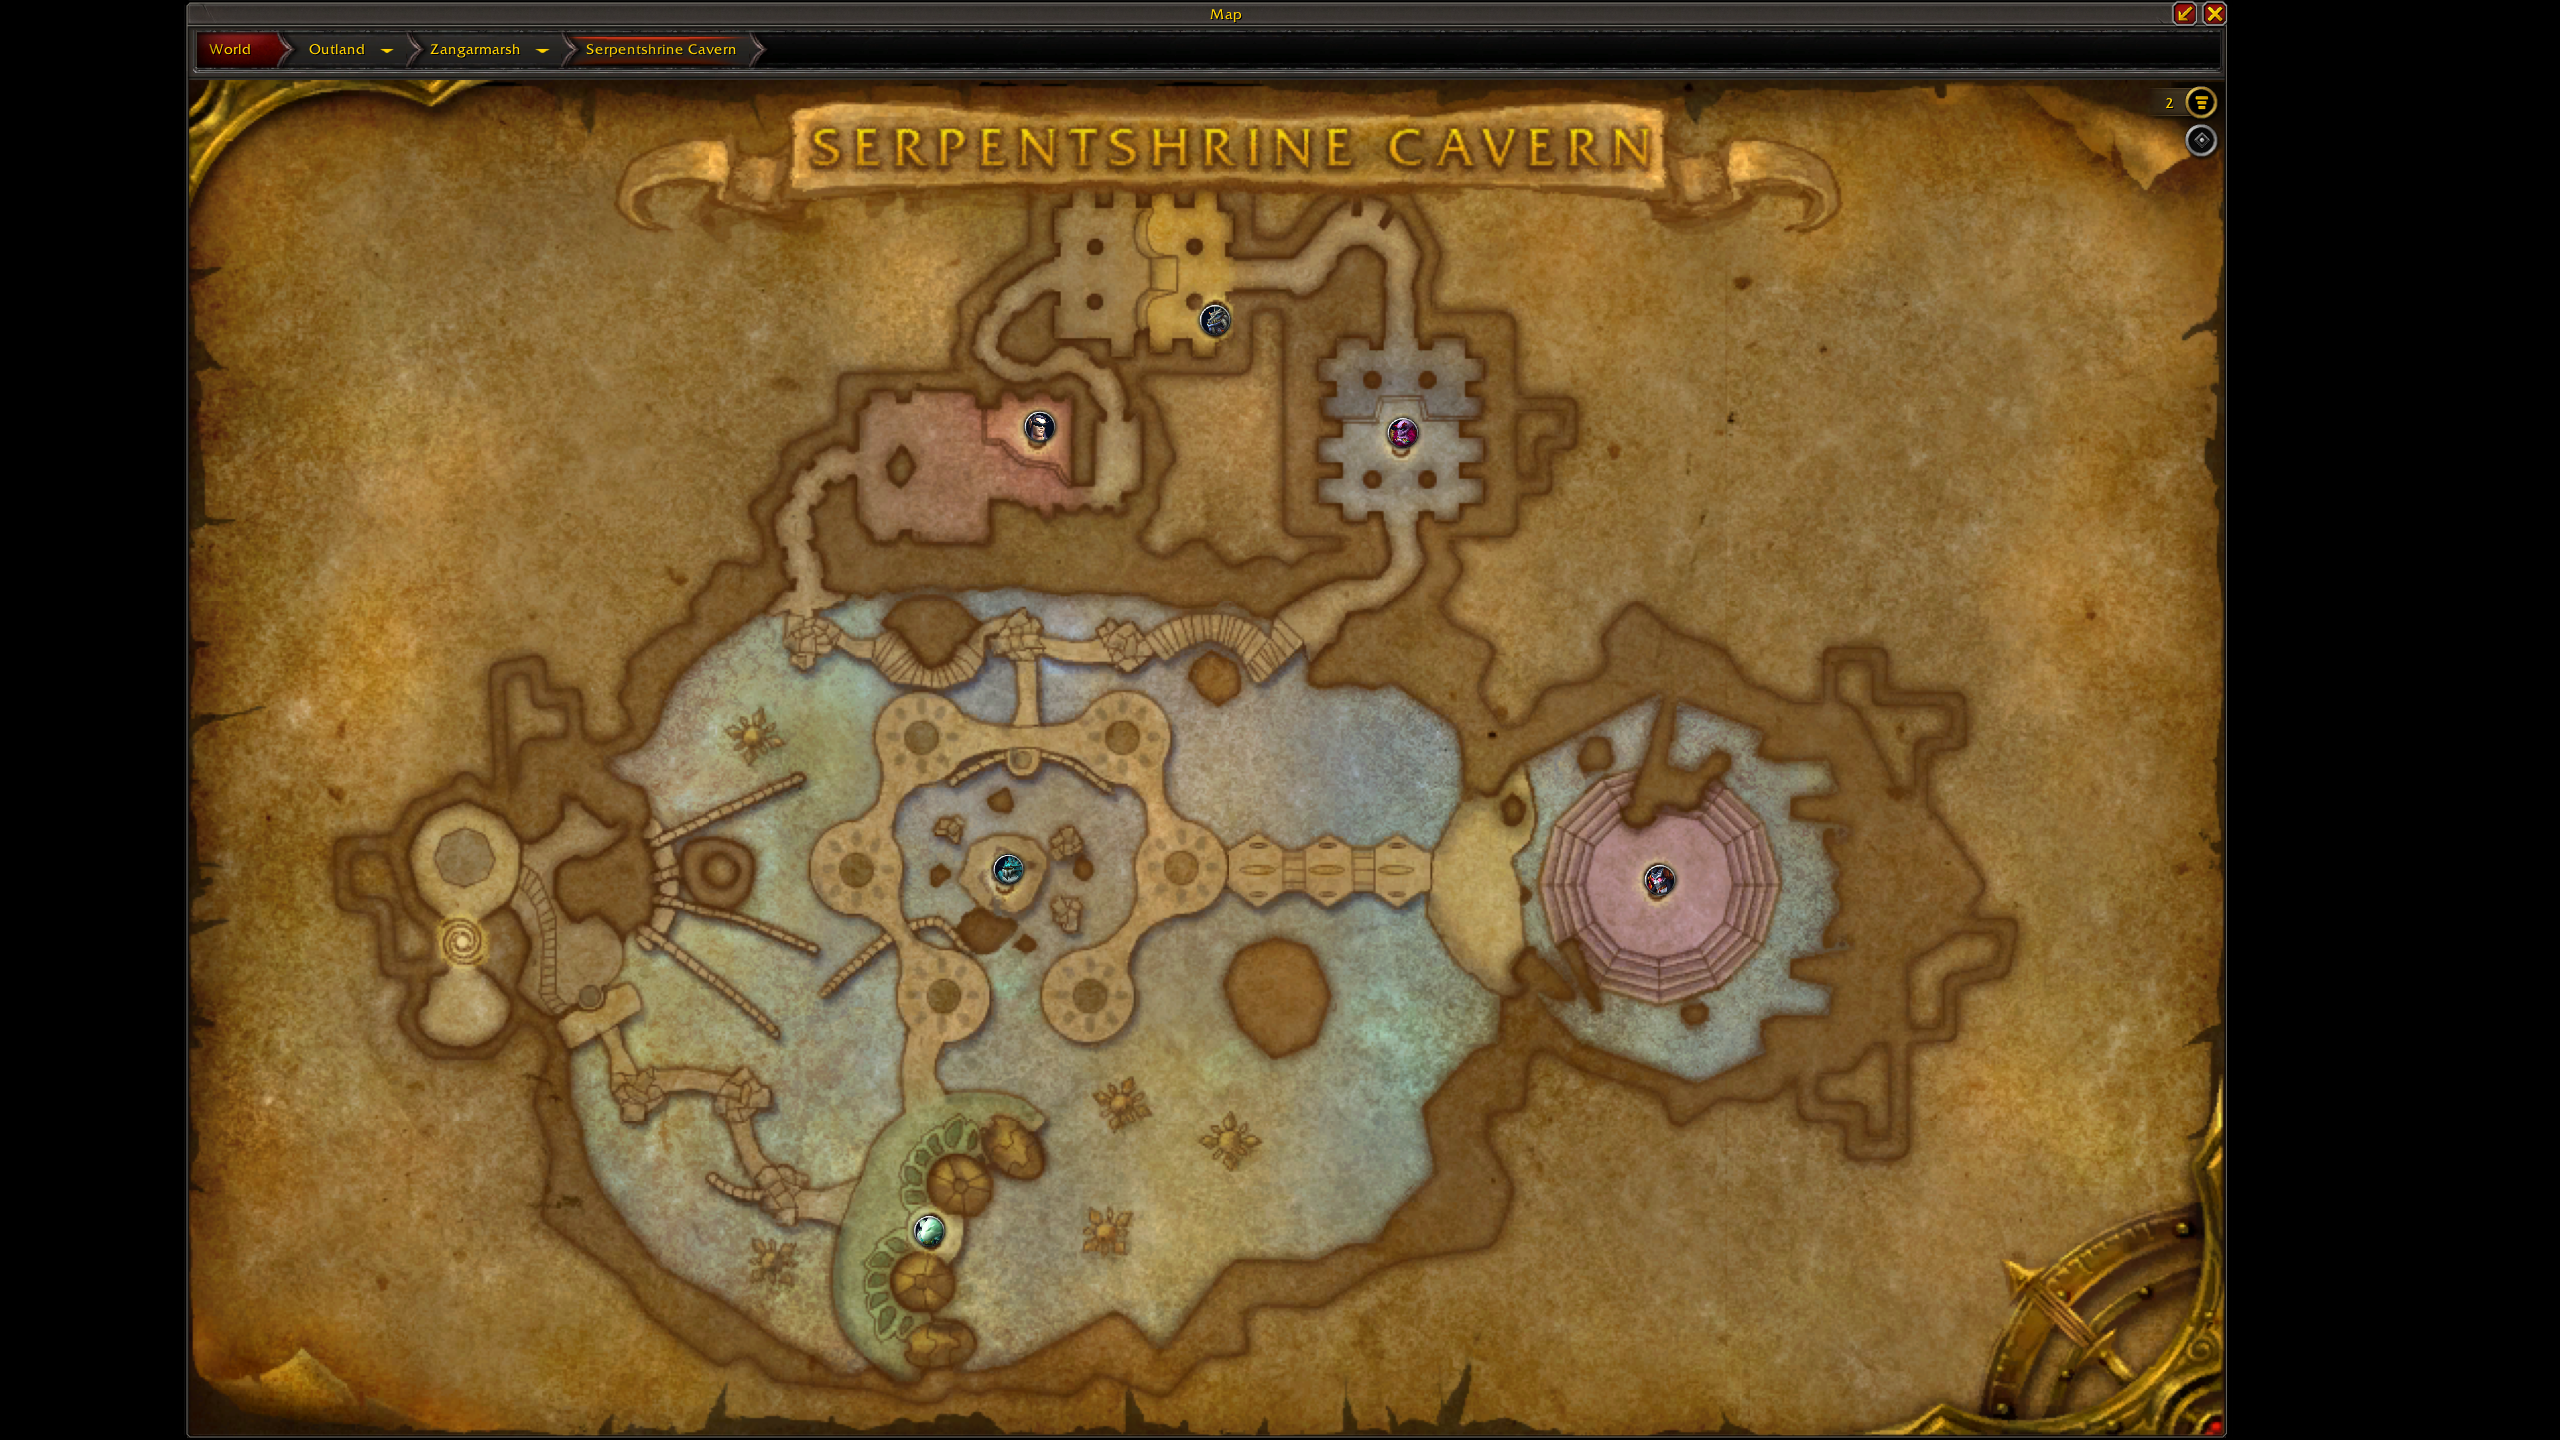
Serpentshrine Cavern Location and Map
Serpentshrine Cavern is located in Zangramarsh. Right in the middle, there’s a place called Coilfang Reservoir, that’s where you’ll find the entrance. There are two flight masters that are the closest to the entrance:
- For Horde: in Orebor Harborage
- For Alliance: in Telredor
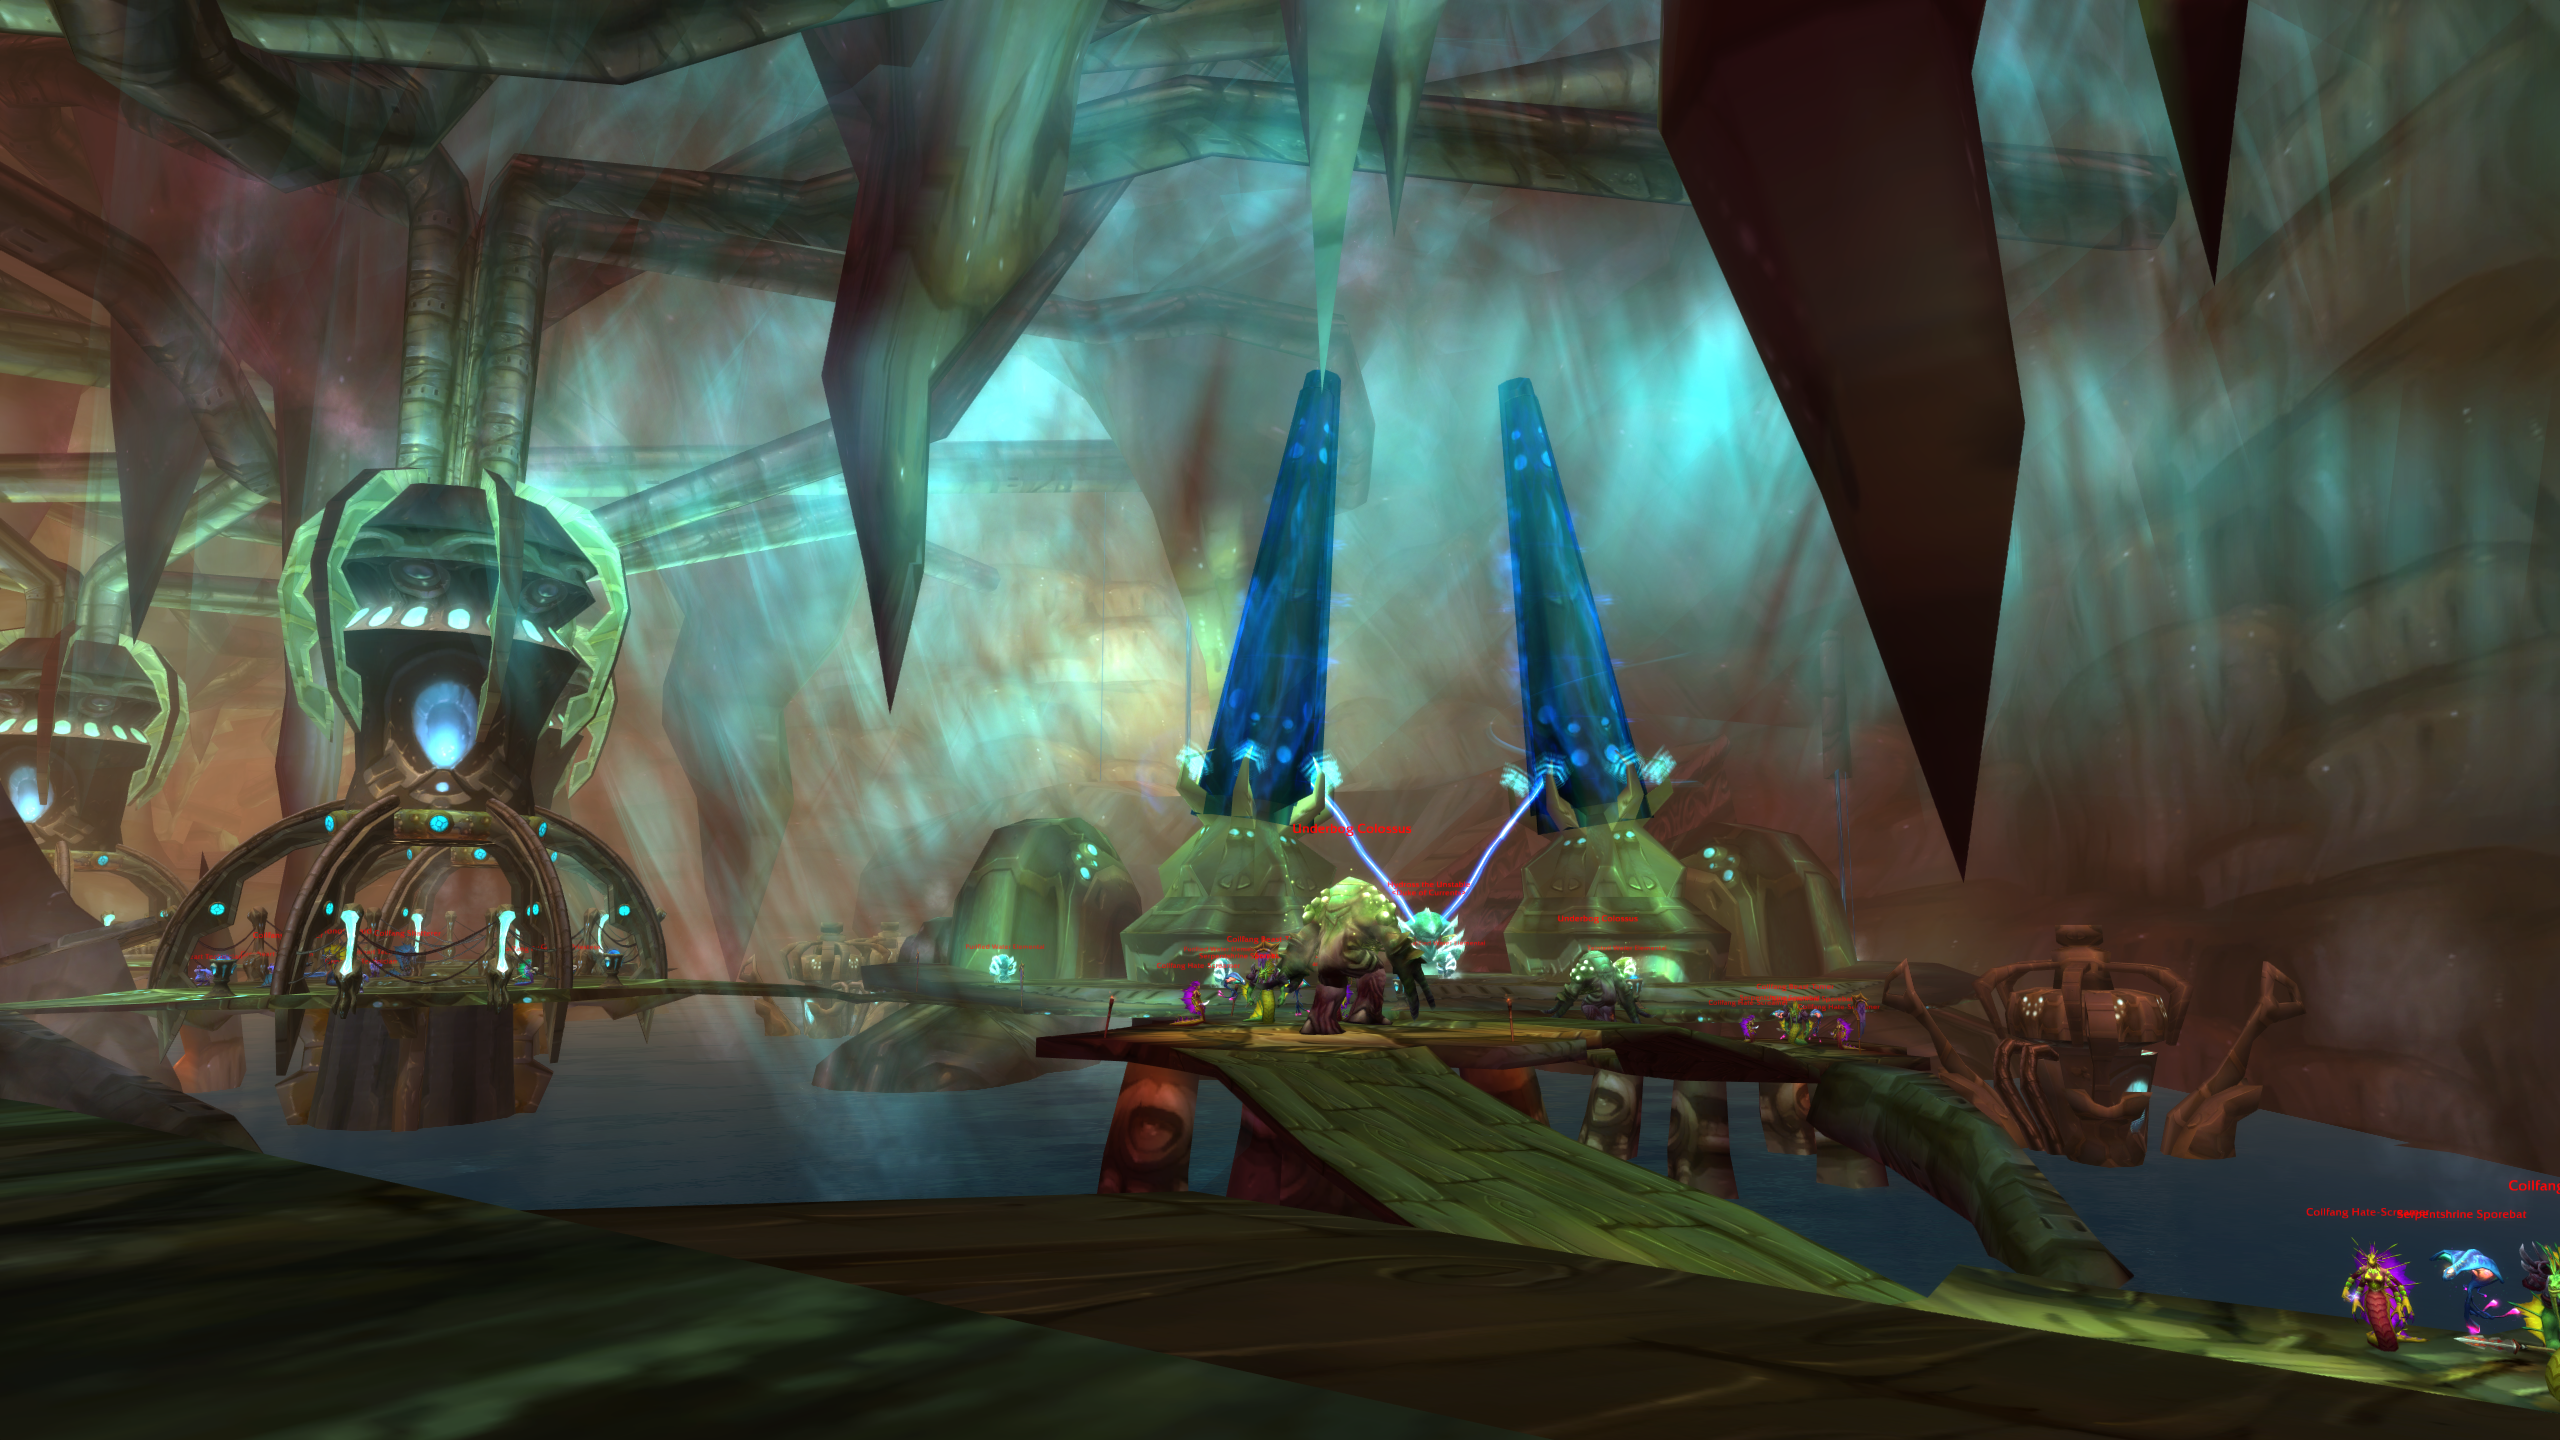
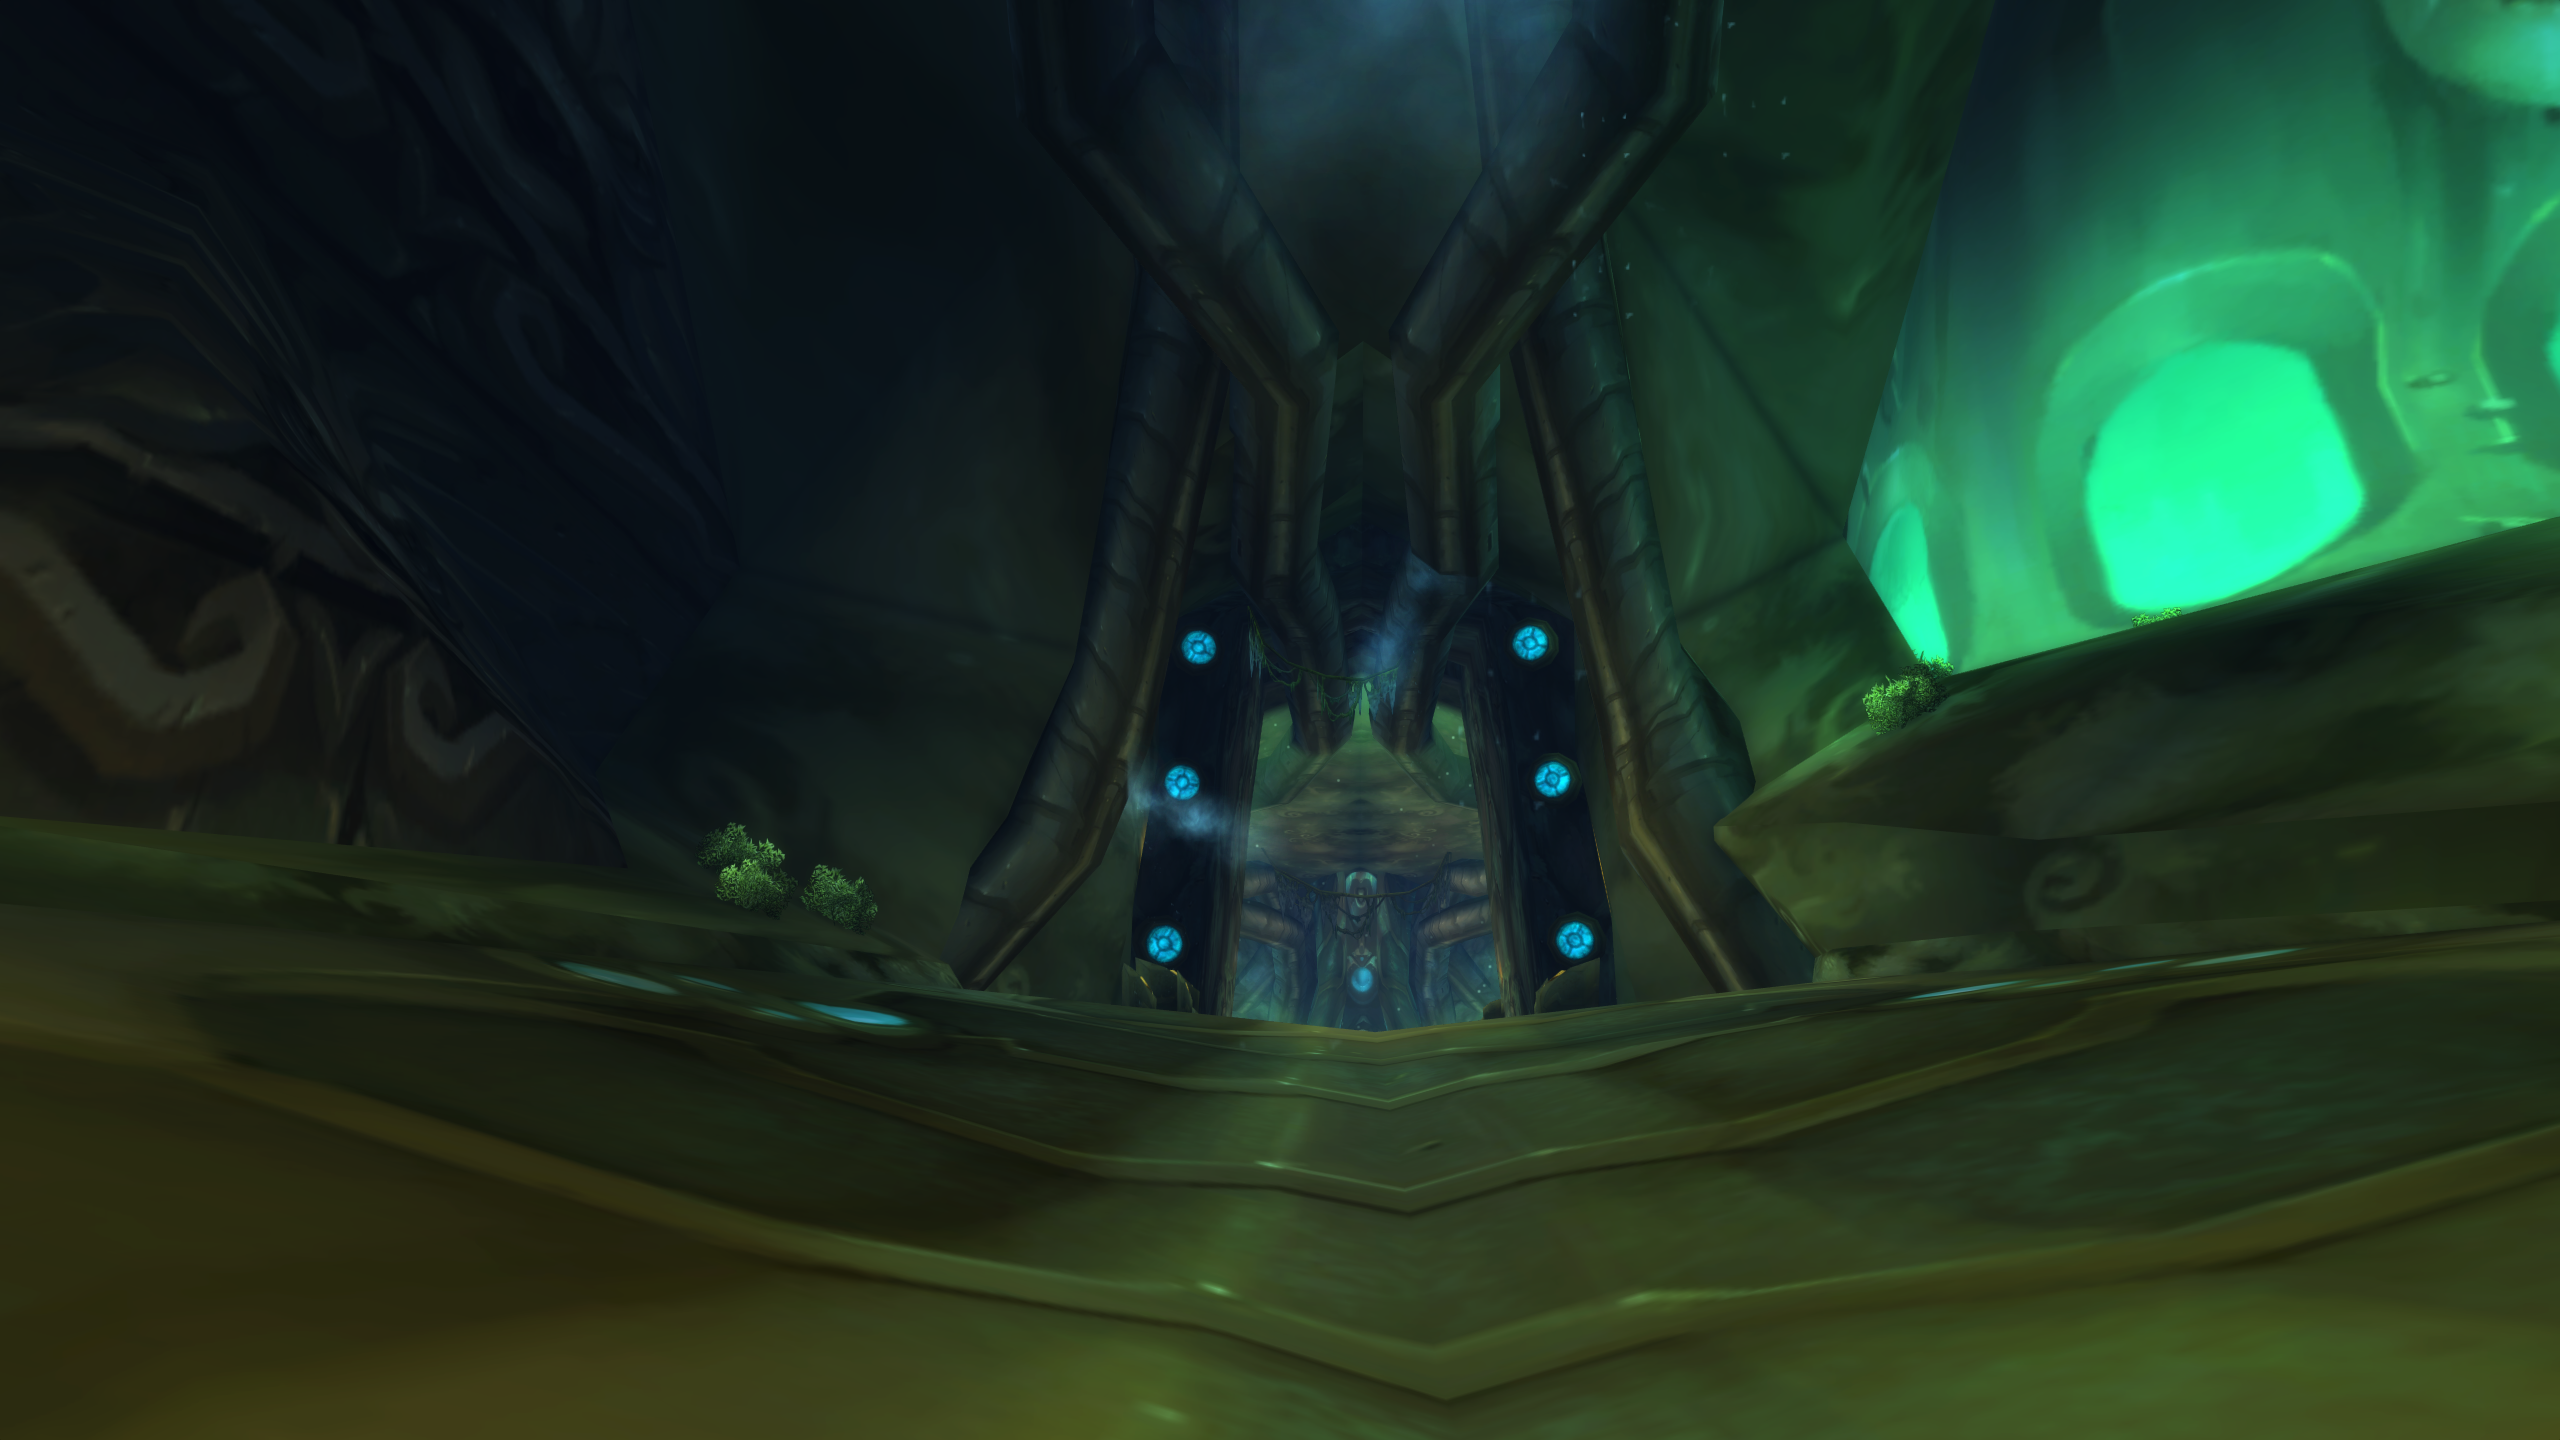
The entrance is located in the Coilfang Reservoir. In the center of it, there's an underwater tube. Dive in and swim through it. It's pretty long, but at the end, you'll find yourself in a pocket where the entrance is. Inside the cavern, you’ll see that each boss has its own arena, with Lady Vashj having hers on the opposite side of the raid’s entrance. To get to her, you will first need to defeat all 5 bosses. Who you start with is up to you.
Serpentshrine Cavern Bosses
As I said before, there are six bosses in this raid. Here, I’ll give you a quick breakdown of what they’re about:
- Hydross the Unstable: This encounter is about swapping the boss between Frost and Nature forms, using resistance tanks, stopping damage during transitions, and killing elemental adds before the raid gets overwhelmed by stacking damage debuffs.
- The Lurker Below: This fight focuses on platform positioning, avoiding Spout by jumping into the water, handling knockbacks, and clearing add waves during each submerge phase before the boss resurfaces.
- Leotheras the Blind: This encounter revolves around managing Human and Demon phases, running away from Whirlwind, letting the Warlock tank build aggro in Demon form, and killing Inner Demons before players get mind controlled.
- Fathom-Lord Karathress: This is a council-style fight where the raid must control Karathress and his three guards at the same time, kill the guards in the right order, interrupt heals, and destroy Spitfire Totems immediately.
- Morogrim Tidewalker: This fight is mainly about controlling large Murloc waves after Earthquake, keeping them away from healers, recovering players hit by Watery Grave, and burning the boss before Water Globules become a problem.
- Lady Vashj: This is a three-phase final boss fight built around spreading for Static Charge, managing a large add phase, passing Tainted Cores to disable shield generators, and finishing the boss before poison clouds cover the platform.
Serpentshrine Cavern Tactics
Hydross the Unstable Strategy
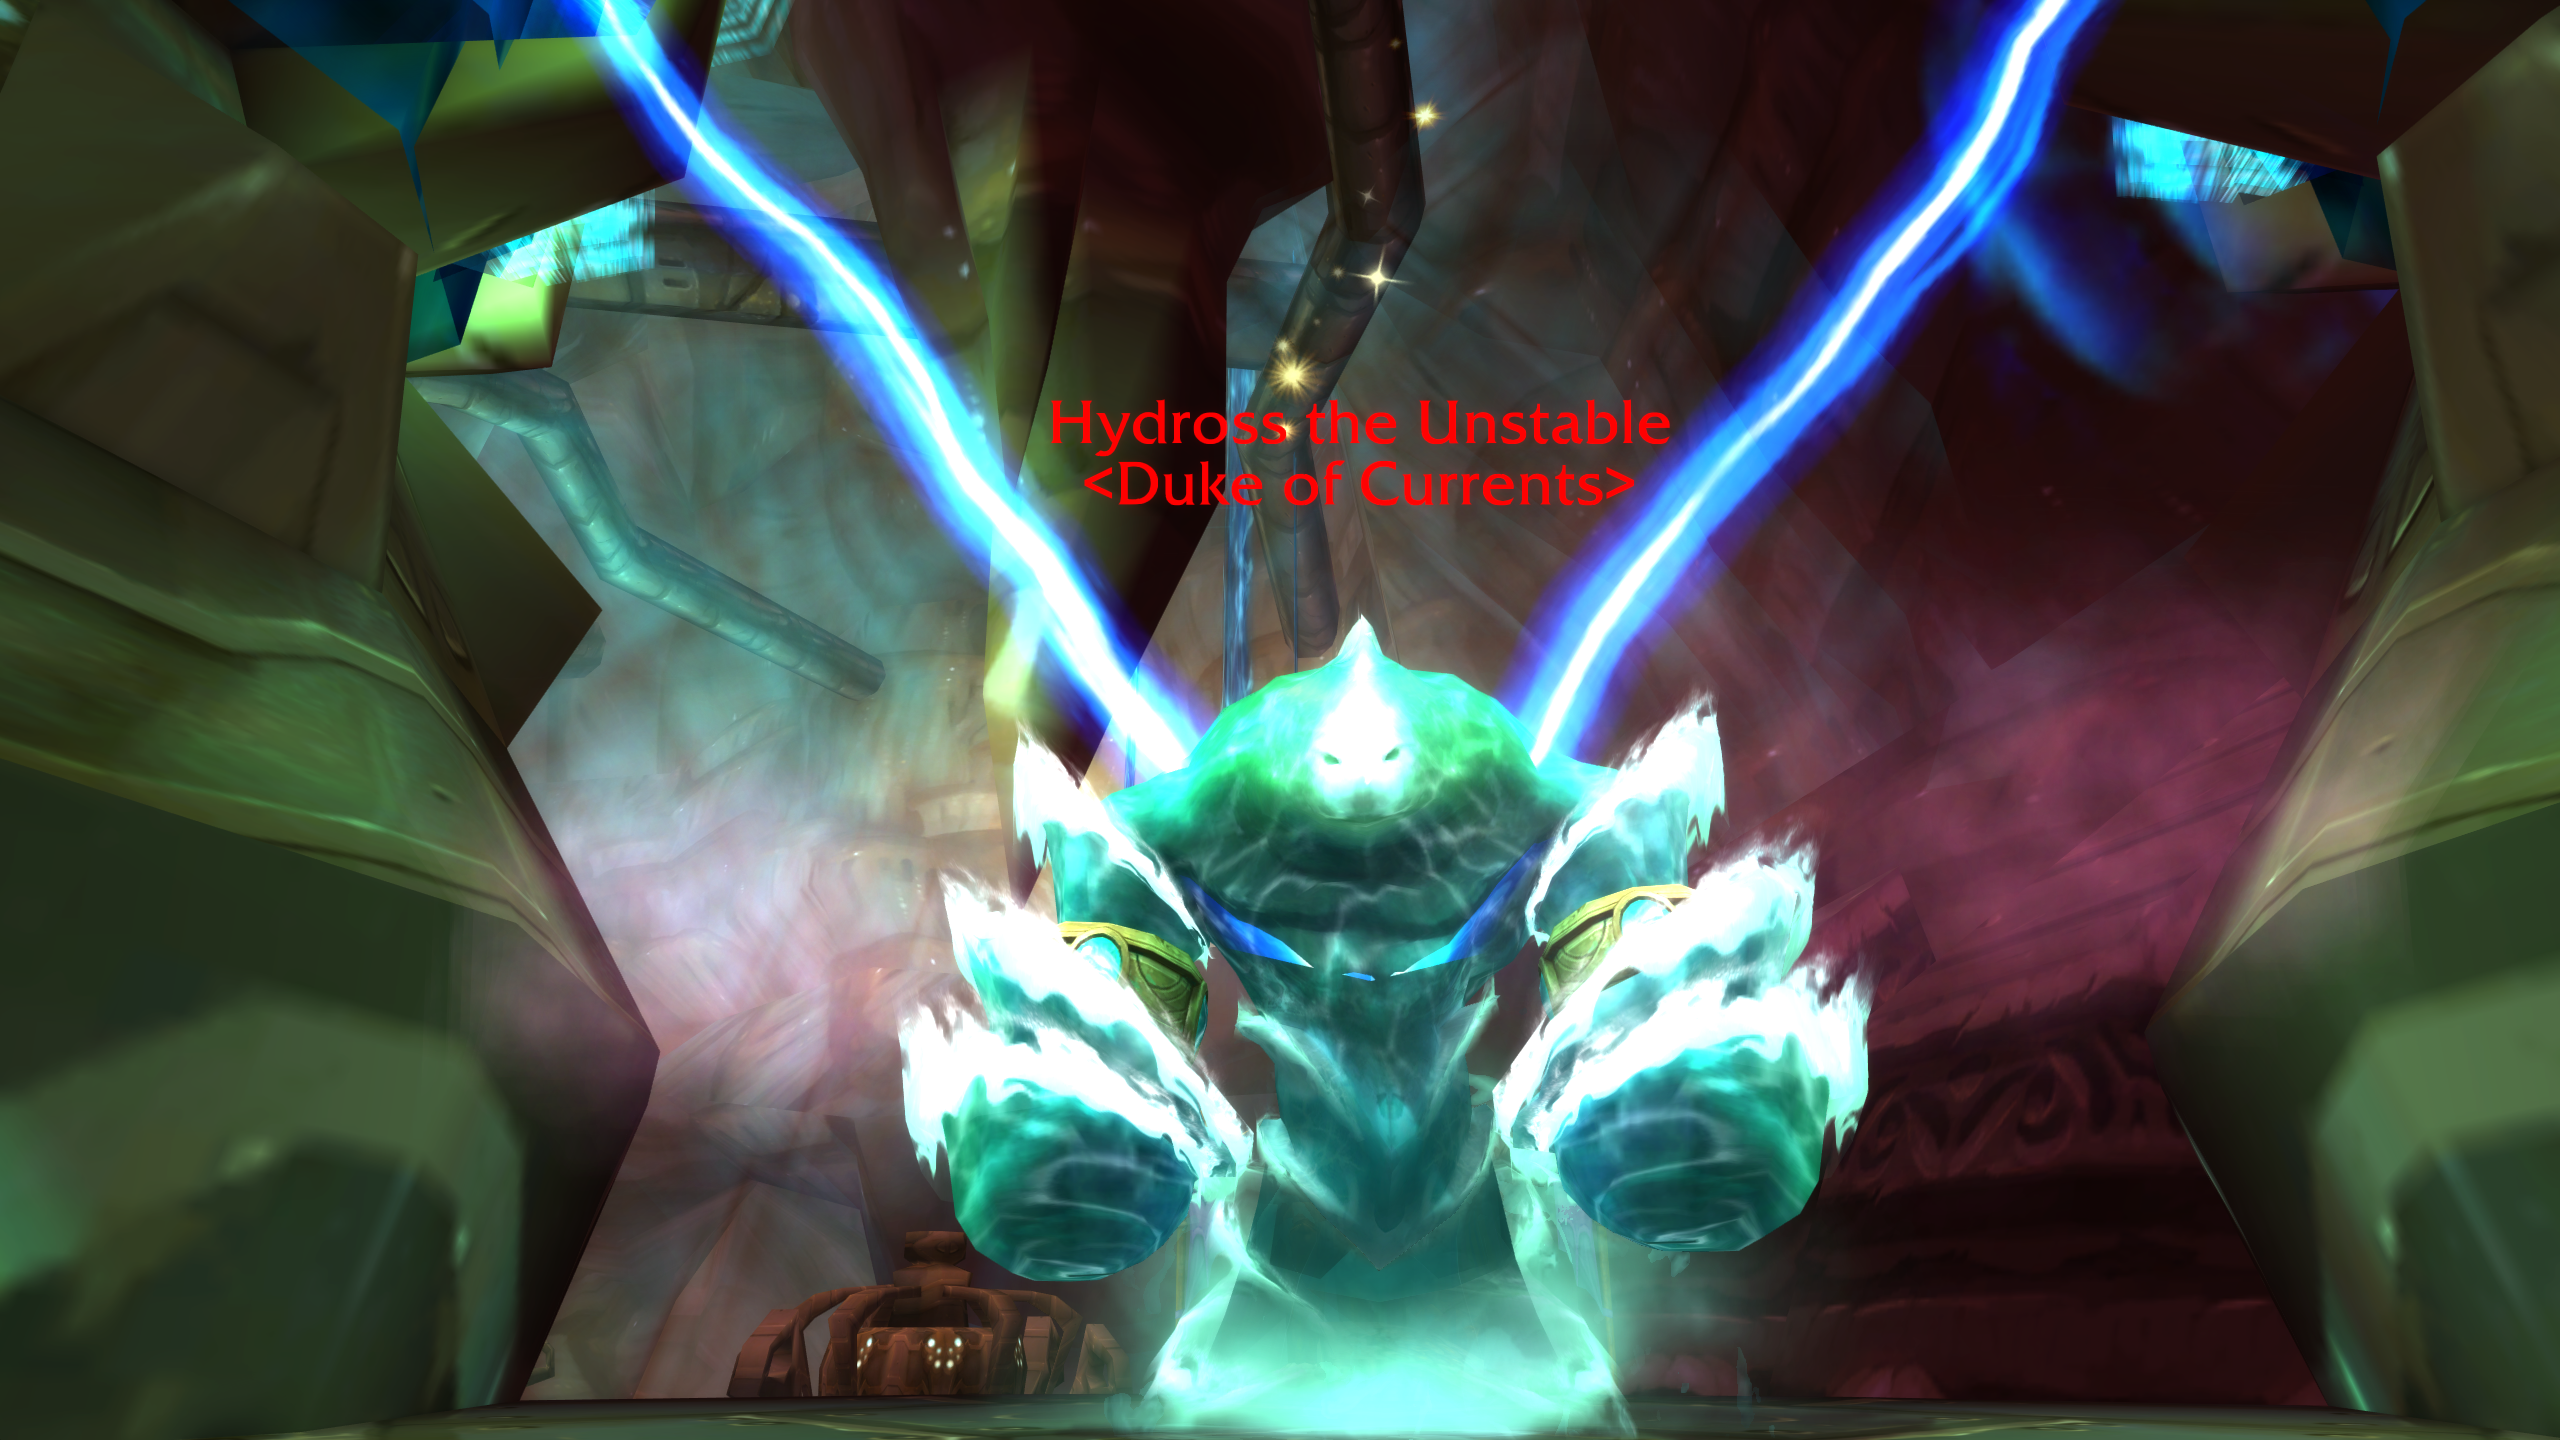
Hydross the Unstable is a fight built around resistance tanks, controlled form swaps, and strict aggro management. The boss has two elemental forms: Frost and Nature. While Hydross stands inside the blue purification beams, he stays in Frost form. Once he is moved past the invisible line marked by the two flags near his platform, he changes into Nature form. Pulling him back across that same line returns him to Frost form.
The main rule is simple: do not let Hydross cross that line by accident. Every time he changes form, he resets aggro and summons four adds. If a DPS player pulls aggro during a transition, Hydross can run across the line again, spawn another add wave, and turn the fight into a mess. This is the most common way raids wipe here.
Your raid should have two prepared tanks: one with Frost Resistance and one with Nature Resistance. Around 365 resistance is the usual target for each tank. The Frost tank handles Hydross during Frost form, while the Nature tank takes over after he transitions into Nature form. Off-tanks can help collect the adds, though strong raids can also use stuns, Banish, and fast AoE to control them.
Here’s a quick look at all abilities used during the fight:
|
Enemy |
Ability |
Description |
|
Hydross the Unstable |
Frost form debuff that increases Frost damage taken. It grows stronger every 15 seconds. |
|
|
Frost form ability that stuns a random player and damages anyone within 8 yards. |
||
|
Nature form debuff that increases Nature damage taken. It grows stronger every 15 seconds. |
||
|
Nature form ability that deals Nature damage over time and reduces damage dealt and healing received by 50%. |
||
|
Spawns four adds whenever Hydross changes form. |
||
|
Frost Add |
Frost elemental add spawned during transitions into Frost form. |
|
|
Nature Add |
Nature elemental add spawned during transitions into Nature form. |
Phase 1: Frost Form
Hydross starts in Frost form because he is standing inside the blue purification beams. The Frost Resistance tank should start the fight, but do not use Misdirection before the pull if it risks dragging the boss across the transition line too early. It is safer to let the tank pull first, position Hydross properly, and then use Misdirection after the boss is stable.
Ranged players and healers should spread out across the arena. The goal is to stay at least 8 yards apart so Water Tomb does not hit several players at once. Healers should try to plant themselves in spots where they can reach the tanks without moving too much. This fight puts a lot of pressure on tanks, especially during transitions, so steady, uninterrupted healing is kinda important here.
Melee players should also avoid stacking together. A simple triangle formation works well, with the tank in front of Hydross and melee split into two groups behind him. This reduces the chance of Water Tomb spreading through the melee group.
During Frost form, Hydross applies Mark of Hydross to the entire raid every 15 seconds. This increases Frost damage taken in stages: 10%, 25%, 50%, 100%, 250%, and 500%. Most raids should transition the boss around the fourth stack, when the raid reaches 100% increased Frost damage taken. Waiting longer makes the Water Tomb and tank damage much more dangerous.
Once the raid reaches the planned stack count, everyone should stop damage and prepare for the transition. Warlocks and Shadow Priests should avoid refreshing DoTs right before the swap, and pets or totems should not keep attacking. Hydross resets aggro when he changes form, so any leftover damage can cause an instant aggro problem.
Elemental Transition
To transition Hydross, the active tank moves him across the invisible line near the flags. When he crosses it, he changes element, resets aggro, and summons four adds. This happens every single time he swaps between Frost and Nature.
This is the most important part of the fight. DPS should slow down or stop completely before the transition. Once Hydross changes form, the next resistance tank must build aggro before anyone attacks again. A Misdirection after the transition is very useful because it helps the new tank establish snap aggro. Do not send it too early, since it needs to help the tank after the aggro reset.
The adds will appear shortly after the form swap. They stay still for a brief moment, but Hydross begins attacking immediately, so healers need to swap their attention to the new tank right away. Off-tanks should collect the adds quickly, while the raid focuses them down before returning to the boss.
Warlocks can Banish some of the adds if the raid needs extra control. If your group uses Banish, keep those adds locked down until they can be safely killed. Letting them break out later, when the raid already has high Mark stacks, can get players killed very quickly. The adds can also be stunned, so use stuns to reduce tank damage and make the transition cleaner.
Phase 2: Nature Form
Once Hydross is moved out of the purification beams, he enters Nature form. The Nature Resistance tank should now hold the boss, while the raid kills the Nature add wave and waits for the tank to build aggro. Do not rush back onto Hydross too early. aggro is still the main danger here.
During this form, Hydross applies Mark of Corruption instead of Mark of Hydross. This works the same way, but it increases Nature damage taken instead of Frost damage taken. The debuff ramps up every 15 seconds, so most raids should again transition around the fourth stack, at 100% increased Nature damage taken.
The main ability in this phase is Vile Sludge. It targets a random player, deals Nature damage over time, and reduces their damage dealt and healing received by 50%. Unlike Water Tomb, it does not spread to nearby players, so positioning is easier here. Still, healers should watch the affected player because the healing reduction can make it awkward to recover.
Nature Hydross is also immune to Nature damage, so Nature-focused players may need to adjust during this phase. Elemental Shamans, for example, can use Fire spells or help with off-healing when needed.
Once the Nature stacks reach the planned swap point, stop damage again and move Hydross back into the purification beams. The Frost tank takes over, another add wave spawns, and the fight repeats.
The whole encounter follows this rhythm:
|
1 |
Frost tank holds Hydross in the beams. |
|
2 |
Raid spreads for Water Tomb and watches Mark stacks. |
|
3 |
At around four stacks, DPS stops. |
|
4 |
Boss crosses the line and changes form. |
|
5 |
aggro resets and four adds spawn. |
|
6 |
New resistance tank picks up Hydross. |
|
7 |
Raid kills adds, then returns to the boss. |
|
8 |
Repeat the same process in the other form. |
The fight is not really that hard once everyone understands the pattern. Tanks need to move Hydross cleanly across the line, healers need to be ready for heavy tank damage during each transition, and DPS players need to control their aggro.
The Lurker Below Strategy
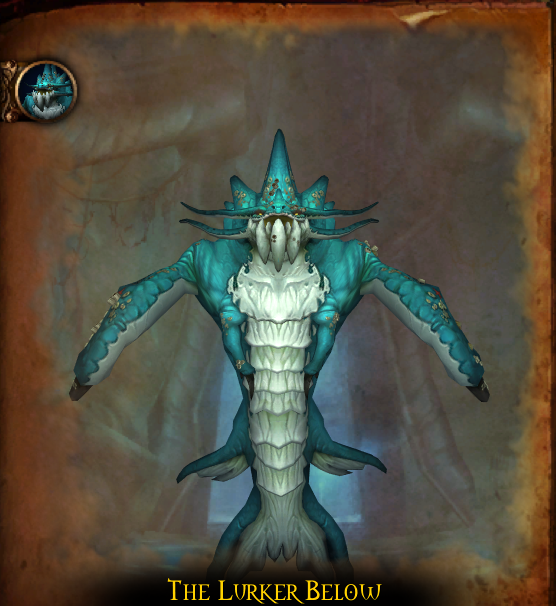
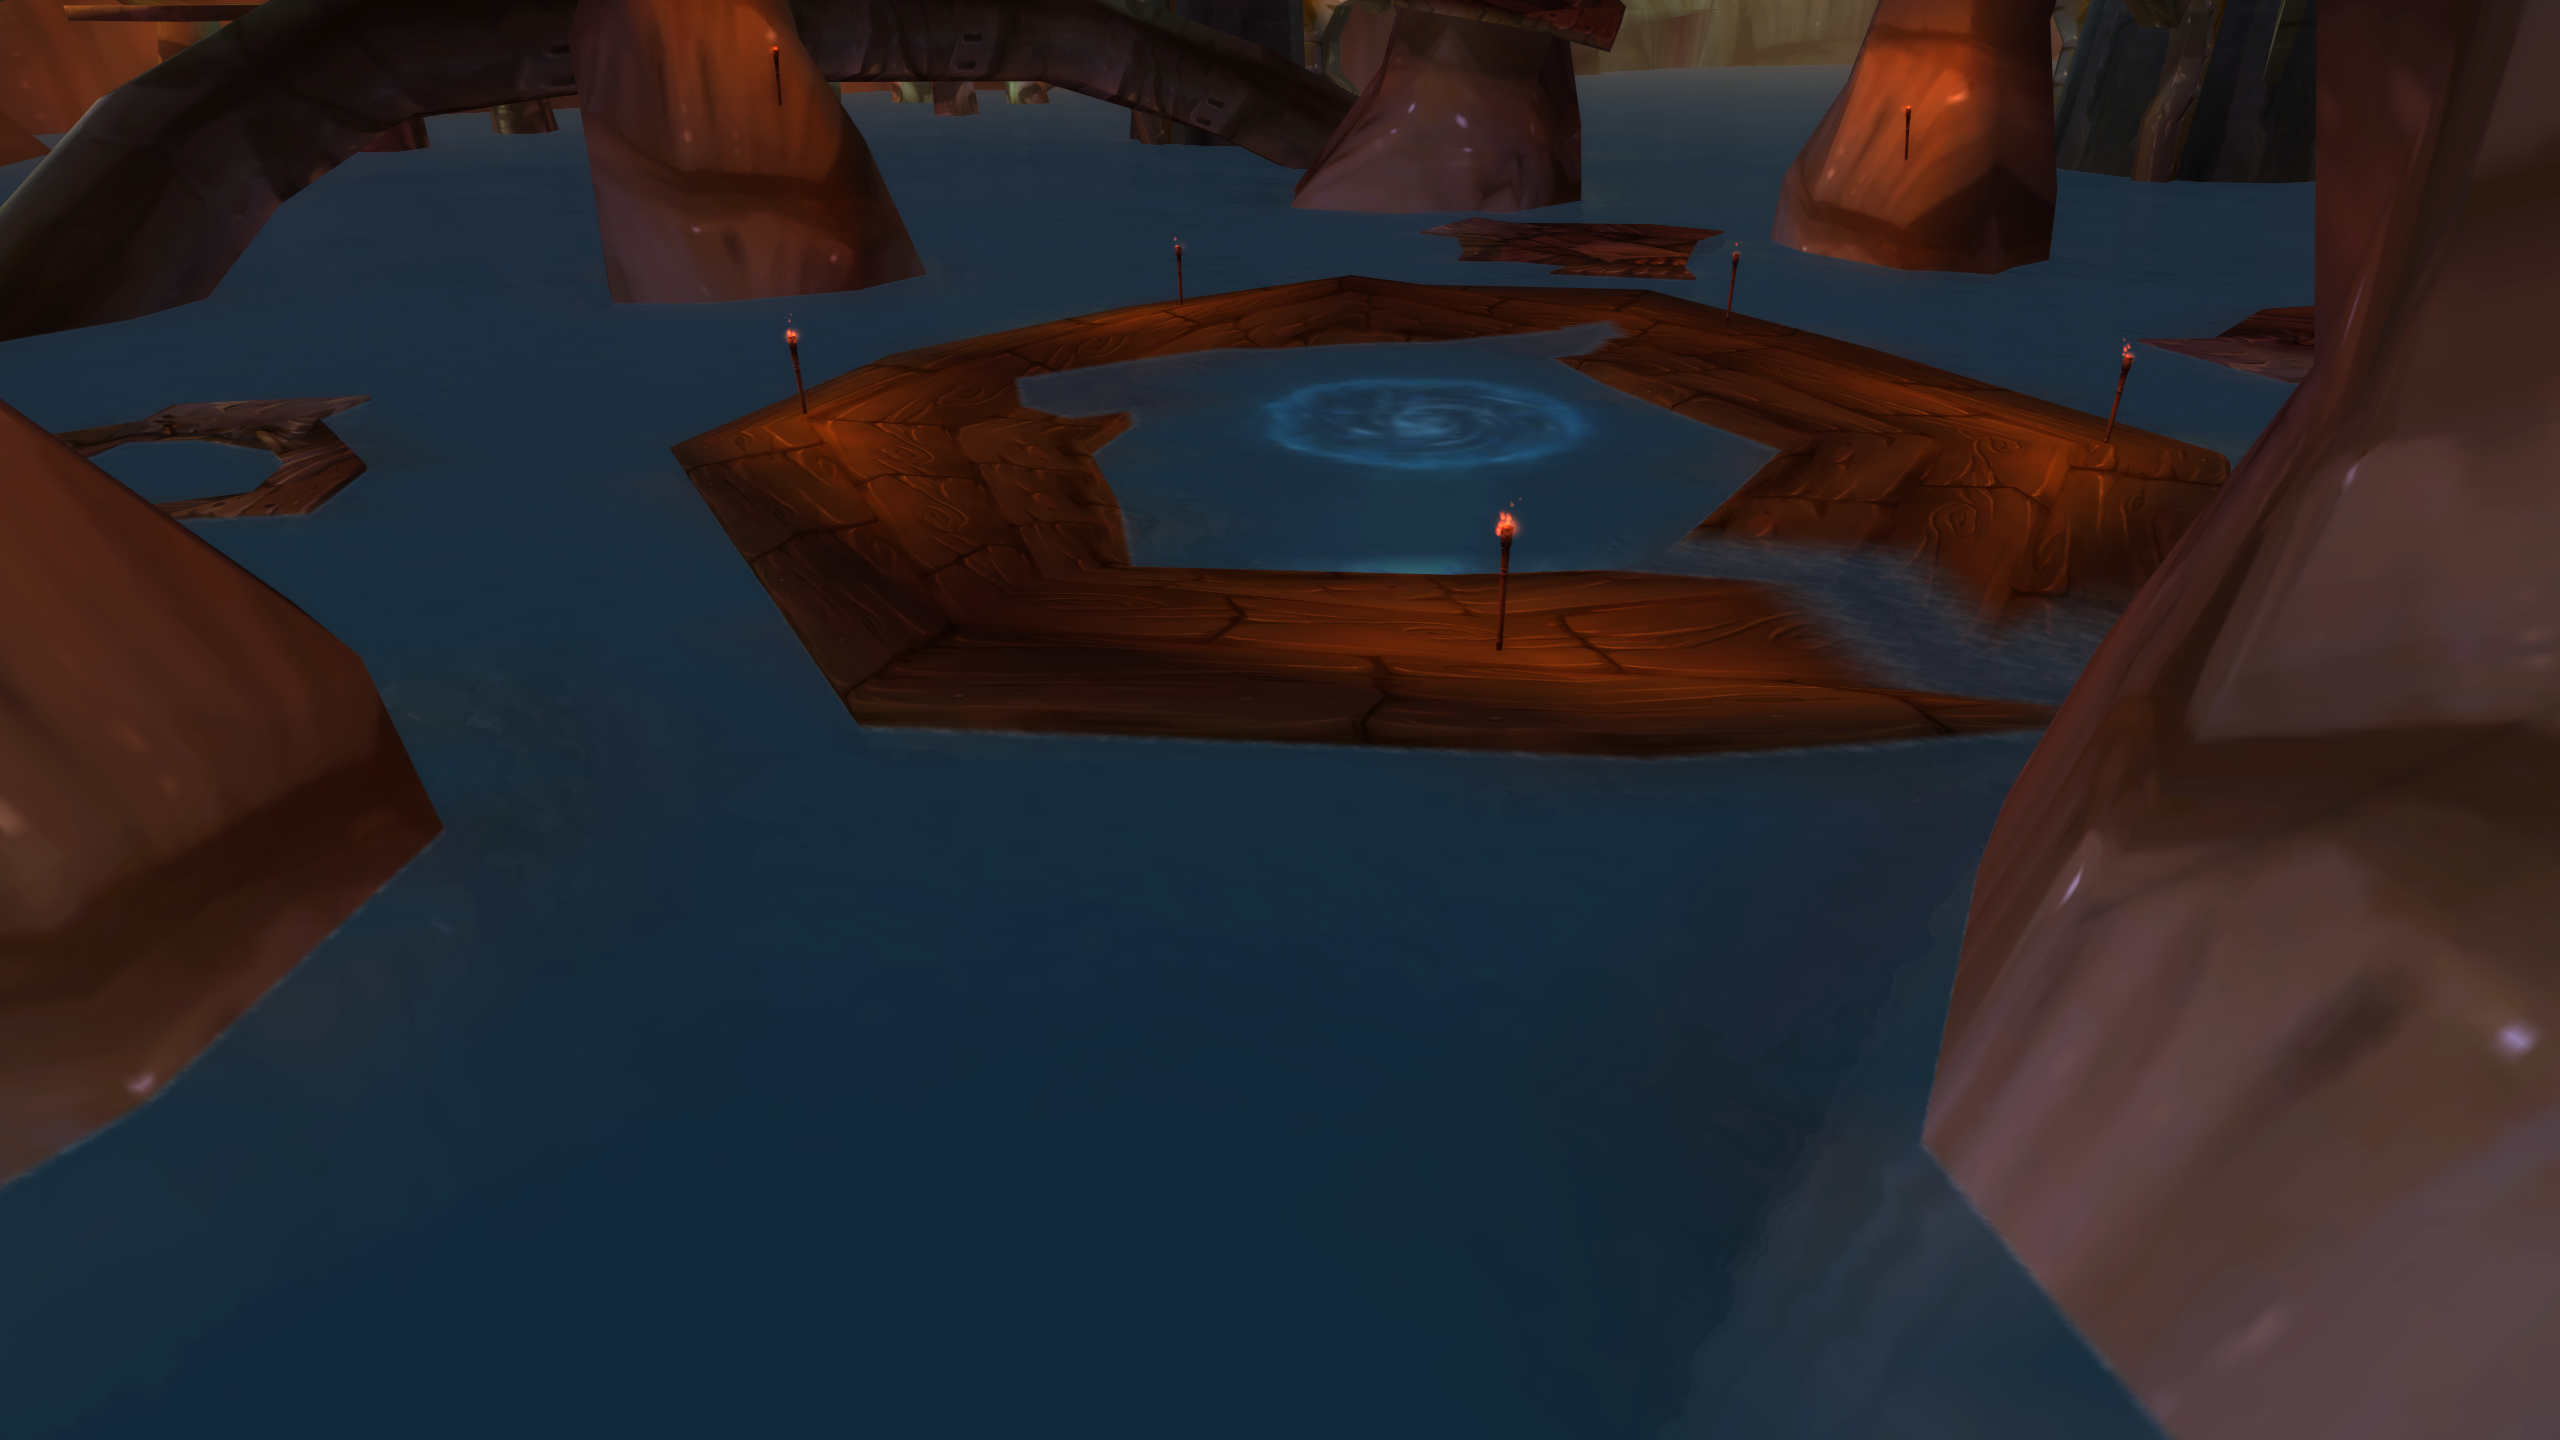
The Lurker Below is a boss encounter built around platforming, water movement, and add control. Unlike most bosses, Lurker does not just wait for you in his arena. The raid needs to fish him out of the central pool, so at least one player should have 300 Fishing or higher.
Before starting the encounter, clear the nearby platforms first. This makes the water safer by removing the Coilfang Frenzy enemies below. Once the water is “boiled,” players can jump in to avoid certain mechanics, but they will take damage from Scalding Water. Do not spam jump in and out of the water, because each jump can cause extra damage and make healers hate you very quickly.
The fight has two repeating parts. During the main phase, The Lurker Below stays in the middle of the platform and uses knockbacks and Spout. During the submerge phase, the boss disappears, and several Coilfang adds spawn around the arena. Here’s a quick look at all abilities used during the encounter:
|
Enemy |
Ability |
Description |
|
The Lurker Below |
Targets a random player and knocks back anyone within 10 yards. |
|
|
Hits players in melee range and knocks them back. |
||
|
Rotating water beam that must be avoided by jumping into the water or moving around the boss. |
||
|
Heavy ranged attack used if no one is in melee range. This prevents players from avoiding the main fight. |
||
|
Cleave |
Frontal attack that can heavily damage melee players. |
|
|
Hamstring |
Slows the tank or target during the add phase. |
|
|
Ranged and Melee Attacks |
Spawns on the smaller platforms and can be crowd controlled. |
The raid should spread across the main platform and the three smaller platforms before the boss is fished up. Most of the raid can stay on the large central platform, while assigned Mages, Warlocks, and Hunters should stand on the smaller platforms. Their job is to control the Ambushers during the submerge phase.
The tank should be the only player in melee range when the boss appears. The Lurker Below can hit hard, and you do not want a random melee player getting slapped at the start because they stood too close. Once the tank has aggro, the raid can begin damaging the boss.
A safe tank position is near the inner edge of the platform, close enough to return quickly after knockbacks. Some groups use a wall or torch position to reduce Whirl movement. The tank can also stand in the water to avoid knockback, but this adds steady water damage and is usually not needed. I always say that for most groups, standing near the edge is safer.
Phase 1: Surface Phase
During the surface phase, The Lurker Below stays in the center of the arena. This part of the fight is mostly about spreading out, avoiding Spout, and not getting knocked into bad positions.
The raid should stay spread so Geyser does not hit several players at once. Geyser targets a random raid member and knocks back everyone within 10 yards. If players are stacked, one Geyser can throw half the raid around the platform and deal unnecessary damage.
Melee players also need to watch out for the Whirl. This ability hits players close to the boss and knocks them back. Melee should be standing near the inner edge of the platform and moving carefully when Whirl is about to happen. Tanks should be ready to get back into melee range quickly after a knockback, because The Lurker Below will start casting Water Bolt if nobody is close enough to him.
Spout is the main mechanic of this phase. The boss shoots a beam of water from his mouth and slowly rotates around the platform. If the beam reaches you, jump into the water and wait for it to pass. Once it moves past your position, get back onto the platform and continue the fight.
Do not panic during Spout. You do not need to sit in the water forever, and you should not keep jumping repeatedly. Drop into the water, let the beam pass, then climb back out. Some melee players can also move around the boss to stay behind the Spout, but jumping into the water is the simpler and safer method for most raids.
After Spout, The Lurker Below will often follow with Whirl, so players near the boss should be ready for another knockback. This is one of the easiest moments to lose control if people climb back up carelessly and get thrown again right away.
Phase 2: Submerge Phase
After the surface phase, The Lurker Below submerges, and several adds spawn. Coilfang Guardians will pop up on the large platform, while Coilfang Ambushers spawn on the smaller platforms. The boss returns after the add phase, so make sure the raid deals with these enemies asap.
The Ambushers on the smaller platforms should be CC’d right away. Mages can use Polymorph, Warlocks can use Fear or Death Coil into Fear, and Hunters can use traps if needed. This keeps the outer platforms stable while the raid handles the more dangerous adds in the middle.
The Coilfang Guardians are the main kill priority. Off-tanks should aggro them quickly and face them away from the raid party, because they have a dangerous cleave. Melee should not stand in front of them. These adds can also be stunned, so use stuns to reduce tank damage and make the phase safer.
Once the Guardians are dead, the raid can move to the smaller platforms and kill the Ambushers. They are not as dangerous as the Guardians, but they can still cause problems if they attack healers or loose players for too long.
When The Lurker Below resurfaces, it’s back to phase 1. Players should be ready for Spout and Whirl as soon as he comes back. Do not stand in the middle of the platform without paying attention, because the boss can punish slow reactions right away.
From there, the fight repeats. The raid returns to the surface phase, spreads for Geyser, avoids Spout, handles Whirl, then clears another add wave after the next submerge.
The most important part of this encounter is keeping it together. I mean, the mechanics are simple, but as soon as everyone in the raid starts moving chaotically, you’ll never recover. So, just one more time: spread out for Geyser, jump into the water for Spout, avoid unnecessary jumping in the water, crowd control Ambushers, and kill Guardians before the boss returns.
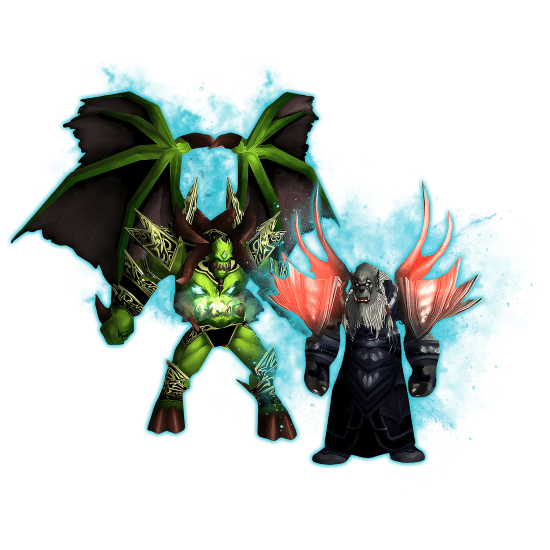
Leotheras the Blind Strategy
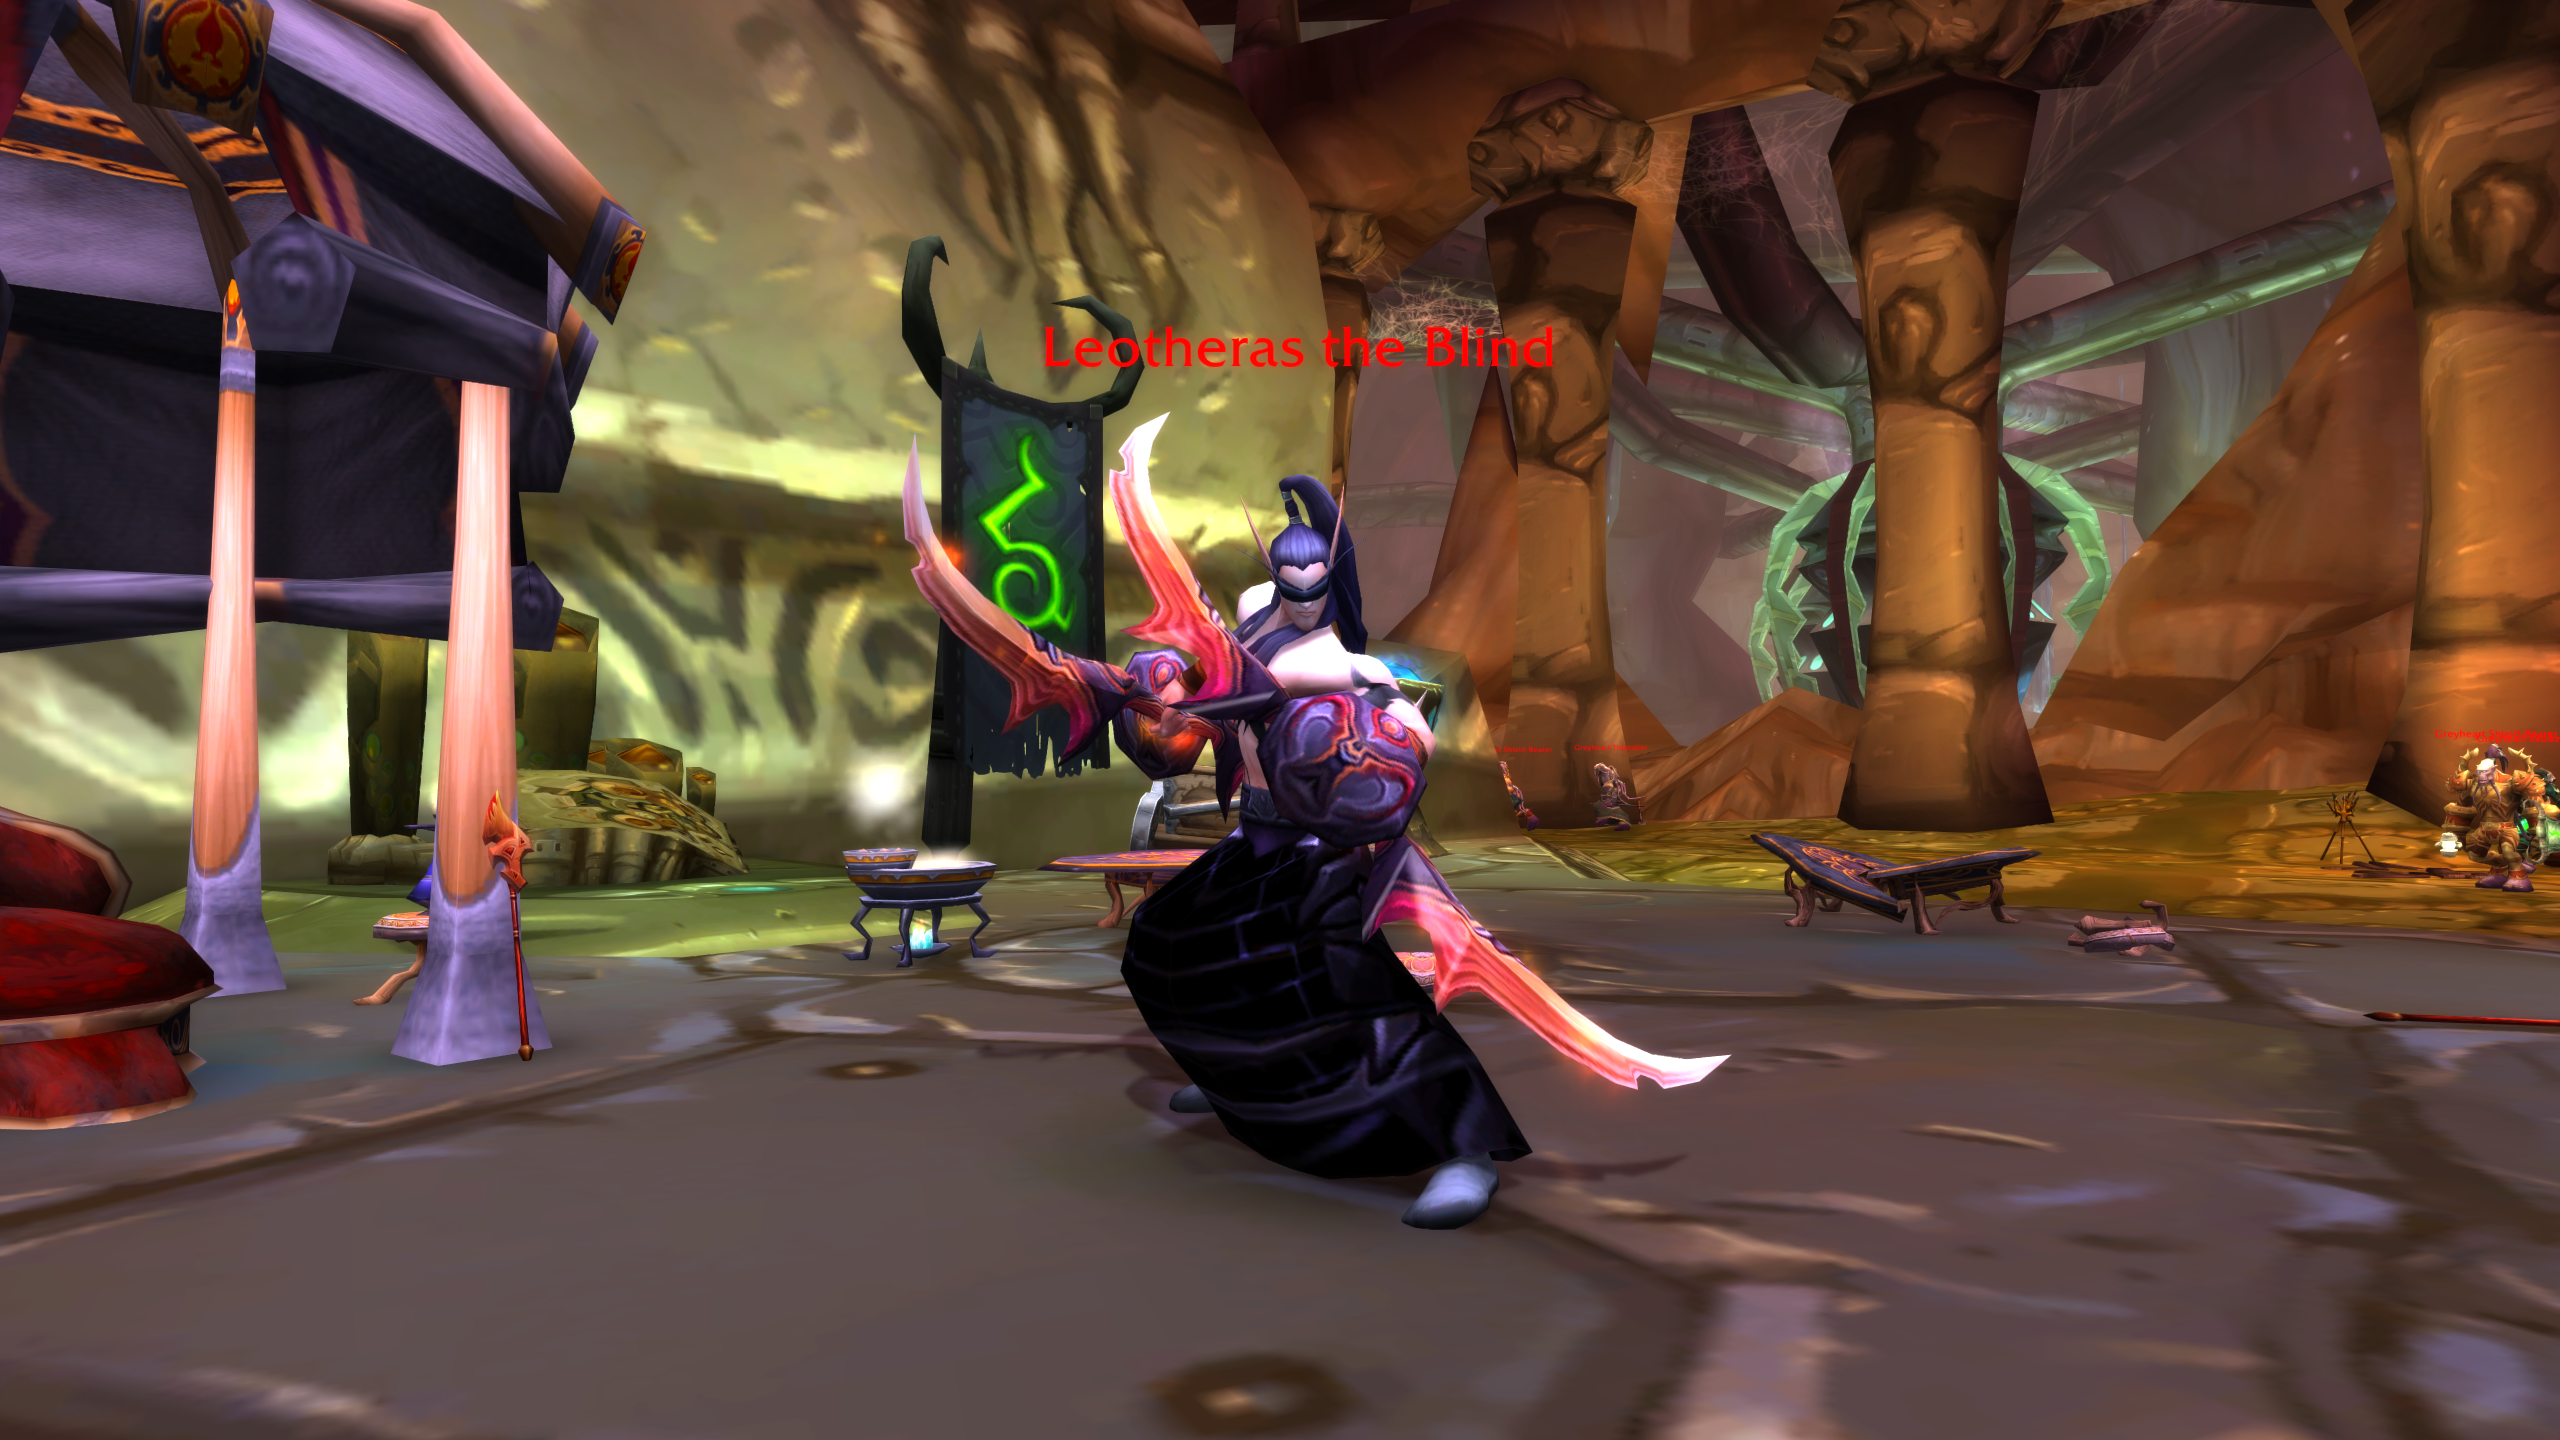
Leotheras the Blind boss switches between Human form and Demon form until he reaches 15% health. In Human form, the raid needs to avoid Whirlwind and let the tank rebuild aggro afterward. In Demon form, a Fire Resistance tank, usually a Warlock, needs to hold the boss while selected players kill their own Inner Demons.
The most important thing to understand is that Leotheras resets aggro often. He drops aggro after Whirlwind, when changing forms, and again when the final split phase begins. Because of that, DPS players need to watch their aggro meter and stop attacking when needed. If the raid ignores aggro, this fight becomes much harder than it should be.
Before pulling the boss, clear the room properly. You need enough space to move away during Whirlwind, and you do not want nearby trash joining the fight. To start the encounter, kill the three Greyheart Spellbinders holding Leotheras in place. Once they die, the boss activates immediately, so the main tank should be ready to pick him up.
Here’s a quick look at all abilities used during the encounter:
|
Enemy |
Ability |
Description |
|
Leotheras the Blind |
Human form ability. Leotheras spins toward random players, dealing damage and applying a bleed. |
|
|
Aggro Reset |
Happens after Whirlwind and during form changes. DPS must stop and let the tank rebuild aggro. |
|
|
Demon form ability. Deals Fire damage to the current target and increases Fire damage taken. |
||
|
Targets several players and summons Inner Demons only they can attack. |
||
|
Mind Control |
If a player fails to kill their Inner Demon in time, they become mind controlled. |
|
|
Demon Form |
Spawns during the final phase at 15% health and must be tanked separately. |
Phase 1: Human Form
Leotheras starts in Human form. This phase is simple on paper, but it can become messy if players stand too close or attack too early after an aggro reset. The main tank should aggro the boss as soon as he becomes active, while the rest of the raid waits for stable aggro before dealing heavy damage.
The main mechanic in this phase is Whirlwind. Leotheras spins around the room and chases random players. Anyone hit by Whirlwind takes heavy damage and receives a bleed effect, so players need to move away as soon as the cast starts. Melee players should run away from the boss immediately, while ranged players should move only as much as they need to stay safe. Running too far can spread the raid out more than needed and make healing harder.
Ranged DPS can continue attacking during Whirlwind if the boss is far away from them, but everyone should be careful near the end of the cast. Once Whirlwind ends, Leotheras resets aggro. This is one of the biggest wipe points in the fight. DPS should stop attacking during the last few seconds of Whirlwind and wait until the main tank has control again.
Hunters can help the tank after a bad aggro reset with Misdirection, but it is often better to save Misdirection for the Demon phase. That phase is more dangerous, and the Fire Resistance tank needs strong snap aggro before the raid starts using major cooldowns.
Healing in Human form is mostly split between tank healing and raid recovery after Whirlwind. Leotheras does not hit extremely hard in this form, so one or two healers can stay on the tank while the others cover players hit by the bleed. If too many players get clipped by Whirlwind, it’s gonna get harder to heal everyone up on time.
After the Human phase ends, Leotheras changes into Demon form and wipes aggro again. Everyone should stop attacking during the transition.
Browse our hottest TBC Anniversary Boosting services


Phase 2: Demon Form
In Demon form, Leotheras should be tanked by a Fire Resistance tank. A Warlock is the common choice because Searing Pain generates lots of aggro from range, but a properly prepared melee tank with Fire Resistance can also handle the phase in some versions of the fight.
The Demon tank needs time to build aggro before anyone attacks. This is where Misdirection is very helpful. Once the Demon tank has stable aggro, the raid can start dealing damage. This is also a good time to use Bloodlust or Heroism, since shortening Demon form reduces the danger from Chaos Blast and helps healers if they get Inner Demons.
Chaos Blast is the main tank mechanic here. It hits the current target with Fire damage and applies a stacking debuff that increases Fire damage taken. This is why Fire Resistance matters. The tank will take more and more damage as stacks build, so healers need to focus hard on the Demon tank. If a melee tank is handling Demon form, other melee players should stay at max melee range to avoid extra damage from the blast.
The second major mechanic is Insidious Whisper. This targets several players and summons Inner Demons. Each targeted player can only damage their own demon. No one else can kill it for them. If the player does not kill it fast enough, they become permanently mind-controlled, and the raid has to kill them.
When an Inner Demon spawns, the targeted player should stop everything and kill it right away. This includes healers and tanks. Healers should keep basic damage spells on their bars for this fight, because they can be targeted too. Protection tanks may need to swap to more offensive gear or weapons if they struggle to kill their demon in time.
Once Demon form ends, Leotheras returns to Human form and wipes aggro again. Be ready, because he can start with Whirlwind shortly after the transition. Spread out, stop damage, and let the main tank regain control.
Phase 3: Split Phase
At 15% health, Leotheras enters the final phase and splits into two enemies: his Human form and his Demon form. The Demon form becomes Shadow of Leotheras and must be tanked separately, usually by the same Fire Resistance tank from Phase 2.
The raid should ignore the Demon form and burn down the Human form. Once the Human form dies, the encounter ends. This is the best time to use any remaining offensive cooldowns if they were not used earlier. The goal is to finish the fight before the split phase drags on and overwhelms healers.
The Demon tank still needs steady healing during this phase, but the rest of the raid should focus damage on Human Leotheras. Players should also be ready for another Whirlwind when the split phase begins. Do not stand close to the Human form during the transition, and do not open with full damage before the tank has aggro.
The fight becomes much easier if the raid respects the same rules from earlier phases. Run away from Whirlwind, stop damage after every aggro reset, let the Demon tank build aggro, and kill Inner Demons immediately. Leotheras is not a complicated boss mechanically, but he punishes impatient DPS players harder than almost any earlier fight in Serpentshrine Cavern.
Fathom-Lord Karathress Strategy
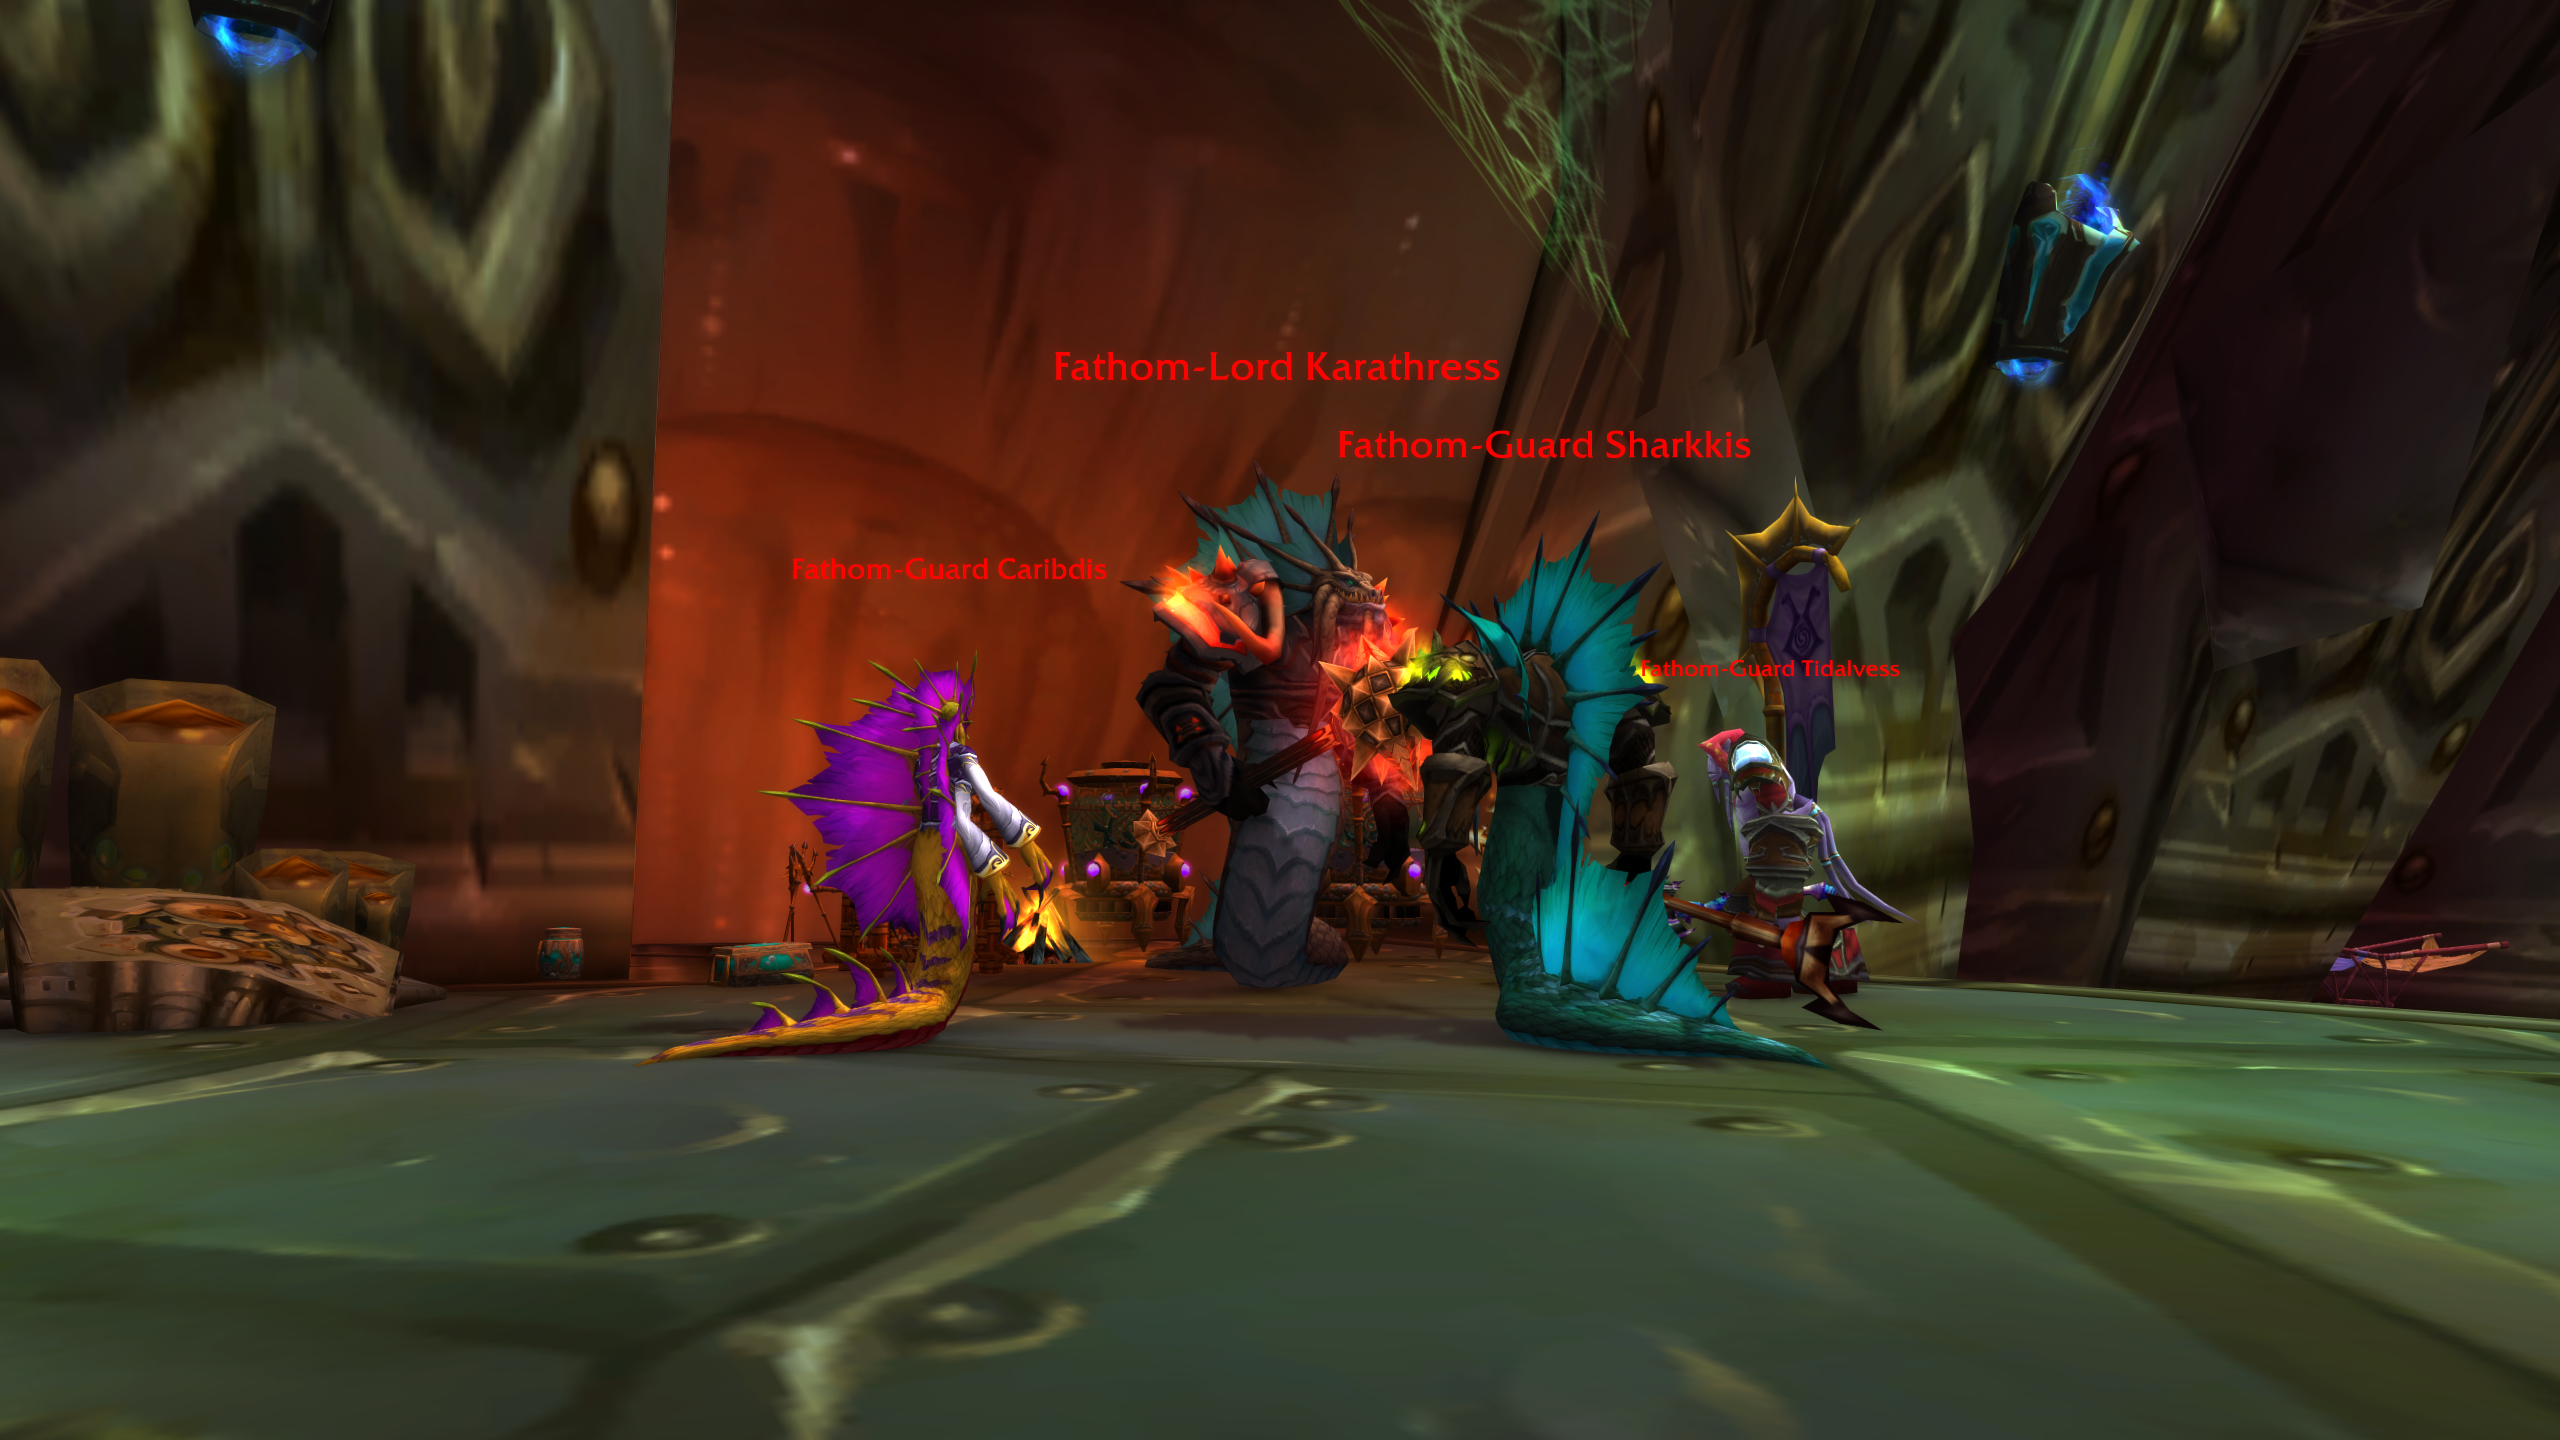
Fathom-Lord Karathress is a council-style encounter where the raid fights Karathress and his three Fathom-Guards at the same time. The fight is less about one major boss mechanic and more about clean assignments. Each guard needs to be tanked, controlled, and killed before the raid fully commits to Karathress.
The main danger is that Karathress gains abilities from each guard after they die. This means the fight does not instantly become easier after the first kill. It becomes more controlled, but Karathress also starts using stronger spells and skills. The raid needs to stay focused on the kill order, keep tanks alive, interrupt Caribdis, and destroy Spitfire Totems every time they appear.
The safest default kill order is:
|
Order |
Target |
Reason |
|
1 |
Removes the most dangerous early tank damage and gives the raid control over Spitfire Totems. |
|
|
2 |
Removes pet pressure, Leeching Throw, and Beast Within from the add side of the fight. |
|
|
3 |
Stops Healing Wave, Cyclones, and Tidal Surge. |
|
|
4 |
Final burn after all guards are dead. |
Some raids kill Sharkkis before Tidalvess to remove Leeching Throw and pet pressure earlier. That can work, but Tidalvess first is better for most groups, trust me. It’s because Spitfire Totem causes a lot of unnecessary deaths if players react slowly.
Here’s a quick look at all abilities used during the encounter:
|
Enemy |
Ability |
Description |
|
Fathom-Lord Karathress |
Hits a random mana user for 50% of their maximum health and briefly stuns them. |
|
|
Fire damage to players near Karathress. |
||
|
Major attack speed and cast speed buff if Karathress reaches 75% while guards are still alive. |
||
|
Gives Karathress The Beast Within after Sharkkis dies. |
||
|
Gives Karathress Spitfire Totem after Tidalvess dies. |
||
|
Gives Karathress Tidal Surge after Caribdis dies. |
||
|
Fathom-Guard Tidalvess |
Frost damage and slow on the tank. |
|
|
Slows nearby players. |
||
|
Removes poison effects from Tidalvess. |
||
|
High-priority totem that damages several raid members. Kill it immediately. |
||
|
Fathom-Guard Sharkkis |
Hits several players with Physical damage. |
|
|
Drains health and mana from a random target. Cannot be dispelled. |
||
|
Summons either a Fathom Lurker or Fathom Sporebat. |
||
|
Increases Sharkkis’ damage and pet damage. |
||
|
Fathom-Guard Caribdis |
Fast heal that must be interrupted. |
|
|
AoE Frost damage around Caribdis. |
||
|
Freezes players near the target. Spread out to reduce overlap. |
||
|
Creates a moving cyclone that throws players into the air. |
Before starting the fight, you should assign tanks and healers clearly. This encounter is very punishing if healers are not assigned to specific tanks. There are several enemies active at once, and some of them can burst tanks very quickly.
The raid should have one tank on Karathress, one tank on Tidalvess, one tank on Sharkkis, and one tank on Caribdis. If your group has fewer tanks, you can adjust with stronger gear and careful positioning, but the best-case scenario would still be dedicating one tank to each of the enemies.
Caribdis should be dragged far away from the rest of the fight. She can heal the other bosses from any range, so distance does not stop Healing Wave. The point of moving her away is to isolate her other mechanics and give the interrupt group a clear job. Assign players with reliable interrupts to Caribdis and keep Curse of Tongues or similar cast-slowing effects on her if available.
Tidalvess and Sharkkis should be held where the raid can reach them easily. Karathress should be controlled by the main tank while the raid kills the guards. Do not push Karathress to 75% while guards are still alive, because Blessing of the Tides can make the fight much more dangerous.
First Target: Fathom-Guard Tidalvess
Tidalvess is the safest first kill target because his tank damage can be nasty and his Spitfire Totem is one of the biggest wipe causes in the fight. He uses Shaman-style abilities, including Frost Shock and several totems, but the raid’s biggest priority is always Spitfire Totem.
When Spitfire Totem appears, everyone should swap to it and kill it immediately. Do not finish a cast on the boss. Do not tunnel the current target. The totem deals heavy fire damage to multiple players and can quickly create a healing problem across the raid.
The Tidalvess tank needs strong healing from the start. His melee damage can spike hard, especially with Windfury-style burst and Frost Shock. Healers assigned to this tank should be proactive, not reactive. Tanks should also use defensive tools early if damage comes in too quickly.
After Tidalvess dies, Karathress gains Spitfire Totem. This means the raid still needs to keep killing the totem for the rest of the encounter. The only difference is that the totem now comes from Karathress instead of Tidalvess.
Second Target: Fathom-Guard Sharkkis
After Tidalvess dies, the raid should move to Sharkkis. Sharkkis is dangerous because of his pets, Leeching Throw, and Beast Within. His damage is not always as scary as Tidalvess, but his mechanics add a lot of extra pressure.
Sharkkis can summon either a Fathom Lurker or a Fathom Sporebat. The tank holding Sharkkis should try to pick up these pets as well, but another tank can help if needed. The pets can knock back and cause aggro problems, so DPS should avoid reckless cleave before tanks have control.
If a Fathom Lurker is summoned, be careful when killing it near the raid, since it can explode on death. Move or control the pet properly before it dies so the raid does not take avoidable damage.
Sharkkis also casts Leeching Throw on random players. This drains health and mana and cannot be dispelled. Healers should watch the affected target, and mana users should be ready for the drain if it lands on them.
When Sharkkis uses The Beast Within, his damage increases. Tanks should be ready with defensive cooldowns, and healers should give the Sharkkis tank extra attention. After Sharkkis dies, Karathress gains The Beast Within, so the main tank should prepare for higher incoming damage later in the fight.
Third Target: Fathom-Guard Caribdis
Caribdis should already be isolated with her own tank and a stun team. Once Tidalvess and Sharkkis are dead, the raid moves to Caribdis and finishes her off.
The key mechanic here is Healing Wave. It has a very short cast time and can heal one of the other bosses for a large amount. This needs to be interrupted every time. If your interrupt team misses too many casts, the fight drags on and can turn into a wipe through mana loss or tank deaths.
Caribdis also uses Tidal Surge, which freezes a player and anyone nearby. Players near her should stay spread out so one Tidal Surge does not lock down several people at once. She can also summon Cyclones that move around the room and throw players into the air. Avoid them and keep the area as clean as possible.
Once Caribdis dies, Karathress gains Tidal Surge. At this point, the raid should move back to Karathress, spread enough to reduce stun overlap, and prepare for the final part of the encounter.
Final Target: Fathom-Lord Karathress
Once all three guards are dead, the raid can focus on Karathress. By now, the main tank should have a huge aggro lead, so DPS can usually attack more freely. Still, players should not ignore aggro completely, especially if Karathress has The Beast Within active.
Karathress will now have several guard abilities, including Spitfire Totem and Tidal Surge. Spitfire Totem remains the main priority. Every player should swap to it instantly and kill it before returning to the boss. If the raid ignores it, the final part of the fight can fall apart even after the guards are dead.
Karathress also casts Cataclysmic Bolt, which hits a random mana user for half of their maximum health and briefly stuns them. This creates steady raid damage, so healers need to keep players topped whenever possible. Do not leave people sitting low for long, because another hit or totem tick can finish them off.
The main tank should use defensive cooldowns if Karathress gains The Beast Within or if healing gets stretched. Warriors should keep Thunder Clap and Demoralizing Shout active, since reducing incoming tank damage makes the whole encounter smoother.
The fight comes down to assignments and target discipline. Tanks need to hold their enemies in the right places, healers need clear tank assignments, DPS need to kill Spitfire Totems instantly, and the interrupt team must stop Caribdis from healing. If those jobs are handled properly, Karathress becomes a controlled council fight instead of a chaotic four-boss brawl.
Morogrim Tidewalker Strategy
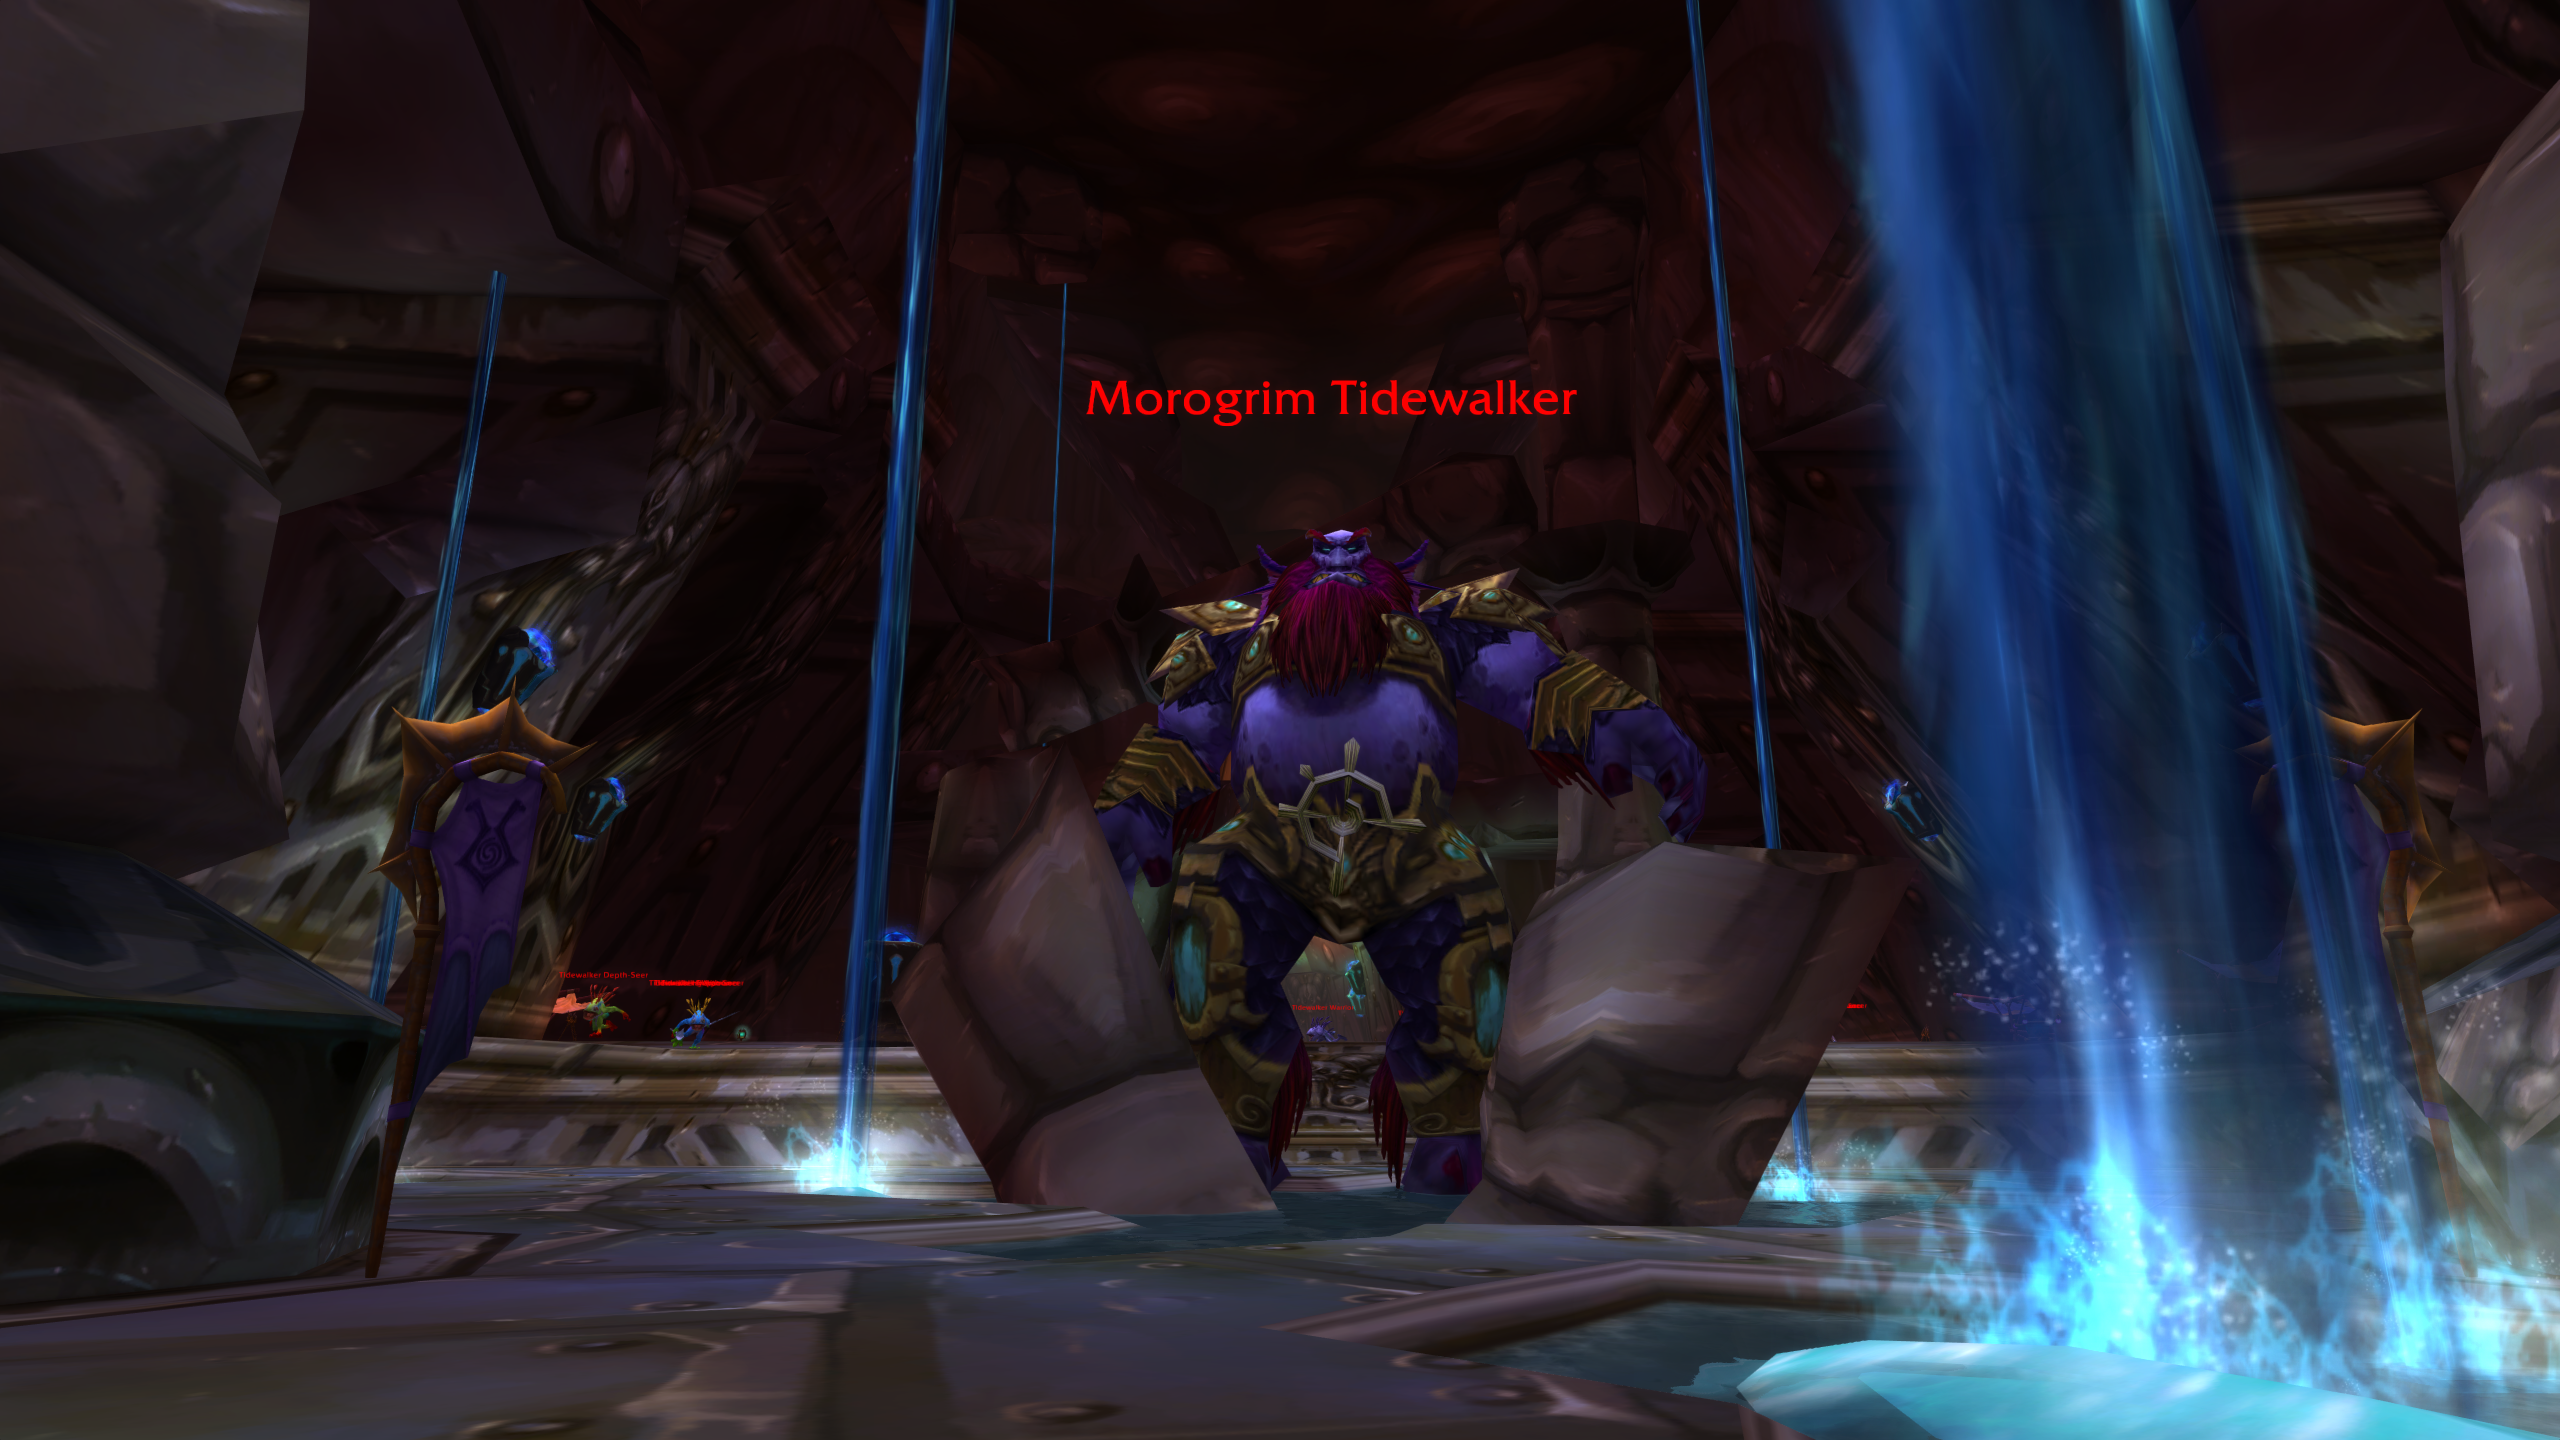
Morogrim Tidewalker is a fight built around add control, healer aggro, and clean positioning. The boss himself is mostly simple, but every Earthquake summons two waves of Murlocs that rush into the room and often go straight for healers. If your add tanks pick aggro them quickly enough, the fight is gonna be easy. If they do not, the raid can fall apart in seconds.
The fight has two main parts. From 100% to 25%, the raid handles Tidal Wave, Watery Grave, Earthquake, and Murloc waves. At 25%, Morogrim stops using Watery Grave and starts spawning Water Globules instead. The raid then needs to keep moving the boss away from the orbs while finishing him off.
For this encounter, you want your strongest tank on Morogrim and one or two tanks ready for Murloc waves. A Protection Paladin is especially strong for the Murlocs because they are low-level enemies and can be controlled well with AoE aggro. Other tanks can do the job too, but the raid must give them time to build aggro before using heavy AoE.
Here’s a quick look at all abilities used during the encounter:
|
Enemy |
Ability |
Description |
|
Morogrim Tidewalker |
Frontal Frost attack that also reduces melee attack speed. The boss must face away from the raid. |
|
|
Teleports four random players to the waterfalls, stuns them, then drops them for fall damage. |
||
|
Deals raidwide damage and summons two packs of Tidewalker Lurkers. |
||
|
Starts at 25% health. Water orbs move toward targeted players and explode if they reach them. |
||
|
Melee Attacks |
Murloc adds that rush into the room after Earthquake and often target healers first. |
Phase 1: Boss Positioning
At the start of the fight, the main tank should pull Morogrim to one of the pillars and face him away from the raid. This keeps Tidal Wave pointed safely into the wall or away from the group. Nobody except the tank should stand in front of the boss, because Tidal Wave deals Frost damage and applies an attack speed reduction.
The rest of the raid should stack behind Morogrim or near the opposite pillar, depending on your group’s positioning plan. The key is to keep the raid close enough for efficient healing and AoE damage, but not in front of the boss.
Morogrim hits hard enough that the main tank still needs steady attention. Keep Thunder Clap and Demoralizing Shout up if your raid has access to them. These small reductions help smooth the incoming damage, especially while healers are distracted by Watery Grave or Earthquake.
Watery Grave will target four random players and send them to the waterfalls in the middle of the room. They get stunned in bubbles, then fall and take damage. Assign one or two healers to watch these players. Restoration Druids are great for this job because they can quickly cover the affected players with healing over time effects.
The raid should not panic every time Watery Grave happens. The affected players need quick healing, but the rest of the raid should stay in position and keep the boss stable.
Phase 2: Earthquake and Murlocs
Earthquake is the main mechanic of the encounter. It deals raid-wide damage and summons two packs of six Murlocs, with one pack coming from each side of the room. These adds are the real fight.
The Murlocs will often run toward healers because of healing aggro. This is why healers need to be careful right after Earthquake. Do not instantly spam big raid heals unless the add tanks already have control. If healers generate too much aggro before the Murlocs are picked up, the adds can rush into the raid and kill them.
Hunters and Mages can make this part much easier. Frost Traps, Blizzard, and other slows can buy the add tanks time to collect both packs. Once the Murlocs are controlled, the tanks should bring them behind Morogrim so the raid can AoE them down quickly.
DPS players should wait for the add tanks to build aggro. This matters more than squeezing out instant damage. Warlocks using Seed of Corruption too early can pull the Murlocs away from the tanks and cause a wipe. Once aggro is secure, the raid should burn the Murlocs hard and clean them up before returning to the boss.
One important problem can happen if an add tank gets hit by Watery Grave while Murlocs are active. If that happens, the adds may chase the tank toward the waterfalls, or they may swap to nearby healers if aggro was weak. This is why having a third tank can make the fight safer, especially for early clears.
After each Murloc wave dies, the raid goes back to damaging Morogrim. The fight repeats this pattern until he reaches 25% health.
Phase 3: Water Globules
At 25% health, Morogrim enters the final part of the fight. He stops using Watery Grave and starts spawning Water Globules from the waterfall locations. These slow-moving orbs fixate on random players and explode for heavy damage if they reach their target.
The important detail is that the Globules only explode when they reach the player they are targeting. Still, the raid should treat them seriously and avoid letting them drift into the group. Once Globules start getting close, the main tank should move Morogrim away and drag him toward a safer part of the room.
This is usually the best time to use Bloodlust, Heroism, and major damage cooldowns. The longer this phase lasts, the more awkward the room becomes. Keep the boss facing away from the raid, keep killing any Murlocs that spawn from Earthquake, and move away from Globules before they connect.
Do not forget that Earthquake and Murloc waves still happen in this part of the fight. The raid cannot fully tunnel the boss unless he is close to dying. Add tanks still need to collect Murlocs, DPS still need to wait for aggro, and healers still need to avoid creating too much early healing aggro.
The fight is mostly about patience and clean execution. Face Morogrim away from the raid, heal Watery Grave targets quickly, let tanks secure Murlocs after every Earthquake, then AoE the adds down. Once Water Globules spawn, move the boss away from them and finish the fight before the room becomes too dangerous.
Lady Vashj Strategy
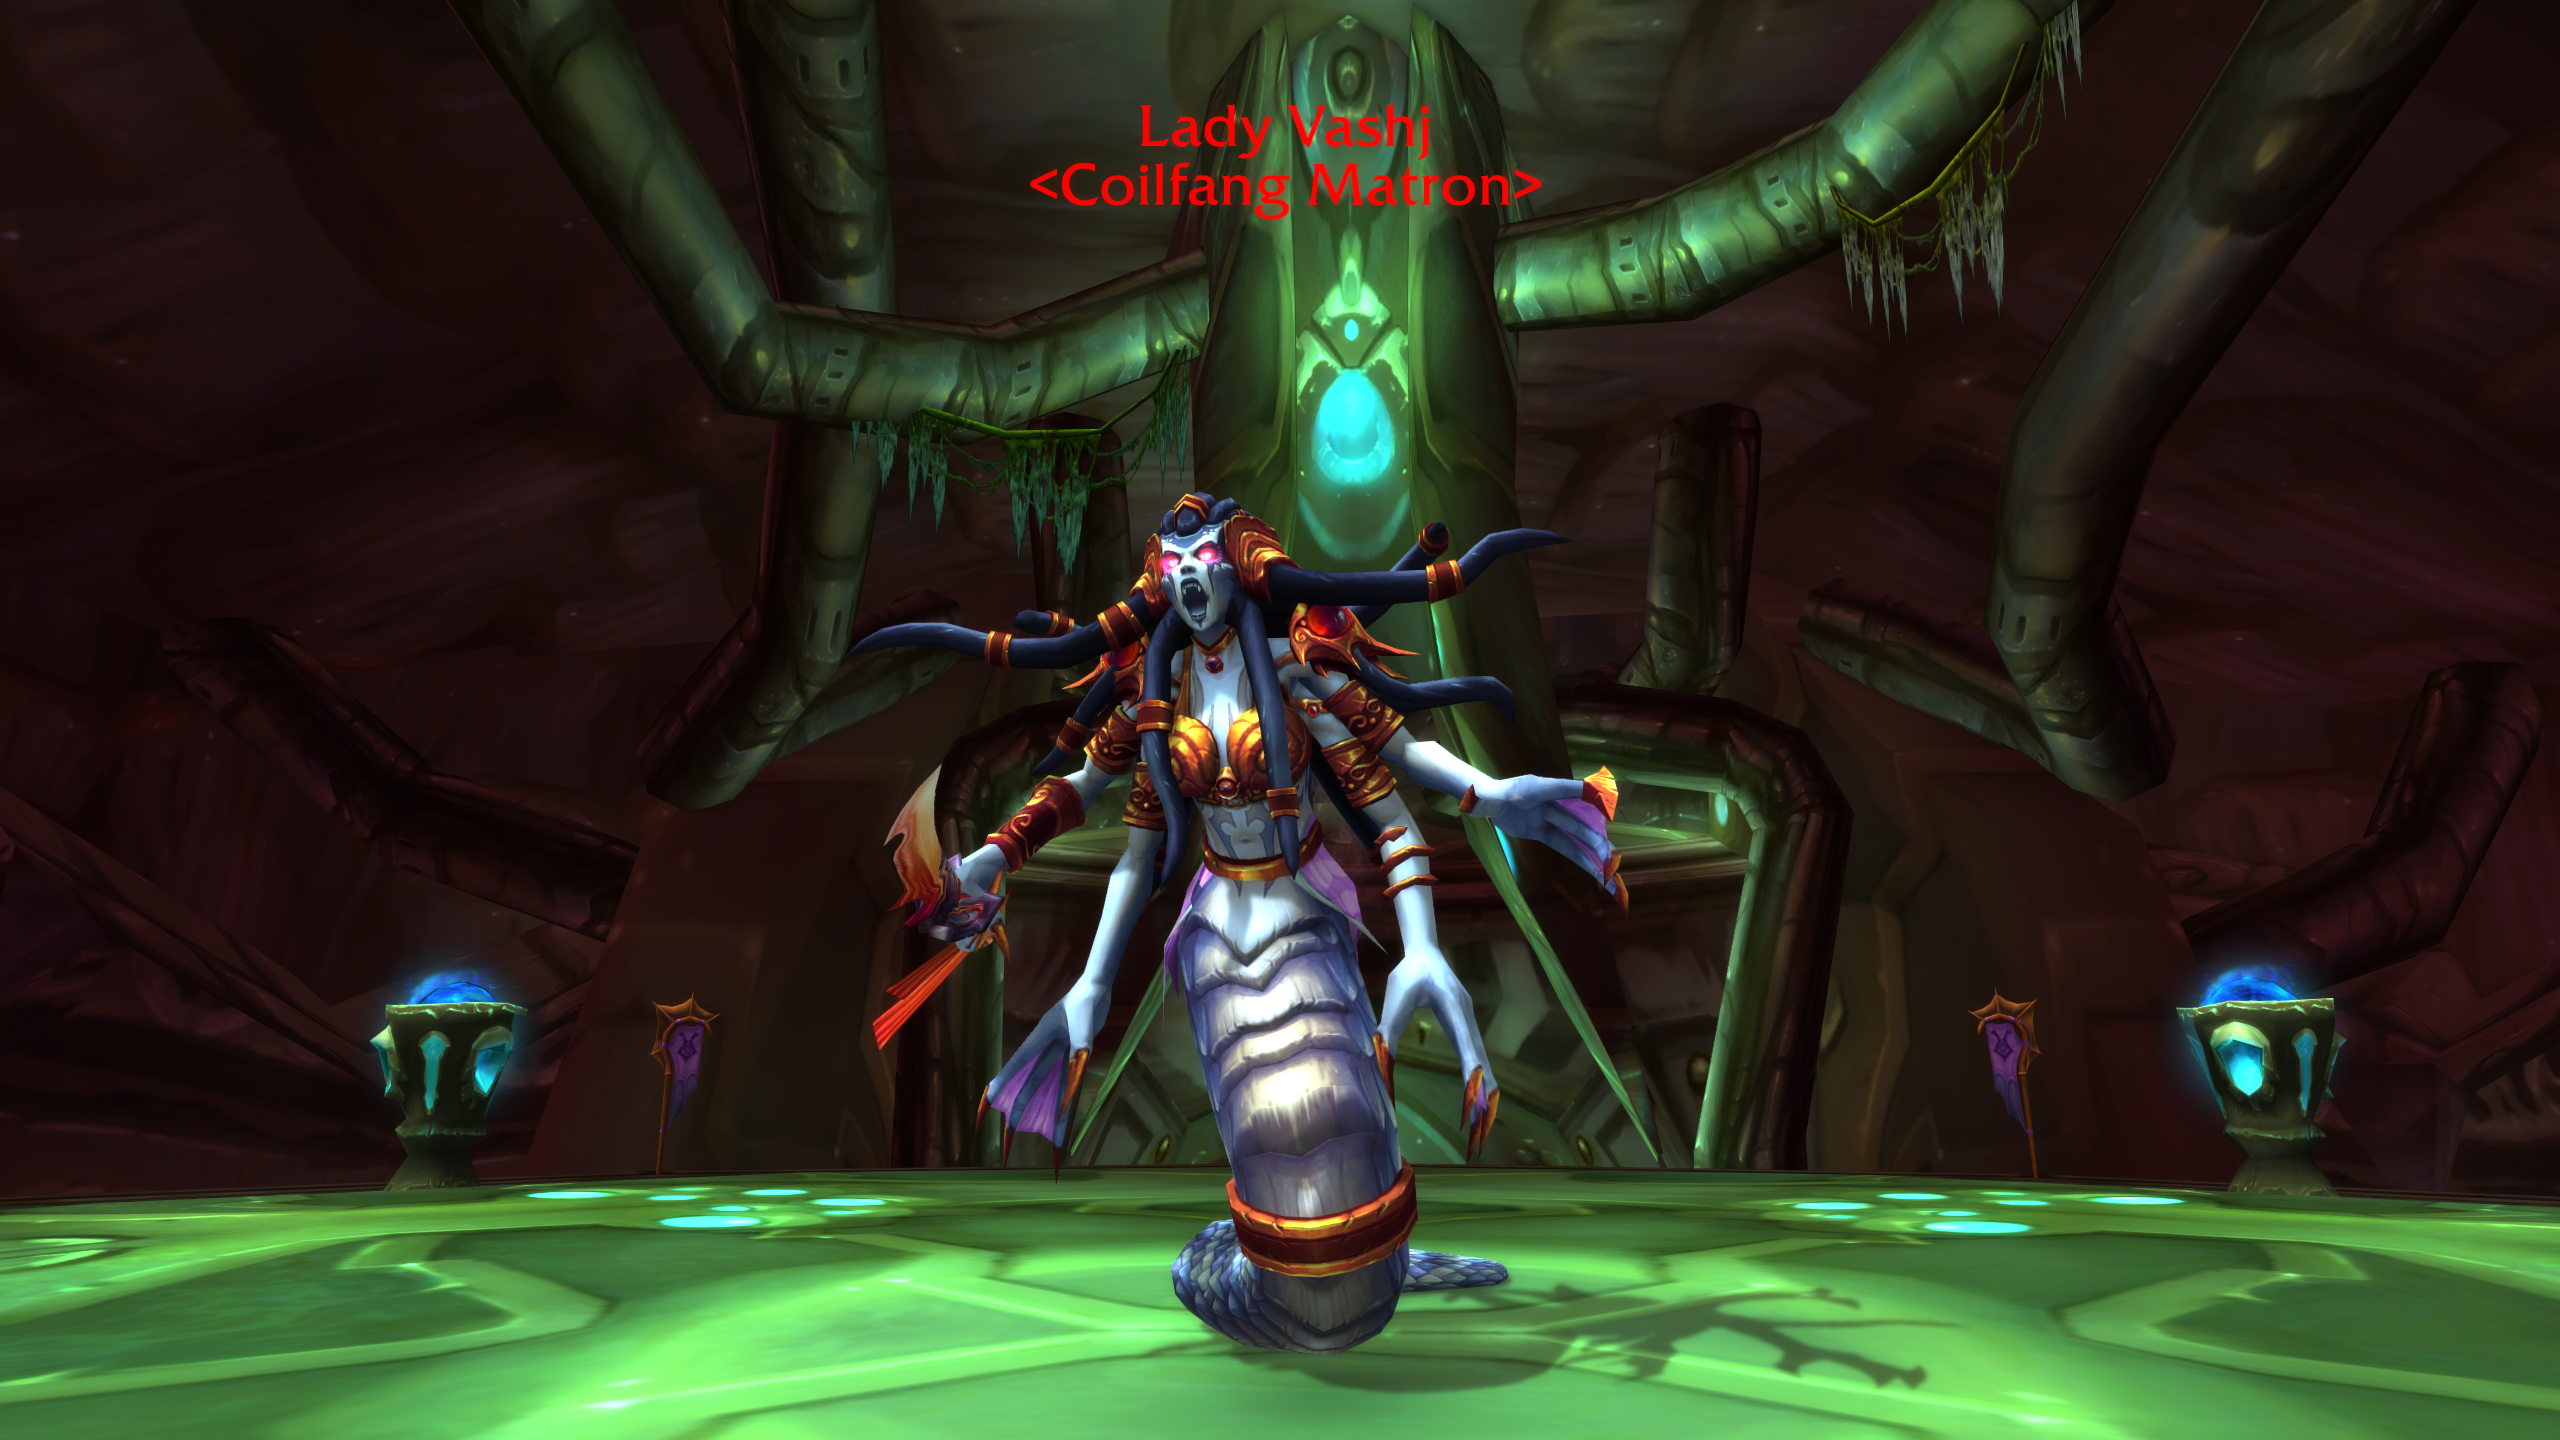
Lady Vashj is the final boss of Serpentshrine Cavern and the most assignment-heavy fight in the raid. The encounter has three phases. Phase 1 is a controlled burn with spread mechanics. Phase 2 is a full add phase built around killing Tainted Elementals and passing Tainted Cores to disable shield generators. Phase 3 returns to the boss fight, but the raid has to finish her before Toxic Spores cover too much of the platform.
The hardest part of the fight is Phase 2. Players need to understand their positions before the pull, because running around randomly will make the platform chaotic. The raid should be split around the room, with ranged players watching the outer edges, melee handling Coilfang Elites, and assigned players managing Tainted Cores.
If Phase 2 is clean, the rest of the fight becomes much easier. If players miss Tainted Elementals, fail core passes, let Striders run through the raid, or allow too many Enchanted Elementals to reach Vashj, the fight can quickly spiral out of control.
Here’s a quick look at all major abilities and enemies in the encounter:
|
Enemy |
Ability |
Description |
|
Lady Vashj |
Hits several players with Physical damage. |
|
|
Heavy Nature hit that stuns the tank. Can be stopped with Grounding Totem. |
||
|
Roots players near Vashj and deals damage over time. The tank should be freed quickly. |
||
|
Debuff on a random player that damages nearby allies. The affected player must move away. |
||
|
Phase 2 frontal cone cast from the center of the room. |
||
|
Mind control effect in versions where it is active. Tanks can taunt controlled players. |
||
|
Enchanted Elemental |
Moves toward Vashj. If it reaches her, it increases her damage. |
|
|
Tainted Elemental |
Stationary add that must be killed quickly before it despawns. |
|
|
Important item used to disable shield generators. The holder cannot move. |
||
|
Coilfang Elite |
Frontal attack. Tanks must face Elites away from the raid. |
|
|
Slows the tank or current target. |
||
|
Coilfang Strider |
Shadow damage against the highest threat target. |
|
|
Pulsing fear around the Strider. Melee should stay away. |
||
|
Toxic Sporebat |
Phase 3 poison clouds that cover the ground and force the raid to move. |
Before pulling Lady Vashj, the raid should already have Phase 2 assignments prepared. This fight becomes much harder if players try to figure out positions after the shield goes up.
The simplest way to handle the room is to split the platform into four quadrants. Each quadrant should have ranged players watching for Enchanted Elementals and Tainted Elementals. Hunters are great for this job because they can cover long distances and quickly tag low-health elementals around the edge.
You also need a clear Tainted Core plan. A clean setup is to assign players near the top of each stair area and near each shield generator. When a Tainted Elemental dies, the core can be passed from the looter to a ranged player, then to someone near the generator. The fewer people involved, the lower the chance that someone panics with the core.
Tanks should know where Coilfang Elites will be held. Strider kiters should also know their path before Phase 2 starts. The safest approach is to keep Elites closer to the inner circle and kite Striders around the outer ring. This prevents melee and ranged assignments from crossing over each other too much.
Phase 1: Lady Vashj
Phase 1 lasts until Lady Vashj reaches 70% health. This phase is simple compared to the rest of the fight, but players still need to spread properly and react to Static Charge.
The raid should spread around Vashj enough to reduce chain damage from Static Charge and Forked Lightning. You do not need to use the entire platform, but players should not stack tightly. If Static Charge lands on someone, that player needs to move away from everyone else immediately. The debuff deals Nature damage to nearby allies, so slow reactions can kill several people at once.
The tank needs to watch Shock Blast and Entangle. Shock Blast hits hard and stuns the tank, so a Shaman should keep Grounding Totem ready for it. If Shock Blast goes through while the tank is already taking melee hits, they can die very quickly.
Entangle roots players near Vashj. The most important target to free is the tank. Blessing of Freedom, shapeshifting, Cloak of Shadows, PvP trinkets, and similar tools can help remove or escape the root. If the tank cannot move when needed, positioning can become awkward fast.
Use only short cooldowns during this phase. The goal is to reach Phase 2 cleanly with good mana, not to waste everything early. Healers should also pace their mana carefully, because this is a long encounter with heavy raid damage later.
Phase 2: Shield Generators and Adds
At 70%, Lady Vashj moves to the center of the platform, activates her shield, and becomes immune to damage. The raid now has to disable four shield generators using Tainted Cores. This is the real heart of the fight.
During this phase, multiple add types spawn at the same time. Each group in the raid has a specific job, and everyone needs to stick to that job instead of chasing every enemy they see.
The basic assignment should look like this:
|
Raid Group |
Main Job |
|
Hunters and assigned ranged |
Kill Enchanted Elementals and call Tainted Elementals. |
|
Melee DPS |
Kill Coilfang Elites. |
|
Ranged DPS |
Kill Coilfang Striders and help with elementals. |
|
Off-tanks |
Pick up Coilfang Elites and help with Tainted Core handling. |
|
Strider kiter |
Keep Coilfang Striders moving around the outer ring. |
|
Core team |
Pass Tainted Cores to shield generators. |
Enchanted Elementals spawn around the outer edge and slowly move toward Vashj. If they reach her, she gains a stacking damage buff. These adds have low health, so assigned ranged players should kill them before they reach the center.
Tainted Elementals are the most important adds in the phase. They spawn around the same outer areas, stay still, cast Poison Bolt, and despawn after a short time. They must be killed quickly. When one dies, it drops a Tainted Core.
The player who loots the core cannot move while holding it. To use it, they must throw it to another player. The core should be passed toward the nearest shield generator until someone standing next to the generator receives it and disables the shield. If a core holder dies, the core is lost, and the raid has to wait for another Tainted Elemental.
This is why communication matters so much. The player who sees the Tainted Elemental should call it, ping it, or mark the location. The core team should already know who receives the first pass and who stands near the generator. A macro for passing the core makes this mechanic much easier.
Coilfang Elites also spawn during this phase. Tanks should pick them up and keep them faced away from the raid because they cleave. Melee DPS should focus these adds and stay behind them at all times.
Coilfang Striders are handled by ranged players. These adds pulse a fear effect around themselves, so melee should stay away from them. A Shaman can kite them with Frost Shock, while other ranged players apply damage as the Strider moves through their quadrant. Do not drag the Strider through the raid, and do not let it run into melee.
Lady Vashj will continue casting Forked Lightning from the center during this phase. It hits in a frontal cone, so players should stay aware of her direction and avoid standing in obvious danger for too long.
Once all four shield generators are disabled, Phase 3 begins. Before disabling the final generator, try to clean up as many remaining adds as possible. Starting Phase 3 with several Elites or a Strider still alive makes the next part much harder than it needs to be.
Phase 3: Final Burn
After the fourth generator is disabled, Lady Vashj becomes active again at reduced health. She also wipes threat, so the main tank needs to be ready near her before the final shield drops. The raid should not immediately unload into the boss. Kill the remaining Phase 2 adds first, then let the tank secure Vashj.
Phase 3 works a lot like Phase 1, but Toxic Sporebats now spawn and drop poison clouds on the ground. These clouds deal heavy Nature damage and will eventually cover more and more of the platform. This acts like a soft enrage. The longer the phase lasts, the less safe space the raid has.
Players need to keep moving out of poison immediately. If you angle the camera down, you can often see the poison projectile before the cloud fully forms. Move as soon as it looks like it will land near you. Do not wait until the cloud is already under your feet.
A good strategy is to slowly move Lady Vashj around the middle circle. This keeps melee players moving and helps prevent the group from standing in old poison clouds for too long. The tank should keep her stable enough for DPS uptime, but not so static that the raid gets boxed in by poison.
This is the best time to use Bloodlust, Heroism, potions, and major offensive cooldowns. The goal is to kill Vashj before the poison clouds make the platform too dangerous. Healers should keep the raid topped, but everyone still needs to avoid avoidable damage. Standing in poison during this phase is one of the easiest ways to throw away a good pull.
Static Charge is still important. If it targets you, move away from the group just like in Phase 1. Do not run through the raid with it, and do not stand near the tank or melee group. The raid is already dealing with poison movement, so one bad Static Charge can create a lot of extra damage.
If mind control is active in your version, tanks should taunt controlled players quickly. They can hit extremely hard and may kill healers or cloth players if left alone. If it is not active in the Anniversary version you are covering, you can remove that line from the final article.
The whole fight comes down to control. Phase 1 is about clean spreading and stable tank healing. Phase 2 is about assignments, core passing, and add control. Phase 3 is about killing Vashj before Toxic Spores take over the room. If your raid communicates during Tainted Cores and keeps every player in their assigned area, Lady Vashj becomes much more manageable than she looks at first.


You got -20% OFF 
Serpentshrine Cavern Loot
In Serpentshrine Cavern, you’re going to get loot up to ilvl 141. Most boss and trash epic quality drops will have an ilvl 128. The tier 5 tokens for Helm, Legs, and Gloves are going to be ilvl 133. The final boss will drop items with an ilvl 138, with weapons dropping at an ilvl 141.
There are 3 types of tokens, which tell you what classes they’re for:
- Hero Tier Tokens are for Warlocks, Mages, and Hunters
- Champion Tier Tokens are for Rogues, Shamans, and Paladins
- Defender Tier Tokens are for Druids, Warriors, and Priests
The tokens can be exchanged for a piece of tier set at one of two vendors:
- Asuur for the Aldor members at 23.6 32.6
- Arodis Sunblade for The Scryers members at 43.6 90.4
Both can be found in Shattrath City. Here’s the full loot table that includes all drops from each of the bosses:
|
Item |
ilvl |
Slot |
Type |
Boss |
|
Fathomstone |
128 |
Held In Off-hand |
Off-hand Frill |
Hydross the Unstable |
|
Wraps of Purification |
128 |
Wrist |
Cloth Armor |
Hydross the Unstable |
|
Living Root of the Wildheart |
128 |
Trinket |
Trinket |
Hydross the Unstable |
|
Scarab of Displacement |
128 |
Trinket |
Trinket |
Hydross the Unstable |
|
Band of Vile Aggression |
128 |
Finger |
Ring |
Hydross the Unstable |
|
Blackfathom Warbands |
128 |
Wrist |
Mail Armor |
Hydross the Unstable |
|
Boots of the Shifting Nightmare |
128 |
Feet |
Cloth Armor |
Hydross the Unstable |
|
Brighthelm of Justice |
128 |
Head |
Plate Armor |
Hydross the Unstable |
|
Pauldrons of the Wardancer |
128 |
Shoulder |
Plate Armor |
Hydross the Unstable |
|
Ranger-General's Chestguard |
128 |
Chest |
Mail Armor |
Hydross the Unstable |
|
Ring of Lethality |
128 |
Finger |
Ring |
Hydross the Unstable |
|
Robe of Hateful Echoes |
128 |
Chest |
Cloth Armor |
Hydross the Unstable |
|
Shoulderpads of the Stranger |
128 |
Shoulder |
Leather Armor |
Hydross the Unstable |
|
Idol of the Crescent Goddess |
128 |
Relic |
Idol |
Hydross the Unstable |
|
Badge of Justice |
70 |
No slot |
Junk |
Hydross the Unstable |
|
Mallet of the Tides |
134 |
Main Hand |
One-Handed Mace |
The Lurker Below |
|
Boots of Effortless Striking |
128 |
Feet |
Leather Armor |
The Lurker Below |
|
Grove-Bands of Remulos |
128 |
Wrist |
Leather Armor |
The Lurker Below |
|
Ancestral Ring of Conquest |
128 |
Finger |
Ring |
The Lurker Below |
|
The Seal of Danzalar |
128 |
Finger |
Ring |
The Lurker Below |
|
Cord of Screaming Terrors |
128 |
Waist |
Cloth Armor |
The Lurker Below |
|
Glowing Breastplate of Truth |
128 |
Chest |
Plate Armor |
The Lurker Below |
|
Choker of Animalistic Fury |
128 |
Neck |
Amulet |
The Lurker Below |
|
Bracers of Eradication |
128 |
Wrist |
Plate Armor |
The Lurker Below |
|
Velvet Boots of the Guardian |
128 |
Feet |
Cloth Armor |
The Lurker Below |
|
Earring of Soulful Meditation |
128 |
Trinket |
Trinket |
The Lurker Below |
|
Tempest-Strider Boots |
128 |
Feet |
Mail Armor |
The Lurker Below |
|
Libram of Absolute Truth |
128 |
Relic |
Libram |
The Lurker Below |
|
Badge of Justice |
70 |
No slot |
Junk |
The Lurker Below |
|
Gloves of the Vanquished Hero |
70 |
Hands |
Armor Token |
Leotheras the Blind |
|
Gloves of the Vanquished Defender |
70 |
Hands |
Armor Token |
Leotheras the Blind |
|
Gloves of the Vanquished Champion |
70 |
Hands |
Armor Token |
Leotheras the Blind |
|
Girdle of the Invulnerable |
128 |
Waist |
Plate Armor |
Leotheras the Blind |
|
Coral-Barbed Shoulderpads |
128 |
Shoulder |
Mail Armor |
Leotheras the Blind |
|
Fang of the Leviathan |
134 |
Main Hand |
One-Handed Sword |
Leotheras the Blind |
|
Orca-Hide Boots |
128 |
Feet |
Leather Armor |
Leotheras the Blind |
|
True-Aim Stalker Bands |
128 |
Wrist |
Mail Armor |
Leotheras the Blind |
|
Tsunami Talisman |
128 |
Trinket |
Trinket |
Leotheras the Blind |
|
Badge of Justice |
70 |
No slot |
Junk |
Leotheras the Blind |
|
Grove-Bands of Remulos |
128 |
Wrist |
Leather Armor |
Leotheras the Blind |
|
Badge of Justice |
70 |
No slot |
Junk |
Fathom-Lord Karathress |
|
Bloodsea Brigand's Vest |
128 |
Chest |
Leather Armor |
Fathom-Lord Karathress |
|
Fathom-Brooch of the Tidewalker |
128 |
Trinket |
Trinket |
Fathom-Lord Karathress |
|
Frayed Tether of the Drowned |
128 |
Neck |
Amulet |
Fathom-Lord Karathress |
|
Leggings of the Vanquished Champion |
70 |
Legs |
Armor Token |
Fathom-Lord Karathress |
|
Leggings of the Vanquished Defender |
70 |
Legs |
Armor Token |
Fathom-Lord Karathress |
|
Leggings of the Vanquished Hero |
70 |
Legs |
Armor Token |
Fathom-Lord Karathress |
|
Sextant of Unstable Currents |
128 |
Trinket |
Trinket |
Fathom-Lord Karathress |
|
Soul-Strider Boots |
128 |
Feet |
Cloth Armor |
Fathom-Lord Karathress |
|
World Breaker |
134 |
Two-Hand |
Two-Handed Mace |
Fathom-Lord Karathress |
|
Mantle of the Tireless Tracker |
128 |
Shoulder |
Mail Armor |
Morogrim Tidewalker |
|
Pauldrons of the Argent Sentinel |
128 |
Shoulder |
Plate Armor |
Morogrim Tidewalker |
|
Razor-Scale Battlecloak |
128 |
Back |
Cloak |
Morogrim Tidewalker |
|
Warboots of Obliteration |
128 |
Feet |
Plate Armor |
Morogrim Tidewalker |
|
Ring of Sundered Souls |
128 |
Finger |
Ring |
Morogrim Tidewalker |
|
Band of the Vigilant |
128 |
Finger |
Ring |
Morogrim Tidewalker |
|
Illidari Shoulderpads |
128 |
Shoulder |
Cloth Armor |
Morogrim Tidewalker |
|
Talon of Azshara |
134 |
One-Hand |
One-Handed Sword |
Morogrim Tidewalker |
|
Pendant of the Lost Ages |
128 |
Neck |
Amulet |
Morogrim Tidewalker |
|
Serpent-Coil Braid |
128 |
Trinket |
Trinket |
Morogrim Tidewalker |
|
Girdle of the Tidal Call |
128 |
Waist |
Mail Armor |
Morogrim Tidewalker |
|
Gnarled Chestpiece of the Ancients |
128 |
Chest |
Leather Armor |
Morogrim Tidewalker |
|
Luminescent Rod of the Naaru |
134 |
Ranged |
Wand |
Morogrim Tidewalker |
|
Badge of Justice |
70 |
No slot |
Junk |
Morogrim Tidewalker |
|
Helm of the Vanquished Hero |
70 |
Head |
Armor Token |
Lady Vashj |
|
Helm of the Vanquished Defender |
70 |
Head |
Armor Token |
Lady Vashj |
|
Helm of the Vanquished Champion |
70 |
Head |
Armor Token |
Lady Vashj |
|
Belt of One-Hundred Deaths |
138 |
Waist |
Leather Armor |
Lady Vashj |
|
Coral Band of the Revived |
138 |
Finger |
Ring |
Lady Vashj |
|
Fang of Vashj |
141 |
One-Hand |
Dagger |
Lady Vashj |
|
Glorious Gauntlets of Crestfall |
138 |
Hands |
Plate Armor |
Lady Vashj |
|
Krakken-Heart Breastplate |
138 |
Chest |
Plate Armor |
Lady Vashj |
|
Lightfathom Scepter |
141 |
Main Hand |
One-Handed Mace |
Lady Vashj |
|
Prism of Inner Calm |
138 |
Trinket |
Trinket |
Lady Vashj |
|
Ring of Endless Coils |
138 |
Finger |
Ring |
Lady Vashj |
|
Cobra-Lash Boots |
138 |
Feet |
Mail Armor |
Lady Vashj |
|
Runetotem's Mantle |
138 |
Shoulder |
Leather Armor |
Lady Vashj |
|
Serpent Spine Longbow |
141 |
Ranged |
Bow |
Lady Vashj |
|
Vestments of the Sea-Witch |
138 |
Chest |
Cloth Armor |
Lady Vashj |
|
Vashj's Vial Remnant |
No ilvl listed |
No slot |
Consumable |
Lady Vashj |
|
Scroll of the Maelstrom |
70 |
No slot |
Miscellaneous Item |
Lady Vashj |
|
Nether Vortex |
75 |
No slot |
Material |
Lady Vashj |
|
Badge of Justice |
70 |
No slot |
Junk |
Lady Vashj |
Crafting patterns and plans can also drop in Serpentshrine Cavern, but they are shared rare raid drops rather than core boss-specific gear.
F.A.Q.
How to unlock Serpentshrine Cavern raid in TBC Anniversary?
You need to complete the Serpentshrine Cavern attunement quest. Pick up the quest in Heroic Slave Pens, kill Gruul and Nightbane, then return to the quest NPC.
At what level can I do the Serpentshrine Cavern raid in TBC Anniversary?
Serpentshrine Cavern is a level 70 raid. You should enter it at max level with a 25-player raid group.
Who is the final boss in Serpentshrine Cavern?
Lady Vashj is the final boss in Serpentshrine Cavern. This is a three-phase encounter.
What is the boss order in Serpentshrine Cavern raid?
The first five bosses can be done in any order. The common boss order is:
- Hydross the Unstable
- The Lurker Below
- Leotheras the Blind
- Fathom-Lord Karathress
- Morogrim Tidewalker
- Lady Vashj
How many bosses are in the Serpentshrine Cavern raid?
Serpentshrine Cavern has 6 bosses. The raid ends with Lady Vashj as the final encounter.


