

 Dallon Avery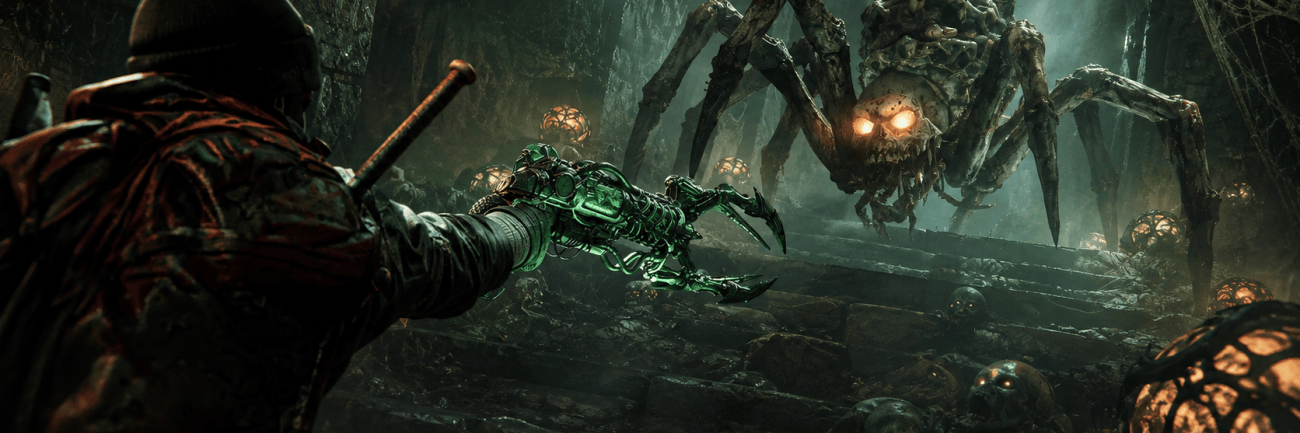
Rex Infernus Main Quest Easter Egg Guide Quick Overview:
- Rex Infernus is the final Round-Based Zombies map in Black Ops 7.
- The map releases with Season 05 Reloaded on August 20.
- The crew must cleanse the Shadowsmiths’ places of power and find the Warden’s inner sanctum.
- Deathspinners and the Web Mother are the two new enemy types.
- Rex Infernus introduces a new Wonder Weapon and the Titan Trap.
- Completing the Main Quest rewards the Bloodthorn Wonder Weapon Skin, a Calling Card, and 10,000 XP.
- Finishing the quest before Directed Mode releases also awards a unique Calling Card variant.
Can't wait to get your hands on the rewards from the final zombies map in BO7? Buy Black Ops 7 Rex Infernus service at Skycoach and let our veteran CoD players beat the map for you, get all the exclusive rewards as fast as possible. No need to wait or struggle with the puzzles, get your exclusive rewards today!


Read closely 
Browse our hottest Call of Duty Boosting services








Black Ops 7 Zombies Story Recap

Since Rex Infernus is the final Zombies map in Black Ops 7, here is a quick reminder of how we got here:
- Ashes of the Damned: The crew learned that the Warden had enslaved the Shadowsmiths and stolen their essence. They freed Veytharion, who restored Dempsey and Maya.
- Astra Malorum: The crew found and freed the second Shadowsmith, Caltheris, restoring Nikolai and Grey. The Warden then captured the crew and the Entity.
- Paradox Junction: Trapped inside a time loop at Nuketown, the crew destroyed the Dark Heart and escaped. They also learned more about the Warden's plan to reshape the Dark Aether.
- Totenreich: The crew freed Dravakar, restoring Richtofen and Weaver. He warned that reality itself was beginning to unravel and told them to recover the World Seed.
- Kowakujō: The crew freed the final Shadowsmith, Nyxara, restoring Takeo and Carver. They also recovered the World Seed needed for the final confrontation.
That brings us to Rex Infernus. All four Shadowsmiths are free, the entire crew has recovered their stolen essence, and the World Seed is finally in their possession. The only thing left to do is find the Warden and finish this.
Rex Infernus Main Quest Walkthrough
Rex Infernus is the final Round-Based Zombies map in Black Ops 7 and the conclusion of the story that started with Ashes of the Damned. This time, there is not much mystery surrounding who the crew needs to fight. The Warden is waiting, reality is falling apart, and everything we have done across the previous maps has been leading here.
The main objective is to cleanse the Shadowsmiths’ places of power, reach the Warden’s inner sanctum, and finally put an end to him. That setup already makes Rex Infernus feel a little different from the previous maps. We are not searching for another Shadowsmith or chasing the next piece of the puzzle anymore. This is the actual endgame.
From the footage and official images, the map is built around fragmented locations suspended in a corrupted version of reality, with portals connecting different areas and the Warden’s domain sitting at the center of everything. We also know there will be a brand-new Wonder Weapon, although Treyarch has deliberately kept its mechanics secret before release.
The Easter Egg goes live together with Rex Infernus on August 20 at 9 AM PT. I’ll update the walkthrough below with every step as the Main Quest gets solved.
Step 1: Unlocking Pack-a-Punch
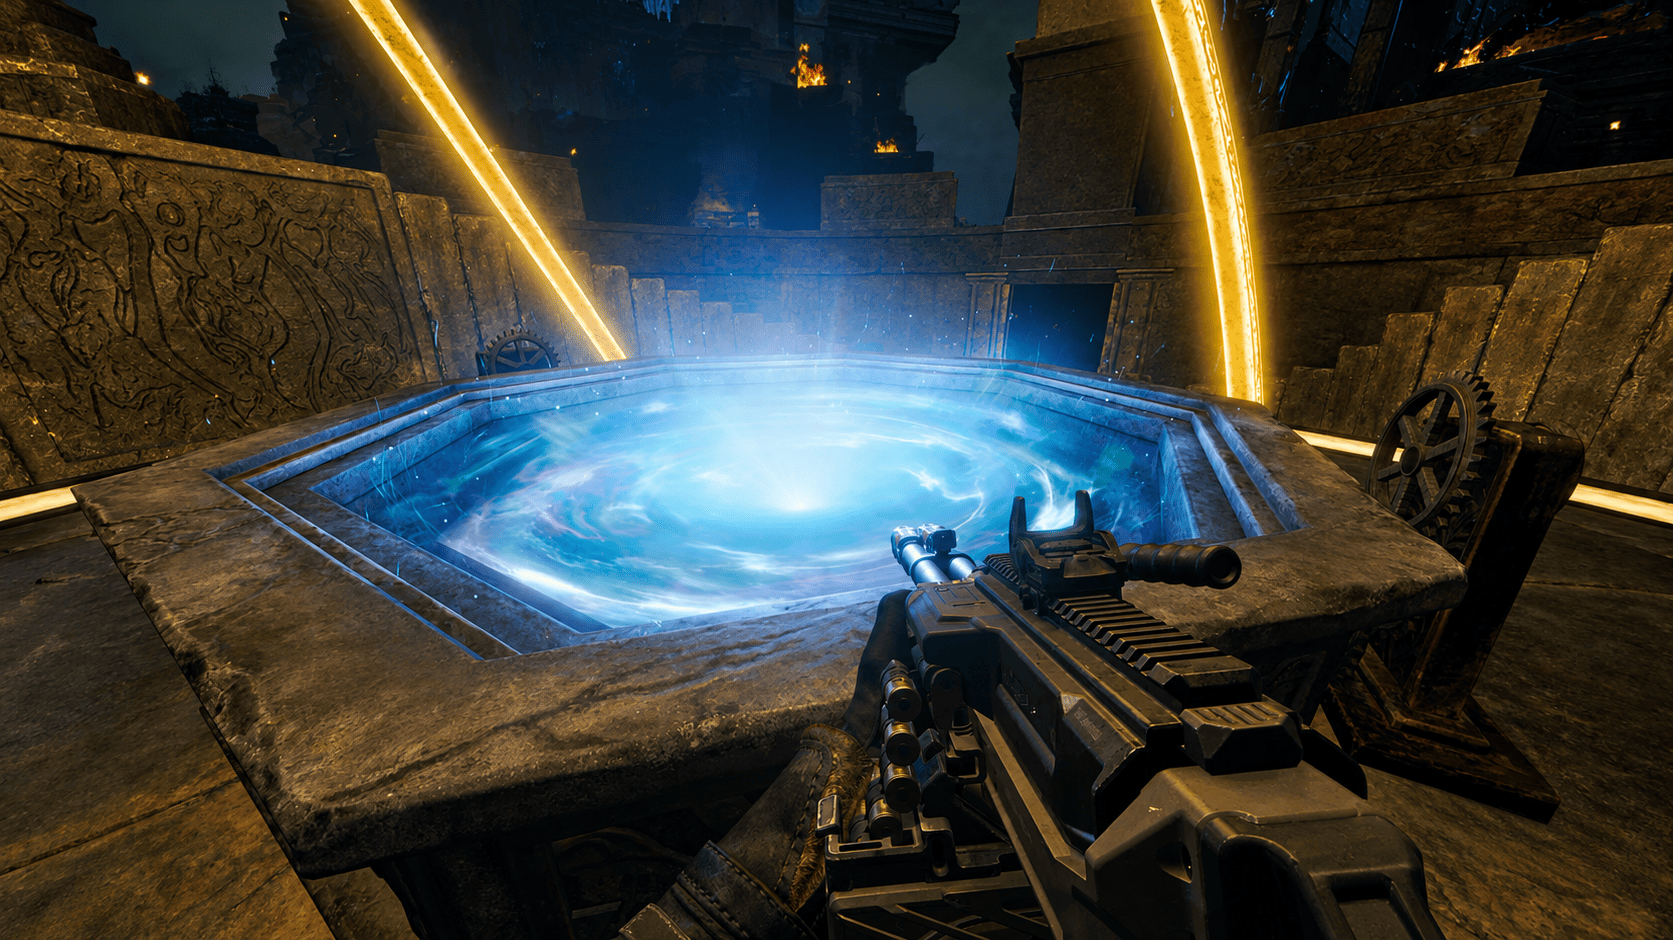
You start in an abandoned house, and your first objective is to "Holdout in Her House". Zombies will be crawling out of all corners, but you'll have a few useful upgrades near you - the bubble gum machine, the Quick Revive upgrade, and two weapon racks on the walls. After a few minutes, you'll hear the phone ringing. Pick it up, and you'll see a short cutscene with the door outside opening. By the way, the piano in the house is interactable, and it will play a role in a future puzzle.
Jump through a portal that takes you to the Nexus Forge, where you'll place the World Seed, which spawns two red flying skulls called "Dread Skull". They will try to fly away, leading you to different locations.
Up next, you'll need to Seize the Usurped Flame and take it back to the Brazier at the forge. You'll be able to use a fireball attack to activate the brazier. Repeat the process for the second skull, following it to the Caltheris Main Chamber. Destroying the second one will also spawn a giant titan who will be smashing the ground with its hands. Avoid those attacks!
Once both braziers are ignited, rotate the Crank Wheels. This will make the forge glow with runes and lower itself under the ground like an elevator platform, while also creating a staircase around it. At the end of that sequence, the Pack-a-Punch is activated!
Step 2: Getting the Wonder Weapon - Warden's Blight Crossbows
Note: Some puzzle variations, particularly Dravakar's riddle, are randomized between matches.
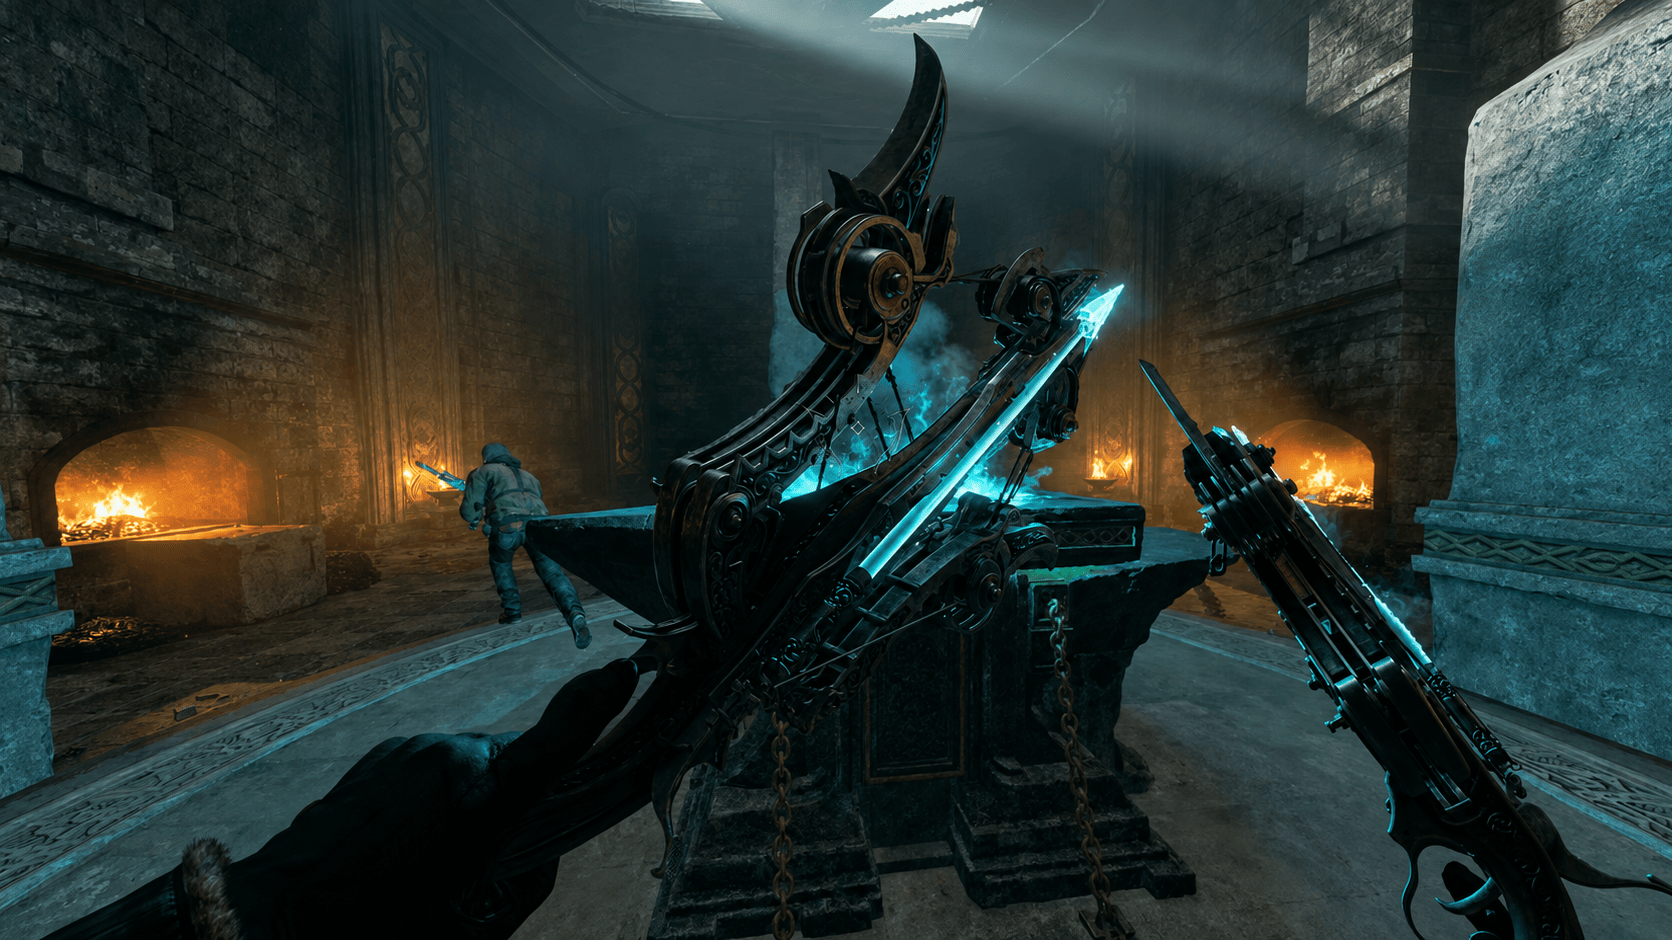
With Pack-a-Punch activated, you can start working on the Warden's Blight, the dual-crossbow Wonder Weapon you'll need throughout the Main Quest.
Get Astral Fire
Grab a Void Claw from one of the green grapple pedestals and find one of the floating Purple Orbs around the map. Use the grapple to pull the orb toward yourself repeatedly until you bring it all the way to Pack-a-Punch.
Once the orb begins spinning rapidly around the machine, rotate the Pack-a-Punch Crank Wheel. The energy will be absorbed into the forge and the Braziers will begin producing the purple Astral Flame. If you run out of grapples or can't find another Purple Orb, advance the round. Both resources replenish over time.
Get the Nyxara Crystal
Before heading into Nyxara's Temple, travel to Dravakar's Main Chamber. Above the entrance is an upper ledge that you can reach by wall jumping or using the grapple.
On the right side is a breakable section of wall. A grenade or another explosive can destroy it, although PHD Flopper is the most reliable method if explosives aren't working for you. Breaking the wall reveals a purple crystal, sometimes referred to as the Fracture of Nyxara. Pick it up. Take the crystal to Nyxara's Main Chamber and place it into the empty holder on the wall. You can reach the holder with a grapple or simply wall jump and interact with it.
Complete Nyxara's Crystal Puzzle
Grab an Astral Flame from Pack-a-Punch and run to the large eye at the back of Nyxara's Temple. The flame doesn't last forever, so don't waste too much time on the way there. Throw the flame directly at the eye to activate a beam that begins bouncing between the purple crystals around the temple. Use the Void Claw to rotate the crystals. Your goal is to keep redirecting the beam from one crystal to the next until it reaches the final door. If the beam stops at a crystal, grapple that crystal again until you hear the confirmation sound and the beam continues.
Once the final crystal is aligned correctly, the beam melts through the blocked doorway and opens access to Nyxara's Inner Sanctum.
Unlock the Silent Area
Enter the new room and approach the giant plant in the center. You'll need to let enemies damage you so the plant can begin draining your health. Keep surviving while allowing it to feed until the objective bar fills completely. When the process finishes, an interactable fruit or heart appears at the base of the plant. The room itself can be opened extremely early, but you cannot use the fruit to enter the next area until Round 8 or later. If you're below Round 8, continue playing until the interaction becomes available.
Eat the fruit and you'll be transported into the Silent Area, a dark forest containing all three Warden's Blight parts.
Find All Three Warden's Blight Parts
You can collect all three parts during a single visit if you're fast enough. If the Silent Area ejects you before you're finished, advance to the next round, return to Nyxara's Inner Sanctum, and use the fruit again.
The three parts are found around dead bodies:
- Central Rock: Find the corpse leaning against the large rock around the middle of the forest. Interact with it, wait for the Warden sequence to finish, and pick up the part.
- Cave: Head toward the cave at the far side of the forest and interact with the corpse near the entrance. Pick up the part after the short sequence.
- Burned Cabin: Find the corpse inside the ruined cabin near the chimney. Melee the floorboards beside the body to reveal the final part.
Once you have all three parts, leave the Silent Area through the portal or wait until you're automatically returned to Nyxara's Temple.
Solve Dravakar's Riddle
Return to Dravakar's Main Chamber. At the back of the room is a wall containing blue writing. Interact with it and Dravakar will read one of several possible riddles.
The puzzle uses four symbols: Star/Sun, Runner, Galaxy, and Moon. Three switches around the room rotate different pillar pairs, while the central lever confirms your answer.
If you haven't touched any of the switches yet, you can use these combinations:
| Riddle | Left Switch | Bottom/Back Switch | Right Switch |
|---|---|---|---|
| I remember the runner that travels to stars while moons and galaxies stay true. | 0 | 2 | 3 |
| I drift to the runner that travels moons who borrow from galaxies when stars stay true. | 3 | 2 | 1 |
| I drift to stars that remember moons who borrow the runner that travels the galaxy. | 1 | 2 | 2 |
| I remember galaxies that drift to moons who borrow the runner that travels the stars. | 2 | 0 | 2 |
After entering your combination, interact with the central lever. If you're correct, the middle pillar lowers and reveals a secret opening in the ceiling. If you're wrong, the puzzle resets and you'll need to advance the round before trying again.
Build Warden's Blight
Grab another Void Claw and grapple into the newly opened Dravakar Inner Sanctum above the chamber. Inside is the anvil used to forge the Wonder Weapon. Interact with it while carrying all three parts and Dravakar will assemble the Warden's Blight. If you're playing co-op, the crafted weapon goes to one player, but additional Warden's Blights can then appear from the Mystery Box. I strongly recommend Pack-a-Punching it as soon as you can. The upgraded version gains a charged alternate attack that creates a powerful tornado-like effect, and you'll need that charged shot for several Main Quest steps later
Note: The following steps are based on an ungoing community investigation and will likely differ from the finished guide.
Step 3: Complete the Remaining Shadowsmith Temple Puzzles
Nyxara's crystal puzzle and Dravakar's riddle were already completed while building the Wonder Weapon. That leaves Veytharion and Caltheris. You can actually do these before getting Warden's Blight, so if you're trying to optimize the Easter Egg, there is nothing stopping you from completing them earlier.
Veytharion Stone Block Puzzle
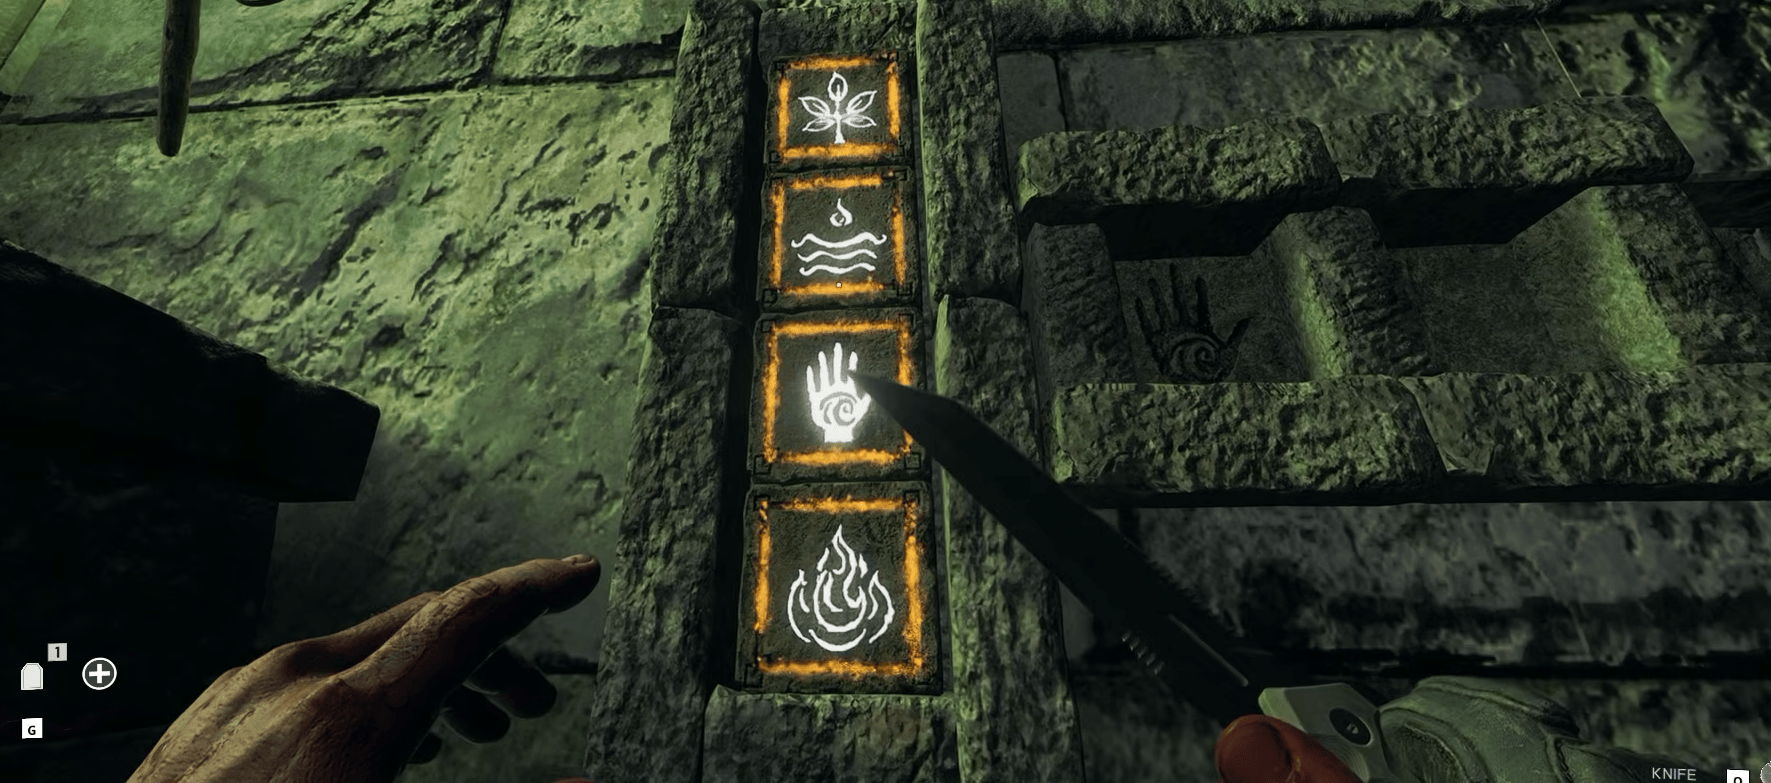
There are four Stone Blocks hidden around Veytharion's area. They represent Water, Plant/Leaf, Hand, and Fire. Death Perception makes them easier to spot, but their locations do not change.
Look for them in these areas:
- Water: Inside Veytharion Sanctuary, underneath the green lantern.
- Fire: On an upper ledge in Veytharion Main Chamber near the GobbleGum machine.
- Plant/Leaf: On an upper ledge in the room with Mule Kick.
- Hand: On the lower level of the Mule Kick room near the zombie spawn window.
Carry all four back to the puzzle wall. Place them in the correct slots, with the Water, Plant, Hand, and Fire symbols matching their positions.
The objective is to move all four blocks to the opposite side using the small moving platform. The main rule is simple: Fire cannot be left touching Water or Plant without the Hand block separating them.
Use the Hand as your buffer. Move Fire and Hand first, bring the Hand back, then transport Water and Plant one at a time while always keeping the Hand between Fire and either of those blocks. Fire should be the first dangerous block you move and the last one you finish positioning.
Once all four reach the opposite side without breaking the rule, the wall opens. You'll receive a free random Perk and reveal a pool of water.
This pool is extremely important. Interacting with it causes rain during the following round, which you'll need for the final stage of every Shadowsmith cleansing.
Caltheris Pressure Plate Puzzle
Head into Caltheris' Main Chamber and go downstairs, where you'll find four pressure plates built into the floor. Stand on the first plate and four glowing squares will appear around the chamber. Shoot all four before the plate drops, then move to the next plate and repeat the process. The targets appear in different places for each plate, including the walls and ceiling, so you need to hit them fairly quickly and close to the center.
If you fail a plate, don't worry. Advance the round and continue from the plate you were working on rather than restarting the entire puzzle. Completing all four opens a hidden wall containing a Lantern and two Purple Orbs. Interact with the Lantern to release additional Purple Orbs around the map. You can use it again on later rounds, which is extremely useful because the Main Quest requires a lot of Purple Orbs.
Step 4: Upgrade the Void Claw and Rebuild the Nexus
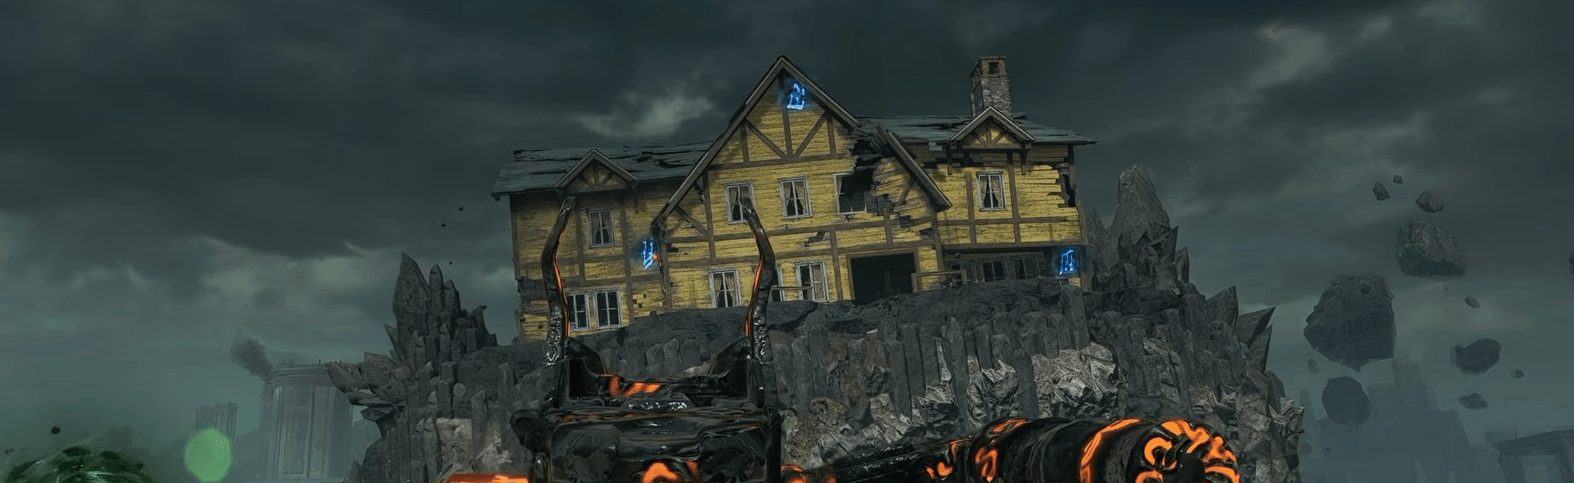
Before continuing, make sure your Warden's Blight is Pack-a-Punched. The charged alternate attack is mandatory for the next steps.
Start the Her House Symbol Puzzle
Return to the Nexus Forge and look toward Her House. Above the broken window on the right side of the house is a very small basketball. A scoped weapon makes this much easier to see.
Shoot the basketball and advance the round. A blue symbol will appear somewhere on the front of Her House. Write down or screenshot its position. Another symbol appears on each of the following rounds until there are four in total. You need to remember the exact order in which they spawned from oldest to newest. Do not shoot the symbols before you're ready. If you shoot one accidentally, the sequence changes and you'll need to build a new four-symbol sequence over the following rounds.
Complete the Special Exfil
Once all four symbols are visible, wait for an Exfil round. The earliest opportunity is Round 11, followed by 16, 21, and so on. Shoot the symbols in the exact order they appeared. If you entered the sequence correctly, you'll see the Twins dancing inside Her House. Go to the Exfil telephone at the Nexus Forge and answer it. This is not a normal Exfil and won't end your game. Instead, you'll need to kill an HVT before a portal appears that takes you back inside Her House. If your Warden's Blight isn't Pack-a-Punched yet, the Twins provide a Pack-a-Punch Crystal here. Use it on the Wonder Weapon.
Get the Eye of the Forge
Go upstairs inside Her House and enter the bathroom. Aim at the toilet and fire a fully charged Warden's Blight shot. This pulls out the Eye of the Forge. Pick it up. Now survive inside Her House until the phone rings again. Answer it and use the new portal to return to the main map.
Upgrade the Void Claw into the Void Talon
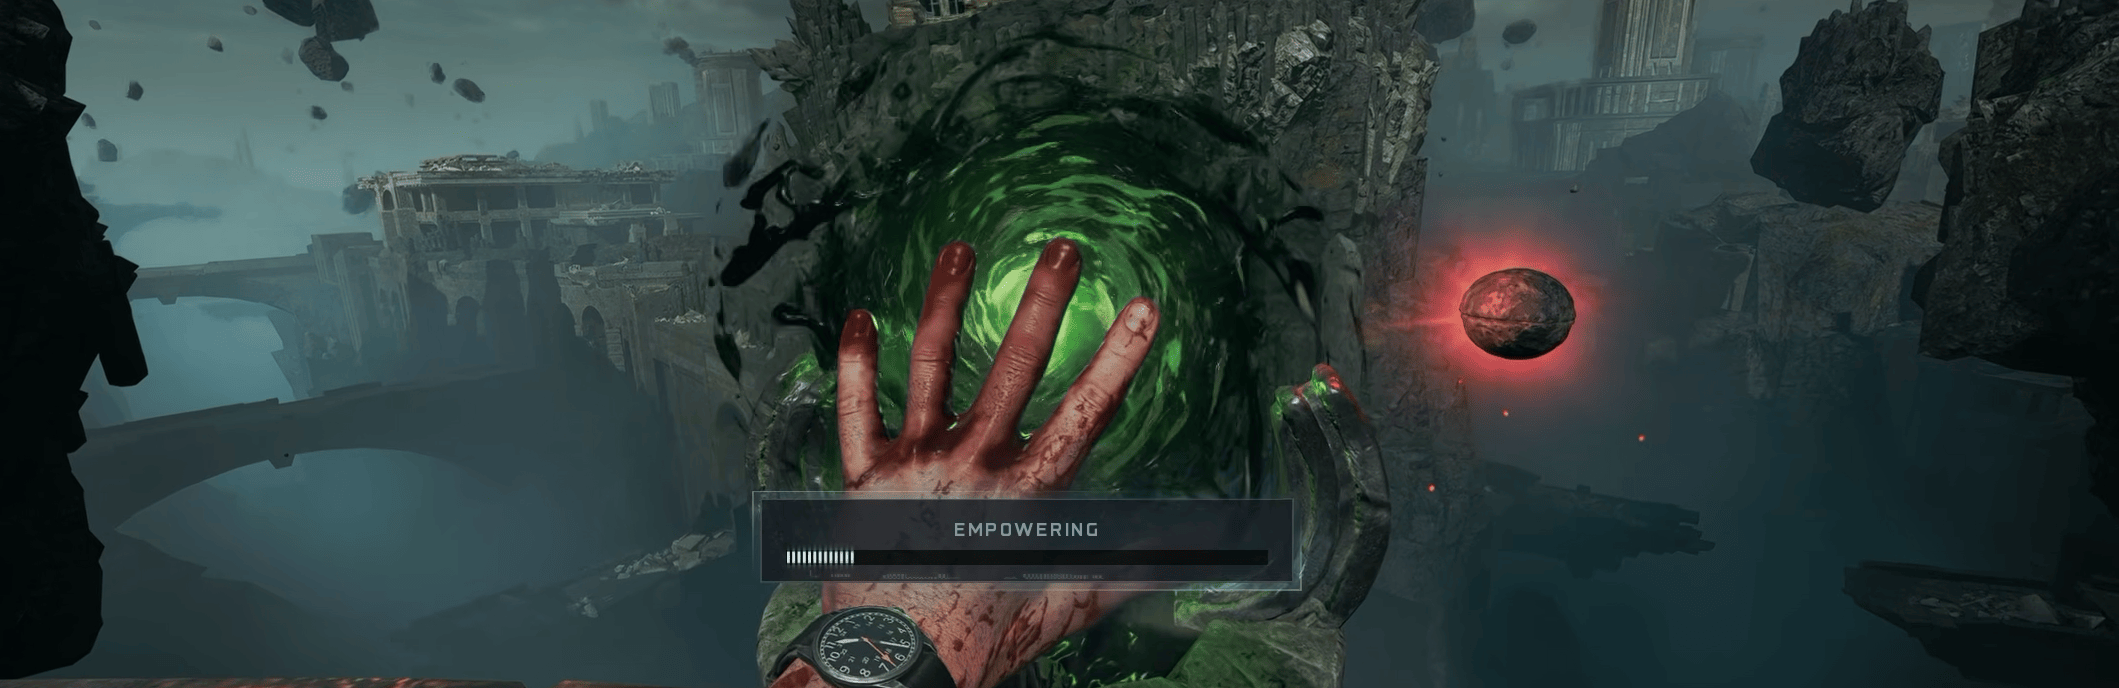
Take the Eye of the Forge to one of the normal green grapple pedestals and interact with it. The pedestal will transform into an upgraded red grapple, the Void Talon. This version lasts much longer than the standard Void Claw and is powerful enough to tear pieces from the Nexus mechanism.
Pick it up before moving on.
Rebuild the Nexus
There are 15 eye-shaped plates that need to be removed with the Void Talon. Three are found around the upper Nexus Forge, with one attached to each of the inner, middle, and outer rotating rings. The other 12 are downstairs in the Nexus Core, with two plates on each of the six wall sections. Use the Void Talon to rip all 15 plates away. Removing the lower plates exposes large gears covered in webbing and triggers a wave of Deathspinners. Kill the spiders, then burn away all of the webs covering the gears. You can use Usurped/Astral Flame, Molotovs, Thermo Grenades, or other explosives that ignite the webbing.
Once all the gears are clear:
- Go upstairs and rotate the Pack-a-Punch Crank Wheel.
- Immediately run back down into the Nexus Core.
- Find the lever on the floor and interact with it before the mechanism stops spinning.
- Keep engaging it until the gears fully activate.
The timing window is short. If you don't make it downstairs quickly enough, wait for the Pack-a-Punch crank to cool down and try again.
Once successful, return upstairs. All three Nexus rings will now be rotating and can be aligned with each of the four Shadowsmith temples.
Each Crank Wheel controls one of the inner, middle, or outer rings. Their starting positions vary, so simply keep track of which ring each crank moves and whether the current mechanism is turning clockwise or counterclockwise.
When all three line up with one temple, the Nexus fires a huge energy beam toward that Shadowsmith. That's your confirmation that the alignment is correct.
Browse our hottest Call of Duty Boosting services








Step 5: Find the Shadowsmith Corruption Items
Each Shadowsmith has a corrupted item that must be returned to their Brazier before their Place of Power can be cleansed. You can collect these while progressing the Her House symbols and other steps, so you don't have to wait until this exact point.
Caltheris - Shimmering Thread
For Caltheris, you need the Shimmering Thread. Use a Void Claw or Void Talon to pull one of the Purple Orbs toward you, then interact with it. The orb drops loot and has a chance to give you the Shimmering Thread. This can happen on the first orb or take several attempts.
If you're running low on Purple Orbs, interact with the Lantern unlocked through Caltheris' pressure plate puzzle to release more around the central areas of the map. Be careful about opening an orb close to the edge of the map, because the quest item can potentially fall somewhere inconvenient.
Nyxara - Ancient Scroll
Nyxara's item is the Ancient Scroll. Apply Shadow Rift to one of your weapons and return to Nyxara's Inner Sanctum. Use the fruit to enter the Silent Area forest again. Train a large group of zombies and trigger Shadow Rift on as many as possible. When the Ammo Mod activates, watch where the affected zombies fall back down. Eventually, one of them will drop the Ancient Scroll.
It can take several activations, so gathering a large horde before triggering Shadow Rift makes the process much faster. Pick up the Scroll and leave the forest.
Dravakar - Blacksmith's Hammer
Dravakar requires the Blacksmith's Hammer. Equip Shatter Blast on one of your weapons and grapple into Dravakar's Inner Sanctum, the same room where you built Warden's Blight.
Several Viking shields are hanging on the walls. Get zombie kills near the shields until Shatter Blast activates. Eventually, the correct shield will be blown off the wall and reveal the Blacksmith's Hammer behind it. Pick it up.
Veytharion - Woven Sash
Veytharion's item is the Woven Sash, and this is easily the strangest of the four. First, interact with the pool revealed by Veytharion's Stone Block puzzle. Advance the round so that it begins raining. The Woven Sash spawns somewhere outside the normal playable boundaries during a rain round. Its location can change between rounds, so you'll need to check the outer islands.
The main locations are:
- Spyra Insula / Jugger-Nog side: Grapple toward the rocks outside the normal boundary and repeatedly interact while falling.
- Arenia Insula / Widow's Wine side: Jump or grapple toward the outer ledge and spam interact as you fall past it.
- Ruinous Insula / PHD Flopper side: Check the rocks near the Mystery Box and grapple or jump toward the outer edge while interacting.
Sometimes you'll see a faint blue glow where the Sash has spawned, but don't rely on it. You can also occasionally hear a metallic sound when the item appears. If you don't find it during the current rain round, use Veytharion's pool again and check the locations on the following round.
Once you've picked up the Woven Sash, you have all four Corruption Items and can begin cleansing the Shadowsmiths.
Step 6: Cleanse the Shadowsmiths' Places of Power
This is the longest part of the Rex Infernus Main Quest.
You'll repeat the same basic structure for each Shadowsmith:
- Align all three Nexus rings with their temple.
- Place their Corruption Item into the Brazier.
- Ignite it using Astral Flame.
- Allow a zombie to absorb the symbol that appears.
- Take that zombie to the correct Titan Trap and let the matching hand kill it.
- Complete the temple's unique pressure plate challenge.
- Raise the hidden ring using a charged Warden's Blight shot.
- Aim its laser at the correct section of wall.
- Kill zombies near the ring until the wall opens.
- Shoot the Shadowsmith's face and destroy the four Shadow Souls.
- Shoot the face again until your screen flashes.
- Bring a Purple Orb beneath the Shadowsmith statue and launch it upward with Warden's Blight.
- During a rain round, hit the glowing point on the restored statue with Astral Flame.
The pressure plate condition and laser position are different for every temple, so follow the individual instructions below.
Cleanse Nyxara
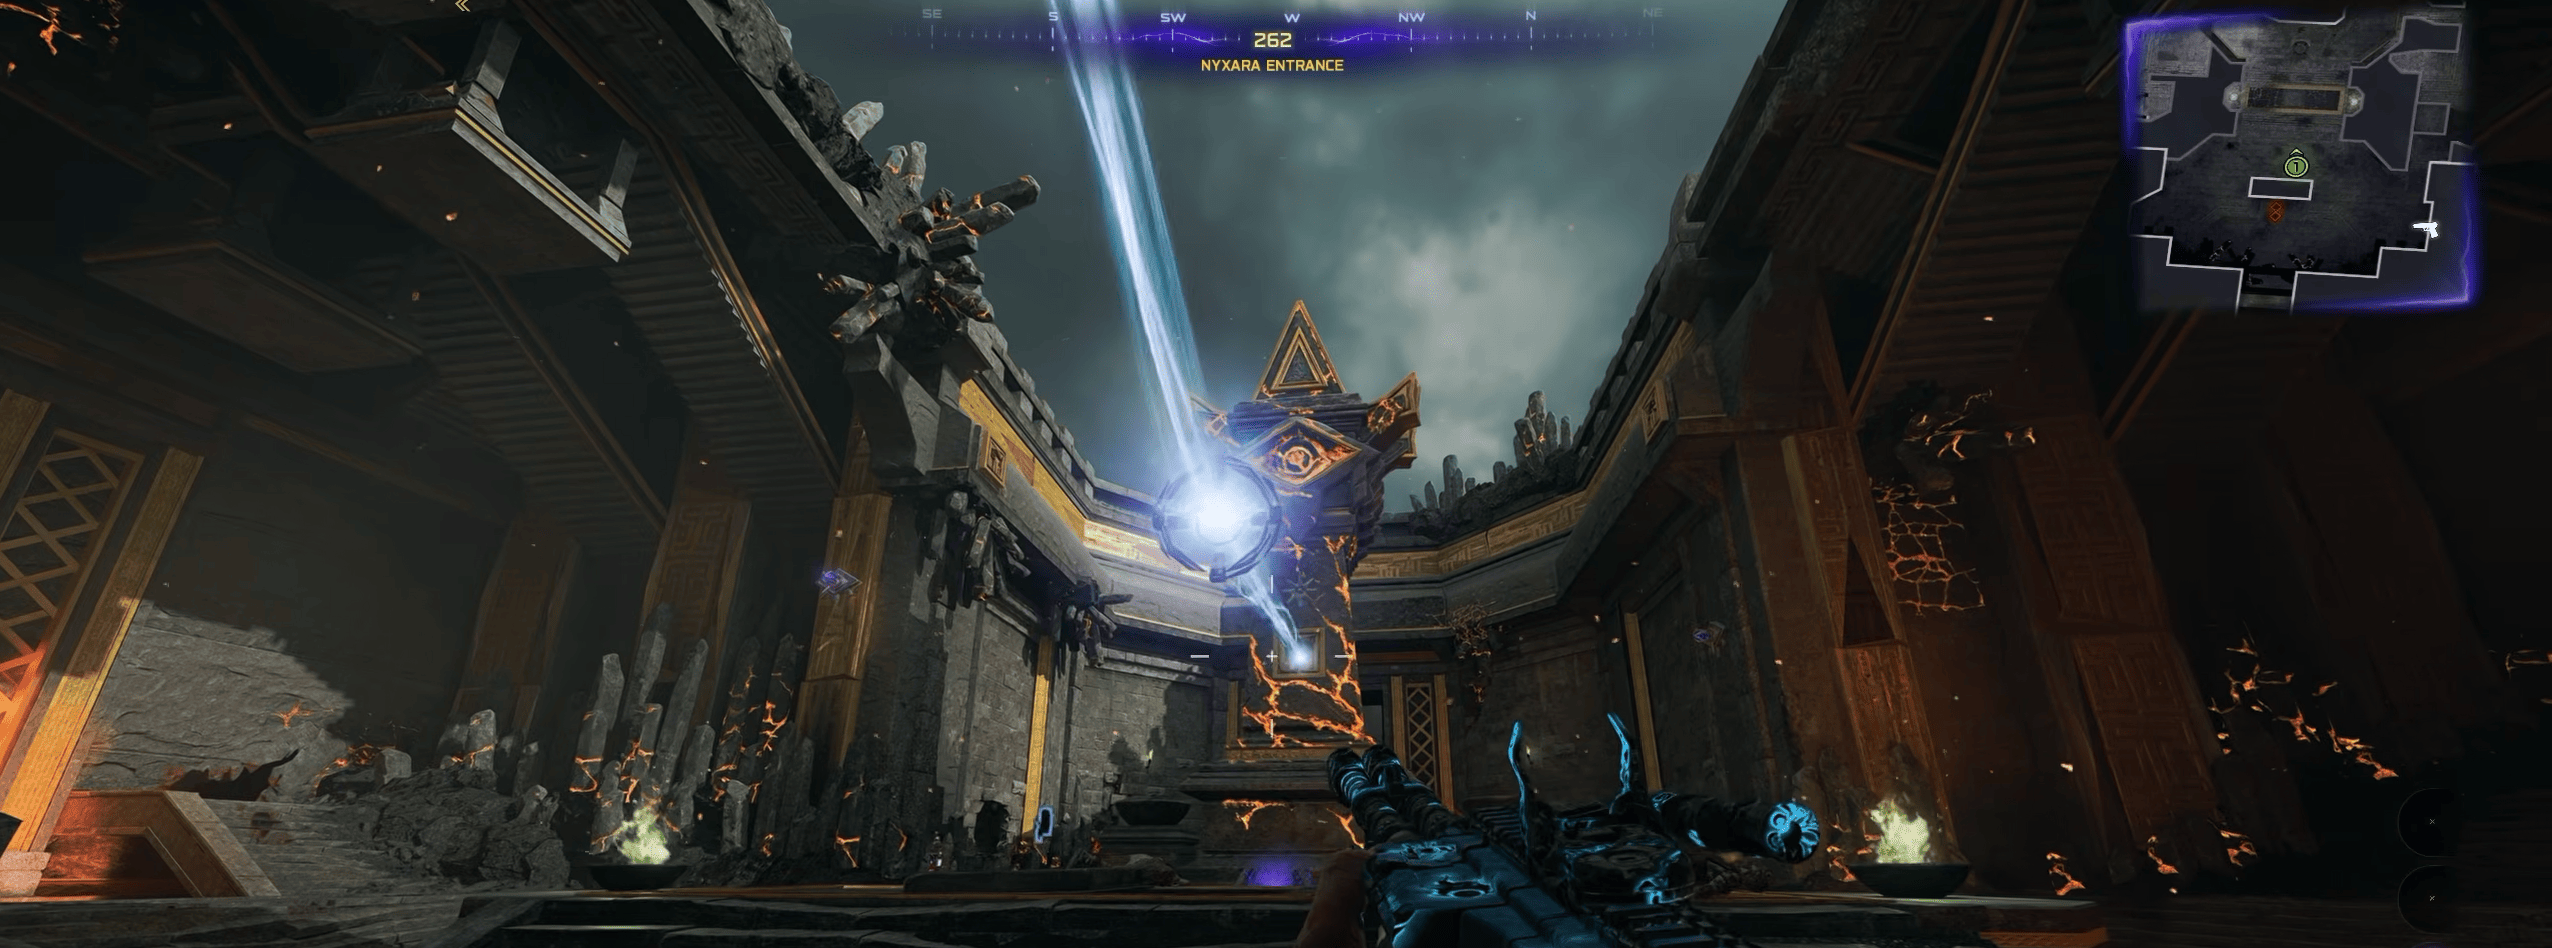
Align all three Nexus rings with Nyxara's Temple. The large Nexus beam should fire toward Nyxara once you've got the alignment right. Take the Ancient Scroll to the Brazier near Nyxara's entrance and place it inside, then grab an Astral Flame from the Nexus Forge and throw it at the Brazier. A symbol will transfer onto a nearby zombie. Lead that marked zombie to the Titan Trap near Veytharion and make sure it is killed by the hand carrying the matching symbol. If you do it correctly, one of the Titan's shackles disappears.
Return to Nyxara's Main Chamber and find the pressure plate. Go prone on top of it and don't move until it opens. You can still shoot, use Warden's Blight, or throw equipment to keep zombies away. Once the plate opens, fire a charged Warden's Blight shot into the mechanism to raise the ring. A laser will shoot from it, and you'll need to rotate the ring by shooting it until the beam points toward the lower section of the wall underneath Nyxara's main area. The angle is quite precise, so make small adjustments.
You'll know the beam is aimed correctly when zombie kills near the ring begin causing the wall to glow and break apart. Keep feeding it souls until Nyxara's face appears. Shoot the face once to begin the lockdown, then destroy the four Shadow Souls that appear throughout the area while dealing with the zombies around you. Kazimirs, Decoys, and Aether Shroud are extremely useful here. Once all four are destroyed, return to Nyxara's face and keep shooting until it lights up and your screen briefly flashes black and white.
Now grab a Void Claw or Void Talon and pull a Purple Orb directly underneath Nyxara's statue. Fire a charged Warden's Blight shot underneath the orb to launch it upward into the statue. Nyxara's eyes should begin glowing purple. Before finishing, interact with Veytharion's pool and make sure you're on a rain round. Grab another Astral Flame and a grapple, get onto the platform facing Nyxara, and throw the flame at the small glowing point around the upper nose/between the eyes. If you hit the right spot, the screen flashes and Nyxara is cleansed.
Cleanse Dravakar
Realign the Nexus rings so that the beam points toward Dravakar's Temple.
Place the Blacksmith's Hammer into Dravakar's Brazier and ignite it with Astral Flame. Let a zombie absorb the symbol and bring it to the Titan Trap near Caltheris. Make sure the correct hand kills the marked zombie to remove another shackle.
Return to Dravakar's chamber and stand on the pressure plate.
This is the least consistent of the four pressure plate triggers. The most reliable method is to stay on the plate and kill zombies around you until it opens. If that isn't progressing, allow zombies to hit you while you're standing on it. Players have also triggered it using charged Warden's Blight shots or explosive damage while remaining on the plate.
Once it opens, use a charged Warden's Blight shot to raise the laser ring.
Rotate it until the beam points toward the back-right wall of Dravakar's chamber. Start killing zombies near the mechanism. If the angle is correct, you'll see the target section of wall begin glowing and breaking apart.
Continue filling the Soul Box until Dravakar's face appears. Shoot it to begin the lockdown and destroy all four Shadow Souls. Several are positioned high up, including one near the ceiling and another above the entrance, so look vertically if you're struggling to find the last one.
Shoot Dravakar's face again until your screen flashes.
Move a Purple Orb underneath Dravakar's statue and launch it upward using Warden's Blight. His eyes will begin glowing.
Trigger another rain round using Veytharion's pool, grab Astral Flame, and get onto the platform facing Dravakar. Throw the flame at the glowing point around his forehead, just above the eye.
A successful hit cleanses Dravakar.
Cleanse Caltheris
Align all three Nexus rings with Caltheris' Temple.
Place the Shimmering Thread inside Caltheris' Brazier and ignite it using Astral Flame. Allow the symbol to transfer to a zombie and take it to the Titan Trap near Caltheris. Let the hand carrying the matching symbol kill it to remove the corresponding shackle. Go back into Caltheris' Main Chamber and stand on the pressure plate. Remain still and hold aim down sights until the plate opens. Facing toward the Mystery Box area while doing this is the easiest way to keep the condition consistent. Use a charged Warden's Blight shot to raise the laser ring. Rotate it until the beam points toward the middle-left section of the wall.
Get zombie kills near the ring until the wall begins reacting and Caltheris' face eventually appears. Shoot the face once, then destroy the four Shadow Souls around the chamber. After the last one is gone, shoot Caltheris again until your screen flashes. Grapple a Purple Orb underneath the Caltheris statue and launch it upward with a charged Warden's Blight shot. On a rain round, grab Astral Flame and get onto the platform directly in front of Caltheris. Throw the flame at the small glowing spot between the eyes. The flash confirms that Caltheris is cleansed.
Cleanse Veytharion
For the final temple, align the Nexus with Veytharion.
Place the Woven Sash into Veytharion's Brazier and ignite it with Astral Flame. Let a zombie absorb the symbol, then bring it to the Titan Trap in front of Veytharion. Have the correct Titan hand kill the zombie to break the final shackle. Go back into Veytharion's Main Chamber and stand on the pressure plate. This time, repeatedly jump up and down on it until it opens. Fire a charged Warden's Blight shot into the mechanism to raise the laser ring. Rotate the ring until the beam passes into the lower-left zombie spawn window. Get kills around the ring and watch the wall inside the window. If you've lined the beam up correctly, the wall begins glowing and slowly reveals a large symbol followed by Veytharion's face. Shoot the face to start the lockdown. Destroy the four Shadow Souls around the room, then shoot Veytharion's face again until the screen flashes. Move a Purple Orb underneath Veytharion's statue and launch it upward with a charged Warden's Blight shot. Make sure the current round is raining, grab an Astral Flame and grapple onto the nearby platform. Aim for the small glowing point around Veytharion's forehead/upper central face and throw the flame. Once the hit registers, Veytharion is cleansed. With Nyxara, Dravakar, Caltheris, and Veytharion all restored, the Main Quest is ready for its final encounter.
Final Step: Defeat the Warden
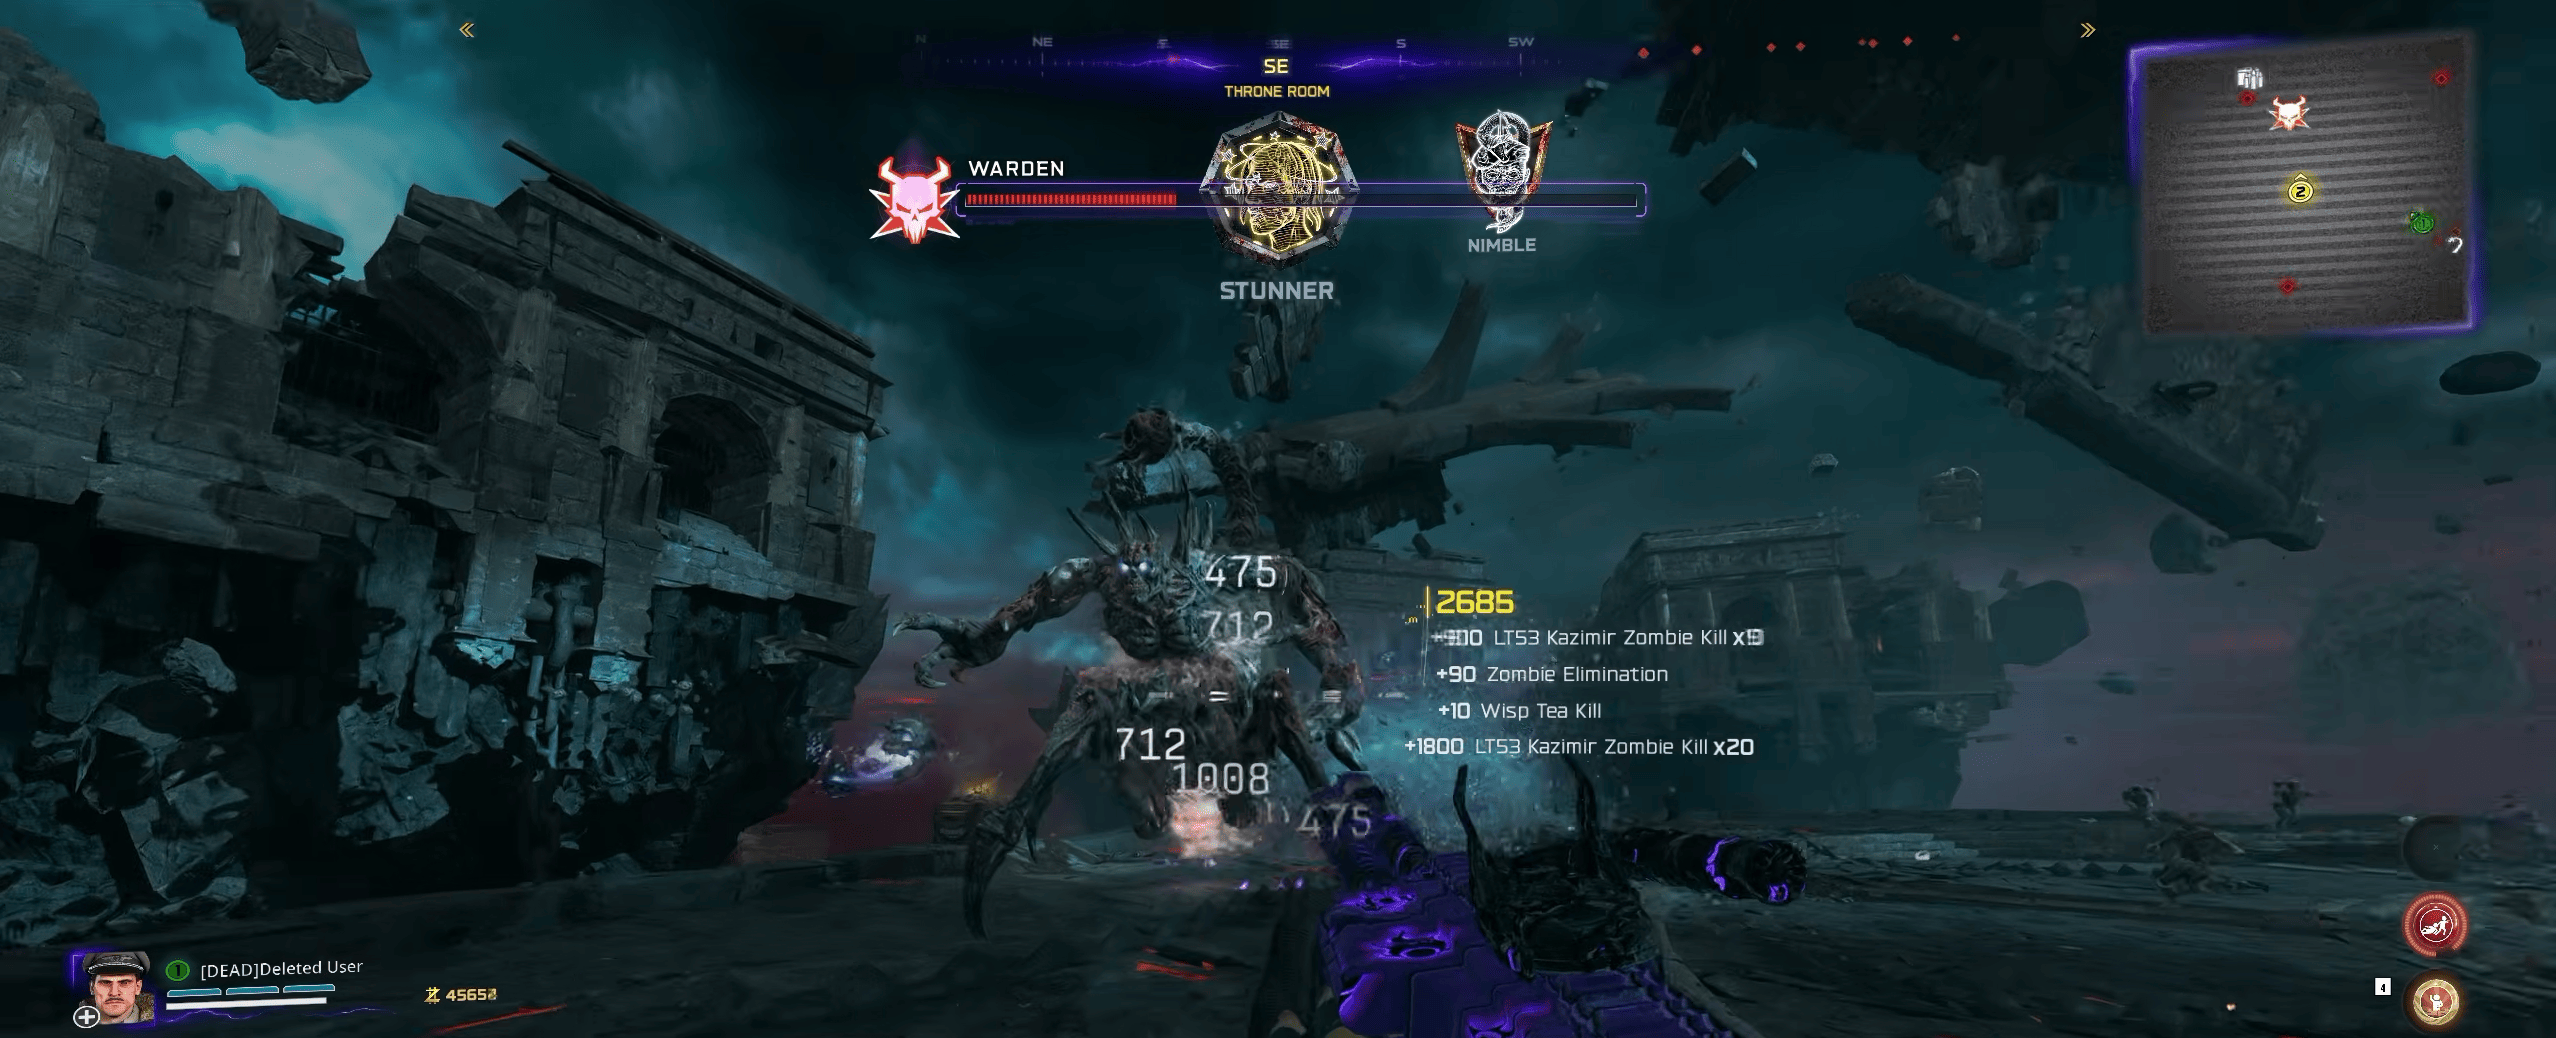
Return to the Nexus Core underneath Pack-a-Punch. You'll now see glowing circles on the floor. In co-op, every player needs to stand on one. Once everyone is ready, interact with the center to begin the final boss fight.
Do not enter until you're properly prepared. The Warden fight is considerably harder than most of the quest leading up to it.
I recommend bringing:
- Pack-a-Punch Level III Warden's Blight
- A Legendary Pack-a-Punch Level III ranged weapon, preferably an LMG, Assault Rifle, or Marksman Rifle
- Full armor
- A Self-Revive
- Plenty of spare Essence for ammunition
- Frenzied Guard or Aether Shroud
- Kazimir grenades
- Strong GobbleGums such as Perkaholic, Raindrops, Power Keg, or Shields Up
The Mammoth LMG is particularly useful because the Warden's main critical weak point is relatively far away during several damage windows.
Warden Damage Phase
The Warden spends most of the fight protected by gray-blue skulls orbiting around his body.
You cannot properly damage his critical weak point while those skulls are active. Shoot and destroy all of them first. Once the skulls are gone, the Warden becomes temporarily stunned and the scorpion-like tail on his back glows orange. That's your main damage window. Use Warden's Blight to destroy skulls and deal reliable non-critical damage, then switch to your strongest ranged weapon when the tail becomes vulnerable. The Warden is extremely fast and aggressive. Keep moving around the arena rather than standing your ground. His attacks can knock you backward and potentially throw you from the platform, so avoid fighting close to the edge whenever possible.
Shadow Souls and Hardened Armor
Between damage phases, the Warden can become protected by a purple or hardened effect while Shadow Souls appear around the arena. Destroy the Shadow Souls as quickly as possible. Leaving them alive keeps the Warden protected and can allow him to regenerate health. Once they're gone, return to destroying the orbiting skulls and attacking the tail.
Destroy the Warden Stingers
You'll also see plant-like Warden Stingers appearing around the arena and firing projectiles at you. Don't ignore them. They become increasingly dangerous as the fight continues and are tied to one of the encounter's wipe mechanics in co-op.
If you see the arena begin charging a large attack in the sky, immediately look for the Stingers or tentacle-like growths around the arena and destroy them before the attack completes. Warden's Blight is excellent here because its charged attack can clear both enemies and environmental threats quickly.
Survive the Prison Intermission
Partway through the fight, you'll be teleported into a smaller prison encounter. In solo, you'll need to survive or kill the HVT that appears. In co-op, every player can be sent into a separate room, meaning everyone has to survive their own encounter. Complete the challenge and you'll be returned to the main boss arena. You'll also receive an Acquired Blessing, which gives you an additional buff for the remaining fight.
Finish the Final Phases
The later phases follow the same general loop but become much more aggressive. More enemies spawn, the Warden attacks faster, and you'll have less breathing room. At one point, the Warden appears to return with around half of his health restored and becomes even more aggressive. Instead of the earlier skull setup, you can now have three skulls orbiting him, all of which need to be destroyed before the tail becomes vulnerable again.
The safest rhythm throughout the final phases is:
- Clear Warden Stingers and dangerous zombies.
- Destroy any Shadow Souls protecting the Warden.
- Shoot all of the orbiting skulls.
- Use a Kazimir or defensive Field Upgrade to create space.
- Focus everything you have on the glowing tail.
- Refill armor and ammunition whenever the game gives you the opportunity.
Max Ammo and Max Armor Power-Ups appear between parts of the fight, but Warden's Blight burns through ammunition quickly. Going in with spare Essence is still a very good idea.
Keep repeating the skull-to-tail damage cycle until the Warden finally goes down. Once you've survived the last phase, the Rex Infernus Main Quest Easter Egg is complete.
Rex Infernus New Enemies
Rex Infernus adds two spider-themed enemies to the Zombies roster: Deathspinners and the Web Mother. Both rely heavily on web attacks, which fits nicely with the return of Widow's Wine.
Deathspinners
Deathspinners are fast enemies that become much more dangerous when several attack at once. Apart from their melee attacks, they can fire web projectiles that slow you down.
Their abdomen is the main weak point, and they're particularly vulnerable to Dead Wire. One Deathspinner should not be much of a problem, but a whole group slowing you while regular zombies close in definitely can be.
Web Mother
The Web Mother is the new Elite enemy on Rex Infernus and begins appearing later in a match. It can teleport around, lunge toward players, cover areas in slowing webbing, and even block doors and machines until the webs are destroyed.
It can also cocoon zombies and turn them into additional hazards. Its skull is the main weak point, and Shadow Rift is particularly effective against it.
Keep your distance and prioritize clearing its webbing whenever it begins restricting your movement.
Rex Infernus Titan Trap
The Titan Trap is the new map-specific trap on Rex Infernus. Activating it causes the enormous Titan to slam its hands into the ground and crush nearby zombies.
The trap becomes especially important during the Main Quest because the symbols on its shackles determine which hand must kill the marked zombies during the Shadowsmith cleansing steps.
Rex Infernus Main Quest Rewards
Completing the Rex Infernus Main Quest rewards:
- Bloodthorn Wonder Weapon Skin
- Main Quest Calling Card
- 10,000 XP
There is also an additional reward for finishing the quest before Directed Mode arrives: a unique variant of the Main Quest Calling Card.
Collecting all required Rex Infernus Intel, including Audio Logs, Documents, and Artifacts, rewards another Calling Card and 10,000 XP. The map also has a separate Mastery Challenge that awards an Animated Calling Card and another 10,000 XP.
Rex Infernus Cursed Mode
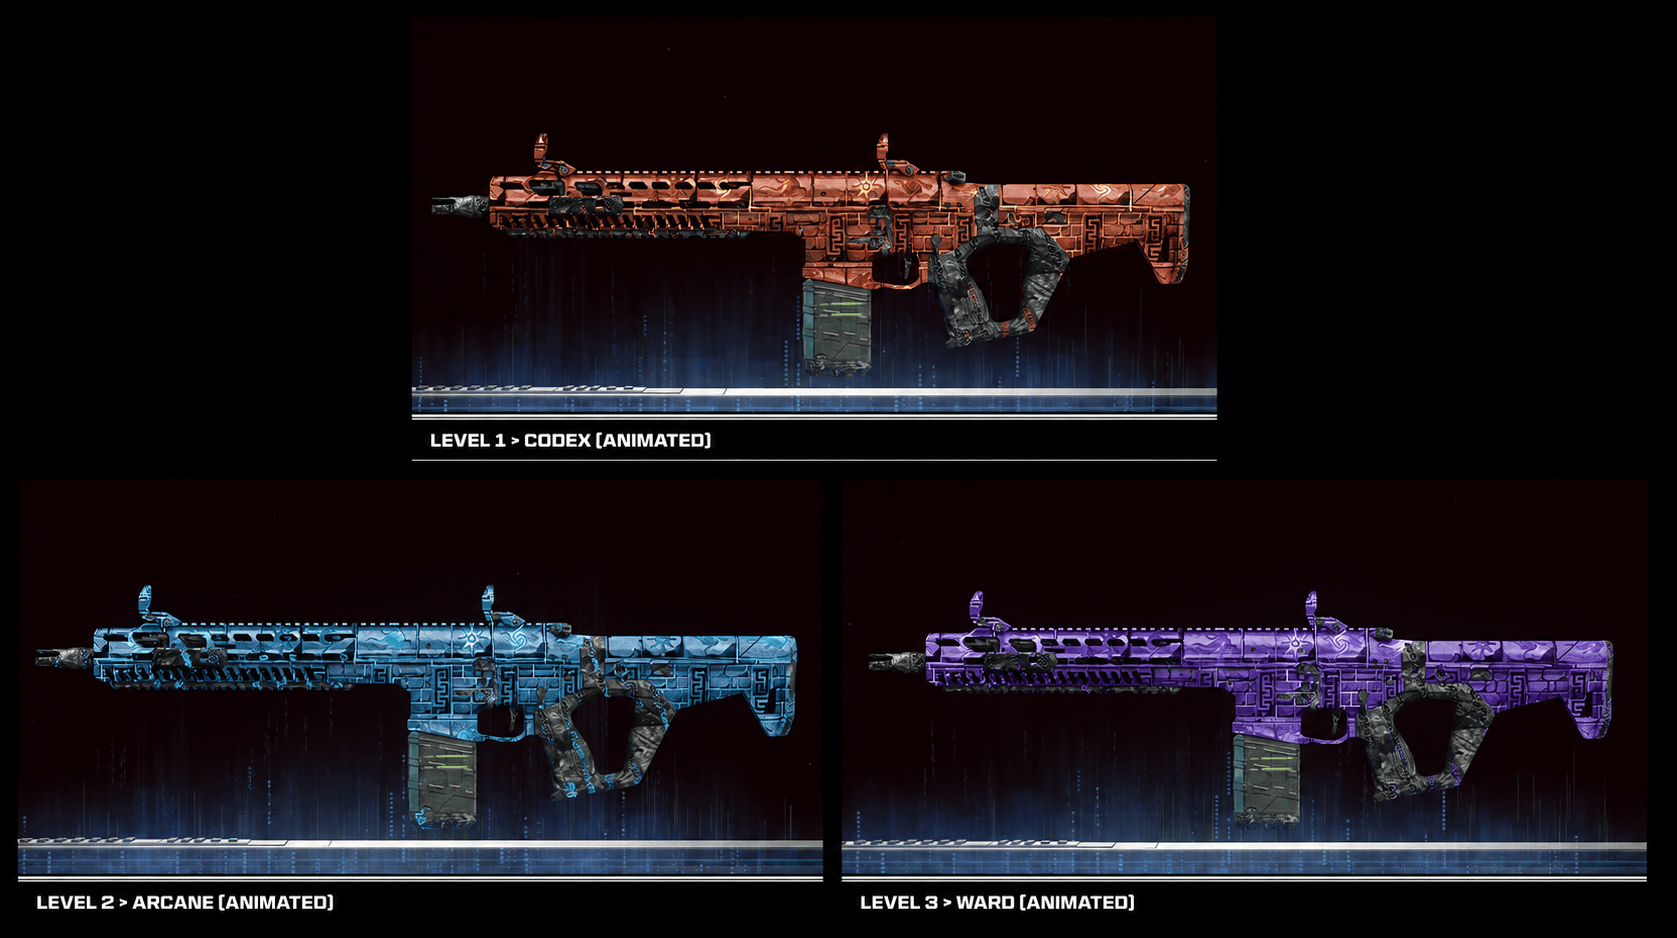
Cursed Mode will be available on Rex Infernus as well. Like the previous maps, it removes Main Quest guidance, limits your HUD, and forces you to begin with a pistol.
Rex Infernus also introduces three new Pack-a-Punch camos tied to this part of the map:
- Codex
- Arcane
- Ward
I would definitely finish the normal Main Quest first. There is little reason to make the Warden’s final map even more miserable before you know where anything is.
Widow's Wine Returns in Rex Infernus
Widow’s Wine finally returns as the new Perk-a-Cola for Season 05 Reloaded. When melee damage pushes your health low enough, the perk can retaliate with an explosion of webbing that affects nearby enemies.
Its Major Augments are:
- Widow’s Bite: Melee attacks can trigger web explosions, while melee kills against cocooned enemies can overcharge your health.
- Hatchling: Web explosions summon a friendly Deathspinner.
- Web Spinner: Web explosions temporarily create a slowing field around you.
- Tangled Web: Normal and Special enemies caught by the explosion are cocooned, while Elite enemies are slowed.
Minor Augments include Haste, The Wide Web, Golden Orb Silk, and Sticky Grenade, giving you options for shorter cooldowns, larger explosions, longer web effects, and webbing triggered by explosive Lethal Equipment.
New Fully Packed GobbleGum
Fully Packed is a new Ultra GobbleGum arriving with Rex Infernus. Its effect is very straightforward: using it instantly upgrades the weapon you are currently holding to Pack-a-Punch Level III.
That could be especially useful during early Main Quest attempts. Instead of spending a huge amount of Essence getting one weapon fully upgraded, you can immediately prepare it for the later stages of the Easter Egg.


You got -20% OFF 
Rex Infernus TR2 and Olympia Weapons

Two more Ultra-Rarity legacy weapons join the Mystery Box on Rex Infernus:
- TR2 Marksman Rifle: A hard-hitting ranged weapon.
- Olympia Shotgun: A close-range shotgun returning from older Zombies games.
Both have stats intended to compete with Wonder Weapons and support normal Pack-a-Punch progression and Ammo Mods. They should be worth watching during the first Main Quest runs, especially before everyone figures out how quickly the actual Rex Infernus Wonder Weapon can be obtained.
Check out other CoD guides:
- Totenreich Main Quest Easter Egg Guide
- Call of Duty Won’t Be Coming to Game Pass Anymore
- Black Ops 7 Season 3 Overview
- Avalon Map Guide for Warzone
F.A.Q.
When does the Rex Infernus Main Quest release?
The Rex Infernus Main Quest becomes available on August 20 at 9 AM PT together with Season 05 Reloaded.
Is Rex Infernus the final BO7 Zombies map?
Yes. Rex Infernus is the final Round-Based Zombies map in Black Ops 7 and concludes the game’s Zombies storyline.
Who is the Rex Infernus final boss?
The Warden is the main enemy the crew is pursuing on Rex Infernus. The Main Quest revolves around cleansing the Shadowsmiths’ places of power, reaching his inner sanctum, and ending his threat.
What enemies are new on Rex Infernus?
Rex Infernus introduces Deathspinners and the Web Mother. Deathspinners are fast enemies that attack in groups and use slowing web projectiles, while the Web Mother is a new Elite enemy with stronger web attacks and the ability to cocoon zombies.
What are the Rex Infernus Easter Egg rewards?
Completing the Main Quest gives you the Bloodthorn Wonder Weapon Skin, a Calling Card, and 10,000 XP. Completing it before Directed Mode arrives also unlocks a unique Calling Card variant.
Is Widow's Wine in Rex Infernus?
Yes. Widow’s Wine returns as a Perk-a-Cola with four Major and four Minor Augments. Its main mechanic revolves around web explosions that can slow or cocoon nearby enemies.