 Dallon Avery
Totenreich Main Quest Easter Egg Guide Quick Overview:
- Start by following the quest markers on the screen
- Get the Glocke Drop and sync it to call in the Pack-a-Punch
- Get the Chains Link from the boat
- Get the Chilly Chunks from the crate on the bridge
- Bring the can of Chilly Chunks to the market and wait for the special round
Don't wait! Buy Totenreich completion service at Skycoach and enjoy the rewards that include camos, calling cards, experience, and much more!
Browse our hottest Call of Duty Boosting services


Totenreich Main Quest Walkthrough
Totenreich is the new round-based Zombies map in Black Ops 7 Season 03 Reloaded. It takes place in Eidskallen, a Norse fishing village in Norway that has been ripped out of reality and pulled into the Dark Aether. The island has existed since the late Bronze Age, passed through the Viking era, and later became home to a Group 935 research facility.
The story begins after the events of Paradox Junction. The time loop is broken, the Dark Heart has been defeated, and the Twins send the crew to Eidskallen. Their arrival is not random. This location is strongly tied to Richtofen, Group 935, and a disaster that turned the whole island into another Dark Aether nightmare.
Step 1: Turning on the Pack-A-Punch Machine

After the cinematic, you will spawn on the Eidskallen Landing of Fishery Island, and your first task will be exploring it. Very soon, you’ll notice ziplines that require power to operate. That will be your next objective.
As usual, the first couple of tasks will actually be marked on your screen, so just follow them to progress.
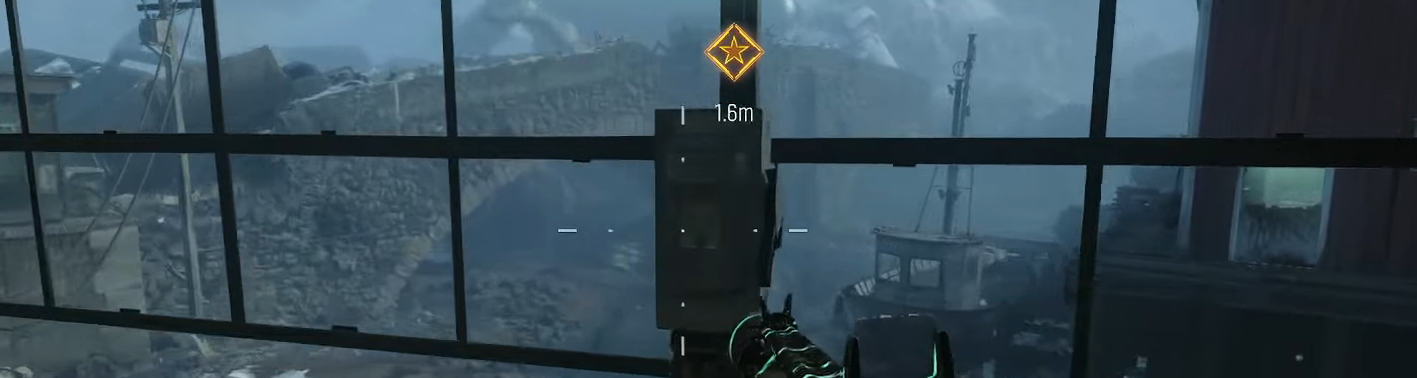
First of all, you’re going to want to start by unlocking some doors. Each door costs 1250 Essence each. As you unlock the next passage, you’ll get a new objective to “Repair Broken Power Lines”. Reach the Core Foundry and repair the broken powerline box.
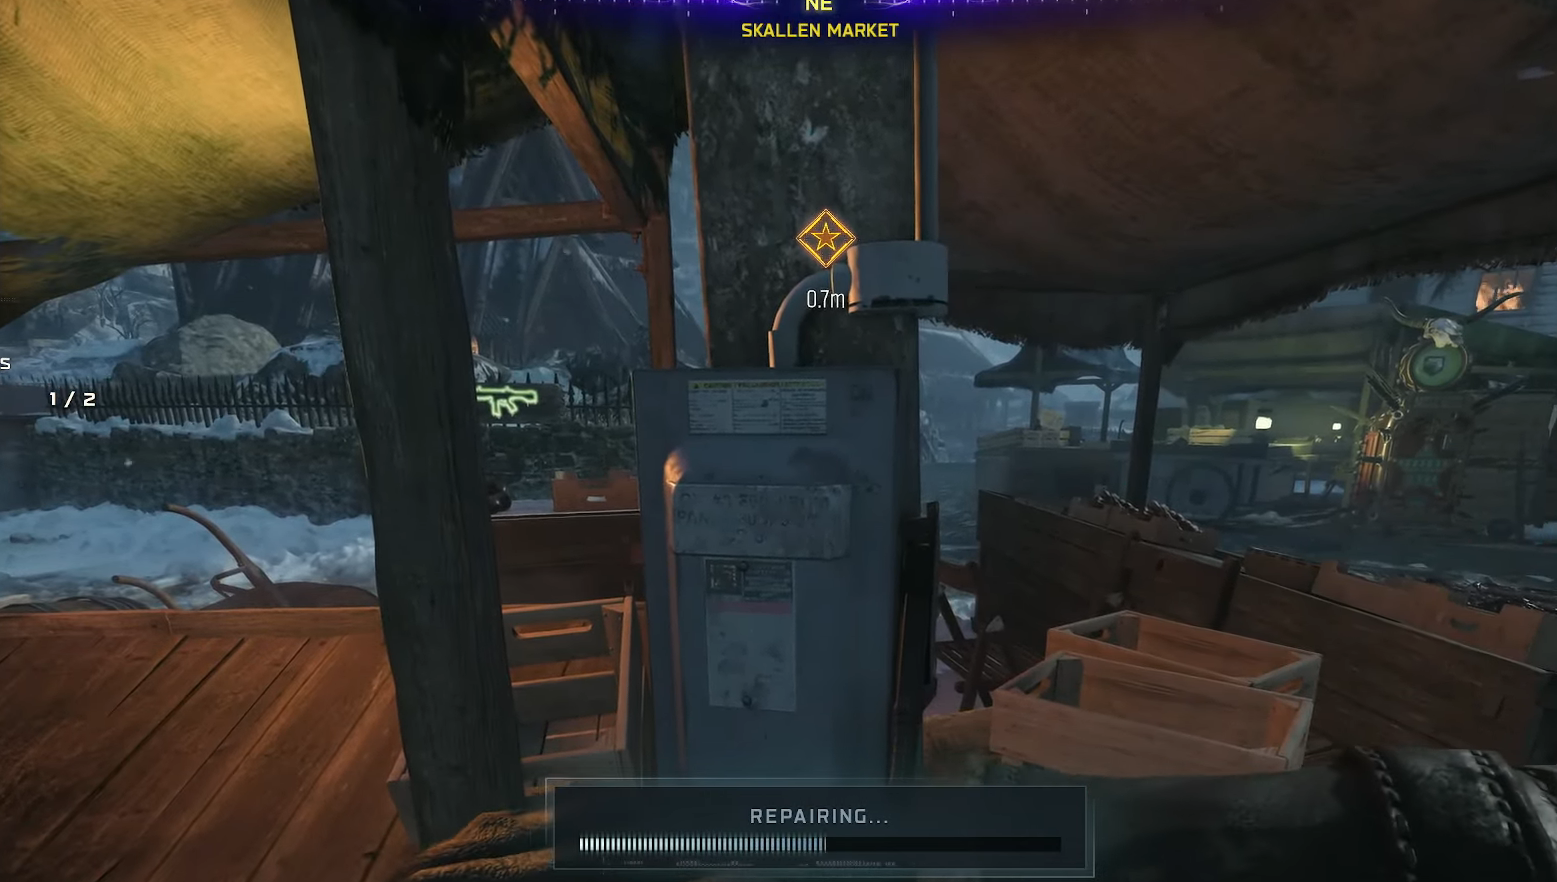
The second box to be repaired is in the Skallen Market.
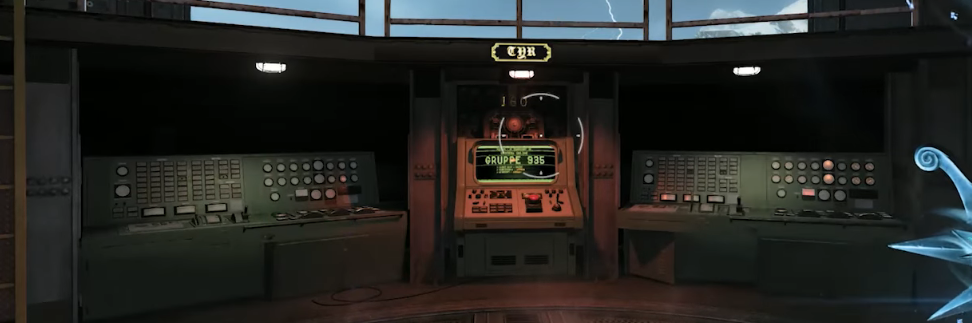
Once you’re done with the second box, you’ll see a power current going across the power lines, and your objective will change to “Enter Tyr’s Head.”
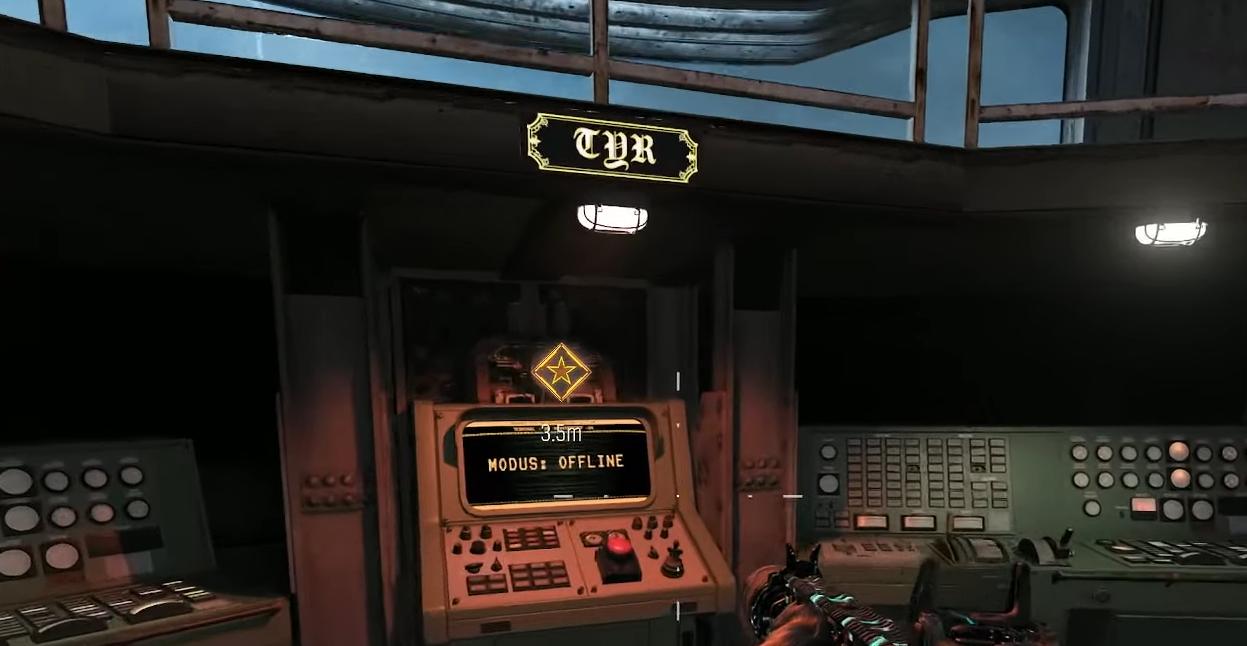
When you enter the room, you’ll see a computer in front of you, and an Ejection countdown timer will start at 1 minute. Once you interact with the computer, you’ll see some information on its screen. These will be the next major objectives that you will gradually work towards.
Gouppe 935
- Glocke Drop - offline
- Wundersignal - offline
- Atomkraft - offline
You’ll also see numbers appear on the Nixie tubes and four teleporters with a screen showing where each teleport will take you on the map. Make a note of the number (it will be different every time you play) of the tubes and exit through a teleporter.
As soon as you exit, you’ll be tasked with recovering an Admin keycard. Once you grab it from the Dry Dock, you’ll then need to proceed to the War Factory located in the Core Foundry. Use the keycard you’ve picked up to open the admin door. Inside the room, you’ll find some zombies and be able to retrieve the Glocke Drop Controller, which works like a streak.
Go back to Fishery Island, where you’ll find a pulsating energy on the ground, which is where you’ll use the controller to initiate Tyr sync. You’re going to have to wait for a minute until the syncing is complete. Once it is done, you’ll see a Glocke Drop dropped from the sky, which will be your Pack-a-Punch machine. You’ll be able to call it anywhere on the map, as long as you have that controller with you.
Step 2: Unlocking Jotunn Star, the Wonder Weapon
This is where the markers stop showing up on your screen, but luckily, you have this walkthrough to guide you.
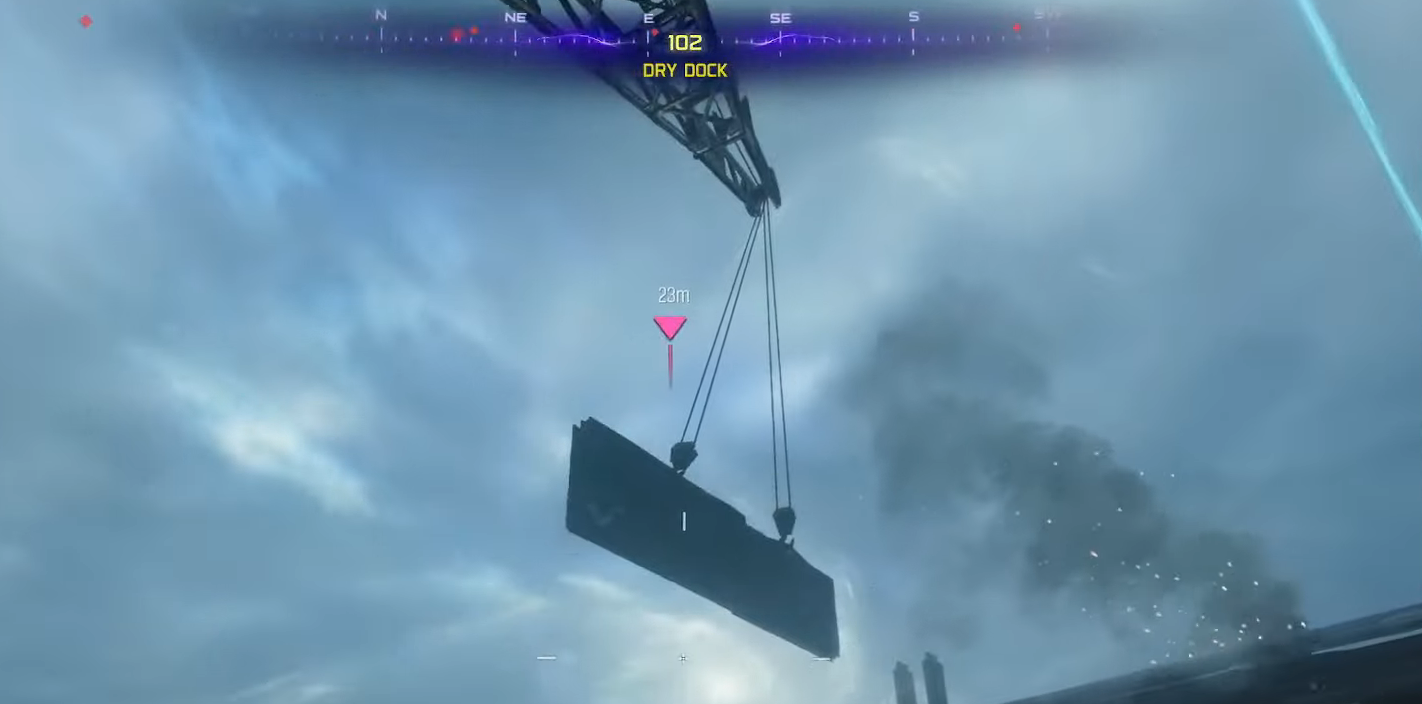
Go to the Dry Dock and find the Titan Crane room. You’ll see the “Engage” button on the wall, which activates the crane, which in turn will lower the wall on the crane. Use a wall jump on it and try to grab the first part of the weapon “Chain Links” that sits on the tip of the ship. To make sure you successfully grab the item mid-jump, hold the interact button as you do the jump.
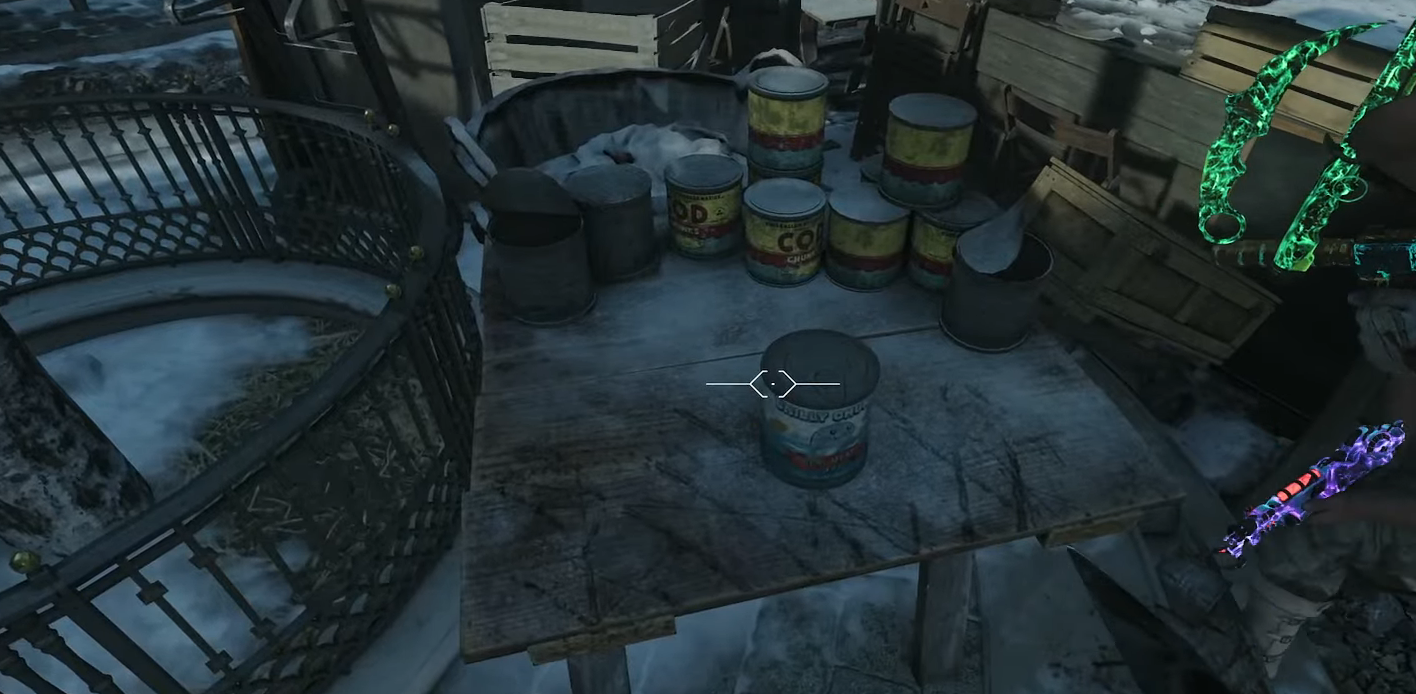
Next, go to the Storm Bridge. That is near Tyr’s Foot in the northern part of the map. There’s going to be a truck and a crate of cans that contain seal meat. Interact with it to get the Chilly Chunks.
Next, go to the section called Burial Grounds behind the Church, which is just across that bridge. In there, you will find double doors. You’ll need the chain link item to open them.
After that, go to the Skallen Market and place the Chilly Chunks can on a trolley with other cans. The Twins will say that it’s for Frosty.
Wait for the special round and kill the zombie bear called Varkrith, aka the HVT Zersa, that will drop one of the weapon’s parts - the Lantern. Grab the lantern and go back to the room you unlocked in the Burial Grounds. Place the Lantern on the table, and it will start the first puzzle.
Constellation Puzzle
Your job is to match the constellation on each side of the table with the same one projected on the wall. The order in which you do this matters as well. Stand facing the table with your back toward the stairs. From that position, the order is always:
- Left symbol
- Right symbol
- Back symbol
- Front symbol
Look around the walls for the matching constellation, then hold interact on the correct wall symbol. If you picked the right symbol, the energy will fly back into the Lantern, and the symbols on the table will stay in place. If the puzzle resets, you picked the wrong symbol or used the wrong order. Interact with the table again to return the symbols to the walls and start over.
Collecting Souls for Astrid and Accessing the Lighthouse
Once all four symbols are matched correctly, Astrid will appear above the shrine. Follow her as she moves through the map. She will stop at several locations and start soul box events, so kill zombies near her until the energy meter fills. Ice zombies will spawn during this step, which makes it easier to fill the soul boxes without burning through too many normal round zombies.
Astrid will move toward the Lighthouse side of the map and spawn a floating parkour route. Do not use the zipline for this part. Follow the platforms, mantle across the rocks, and keep moving while clearing zombies along the way. A Kazimir, Aether Shroud, or any panic tool helps a lot here because zombies can block your jumps.
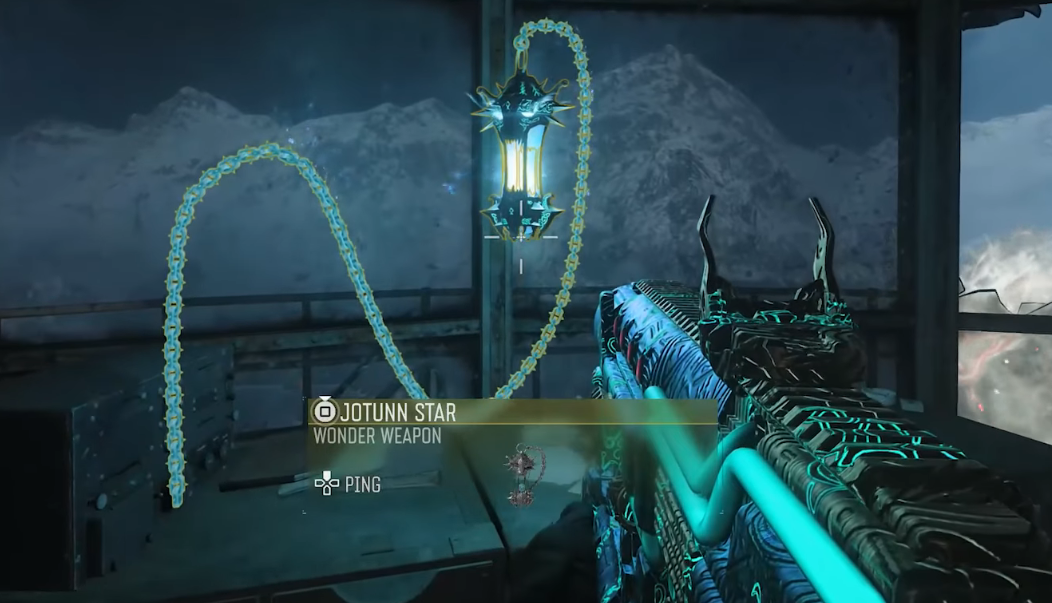
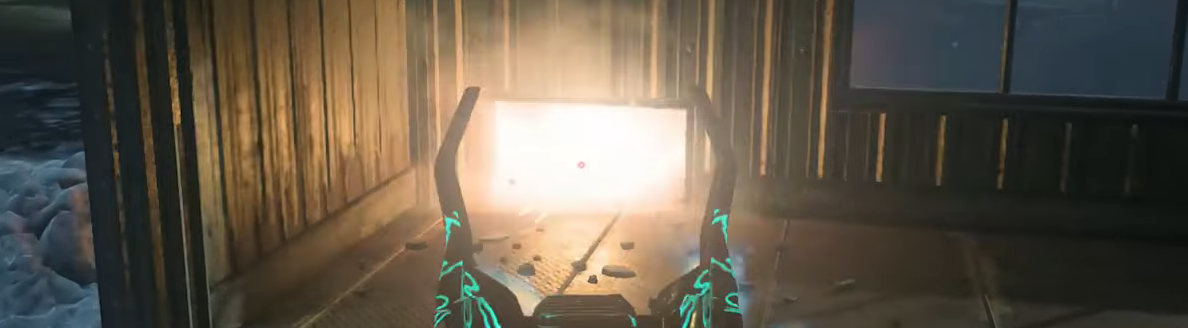
The route eventually leads back into the Lighthouse. Keep climbing until you reach the top, then use the prompt to enter the Lighthouse interior. Once inside, pick up the Jotunn Star from the table.
The Jotunn Star is the map’s Wonder Weapon. It has a melee attack, a charged ranged attack, and a Lantern effect that protects you from freezing during later steps. To charge the ranged attack, kill zombies with the melee attack first.
Browse our hottest Call of Duty Boosting services


Step 3: Getting the Wundersignal
After you have acquired the Jotunn Star, your next task will be acquiring a few more key items. We'll start with getting the Wundersignal. Go back to the lighthouse, and on the second floor, you'll need to find a crowbar. This starts the Wundersignal part of the Easter egg.
 Next, go to the War Factory admin room and inspect the cargo manifest. Look for the row with the ammo icon. The ID next to that icon tells you which cargo crate contains the Flak Gun Round.
There are four possible crate locations:
- War Factory
- Core Foundry
- Dry Dock
- Fjord Road
Each crate has an ID on it. Open the crate that matches the ammo ID from your manifest. If you open the wrong crate, you may trigger a negative effect like gas or an EMP, so checking the manifest is the cleaner method. You can brute force the crates, but it is messier.
Once you get the Flak Gun Round, take it to the correct Flak Cannon on Beacon Island near the Lighthouse. Load the round into the cannon, then melee the cannon with the Jotunn Star. If done correctly, the cannon fires at the robot's head near the spawn.
Return to the robot head and interact with the damaged section. You will first get a chunk of salvage, then you can interact again to pick up the Transmitter.
Take the Transmitter back inside Tyr’s Head and install it on the sparking panel. After that, watch the two blinking white lights inside the head. The left and right lights flash in two separate number pairs. You need to count both pairs.
For example, your first pair might be:
- Left light: 2 flashes
- Right light: 2 flashes
Then your second pair might be:
- Left light: 3 flashes
- Right light: 5 flashes
Your numbers will be different each match. If counting both lights at once feels awkward, focus on one side first, then watch the pattern again for the other side.
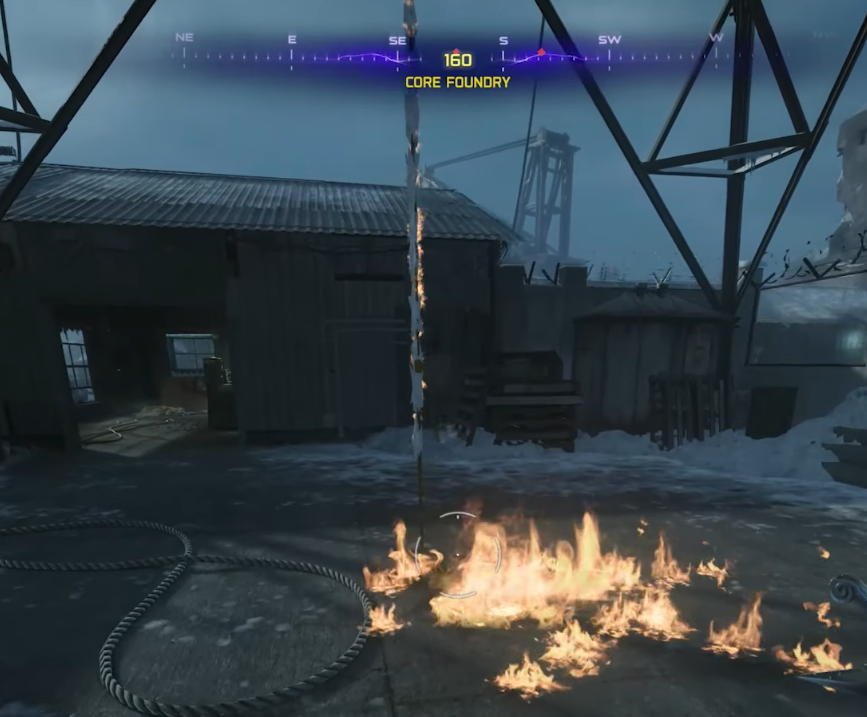
Next, go to the Core Foundry and throw a Molotov at the frozen rope. If you do not have one, craft a Molotov or pick one up from the map. Once the rope melts, climb up and interact with the oscilloscope console.

Enter the first light pair into the two dials. The left number goes into the left dial, and the right number goes into the right dial. If it works, the robot fires a rocket strike. Wait for the console to come back online, then enter the second pair. Some runs may require waiting until the next round before the second input works.
After both sequences are entered correctly, a box opens nearby with the Wonder Barrage Controller (strike) inside. Pick it up. You will need it for the Atomkraft Core section.
Step 4: Getting the Atomkraft Core
 The Atomkraft Core requires three pieces of uranium. It is located in the Machine Workshop, the access to which is unlocked by using the Barrage strike. You can open it right away, or after collecting uranium pieces. You can collect them in any order, but the cleanest route is to handle the Ravager, RC-XD, and Glocke Drop steps one by one.
For the first uranium piece, you need to fish up a glowing green radioactive fish. Fishing rods can spawn around Dry Dock, Storm Bridge, Fishery Island, Beacon Island, the Lighthouse area, and several shoreline spots around the map.
You can only find the green fish after picking up the Jotunn Star. Check fishing spots and look into the water for a green glow. Once you find it, hold interact to start fishing, then interact again when the rod glows blue.
Catching the radioactive fish spawns an irradiated Ravager. It may disappear at first, but it should return the next round as an HVT marked on your Tac Map. Damage it until it moves, track it to the next location, and repeat this until it dies. On the final down, it drops a uranium piece.
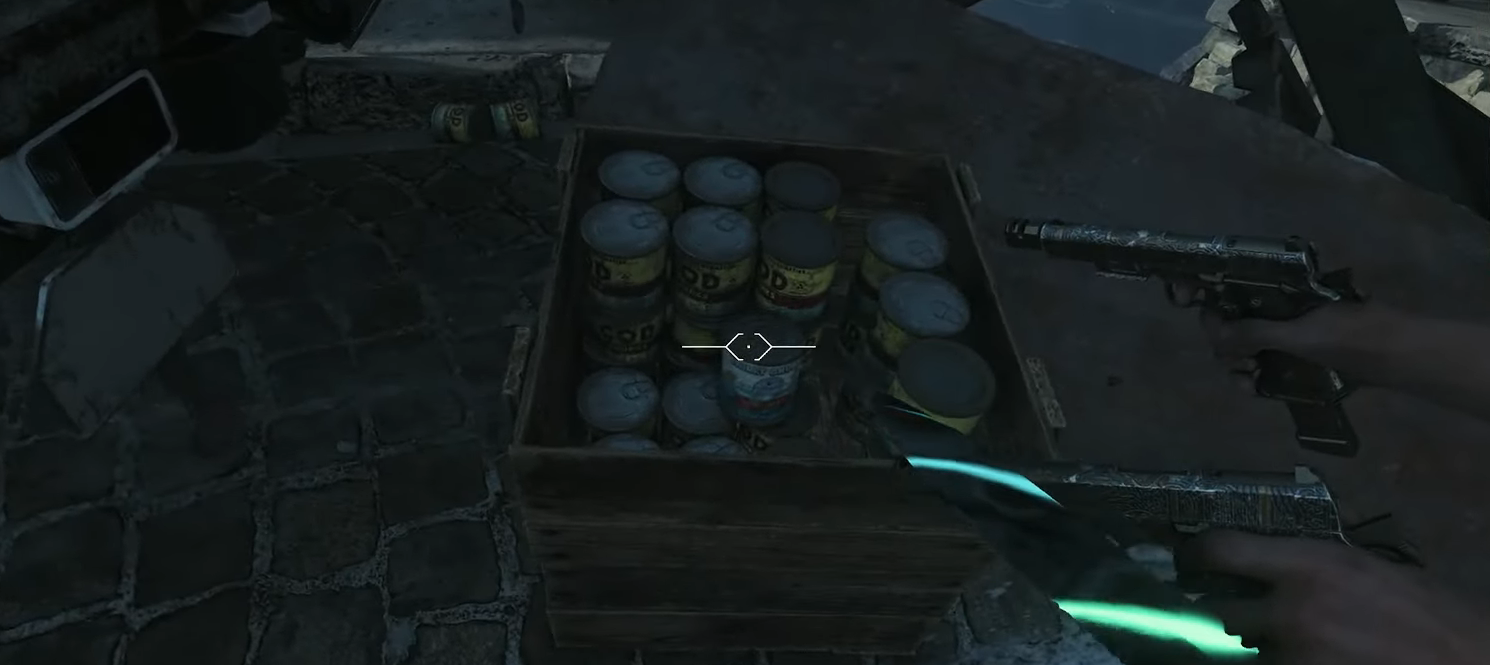
For the second uranium piece, get an RC-XD. One free RC-XD can be found on a crate in Eidskallen Square, but you can also craft one.
Take the RC-XD to the Core Foundry and shoot the small metal grate to reveal a hidden path. Deploy the RCXD through the opening, drive it down the path, jump across the water gap, and detonate it near the barrels in the hidden room. This opens a secret Group 935 Genetic Lab under Fishery Island.
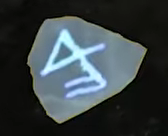
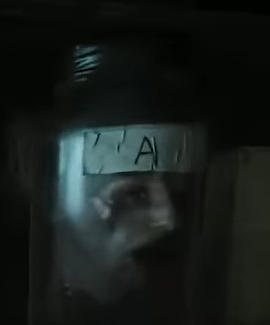 Enter the lab and look through the window toward the numbered doors. Two numbers will have radiation symbols under them. Convert those numbers into letters:
- 1 = A
- 2 = B
- 3 = C
- 4 = D
- 5 = E
Find the two head jars in the room that match those letters, then place them on the machine. If you picked the correct jars, the machine creates a purple liquid or mist. If it turns blue instead, the combination is wrong, and you need to retry.
Use the purple jar on the crab claw to create the Necro Spike. Take the Necro Spike to the locked cell and use it as a lockpick. Rotate the lockpick until the white outline appears, hold it in place, then repeat for all three lock positions. Once the cell opens, pick up the uranium inside.
For the third uranium piece, you need a Glocke Drop score streak. You can craft one, fish one up, or use one from another map source.
Call in the Glocke Drop when you have a large zombie horde nearby. Zombies caught in the effect will float in the air and glow orange. Shoot the floating zombies only. As you kill enough of them, the lights on the side of the Glocke Drop will turn green. Once all lights are green, it drops rewards, including the final uranium piece.
After collecting all three uranium pieces, use the Wonder Barrage Controller near the blocked staircase by the Dry Dock crafting table. The barrage destroys the debris and opens the route into the Machine Workshop. If the door does not open right away, wait a bit or use another barrage.
Uranium Rods Puzzle
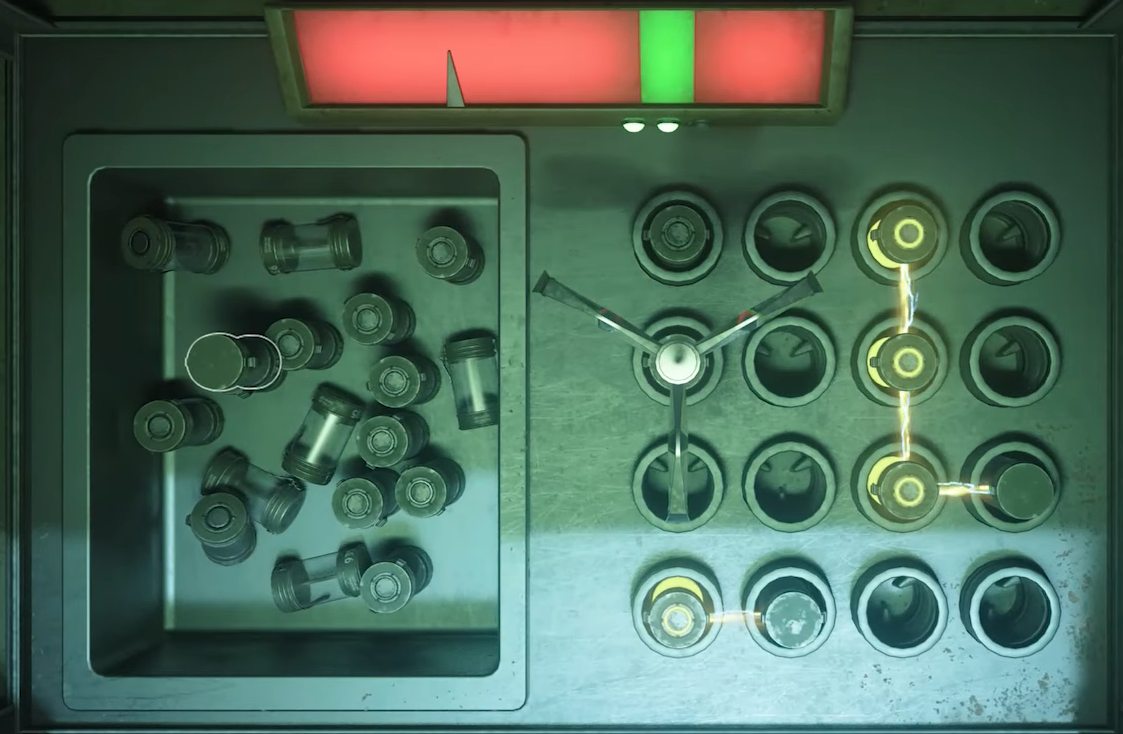
Inside the Machine Workshop, place the three uranium pieces into the claw machine. This starts a puzzle where you move uranium rods from the left side onto the grid on the right. Your goal is to push the meter into the green zone without overloading it.
The simple rule is this:
- Connected rods create more charge.
- Isolated rods create less charge.
- Too many connected rods will overload the meter.
Start by placing one rod near a larger cluster to generate charge. Then use the second and third rods to adjust the meter. If you need more charge, place a rod next to another node. If you are close to the green zone, place the remaining rod away from the main cluster so it only adds a small amount.
If you fail the puzzle, you need to wait until the next round to try again. Once you succeed, the machine drops the Atomkraft Core.
Step 5: Charging the Atomkraft Core
Pick up the Atomkraft Core and carry it to the spawn at Eidskallen Landing on foot. You cannot sprint while holding it, and using a zipline or entering Tyr’s Head will make you drop it. Place it on the box next to Quick Revive, then activate the generator in the
nearby shack. Protect the core while it charges. The process will stall several times, forcing you to return to the shack and reactivate the generator. Keep defending the core until the charge finishes.
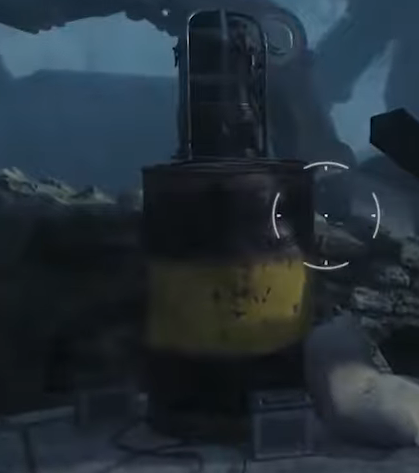
Pick up the charged Atomkraft Core and carry it to Storm Bridge. You will slowly lose health while carrying it, and ice obstacles will rise from the ground. You can destroy some of them with the Jotunn Star or avoid them by taking another path. Place the core on the black barrel with the yellow stripe in the middle of the bridge. This triggers a scene where the robot and Dravakar clash. After the encounter ends, pick up the Dravakar Shard near the left side of the bridge, close to Tyr’s Foot.


You got -20% OFF 
Step 6: Getting the Sunstone
 Take the Dravakar Shard to Bloodheim Hall, the longhouse on the right side of the map. Place it on the fire pit or spit inside the hall. Now charge the Jotunn Star by killing zombies with its melee attack. Once the Lantern is charged, use the ranged attack on the shard over the fire. This should light the blue flame beneath it.
Next, get a Disciple Injection score streak. There is a free one inside the Church, but you can craft one if the free one has already been used. Use the Disciple Injection inside Bloodhelm Hall. Grab zombies and throw them at the fire or meat over the flame. Keep doing this until the lockdown begins. You do not need to wait several rounds for this step. You just need enough successful zombie throws. If a throw misses or does not count, keep grabbing more zombies and throwing them into the target.
During the lockdown, a named Necropinser HVT called Calrynnor spawns. Kill it, then look near the fire pit for the Sunstone. It may not drop exactly at the enemy’s feet, so check the area around the fire if you do not see it right away. Pick up the Sunstone and take it to the Church.
Step 7: Solving the Sunstone Rune Puzzle
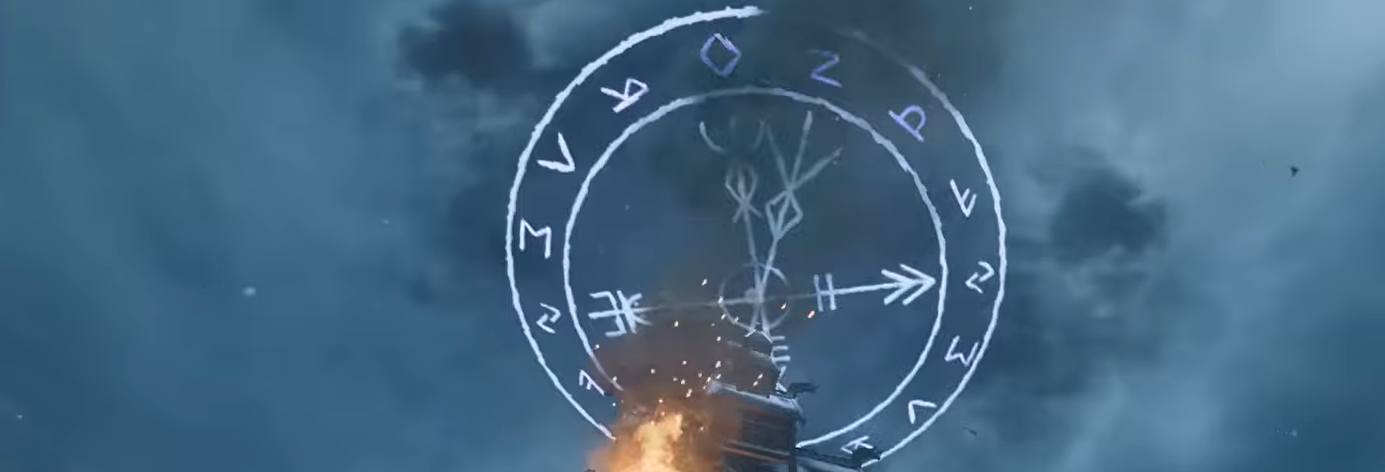
Place the Sunstone on the podium inside the Church, then melee it with the Jotunn Star. This activates a compass-like rune dial above the Church roof. Look up at the rune dial. Three arrows point toward three different symbols, and each arrow shows the order you need to follow.
- Arrow with one line = first symbol
- Arrow with two lines = second symbol
- Arrow with three lines = third symbol
Around the map, several bonfire mounds will appear with matching symbols. Possible locations include the Burial Grounds, Eidskallen Square, the Lighthouse area, spawn, and the left side of the bridge. Find the bonfire that matches the first symbol, then hit it with a charged Jotunn Star ranged shot. After that, find the second symbol and do the same thing. Finish with the third symbol. If you hit the wrong bonfire, the rune dial above the Church will spin and reset. If you hit the correct one, the dial stays stable and lets you continue.
After lighting all three bonfires in the correct order, the arrows above the Church will point in one direction. That means the boss fight is unlocked. Before entering the fight, prepare properly. Bring a strong ranged weapon, full armor, the Jotunn Star, Pack-a-Punch upgrades, and useful GobbleGums. Shields Up, Near-Death Experience, Idle Eyes, Power Keg, Raindrops, or any survival-focused GobbleGum can help.
A ranged weapon like the Novaline or another accurate rifle is best for boss damage. When you are ready, enter Tyr’s Head and interact with the front panel to start the final encounter.
Final Encounter: Dravakar Boss Fight
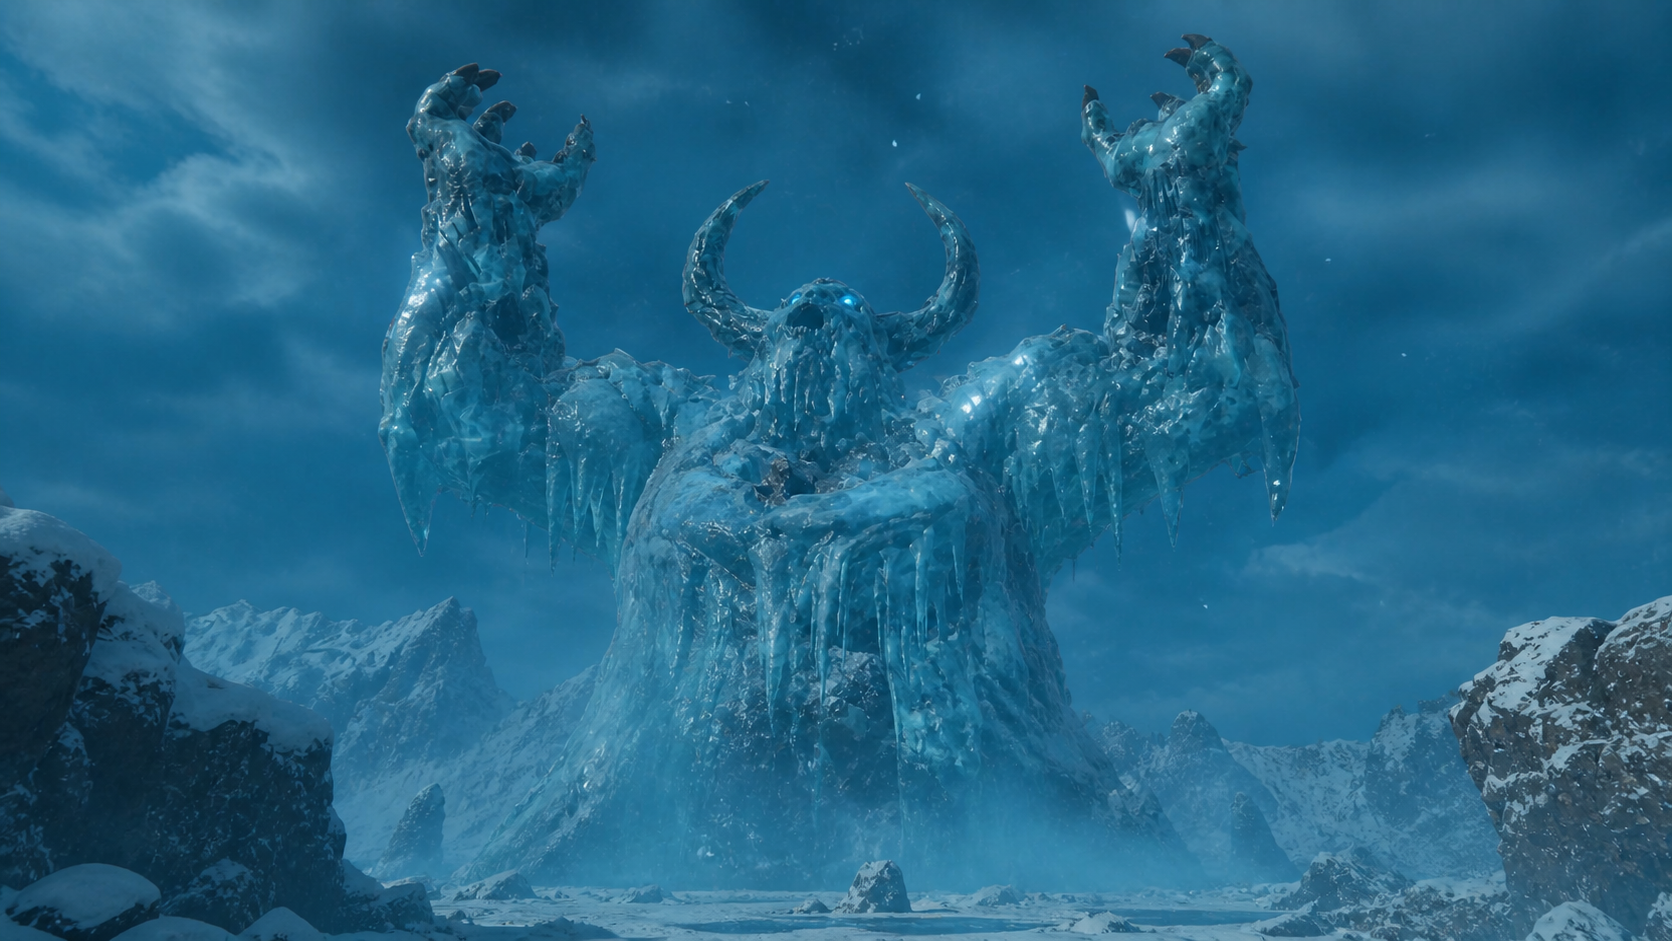
The Dravakar boss fight starts with the giant robot and Dravakar fighting in front of you. During this phase, shoot the red weak spots that appear on Dravakar’s body. These are your main damage windows, so focus them whenever they appear. Dravakar will also freeze parts of the arena. If you see a red pulse or the ground becomes dangerous, move to another section. When Dravakar throws rocks or ice meteors, hide behind the pillars or large boulders to avoid the damage.
After enough damage, Dravakar becomes immune, and floating Viking ice heads (Gjallarfrost) appear around the arena. Use the charged ranged attack from the Jotunn Star to hit each head in the mouth. The traps in the boss arena help a lot here. If you interact with the middle of a trap, it creates a small area around it. Standing inside that area lets you fire ranged attacks with the Jotunn Star as much as you like, which makes the floating heads much easier to knock down.
Once a head drops, damage it with your guns until it breaks. Each destroyed head can drop ammo and armor, which is important because armor is limited during this fight. After the head phase, Dravakar returns to another damage phase. Shoot the red weak spots, avoid frozen zones, and hide behind cover during meteor attacks. The fight repeats this pattern several times.
Later phases add more floating heads. You may need to destroy one head first, then two, then three across the arena. Stay proactive here. The longer you leave the heads alive, the messier the fight becomes. Holding out the Lantern can protect you and nearby teammates from freezing. This is especially useful when the arena gets covered in ice or when teammates are trying to keep shooting weak spots. Once enough damage is dealt, Dravakar’s face and eyes become the final weak spots. This starts the last phase. The arena becomes more restricted, and Dravakar begins throwing rock patterns across the middle area.
The final phase includes several attack patterns:
- S-shaped rock patterns that you need to weave through
- V-shaped patterns with safe gaps between the rocks
- Arrow-like patterns that hit different lanes
- Horizontal low rock lines that you should prone under
Keep shooting Dravakar’s face and eyes while dodging these patterns. In co-op, Near-Death Experience is extremely useful here because players can go down quickly. In solo, the right Quick Revive setup can let you revive yourself by shooting the boss with your secondary weapon while downed.
Do not stop damaging the face unless you need to dodge. This phase is chaotic, but it is mostly about staying calm, reading the rock patterns, and keeping pressure on the final weak spots. After enough damage, the giant robot returns and finishes Dravakar. Once the cutscene plays, the Totenreich main quest is complete.
F.A.Q.
How to unlock the Pack-a-Punch machine on Totenreich map in CoD Zombies?
To get the Pack-a-Punch, just follow the markers you see on the screen that will take you around the map. Eventually, you’ll have to reclaim the Glocke Drop Controller and sync it in Fishery Island, and after that, you’ll be able to call the Pack-a-Punch machine to drop from the sky.
Who are the Twins on the Totenreich map in CoD Zombies?
The Twins are two mysterious child-like sisters in Black Ops 7 Zombies. One appears human, while the other looks undead, and both are trapped in the Dark Aether’s looping version of Nuketown.
What does the number on the Nixie tubes mean in the Totenreich map?
The number above the computer in the Tyr Head has nothing to do with the main quest easter egg.
Where to find the Chain Links on the Totenreich map in CoD Zombies?
The Chain Links is on the nose of the ship. To get it, you need to lower the wall using the crane, and then wall jump on it to grab the item.
How to get the Lantern on the Totenreich map in BO7 Zombies?
Put the Chilly Chunks can on the trolley in the market section of the map and wait for the second special round that will spawn a zombie bear. Kill it and grab the Lantern.


