

 Dallon Avery
Escape from Tarkov All Battle Pass Documents Locations Guide Quick Overview:
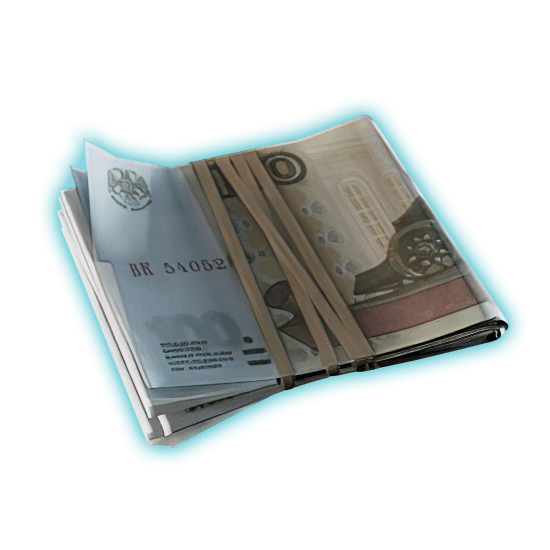
- Battle Pass rewards are unlocked with TerraGroup Documents
- Docs behave as quest items, meaning they’re individual for each player in the raid
- There are 9 doc types, one of which is the universal kind that can be used in place of any other
- Different doc types can be found on different maps
- Every reward requires a different combination and amount of documents to unlock it
Trying to unlock as many documents as fast as possible to get those sweet battle pass rewards? Buy EFT Documentation Farm service at Skycoach and let our professional team help you get them! Don't risk your PMC, get the docs today!


Read closely 
Browse our hottest EFT Boosting services




How the Kord Breach Battle Pass Works
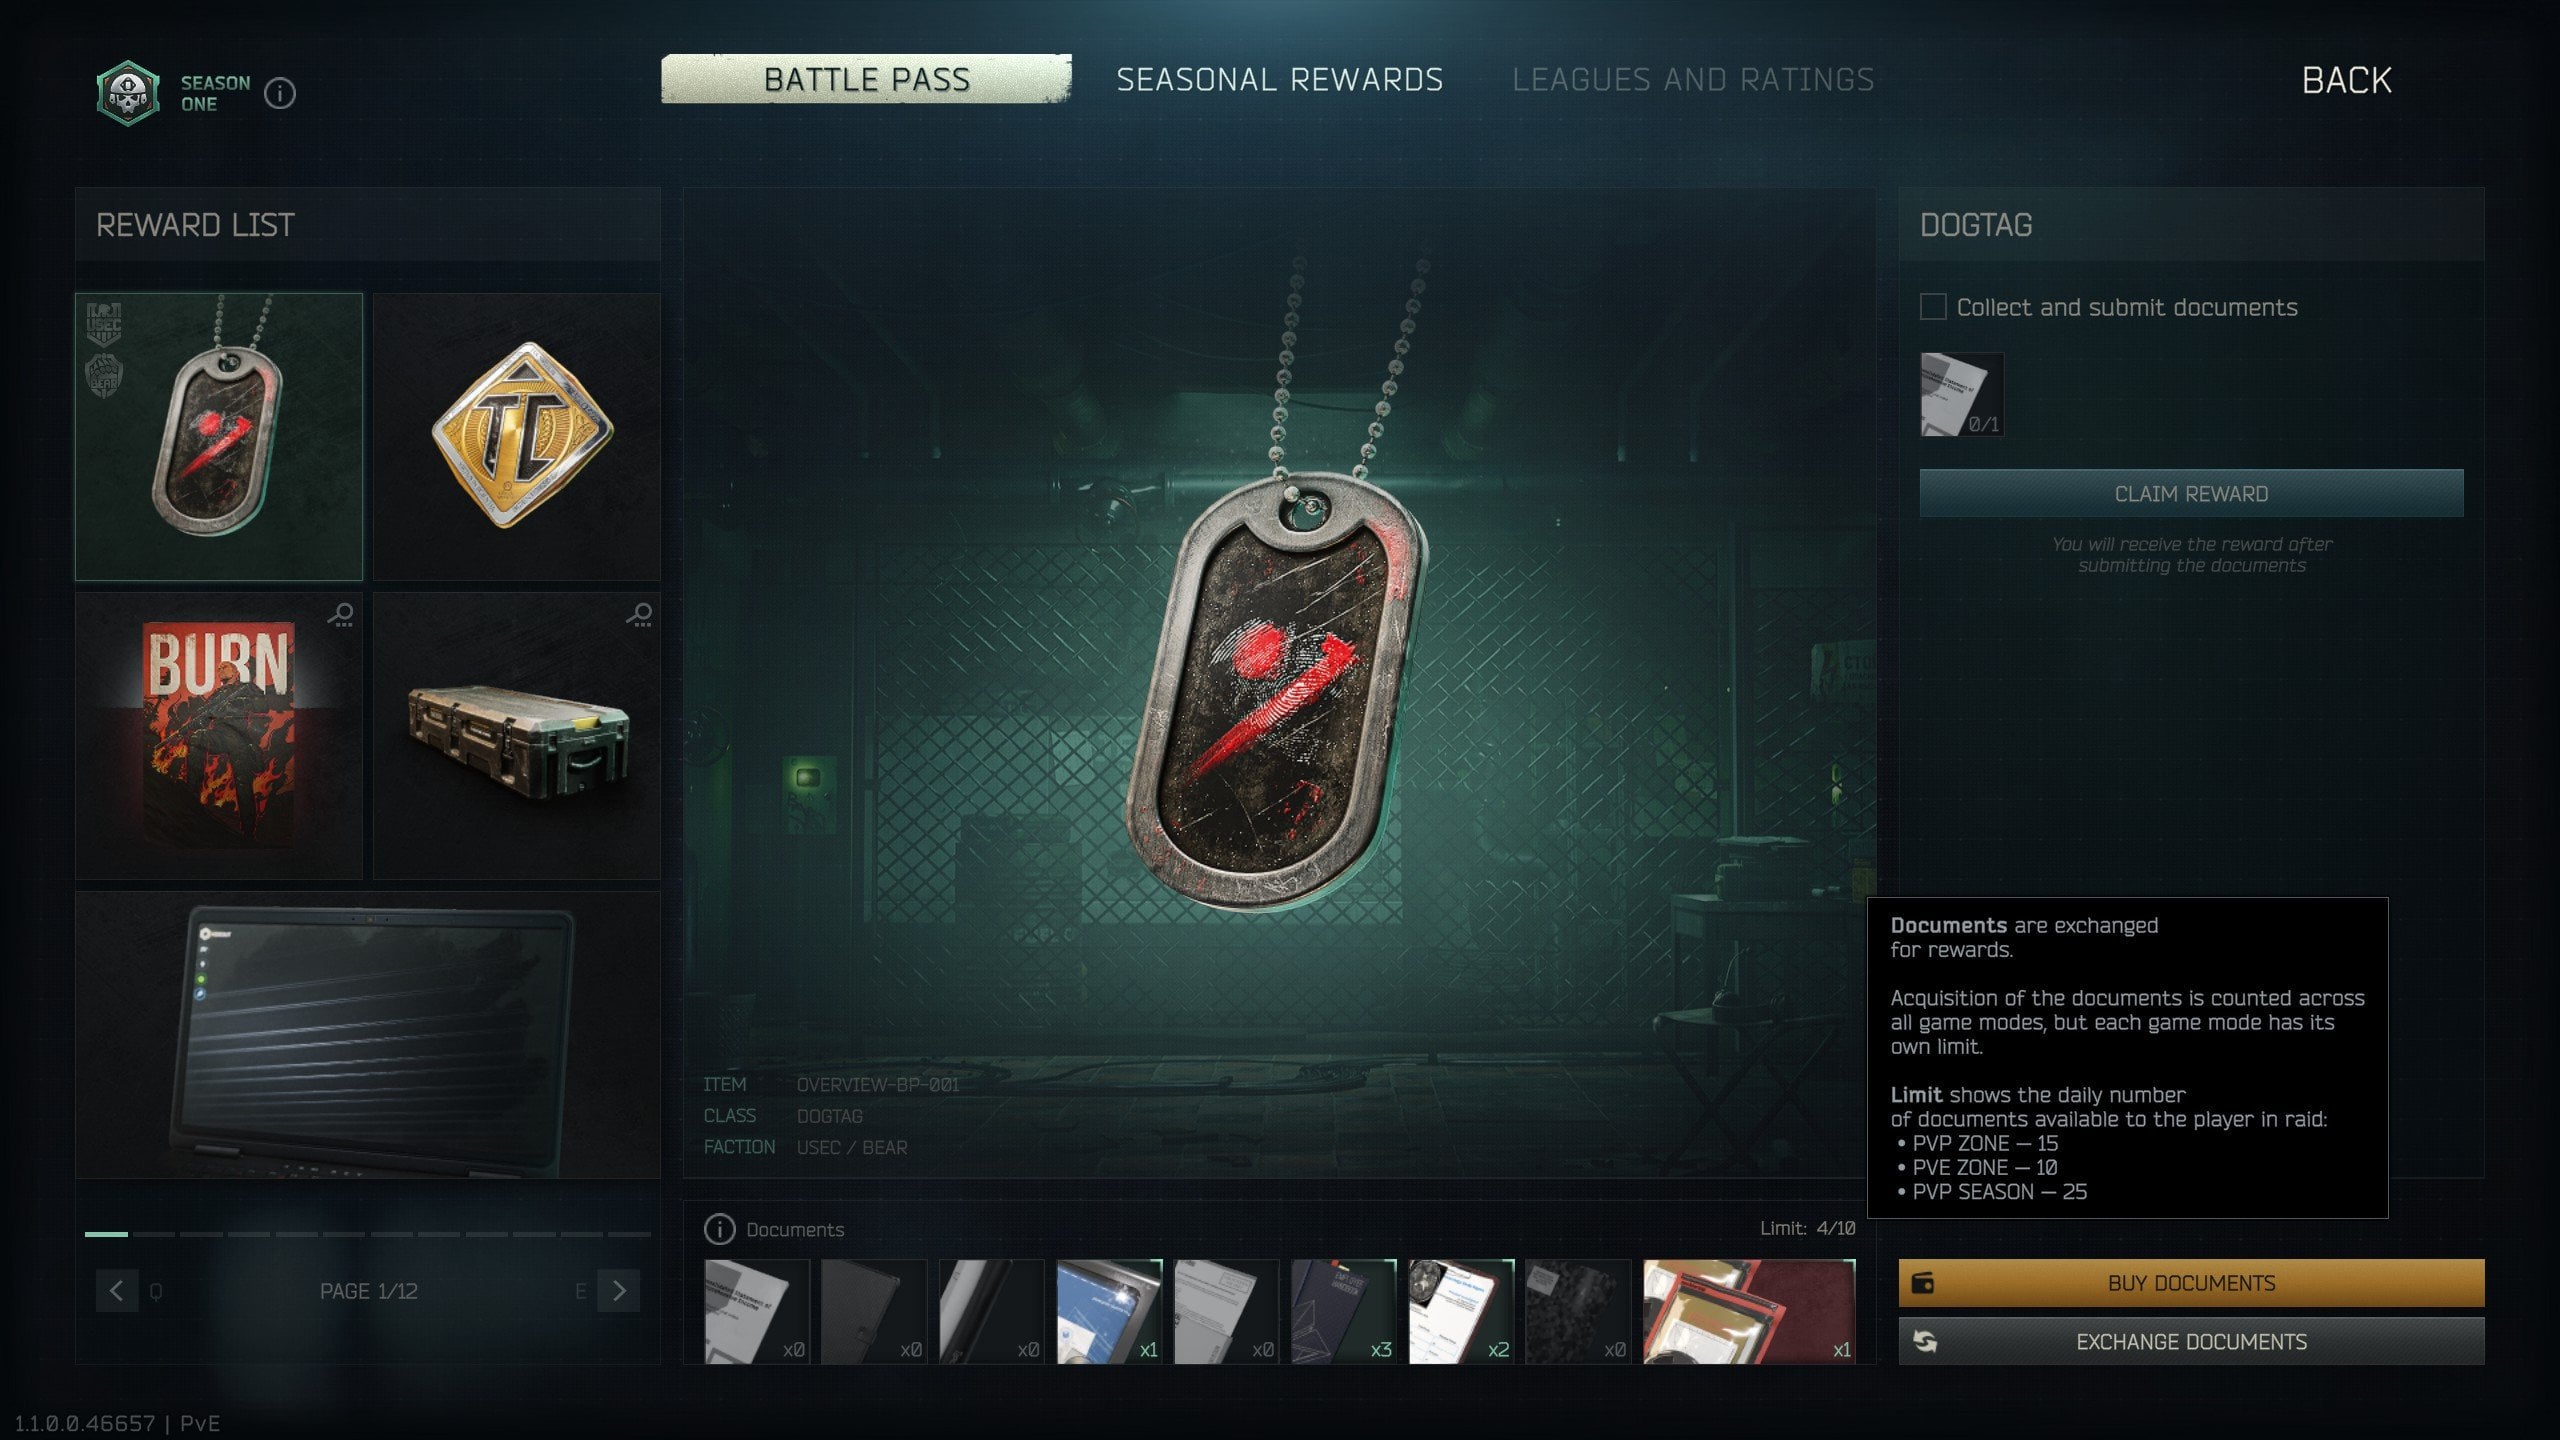
The first-ever battle pass in Escape from Tarkov is completely free and doesn’t feature a paywalled “VIP” track. But there’s a Tarkov-esque caveat - you’re going to have to work hard to unlock every reward in it.
The thing is - this battle pass does not use a traditional XP track. You don’t get battle pass XP to unlock rewards on level up. Instead, players unlock its rewards by finding and submitting special seasonal items called Documents. And let me tell you, this is actually a blessing in disguise!
Each reward has its own requirements, which can be viewed by selecting it in the Battle Pass menu. Most rewards require a specific number of one or more Document types. Once all required Documents have been submitted, the reward can be claimed.
Documents are a new type of item that can spawn during raids in specific places. In today’s guide, I’ll list all spots that I know of so far with some screenshots to demonstrate that I’ve actually found those spots myself and not just looked them up on YouTube.
So, is Escape from Tarkov Battle Pass free? Yes, it is, absolutely free, although you do have the option to buy those documents and unlock rewards with your money. But there’s no “premium” track. Another great thing about this BP is that it’s synchronized across all game modes and characters. Meaning, you can progress it and farm documents on Permanent PvP, Seasonal PvP, and PvE characters. Unlocked Battle Pass rewards are also immediately available to all characters and will remain after the season has ended or a profile is reset for a prestige. What doesn’t carry over are Battle Pass currency, Documents, and Black Division crates (one of the BP rewards). Black Division crates are also not synchronized between characters; you can only claim them for one character once.
Document Types and Daily Cap
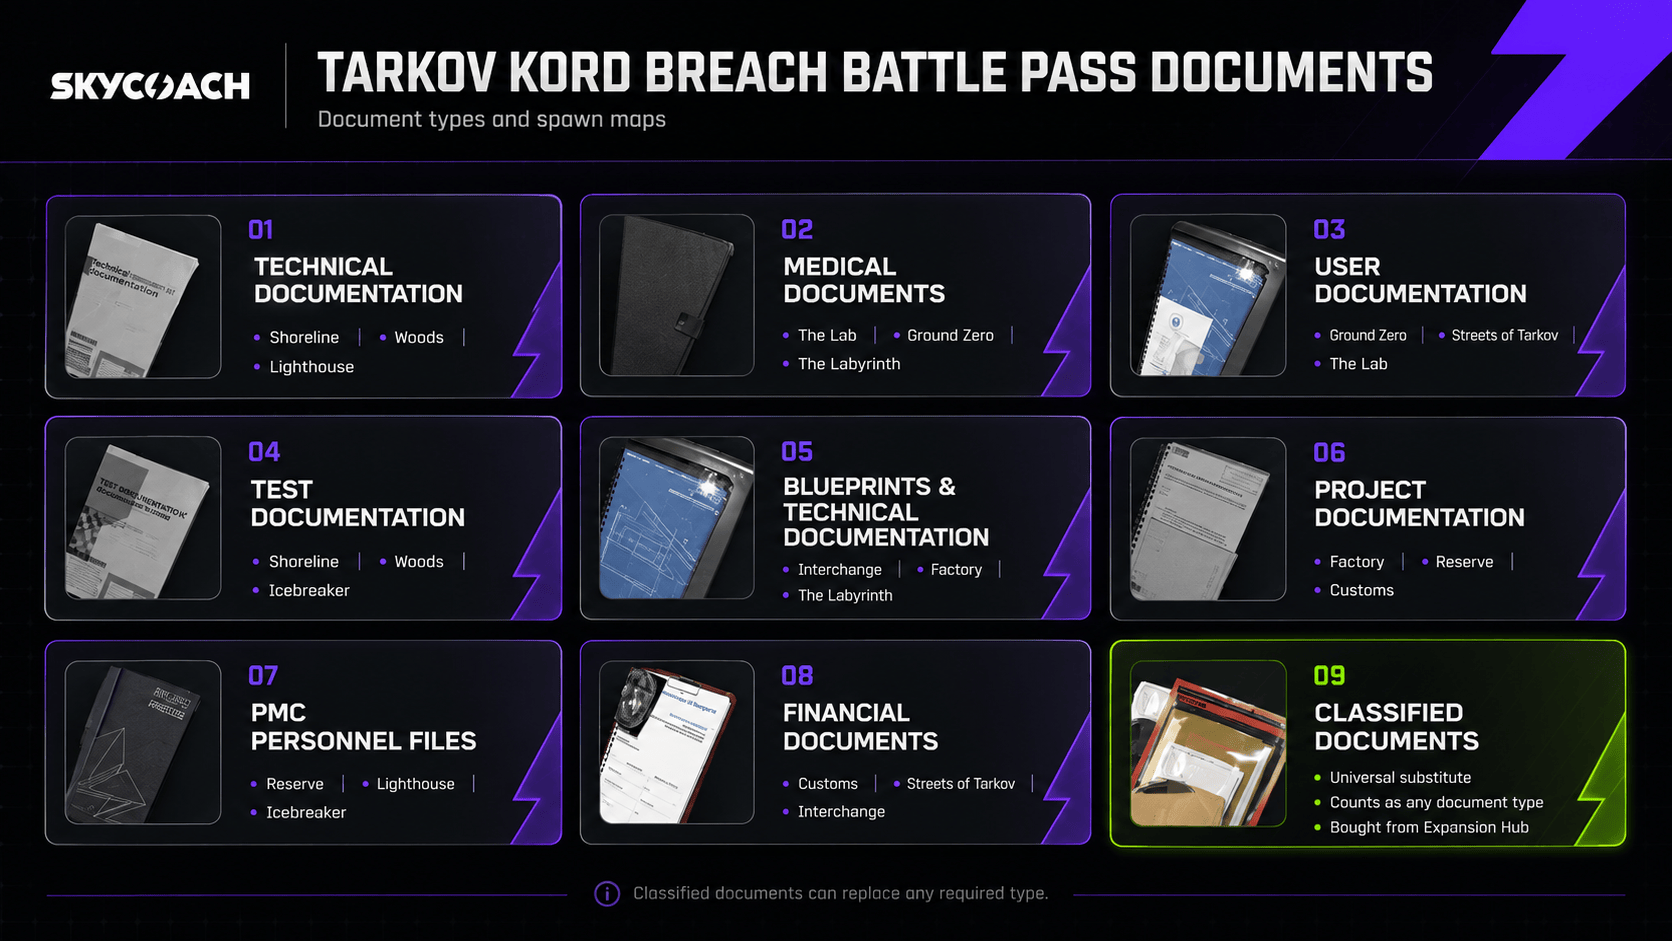
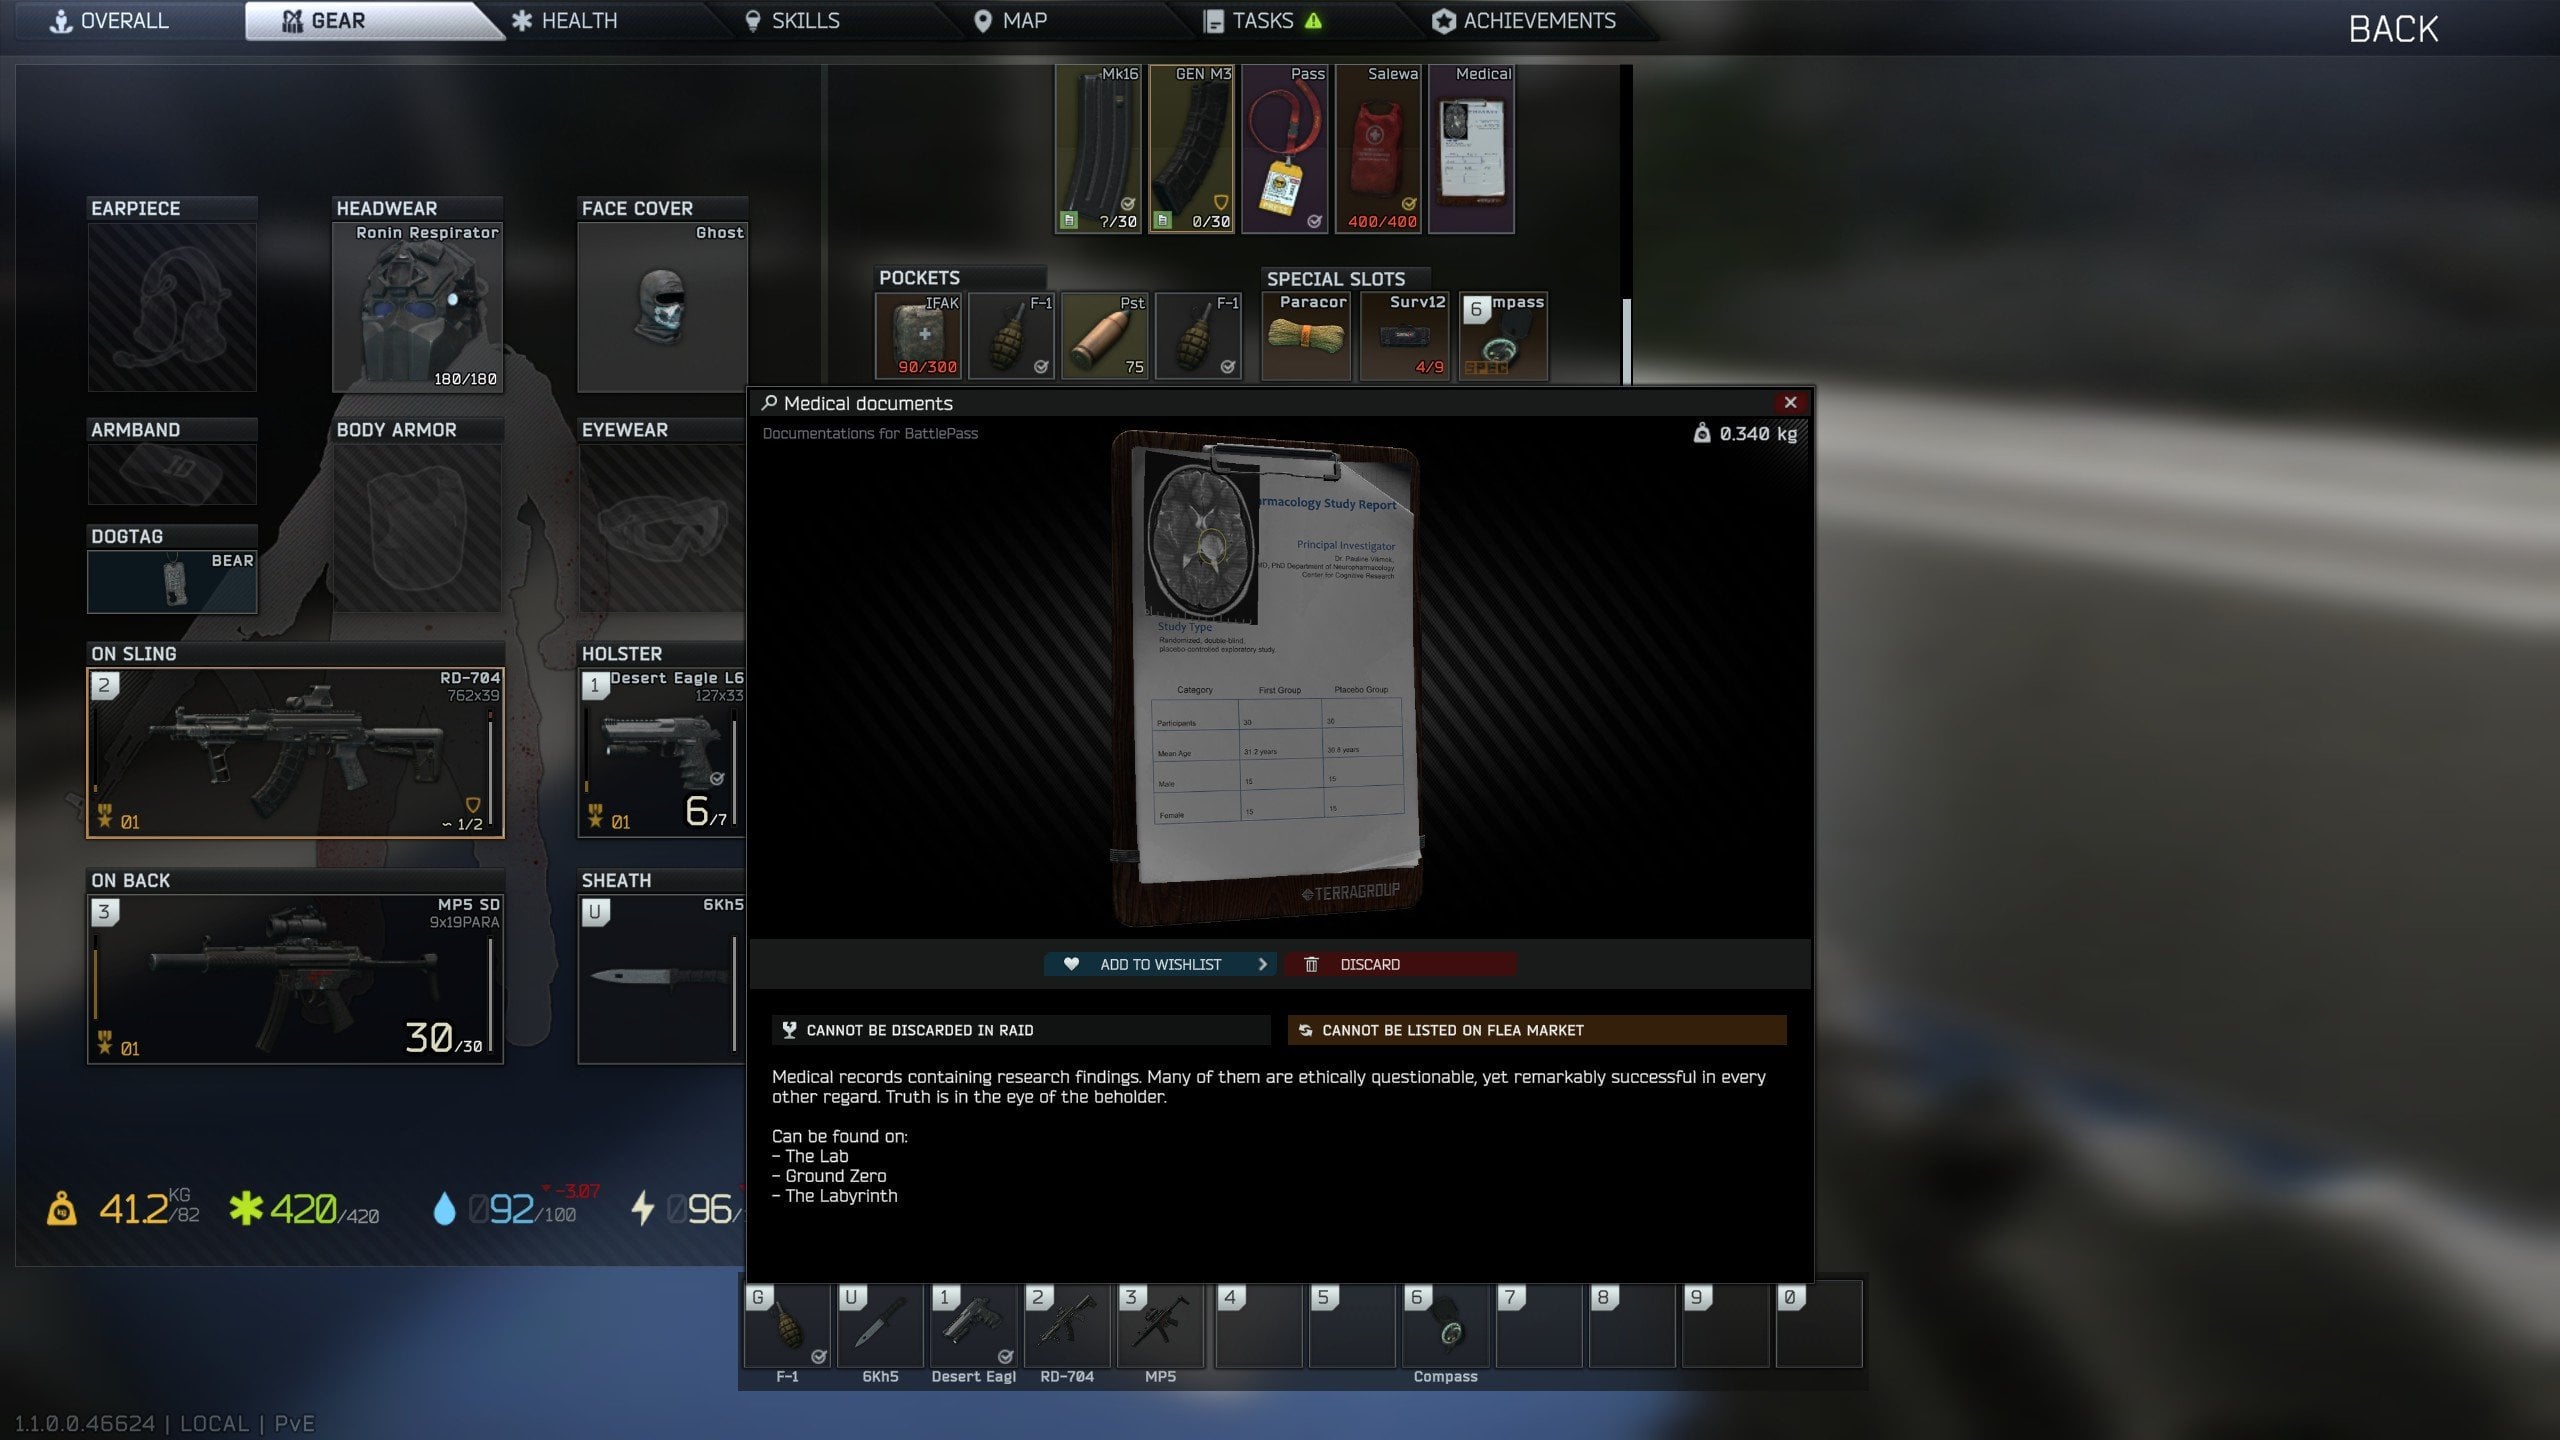
The Kord Breach Battle Pass includes eight regular Document types found during raids. Each category appears on three specific maps, listed directly in its in-game description.
There is also a ninth special type called Classified Documents. These can be purchased through the Expansion Hub and used instead of any regular Document required for a Battle Pass reward.
|
Document type |
Description |
Maps |
|
Technical documentation |
Operating manuals for TerraGroup equipment. |
Shoreline, Woods, Lighthouse |
|
Medical documents |
Medical records containing TerraGroup research findings. |
The Lab, Ground Zero, The Labyrinth |
|
User documentation |
Documentation issued to new TerraGroup employees. |
Ground Zero, Streets of Tarkov, The Lab |
|
Test documentation |
Records of experiments conducted in TerraGroup-controlled laboratories. |
Shoreline, Woods, Icebreaker |
|
Blueprints and technical documentation |
TerraGroup blueprints and technical data backed up onto a disk. |
Interchange, Factory, The Labyrinth |
|
Project documentation |
Tarkov Infraline documents and blueprints unrelated to transportation infrastructure. |
Factory, Reserve, Customs |
|
PMC personnel files |
TerraGroup personnel records covering PMC operators. |
Reserve, Lighthouse, Icebreaker |
|
Financial documents |
Financial reports from TerraGroup and its affiliated companies. |
Customs, Streets of Tarkov, Interchange |
|
Classified documents |
A universal Document that can replace any other required type. |
Purchased from the Expansion Hub |
Note that docs don’t just appear anywhere on the specified maps; there are specific locations you must go to, which I will list in this guide.
Also, these documents can be found on dead Black Division soldiers, which have a chance to spawn on any map if you play as a seasonal character. Black Division are mostly seen on Icebreaker and Terminal maps.
Another source of the docs is the seasonal questline [Kord Breach] available to seasonal characters only.
Classified Documents are the Battle Pass’s universal currency. A Classified Document can be submitted in place of any regular Document type, making it useful when a player is missing a specific category needed for a reward.
Unlike the eight regular types, Classified Documents are not described as raid spawns. They are available from the Expansion Hub and can be bought with money. Because they can replace any category, they provide a paid alternative to repeatedly searching specific maps for one missing Document. So, yes, you can literally buy Battle Pass rewards with real money.
But it is possible to exchange different types of documents. I’ll provide more info once I learn how that works.
There’s another rule - you can’t just run the raids nonstop, checking out the same spots with no end. Players can only find a limited number of Documents per day. Here’s the daily cap table:
|
Game mode |
Daily Document limit |
|
PvP Zone |
15 |
|
PvE Zone |
10 |
|
PvP Season |
25 |
Since PvE is the easiest mode of all, its cap is the lowest of the 3, which is understandable. And I'm pretty sure they don’t spawn in practice mode. You can check the current limit on the battle pass page, at the bottom where the document types are listed. This limit is shared between all characters. If I were you, if you have PvE, I’d find the first 10 in PvE.
Each document is a physical item, meaning it doesn’t go to your “quest item” inventory, so you actually have to have space in your pockets to grab the docs. Luckily, these items can also be put into your secure container.
All EFT Battle Pass Documents Locations
I, for one, am excited to farm these documents because they give me something else to do other than the endless grind for quests, which sometimes lead to the game crashing due to a memory leak. I’ve almost deleted the game because of that. At least now, I get to do something different, learn the maps by memorizing spawn locations, and on top of all of that, I get to keep exclusive rewards that won’t be available once the season ends.
It is possible to find more than one document in the same raid, so if you found one, keep checking the other places if it’s safe enough. Also, docs of the same type can be stacked. I don’t know the maximum amount, but I managed to get out of one raid with 3 docs: 2 users and 1 medical.
Note: not all spawns have been discovered or verified; I will keep adding more when new ones are discovered.
Ground Zero Document Locations
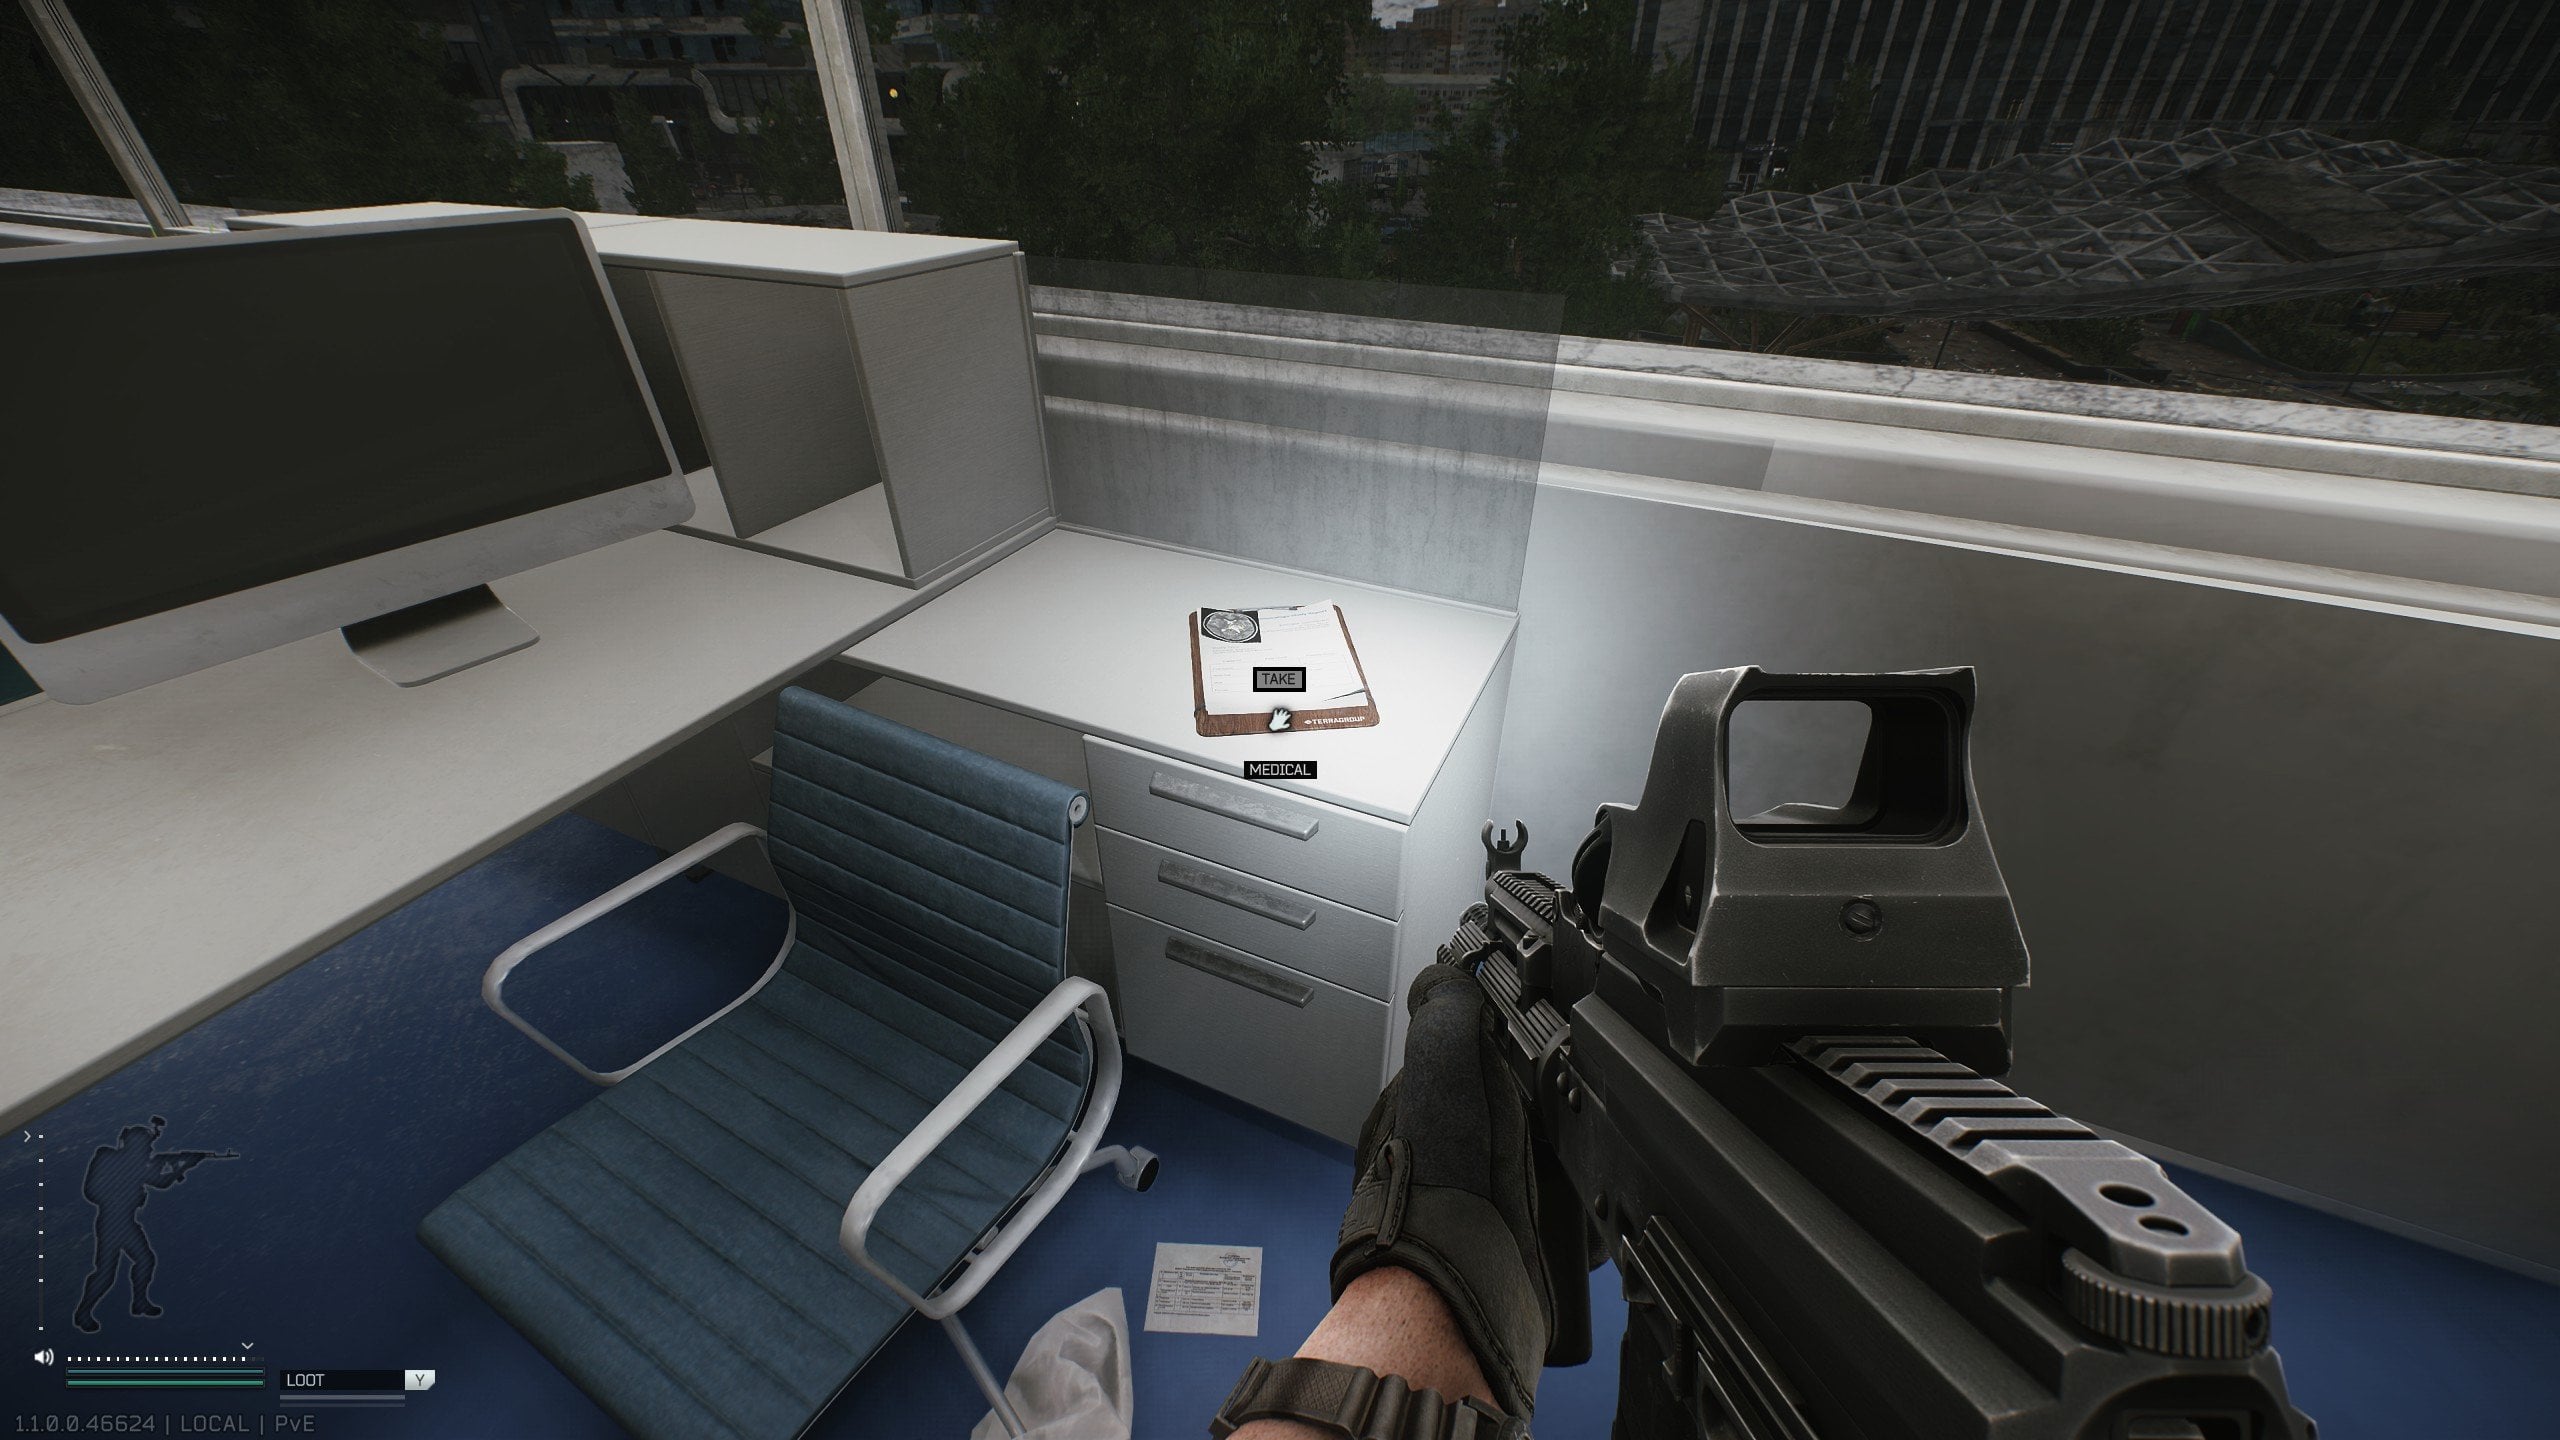
Possible doc types: Medical documents and User documentation
TerraGroup Building, second floor
- Blue couches
- Go upstairs to the second floor.
- Check directly on top of the blue couches.
- Hallway bench
- Enter the door at the end of the hallway.
- Turn left and inspect the top of the bench.
- Room 3 workstations
- Continue toward Rooms 3 and 4.
- Search the workstation desks throughout Room 3.
- Medical documents spawn on one of these desks.
- Room 4 workstations
- Room 4 is locked from the hallway.
- Enter Room 3 and cross the balcony to reach it.
New locations to check:
- Tarbank - ground-floor glass table: Enter Tarbank and check the glass table on the ground floor near the barbed-wire area.
- Tarbank - second floor: Go upstairs and inspect the desks and exposed surfaces on the second floor.
- Coffee Maniac - rounded table: Enter Coffee Maniac and check the rounded table inside. User documentation can spawn here.
On this map, the spawn is in the TerraGroup building, the one you start your game in. Get to the second-floor reception and check the reception desk, the blue couches, and the chairs with coffee tables. Keep going and move to the corridor; there’ll be a bench with another spawn. The most promising spawn points are actually in offices 3 and 4. Office 3 has a kitchen and some medical supplies on the table; check that table as you enter the room and then check all the tables with PCs on them. Then get into Room 4 either by using the balcony outside the window or by picking up the key off the dead scientist's body on the first floor. Once inside, check every desk with a PC there as well. Don’t check any drawers or loot containers.
Factory Document Locations
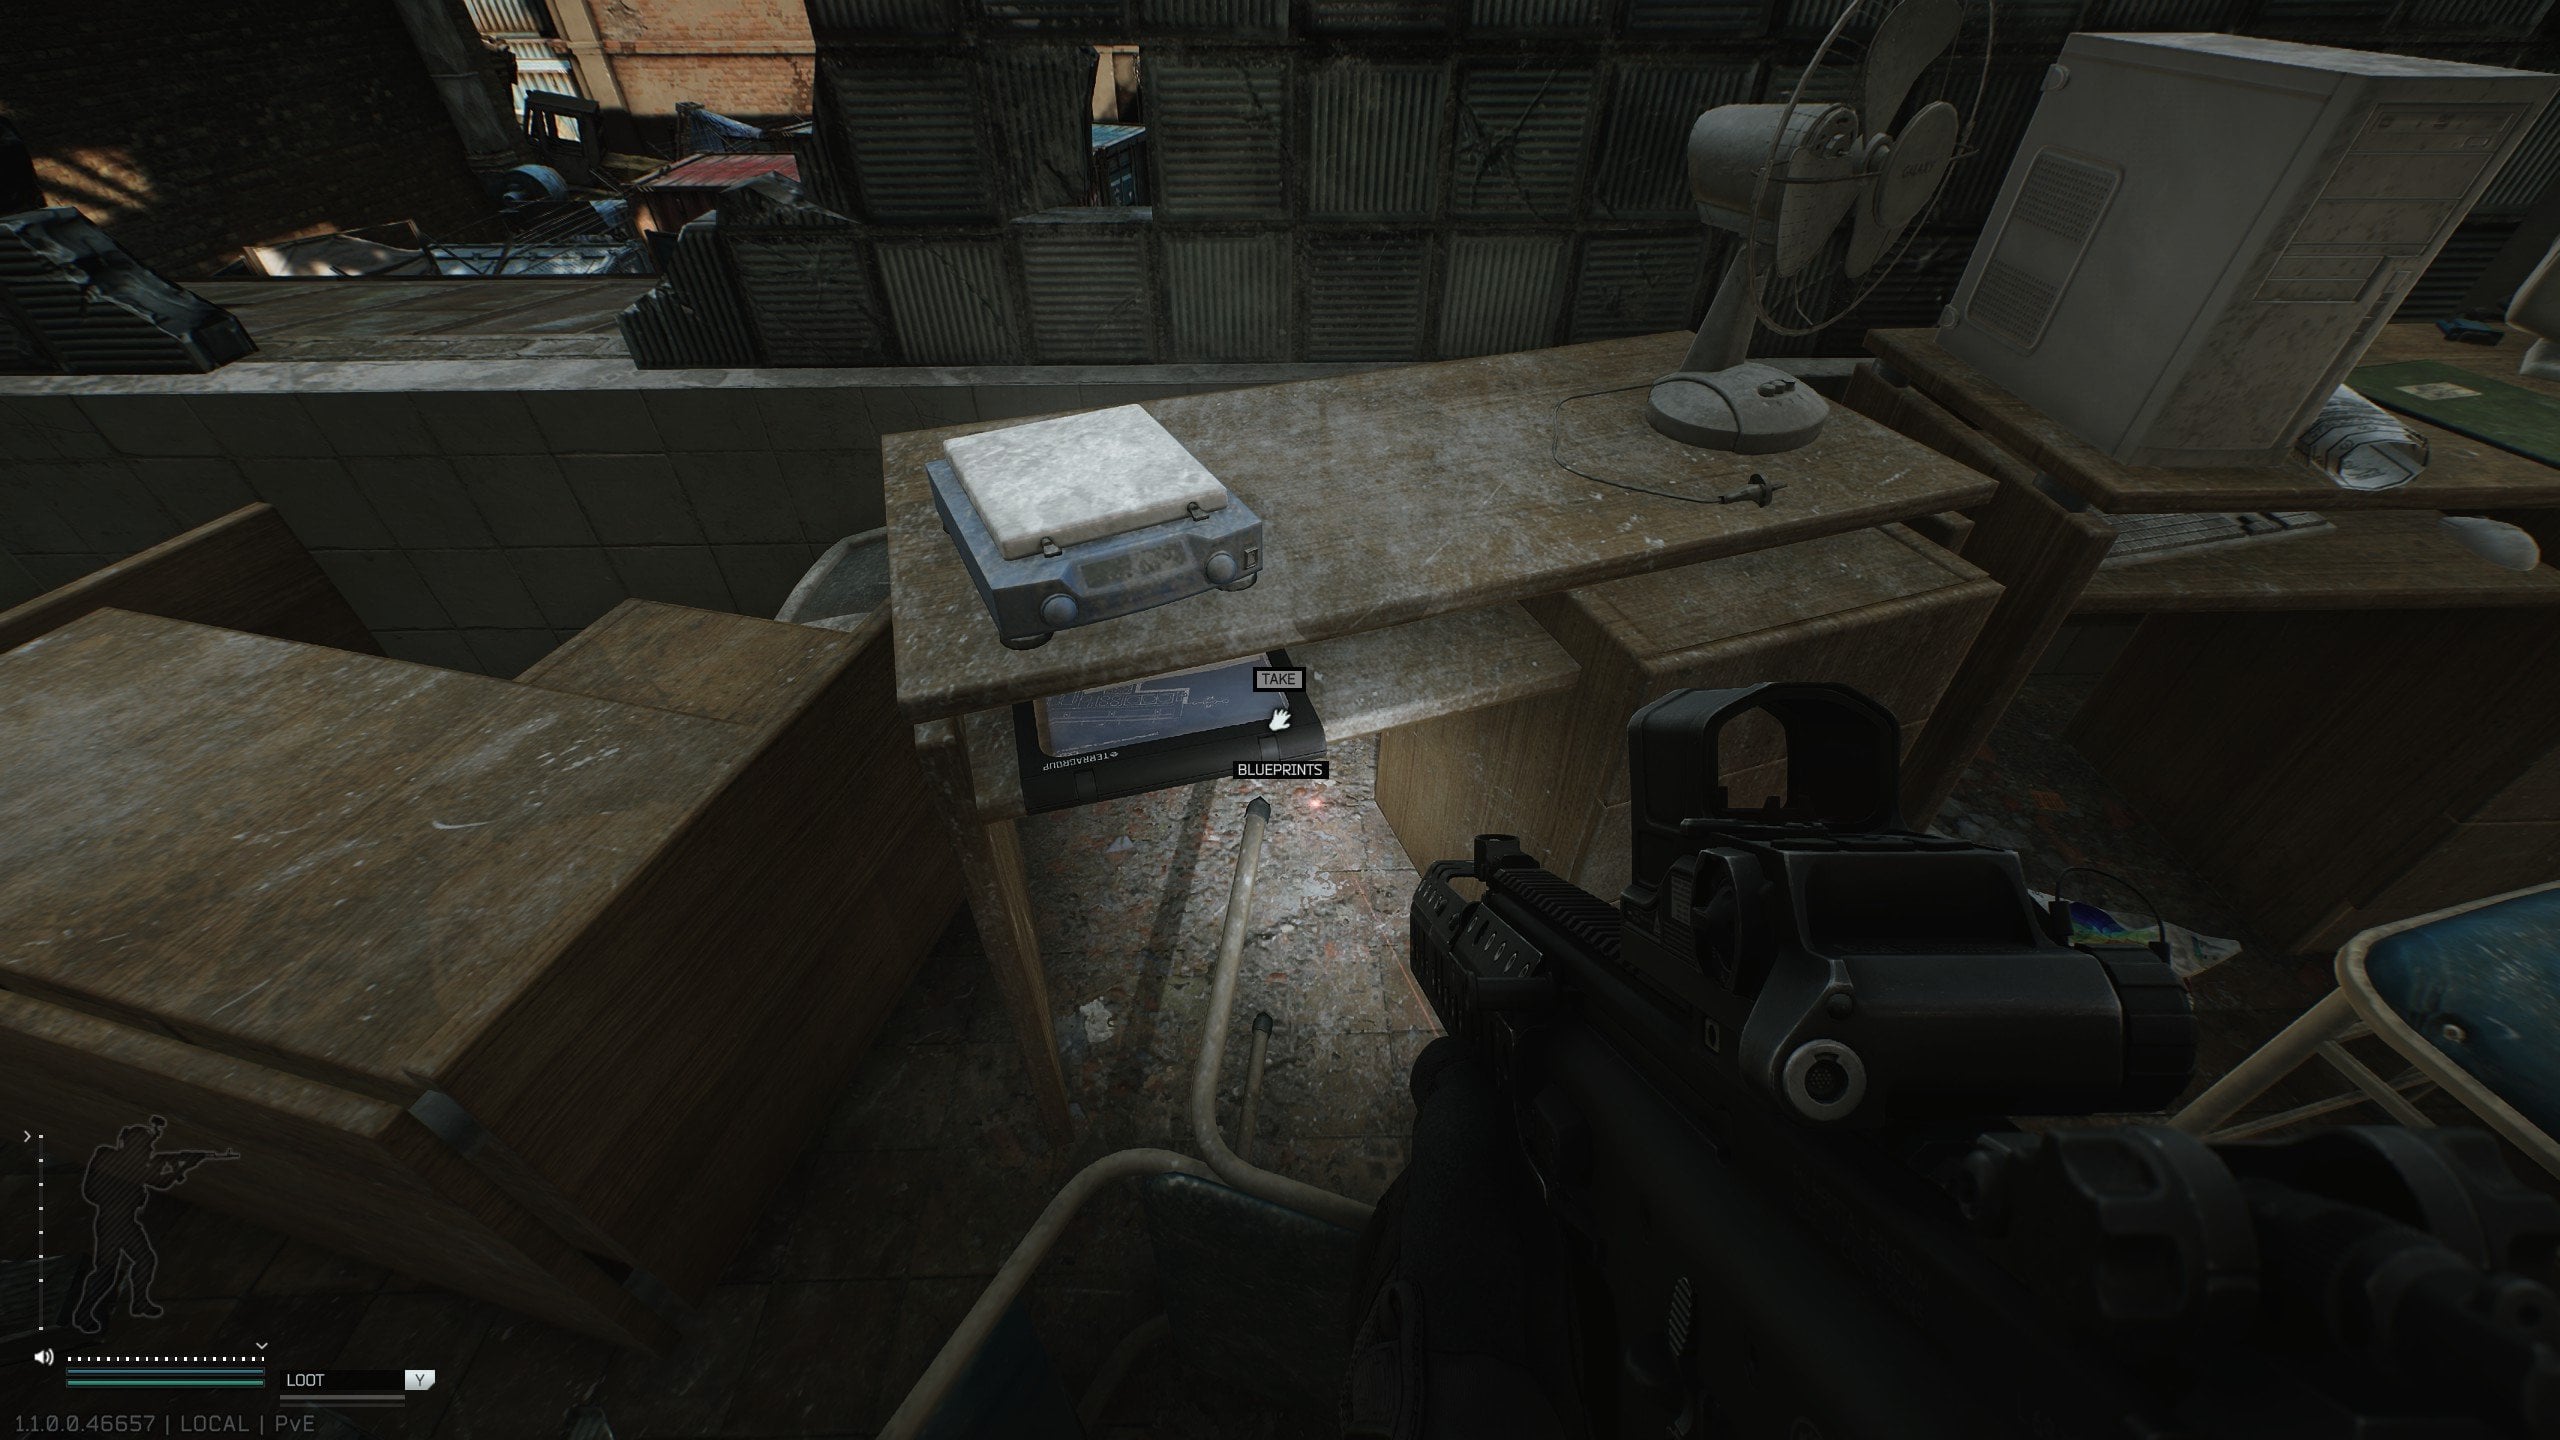
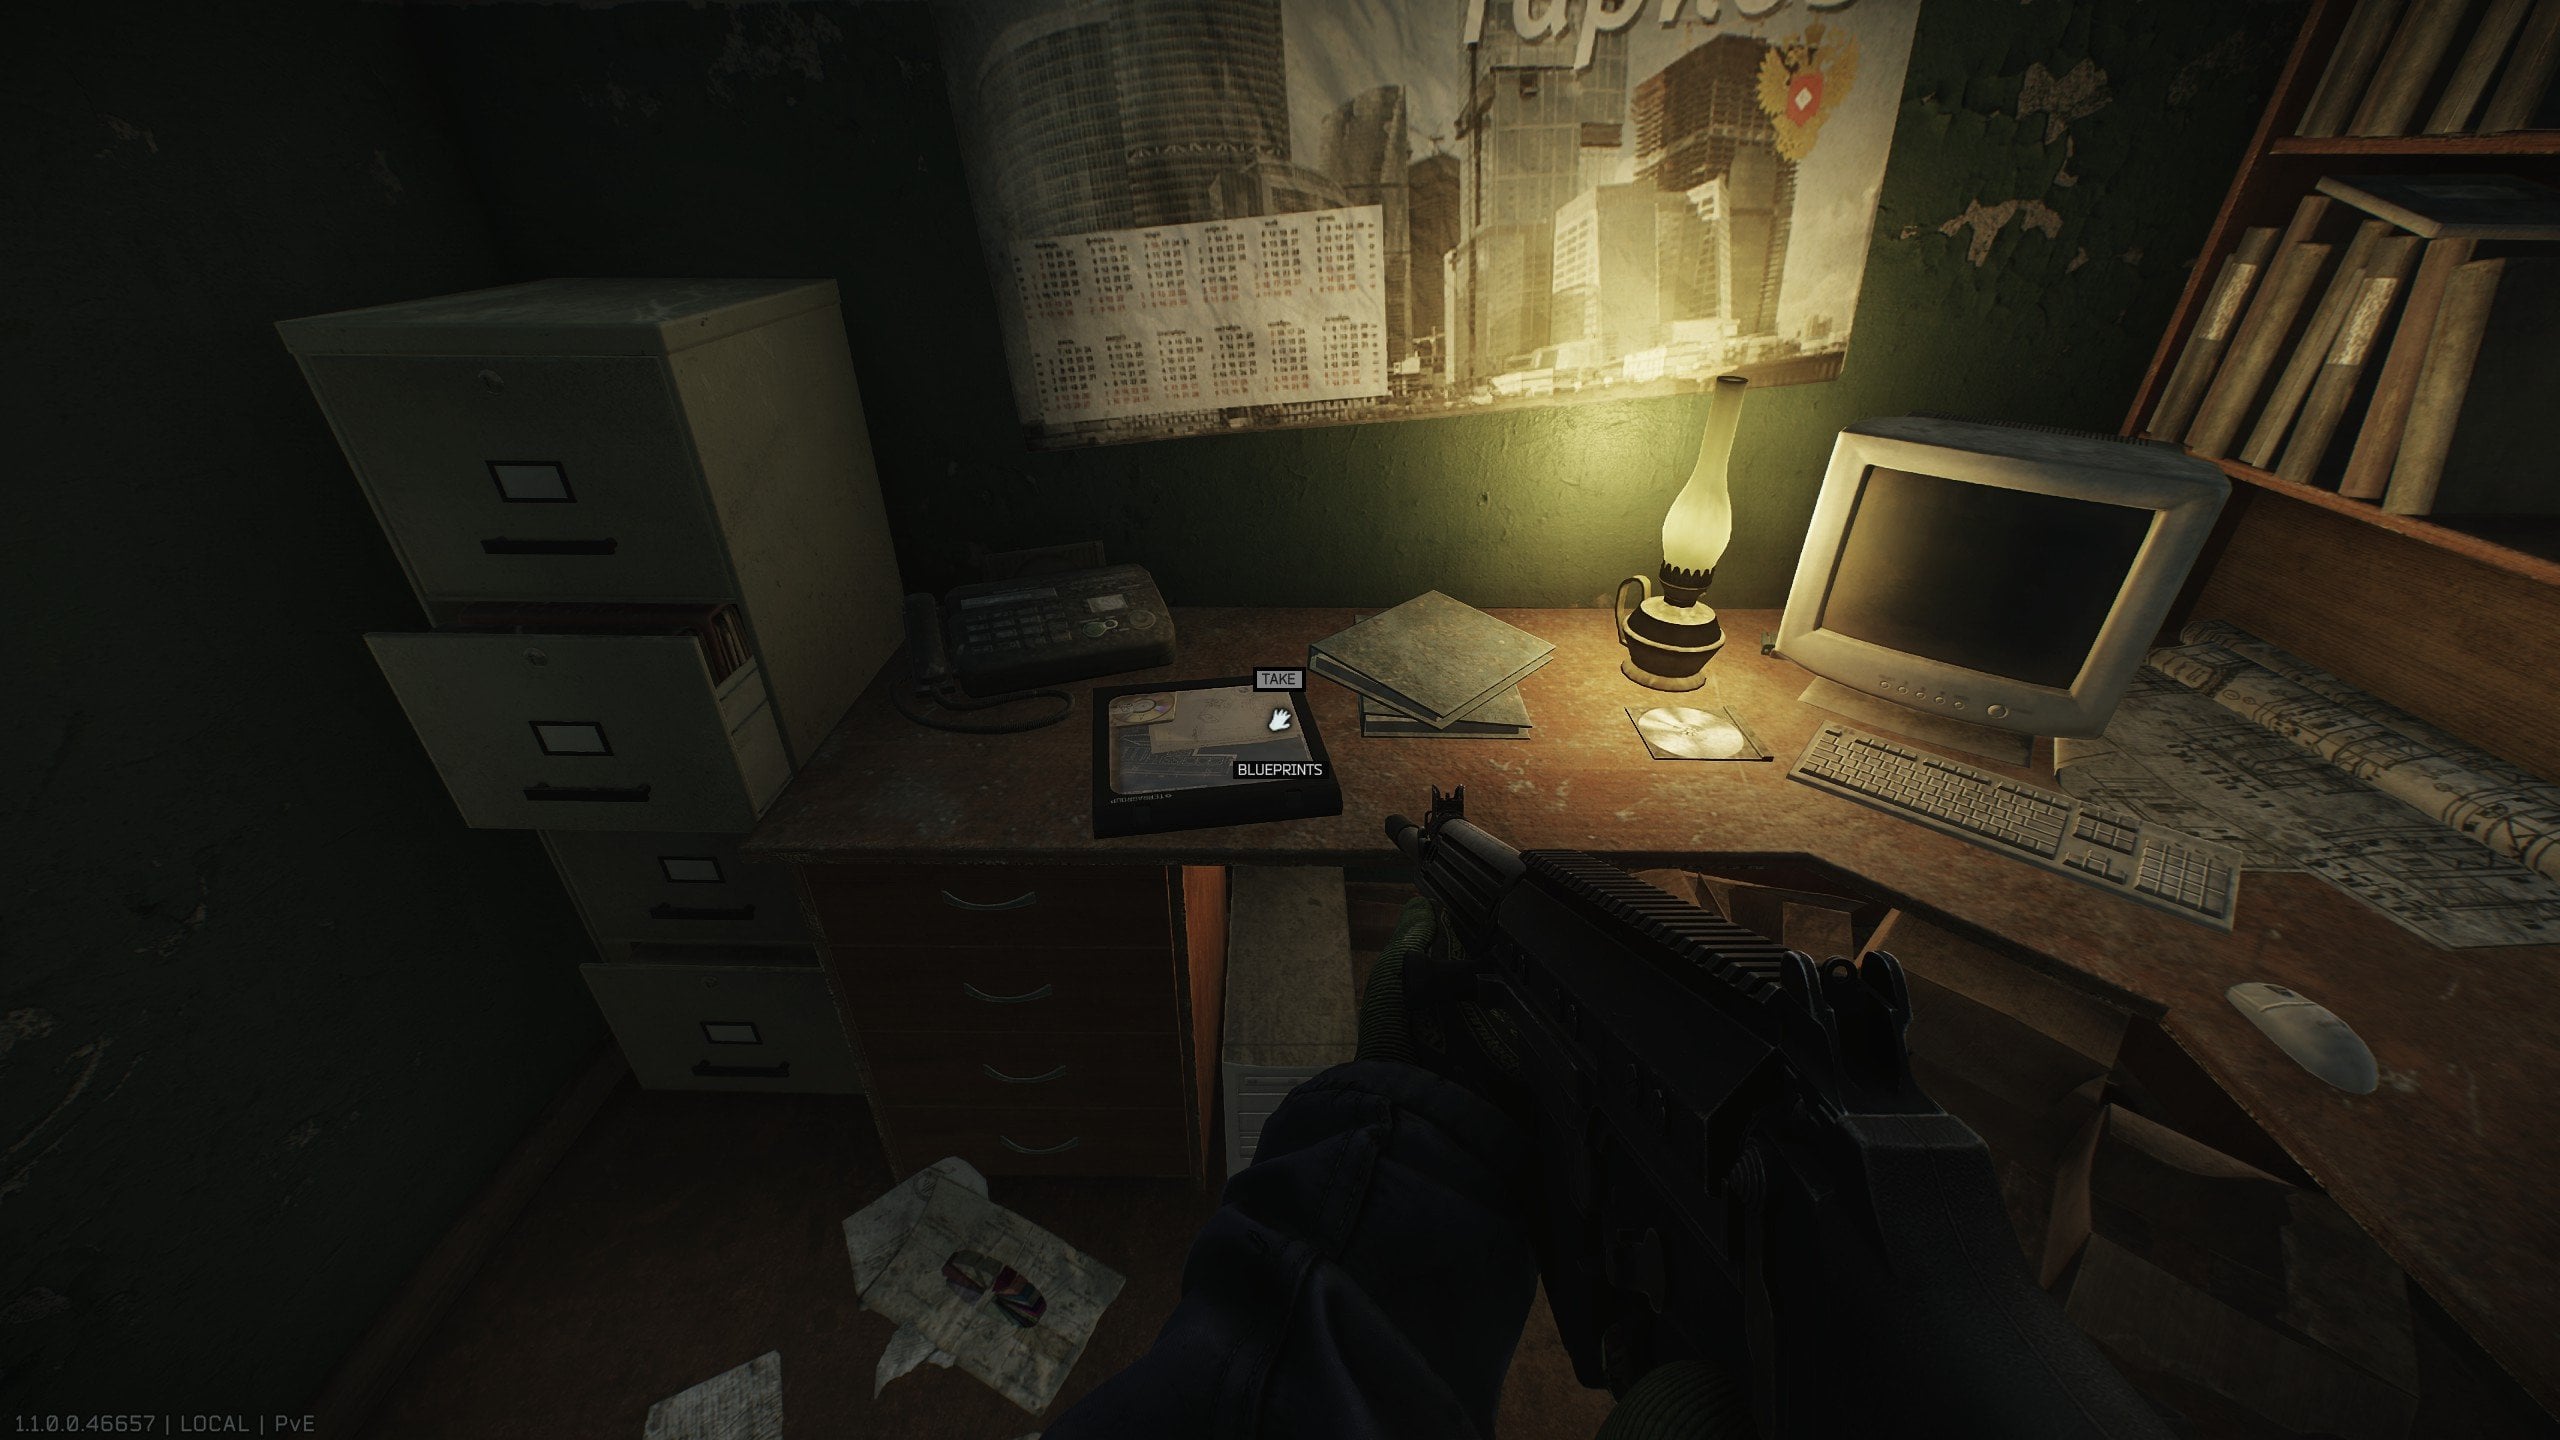
Possible types: Blueprints, technical documentation, and Project documentation
Med Laboratory area near Gate 2
- Ground-floor wooden bench
-
- Enter the laboratory building near Gate 2.
- Check the top of the wooden bench near the entrance.
-
- Second-floor laboratory desk
- Go upstairs to the second floor.
- Search the desk inside the room shown in the screenshot.
- Blueprints and technical documentation were found here.
Third-floor office area
- Breached office
-
- Go to the third floor.
- Breach the door.
- Look to the left beside the metal cabinet.
-
- Safe office desk and drawer
- Enter the adjacent office containing the safe.
- Check the top of the desk and the open drawer.
- Blueprints and technical documentation were shown inside the drawer.
- Safe office filing cabinet
- Check the top of the filing cabinet on the left side.
- Search the nearby desk as well.
First-floor office area
- Window-access room
-
- The room cannot be entered normally.
- Climb through one window and enter through the window at the rear.
- Search the desk with the monitor and the top of the filing cabinet.
-
Near Gate 1
- Blue lockers
- Start at Gate 1.
- Turn around and follow the right wall.
- Find the two jackets and inspect the nearby blue lockers.
There is also one major spawn spot for these docs, and it's in the med lab next to Gate 2. You probably already know this, as it’s a common spawn. You primarily look in two places. The ground floor, on the bench and in the office that has the door into the lab on the second floor. In the office, the doc could be found on either the toppled table or in the niche of the table right next to it. The lab doesn’t appear to have any spawns.
Another spot is the Factory administration building office on the third floor. You know the one. The main office with the safe in it; turn right and look into the open desk drawer. If you move to the left of that office, where the metal cabinets are and an older PC with the blue screen, check the top of the metal cabinet and the desk near it. Also, next door is breachable, and inside you’ll see a lot of furniture tossed around; look for the Project docs on the left, near or on top of the metal cabinet.
Then there’s one on the first floor of the same building. Find a door that can’t be breached or opened, go left and exit outside, then move to the window leading into that room and enter through it. Check the desks and cabinets.
New spots to check:
- Polikhim keycard room - beside the safe: Enter the Polikhim room and check the floor beside the safe on the right. Project documentation can spawn there.
- Gate 3 - workshop room: Check the small workshop or shipping-container-style room outside Gate 3. Look at the desk near the toolbox.
- Laboratory building - kitchen: Check the kitchen area below the laboratory.
- Scav Bunker - server racks: Check the server racks above the Scav Bunker.
- Gas Analyzer room - desk: Check the desktop beside the lamp inside the Gas Analyzer room.
- Gate 3 - shipping-container desk: Search the desk inside the shipping-container room near Gate 3.
The final spot is next to Gate 1; turn around and find the blue lockers.
Browse our hottest EFT Boosting services





Woods Document Locations
Possible types: Technical documentation and Test documentation
- Plane crash cockpit
-
- Go to the crashed aircraft.
- Enter the cockpit and inspect the interior.
-
- Checkpoint guard post near Sawmill
- Enter the small checkpoint cabin near the lumber mill.
- Check the top of the filing cabinet.
- Dead PMC near Scav House
- Find the damaged black SUV near Scav House.
- Look behind the vehicle for a dead PMC.
- Check the ground beside the body.
In Woods, the spawn spots for docs are in pretty low-traffic areas. The first one is the crashed plane’s cockpit. No player needs to go there unless they’re doing the first Jaeger and Mechanic tasks. The second spawn is in the USEC checkpoint, right after the Sawmill. It’s a medium traffic area because it's on the way to the pickup extract, and it contains the two metal cabinets and a few military cases. Check for docs on top of those two cabinets. The final spawn is in the open. When going from the checkpoint and towards the pickup extract, on the road leading to the scav house with the mounted LMG, you’ll see a burnt SUV and a dead body covered in tarp. Check the tarp. Sometimes a lootable dead USEC spawns by the SUV as well. It’s hard to miss, but be careful and check the area before looting there.
Woods has way more Document spawns than I originally expected. Most are around USEC Camp, EMERCOM, and the Sawmill areas.
- USEC Camp - white plastic chair: Search the white plastic chair inside the USEC Camp.
- Sniper rock - sleeping bags: Check the sleeping bags near the huge sniper rock.
- EMERCOM Camp - white container: Find the white container containing or surrounded by bodies and check beside the corpse inside.
- USEC checkpoint - portable toilet: Check around the portable toilet near the USEC checkpoint.
- Southern USEC Camp - green barrel: Look for the chair beside the green barrel.
- Southern USEC Camp - tent: Check beside the bed inside the southernmost tent.
- Northern USEC Camp - stretcher: Check beside the corpse and stretcher in the northern section of the camp.
- Old Sawmill - southern prefab shack: Enter the southern prefab building and inspect the floor.
- Old Sawmill - brick building: Enter the brick building and check the floor beside the bookshelf.
- Sawmill - lakeside shack: Check the drawer inside the small shack near the water.
- Sawmill - northern hut: Of the three small huts, enter the northernmost one and check the chair.
This makes Woods much better for Documents than my original three-spawn route suggested. USEC Camp alone is worth passing through if you're already on that side of the map.
Interchange Document Locations
Possible types: Blueprints, technical documentation, and Financial documents
- Office between OLI and Goshan
-
- Enter the small office located between OLI and Goshan.
- Find the smaller control-room-style office inside.
- Check the desk beside the stack of books.
- Financial documents were shown here.
-
- IDEA office
- Enter the IDEA office area.
- Check the desk immediately to the left.
- Search the tops of the other desks throughout the room.
- OLI - information desk near loading docks: Check the information or kiosk desk closest to the OLI loading docks.
- Computer rooms - desks: Blueprints and technical documentation have been reported inside Interchange's computer rooms, so check the desktops whenever you're passing through them.
When facing the GOSHAN grocery store, turn right and go inside the double doors that lead to the offices. Enter the smaller office with desks, and check those. Another spot is in the offices next to IDEA. The offices are on the left end of the store when you’re facing it. Search every desk there too. There are also reports of Documents in the newer exterior areas of Interchange, but I haven't seen enough exact spawn information to tell you which specific object to check yet.
Customs Document Locations
Possible types: Project documentation and Financial documents
The Big Red
- Two blue shacks beside Big Red
-
- Enter both blue shacks.
- Check the desks and the tops of the cabinets.
- Financial documents were shown in one of these spots.
-
- Blue shack opposite Big Red
- Cross to the other side of the warehouse.
- Enter the separate blue shack.
- Check the desk and the tops of the filing cabinets.
- Customs office inside Big Red
- Climb the stairs inside the warehouse.
- Unlock the office using the Customs office key.
- Enter the first room on the right.
- Search the tops of all the tables.
Crackhouse
- Second-floor library room
-
- Go upstairs and enter the first room ahead.
- Check the table, filing cabinets, and bookshelves.
- Inspect the gaps between individual books.
- Financial documents are between books on the far bookshelf in the corner.
-
Stronghold
- Couch area
-
- Enter the smaller interior area containing a couch.
- Check directly on top of the couch.
-
Old Gas Station
- Station interior
-
- Search the desk.
- Check the floor and shelves around the room.
-
Two-story Dorms
- Room described as the “guardhouse key room”
-
- Check the ledge or table near the room.
-
- Room 216
- Go upstairs and enter Room 216.
- Search the desk and cabinets.
Three-story Dorms
- Guard room
-
- Search the unlocked guard room.
- The exact spawn surface is not stated.
-
- Room 212
-
- Go upstairs to Room 212.
- Check the desk holding the computer.
- Three-story Dorms Room 304 - nightstand: Unlock Room 304 and check the nightstand for Financial documents.
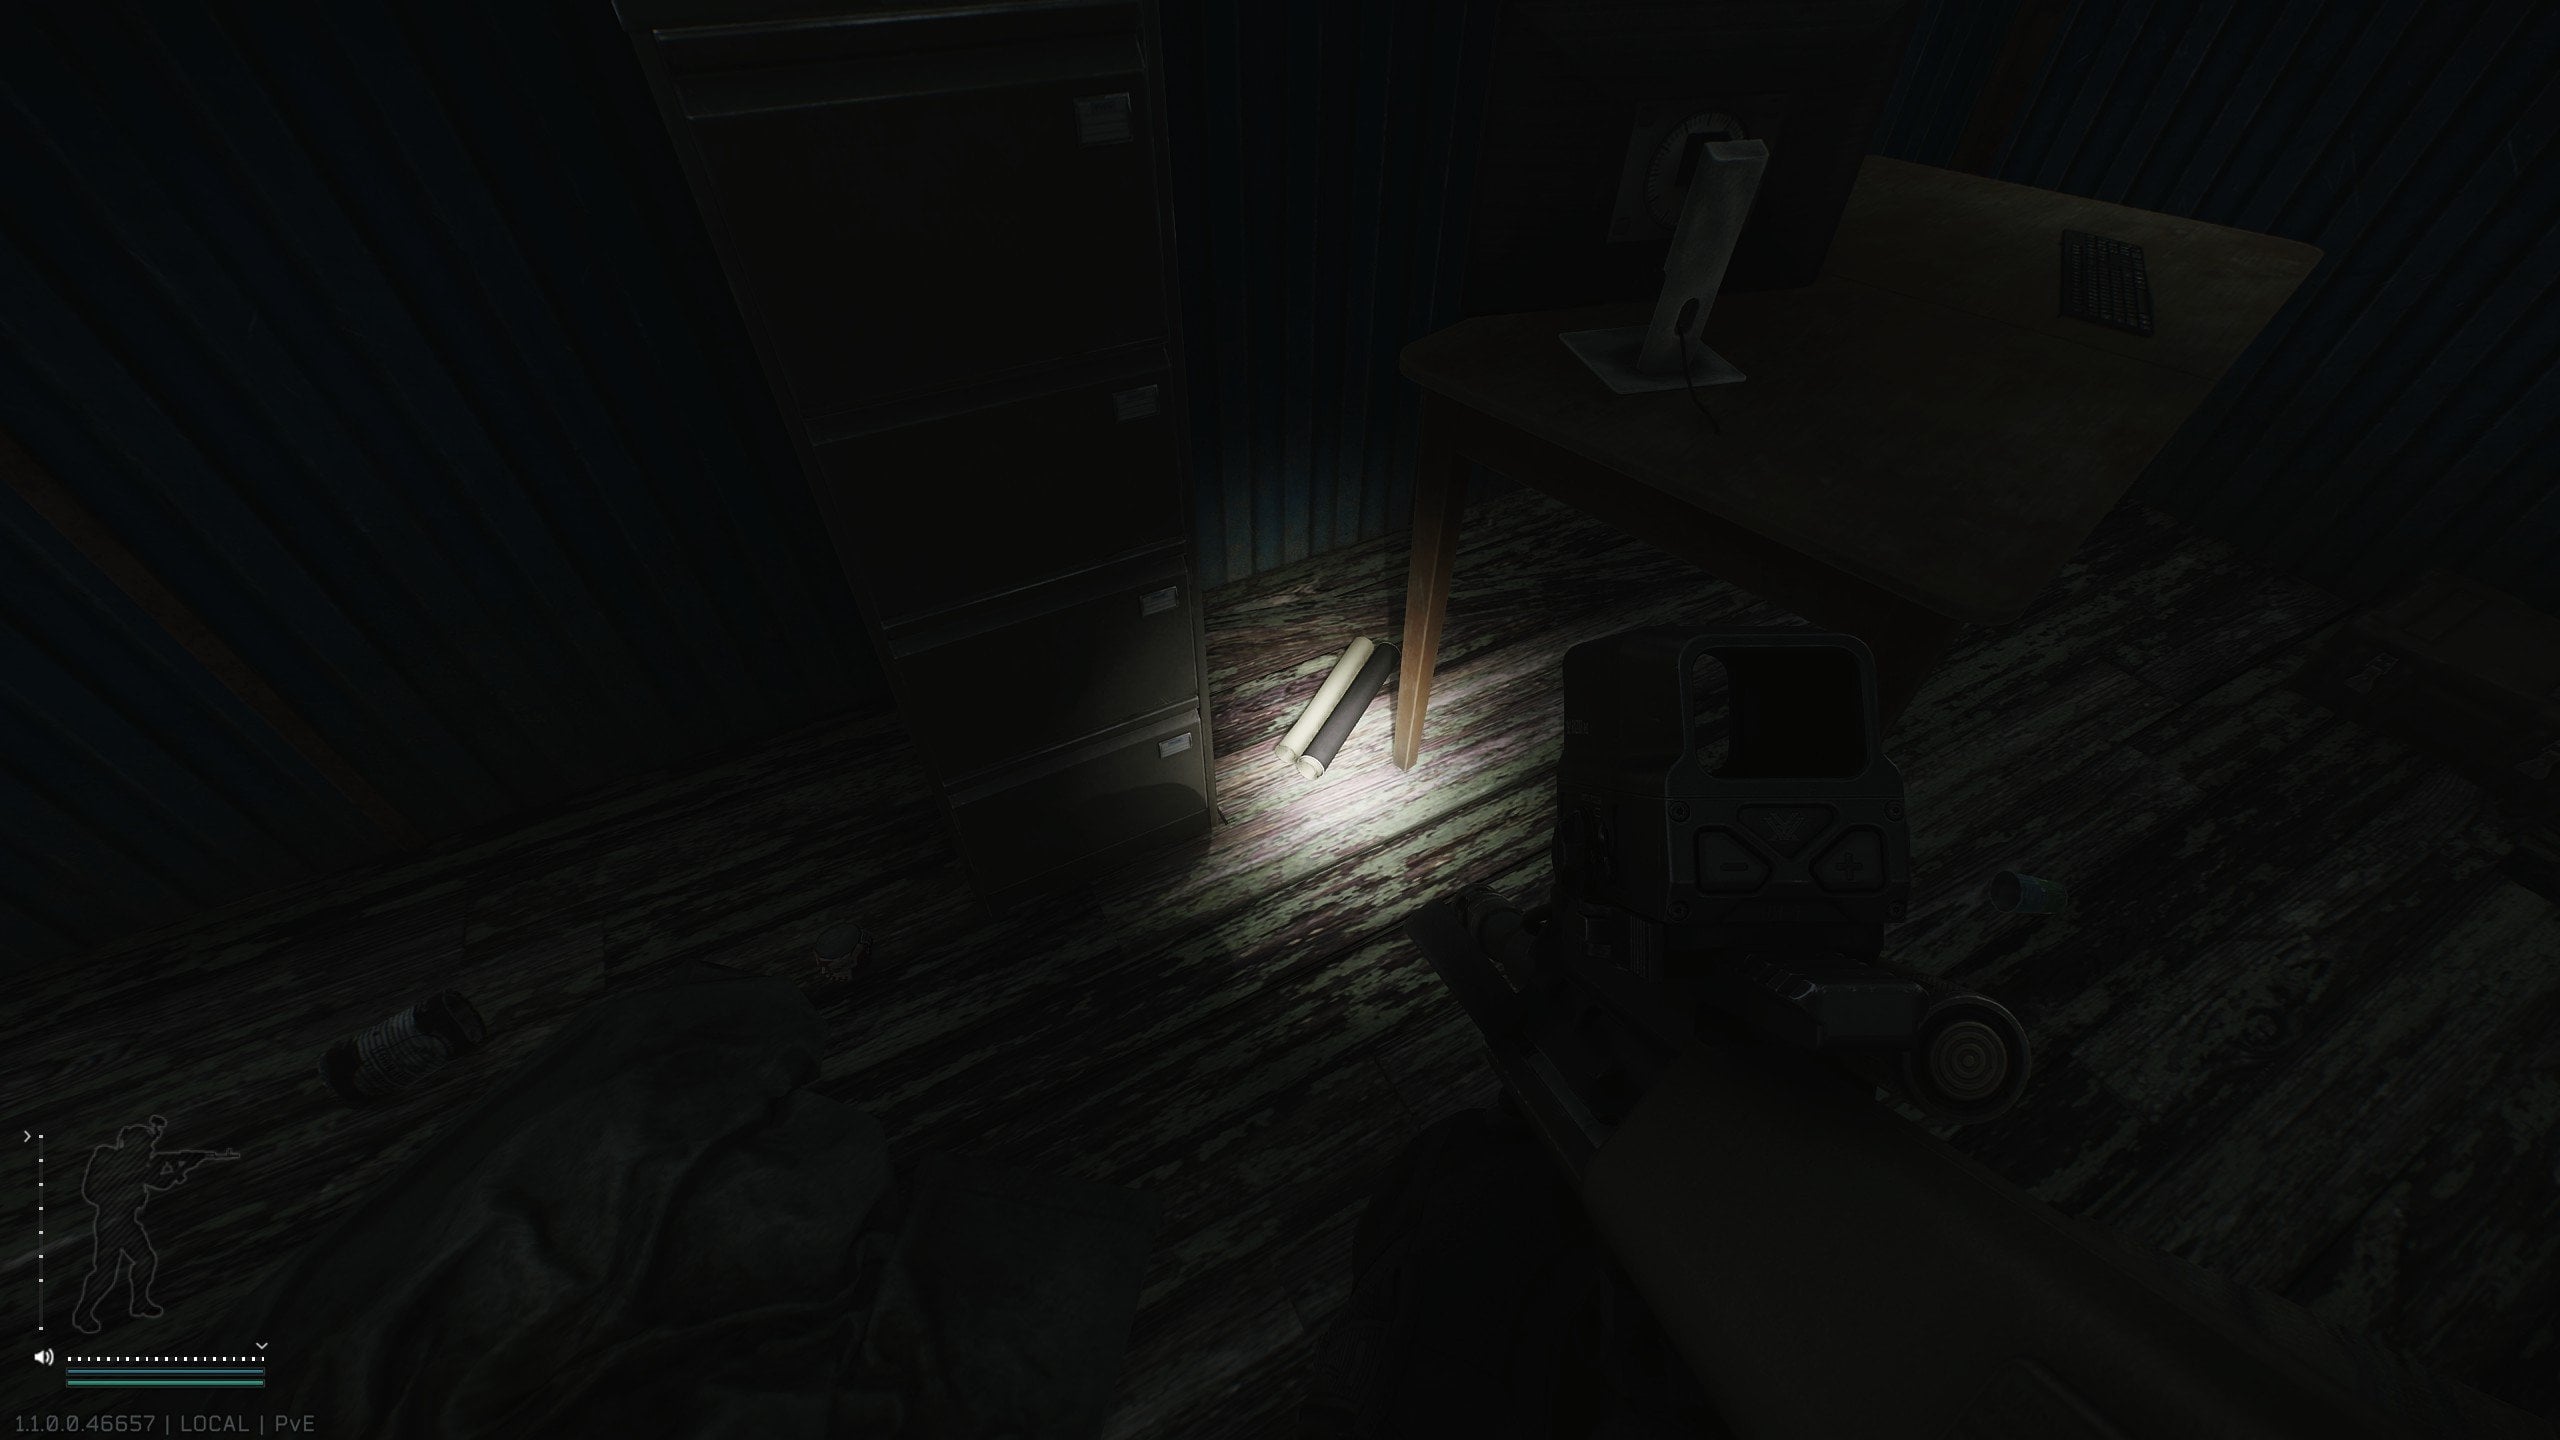
The easiest spawn to memorize is the one on the side of the Customs administration building, you know, the red one. On its territory, there are two blue shacks, one with a medical crate. Go there and check the desk, on top of the metal cabinet, and around the place. Do check both of those control points. Another spawn is in the administration offices, so you will need a key, which you’ll likely end up having anyway for one of the first tasks. Get in there and check every office desk in there.
The next spot is in the medical building behind the two factories where the scavs spawn. Its windows overlook the Scav base. Go to the second floor there and inspect every file cabinet, every desk, and bookshelf. Sometimes the documentation spawns tucked in between books, so keep your eyes open!
Another spawn is inside the Scav base, you know the one where the Goons spawn sometimes. If you know one of the tasks for unlocking the Ref trader is placing posters in the Scav base, that’s the room where you need to check. The one with beds and a couch. Check the couch.
One more spawn is in the Old Gas Station. Check on the floor and on the desk.
In the two-story dorm, there’s a spawn point right at the reception. But not inside, but outside. Then, in the same building, check room 216.
The reception in the three-story dorm also has a spawn point. Then check room 212 on the second floor.


You got -20% OFF 
The Lab Document Locations
Possible types: Medical documents and User documentation
- Meeting room above reception
-
- Go to the second floor above the reception area.
- Face the cat statues and turn right.
- Enter the unlocked room.
- Break the glass and check the oval meeting table.
-
- Green keycard medical area
- Search the medical area accessed with the green keycard.
- The creator did not enter it or identify an exact surface.
- Workstations opposite the red keycard room
- Face the cat statues and turn left toward the red keycard room.
- Search the workstations directly opposite its entrance.
- Check the tops of the desks and tables.
- Green Keycard area - bookshelf table: Enter Green and turn left. Check the table near the bookshelf.
- Residential Unit - first room on the right: Enter the Residential Unit and check the desk in the first room on your right.
- Residential Unit - rear room: Continue deeper into the Residential Unit and check the desk in the room at the back.
- Southern offices - table: Search the table in the southern office area.
- Parking area - table: Check the table around the parking section of the map.
- Violet/Red area - furthest PC desk: Search the furthest computer desk in the Violet and Red Keycard side of Labs.
- Black room area - large glass office: Check the large glass-office table close to Black Keycard.
- Black Keycard - nearby office: Search the office immediately beside the Black Keycard area.
In the Labs, possibly the worst place to hunt for docs. The simplest place to remember is the second floor above the reception. Look at the round table with the cat statues and turn right. The first door on the right will lead you into an office. Inside, there’ll be a meeting room with a larger desk and a laptop on it. Check that desk.
Now, go back and turn left this time from the cat statues. The first door on the left will need a red keycard. Inspect all tables there. Another place to check is next to the Infirmary, for which you’ll need a green keycard to access.
Shoreline Document Locations
Possible types: Technical documentation and Test documentation
- Pier - emergency beds: Check the emergency beds outside the main Pier building. Test documentation can spawn directly around this area.
- Pier building - counter: Enter the main building at the Pier and inspect the counter inside. Technical documentation can spawn on top of it.
- Weather Station - second floor: Enter the Weather Station and go upstairs. Check the exposed surfaces and desks on the second floor for Test documentation.
- Gas Station - office desk: Enter the Gas Station and make your way past the burning shelves. Check the desk inside the office on the right.
- Cottage - rear entrance desk: Go inside the Cottage and check the desk near the rear entrance.
- Smuggler's Base - southern warehouse: Enter the southern warehouse and look for the white chair along the northern wall. A Document can spawn on or around the chair.
There are also reports of Documents spawning elsewhere around Resort, Power Station, Pier, and Smuggler's Base. I haven't found precise enough spawn points for those yet, so I wouldn't run around checking every random desk there unless you're already passing through.
Lighthouse Document Locations
Possible types: Technical documentation and PMC personnel files
Lighthouse actually has quite a few Document spawns, although some of them require going directly into the Water Treatment Plant.
- Water Treatment Plant Building 2 - radio room: Enter Building 2 and find the radio room near the vehicle. PMC personnel files can spawn inside.
- Scav Village - red two-story house: Enter the red two-story house and go upstairs. Check the bedroom on the second floor.
- Water Treatment Plant - southeastern basin tent: Go to the southeastern water basin and check inside the tent for PMC personnel files.
- Blue Chalet - upstairs bedroom: Go upstairs inside the Blue Chalet and check the rounded table in the bedroom.
- Big Chalet - garage: Search the garage connected to the Big Chalet. Check the desks and exposed surfaces inside.
- Double Pier - right building: Go to the Double Pier and enter the building on the right. There are at least two Document spawn points inside, so check the desks and other exposed surfaces.
- Big Chalet - small side building: Check the small building beside the Big Chalet, near the grill area.
- Small Chalet - bedroom: Enter the Small Chalet and inspect the bedroom.
- Big Pier building - upper floor: Enter the large building at the Pier and go upstairs. Search the desks and tables on the upper floor.
- PMC House - upper floor: Enter the large house beside the main road and go upstairs. Check the right side of the upper floor.
- Small Chalet - tennis court tent: Go to the tennis court beside the Small Chalet and check inside the nearby tent.
- Water Treatment Plant Building 3: Search the interior of Building 3, especially the desks and work areas.
- Blue Chalet - wine room table: Check the table beside the wine room on the first floor. Technical documentation has reportedly been found here.
- Central western Pier - second floor: Enter the Pier building and go upstairs. Check the table drawer on the second floor.
- Water Treatment Plant Building 1 - western office: Go to the second floor of Building 1 and enter the western office. Check the desk for a possible Document spawn.
Lighthouse looks like one of the better maps for farming PMC personnel files simply because there are so many places to check in one raid. The downside is obvious: half of them are in areas where Rogues can turn your farming run into a loading-screen simulator.
Reserve Document Locations
Possible types: Project documentation and PMC personnel files
- D2 - room opposite the extraction: Reach the D2 extraction area and enter the room directly opposite the extract. Check the furniture and exposed surfaces inside.
- Black Bishop - underground desk: Go underground beneath Black Bishop and check the desk there for PMC personnel files.
- RB-KORL - shelving: Unlock RB-KORL and check the shelving immediately to your right. One reported spawn is on the second shelf from the bottom.
- RB-KORL - between shelves: Project documentation can also spawn between two shelving units inside the room.
- RB-KPRL - beside the weapon locker: Unlock RB-KPRL and look to the left of the blue weapon locker or safe. PMC personnel files can spawn there.
- RB-KPRL - window area: Check the surfaces around the window inside RB-KPRL as well.
- Command Center - D2 power switch desks: Check the floor near the desks beside the D2 power switch. This one is community-reported, so I would consider it a secondary spot rather than one of the main locations.
Reserve is another map where bringing the right keys is going to save a lot of wasted time. RB-KORL and RB-KPRL are especially worth checking because multiple Document spots have been reported inside them.
Streets of Tarkov Document Locations
Possible types: Financial documents and User documentation
- TerraGroup building - server room: Enter the TerraGroup building and check the server room. User documentation can spawn inside.
- Unity Credit Bank - desk: Search the desks inside Unity Credit Bank. User documentation has been found on one of them.
- Cardinal - corporate apartment: Enter the corporate apartment in the Cardinal Residential Complex and check the table inside.
- Y21 garage extraction activation room: Enter the room used to activate the Y21 garage extraction and check the table.
- Unity Credit Bank - financial documents: Financial documents can also spawn inside the Unity Credit Bank, making the location worth checking regardless of which of the two Streets Document types you need.
- TerraGroup reception - shelving: Check the shelving underneath and around the reception counter inside the TerraGroup office.
- TerraGroup security room - bookshelf: Enter the security room and inspect the bookshelf.
- TerraGroup security room - drawers: Check beside the drawers in the same security room for another possible spawn.
- Financial institution - second-floor meeting room: Go upstairs and check the desk inside the meeting room.
- Office behind Beluga - second floor: Enter the office building behind Beluga, go upstairs, and inspect the shelving.
There are also repeated reports of Documents around Concordia, LexOs, Cardinal, and the Klimov area. Those locations are still too vague for me to call them proper spawn points, though, so I'd focus on the spots above first.
Icebreaker Document Locations
Possible types: PMC personnel files and Test documentation
Icebreaker has received quite a few newly discovered Document spawns. Since the map has a more linear progression than most Tarkov locations, you can actually check several of them during the same run.
- Starting area - room opposite the green flare: Check the room across from the green flare shortly after starting the raid. PMC personnel files can spawn inside.
- Starting area - green flare: Test documentation can also spawn around or underneath the green flare itself.
- Level 1 Infirmary - Medical Office desk: Enter the Medical Office in the Infirmary and check the desk. PMC personnel files can spawn here.
- Level 1 Infirmary - medical area: Search the exposed surfaces throughout the medical area for Test documentation.
- Level 1 - Med Storage: Enter the Med Storage room and check the shelves and other exposed surfaces.
- Before the helipad - crate area: Before reaching the helipad, search around the nearby group of crates.
- Before the helipad - small left room: Enter the small room on the left and check the shelving at the back.
- Level 2 - drone room: Check the drone room before reaching the helipad.
- Under the helipad - secured room: Enter the secured or classified room beneath the helipad and inspect the shelving.
- Password room above the boss area - desk: Enter the password-locked room one level above the boss area and check underneath the desk. PMC personnel files can spawn there.
- Password room above the boss area - bookshelf: Check the bookshelf in the same room for Test documentation.
Considering how many of these spots are placed along the natural route through Icebreaker, I'd check every one you pass rather than going into the raid for a single specific spawn.
The Labyrinth Document Locations
Possible types: Medical documents and Blueprints and technical documentation
- Prototype Weapons meeting room - wooden crate: Enter the meeting room in the Prototype Weapons area and check the wooden crate.
- Prototype Weapons meeting room - scientist: Check beside the dead scientist inside the same meeting room.
- Observation Room - scientist: Check beside the scientist's body near the Observation Room.
- Central tractor area - scientist: Find the dead scientist around the central tractor area and inspect the ground beside the body.
- Observation Room key door - dead worker: Check beside the dead worker near the Observation Room key door. Medical documents can spawn around the body.
The Labyrinth seems to follow a pretty obvious pattern: if you see a dead TerraGroup employee or scientist in an important room, check the ground around the body before moving on.
Tips for Farming Battle Pass Documentation in Espace from Tarkov
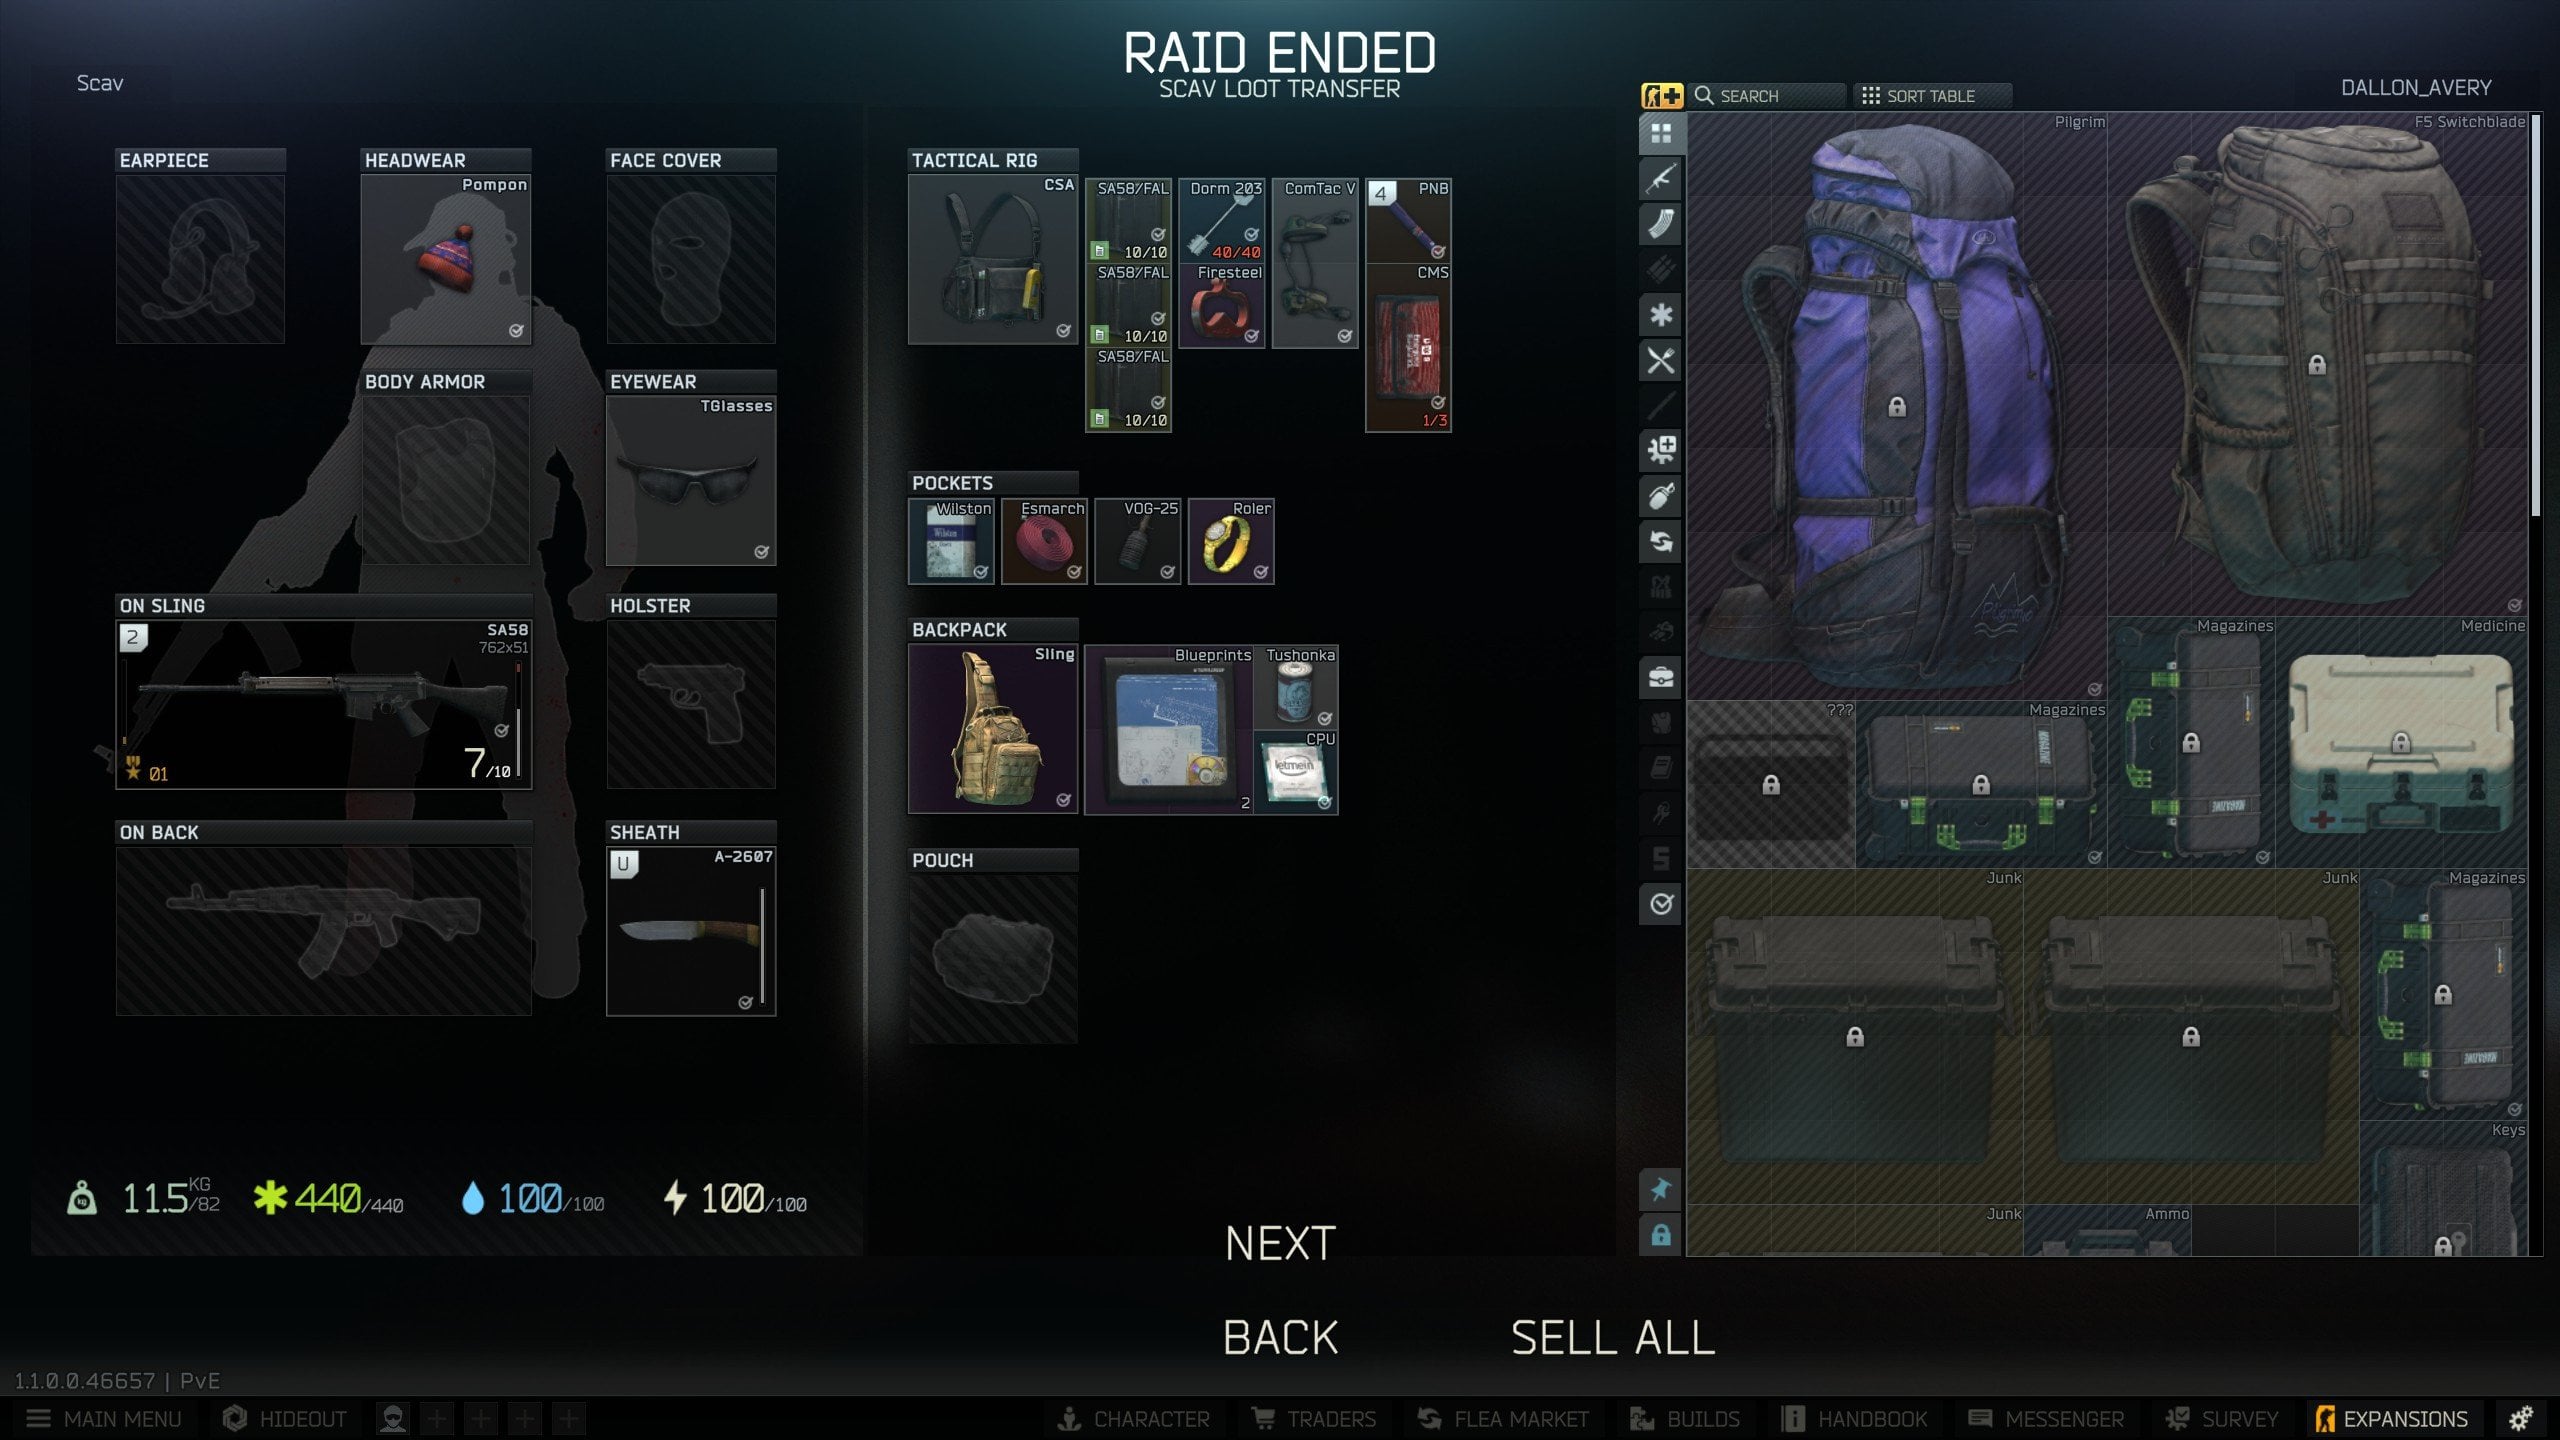
Now, I know I’ve already sprinkled some advice here and there in this guide, but I want to put them all together in one section to help you memorize them:
- Watch the daily cap
- You can stack the same docs in your inventory and inside your stash
- It’s possible to find more than one doc in the same raid, so check all possible spots!
- Make sure to make some space in your secure container (even Alpha) to ensure safe extraction no matter what!
- I recommend farming docs in PvE mode if you have access to it.
- You CAN USE SCAVS to find documentation. Do that instead of risking your PMC.
- Farm docs in smaller maps first: Ground Zero and Factory are the best (beware of Tagila!). Then go to Customs, Interchange, Woods, etc.
- Some spawn points are behind locked doors; make sure you have the keys!
- In the battle pass, you must unlock all rewards on the current page before being able to claim the rewards from the next page. There are 12 pages in total.
- You don’t need to buy Classified Documents to unlock all rewards in the battle pass.
My ideal approach for farming these docs would be using PvE mode to find the first 10, and then the other 15 using mainly runs as a Scav. Enjoy!
Changelog
August 9, 2026: added document spawn spots for missing locations: Shoreline, Lighthouse ,Reserve, Streets of Tarkov, Icebreaker ,The Labyrinth. Added new spawn spots for locations: ground zero, woods, factory, interchange, customs, and labs.
Check out more Escape From Tarkov guides:
- Best Modifiers in Escape from Tarkov
- When is the Next Wipe?
- Icebreaker Map Guide
- Questing guide
- Prestige guide
- Promo Codes
- Weapons Tier list
F.A.Q.
How does Tarkov Battle Pass work?
You unlock rewards by finding and submitting TerraGroup Documents instead of earning Battle Pass XP. Each reward requires a specific combination and number of Document types.
Is Tarkov Battle Pass free?
Yes, the Kord Breach Battle Pass is free and has no premium track. You can still buy Classified Documents to speed up progression.
Where to find Battle Pass Documents in EFT?
Documents spawn at fixed points on specific maps, usually on desks, cabinets, benches, shelves, or similar surfaces. Each Document description lists the maps where that type can appear.
Best map for Battle Pass Documents in EFT?
Ground Zero and Factory are the best starting maps because they are small and have several known spawns. Customs is another good option once you learn its routes.
What are Classified Documents in EFT?
Classified Documents are universal Documents that can replace any regular type. They are bought through the Expansion Hub with real money.
Can Scavs find Battle Pass Documents in EFT?
Yes, Documents can be found and extracted during Scav raids. This lets you farm them without risking your PMC gear.
Can Documents go in a secure container in EFT?
Yes, Battle Pass Documents can be placed inside a secure container. Make room before the raid so you can keep them even if your PMC dies.
What is the daily Document limit in Escape from Tarkov?
- PvP Zone: 15
- PvE Zone: 10
- PvP Season: 25
The current limit is shown at the bottom of the Battle Pass page.
Do Documents spawn in Escape from Tarkov PvE?
Yes, Documents spawn in PvE raids. PvE has a daily limit of 10 Documents.
Can multiple Documents spawn in one raid in Escape from Tarkov?
Yes, you can find more than one Document during the same raid. Documents of the same type can also be stacked in your inventory.
Do Battle Pass rewards carry over in Escape from Tarkov?
Unlocked rewards remain after the season ends, a profile reset, or Prestige. Documents, Battle Pass currency, and Black Division crates do not carry over.
Which maps have Battle Pass Documents in Escape from Tarkov?
- Ground Zero
- Factory
- Woods
- Interchange
- Customs
- The Lab
- Shoreline
- Lighthouse
- Reserve
- Streets of Tarkov
- Icebreaker
- The Labyrinth
Different Document types appear on different groups of three maps.