 Dallon Avery
Escape from Tarkov Icebreaker Map Guide Quick Overview:
- Icebreaker is the first map in EFT that takes place outside of Tarkov City
- To unlock the map, you need to complete two questlines: Boreas and Hangover
- Icebreaker is mainly a PvE-focused map for 1-3 players
- There are two bosses with guards - The Wedge and Knight
- There’s only one extraction - the Helicopter, called by a green signal flare
- Entering the map costs 400k rubles, and extraction costs 3000 euros
Want to get the loot from the new map without risking loosing yours? Buy Tarkov Icebreaker Raid service at Skycoach and let professional EFT players raid for you! Enjoy millions worth of loot and quest progress!

Read closely 
Browse our hottest EFT Boosting services


The EFT Icebreaker Map Overview
I couldn’t believe the map like Icebreaker would be added to Tarkov. I mean, sure, it was teased in the past, but for some reason, I thought it was still too far away from its release.
Icebreaker is the 13th map in Escape From Tarkov and the first map ever in the game that is set not in Tarkov or the Norvinsk Region. As is very evident from the promos, you’ll be traveling Boreas, a nuclear-powered icebreaker ship owned by Paradigm Shipping, a logistics corporation. The destination and cargo on board are unknown. By all means and purposes, this is a ghost ship stranded somewhere in the ice of the Gulf of Finland. But, needless to say, Paradigm Shipping and TerraGroup are in cahoots, and it's up to us to find out what this ship has to do with whatever is going on in Tarkov.
The icebreaker class ships are massive, and Boreas is no exception - it has a total of 14 explorable floors or areas spanning from the Lower Automation to the Bridge Roof at the very top. Decks vary in size and purpose. I’ll go over each deck separately in my map layout section.
A really cool thing about this map is the fact that it's designed for PvE gameplay and not just another PvP slaughterfest. You’re given 50 minutes on this raid. Despite being mostly claustrophobic in layout, much like the Labyrinth or the Factory, this map is made for a solo playthrough or a single squad of 3 players. Although that doesn’t make it any less scary because it is populated by the two most geared enemy factions - the Rogues and the Black Division.
Lastly, Icebreaker hosts a bunch of quests and an NPC, the last surviving scientist (called Survivor in the game) on the ship. You will communicate with him through an intercom on level 1, near the east side of the ship.
How to Unlock The Icebreaker Map
Unlocking the map takes a lot of effort on our end, mainly involving completing a questline. To unlock the questline, you need to either get your hands on a Paradigm Shipping poster, which drops from Knight boss (one of the Goons), or catch the distress signal through the Hideout radio system at Intelligence Center level 3. I will not unload the entirety of the Boreas questline here, but here are the main steps:
- Talk to Mechanic about the distress signal
- Repair the equipment under the cellular tower on Woods with a Toolset
- Find the Paradigm Shipping directive in the Lighthouse freight yard
- Talk to Mechanic about Boreas
- Arrange transport through Prapor
- Complete the required transport branch based on your earlier story choices
- Talk to the BTR Driver about alternative transport
- Finish the BTR Driver branch tied to your quest progress
- Return to Mechanic
- Board the smuggler hovercraft on Shoreline
- Pay 400,000 Roubles to transit to Icebreaker
Paradigm Shipping poster can be purchased on the Flea Market. Depending on the choices made in other quests, you’ll have branching objectives in this one, specifically:
- If you gave the Armored case to Prapor during Falling Skies, they need to hand over AMG-10 hydraulic fluid.
- If you kept the Armored case, they must hand over 3 found-in-raid Military power filters and AMG-10 hydraulic fluid.
- If Falling Skies is not completed, you must eliminate 30 targets on Reserve, launch a yellow flare at the Woods transit on Reserve, then hand over AMG-10 hydraulic fluid.
After that, the BTR Driver branch also changes. Players who completed The Price of Independence get a shorter route. Players who completed Choose Your Friends Wisely must hand over 200 rounds of 7.62x54mm R BT gzh, find and burn Skier’s reports on Customs, and eliminate 15 targets in smuggler territories. Players who completed neither route only need 10 kills at smuggler territories.
The rest of the questline takes you to the ship where you’ll continue to complete various objectives.
How to Access Icebreaker
After the last step, whatever it may be for you, you tell Mechanic that you found transport to the icebreaker. This unlocks the transit option to the new map from Shoreline, where you need to board the hovercraft. You’ll need
- 400k rubles to pay for the passage to Boreas
- A green signal flare to call the chopper for extraction
- 3000 euros to pay for the extraction
More on what to bring with you in the loadout section of my guide. To make the map available in the map selection screen from the menu, you need to finish the Hangover quest, which is the last quest from the BTR driver (currently).
Map Layout
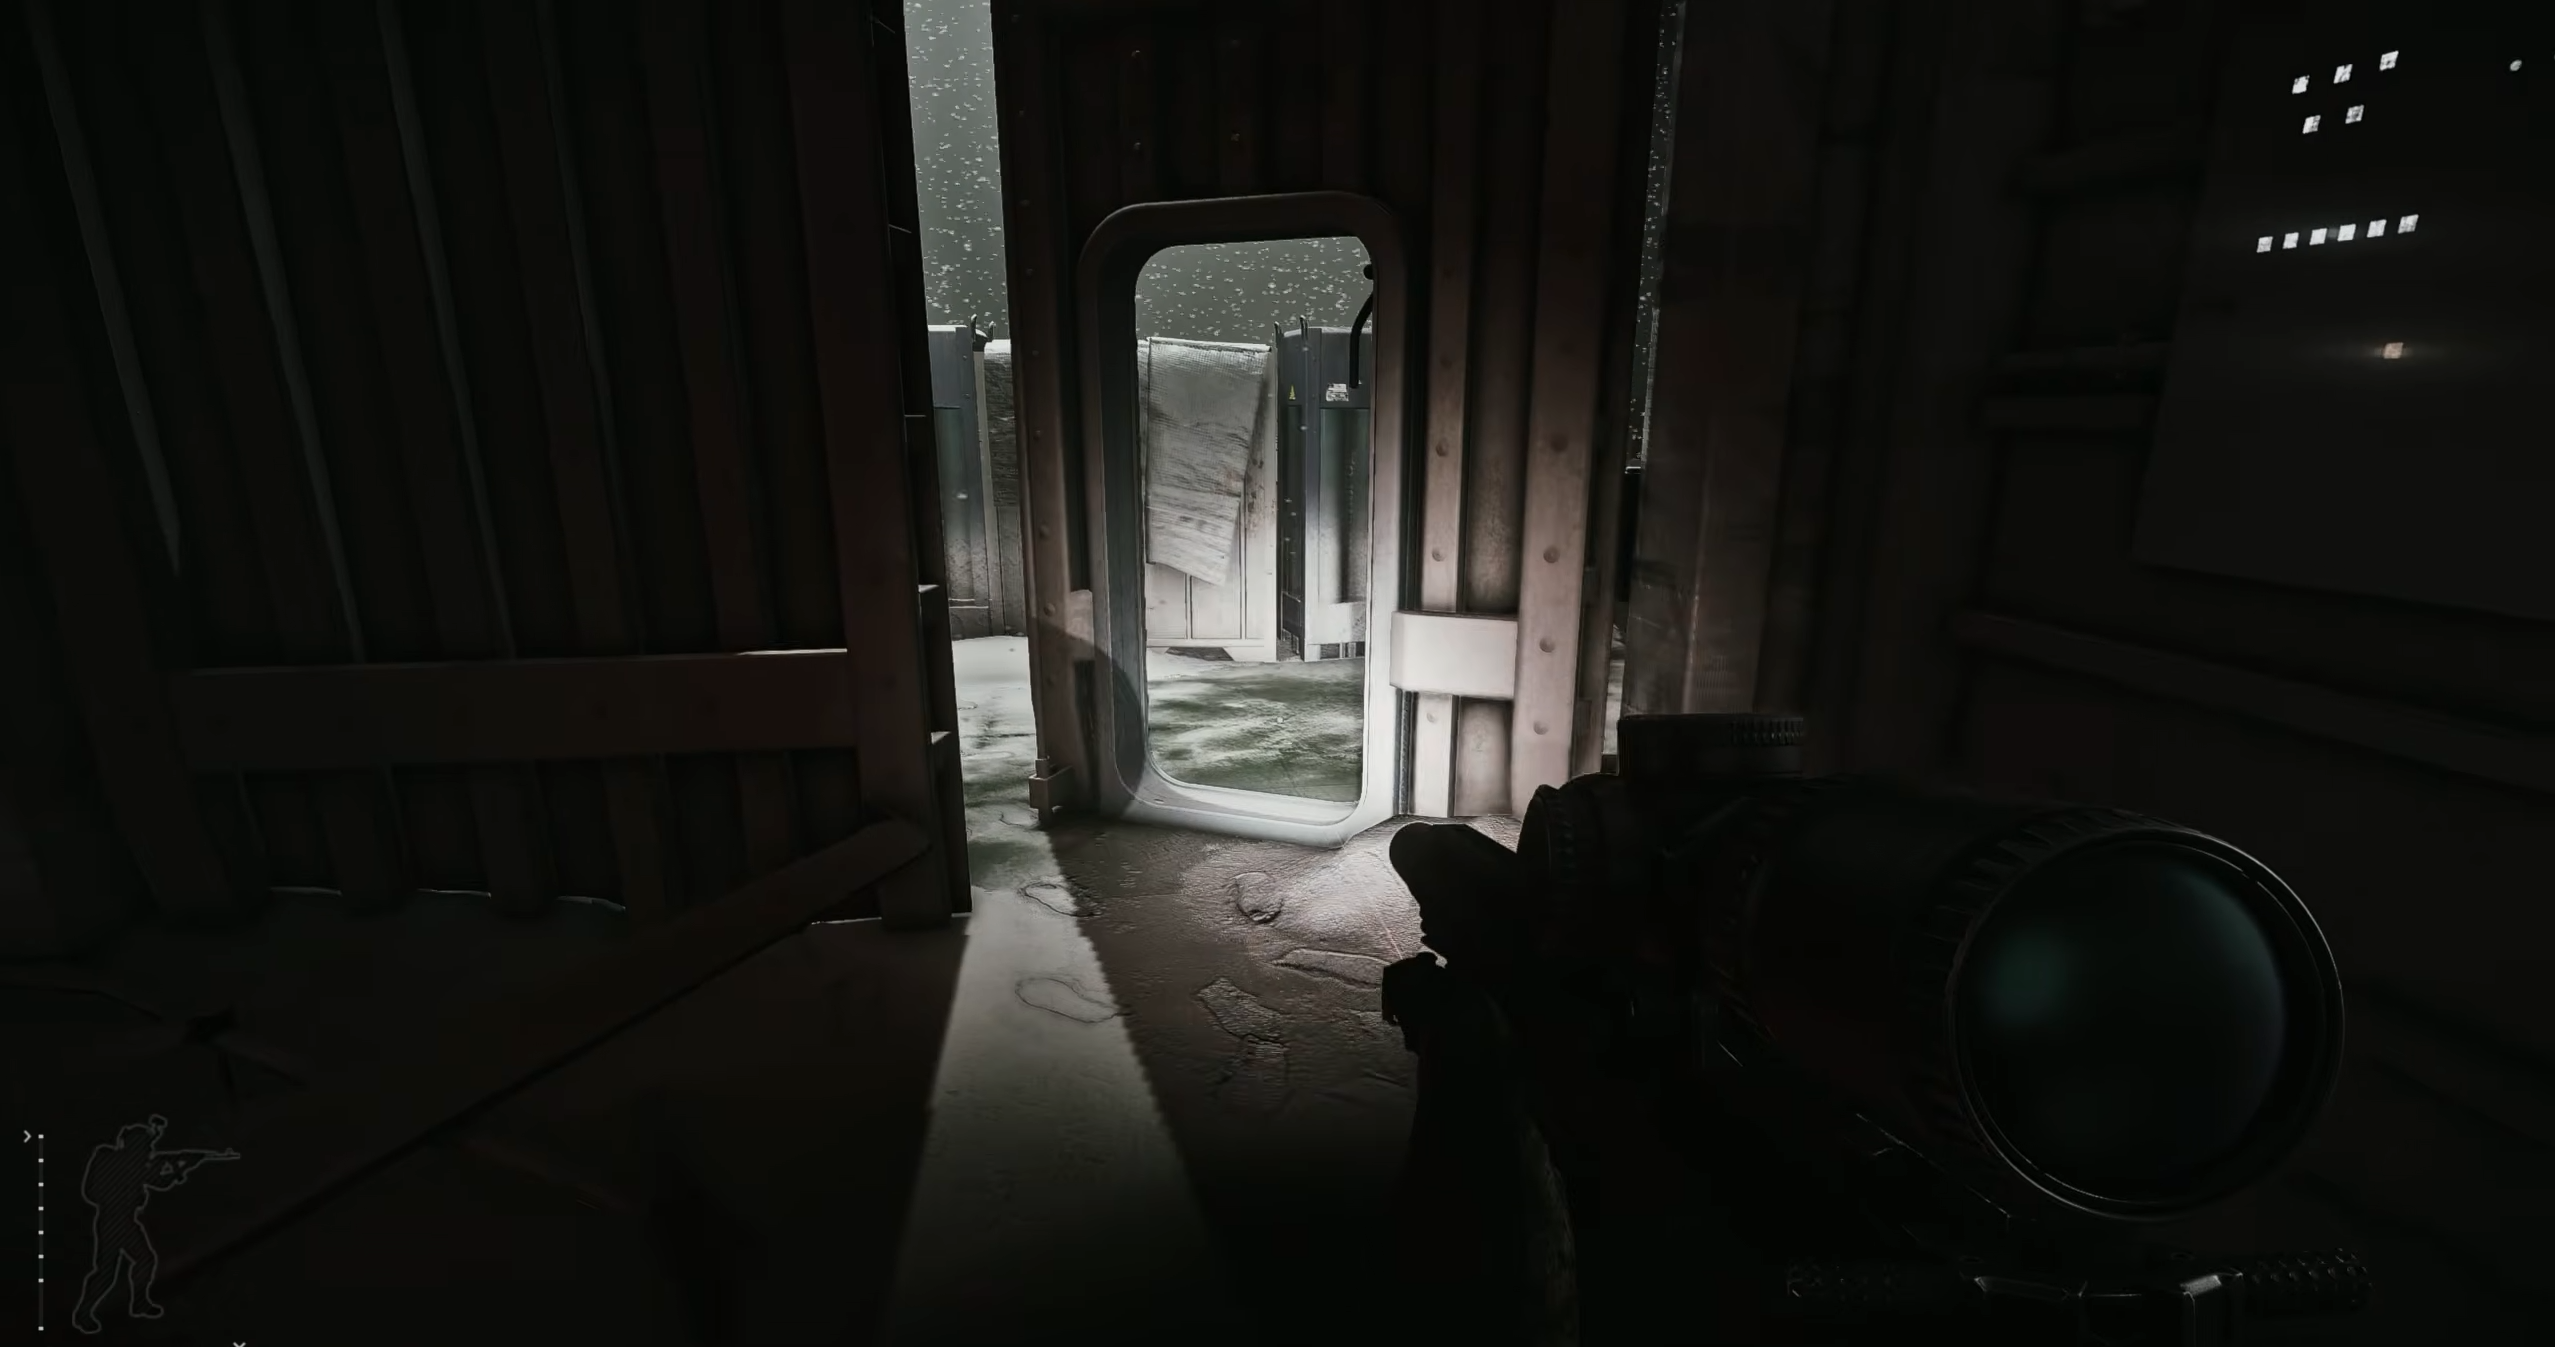
Boreas is a ship with multiple decks, going from lower decks with various machinery and engine bays to the top decks. Inside, you’ll encounter narrow corridors, sealed doors, and some open areas outside. For the majority of your walkthrough from the spawn to the extraction, you’ll be progressing upward from lower to higher decks. Here’s the breakdown of the floors:
|
Level |
Area |
Main Use |
|
10 |
Bridge Roof |
Final upper section and hatch route |
|
9 |
Bridge |
Captain's objective and high-value loot |
|
8 |
Stairs |
Blocked route marker |
|
7 |
Offices |
C-1 compartment and upper quest route |
|
6 |
Accommodation |
Upper superstructure route |
|
5 |
Accommodation |
Crew quarters path |
|
4 |
Accommodation |
Mid superstructure route |
|
3 |
Gym and Canteen |
The Wedge boss area and gas torch spawn |
|
2 |
Helipad |
Helicopter extraction zone |
|
1 |
Infirmary |
Scientist intercom and engine room keycard spawn |
|
0 |
Storage and Security |
Knight area and lower route access |
|
-1 |
Fuel Pumps |
Lower ship route |
|
-2 |
Engine Room |
Black Division fight and engine route |
|
-3 |
Lower Automation |
Lowest marked ship level |
A huge shoutout to RE3MR.com, responsible for the creation of the map, and everyone who contributed to this work. According to this map and deck layout, there’s only one PMC spawn point, outside the infirmary on deck 1. The extraction is on deck 2, but to get there you’ll have to make your way through the engine room and some other parts of the ship. You’re given 50 minutes to explore the ship, which is enough if you’re going straight for the extraction. I’ll explain more in my walkthrough section.
Access Codes and Keys
On your way, you’ll encounter a bunch of consoles and locked doors that require keycards, a few special items and a few codes. Here’s the list:
|
Icon |
Item |
What It’s For |
How to Get It |
|
|
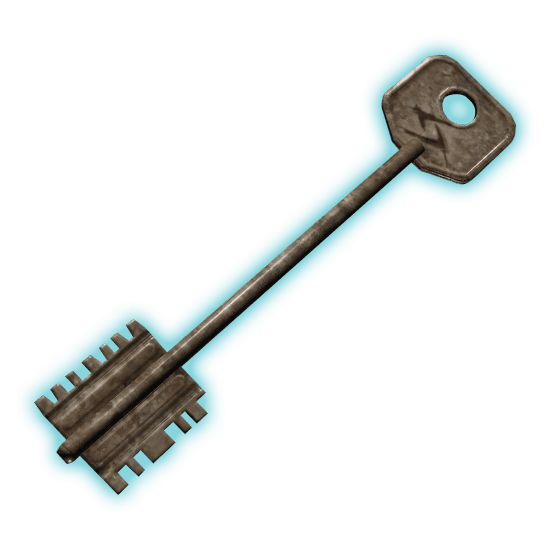
Boreas crew quarters keycard |
Opens multiple crew rooms on Icebreaker, including rooms on levels 3, 4, and 5. It is also required for The Ticket story chapter. |
Found on Knight. It can also spawn in the level 3 canteen on a table or couch, and in the level 3 gym area on nearby tables. |
|
|
Boreas engine room keycard |
Opens the engine room door on level 0. It is required for Boreas' story progression. |
Found on the body on level 0 of Icebreaker. It can spawn in the body’s left hand, right hand, or next to the head. |
|
|
Compartment C-1 keycard |
Opens the server room on level 7. It is required for Boreas' story progression and gives access to electronics loot. |
Found in the left hand of a captain on level 9 of Icebreaker. |
|
|
Compartment C-3 keycard |
Opens the laboratory on level 1. It is required for The Ticket story chapter. |
Obtained once while progressing through the Boreas story chapter. The lab door cannot be opened if the player entered the raid without the required Boreas progress. |
|
|
SZ-1 explosive charge |
Opens the chained door on level 3 of Icebreaker. |
Bought from Prapor LL1 after progressing through the Boreas story chapter. It is placed in a special item slot and persists on death when stored there. |
|
|
BBQ-S43 gas torch |
Opens the hatch on level 10 by thawing it. Needed to progress the quest |
Found in the kitchen on level 3 of Icebreaker. It can spawn on the countertop next to the lockers, inside a green crate on that countertop, or inside a wooden crate on a serving trolley. |
|
|
RSP-30 reactive signal cartridge |
Used to call the Helicopter extraction with a green flare. |
Bring a green flare into the raid, or loot one from Icebreaker if you find a flare spawn during the run. |
|
- |
Standard security keypad |
Found Deck 6 Accommodation. Opens access to Deck 7 Offices |
Code: 312220 |
|
- |
Security keypad Accommodation 4 |
Access to Accommodation on deck 5 |
Check the Bulletin Board in the shack on the lower level of the engine room. |


One more thing: sealed doors that you come across can be sealed again to cut off access. Could come in handy when you’re clearing the decks to make sure that you don’t get shot in the back.
Enemies and Bosses
The two enemy factions that you will encounter here are the Rogues led by none other than Knight and Black Division dudes led by the Wedge, the new boss in the game. I wouldn’t dare to count the total number of enemies on the map, but judging by several livestreams I’ve watched, the count was about 31 - 33 enemies in solo runs and about 40 for squad runs, including the two bosses. Here’s what you can expect:
|
Location |
How Many |
Who |
|
Infirmary, level 1 |
2 to 3 enemies, plus Knight |
Rogues and Knight |
|
Storage, level 0 |
Variable, usually 1 to 2 possible enemies |
Rogues |
|
Engine room, levels -2, -1 |
6 solo, around 8 in a team |
Black Division |
|
Helipad, level 2 |
3 solo, 4 in a team |
Black Division |
|
Below the helipad, level 1 |
6 solo, around 8 to 9 in a team |
Black Division |
|
Leading up to Gym Canteen, level 3 |
Around 3 |
Black Division |
|
Crew quarters / Gym Canteen boss area |
4 total solo, 5 total in a team |
The Wedge and his guards |
|
Upper deck after the 312220 keypad door |
5 enemies |
Black Division |
Enemies are mostly equipped with weapons that use 5.56 ammo, Lvl 5 armor, helmets, and high-end night vision goggles. Black Division also comes equipped with gas masks, which are useful because they like throwing tear gas grenades. There have been some bugfixes already, some of them increased the number of enemies that spawn, so these numbers are very rounded.
The Best Loadout for Icebreaker
Speaking of ammo and weapons, I have a few suggestions on what you should bring. Consider this section also a tips and tricks section, as most of the tips and tricks on this map have to do with the stuff that you bring with you.
|
Slot |
Item |
Why |
|
Primary weapon |
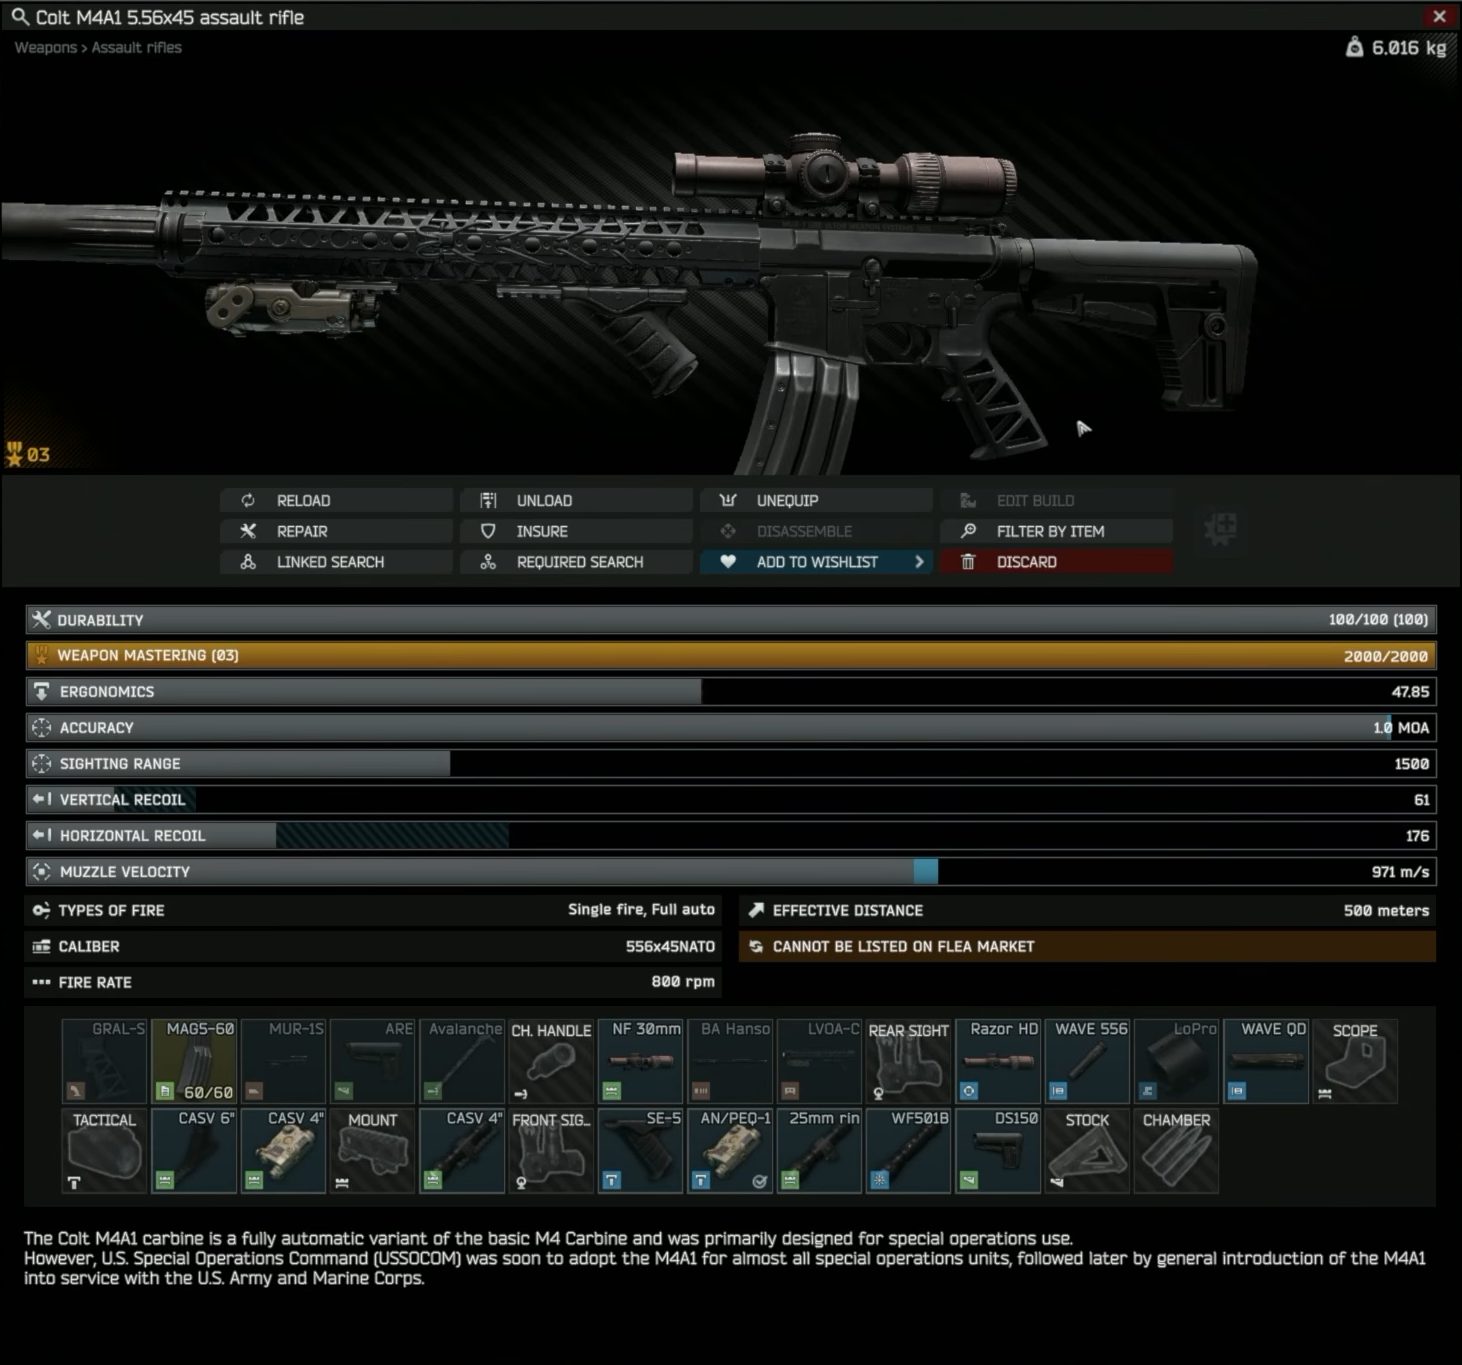
HK, M4, MCX, G36, or another reliable 5.56 rifle |
Black Division often drops usable 5.56 ammo and magazines, so these weapons are easier to keep running during long Icebreaker raids. |
|
Ammo |
M856A1, M855A1, M995, or M80/M81 for 7.62 rifles |
One-shot BD enemies in their helmets. M855A1 and M995 can also be looted from Black Division. |
|
Magazines |
Several loaded magazines, ideally 300 to 400 rounds for solo runs |
Reloading ammo manually wastes too much time. It’s too dangerous. |
|
HE Grenades |
M67s, VOGs, or other explosive grenades |
They force Rogues and Black Division out of cover, especially in the engine room and areas around the helipad. |
|
Smoke grenades |
M18s |
Prevents AI from pushing and gives you breathing space. |
|
Flashlight attachments |
Two good flashlights or one high-quality dedicated flashlight |
Helps in dark interiors and smoke-heavy fights. Dedicated flashlights give better visibility than a laser combo. |
|
Laser |
AN/PEQ or another laser module |
Useful if you run a dedicated flashlight and still want close-range aiming support. |
|
Optic |
LPVO, red dot, or holographic sight |
Any sight you like will do |
|
Multi-tool |
Multi-tool |
Will be useful for Icebreaker progression. |
|
Mask |
Gas mask |
Black Division can use tear gas. Also some areas have radiation |
|
Night vision |
Any good-quality NVGs |
Helpful in darker areas, but you can also loot them from Black Division. |
|
Stims |
Propital, green stim, Zagustin, Perfotoran, MULE |
Stims help you survive long fights, stop bleeds, recover faster, and carry more loot if needed. |
|
Meds |
IFAK, AFAK, Salewa, CMS or Surv kit, painkillers, Golden Star Balm |
Fast meds are valuable during repeated fights. A CMS or Surv kit is important because limb damage is common. |
|
Containers |
Empty stim case |
Icebreaker has many stim spawns, so this helps recover raid cost even if the run gets messy. |
|
Case |
Docs case with keycards and money |
Keeps keycards and extraction cash organized and safer. |
|
Extraction money |
Around 3,000 Euros |
Helicopter extraction costs 3000 Euros, but bringing extra avoids problems if the fee varies. |
|
Extraction item |
Green flare |
Needed to call the Helicopter extract. You can bring one or find one on the map. |
|
Food and drinks |
Any compact food and water |
Useful for full clears, since long Icebreaker runs can drain energy and hydration. |
Because of how AI works in this game, you can use it to your advantage on this map specifically. I’m talking about the cheesy tactic of throwing an HE ‘nade, which automatically makes the enemies turn around and run, which gives you the window to kill them. I saw some people use flash grenades to stop the enemies from shooting, but all you really need are smokes for separating areas in a similar way to doors (in a sense) and HE grenades for that behavior trick.
Most of the time, you’ll be able to peek around a corner and see parts of the enemy who aren’t moving. Then you would usually either go for a kill or use the ‘nade trick in long corridors.
Browse our hottest EFT Boosting services


EFT Icebreaker Map Solo Walkthrough
In this section, I’ll give you a rundown of the map from spawn to extraction with the added elimination of Wedge, who is an optional boss and is not required for extraction alone. He does stand on the way to the ship’s bridge and the captain…
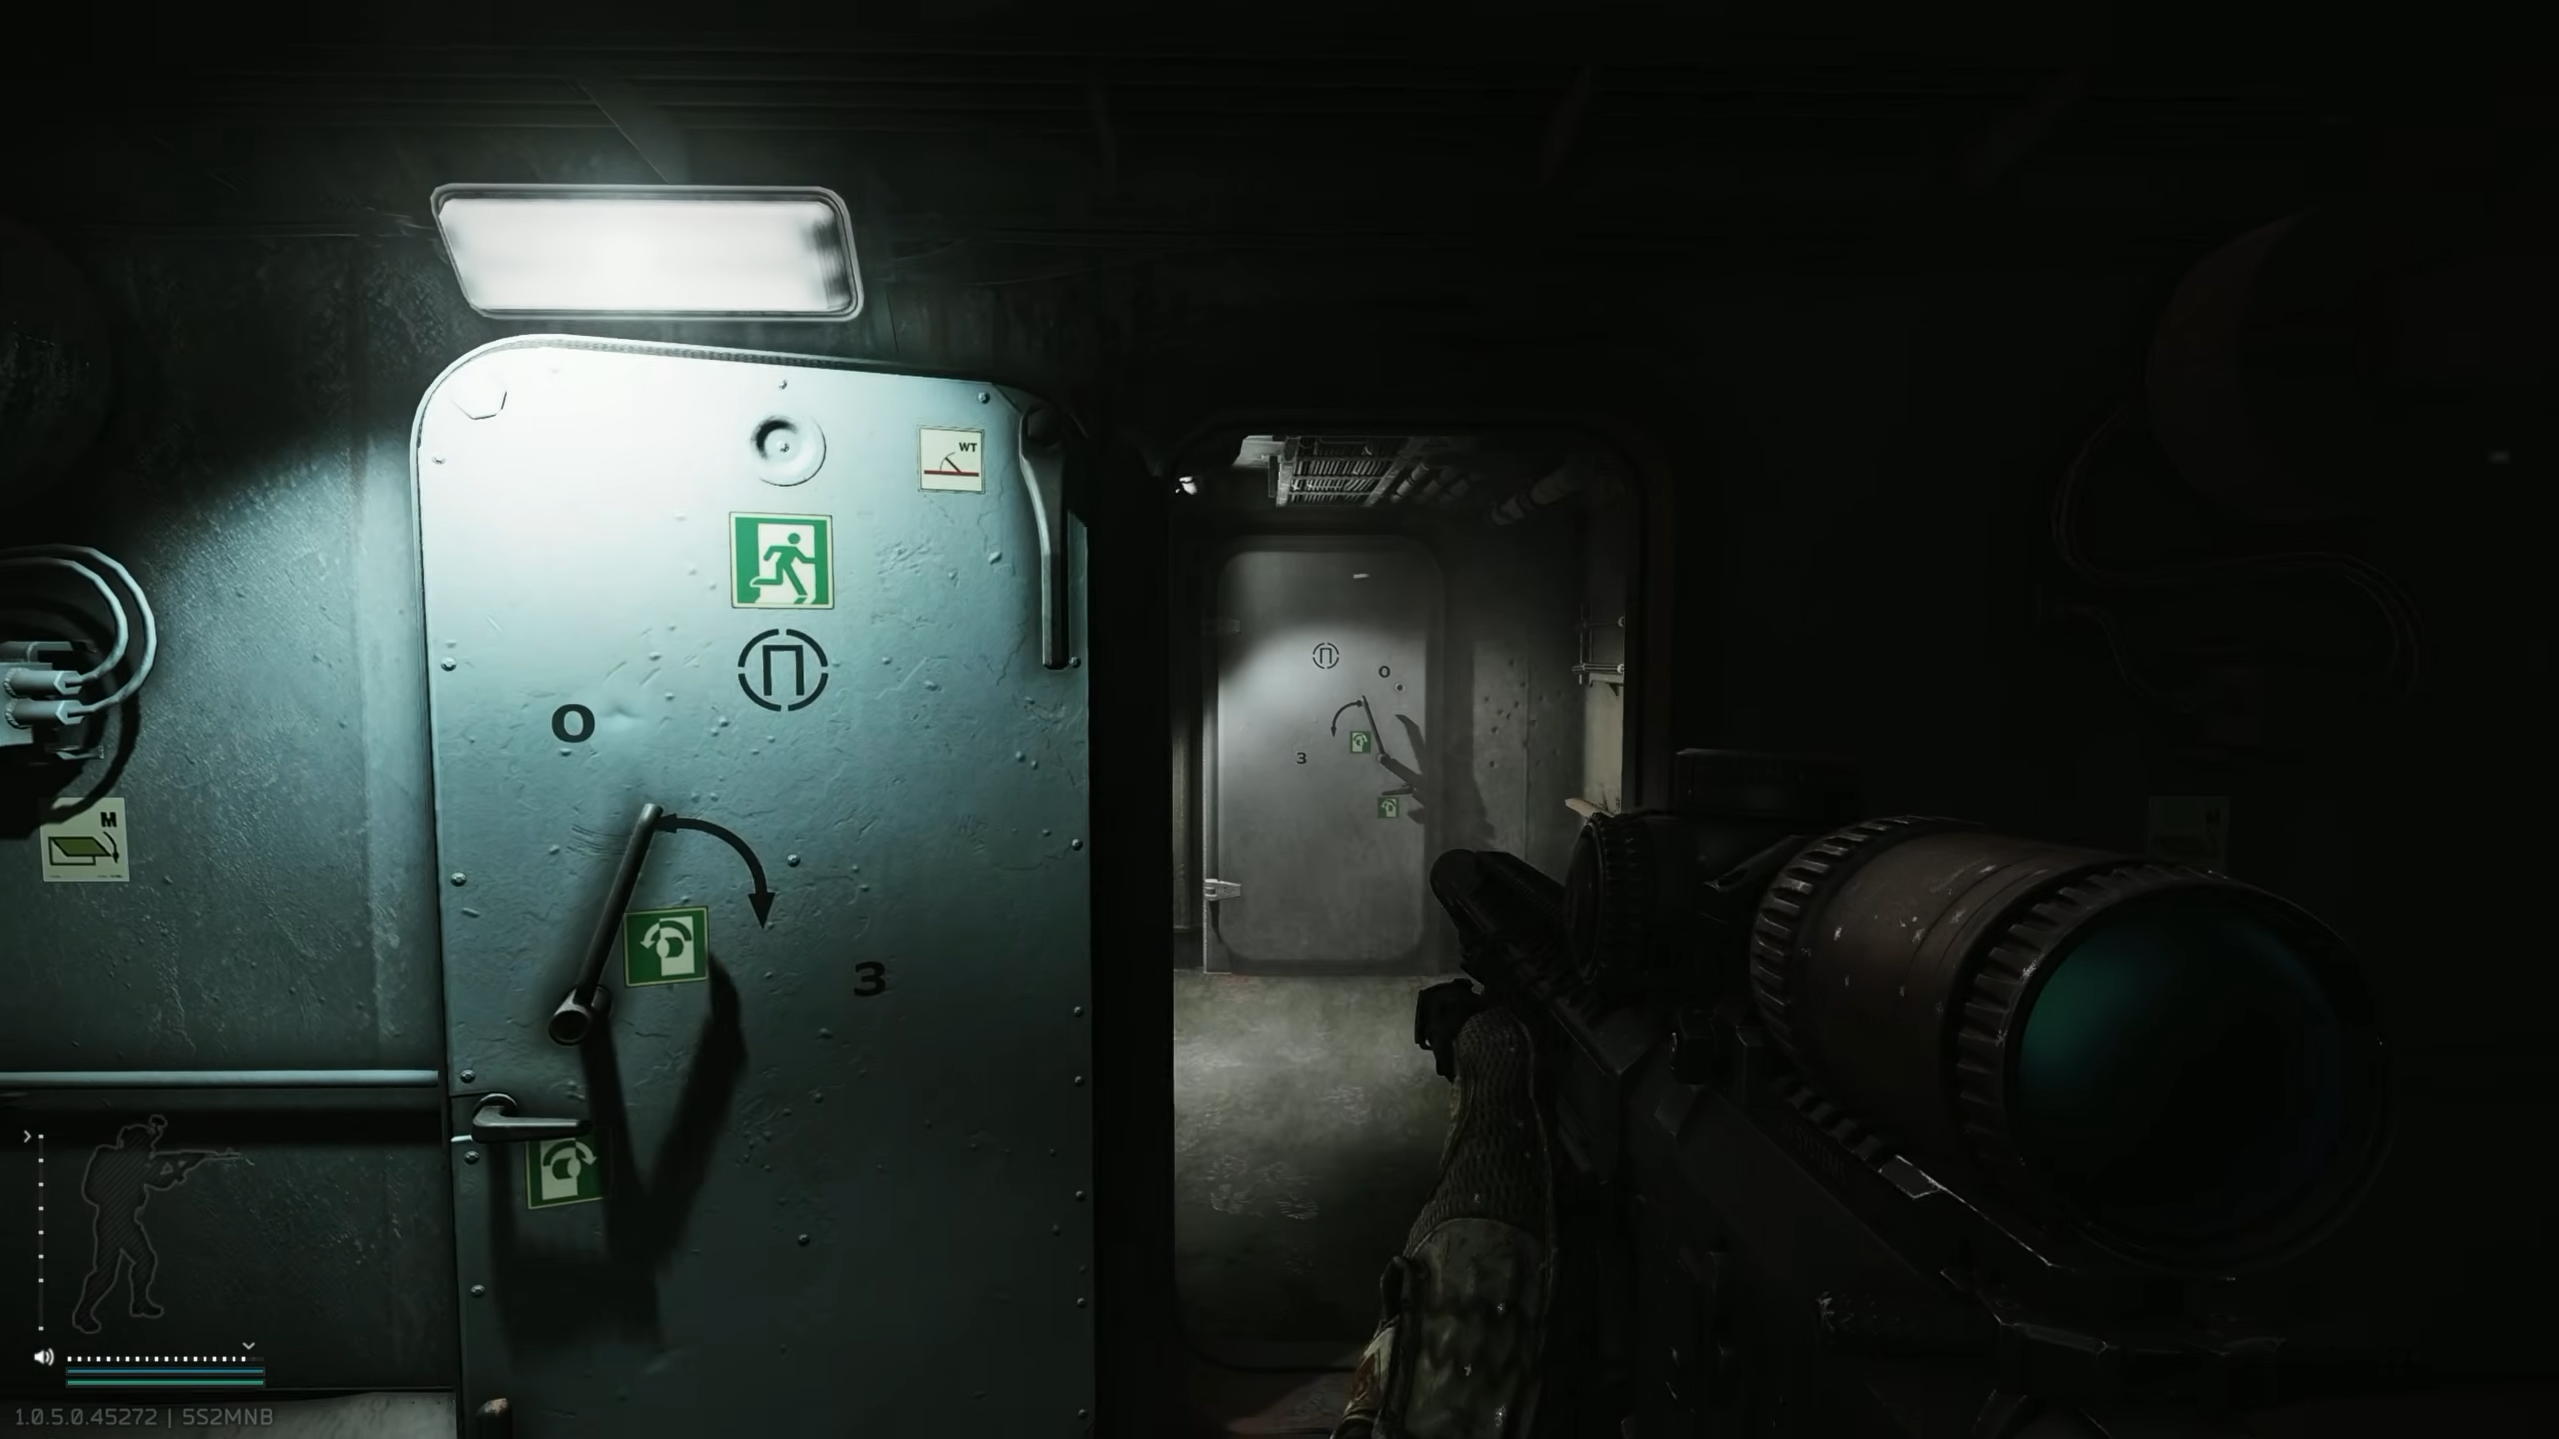
Now, you start near the Infirmary on Level 1. Pop painkillers, and make sure your gun is in full-auto mode, because behind those two doors are the Knight and his guards. Open the second door and make sure to clear the first enemy you see. Then immediately run back outside. This will give you space to deal with enemies that will rush you. Knight sometimes hides in the corner behind the first door, and if he does, it’ll be easy to kill him if you commit to your peek around it.
Going to the Scientist and Getting the Engine Room Keycard
Move back inside the Infirmary and check your corners. Turn right and open the door. On the left, you’ll see a door with an intercom. That’s where the Scientist is. Turn back and go left from the entrance, check the medical rooms until you find a corpse on the floor in one of them. He’ll have the Engine Room keycard in his head or by his head. Grab any medical items if you need them. Go back to the entrance and now go forward into a room with stairs up and down.
Move Through Storage & Security on Level 0
Clear the lower level before taking the stairs down; there could be around 3 enemies. Then come down the stairs and turn left. You’ll come to a long corridor that spans to the left and right. Rogues could be camping it; watch for open doors. You can use a smoke to cut off parts of the corridor to push safely.
On the right side, there’ll be a card terminal next to a door. Select the “Try ER” option and open the door. You’ll enter a small “buffer” room called the Staff Locker room where you’ll have the chance to heal up and loot some food. You’ll see a cutscene as you approach the exit door on the other end of it. The cutscene doesn’t pause the raid timer.
Clearing the Engine Room, Levels -2 & -1
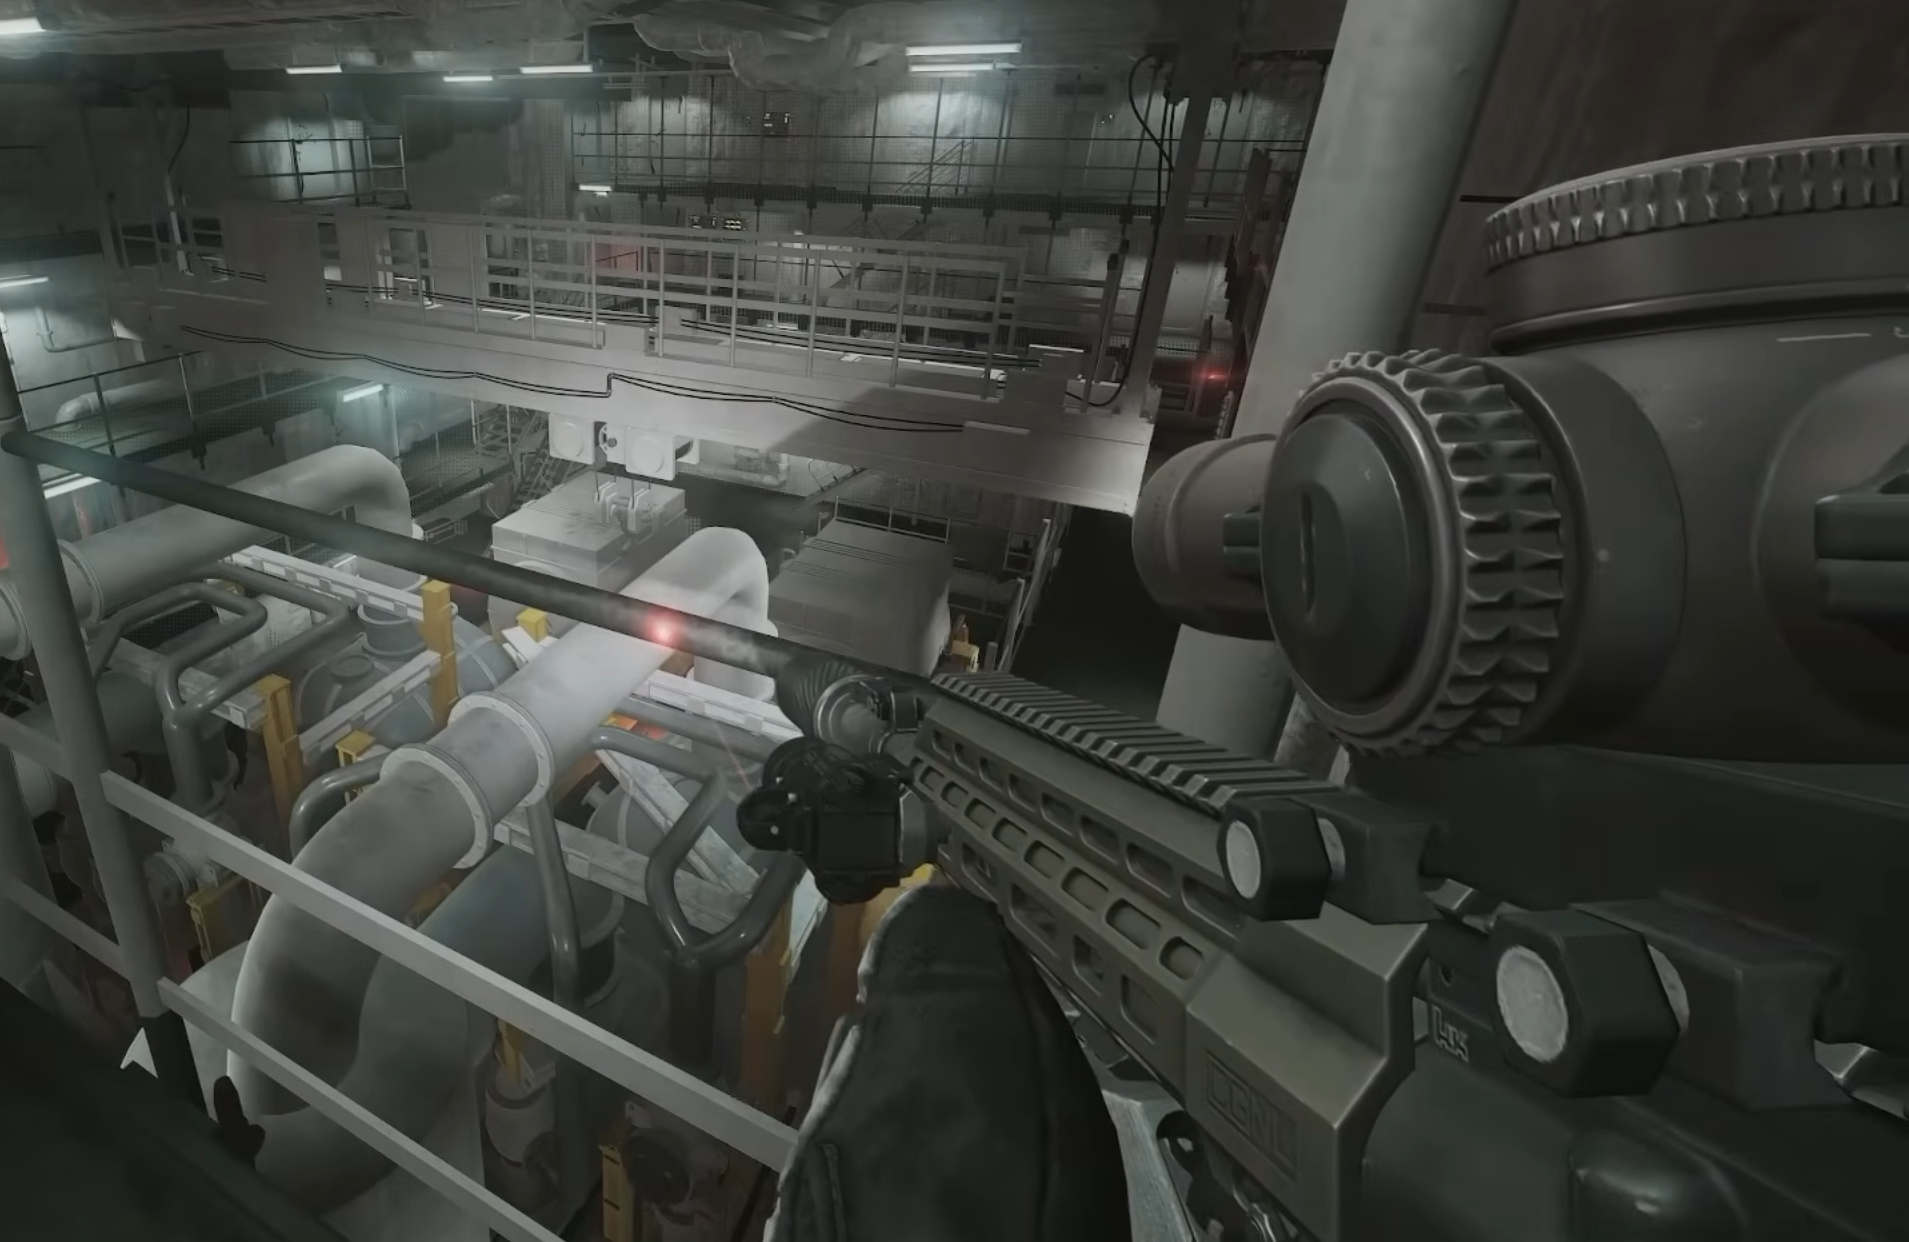
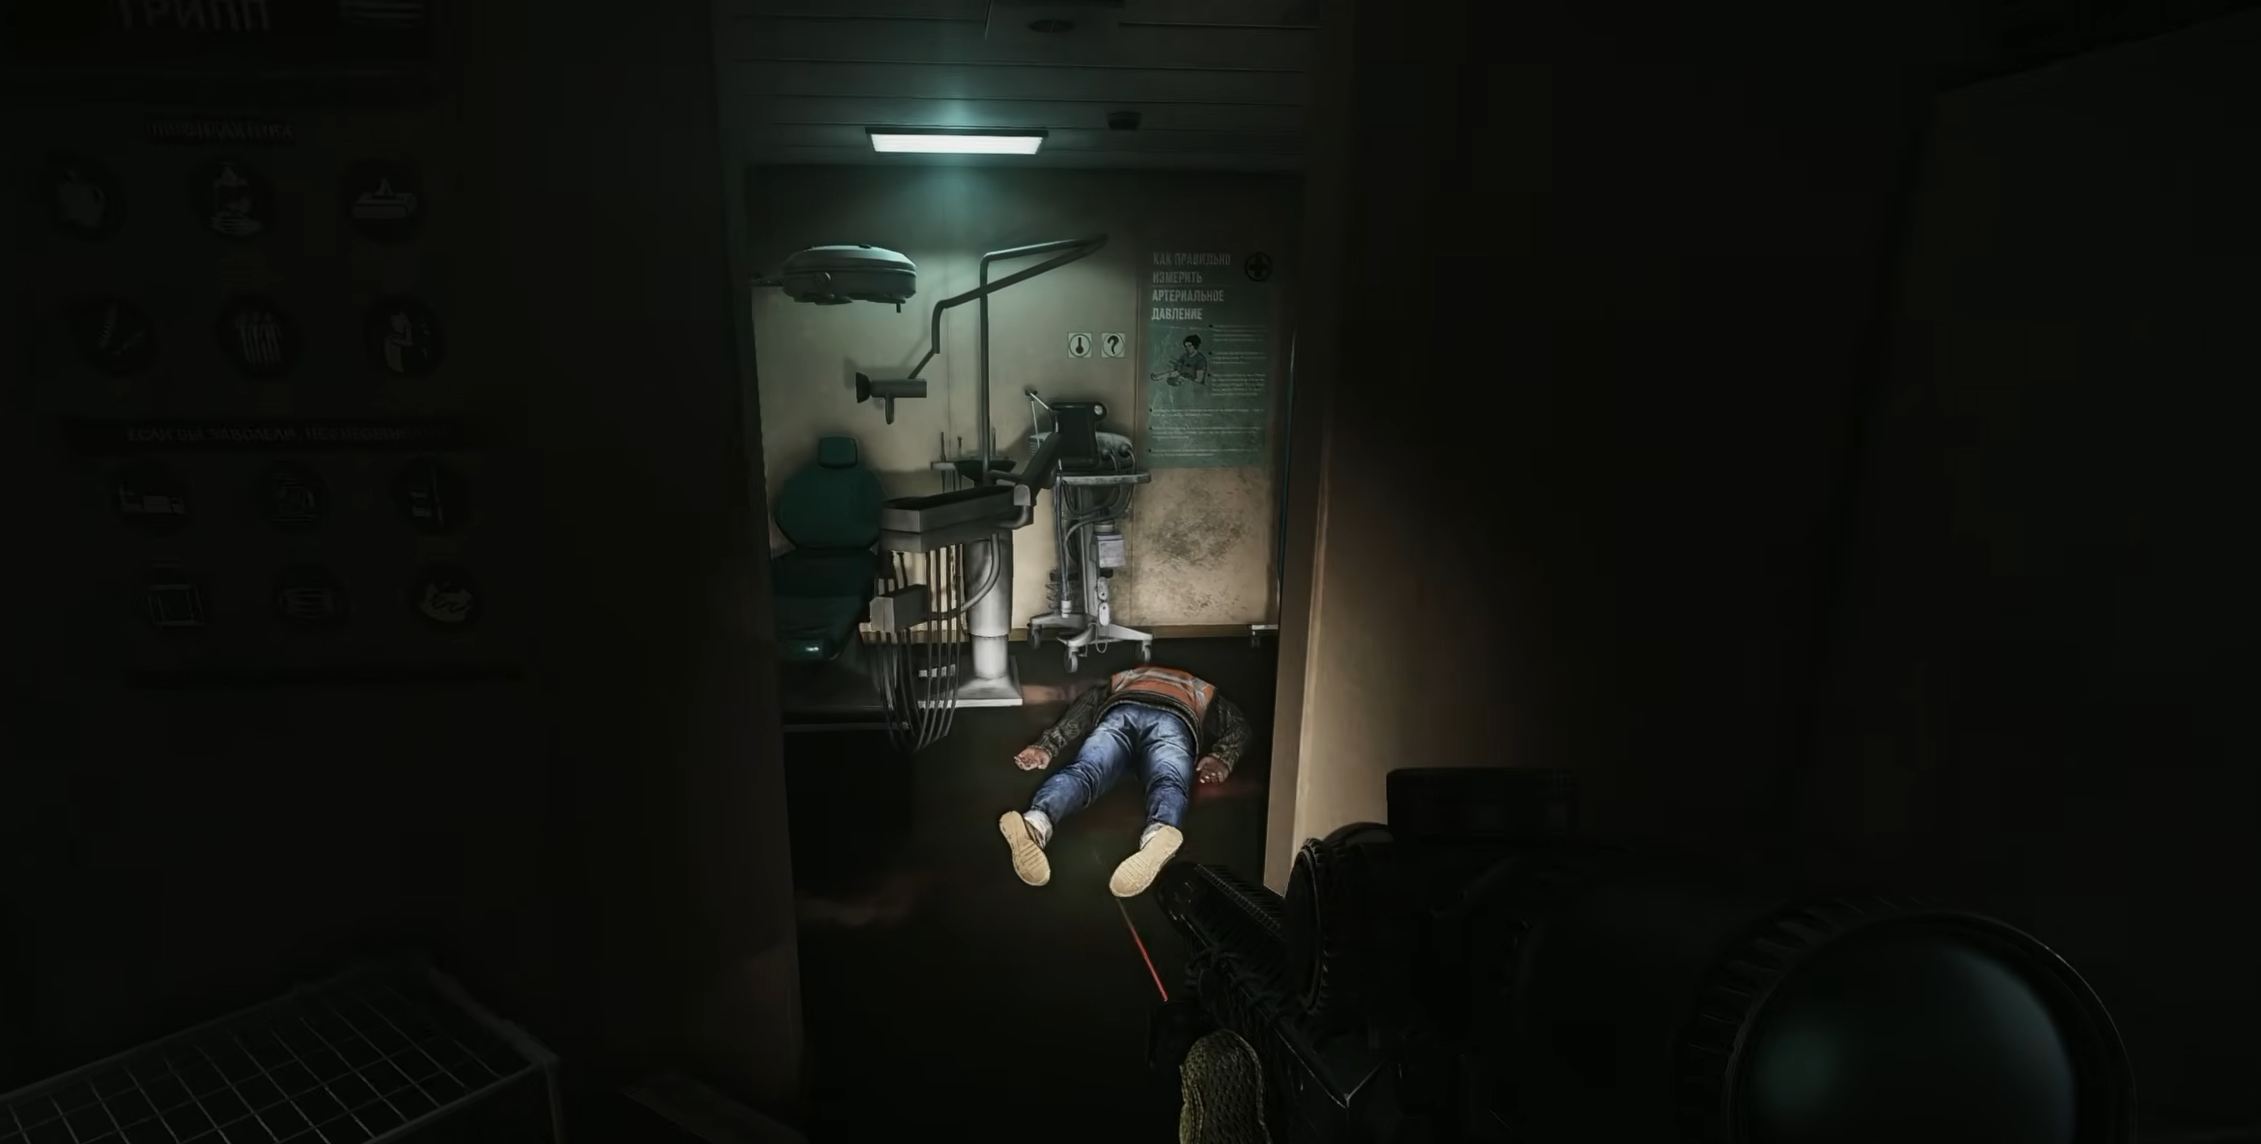
Continue moving forward, take the first stairs up, and you’ll find a sealed door. Open it, and you will enter the Engine room, which features multiple levels. Across the room, there’ll be the same kind of balcony and sets of stairs as the ones you’re on right now.
Black Division will spawn as soon as you cross the middle of the room. They’ll be coming from the opposite side. The safest tactic here is not to push through the middle. Trigger the spawn and then run back, hide behind engines, and use nades to make them move out of cover.
Alternatively, you can try to skip them. Take out your grenade and rush to the opposite side of the room. Go up the stairs one level, open the door that leads to a long corridor from which the BD’s will come. Throw the ‘nade in there, which will make the enemies run inside the engine room right past you. As they go in, you immediately run inside the corridor and up the stairs again into a room that leads outside to the helipad.
This is a risky tactic. The safer way would actually be killing them. To do that, run to the opposite side of the room and up the stairs. Now, instead of opening the door to the corridor from which they spawn, open the door right next to it, which leads into a smaller room. Go in there and use it to make your stand. Then open the corridor door and start taking them down one by one. Use the ‘nade trick if you have to. You can clearly see them running up and down the stairs, so it should be easy to prepare for them. There should be around 6-8 BD’s. Then, go up the stairs and clear another two BD’s.
Clearing the Helipad
The helipad is guarded by more Black Division dudes. Facing them in the open is not a good idea. Your best bet is hiding behind the stacks of shells right outside the doorway from where you are now. Just use quick peeks to deal with the enemies.
If you don’t kill them in one peek, don’t re-peek. Wait around 5 seconds, at which point the AI drops aggro, and the next time you peek, it’ll be as if they never saw you before!
The helipad is located above the deck that has enemies, so if you see an enemy on the right side, don’t push because the enemies on the deck below the helipad will see and kill you! Once you’ve dealt with everyone on the helipad, secure the deck right below it. There’ll be around 6-8 enemies there.
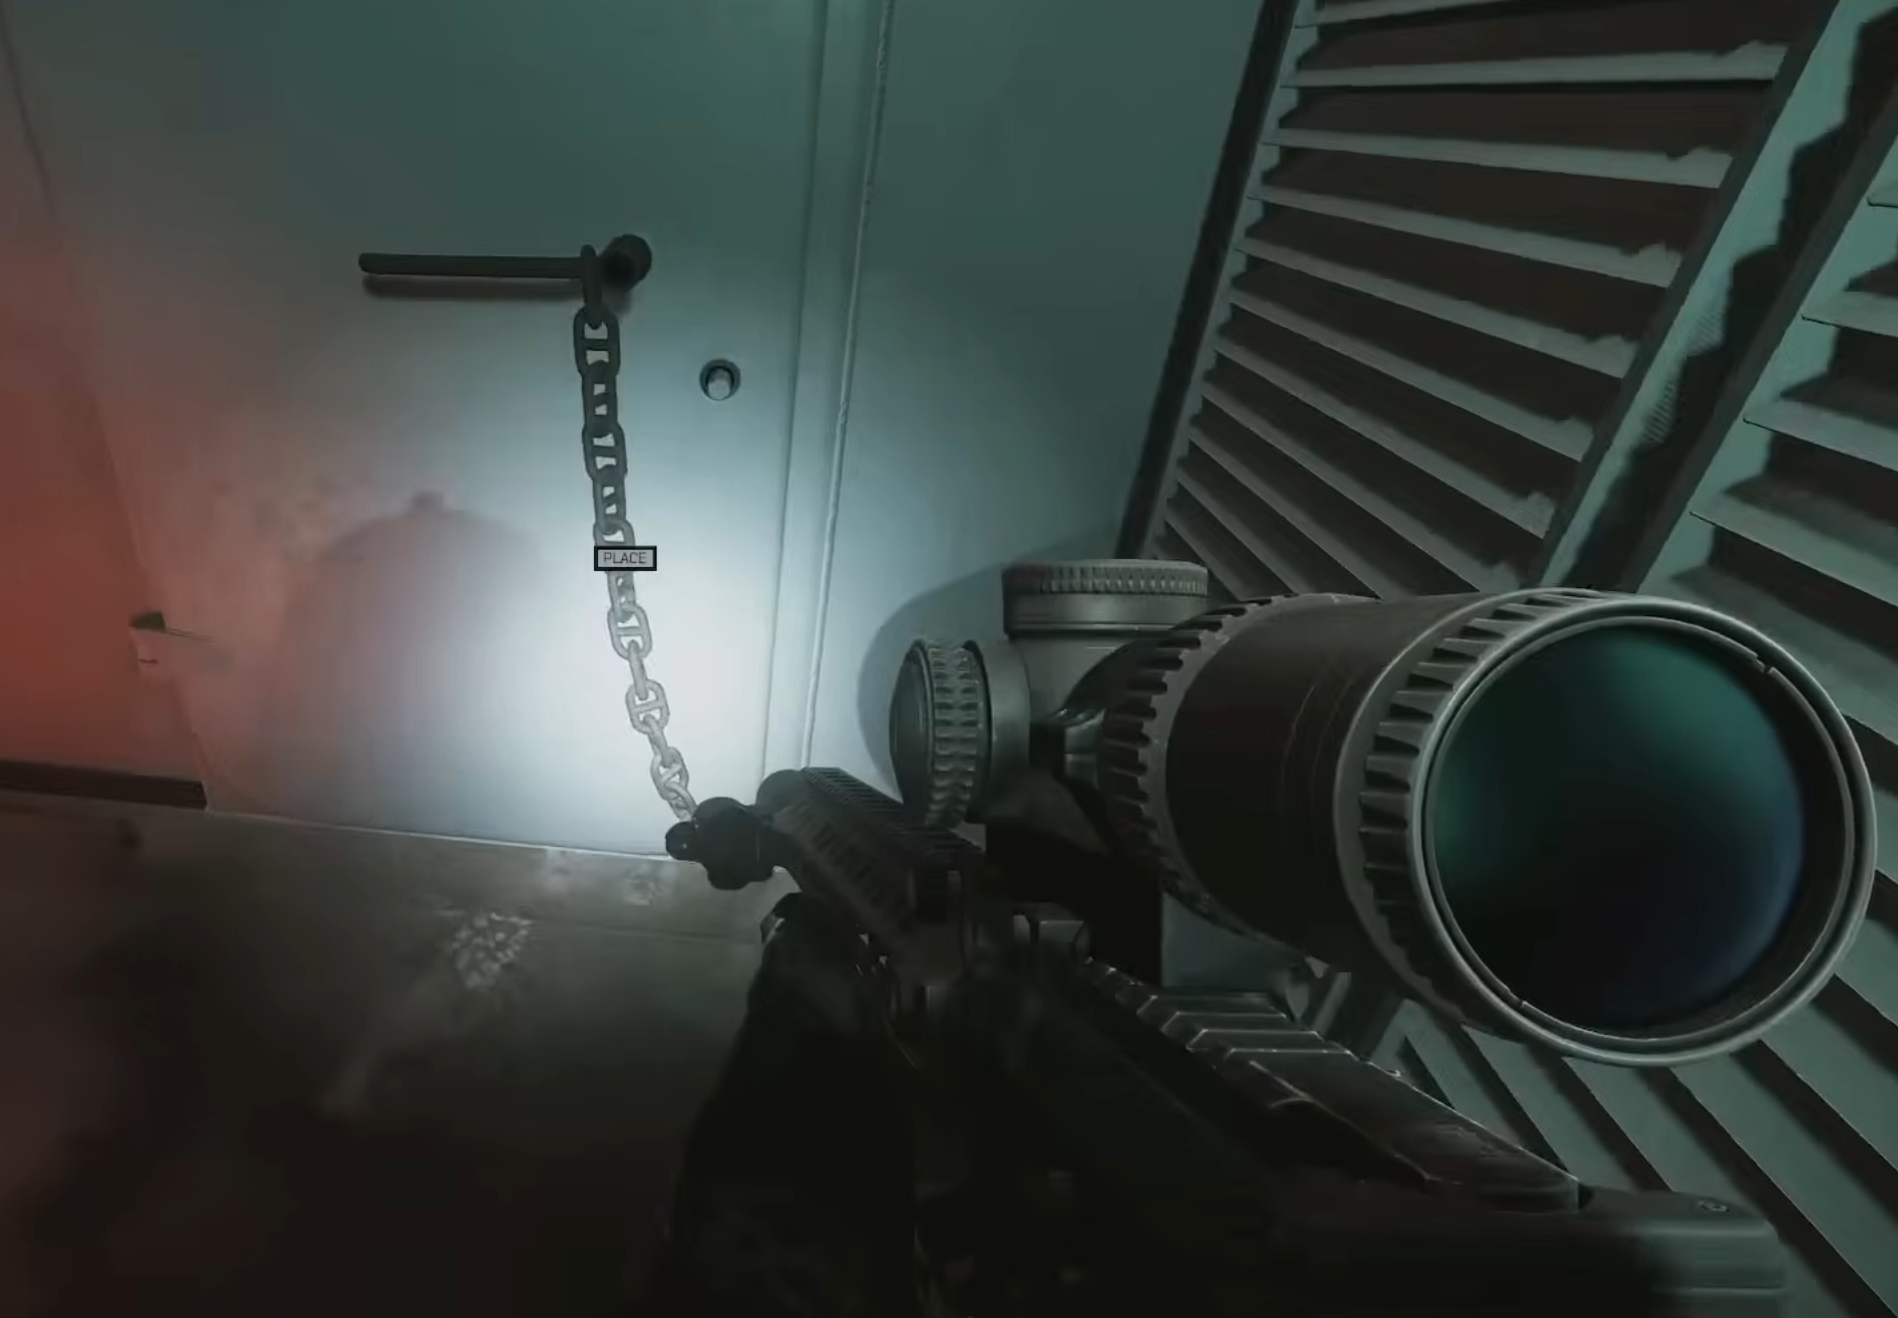
Chained Door
If you don’t want to extract yet, you can try taking down the Wedge. As you clear the deck below the helipad, you will eventually come across a set of stairs leading up to level 3 from the helipad that would be on the left side of the ship. The stairs should be right next to the orange safe boat. Upstairs there’ll be more BD’s, and the safest way of dealing with them would be standing in the corner behind the stairs and looking up. They’ll eventually peek you, and you’ll just have to be quick enough to click their heads. That spot is safe enough because you can always crouch to avoid being shot.
After that, go up the stairs, turn right, and run to the other set of stairs. On top, you’ll see a door with a chain on it. Use the SZ-1 explosive charge on the chain to open it. Place the bomb and get away from it far enough, because the explosion could kill you!
How to Kill Wedge
Make sure you have the gas mask on. Grab it from one of the BD bodies if you have to. The area with the boss has gas.
The boss has 3 guards if you play solo and 4 if you’re in a squad. The tactic for killing them is using a bunch of smoke grenades and at least two flashlights on your gun to be able to see through it. Another thing that will help here is reducing the Volumetric Lightning option in the graphics settings.
The door that starts the encounter leads into a corridor inside the ship, so you can actually start with the HE grenade. If you’re lucky, you’ll send the boss running away from you, which will help you kill him.
Smoke the end of the corridor and then right past the right turn on the right in the middle of it that leads into the gym. Throw a few smokes inside the gym. Enemies inside will try to throw some flash grenades or something else. Dodge everything! The boss will drop around 5k euros, which will help with the extraction.
The cantina outside the gym will have the same two sets of stairs, just like the infirmary at the start.
Getting to the Captain
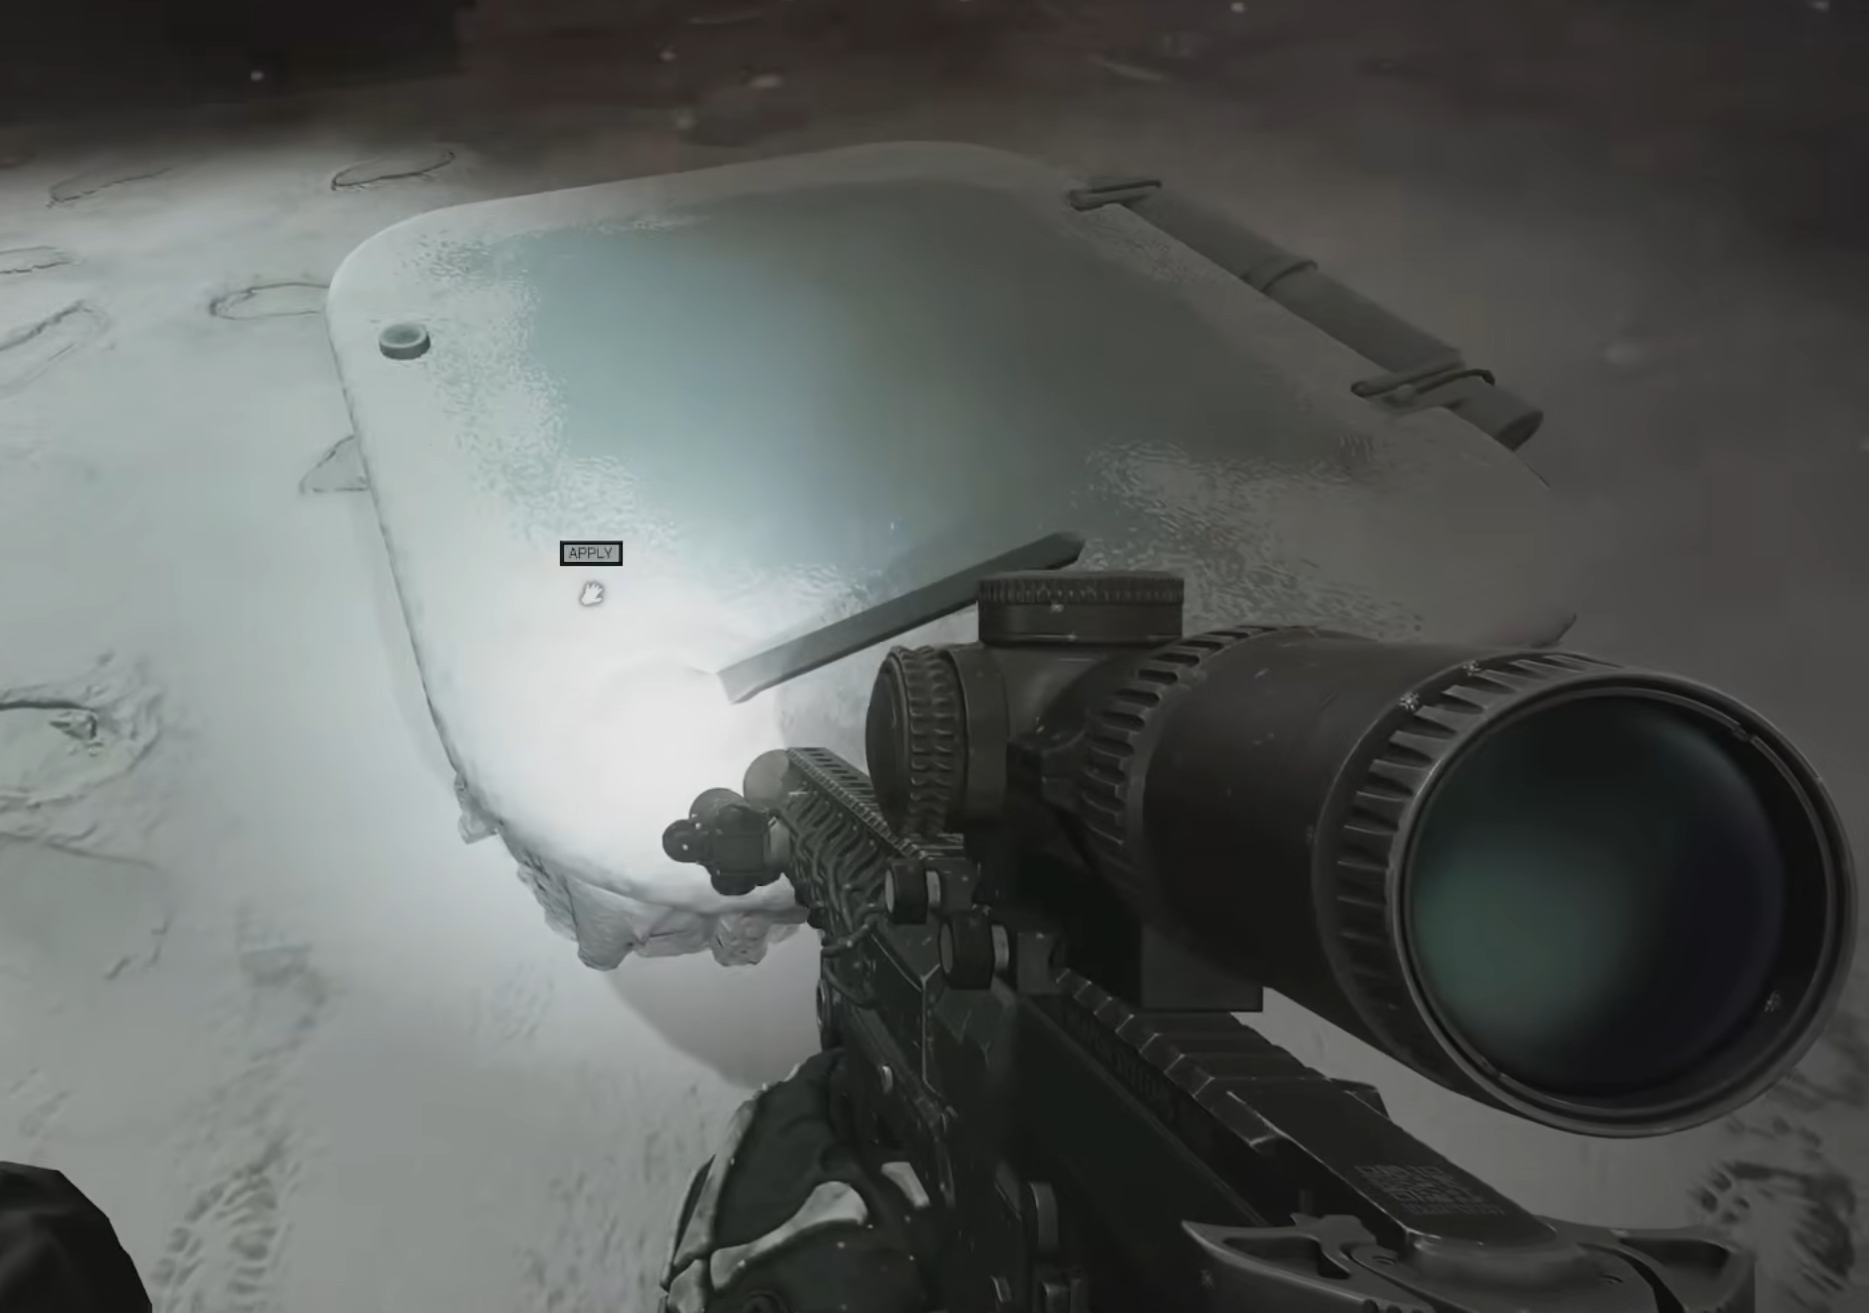
Once you’ve dealt with the boss and his guards, check the kitchen to find the BBQ-S43 Gas Torch. Then go up the stairs a few levels to Accommodation level 4. You’ll find a door with a keypad. Turn around, and you’ll find a code written on a corkboard. The code is different every time. Loot the goodies inside the room, then exit and keep going up. You’ll come to a sealed door, which leads back outside. When outside, you’ll see stairs; take them, and you’ll see the captain’s bridge. Under it, there’ll be another sealed door and the last batch of Black Division goons. Behind the sealed door, there’ll be a door with a keypad. Enter the code: 312220. This will lead you to Level 7 offices.
The enemies will either be in the offices or just past them on the stairs. Use the gun with a shorter barrel if you can for safer peeks. Loot this level if you want, and then go up one more time. You’ll come across another card-access door. Select the “Try C-1” option this time to open the server room. Inside, you’ll find some quest items.
Go back outside for the last time by opening the door with the 312220 code and taking the stairs up. Run to the very top and locate the interactable hatch. Use the torch on it to thaw the handle. Jump down onto the bridge and loot the area. You’ll find the captain’s corpse holding the black Compartment C1 card.
To exit the bridge, find the only breachable door that will take you outside.
How to Extract from Icebreaker
To extract, you’ll need to use the green flare while standing on the helipad. Wait for the helicopter to arrive. Important - the sound of the helicopter is very loud, so clear the deck below you before calling the heli. Otherwise, you’ll not hear any enemies left, which will be dangerous.
Once the heli has landed, hand in 3,000 euros. The price could be different depending on the reputation rank. The first extraction time will be 60 seconds, but later on, it can be reduced to about 7 seconds.

You got -20% OFF 
Best Looting Spots on Icebreaker
Icebreaker has great loot, especially if you have the time to check the optional rooms. The best way to loot the map is to follow your route naturally instead of clearing random rooms for too long. Focus on medical items early, Black Division gear in the middle, and high-value tech loot near the C-1 server room and the Bridge.
The best loot spots on Icebreaker are:
- Infirmary on Level 1
This is one of the first valuable areas you reach. The Infirmary has medical supplies, CMS kits, IFAKs, stims, pills, and the Boreas engine room keycard near the dead engineer. It is worth checking even during a rushed run because stims can quickly cover a big part of the Icebreaker entry cost. LEDX spawns and extra medical loot around the early rooms, so bring an empty stim case if possible. - Laboratory on Level 1
The C-3 laboratory is one of the best locked rooms on the ship. It requires the Compartment C-3 keycard and the right Boreas story progress, since the door cannot be opened by players without the required chapter state. Behind the lock, the room is listed with multiple LEDX spawns, which makes it one of the highest-value medical rooms on Icebreaker. - Storage & Security on Level 0
This area is valuable because of enemy loot and nearby side rooms. Knight and the first Rogues can give you grenades, smokes, helmets, armor, and usable weapons before the run properly opens up. It is also close to early medical rooms, so this whole Level 0 and Level 1 opening route can help recover your raid cost before you even reach the Engine Room. - Lower control room near the Engine Room route
Before the Engine Room fight, check the side control room and nearby technical spots. This is not the main prize of the map, but it is a quick pickup if the area is already clear. - Engine Room on Level -2
The Engine Room is risky, but it can be worth clearing. The small side rooms can spawn quest items, Ultralinks, and possible GPU spawns. Black Division also turns this area into a gear farm, since they can drop M4s, MCXs, good magazines, armor, grenades, and sometimes NVGs. Do not start looting here until the full group is dead, since enemies can rotate above and around the engines. - Helipad on Level 2
The Helipad area is not just an extraction zone. After clearing the first Black Division group and the enemies below the Helipad route, you can loot bodies for ammo, weapons, armor, helmets, NVGs, and extra grenades. This area is especially useful if you plan to continue toward The Wedge, because it lets you refill before pushing deeper into the superstructure. - Gym & Canteen on Level 3
Gym & Canteen becomes valuable after The Wedge encounter. The Wedge and his guards can carry useful gear, and the boss can also have Euros, which helps pay for extraction. The kitchen is also where you look for the BBQ-S43 gas torch, and it usually has food and drinks nearby. This is a good place to reset after the boss fight before climbing higher. - Level 3 Crew Quarter keycard spawns
The Boreas crew quarters keycard can spawn around the Canteen and Gym area on Level 3. Check tables, couches, and nearby surfaces after the Wedge area is clear. This keycard opens several crew rooms across Levels 3, 4, and 5, so it is worth grabbing if you find it. - Accommodation keypad room
After The Wedge area, the route moves upward through Accommodation. One of the rooms uses a code from a nearby bulletin board. Check the board in your raid, then open the room. Valuables like rollers, Moonshine, and Tetris loot in this kind of locked room, making it a worthwhile stop if you already have the code. - C-1 server room on Level 7
C-1 is one of the main tech loot rooms on Icebreaker. It is tied to Boreas' progression and can contain quest items, Ultralinks, memory-style loot, electronics, PC blocks, and other tech spawns. This room is especially important if you still need hard drives, server RAM modules, Ultralink satellite modules, or cryptographic processors for the questline. - Offices on Level 7
Offices are worth checking while moving toward C-1 and the upper ship route. The danger here comes from the final Black Division group, so do not loot before the area is secure. Once clear, check desks, shelves, and nearby tech surfaces while keeping an eye on your timer. - Bridge on Level 9
Bridge is probably the best loot area on Icebreaker. Loot on the tables, under tables, and across the floor, with examples like GPUs and other valuable tech items. The captain is also here, and this is where you can get the C-1 keycard. Search carefully because smaller items can blend into the room. - Black Division bodies across the full route
Black Division is one of the best “loot sources” on Icebreaker. Their bodies can give you M4 and MCX magazines, usable ammo, armor, helmets, NVGs, grenades, and extra weapons. This matters because Icebreaker has many chained fights, and enemy gear can keep your run going without forcing you to pack mags or waste time.
For normal raids, the safest loot path is Infirmary, Engine Room, Helipad bodies, Gym & Canteen, C-1, and Bridge. For shorter money runs, stop around Infirmary, Storage & Security, Engine Room, and Helipad, then extract before the upper ship turns the raid into a full clear.
Check out more Escape From Tarkov guides:
F.A.Q.
How to unlock Icebreaker in Escape from Tarkov?
You unlock Icebreaker through the Boreas story chapter. At first, the map is reached through the Shoreline transit at the pier. Direct access from the location screen unlocks later after completing Hangover.
Where is the Icebreaker transit on Shoreline in EFT?
The Icebreaker transit is located at the pier on Shoreline. It uses the smuggler hovercraft and costs 400,000 Roubles. Bring the money before entering Shoreline, or you will not be able to board.
How much does it cost to enter Icebreaker in EFT?
Icebreaker costs 400,000 Roubles to enter. This fee still applies after the map becomes selectable from the location screen. You should also bring Euros for extraction, since the Helicopter extract has its own cost.
How do you extract from Icebreaker in EFT?
The main extraction is the Helicopter on Level 2, near the Helipad. You need to fire a green flare inside the signal flare area. The extract also costs Euros, so bring around 3,000 Euros to stay safe.
Do you need a green flare for Icebreaker in EFT?
Yes, a green flare is required for the Helicopter extraction. You can bring one into the raid or find one on the map.
Does insurance work on Icebreaker in Escape from Tarkov?
No, insured gear left behind on the map will not return. Because of that, avoid bringing gear you expect to recover later.
Who are the bosses on Icebreaker in EFT?
Icebreaker features Knight and The Wedge. Knight appears early around the lower ship route, while The Wedge is found later around Gym & Canteen on Level 3. The Wedge fight includes the boss and several guards, not several separate bosses.
How many enemies are on Icebreaker in Escape from Tarkov?
A full solo route can put you against roughly 30 or more AI enemies. Most of them are Rogues and Black Division soldiers. Squad runs can have higher enemy counts in several encounters.
What is the best loadout for Icebreaker in EFT?
A 5.56 rifle like an M4, HK, MCX, or G36 works well. Black Division often drops useful 5.56 ammo and magazines, which helps during long runs. Bring smokes, explosive grenades, a gas mask, good flashlights, loaded mags, meds, and around 3,000 Euros.
Where is the Boreas engine room keycard in EFT?
The Boreas engine room keycard is found on a body near the Infirmary area. It can spawn in either hand or near the head. You need it to access the Engine Room route during Boreas progression.
What is the Icebreaker keypad code in EFT?
The standard upper-deck keypad code is 312220. This code is used for upper ship access during Boreas progression. Other keypad codes can be random and must be checked on the nearby bulletin board.
Where is the gas torch on Icebreaker in EFT?
The BBQ-S43 gas torch is found in the kitchen on Level 3. Check the countertops, green crate, and serving trolley crates around Gym & Canteen. You need the torch to thaw the hatch on the Bridge Roof.
Is EFT Icebreaker good for solo players?
Icebreaker can be done solo, but it is one of the harder routes in Tarkov. The map has many forced fights, tight angles, and expensive entry and extraction costs. Solo players should move slowly, count enemy kills, and avoid calling the helicopter too early.
Is Icebreaker a temporary event map in Escape from Tarkov?
Icebreaker was introduced through the Icebreaker event and the Boreas story chapter. But the map is here to stay in the game forever.


