 Dallon Avery
Broken Rain Incursion Guide for Division 2 Quick Summary:
- Broken Rain Incursion has 4 bosses
- The first two bosses are simple DPS checks. The last two have an additional mechanic that you will have to multitask
- To escort the Patch drone, make sure at least one player is near it
- To disable the turrets during the second boss encounter, shoot the weak point on the boss’ back.
- Use the thermite charges on the SHD caches during the final boss encounter to prevent her from repairing her armor
Don't have the time to sit through all 4 encounters? Buy Broken Rain Incursion service at Skycoach and enjoy the rewards from it provided to you by professional Division 2 veteran players who will run it for you or with you.


Read closely 
Browse our hottest Division 2 Boosting services







Division 2 Black Rain Incursion Story & Mission Objectives
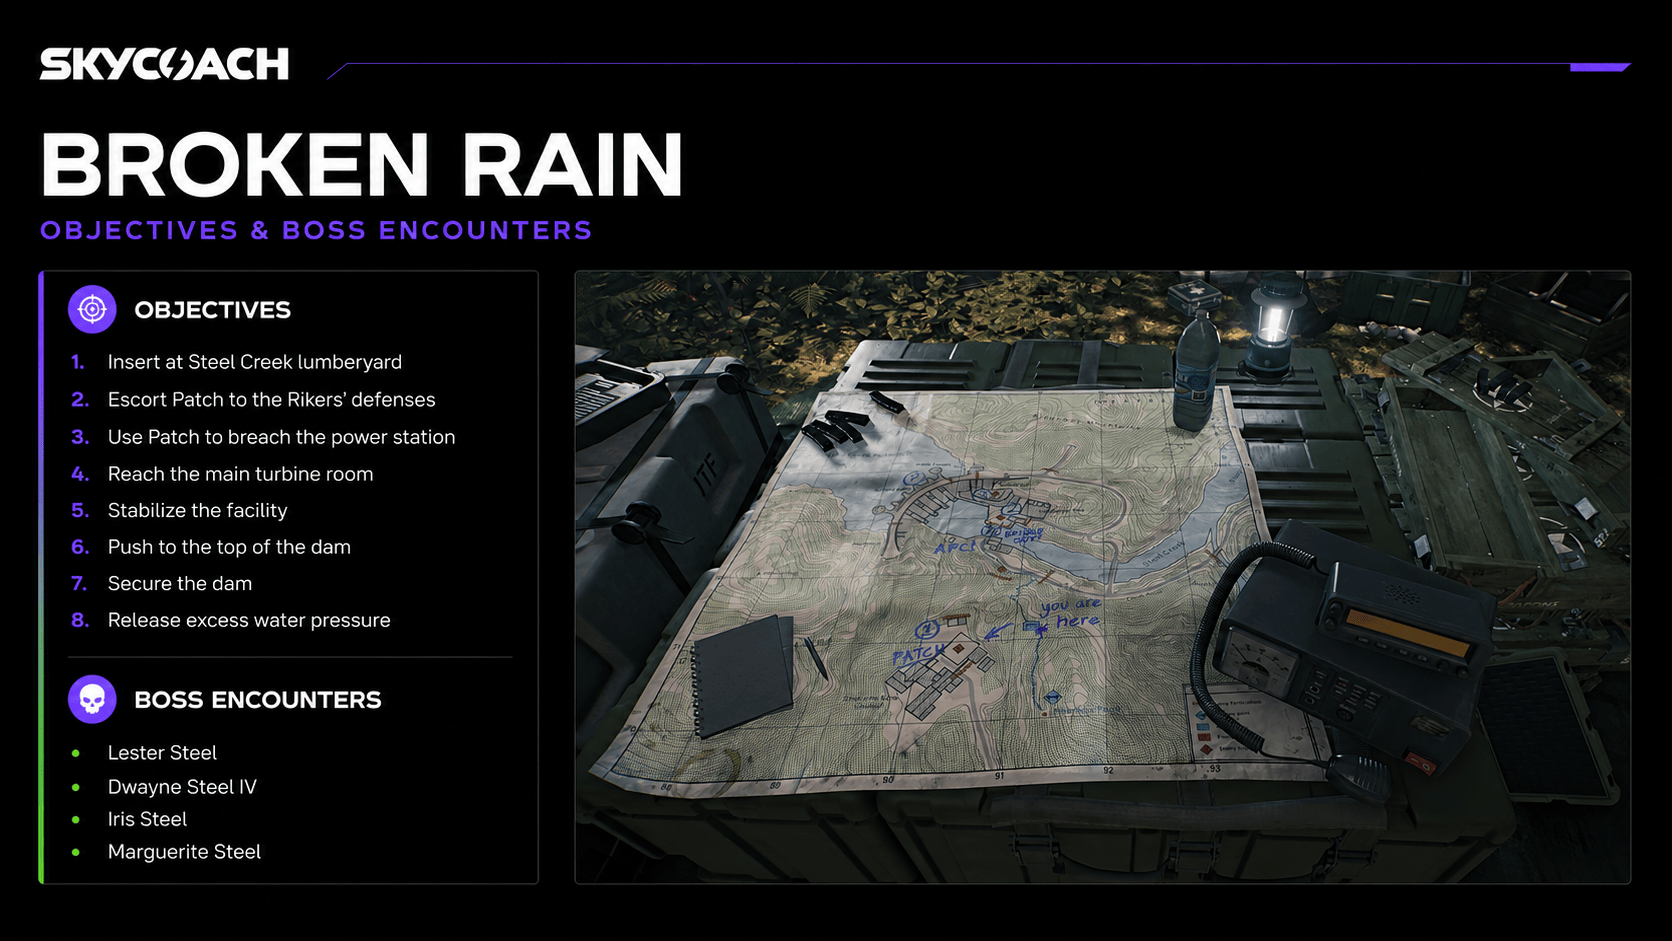
I figured I’ll give you a brief lore drop for the Black Rain before we get to the walkthrough itself. So, the Rikers have transformed Steel Creek Dam into a fortress, and you must gather your team to take on powerful new bosses.
The situation is actually a bit more urgent than simply taking the facility back. Steel Creek Dam and its hydroelectric power plant are one of the last operational power stations on the Eastern Seaboard. The JTF had kept the site running since the crisis began, but the Rikers eventually seized control of it. To make things worse, a Category Four hurricane has hit the area, putting the dam and the entire facility under even more pressure.
The JTF already attempted to retake Steel Creek, but the operation fell apart before it could properly begin. Commander DaCosta and her combat team were overrun by the Rikers, leaving Engineer Harvey Stanfield holed up nearby with what remains of the strike team. That is basically where we come in.
The original Operation Broken Rain plan gives you a pretty good idea of what you’ll be doing throughout the Incursion. These are the objectives:
- Insert near the Steel Creek lumberyard.
- Escort Patch, essentially a walking bomb, to the Rikers' defenses.
- Use Patch to breach the power station.
- Get the engineers into the main turbine room.
- Stabilize the facility before it tears itself apart.
- Push the combat team toward the top of the dam.
- Secure the dam.
- Release excess water pressure through the main sluice gates.
So, you’re not only clearing the Rikers out. You’re trying to prevent one of the region’s remaining power stations from being destroyed while a hurricane is actively making the situation worse.
There’s also an Event Pass available for this Incursion. It runs August 11-25 and lets you unlock a total of 4 new FTF-themed outfits, weapons, outfit Tokens, and more. So, if you have the time to jump into the game while the Event Pass is active, that would be the best time to play the new Incursion, as on top of the mission rewards, you’ll be unlocking the stuff from the Event Pass.
Division 2 Broken Rain Incursion Walkthrough
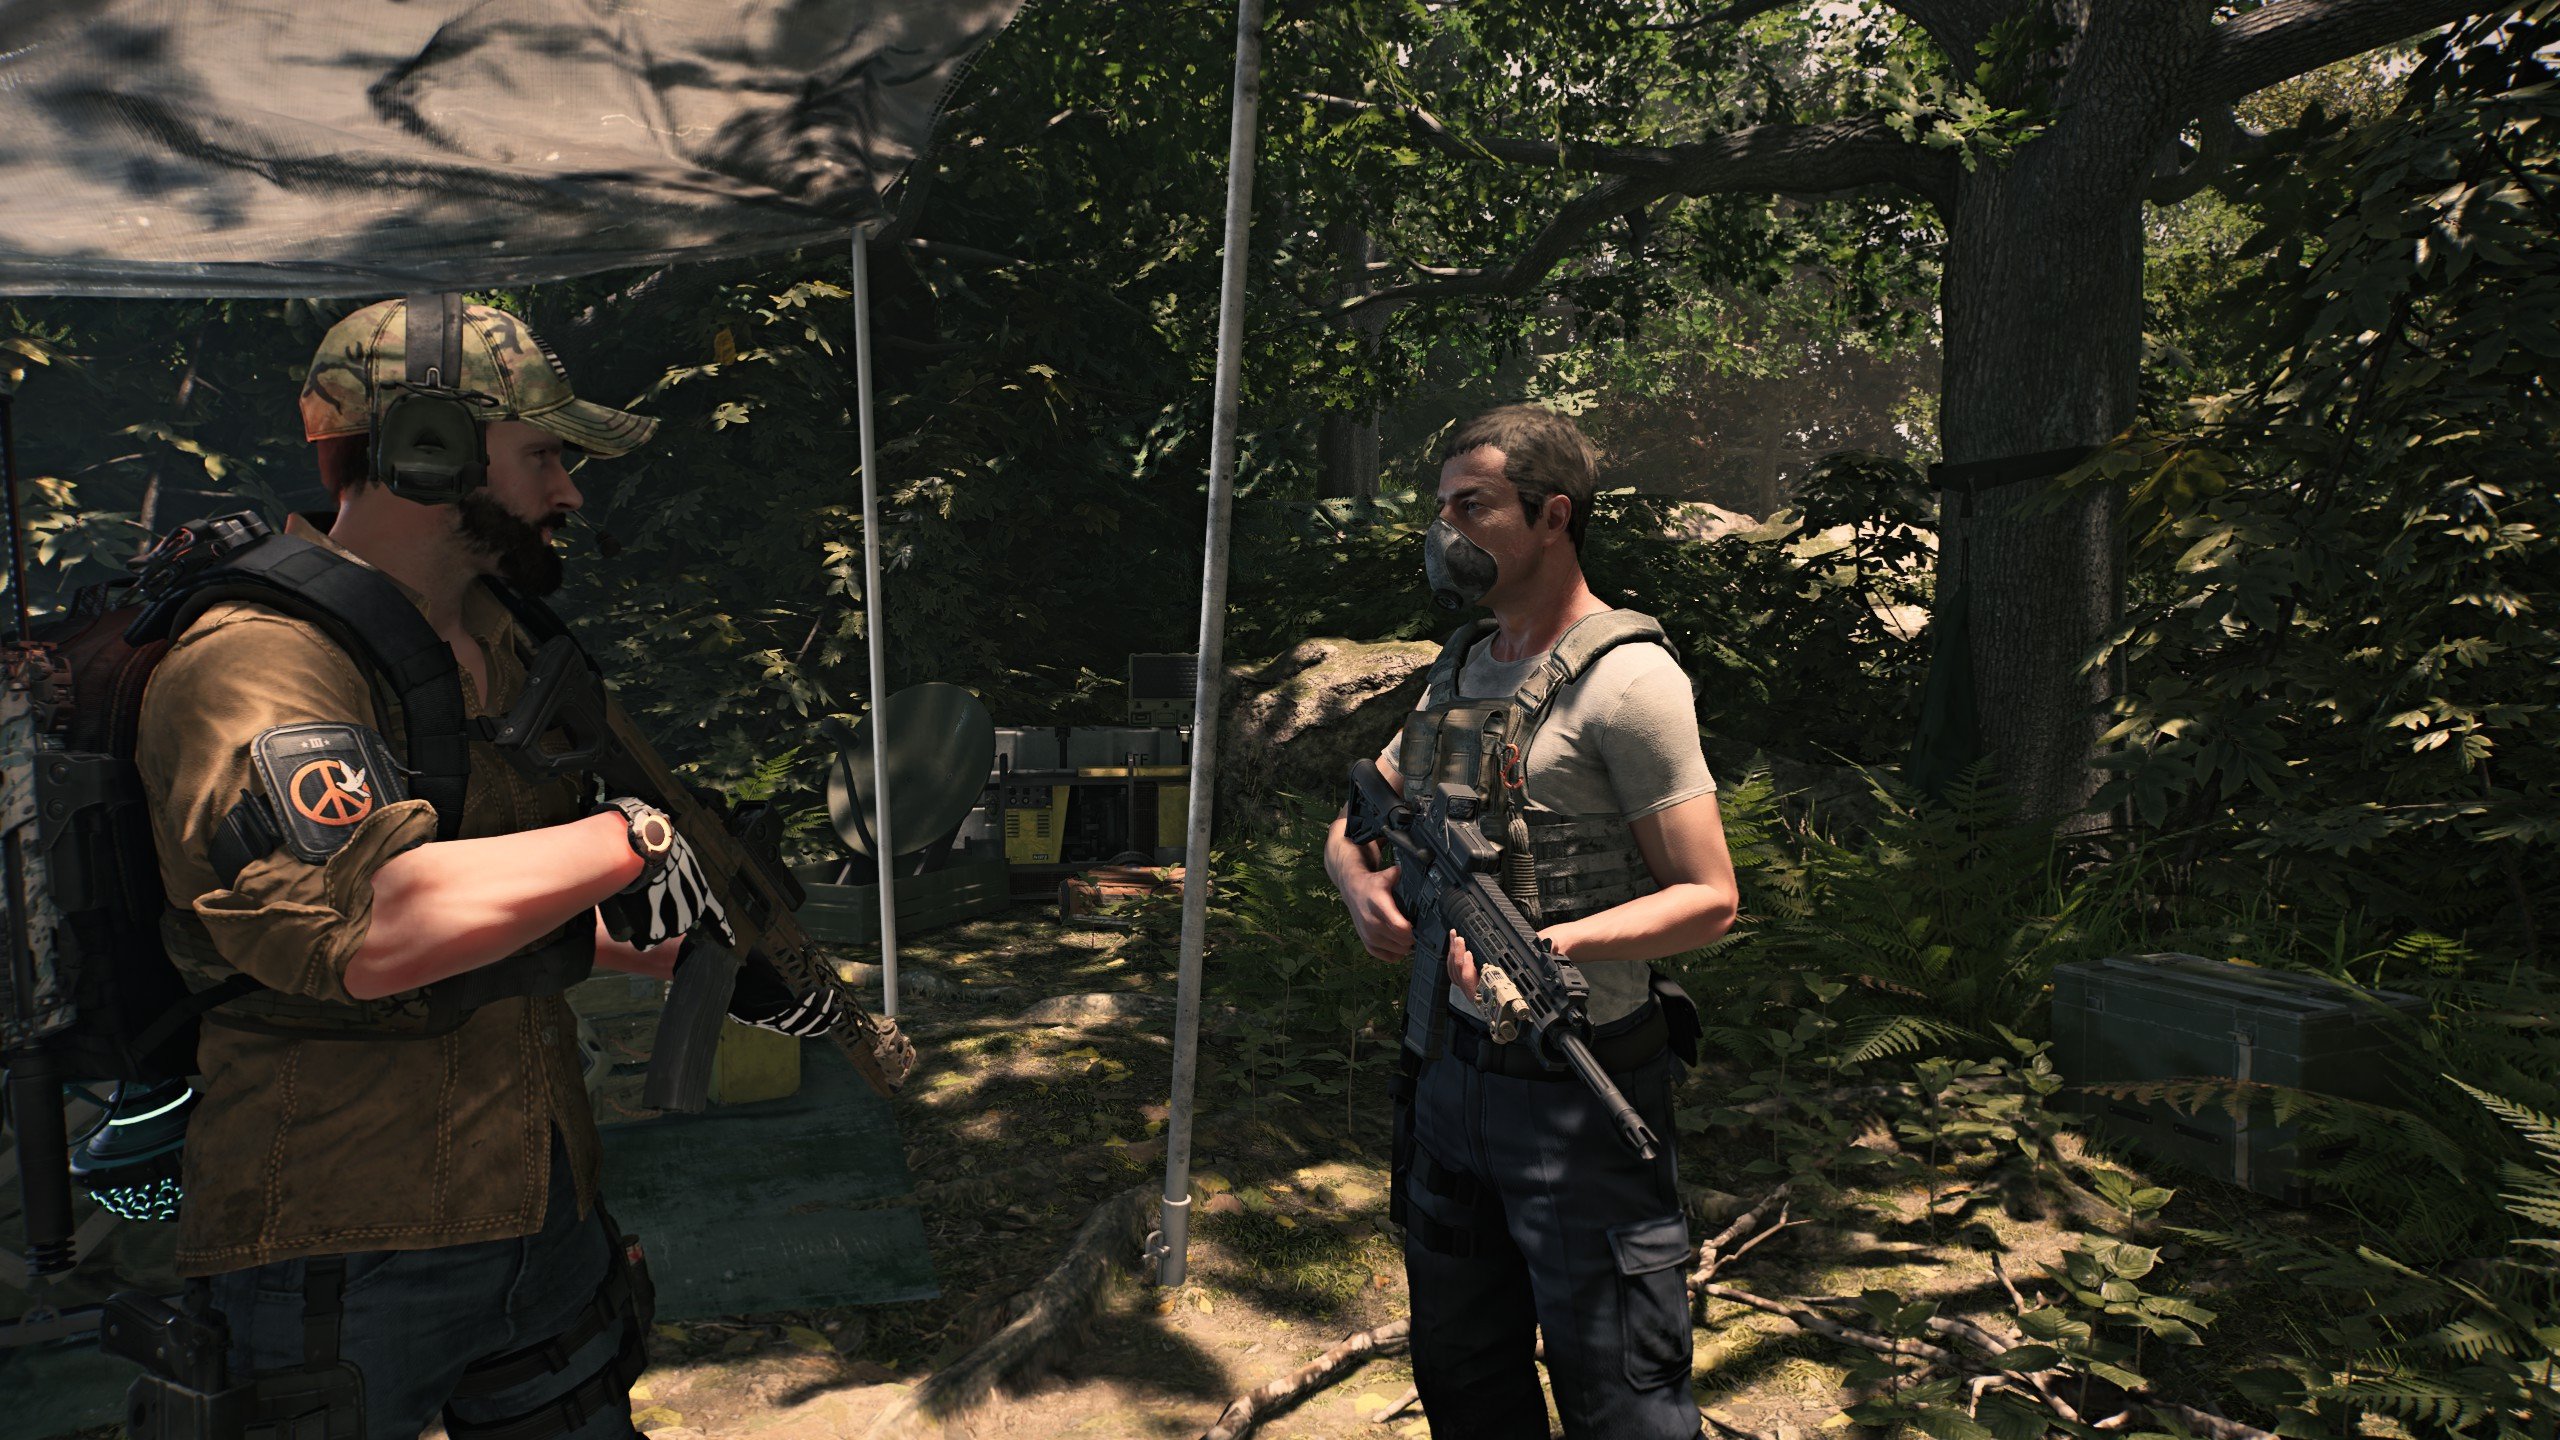
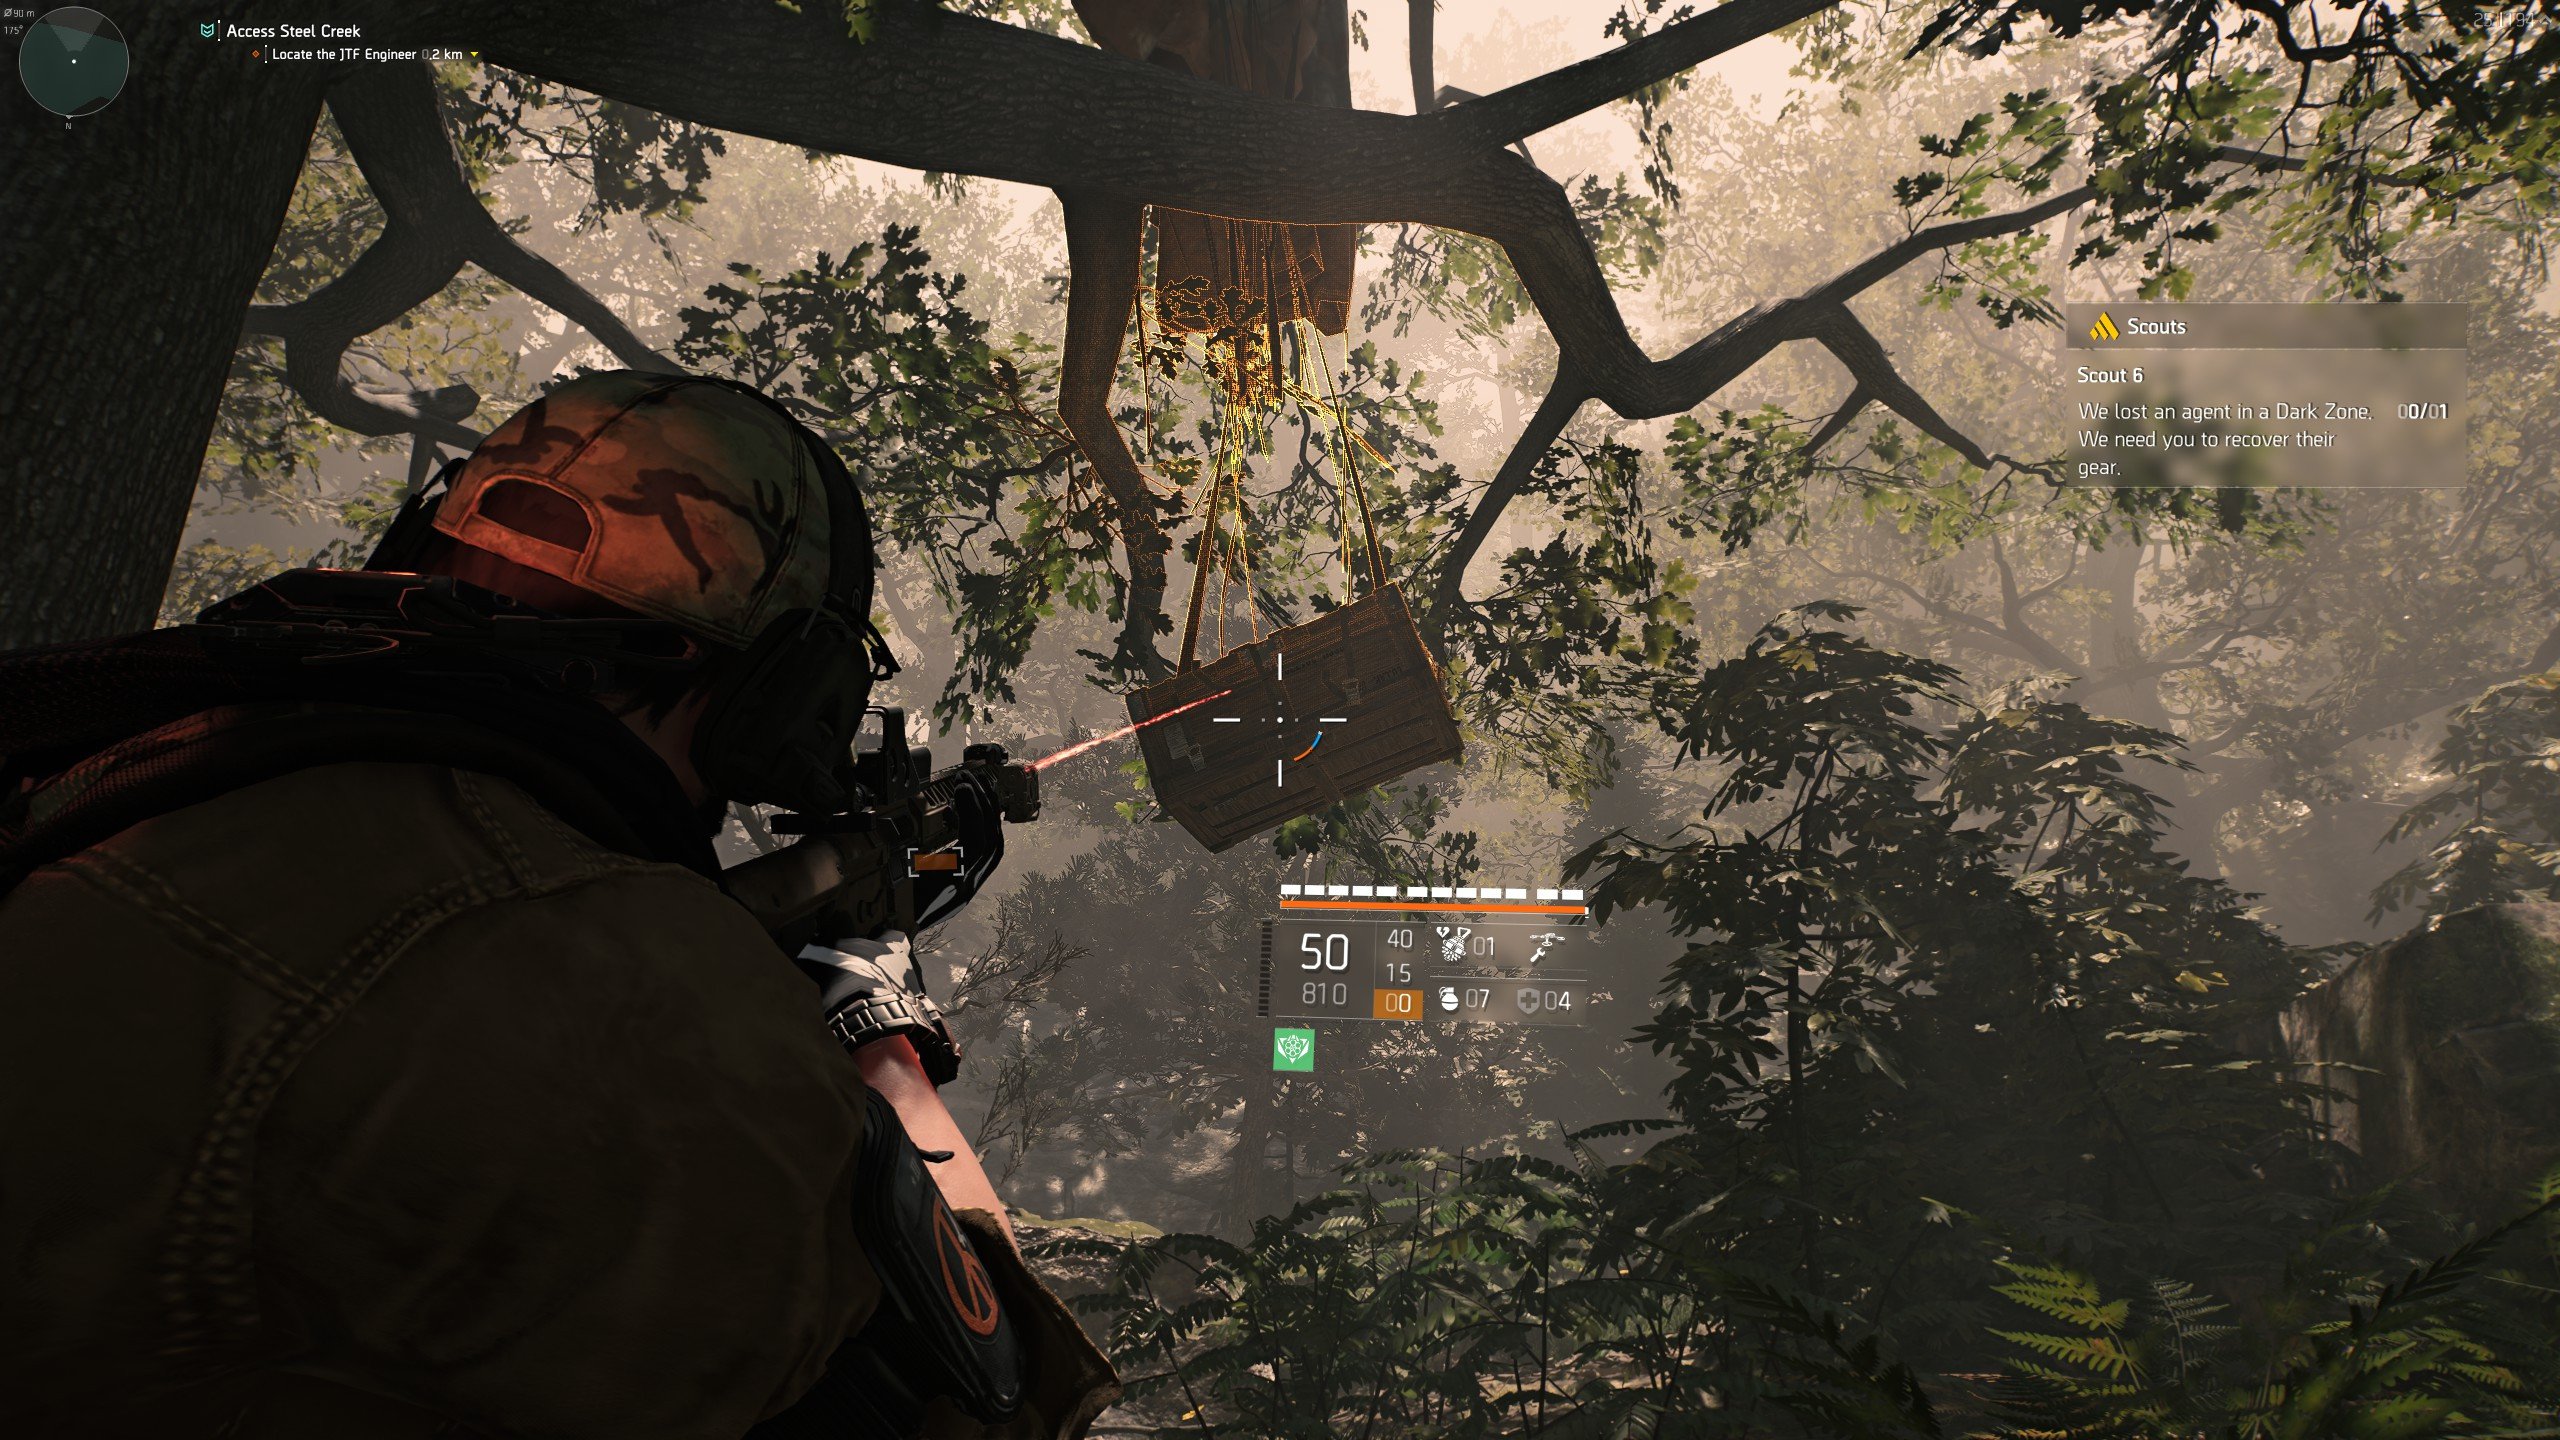
The mission starts with you and your team landing near the camp where the engineer Harvey Stanfield is stationed. So the very first objective is simply running up ahead and interacting with him. On your way there, you will also find the crate hanging off a tree with a parachute. If you shoot it, the contents will fall on the ground, and you’ll be able to pick up some resources. You’ll find these all throughout the incursion.
On the table to the left of Stanfield, you will find a map and a radio with which you can interact to listen to Commander DaCosta's briefing for this mission. The map on the table is actually an accurate representation of the area and your objectives on it. However, the mission itself is pretty linear.
All of these interactions are actually optional, and if you want, you can just run past the engineer to your first big encounter. Your first real objective is to recover Patch, which is a makeshift walking drone that you will be escorting to different objectives.
Recovering Patch
Once you reach the Lumberyard, you just have to clear out the enemies. Make sure to get rid of the snipers, because they deal so much damage; they’ll leave you with about 1 HP. These snipers will also appear during the first boss fight, so do make a habit of targeting them first.
After you’ve cleared the adds, group up next to the Patch: the Warhound Dog drone to start the first boss encounter.
Boss Encounter #1: Lester Steel
Lester Steel is the first boss encounter in Broken Rain, and he is a simple enough boss to beat. He runs around with a chainsaw. One of the effective team compositions here is: 3 DPS and 1 tank build. Have the tank kite the boss, preferably running around in some small area of the arena; the other two DPS deal damage to him, and the third DPS focuses on add clearing, especially the snipers.
This boss is just a DPS check; there are no difficult mechanics here. Just make sure that someone takes care of the sniper adds.
Once the boss has been defeated, activate Patch, and it will go to the gates leading out of the Lumberyard. There’s a button in the shack to the right of the gates that opens the gates.
Escorting Patch
On the way to the next objective, you’ll have to face off against numerous enemies, so to clear them all out, you will need all 4 team members with DPS builds.
Patch will only move if there’s at least one player near him, so dedicate one of you to stay behind and make sure the drone actually moves, while the rest of you can run ahead and take care of the threats. The player who escorts the drone can use a tank build. The drone has a health bar, and it can be damaged and even destroyed before it reaches its next objective.
NOTE: You don't actually need to escort Patch continuously. If the whole team moves far enough away, Patch stops where he is, letting you clear the next area before bringing him forward.
At one point, you’ll see a set of wooden stairs leading up. Have at least one player go there and take the high ground, as it will definitely come in handy next. Right after this set of stairs, you’ll encounter the ATC Turret, which is super deadly and can destroy the Warhound pretty quickly.
To kill the turret quickly, the person on the high ground will have a great angle on two out of four weak points. Shoot all weak points to kill the turret. It would be a good idea to stay on this high ground position to take care of more adds that will run into you.
The main idea of escorting Patch is to move at the same pace - don’t let anyone run ahead and get killed. The time wasted on reviving someone is when your drone will get damaged, which will make the rest of the mission more difficult. So, just stay more or less close to each other and don’t rush.
The Bridge
Right after the turret, you’ll come across the dam section, and Patch will be unable to move because there’s a gap between it and the objective, which is the gate that will need to be blown up. The goal here is to use the crane on the other side and have it lower the platform, which will be used by Patch as a makeshift bridge to get across.
To make this work, you will need to press two buttons in different locations and then activate the crane so it lowers the platform.
Button 1 is on the left side of where you enter this area. So if you were on the high ground before, use the zipline to get down and run to the left. There’ll be a structure with fuse boxes inside. Hit that one.
Button 2 is on the other side of the gap where the enemies and the crane are. When looking at the other side, you’ll probably notice a building with an open window and a yellow tarp on it; that’s the entry point leading to the second button. Clear the enemies, climb into the window, and press the second button.
Once both buttons are pressed, go to the green crane from Slanter Construction Company and press the button on it to activate it so that Patch can cross the gap.
Boss Encounter #2: Dwayne Steel IV
Dwayne Steel IV is a boss with a shield covered by various rocket turrets and other adds. Have the same composition as in the previous boss encounter, meaning at least one tank. The best position to take is behind the white truck with the graffiti that says “The Keep” on it. It also has the ammo restock chest near it.
The boss is another DPS-check-style encounter, but there’s a trick that will help you disable the rocket turrets, which will make the whole encounter way easier. So, what you have to do to disable them is destroy the boss’s backpack. Get the tank to aggro the boss and have him turn your back to you so you can shoot it. You can also use the decoy on him to make him turn, which is way safer.
After that, just take your time and shoot the boss. Make sure to also kill all adds for the encounter to be officially completed.
Traversal Segment
Once you have dealt with Dwayne Steel IV, you’ll get inside the Hydro Station. Just keep moving forward until you find Commander DaCosta locked up behind some bars. Shoot the lock off the door and speak with her.
Boss Encounter #3: Iris Steel
The next encounter could be quite annoying, especially compared to the simple DPS checks of the previous two. The encounter takes place in the Turbine Room. As soon as you make your way inside, activate the marked objectives - the Water Pressure valve and the computer terminal, which resets the Turbine Control.
Here’s how this works. Inside the control room, you’ll see 4 monitors, one for each turbine. Strictly speaking, two turbines are on the left side of the arena and two on the other, so:
- Turbines T1 and T2 - left side
- Turbines T3 and T4 - right side
There are buttons for each individual turbine, and two valves outside the room for each pair of turbines. Once one of the monitors goes red, you need to press the button that corresponds to that specific turbine and also leave the control room and use the correct valve for that pair. You need to interact with both the corresponding turbine control and its valve. Depending on the phase, one may need to be activated before the other.
Managing turbines is what you’ll be doing throughout this boss encounter. It’s best to dedicate one player, preferably with a healer build, to manage the turbines, which includes pressing the buttons in the control room and also turning the valves. The whole team can stay inside the control room and only run out to turn the valves.
How to deal with the boss? Iris Steel is immune to damage, and the only way to make her vulnerable is to use the EMP Jammer or something similar. There’ll be a window to do that once Iris runs up to one of the turbines to disable it. That’s the moment when someone (other than your turbine manager guy) leaves the control room and uses the Jammer to disable her immunity and allow the rest of the team to deal damage.
Traversal Segment
The traversal segment after the Iris Steel encounter is your typical Division 2 gameplay. There are no mechanics to worry about; you’ll just be using ziplines, opening doors, and killing whatever enemies you meet as you make your way to the top of the Dam.
Final Boss: Marguerite Steel
Before Marguerite Steel appears, you first need to activate all 3 sluice gates. To do that, one player has to pick up the Encryption Key on one side of the dam and carry it to the terminal on the opposite side. As soon as you pick it up, a 40-second timer starts, so you need to make it across and insert the key before time runs out.
I recommend assigning this job to your tank, preferably with some Hazard Protection. The runner gets targeted by bombs along the way, while electrical hazards appear across the floor. There are also snipers overlooking the route, so the rest of the team should prioritize taking them out and keeping enemies off the runner.
Once you reach the other side, insert the Encryption Key and press the highlighted button to activate the sluice gate. You then need to repeat the same run two more times, for a total of three Encryption Key deliveries. Later runs also throw additional enemies into the route, so don't rush blindly through the hazards just because of the timer.
When all 3 sluice gates are open and operational, Marguerite Steel will appear along with tons of ads. This is a similar boss fight to the previous one in the sense that you have to multitask.
First of all, one of you needs to manage the pressure. You’ll see a gauge on the top-left side of the screen that shows a percentage, and the goal is to keep that number as low as possible.
Each gate has a button that, when it flashes green, you need to press to (possibly) release the pressure or stop it from climbing further.
The boss has two weak points - the helmet and the backpack. Once you destroy one, the miniboss will spawn. It will be either Whirlwind, Turkey, or The Delivery Man. Also, the boss will attempt to repair her lost armor at one of the SHD caches. Each miniboss drops a thermite charge on death, which you then have to use on the SHD cache to prevent the boss from repairing her armor. So you repeat that 3 times, and only then does the boss become fully vulnerable, and you can defeat her.
Broken Rain Incursion Rewards and Challenges
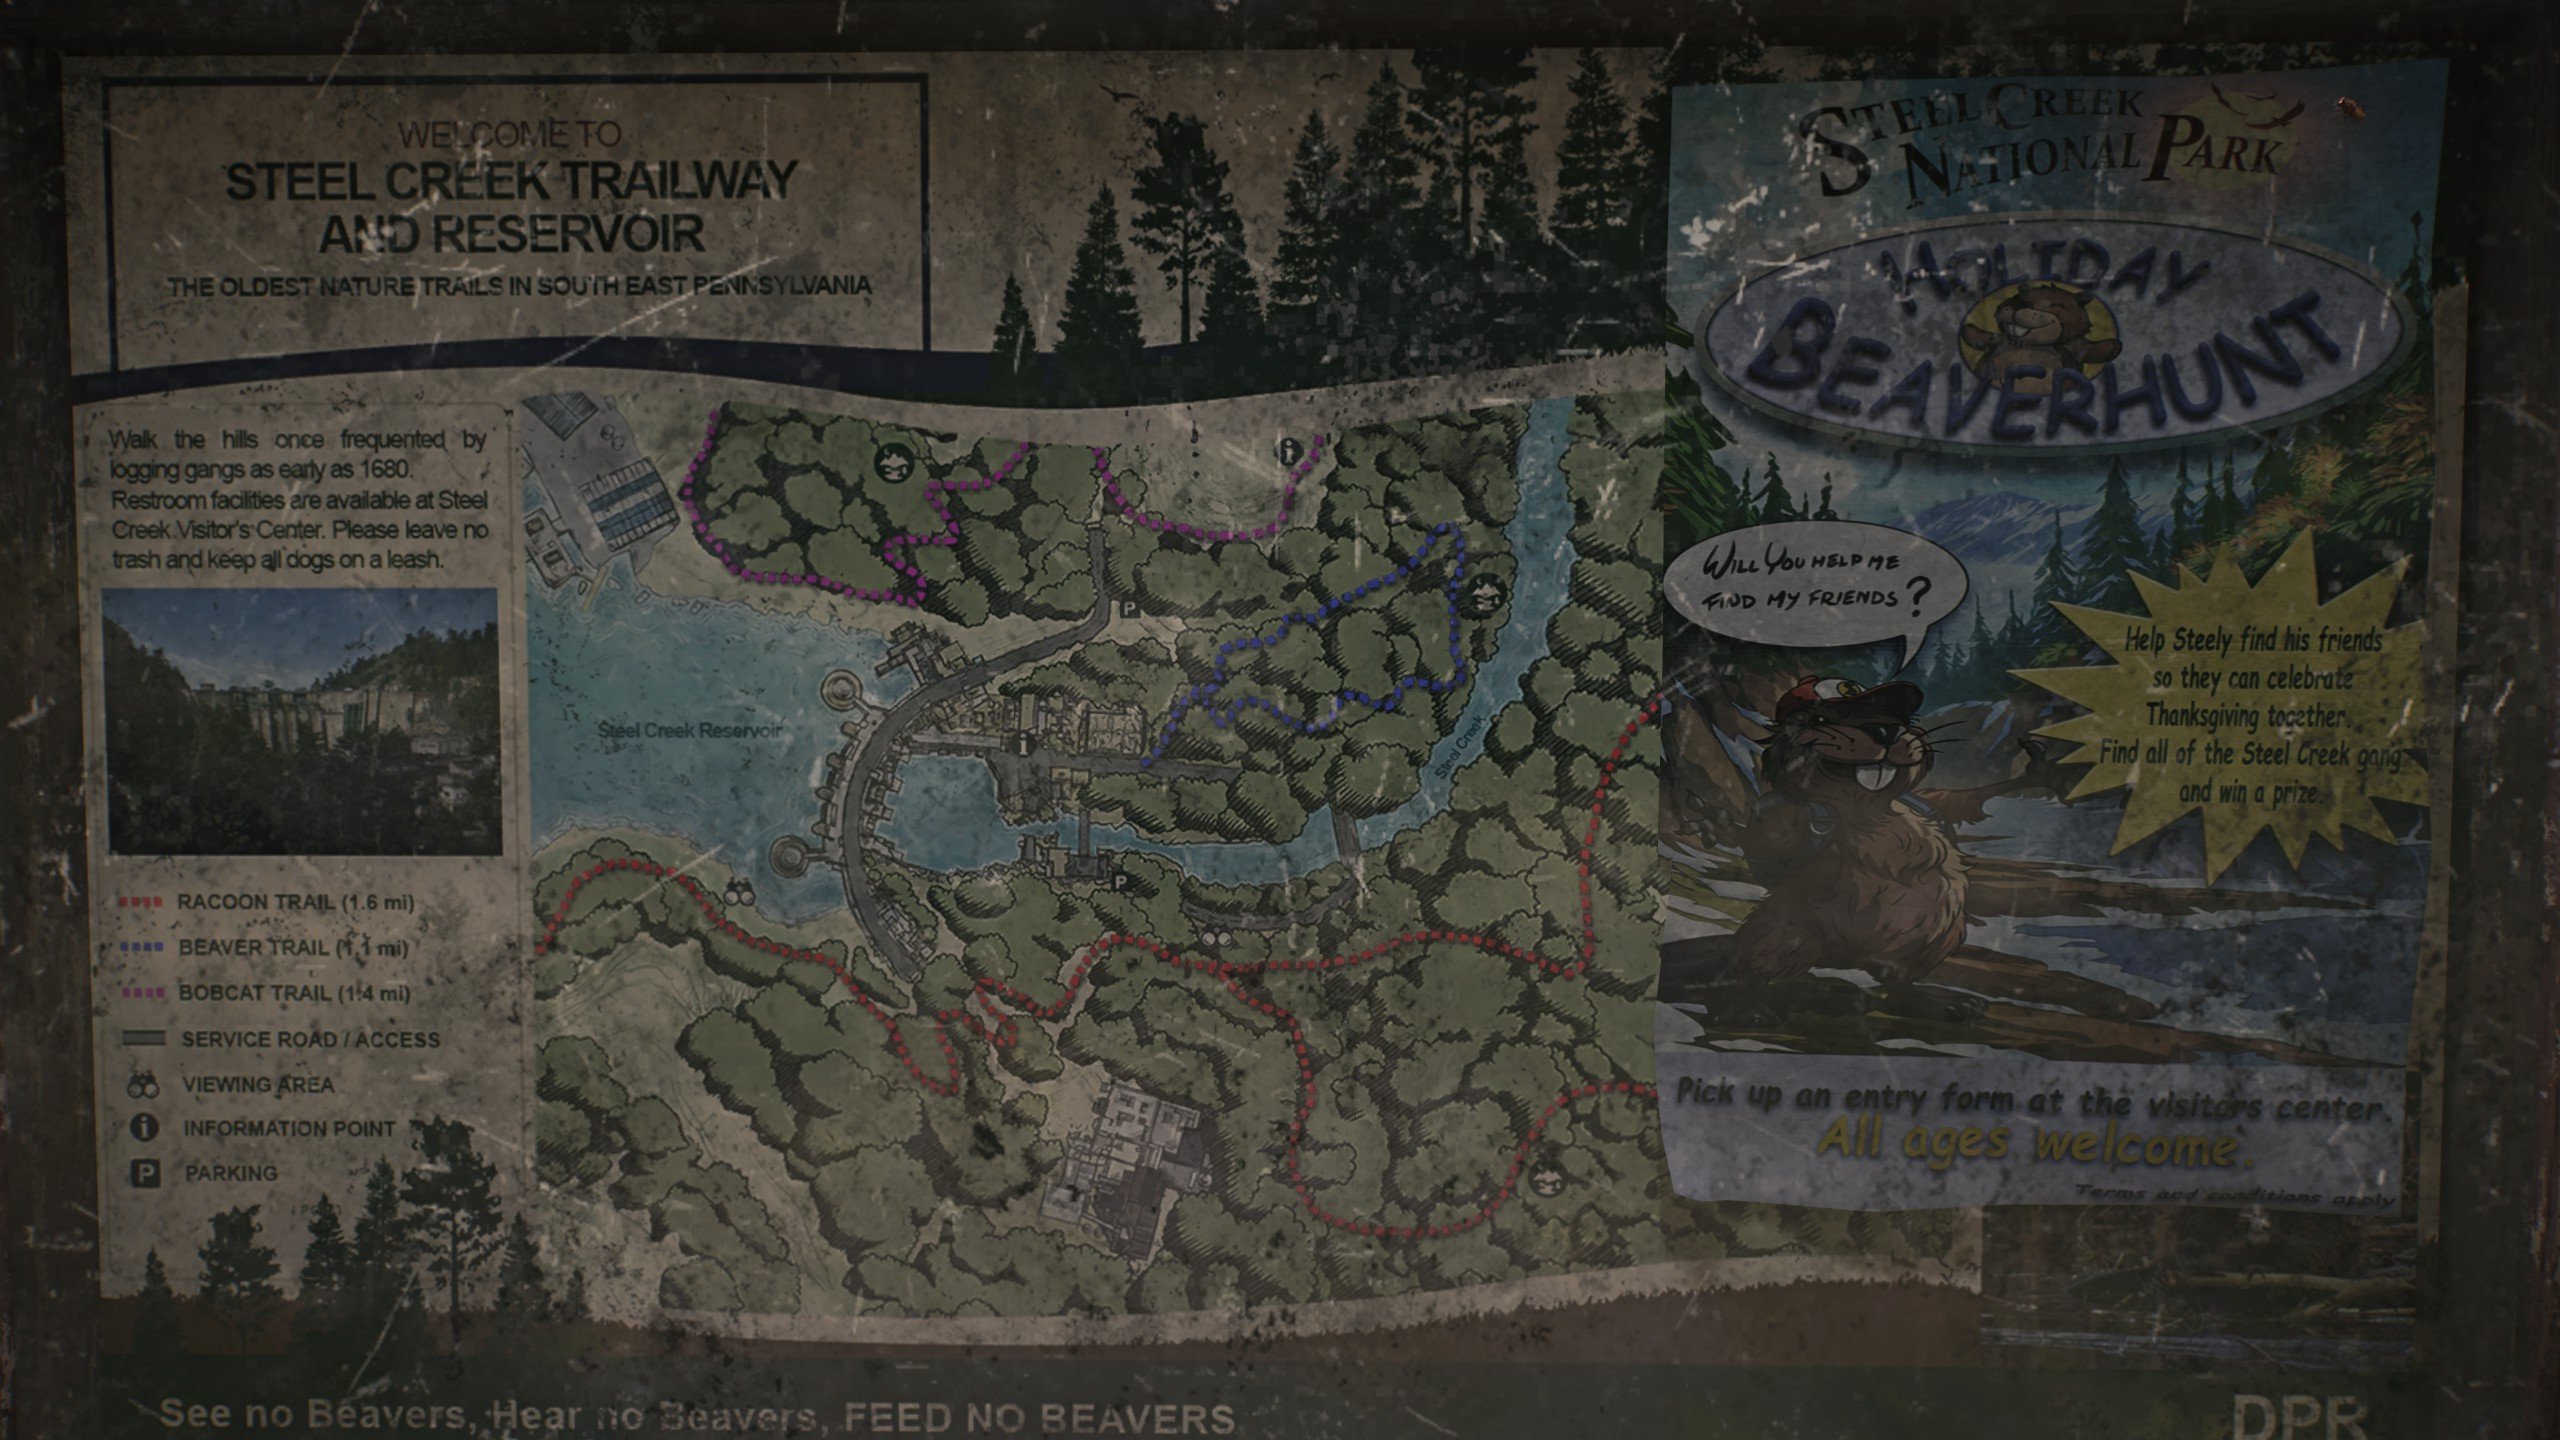
Broken Rain has a mix of guaranteed completion rewards, boss drops, and special rewards tied to the Incursion. Completing Broken Rain rewards you with:
- 315,600 XP
- 2,000 Credits
- Broken Rain: Bronze patch
- Prototype Cores Cache
- Dam Cipher Fragment
Day-1 bonus: clear within 24 hours of launch to earn the Golden Beaver + Silver Beaver Arm Patches. After 24h, only Silver Beaver remains available through the first week.
Steel and Sons ACR Exotic
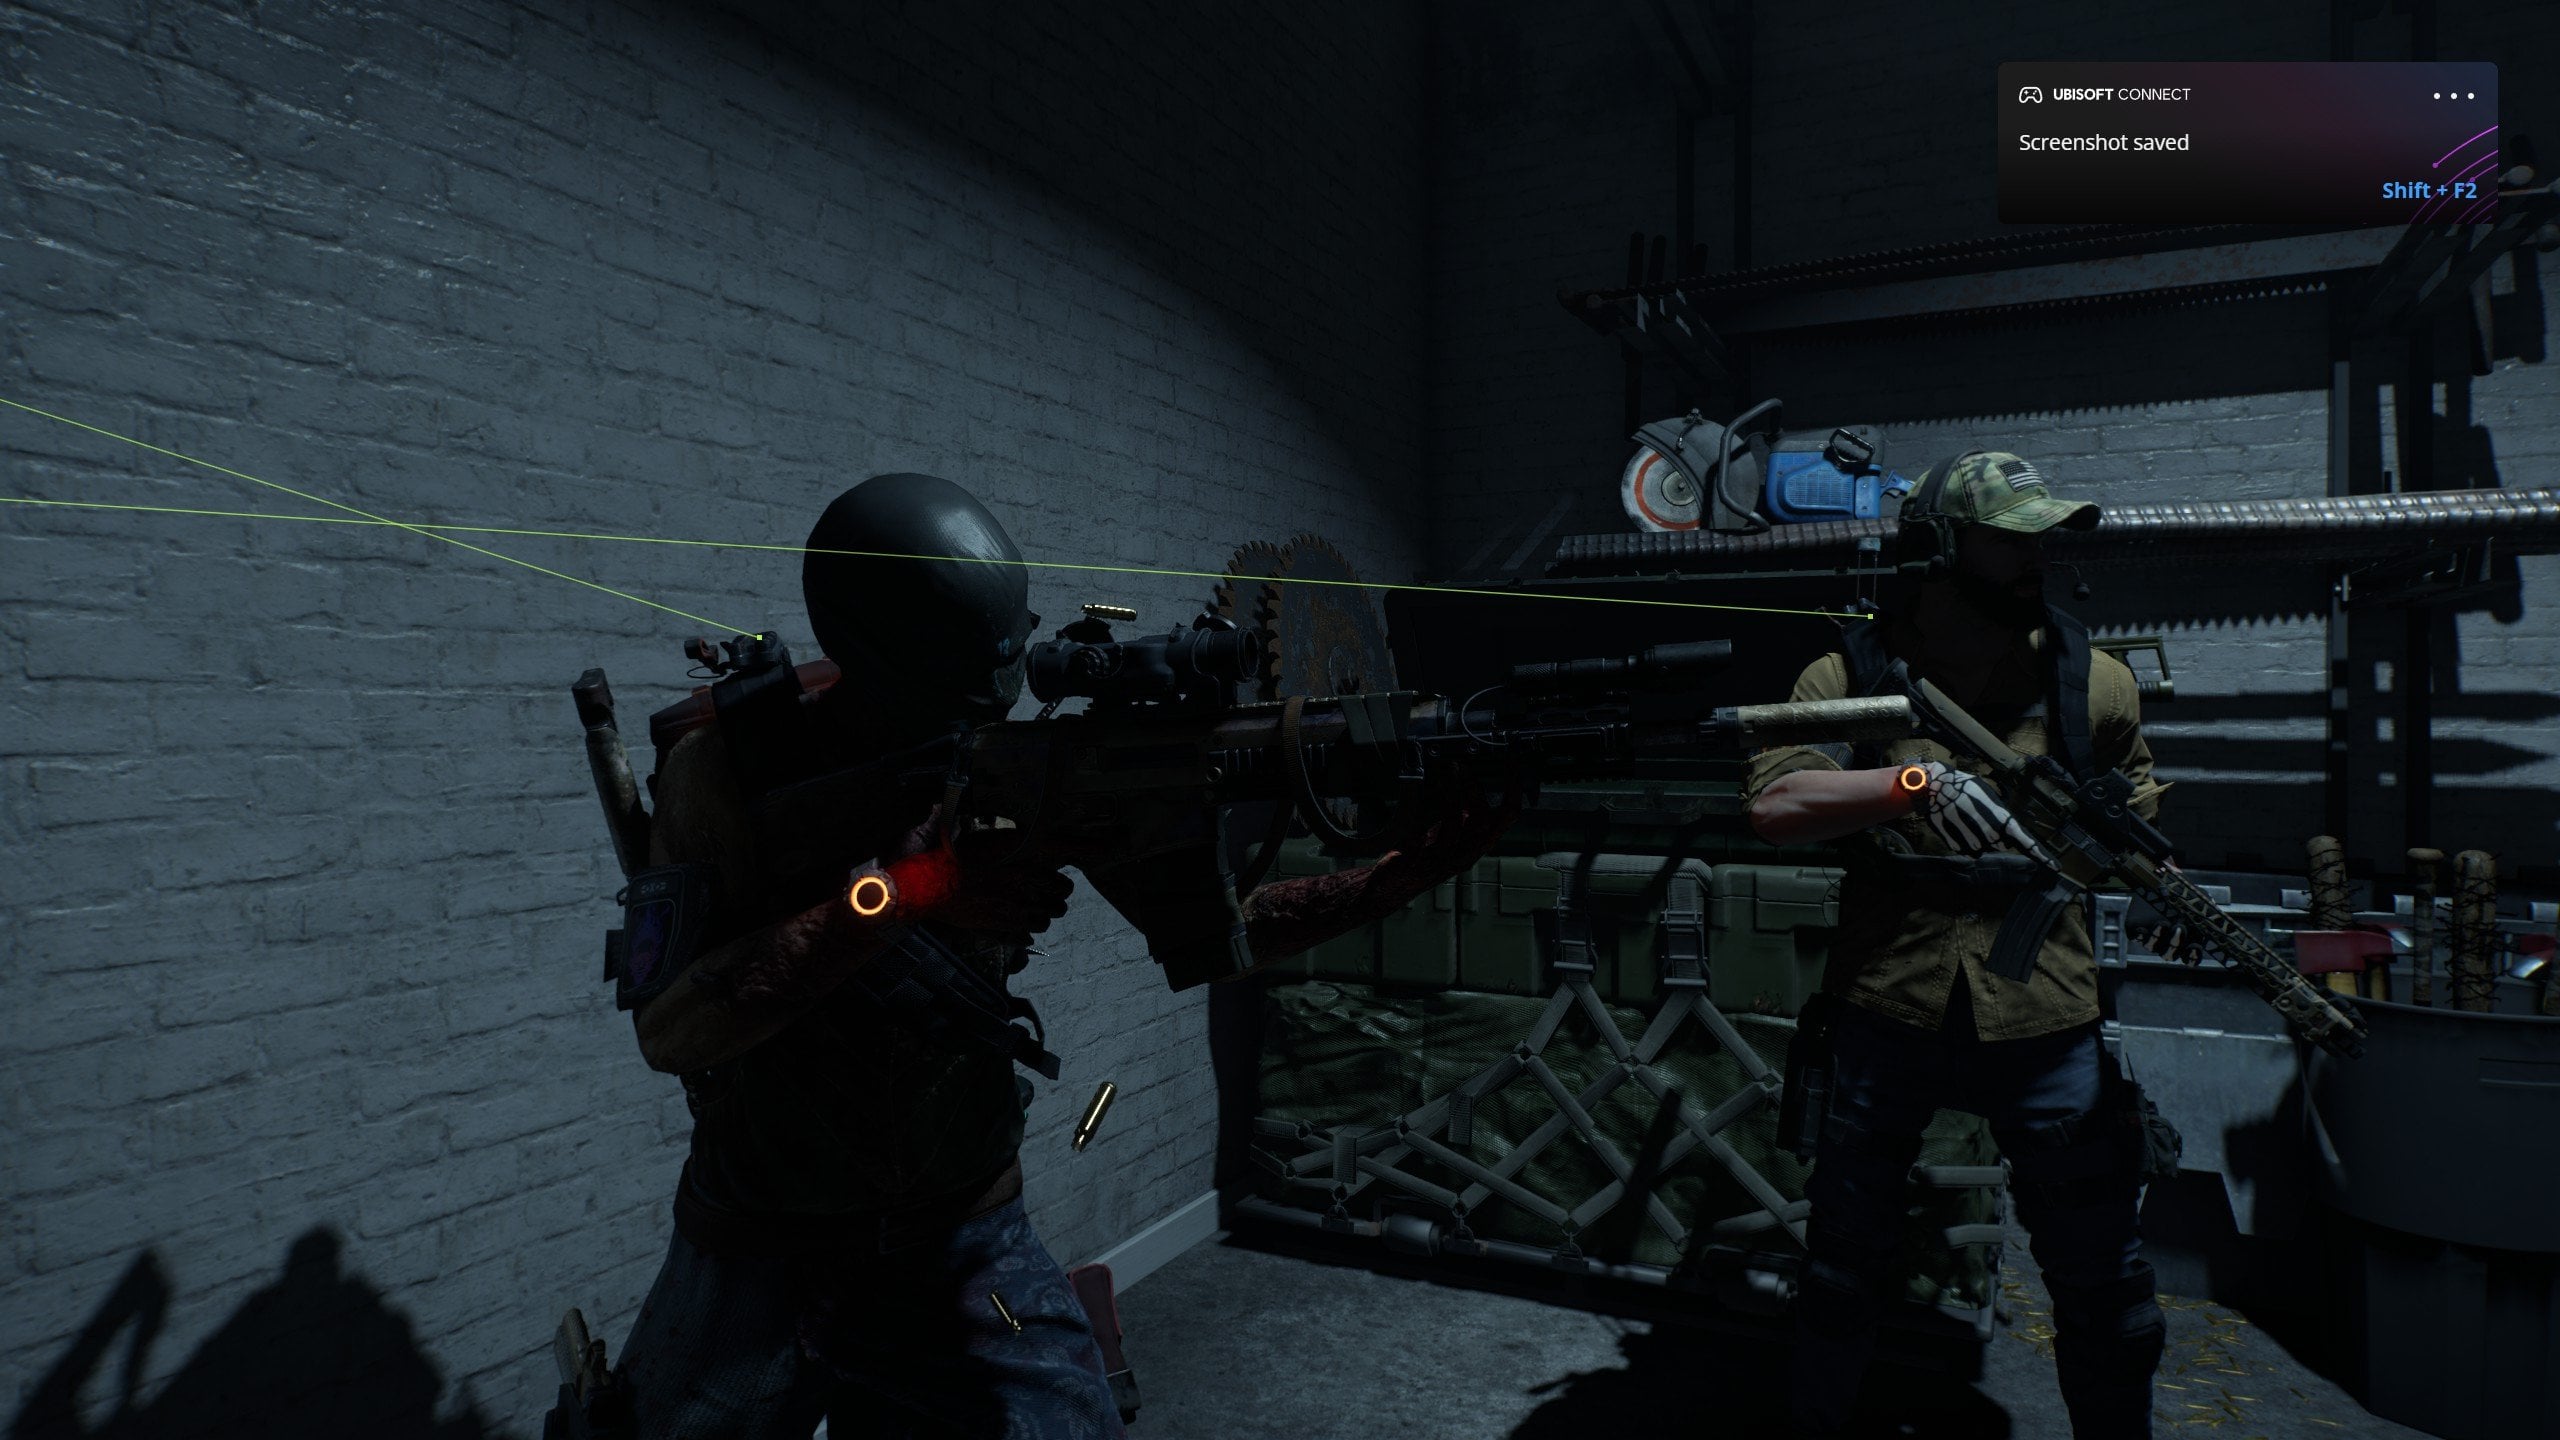
The main reward you’ll probably be chasing is the Steel and Sons ACR, the new Exotic weapon tied to Broken Rain.
It has a chance to drop directly from the Incursion bosses, although the drop rate there appears to be considerably lower than from the final reward chest. The chest at the end provides you with a better shot at getting the Exotic, but its weekly reward is limited to once per character, so additional characters give you more weekly chances.
Broken Rain Challenges
Besides simply completing the Incursion, Broken Rain has additional challenge and cosmetic rewards that aren't all displayed on the Normal mission panel.
The first confirmed one is the Broken Rain: Bronze patch, which is listed directly among the rewards for a Normal completion.
There are also additional Broken Rain rewards tied to harder or special completion conditions, including flawless and hidden objectives. I’ll update the exact requirements and rewards here once they’re confirmed in-game, rather than relying on the conflicting information appearing in day-one guides.
Best Loadouts for Broken Rain Incursion
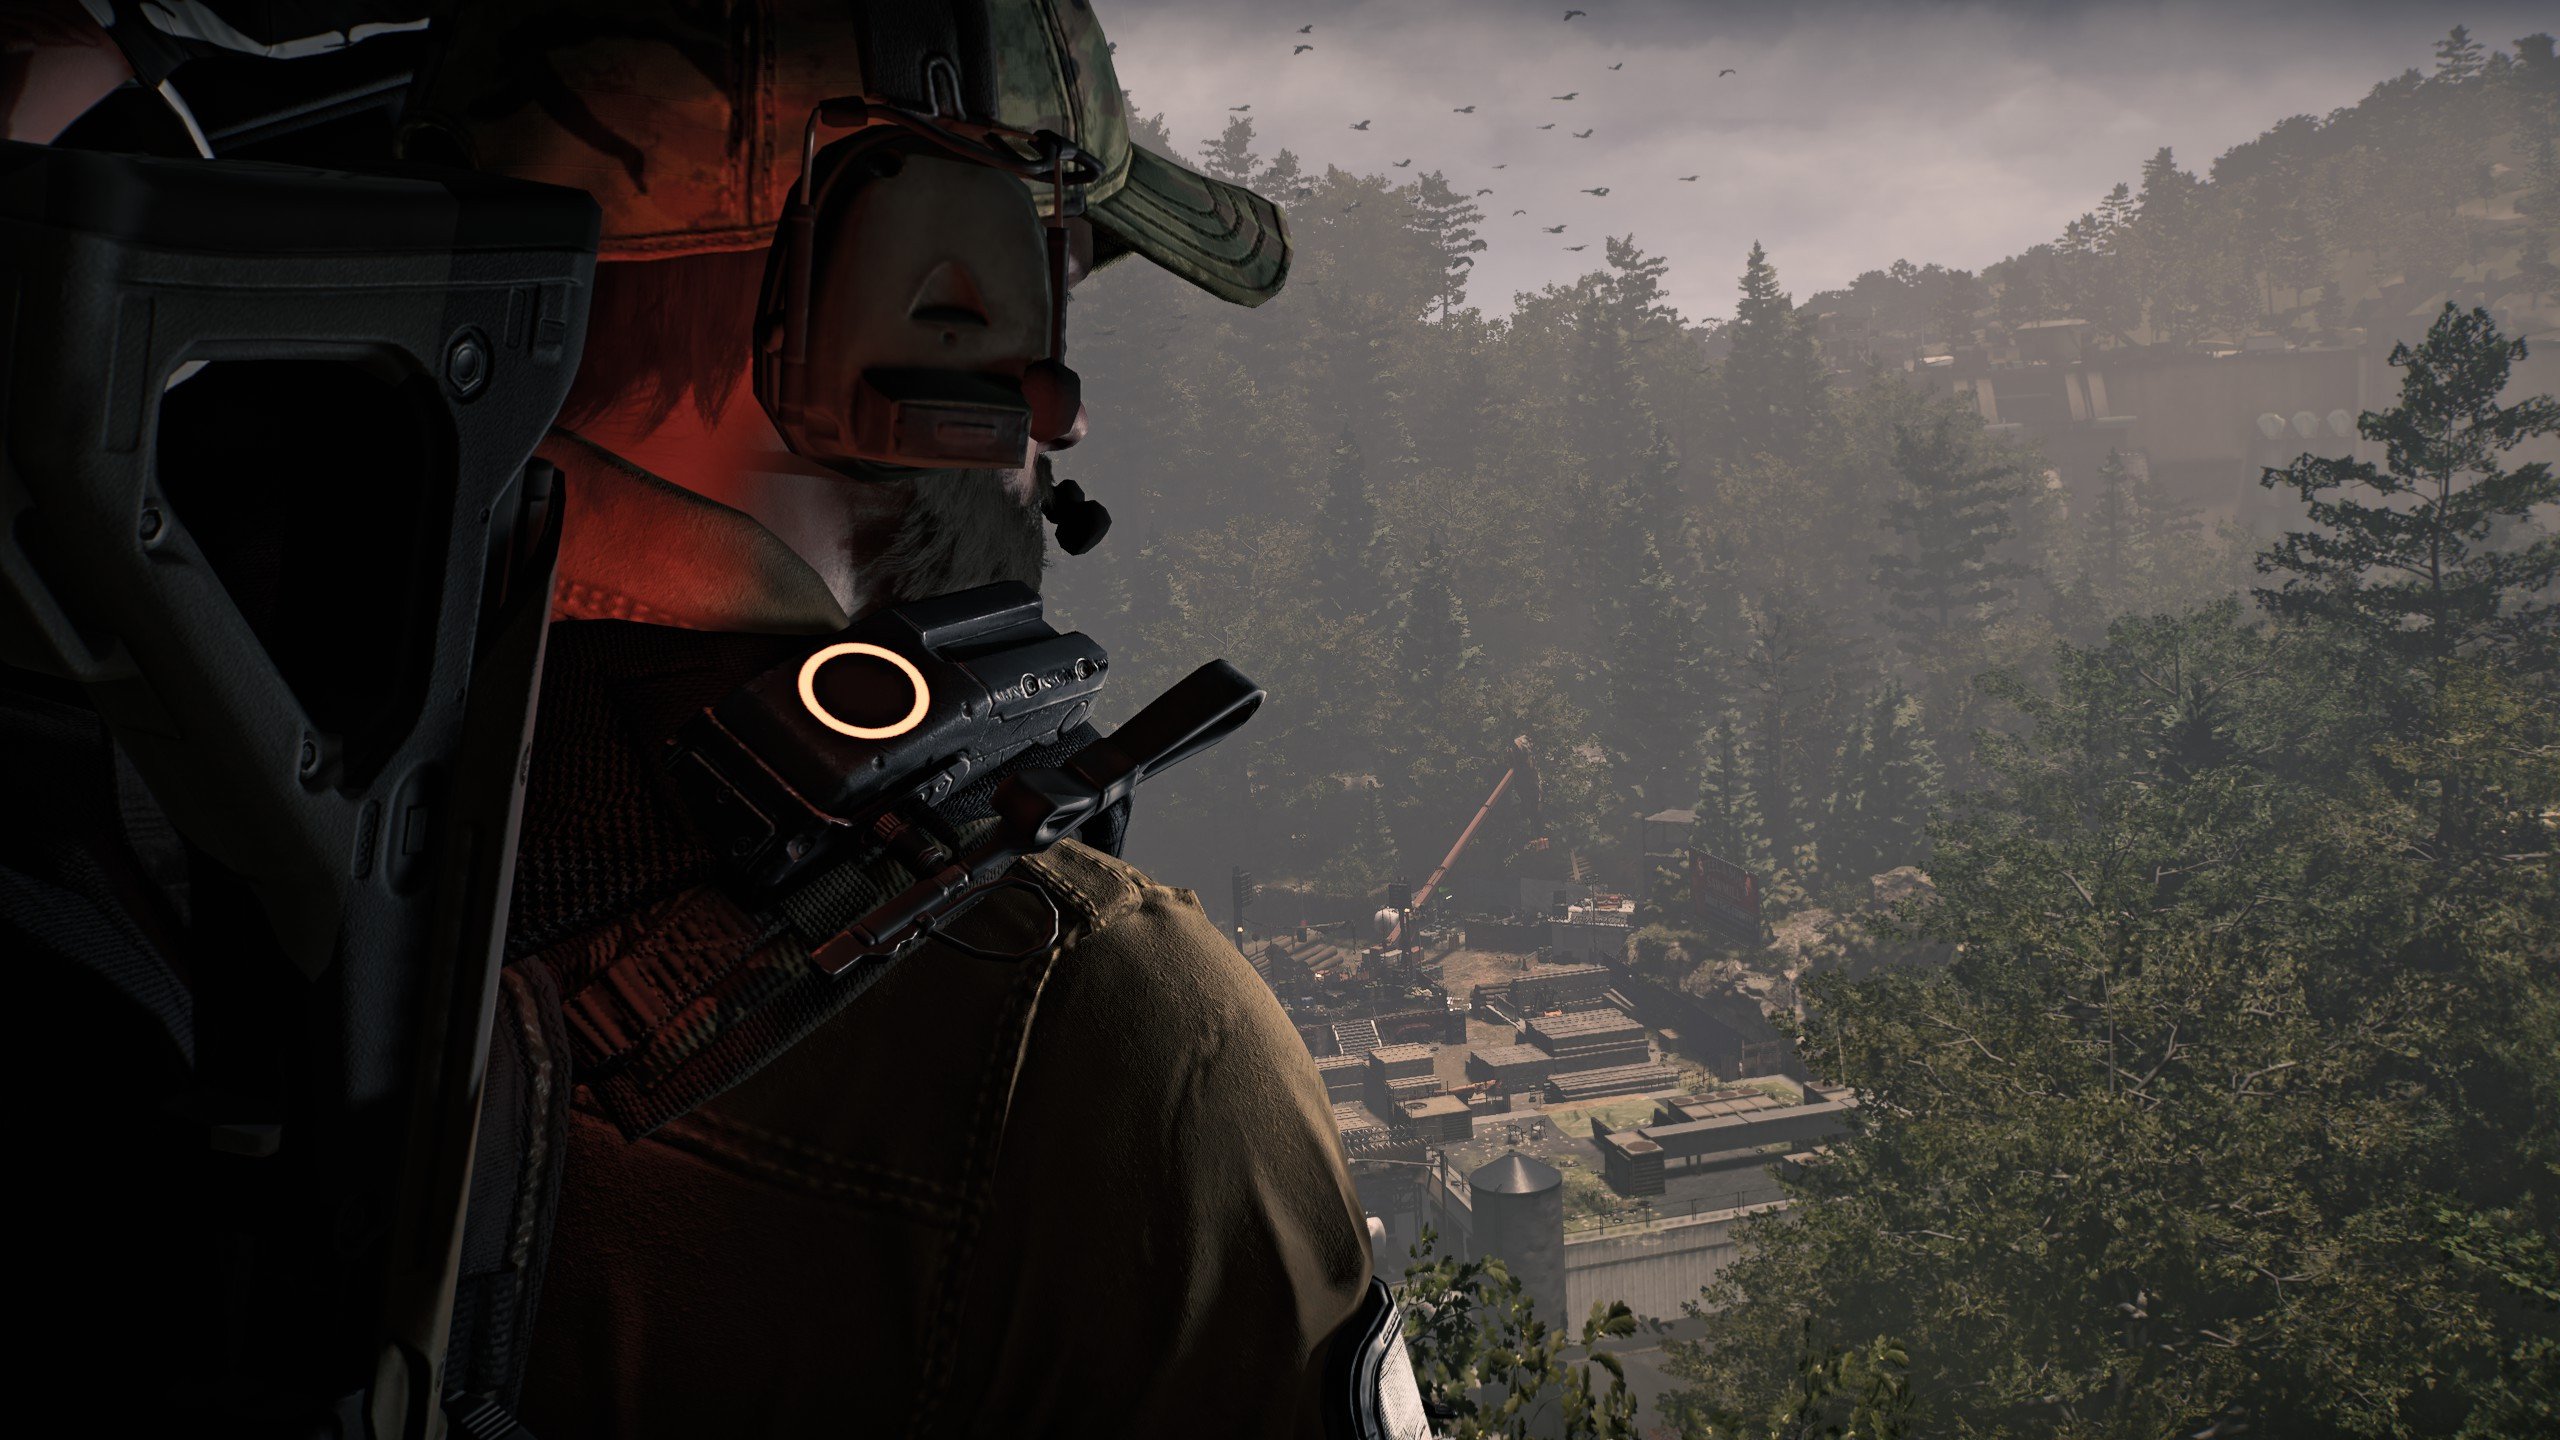
I’d like to highlight a few loadouts that will help you beat this Incursion. These are only my recommendations, so if you’re certain your loadout is better, it probably is.
Ubisoft also included gear and weapons on the free Event Pass track that combine into two DPS builds and one Healer build specifically suggested for taking on the Rikers. Because of that, I’m going to treat those as the official Broken Rain loadouts.
Also, Prototype Gear can be used in Broken Rain, but its stats are fully normalized.
Official DPS 1 Loadout - Tipping Scales
- Primary: Big Alejandro Exotic LMG
- Secondary: Gear Shift Named LMG
- Mask: Tipping Scales
- Backpack: Tipping Scales
- Gloves: Tipping Scales
- Kneepads: Tipping Scales
- Chest: Equalizer
- Holster: Centurion’s Scabbard
This is the more LMG-focused of Ubisoft’s two DPS setups and should work well for sustained boss damage and general add clearing.
Official Healer Loadout - Ortize: Reficere
- Primary: Bittersweet Exotic Rifle
- Secondary: Lefty Named Shotgun
- Mask: Ortize: Reficere
- Gloves: Ortize: Reficere
- Holster: Ortize: Reficere
- Kneepads: Ortize: Reficere
- Backpack: Birdie’s Quick Fix
- Chest: Benefactor
A dedicated healer is useful throughout Broken Rain, but especially during the Iris and Marguerite encounters, where the team has to split its attention between mechanics, adds, snipers, and the boss.
Official DPS 2 Loadout - Striker
- Primary: St. Elmo’s Engine Exotic Assault Rifle
- Secondary: Lud Named Assault Rifle
- Mask: Striker’s Battlegear
- Backpack: Striker’s Battlegear
- Chest: Striker’s Battlegear
- Kneepads: Striker’s Battlegear
- Gloves: Overdogs
- Holster: Salvo
If you just want a straightforward DPS option, Striker is probably the safest starting point. Broken Rain has several encounters that ultimately turn into damage checks once their main mechanic is handled, so having one or two strong Striker players makes a lot of sense.
Meta DPS Loadout - Striker
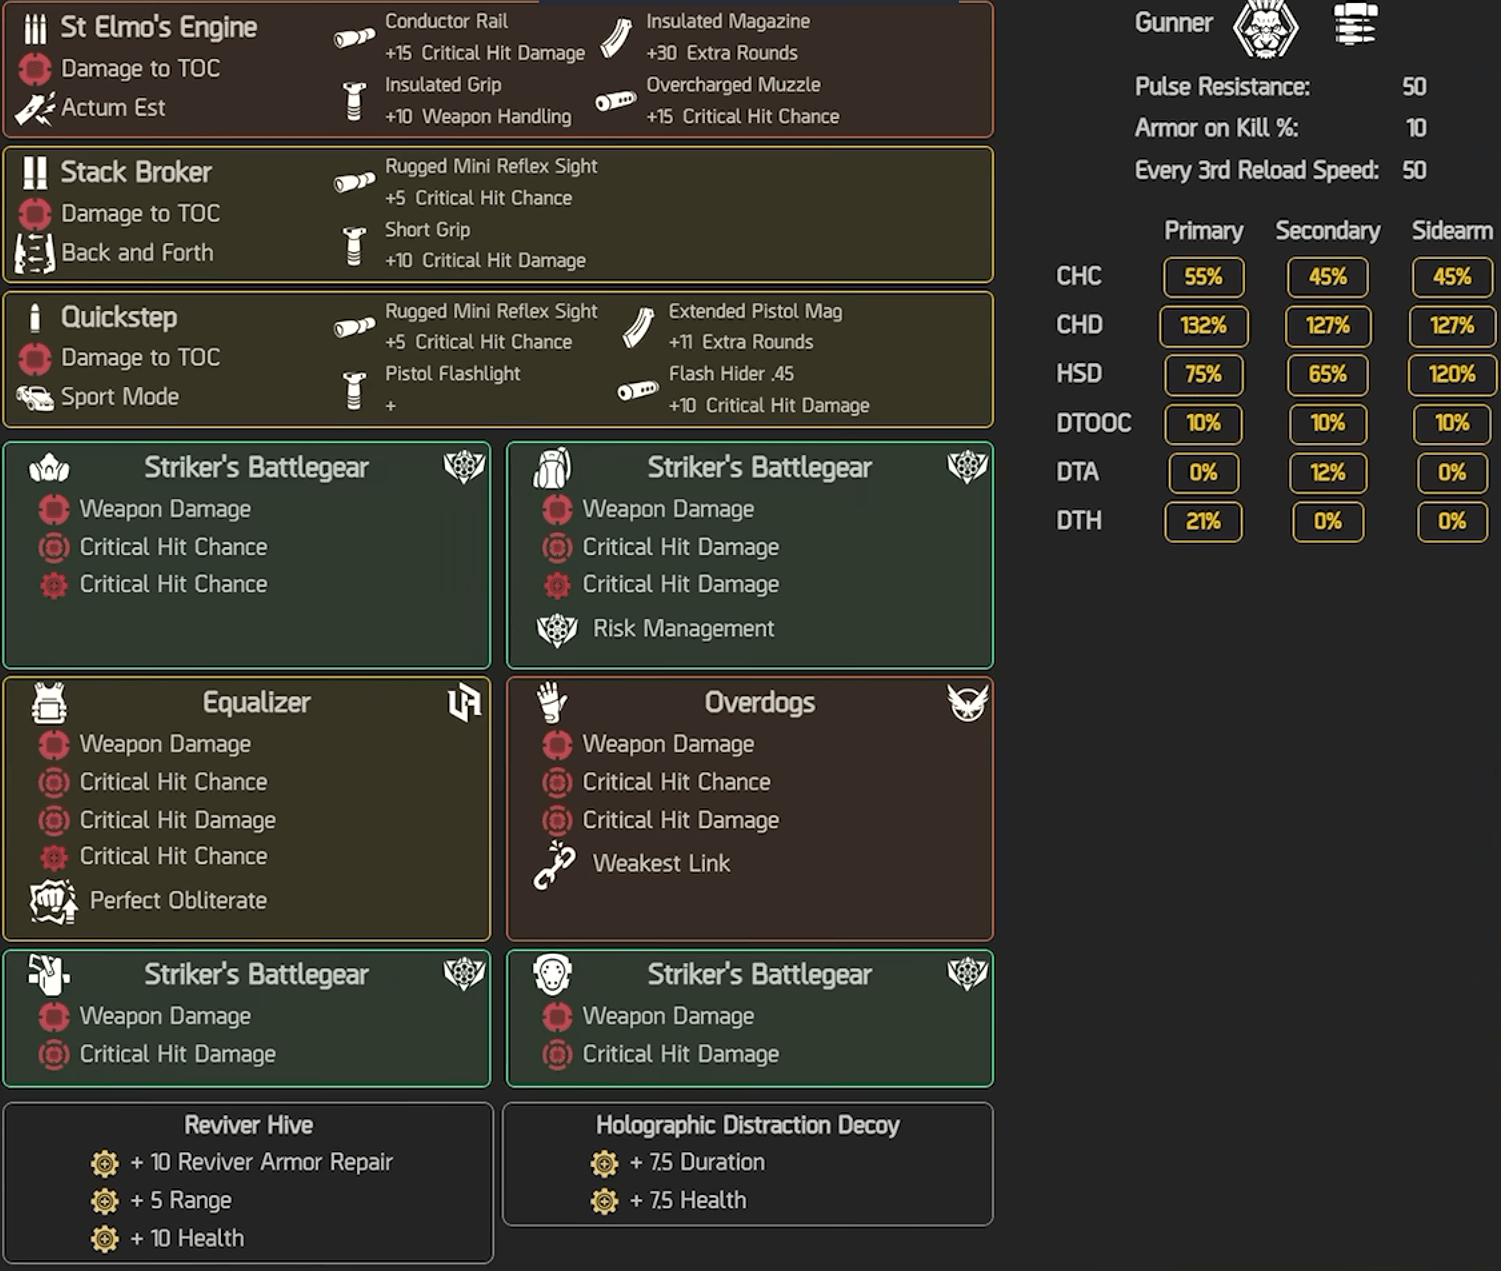
A more conventional Striker setup is also one of the safer choices for the Incursion:
- Primary: St. Elmo’s Engine
- Secondary: Stack Breaker
- 4-piece Striker’s Battlegear
- Equalizer Chest
- Overdogs Exotic Gloves
- Reviver Hive
- Holographic Distraction Decoy
- Gunner Specialization
This version focuses heavily on Critical Hit Chance and Critical Hit Damage while keeping the Decoy available to pull attention away from the team.
Striker was one of the main DPS archetypes recommended before Broken Rain launched, and it has held up well now that players have actually cleared the Incursion. High, consistent DPS is useful against Lester, Dwayne, Iris, and Marguerite alike.
Iris Steel Cheese - Negotiator’s Dilemma
There is also a very strong Negotiator’s Dilemma strategy specifically for Iris Steel.
Normally, Iris is immune until you EMP her while she interacts with one of the turbines. However, Negotiator’s Dilemma lets you mark Iris and then damage marked snipers or other enemies to transfer damage onto her.
One player who completed Broken Rain several times was able to kill Iris this way without relying heavily on the intended EMP damage windows.
I’d treat this as an encounter-specific cheese rather than your main DPS build, especially because Ubisoft could always patch the interaction later.
Healer Loadout - Future Initiative
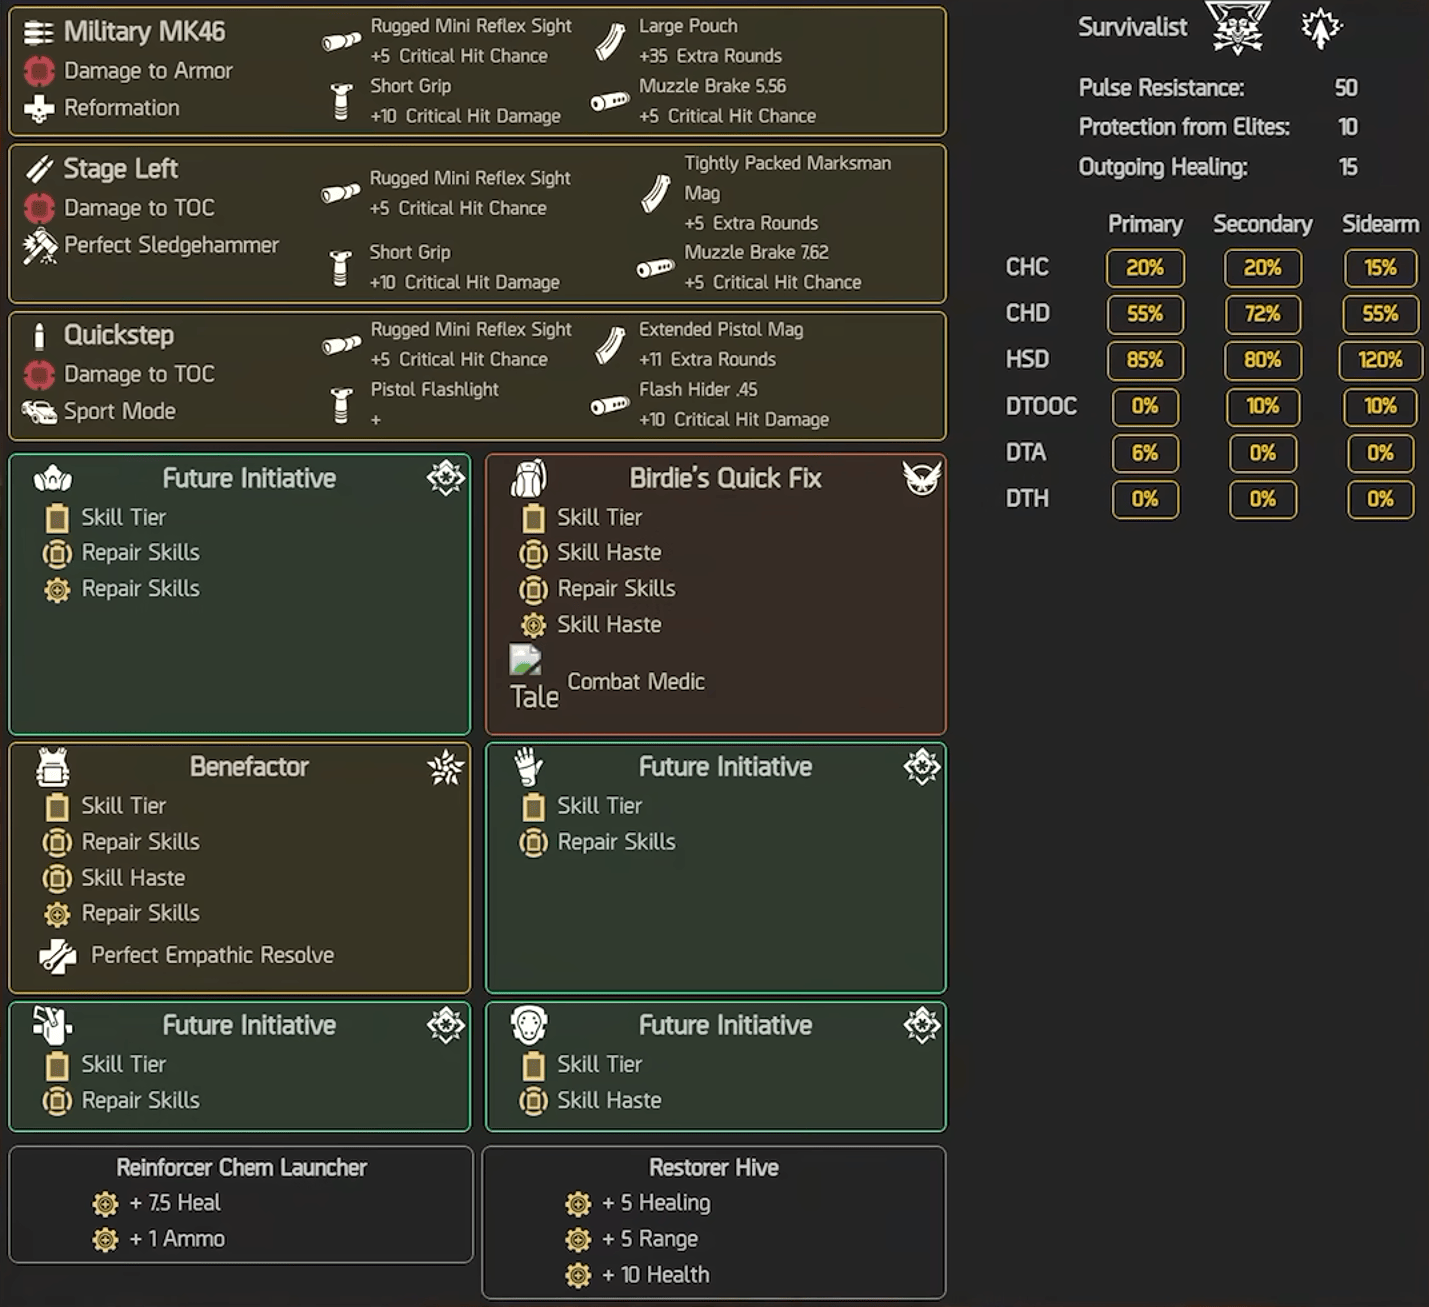
If you want a more traditional meta healer instead of the Event Pass setup, this is a very strong option:
- Primary: Military MK46 with Reformation
- Secondary: Stage Left with Perfect Sledgehammer
- 4-piece Future Initiative
- Birdie’s Quick Fix Exotic Backpack
- Benefactor Chest
- Reinforcer Chem Launcher
- Restorer Hive
- Survivalist Specialization
Future Initiative gives you strong healing while also increasing your team’s damage. Benefactor adds Perfect Empathic Resolve, while Birdie’s Quick Fix makes it much easier to keep the team alive and recover players when an encounter gets messy.
This kind of healer is particularly useful in Broken Rain because 3 DPS + 1 Healer works well for several encounters, including Iris.
Tank Loadout - Foundry Bulwark
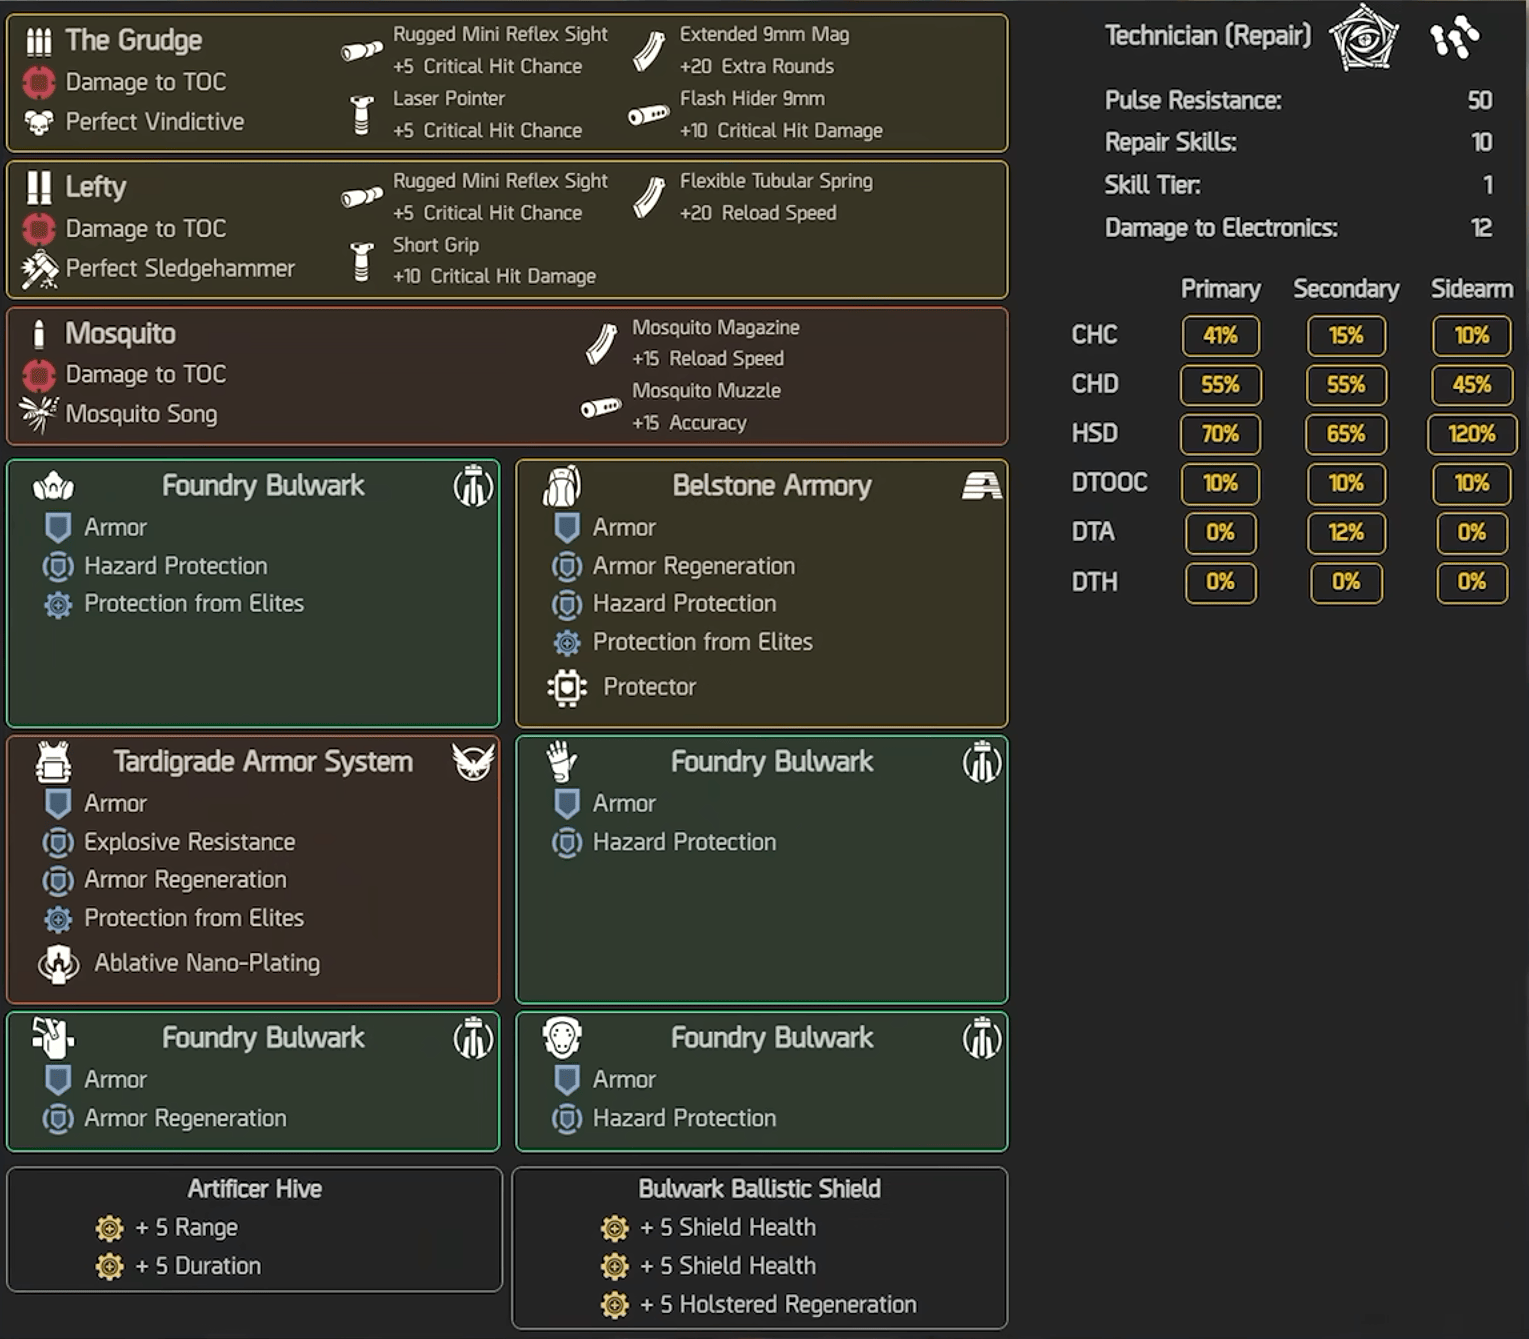
You do not necessarily need a tank for the entire Incursion, but there are a couple of places where one makes things noticeably easier.
A solid setup is:
- Primary: The Grudge
- Secondary: Lefty
- Sidearm: Mosquito Exotic Pistol
- 4-piece Foundry Bulwark
- Tardigrade Armor System Exotic Chest
- Belstone Armory Backpack with Protector
- Artificer Hive
- Bulwark Ballistic Shield
- Technician Specialization
Prioritize Armor, Hazard Protection, Armor Regeneration, and Protection from Elites.
The most obvious use for this build is the final encounter. The Encryption Key runner has to deal with bombs, electrical hazards, adds, and snipers while crossing the dam, so a tank with Hazard Protection is much safer than sending a glass-cannon DPS player. Players who have repeatedly cleared Broken Rain specifically recommend using the tank as the runner here.
A tank can also be useful for keeping Lester or Dwayne occupied while the rest of the group focuses on damage.
Crowd Control Loadout - Eclipse Protocol
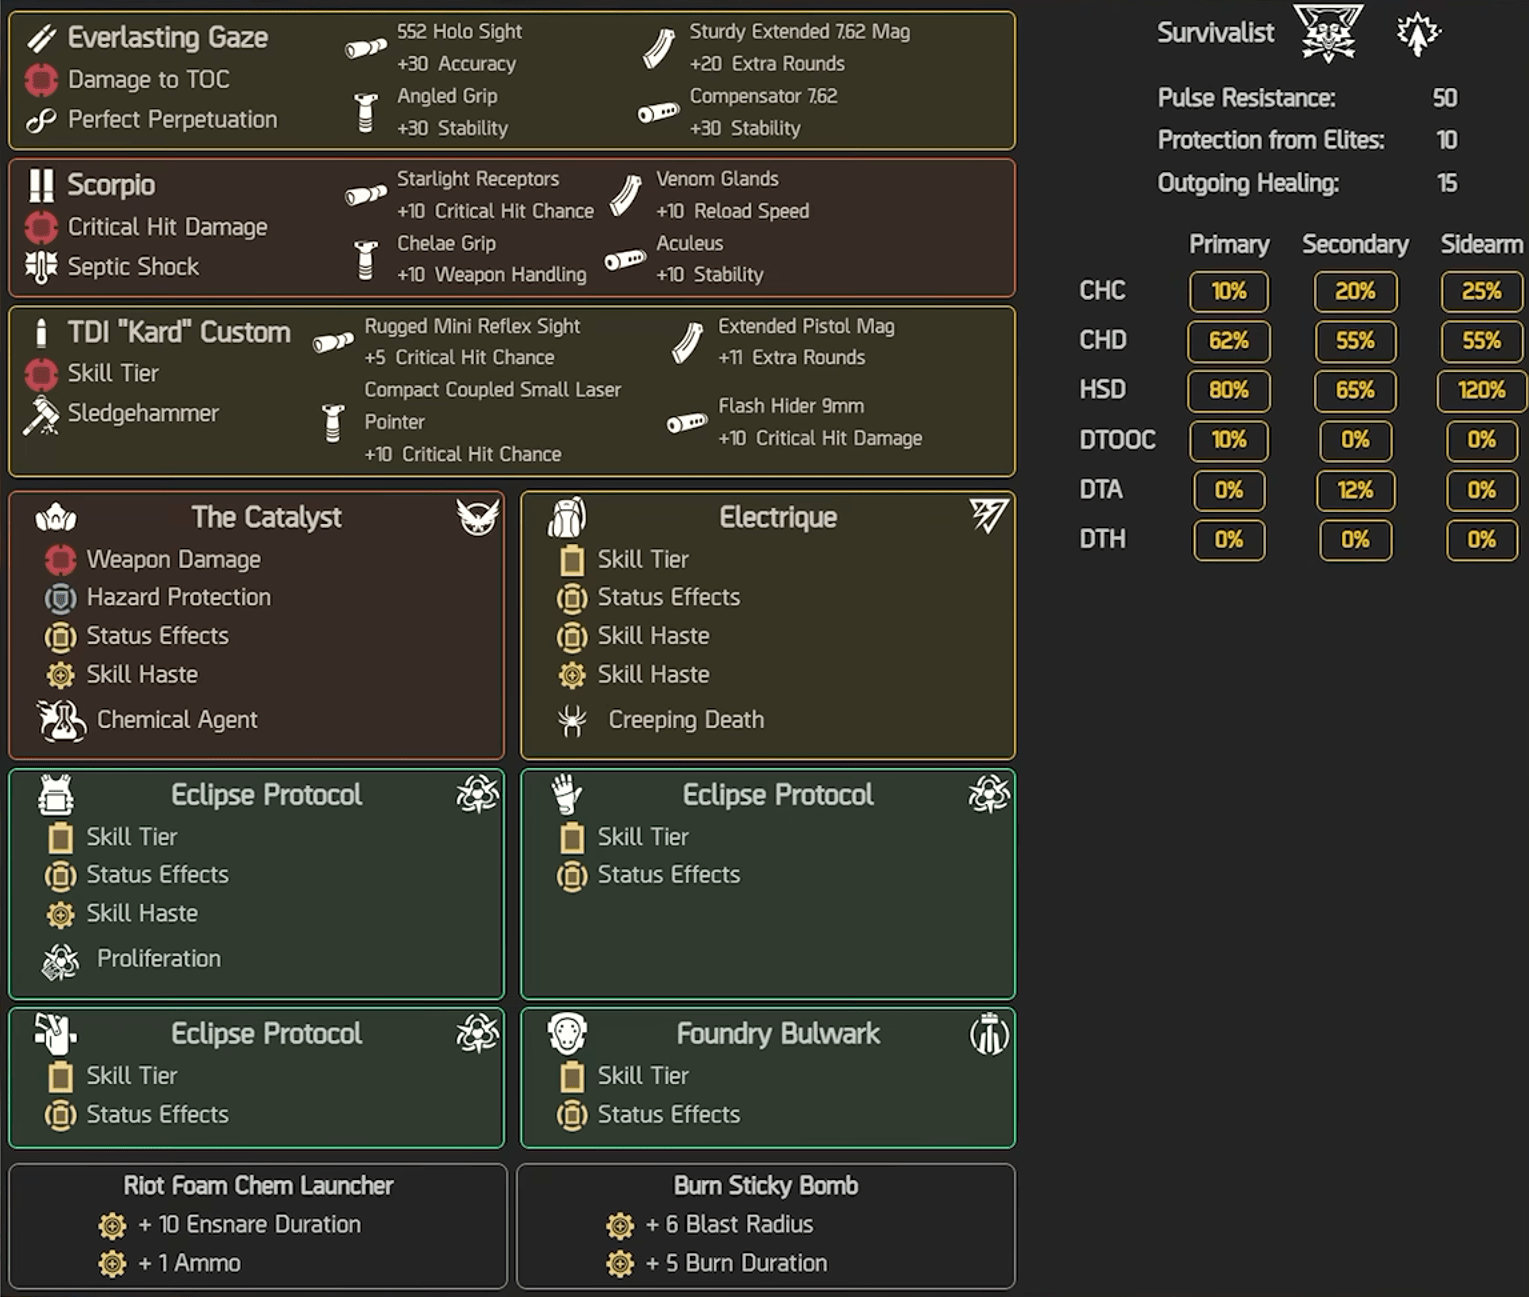
Crowd Control is more of an optional role, but it can still make add-heavy sections easier:
- Primary: Everlasting Gaze
- Secondary: Scorpio
- Sidearm: TDI “Kard” Custom
- Eclipse Protocol pieces
- The Catalyst Exotic
- Electrique Backpack with Creeping Death
- Riot Foam Chem Launcher
- Burn Sticky Bomb
- Survivalist Specialization
Stack Status Effects and Skill Haste.
Eclipse Protocol can lock down groups of Rikers while your DPS players concentrate on priority targets. Scorpio is also useful against elites at close range.
I would not consider CC mandatory for Broken Rain, though. It makes more sense as a flex loadout somebody can switch to if your group is struggling with adds rather than something you build your entire team around. The original recommendation for this setup was also made before Broken Rain released, so DPS, healing, and tanking have much stronger post-launch evidence behind them.
Recommended Team Setup
For most of Broken Rain, I’d start with:
- 2-3 DPS
- 1 Healer
- Tank available as a loadout swap
- Negotiator’s Dilemma available for Iris
You don’t need to stick with the same four builds for the entire Incursion. Broken Rain is much easier if players are willing to swap roles between encounters. A tank is particularly helpful for the final boss, while Iris benefits much more from a healer and high DPS.
Check out more Division 2 guides:
- How to Get Lexington
- Battle for Brooklyn Secret Hunter Masks Guide
- How to Get Provocator Armor
- Leveling Guide
F.A.Q.
What is the best team composition for Broken Rain?
For most encounters, 3 DPS and 1 Healer works well. Having a Tank loadout ready is especially useful for Lester and the final Marguerite Steel encounter.
What is the best DPS build for Broken Rain?
Striker’s Battlegear is one of the safest all-purpose DPS choices. Negotiator’s Dilemma is also particularly strong against Iris Steel because of its damage-transfer interaction.
How do you make Iris Steel vulnerable?
Wait for Iris to move toward one of the turbines, then hit her with an EMP effect such as Jammer Pulse. This temporarily removes her immunity and creates a DPS window.
What happens if water pressure reaches 100%?
You fail the Marguerite Steel encounter. Watch the numbered sluice-gate indicators and activate the corresponding controls before the pressure reaches 100%.
What are Encryption Keys and Thermite used for?
Encryption Keys are used during the opening phase to activate the three sluice gates. Thermite drops from named minibosses later and is used to destroy Marguerite’s SHD repair caches.
What are the main Broken Rain rewards?
Broken Rain offers the Steel and Sons ACR Exotic, caches, Dam Cypher Fragments, cosmetic patches, and additional challenge rewards. Normal difficulty also awards the Broken Rain: Bronze patch.