 Dallon Avery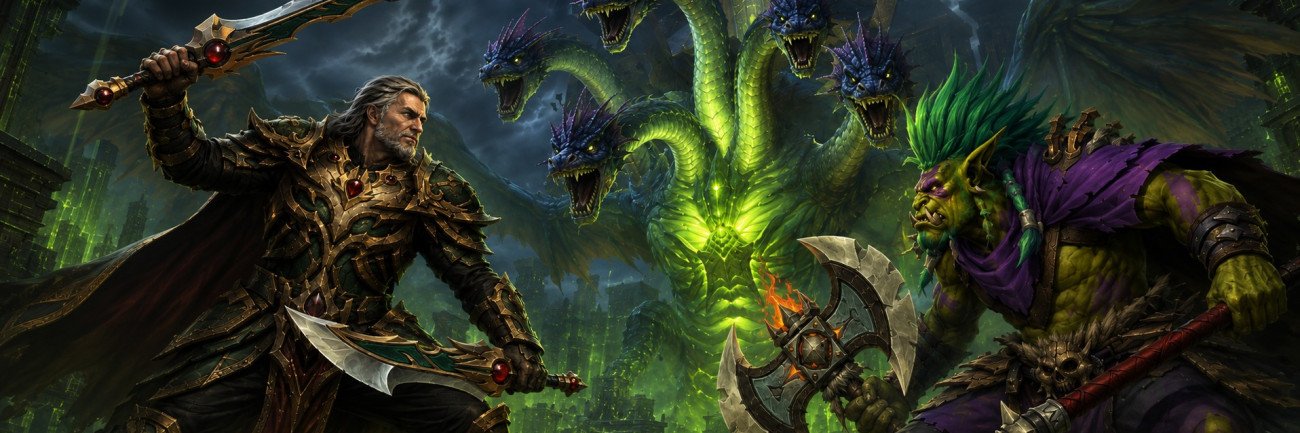
The Venomous Abyss Raid Quick Overview:
- The Venomous Abyss is an 8-boss raid in Midnight Patch 12.1.
- Normal, Heroic, Mythic, and Raid Finder Wing 1 open during the week of August 18.
- The raid is located on the Coiled Isle, inside the Vaults of Atal'Utek.
- Requirements: level 90 and ilvl 273 for Raid Finder.
- The final boss is Ula'tek.
- Bosses 2-6 drop tier tokens, while Ula'tek drops the universal Slumbering Coil Curio.
Want to get some heroic loot but don't have the time to go through the whole raid? Buy The Venomous Abyss Heroic Boost at Skycoach and get the loot you deserve! All difficulties and any number of raid runs are available, so go nuts!


Read closely 
Browse our hottest WoW Boosting services
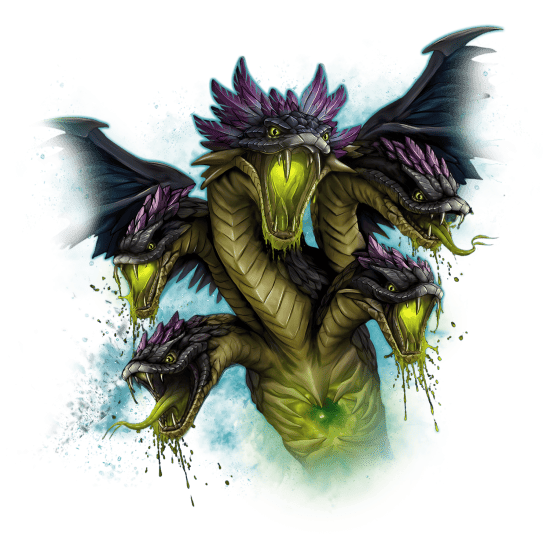

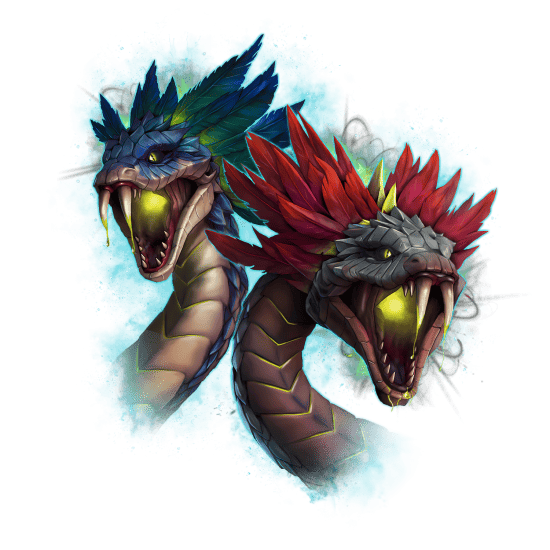

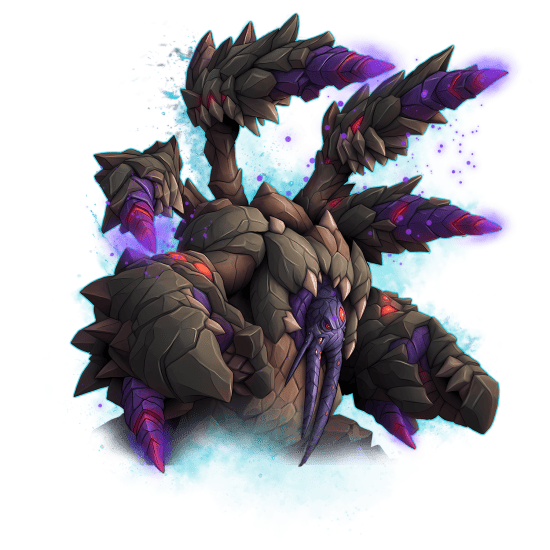

The Venomous Abyss Raid Overview
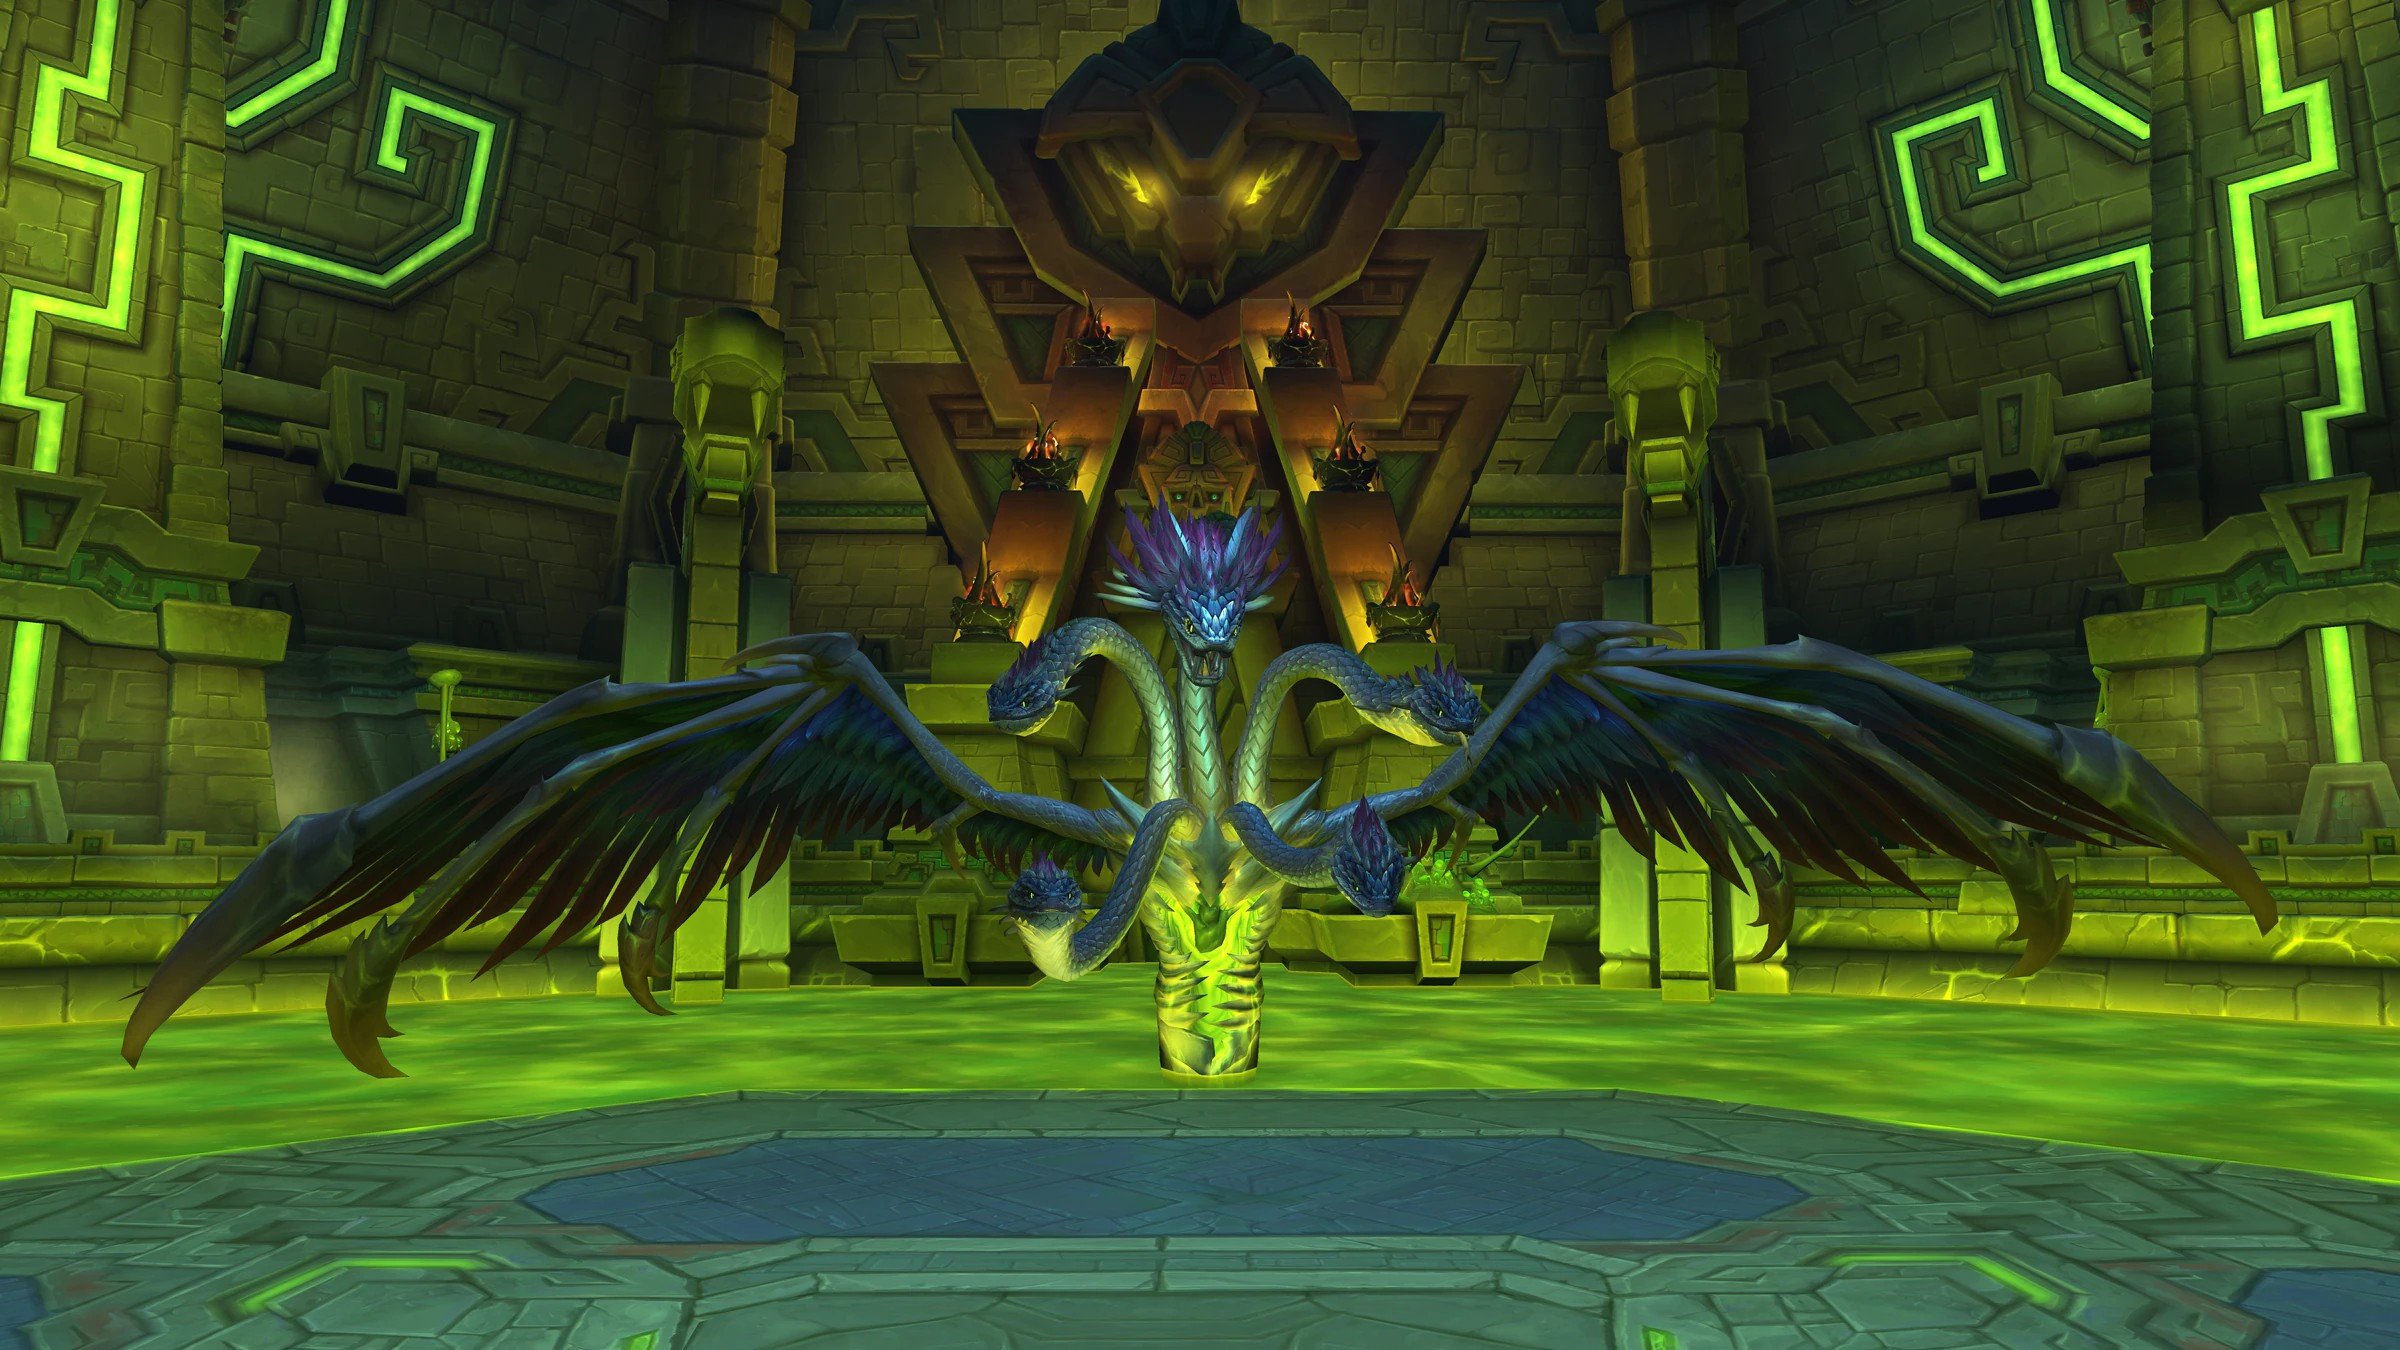
The Venomous Abyss is Midnight's Season 2 raid and the expansion's next major raid after the Season 1 storyline and the smaller Sporefall encounter. This raid is not the continuation of the battle between the protectors of Azeroth and the forces of the Void with Xal'atath leading them. That story reached its resolution back during the March on Quel'Danas raid.
The Venomous Abyss is the culmination of the side story involving Zul’jan, which leads into Curse of Ula’tek. You travel to the Coiled Isle with his sister Zul’jarra. This raid is the finale of that pursuit. Here are some facts about this whole story:
- Zul'jan is being influenced by Malacrass.
- His actions free the forgotten broods of Ula'tek.
- Ula'tek is an ancient entity associated with hatred, corruption, and venom.
- Her power grows beneath the Coiled Isle.
- Zul'jarra asks the Champions of Azeroth to enter the Vaults of Atal'Utek.
- The raid progresses through the creatures and defenses inside the vaults.
- Ula'tek herself is the eighth and final boss.
Here’s the raid’s schedule:
|
Date |
Available Content |
|
Week of August 18 |
Normal, Heroic, Mythic, Raid Finder Wing 1 |
|
Week of August 25 |
Story Mode, Raid Finder Wing 2 |
|
Week of September 1 |
Raid Finder Wing 3 |
|
Week of September 8 |
Raid Finder Wing 4 |
Venomous Abyss is not completely linear; there are some choices to be made in terms of which of the bosses to approach first. Refer to the boss list section for more info.
The Venomous Abyss Map & Requirements
The raid entrance is, unsurprisingly, located on the Coiled Isle; to be specific, inside the Vaults of Atal’Utek zone.
[Insert map image.]
The Venomous Abyss raid entrance coordinates:
- 47.2, 21.7
There are 3 entries into the Vaults of Atal'Utek:
- Gate of the Serpent Eye: 43.3, 44.2
- Gate of the Eastern Fang: 45.4, 65.9
- Gate of the Western Fang: 31.8, 64.9
As for the requirements, these are pretty simple as far as raids go:
- Level 90
- Item level 273 for Raid Finder
- Story Mode
If you want my recommendations for the minimum ilvl to enter raid your preferred difficulty, here it is:
|
Difficulty |
Required / Recommended ilvl |
Raid Loot |
|
Raid Finder |
273 required |
279-289 |
|
Normal |
279+ recommended |
292-302 |
|
Heroic |
292+ recommended |
305-315 |
|
Mythic |
305+ recommended |
318-344 |
As you know, the game doesn’t have any requirements beyond the minimum for the RF, so my recommendations just align with the Season 2 gear ladder where 279 is Veteran track, 292 is for Champion, 305 for Hero track, and, finally, 318 for Mythic track gear. Some raid parties may ask for more, especially for Heroic and Mythic progression.
The Venomous Abyss Boss Order
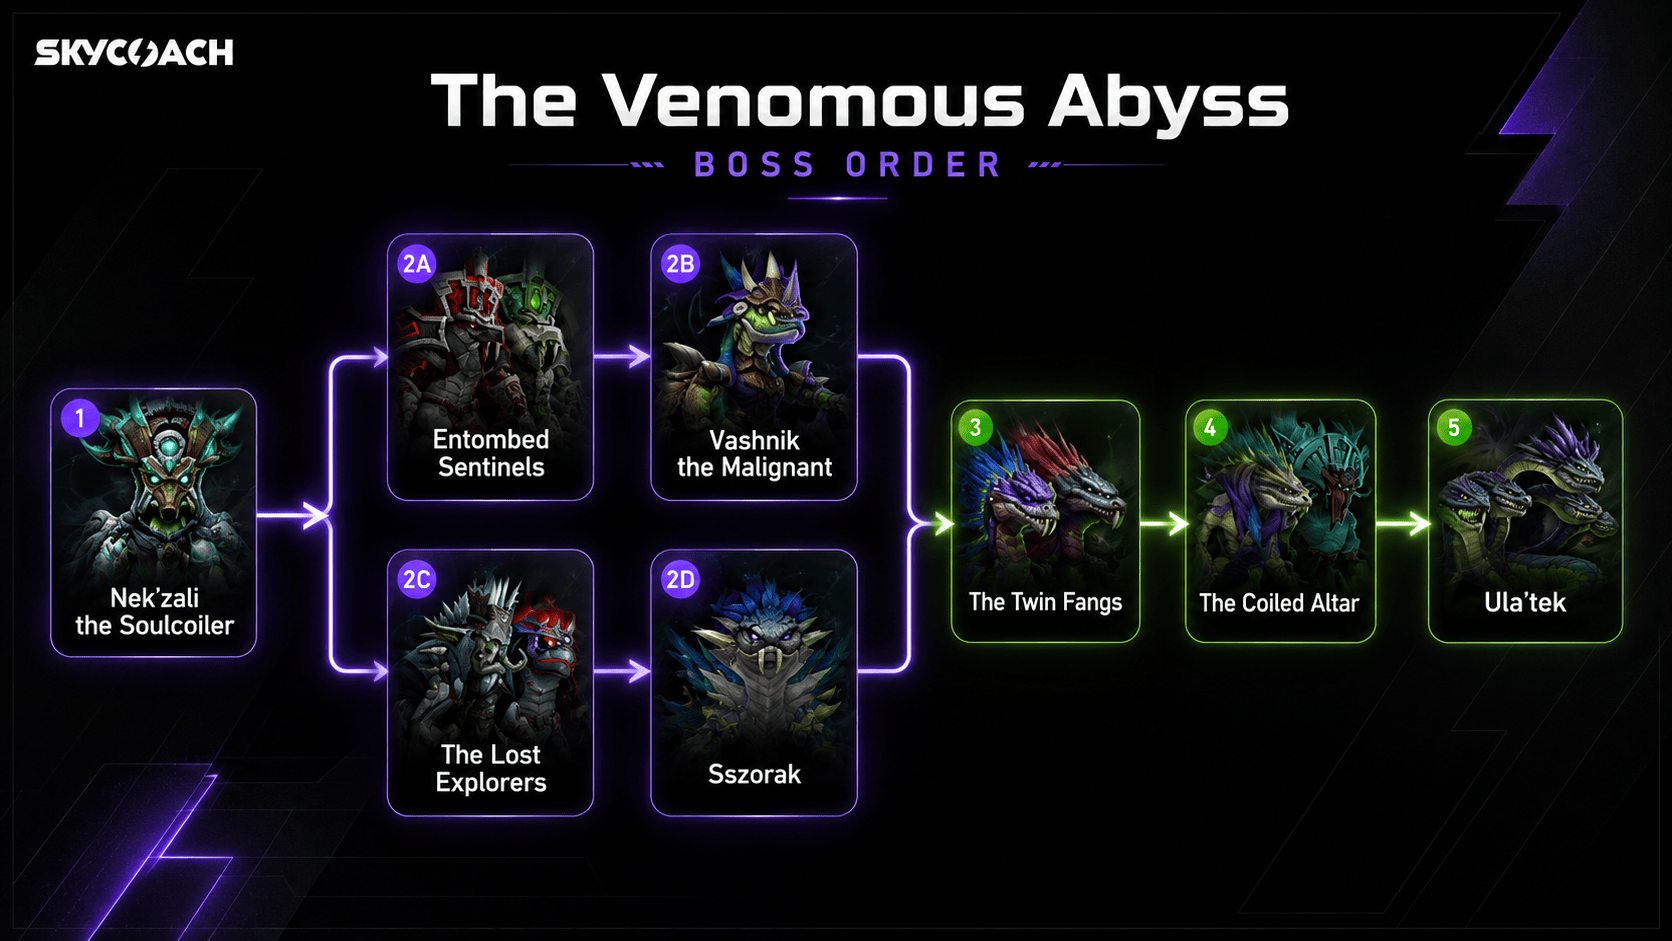
The Venomous Abyss raid features a total of 8 boss encounters with two choices for wings, both of which your party needs to clear before progressing further. So, your first encounter will always be the Soulcoiler, then come the two wings with 2 bosses each. After you’ve dealt with all 5, you will return to the center of the raid to fight the 3 remaining bosses.
- Nek'zali the Soulcoiler
- Entombed Sentinels / The Lost Explorers
- Vashnik the Malignant / Sszorak
- The Twin Fangs
- The Coiled Altar
- Ula'tek
Nek'zali the Soulcoiler Tactics
Nek'zali the Soulcoiler is the first boss of The Venomous Abyss. The fight has two phases with an intermission between them, mixing single-target damage with add cleave. You can use Bloodlust or Heroism on pull, or save it for Phase 2 if your group needs more damage to beat the enrage.
There are two mechanics you need to understand right away. The first is Soulcoil Rite, a heavy raidwide hit that happens naturally during Soulcoil Ignition. It can also be triggered when a Restless Amani reaches the Soulcoil Well, which is something you absolutely want to prevent.
On Heroic, every Soulcoil Rite also gives the raid a stack of Ritual Burn, increasing damage taken from future Soulcoil Rite casts by 15% for one minute. This effect stacks, so letting adds reach the well can quickly turn manageable raid damage into a wipe.
Here’s a quick look at the main abilities used during the fight:
|
Enemy |
Ability |
Description |
|
Heavy raidwide Shadow damage. Can happen naturally or when a spirit reaches the Soulcoil Well. |
||
|
Channels several Soulcoil Rite hits in quick succession. |
||
|
Targets several players with a DoT that leaves a damaging Latent Cultist pool when removed. |
||
|
Launches spirits toward the active tank. Raid damage decreases the farther they travel. |
||
|
Boss melee attacks apply Hollowed to the active tank. |
||
|
Stacking DoT that also reduces healing and absorbs received by 5% per stack. |
||
|
Magic absorb shield that makes the add advance toward the Soulcoil Well and prevents it from dying. |
||
|
Starts the intermission at 50% health and makes Nek'zali unavailable while the raid kills the Echoes of Jawae. |
||
|
Large group soak that splits damage between players inside and sends flames toward players outside. |
||
|
Heroic mechanic that lets the lingering flames burn nearby Amani corpses. |
||
|
Deals periodic damage to several players and eventually applies Hollowed. |
||
|
Triggers Soulcoil Rite and causes Latent Cultists around the arena to reposition. |
||
|
Effectively the hard enrage once Nek'zali reaches full energy. |
Phase 1: Soulcoiler Initiation
Start by pulling Nek'zali somewhere next to the Soulcoil Well. You want the boss close enough that the raid can cleave adds when they are grouped, but nobody should actually stand inside the well. After a while, Nek'zali casts Essence Rend on several players. If you get targeted, move toward the outer wall before the effect is removed or expires. When Essence Rend ends, it leaves behind a Latent Cultist with a damaging area around it. Dropping these near the edge keeps the middle of the arena clean for the rest of the fight. The active tank will also be targeted by Possession Barrage. When this starts, that tank needs to run as far away from the boss as possible. Several spirits are launched toward the tank and explode once they reach them. The farther those spirits travel before exploding, the less raidwide damage they deal. Healers should be ready for the hit from Possession Barrage, while the targeted tank should use a defensive. On Heroic, every spirit from Possession Barrage also applies Hollowed, reducing healing and absorbs received by 5% per stack. Tanks also gain Hollowed from Nek'zali's Sever attacks. The easiest way to handle this is to swap whenever the current tank's Hollowed stacks fall off. Whoever is currently tanking when Possession Barrage begins still needs to run away and take the barrage. The main mechanic of Phase 1 is the Restless Amani. These adds appear around the room and begin moving toward the Soulcoil Well. While Gravebound Advance is active, they have a magic absorb shield, cannot properly die, and keep advancing toward the well. Grip, slow, stun, and otherwise control the adds while DPS breaks Gravebound Advance. Once the shield is gone, stop worrying about their march toward the well, group them together, and AoE them down. Do not let an add reach the Soulcoil Well. Doing so immediately triggers another Soulcoil Rite. On Heroic, that also means another Ritual Burn stack for the entire raid, making every future Soulcoil Rite more dangerous. Keep repeating these mechanics until Nek'zali reaches 50% health and begins the intermission.
Intermission: Ritual of Awakening
At 50%, Nek'zali moves to the Soulcoil Well and begins Ritual of Awakening. Two Echoes of Jawae become active, and you need to kill both before Nek'zali returns. Focus the Echoes one at a time rather than splitting damage between them. Each Echo casts Hungering Pyre, creating a large red group soak. The raid should split roughly in half. One half stands inside the soak to split its damage, while the other half stays outside. Players who do not soak Hungering Pyre are targeted by Slithering Flames. On Heroic, these eventually trigger Cremation. If you get one of these circles, place it on top of a dead Amani corpse. Cremation burns the corpse and prevents it from being used again during the intermission.
This means add placement in Phase 1 matters more on Heroic. Try not to leave corpses spread across completely useless parts of the room, because the non-soaking players will need to reach them during Hungering Pyre. The Echoes also use Residual Toll, which causes several players to take periodic Shadow damage. After the effect runs its course, those players gain Hollowed, reducing the healing they received. Healers should keep a close eye on these targets, especially when Residual Toll overlaps with Hungering Pyre. Once both Echoes of Jawae are dead, Nek'zali becomes active again, and Phase 2 begins.
Phase 2: Invoke and Enrage
Phase 2 keeps most of the Phase 1 mechanics. You still need to control the Restless Amani, break Gravebound Advance, group the adds, and kill them before they can reach the Soulcoil Well. The active tank also continues dealing with Possession Barrage, so keep sending the targeted tank away from the boss to reduce the raid-wide hit. The new mechanic is Invoke. Every Invoke triggers another Soulcoil Rite, so healers need to be ready for another burst of raidwide damage. It also causes the Latent Cultists left around the arena to perform Entwined Step, moving their damaging areas in different directions.
Watch where those pools are going rather than assuming a previously safe part of the room will stay safe. This is why clean Essence Rend placement earlier in the fight helps a lot. From here, it becomes a damage race. Nek'zali continues gaining energy, and once she reaches full energy, Uncoiled Rage effectively hard enrages the encounter. Kill her before that happens. If your group comfortably handles Phase 1 but struggles to finish the boss before Uncoiled Rage, save Bloodlust or Heroism for Phase 2 instead of using it on pull.
Tank Mechanics
Tanks mainly need to manage Hollowed and Possession Barrage. Swap once Hollowed falls off the other tank, and make sure whoever receives Possession Barrage immediately runs away from the boss. Use a defensive for Possession Barrage, especially on Heroic where the spirits add even more Hollowed stacks.
Healer Notes
The biggest healing moments come from Soulcoil Rite, Soulcoil Ignition, and Possession Barrage. On Heroic, Ritual Burn makes repeated Soulcoil Rite hits increasingly dangerous, so unnecessary rites caused by adds reaching the well are especially punishing. During the intermission, watch players affected by Residual Toll and anyone carrying several Hollowed stacks.
DPS Notes
The main DPS priority is simple: do not tunnel the boss while Restless Amani are walking toward the Soulcoil Well. Break Gravebound Advance as quickly as possible, then group the adds and cleave them down. During the intermission, focus one Echo of Jawae at a time. In Phase 2, continue swapping to adds when needed while pushing Nek'zali hard enough to kill her before Uncoiled Rage.
Entombed Sentinels Tactics
The Entombed Sentinels fight is awesome, but honestly, it’s pretty basic. You fight two bosses, the Breath of Ula'tek and the Blood of Ula'tek, and the encounter alternates between a main phase and a short intermission. It is mostly single-target damage with one priority slime add, and you can use Bloodlust or Heroism on pull. The first thing you need to do is split the raid evenly between the two bosses. Half of the raid goes with the Breath of Ula'tek on one side of the room, while the other half goes with the Blood of Ula'tek on the opposite side. Keep the bosses at least 40 yards apart because Ula'tek's Dominance makes them take 99% reduced damage when they get too close.
Players near each boss also keep gaining a stacking debuff associated with that Sentinel. Getting stacks from both bosses at the same time gets real spicy for the healers, so pick your side and stay there until the intermission tells you otherwise. Here’s a quick look at the main abilities used during the fight:
|
Enemy |
Ability |
Description |
|
Entombed Sentinels |
Reduces both bosses' damage taken by 99% when they are too close together. |
|
|
Breath of Ula'tek |
Spawns a priority slime add that deals constant raidwide damage through Contaminate. |
|
|
Venom Coagulation |
Pulses Nature damage into the entire raid while the slime is alive. |
|
|
Breath of Ula'tek |
Spawns venom droplets that players need to run over before they explode. |
|
|
Toxic Droplet |
Heavy raidwide damage if a Toxic Droplet is left alive for too long. |
|
|
Breath of Ula'tek |
Heavy tank hit that increases the boss's Physical damage each time it hits the same tank. |
|
|
Breath of Ula'tek |
Heroic mechanic that sends venom back toward the boss after several seconds. |
|
|
Blood of Ula'tek |
Marks one player for a group soak that splits the damage between nearby players. |
|
|
Blood of Ula'tek |
An 18-second dispellable DoT placed on several players. |
|
|
Blood of Ula'tek |
Heroic mechanic that creates damaging red pools when blood venom effects expire. |
|
|
Blood of Ula'tek |
Heavy tank hit followed by a long stacking DoT. |
|
|
Entombed Sentinels |
Starts the intermission, makes both bosses take 99% less damage, and heals the lower-health boss to match the other one. |
|
|
Entombed Sentinels |
Gives every player 1-3 toxin stacks. Players must combine them into exactly four stacks to clear the mechanic. |
|
|
Entombed Sentinels |
Punishes players who fail to clear Helical Toxins before it expires. |
Main Phase: Split the Sentinels
Start by splitting the raid roughly in half. One tank and half the raid take the Breath of Ula'tek to one corner, while the other tank and the other half take the Blood of Ula'tek to the opposite corner. Keep that split for the entire main phase. You also want to keep their health fairly even. When the intermission starts, Vitriolic Stasis heals the lower-health Sentinel until it matches the healthier one. So if one side is absolutely blasting while the other side is struggling, congratulations, some of that damage basically disappears. The two sides have different mechanics, so we’ll go through them separately.
Breath of Ula'tek: Green Side
The green boss only has a few things you really need to care about. The big priority is Venom Coagulation, which spawns a large slime roughly once per minute. While that slime is alive, it keeps casting Contaminate, which pulses damage into the entire raid. So when the slime appears, everyone on the green side swaps to it and kills it. Do not just keep tunneling the boss. You want that slime dead before another one appears, because having multiple Contaminate effects going at once is obviously not the plan. Then you have Toxic Droplets. A bunch of green droplets appear around this side of the arena, and players destroy them simply by running over them. Doing that deals a little damage to the player, but that is much better than letting the droplet sit there. If a Toxic Droplet survives for 16 seconds, it goes off with Noxious Blast, dealing a big hit to the entire raid. Everyone on this side should help clean them up rather than assuming somebody else will do it.
The tank mechanic is Empowering Slam. It deals big Physical damage, and every time the same tank gets hit, the Breath of Ula'tek gains increased Physical damage. The buff only resets once Empowering Slam hits the other tank. The problem is that the other tank is currently on the other side of the room tanking a completely different boss. So for the first main phase, the green-side tank just needs to survive the increasing hits. The reset happens after the intermission when the tanks swap bosses.
On Heroic, the Breath of Ula'tek also gets Living Venom. The venom from abilities on this side launches back toward the boss after a few seconds. These are basically the easiest projectiles in the world to dodge. Just watch where they are going and step out of the line.
Blood of Ula'tek: Red Side
The red boss is similarly simple, but this side is a little more annoying for the healers. Unstable Miasma goes onto one random player and explodes after a few seconds. Everyone on the red side needs to help soak it so the damage gets split between the group. Bring the Unstable Miasma soak toward the outside edge of the platform rather than doing it right underneath the boss. On Heroic, the players involved in the soak will eventually leave Blood Venom pools, so soak at the edge, wait there long enough to drop the pools, and then move back in. The Blood of Ula'tek also applies Blighted Blood to several players. This is an 18-second DoT that does a ton of damage and can be dispelled. There are several applications at once, though, so if you get Blighted Blood, use a personal defensive and help your healers out.
On Heroic, you really do want those dispels. If Blighted Blood is allowed to expire naturally, it leaves another Blood Venom pool on the ground. Healers should clear the debuffs before that happens whenever possible so the red side does not slowly become a giant puddle. The tank buster here is Bloodvenom Injection. It starts with a big Physical hit and then leaves a long stacking DoT on the tank. That DoT lasts long enough that it will still be active for a few seconds after the intermission. This matters because the tank who was just eating Bloodvenom Injection is about to swap over and tank the green boss. Be ready with a defensive when that happens.
Intermission: Helical Toxins
When both Sentinels reach full energy, they run into the middle and start Vitriolic Stasis. They take 99% reduced damage during this, and whichever boss has less health heals until it matches the healthier one.
This is also where everybody gets to do a little math. Every player gets Helical Toxins, represented by four orbs above their head. Some are green and some are red. The only number you really care about is how many green orbs you have.
You need to run into another player whose number brings the two of you to exactly four green orbs.
So:
- 1 pairs with 3
- 2 pairs with 2
- 3 pairs with 1
When the two correct players collide, the stacks combine into four and Helical Toxins clears harmlessly. You have 28 seconds to figure this out, so there is plenty of time. Don't panic and just run into the first person you see. Find your exact match, touch them once, and you're done. If you fail to reach exactly four before Helical Toxins expires, Cultivated Burst hits you for a huge amount of damage and leaves a nasty one-minute DoT. In practical terms, just do the math.
Once Vitriolic Stasis ends, the Sentinels separate again and the main phase starts over.
Tank Mechanics
The important part for tanks is that you swap bosses after every intermission. The Breath of Ula'tek keeps powering up Empowering Slam every time it hits the same tank. Swapping tanks after Vitriolic Stasis lets the next Empowering Slam hit the other tank and reset that damage increase. Meanwhile, Bloodvenom Injection leaves a long DoT behind. If you are moving from the Blood of Ula'tek to the Breath after the intermission, that DoT may still be ticking when you start taking green-side tank damage, so use a defensive if needed.
And obviously, drag the bosses straight back to opposite sides after the intermission. Do not leave them hanging around together with Ula'tek's Dominance active while everyone wonders why their damage disappeared.
Healer Notes
The green side gets steady raid pressure whenever Venom Coagulation is alive because of Contaminate. The faster DPS kills the slime, the less annoying that becomes. The red side needs more direct attention. Blighted Blood goes onto several players at once and hits hard for 18 seconds. On Heroic, dispel these before they expire so they do not leave extra Blood Venom pools. Be especially careful with the tank coming off the Blood of Ula'tek after an intermission. Bloodvenom Injection can still be ticking when that tank starts taking Empowering Slam from the other boss.
DPS Notes
Split DPS as evenly as possible between the Sentinels because Vitriolic Stasis heals the lower-health boss back up to the healthier one. Burning one boss way ahead of the other is just wasting damage. On the green side, Venom Coagulation is your priority target. Swap immediately, kill the slime, then go back to the boss. Everyone should also help clear Toxic Droplets. It only takes running over them, and letting one turn into Noxious Blast is a very avoidable way to make the entire raid angry.
Vashnik the Malignant Tactics
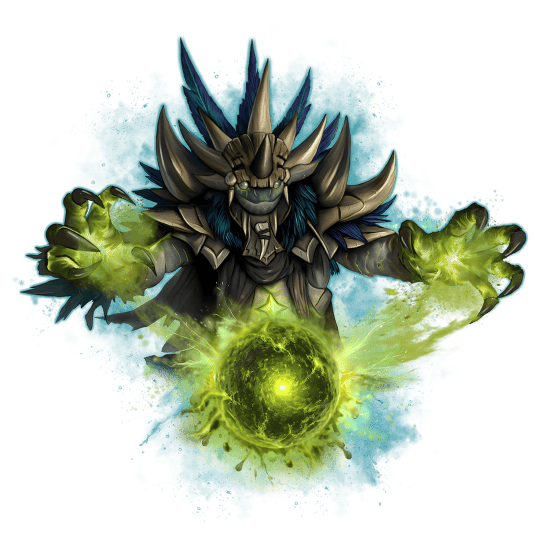
Vashnik the Malignant is a one-phase fight with a bunch of rotating mechanics. You get single-target damage, cleave, and AoE adds, and you can use Bloodlust or Heroism on pull.
The main idea is pretty simple: there are three fountains around the room, and you move Vashnik between different pairs of them. Whenever he reaches full energy, he casts Imbibe, activating the two closest fountains. Each one spawns its own type of add and gives Vashnik an Infusion tied to that fountain.
You don't want to sit between the same two fountains all fight. Each Infusion makes that fountain stronger the next time it gets selected, increasing the damage of its raidwide hit and the health of its adds. So after every Imbibe, kill the adds, deal with the infections, then move Vashnik to the next pair before he reaches full energy again.
Here’s a quick look at the main abilities used during the fight:
|
Enemy |
Ability |
Description |
|
Vashnik |
Activates the two nearest fountains, spawns their adds, and gives Vashnik their Infusions. |
|
|
Vashnik |
Stacking raidwide damage that increases as the fight goes on. |
|
|
Living Venoms |
Massive raidwide damage and a long DoT if an add reaches the pool in the middle. |
|
|
Blood Fountain |
Makes future Blood Fountain adds tougher and its raidwide damage stronger. |
|
|
Clotting Venom |
Prevents the initial Blood add from being crowd controlled. |
|
|
Shadow Fountain |
Makes future Shadow Fountain adds tougher and its raidwide damage stronger. |
|
|
Flame Fountain |
Makes future Flame Fountain adds tougher and its raidwide damage stronger. |
|
|
Burning Venom |
Pulses raidwide Fire damage while each Flame add is alive. |
|
|
Burning Venom |
Causes raidwide damage when a Flame add dies. On Heroic, also applies a stacking DoT. |
|
|
Vashnik |
Gives players infections based on the fountains currently empowering Vashnik. |
|
|
Vashnik |
Blood infection that prevents healing and lets the targeted player siphon health from nearby allies. |
|
|
Vashnik |
Flame infection that explodes for raidwide damage, reduced by distance. |
|
|
Vashnik |
Shadow infection with a healing absorb that repeatedly creates small eruptions under the player. |
|
|
Vashnik |
Targets players who eventually fire Plague Waves in four directions. |
|
|
Vashnik |
Heroic raidwide hit that also launches Catalytic Bile around the room. |
|
|
Vashnik |
Heavy tank hit, DoT, and stacking increase to Physical damage taken. |
Main Phase: Rotating the Fountains
When you walk into the room, you'll see the Malignant Cavity, the big triangle-shaped pool in the middle, with three fountains spread around it. There's a Blood Fountain at the back, a Shadow Fountain on one side, and a Flame Fountain on the other.
Each fountain has its own adds and its own version of Adaptive Infection:
- Blood: one big add that splits into smaller adds, plus Siphoning Infection.
- Shadow: lots of smaller adds that fire swirlies when they die, plus Stygian Infection.
- Flame: two adds that constantly pulse raidwide damage and explode when killed, plus Exploding Infection.
The fountain order doesn't really matter as long as your raid actually has a plan. One easy rotation is to start with Flame + Shadow, then move to Blood + Shadow, then Blood + Flame, and keep rotating from there.
The important part is that one fountain overlaps between each set. That fountain gets another Infusion stack, making its next adds tougher and its related damage stronger. Try not to repeatedly empower the most dangerous fountain if you don't have to. On Heroic, that especially means avoiding unnecessary back-to-back Flame stacks because the Flame adds can get real spicy for the healers.
Browse our hottest WoW Boosting services





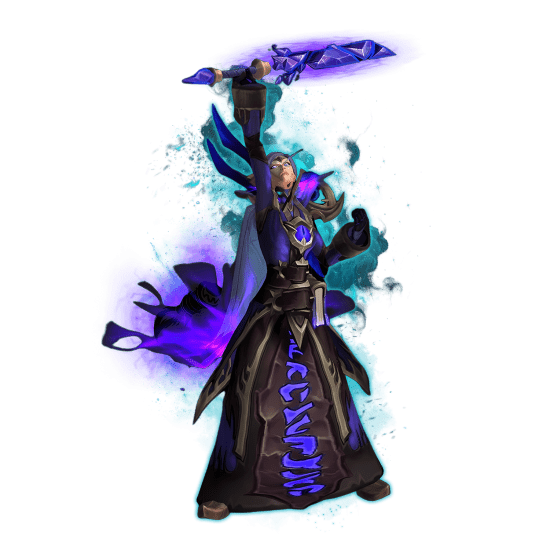

Flame and Shadow Fountains
Start by pulling Vashnik between the Flame and Shadow fountains. Use Bloodlust or Heroism here and burn the boss until he reaches full energy.
At 100 energy, Vashnik casts Imbibe. The Shadow Fountain spits out a bunch of Shrouded Venoms, while the Flame Fountain creates two Burning Venoms.
You have a couple ways to handle this. You can drag Vashnik toward the Flame adds while your best AoE classes go blow up the Shadow adds, or move toward the Shadow pack and use grips, banishes, and other control on the Flame adds. Either way, no living venom should ever reach the Malignant Cavity in the middle.
If that happens, the add triggers Malignant Burst, which does massive raidwide damage and leaves a long DoT. So yeah, don't let that happen.
The Shadow adds are pretty simple. Burn them down and dodge the little shadow swirlies they shoot out when they die. They are mostly an AoE job.
The Flame adds need a little more respect. Each Burning Venom constantly pulses raidwide damage through Burning Presence, so you still want them dead quickly. But ideally, kill them one at a time.
Every Flame add explodes with Caustic Surge when it dies, dealing another raidwide hit. On Heroic, that explosion also leaves a stacking DoT on everyone.
Killing both Flame adds at exactly the same time means two raidwide explosions and two DoT stacks at once. That's not fun for the healers. Focus one down, let the raid stabilize, then kill the second one.
It also helps to call out when a Burning Venom is about to die so healers can top everyone before Caustic Surge.
A little later, Vashnik casts Adaptive Infection, using the infections associated with the two fountains you just activated.
The Flame version is Exploding Infection. One player gets a big explosion on them and needs to run far away from the raid. When it goes off, everyone takes damage, but the farther away they are from the explosion, the less damage they take. So just get out.
At the same time, several players get the Shadow Fountain's Stygian Infection. This comes with a big heal absorb and repeatedly drops small shadow eruptions at your feet. Keep moving out of the swirlies while healers burn through the absorb.
Once the adds are dead and the infections are handled, start moving Vashnik toward your next two fountains before he reaches 100 energy again.
Blood and Shadow Fountains
For the next set, move Vashnik between Blood and Shadow.
When Imbibe goes off again, the Shadow Fountain gets empowered for the second time in a row. That means its adds come out with more health. Nothing really changes mechanically, though. Send your good AoE DPS over there and blow them up like before.
The Blood Fountain spawns a large Clotting Venom. The initial add has Sanguineous Fortitude, so you can't just grip or stun it into the perfect spot.
Instead, drag Vashnik onto the Clotting Venom and cleave them together.
When the big Blood add dies, it splits into several smaller Clotting Venoms. Those smaller adds need to die before they can reach the Malignant Cavity. Swap to them and clean them up instead of tunneling Vashnik.
The Blood version of Adaptive Infection is Siphoning Infection.
This puts a circle around a random player and basically turns off their incoming healing. Other players need to step into that circle. The infected player then siphons health from nearby allies, which helps them deal with the infection.
So if somebody gets Siphoning Infection, don't leave them standing alone wondering why every heal is doing nothing. Stack a few players inside their circle and help them out.
You'll also get Stygian Infection again because Shadow was selected for a second time. Heal through the absorbs and keep dodging the eruptions under your feet.
Once everything is dead, move Vashnik toward the next fountain pair and rinse and repeat until the boss is dead.
Plague Froth
While you're juggling fountains, Vashnik also has a few mechanics that happen regardless of which fountains are currently active.
Plague Froth targets random players with venom. When the effect ends, Plague Waves shoot away from those players in the four cardinal directions.
If you get Plague Froth, move away from the rest of the raid before the waves come out. Everyone else just watches where they're going and dodges them.
The mechanic is way easier when the targeted players spread out first. If everybody drops their waves in the middle of the raid, suddenly you're playing venom Frogger for no reason.
Heroic: Malignant Catalyst
On Heroic, roughly every 45 seconds Vashnik casts Malignant Catalyst. This starts with a big raidwide hit, so healers need to be ready for it.
It also launches Catalytic Bile around the Malignant Cavity. Players need to catch these impact circles. If a Catalytic Bile lands without anyone in it, it deals additional damage to the entire raid instead.
So don't all panic after the first raidwide hit. Find the nearby bile circles, put somebody in each one, and keep going.
This can overlap with fountain adds and infections, which is where the fight starts getting a little messy. Healers should plan raid cooldowns around the nastier overlaps, especially if Burning Venoms are also about to die.
Tank Mechanics
Dripping Fangs is the tank mechanic. It deals a big Physical hit, leaves a long Nature DoT, and increases Physical damage taken by 100%. This effect stacks.
Just taunt swap after each Dripping Fangs, or whenever the other tank's debuff has fallen off.
The more important tank job is positioning. You need to move Vashnik between fountain pairs before each Imbibe. If the boss reaches full energy while he's standing in the wrong place, congratulations, that's your fountain combination now.
Get the adds under control first, then start moving toward the next pair with enough time to spare.
Healer Notes
This fight has a lot of predictable raid damage.
Burning Venoms constantly deal damage through Burning Presence and then hit everyone again with Caustic Surge when they die. On Heroic, killing two of them together also gives everyone two stacks of the additional DoT, so try to stagger their deaths.
Stygian Infection puts large healing absorbs on players, while Siphoning Infection prevents its target from receiving normal healing until the mechanic is dealt with.
On Heroic, Malignant Catalyst is another big raidwide damage event. Keep an eye on when this overlaps with Flame adds dying because that's when things can get ugly fast.
DPS Notes
The main rule for DPS is that living venom adds always matter. If one reaches the center and triggers Malignant Burst, you're giving the entire raid a huge hit and a long DoT because somebody wanted another two globals on the boss.
Shadow adds are your big AoE target. The Blood add should be cleaved with Vashnik and then its smaller adds burned down immediately. Flame adds need to die quickly, but stagger their deaths so Caustic Surge doesn't double-tap the raid.
And once the current add wave is handled, go back to burning Vashnik while the tanks move him toward the next pair of fountains.
The Lost Explorers Tactics
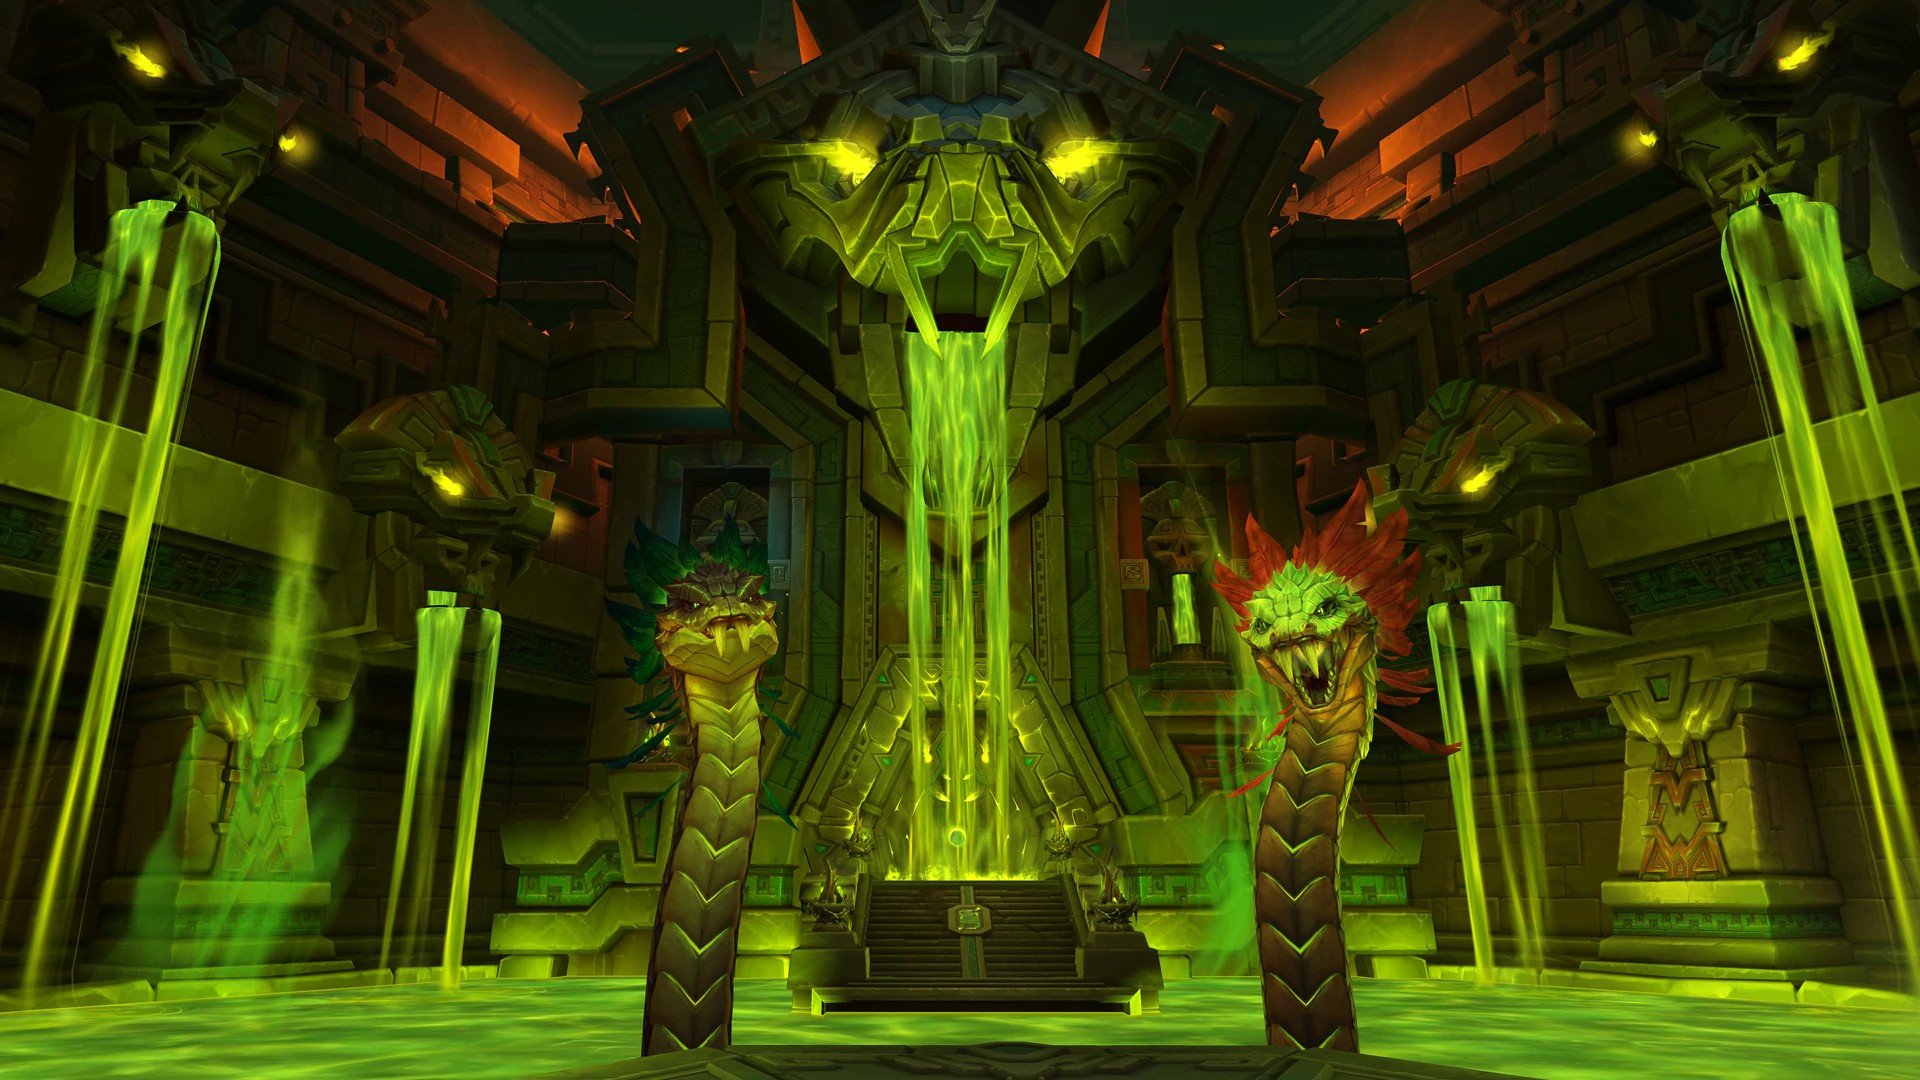
The Lost Explorers is a one-phase fight with constant two-target cleave, some spread three-target cleave for ranged, and you can Bloodlust or Heroism on pull. There are three turtles in the fight: First Mate Nama, Scrollsage Iku, and Trader Gebbo, and they all have their own abilities.
The big rule is to keep Nama and Iku away from Gebbo as he walks around the platform. On Heroic, Aura of Unity gives the turtles United Defense, reducing their damage taken by 99% when Iku and Gebbo are both close to Nama. So yeah, stacking all three turtles together is absolutely banned.
There's also Mor'zahi, who doesn't really do much himself, but he keeps gaining energy. If he reaches full energy, Empowered Ascension basically kills the raid. To stop that, you'll open Gebbo's boxes, find a Disgusting Fish, and use it on one of the three turtles before Mor'zahi gets to 100 energy. Each turtle can only take the fish once, and each one gains a new ability after you smack them with it.
The order doesn't really matter, but the easiest one is Nama first, Iku second, and Gebbo third.
Here’s a quick look at the main abilities used during the fight:
|
Enemy |
Ability |
Description |
|
Mor'zahi |
Happens at full energy and deals massive continuous raidwide damage. Use a fish before this happens. |
|
|
Mor'zahi |
Resets Mor'zahi's energy after a controlled turtle consumes a Disgusting Fish and gives that turtle additional abilities. |
|
|
First Mate Nama |
Every melee increases Nama's Physical damage against the current tank. |
|
|
First Mate Nama |
Fires three spinning shells toward a player. Getting hit stuns you for 4 seconds. |
|
|
First Mate Nama |
Marks three players for consecutive group soaks. Missing a soak deals massive raidwide damage. |
|
|
First Mate Nama |
Heroic mechanic that gives all three turtles 99% damage reduction when Iku and Gebbo are both close to Nama. |
|
|
Scrollsage Iku |
Teleports to a targeted player's location and deals less raid damage the farther that player is from everyone else. |
|
|
Scrollsage Iku |
Interruptible cast that deals heavy damage, applies a DoT, and slows the target. |
|
|
Scrollsage Iku |
Tank attack that repeatedly deals Frost damage and increases Magic damage taken. |
|
|
Scrollsage Iku |
Targets players with huge Frost or Fire circles. Opposite elemental effects cancel each other out. |
|
|
Trader Gebbo |
Throws boxes around the room. Breaking them damages the raid, gives the player Splinters, and may reveal a fish. |
|
|
Trader Gebbo |
Throws Bouncy Mushrooms around the platform that launch players into the air. |
|
|
Trader Gebbo |
Drops a bomb near a targeted player, eventually creating a deadly Blast Wave across the platform. |
|
|
Trader Gebbo |
Massive shockwave from the bomb. Use the Bouncy Mushrooms to jump over it. |
Main Phase: Keep the Turtles Apart
Start with one tank on First Mate Nama and the other tank on Scrollsage Iku. Pull those two away from Trader Gebbo, who can't really be tanked and just patrols around the outside of the platform throwing junk at people.
You'll basically keep moving Nama and Iku counterclockwise around the platform to stay away from Gebbo. On Heroic, this is especially important because if Iku and Gebbo are both close to Nama, Aura of Unity gives all three turtles United Defense and they take 99% less damage.
On pull, Iku immediately starts casting Icebound Flames. Interrupt it. This should mostly be handled by whichever tank is currently on Iku. If one gets through, the target takes a bunch of Frostfire damage, gets a nasty DoT, and gets slowed.
A few seconds later, Iku casts Blink Nova on a random player. That player needs to run away from the raid before Iku teleports to them. The farther that player is from everybody else, the less damage the raid takes.
We like moving the Blink Nova target toward the opposite side of Gebbo. That reduces the raid damage and also lowers the chance that Iku accidentally blinks right next to Gebbo and activates the Heroic shield.
Trader Gebbo and the Disgusting Fish
While Nama and Iku are doing their thing, Gebbo occasionally casts Throw Junk, throwing a bunch of boxes toward players.
First, dodge the swirlies where the boxes are going to land. Then spread out and have different players break the boxes. Breaking one gives that player Splinters, a stacking bleed, and causes Relic Rupture, which deals raidwide damage.
So don't have one person stomp every box like they're speedrunning bubble wrap. Spread them between players, and make sure the raid is healthy before you start breaking them.
Most of the boxes have nothing useful inside. One of them will contain a Disgusting Fish, which will be obvious because it gets a big blue arrow over it. Assign somebody to grab it. Anyone can do this, but having a melee player take it is usually easier because you need to be in melee range of a turtle to use the extra action button.
Keep an eye on Mor'zahi's energy. Once he's getting somewhere around 90%, the player holding the fish needs to run into melee and use it on the turtle you've assigned.
Using the fish causes Binding Anguish, resets Mor'zahi's energy, and gives that turtle a new mechanic for the rest of the fight.
Do not wait too long. If Mor'zahi reaches full energy, Empowered Ascension starts blasting the raid every half second. That's basically game over.
First Fish: Mighty Thud
The easiest first target for the fish is First Mate Nama.
Once Nama gets smacked with it, he gains Mighty Thud for the rest of the fight.
Mighty Thud marks three random players with soak circles. After a few seconds, Nama jumps onto all three players one at a time, starting with the closest target and moving to the farthest.
Each landing does massive Physical damage split between everyone inside that player's circle. So you need to split the raid fairly evenly between all three soaks.
The easiest way is to assign groups beforehand. Groups 1, 2, and 3 can each take one soak, then everyone else just gets in where they fit in.
Do not leave one of the three players alone. If a Mighty Thud fails to hit another player, it smacks the entire raid instead.
The landings also leave Aftershock on the ground, so move out once your soak is finished.
Second Fish: Frostfire Volley
The next fish goes to Scrollsage Iku.
After that, Iku starts using Frostfire Volley. Several players get huge Frost circles, and several other players get huge Fire circles.
If you get one, move away from the raid and find somebody with the opposite color. You basically want to make Frost and Fire pairs.
Drop your two circles close to each other, but do not overlap the initial hits. Once they land, you'll be left with either Burning Flames or Piercing Frost and a matching elemental patch on the ground.
Then pop a personal if you need one and run into the opposite-colored patch.
Fire removes Frost, and Frost removes Fire. Doing that clears your lingering debuff and gets rid of the opposite patch. Nice and simple.
What you don't want to do is slam the initial Fire and Frost circles on top of each other. That triggers Elemental Explosion, which hits the entire raid. Pair up first, drop them beside each other, then cross into the opposite color.
Third Fish: Mushroom Toss and Explosive Surprise
The final fish goes to Trader Gebbo.
Once Gebbo gets smacked with it, he starts using Mushroom Toss and Explosive Surprise.
Mushroom Toss throws a bunch of Bouncy Mushrooms around the platform. Don't immediately run onto them. You need those mushrooms for the bomb.
A player will get targeted by Explosive Surprise. If that's you, take it toward the outside edge of the platform before it drops.
A few seconds later, the bomb sends Blast Wave across the entire platform.
Right before Blast Wave reaches you, everyone steps onto one of the Bouncy Mushrooms from Mushroom Toss. The mushroom launches you into the air and you bounce right over the wave.
Some mobility abilities can also get you through Blast Wave, but not all of them work. So test that at your own risk. The mushroom is right there. Just use the mushroom.
On Heroic, the bomb also leaves Spreading Flames around the area, which is another good reason to drop Explosive Surprise near the edge instead of right in the middle of everything.
Shell Spin
There's one other mechanic that is pretty important throughout the fight.
First Mate Nama occasionally casts Shell Spin, firing three spinning turtle shells in the direction of a random player.
Getting hit by one stuns you for 4 seconds. Four seconds doesn't sound like much until you're stunned during Mighty Thud, Frostfire Volley, or a Blast Wave.
Melee should help bait Shell Spin toward the outside of the platform and away from ranged players. The shells can be a little hard to track once they're moving, so pointing them somewhere nobody needs to stand makes the mechanic way easier.
Tank Mechanics
Start with one tank on First Mate Nama and the other on Scrollsage Iku.
Nama's melee attacks keep stacking Steady Strikes, increasing his Physical damage against his current tank. Iku periodically uses Shredding Shards, which hits the tank repeatedly and stacks increased Magic damage taken.
After Iku finishes Shredding Shards, bring Nama and Iku close enough for the tanks to taunt-swap the two bosses, then spread them back out from Gebbo.
From there, repeat the swap after every Shredding Shards. This lets the tank debuffs reset while keeping both tankable turtles under control.
You also want all three turtles at roughly the same health. Keep Nama close enough to whichever other turtle has more health so DPS can cleave them together, while the lower-health turtle stays farther away.
Once one turtle dies, things get ugly fast. Nama can gain Relentless Escalation, Iku starts using Cataclysmic Invocation, and Gebbo gets Smashing Shovel. So yeah, keep their health close and try to finish them around the same time.
Healer Notes
There's a lot of raid damage here, but most of it is predictable.
Make sure somebody interrupts Icebound Flames. If one gets through, its lingering effect can be dispelled, but it's much easier to just stop the cast in the first place.
Be ready for Blink Nova, especially if the targeted player doesn't get very far away.
Trader Gebbo's Throw Junk is another repeated damage point. Players breaking boxes take Splinters, while Relic Rupture hits the raid. Make sure everyone is healthy before several boxes get opened.
Later in the fight, Mighty Thud and Frostfire Volley add even more raid damage, so things naturally get busier every time another fish is used.
DPS Notes
This fight is basically a health-balancing game.
Nama and Iku should be cleaved together whenever positioning allows it, while ranged players can keep damage going on Gebbo as he patrols around the platform. Keep checking all three health bars instead of tunneling whatever happens to be in front of you.
You really don't want one turtle dying way before the others. The remaining explorers gain dangerous abilities once one of their friends dies, so bring all three down together and finish them as close to each other as possible.
And when Gebbo throws Throw Junk, stop staring at the meters for five seconds and help open the boxes. You still need those fish before Mor'zahi reaches Empowered Ascension.
Sszorak Tactics
Sszorak is a one-phase, fully single-target fight, and honestly, most of it is about not getting launched off the platform. The boss activates three clusters of winds one at a time, and you use the green blobs left by Venomous Surge to knock the raid back onto the platform instead of into the abyss.
You can use Bloodlust or Heroism on pull, but there is also a really good burn window during Dig In, when Sszorak takes 30% increased damage for 25 seconds. Depending on your cooldown timings, saving Bloodlust for that can be better.
Before pulling, assign one player to put three world markers on the opposite sides of the three wind clusters around the platform. Those are where you want the Viscous Cysts to go, because you'll need one cyst for each knockback during Howling Maelstrom.
Here’s a quick look at the main abilities used during the fight:
|
Enemy |
Ability |
Description |
|
Sszorak |
A four-hit frontal combo made up of Ravage and Mutilate in a random order. |
|
|
Sszorak |
White frontal that should only hit one tank. Taking another Ravage while debuffed is basically not an option. |
|
|
Sszorak |
Green frontal that splits its damage between players hit. On Heroic, repeated hits become dangerous because of Mutilated Gash. |
|
|
Sszorak |
Sends poisonous tornadoes around the arena that deal damage and slow players hit. |
|
|
Sszorak |
Targets players with a hard-hitting DoT that eventually explodes and leaves a Viscous Cyst. |
|
|
Viscous Cyst |
Green blob that knocks the entire raid away when touched. Used to counter the Howling Maelstrom winds. |
|
|
Sszorak |
Heroic mechanic that creates damaging Caustic Residue pools around the arena. |
|
|
Sszorak |
Marks players with a direction and eventually launches them through the air. |
|
|
Players |
Keeps launched players floating until they collide with another affected player. |
|
|
Sszorak |
Activates a sequence of huge winds that try to push the raid off the platform. |
|
|
Sszorak |
Happens during Howling Maelstrom and makes Sszorak take 30% increased damage for 25 seconds. |
|
|
Sszorak |
Boss melees stack increased Physical damage taken on the current tank. |
Main Phase: Apex Predator
Start by pulling Sszorak to one edge of the platform and have the raid loosely stack behind him. You want to keep the middle clean because there's going to be a lot of movement later, and keeping everyone together also makes his frontal combo much easier to control.
Sszorak periodically casts Apex Predator, which is a combo of four frontals in a random order. The two attacks are Ravage, the white frontal, and Mutilate, the green frontal.
Ravage is the tank hit. One tank needs to stand in front of Sszorak and take it alone. It also massively increases damage taken from another Ravage, so the same tank should not be eating both white frontals.
Mutilate is the opposite. This one needs the raid standing in front of the boss with the tank so the damage gets split between everyone.
The attacks can come in any order, so the tanks basically taunt Sszorak back and forth depending on which frontal is next.
For example, if the combo is two Ravage casts followed by two Mutilate casts, Tank 1 takes the first white frontal alone, Tank 2 taunts and takes the second one alone, Tank 1 taunts back for the first green group soak, then Tank 2 takes the last green soak.
It sounds more complicated than it is. White means one tank. Green means raid soak. Just keep swapping the boss to whoever should be taking the next hit.
On Heroic, Mutilate also leaves players with Mutilated Gash, making another Mutilate much more dangerous. Your whole raid may still be able to soak every green frontal depending on tuning and gear, but if repeat soaks are murdering people, split the raid into two groups and alternate which group helps soak each Mutilate.
Sszorak also throws out Tempest tornadoes during all of this. These are just poisonous wind vortices moving around the platform. Dodge them. Getting clipped deals damage, puts another DoT on you, and slows you, which is exactly what you don't want in a fight where half the mechanics are trying to throw you off a cliff.
Venomous Surge and Viscous Cysts
After the frontal combo, Sszorak casts Venomous Surge, putting green arrows on two players.
Those players need to run to the world markers you placed before the pull. When Venomous Surge expires, it hits the raid and leaves a Viscous Cyst at that location.
These green blobs are not just bad stuff you want out of the raid. You're deliberately setting them up for Howling Maelstrom later.
You'll get four Viscous Cysts before the winds, but you only really need three. Put the first three at the assigned markers on the opposite sides of the wind clusters. The fourth is basically your safety blob, so it can go somewhere convenient as long as it isn't sitting right in the middle of the raid.
Venomous Surge hurts pretty hard while the targeted players are running away, so make sure healers stay in range of them. Don't send somebody sprinting across the platform with a ticking poison and then wonder why they fell over by themselves.
On Heroic, Venomous Surge also comes with Caustic Claws, creating Caustic Residue pools on the ground. That's another reason to keep all of this near the outside. You really don't want to fill the middle of the arena with poison right before the wind mechanic starts.
Raging Crosswinds
Then you get one of the cooler mechanics in the fight, Raging Crosswinds.
Several players get a white circle with a line showing the direction they're about to be launched. If you're targeted, find another player with Raging Crosswinds and line yourselves up so your arrows point directly at each other.
When the circles expire, both players get blasted through the air and gain Turbulent Gusts. That wind keeps you floating instead of immediately dropping back to the platform.
The way you remove Turbulent Gusts is by colliding with another player who also has it. So if the two of you aimed your launch lines at each other correctly, you smack into each other in mid-air, the wind disappears, and you both fall back onto the platform.
Pretty sweet mechanic, honestly.
Just don't point your line randomly across the room. If you miss your partner, you can keep floating straight off the side of the platform, which is not nearly as cool.
After that, stack back behind Sszorak and do the whole sequence again. Deal with another Apex Predator, send the next Venomous Surge targets to their markers, and do another Raging Crosswinds smashy-face.
Howling Maelstrom and Dig In
After you've gone through the mechanics twice, it's time for the pseudo-intermission.
Before Howling Maelstrom starts, tanks need to drag Sszorak into the middle of the platform. The three wind clusters around the room will activate one after another, with each gale trying to push the raid straight off the edge.
This is what all those Viscous Cysts were for.
When the first wind starts pushing, the raid moves toward the green blob you've placed on the opposite side. One player touches the Viscous Cyst, causing it to explode and knock the entire raid away from the blob.
If you placed it correctly, that knockback sends everyone back toward the platform instead of letting the wind throw them off.
A few seconds later, the second gale activates. Move toward your second Viscous Cyst, pop it, and use the knockback to counter that wind too.
Then do it one more time for the third gale.
So the whole mechanic is basically: wind tries to throw you one way, green blob throws you back the other way. As long as your cysts are in the right places, it's pretty straightforward.
Any Viscous Cysts that aren't used eventually explode on their own, so be ready for the extra knockback from your spare blob. Don't survive all three winds and then get casually launched off by the emergency cyst nobody remembered existed.
While all of this is happening, Sszorak casts Dig In and takes 30% increased damage for 25 seconds.
That's a huge burn window. DPS should keep hitting the boss while dealing with the winds, and depending on your cooldown timings, this is a great place to use Bloodlust or Heroism instead of using it on pull.
Once Howling Maelstrom ends, drag Sszorak back toward the edge, stack the raid behind him again, and rinse and repeat until he's dead.
Tank Mechanics
Outside of the Apex Predator combo, tanks also need to manage Corroding Venom.
Every Sszorak melee attack increases the current tank's Physical damage taken by 3% for 12 seconds, and the effect stacks. Just swap whenever the other tank's Corroding Venom has fallen off.
During Apex Predator, pay more attention to the actual frontal sequence. One tank solo takes Ravage, while Mutilate needs the raid helping with the soak. Taunts work during the combo, so keep passing Sszorak between the tanks as needed.
Before Howling Maelstrom, move the boss back into the middle so everyone has enough room to deal with the three wind directions.
Healer Notes
The main healing check outside of the frontal combo is Venomous Surge. The targeted players take heavy ticking damage while running to their assigned markers, so make sure they don't outrange every healer on their way out.
Mutilate is another obvious damage point. On Heroic, repeated soaks become much more dangerous, so if your raid is splitting into alternating soak groups, keep track of who is actually supposed to be in each one.
On Heroic, Caustic Claws also means more poison on the floor around Venomous Surge, so targeted players may need extra attention while moving into position.
DPS Notes
This fight is fully single target, so you get to hit Sszorak basically the entire time. The real question is when you want to use your biggest cooldowns.
Using Bloodlust on pull is completely fine. But Dig In gives you 25 seconds of 30% increased damage taken on the boss, which makes Howling Maelstrom the obvious burn window.
If your major cooldowns line up with it, save them. And while the winds are happening, keep doing damage whenever your class allows it. Sszorak is just standing there taking 30% extra damage, so don't spend the whole 25 seconds admiring the tornadoes.
The Twin Fangs Tactics
The Twin Fangs is a one-phase, two-target fight with an intermission at 100 energy. You fight Vexhul and Ithraz at the same time, and they do not share health, so consistent two-target cleave is really good here. A standard 2-tank, 4-healer, and 14-DPS setup works well, and you can use Bloodlust or Heroism on pull.
The big rule is to keep Vexhul and Ithraz at roughly the same health. If one dies early, the other gains Uncoiled Wrath, increasing their damage by 25% every 4 seconds. So yeah, don't burn one serpent while the other is sitting at 20%. Bring them down together.
Neither boss can really be repositioned, so the raid can loosely spread around the area where you pull. Make sure someone stays in melee range of each boss as well. Vexhul uses Concentrated Spittle if nobody is close enough, while Ithraz uses Clotted Bolt.
The core mechanic of the entire fight is Eternal Venom. A bunch of green mechanics give you stacks, each stack keeps ticking for Nature damage, and hitting 7 stacks kills you. Some stacks are unavoidable, so the fight is really about not collecting extra ones from mechanics you could have dodged.
Here’s a quick look at the main abilities used during the fight:
|
Enemy |
Ability |
Description |
|
Permanent stacking DoT gained from several mechanics. Reaching 7 stacks kills the player. |
||
|
Channels heavy damage into the tank and creates Caustic Globules around them. |
||
|
Caustic Globule |
Must be soaked before it ruptures. Soaking gives one player Eternal Venom; leaving it up gives the whole raid a stack. |
|
|
Gives the raid Eternal Venom and summons three Spawns of Vexhul. |
||
|
Targets players with acid lines. Anyone clipped gains Eternal Venom. |
||
|
Deals raidwide damage and sends green venom waves across the platform. |
||
|
Intermission beam that rotates around the platform and rapidly applies Eternal Venom if touched. |
||
|
Creates repeated tank soaks. Missing one damages and knocks back the entire raid. |
||
|
Places red circles on players that deal increasing damage and leave slowing Congealed Gore pools. |
||
|
Three large consecutive group soaks. Each player hit can remove one Eternal Venom stack. |
||
|
Increases Ravenous Feast damage taken by 800% and prevents another stack removal for 8 seconds. |
||
|
Covers the platform in red impact circles during the intermission. |
||
|
Surviving boss gains 25% increased damage every 4 seconds when the other dies. |
Main Phase: Eternal Venom
As soon as the fight starts, keep an eye on your Eternal Venom stacks.
Anything green is generally something you don't want to touch. Some mechanics give everyone a stack automatically, but getting clipped by avoidable venom just pushes you toward the lethal threshold faster. And since Eternal Venom sticks around, mistakes early in the fight make everything later harder.
There is only one reliable way to remove a stack: Ravenous Feast. So don't treat your venom stacks like a normal debuff that's eventually going to fall off. It isn't.
Vexhul: Caustic Deluge and Globules
The first major mechanic comes from Vexhul, who casts Caustic Deluge on the current tank.
Caustic Deluge repeatedly hits that tank for heavy Nature damage and applies Envenomed, increasing damage taken from future Caustic Deluge hits by 10% for 90 seconds. This stacks, so tanks eventually need to swap which serpent they're handling rather than letting one person keep eating increasingly nasty Deluges forever.
At the same time, Caustic Deluge creates a bunch of Caustic Globules around the area.
These all need to be soaked.
Touching one Caustic Globule gives that player one stack of Eternal Venom. If nobody touches it within 10 seconds, it ruptures instead and gives the entire raid another stack.
So spread the globules between players with low venom stacks. One person taking one stack is infinitely better than twenty people taking one.


You got -20% OFF 
Ithraz: Stone Breaker
At around the same time, Ithraz uses Stone Breaker.
Three white impact circles appear one after another. This is primarily a tank mechanic, and one tank needs to stand in each impact so somebody gets hit.
Every Stone Breaker applies Fractured, increasing damage taken from future Stone Breaker hits by 33% for 90 seconds.
If nobody soaks one of the impacts, the platform reverberates instead, dealing heavy raidwide damage and knocking everyone back. That's obviously worse.
The easiest plan is for tanks to alternate Stone Breaker sets. One tank handles one set, then the other tank handles the next while the first tank's stacks have time to fall off.
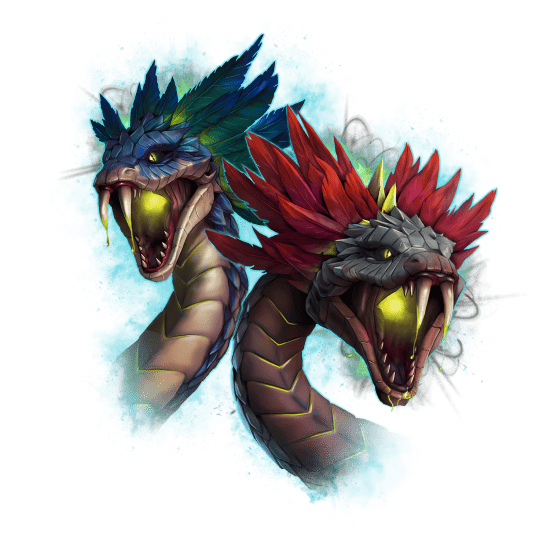
Venomous Emergence
Vexhul then casts Venomous Emergence.
This automatically gives everyone another Eternal Venom stack and summons three Spawns of Vexhul in the middle of the platform.
These are priority adds. Kill them quickly.
Each Spawn of Vexhul repeatedly uses Corrosive Spit toward random players. The targeted player is going to take the hit, but anyone else standing in the line also gets hit and gains another Eternal Venom stack.
So if the line isn't targeting you, move out of it. There's absolutely no prize for helping somebody soak Corrosive Spit.
Coiling Ichor
Ithraz also puts Coiling Ichor on several players.
This gives you a large red circle that deals increasing damage as it tightens around you. When it expires, it leaves Congealed Gore on the ground, which deals damage and slows anyone standing in it.
If you're targeted, move toward the outside of the room and spread away from the other Coiling Ichor players. Drop your puddle somewhere out of the way, then come back in.
There's no reason to decorate the middle of the platform with giant slowing pools when you're going to need that space for adds, waves, and the intermission later.
Stir the Depths
Vexhul follows up with Stir the Depths.
The initial part deals raidwide damage, but that doesn't give you another Eternal Venom stack.
The green waves that travel across the room afterward do.
So heal through the unavoidable raid damage and just dodge the waves. At this point in the fight, taking a completely avoidable venom stack because you didn't move two yards is a pretty expensive mistake.
Ravenous Feast
The most important mechanic from Ithraz is Ravenous Feast.
A huge red soak circle appears and explodes three times in quick succession. Each hit deals massive Physical damage split between the players inside.
More importantly, getting hit by Ravenous Feast removes one stack of Eternal Venom.
This is the only normal stack removal in the fight, so you really want to use it.
The problem is Feasted. After soaking one hit, you take 800% increased damage from Ravenous Feast for 8 seconds and can't remove another Eternal Venom stack during that time.
In other words, the same group can't soak all three hits.
The cleanest setup is to divide the raid into three groups. Group 1 takes the first Ravenous Feast, Group 2 takes the second, and Group 3 takes the third.
Another option is to use two larger groups and have immunity players handle the final hit, depending on what your raid has available.
Either way, make sure enough players are inside every soak. Missing one hits the whole raid instead.
After Ravenous Feast, the bosses go through their ability loop again. After the second Feast, they reach the intermission.
Intermission: Vile Flood and Sanguine Storm
At 100 energy, Vexhul and Ithraz Submerge and change positions.
Stay away from the places where they dive and reappear because Submerge leaves dangerous Noxious Slick behind.
Then Vexhul appears in the middle and casts Vile Flood.
This is a huge rotating green beam. Watch the rotating indicators around Vexhul to see which way the beam is about to spin.
The easiest way to handle it is to move against the direction of rotation and cross through the beam once. The spot you've already crossed is safe because the beam doesn't make a full rotation.
Do not stand in Vile Flood. It repeatedly applies Eternal Venom, so getting caught in it for more than a moment can send you from perfectly fine to dead very quickly.
Melee players can move ahead toward Ithraz and start attacking again, but they need to be ready to cross the beam when it catches up. Don't greed three globals and then get blendered by venom.
At the same time, Ithraz casts Sanguine Storm, covering the room in red impact circles.
Those are straightforward. Dodge them while you're moving around Vile Flood.
On Heroic, Sanguine Storm also leaves Congealed Gore pools behind, so the room gets a little tighter as the intermission continues.
Once the intermission ends, Vexhul and Ithraz settle into their new positions and the entire main-phase loop starts again.
Tank Mechanics
Tanks have two major mechanics to manage.
Vexhul's Caustic Deluge applies Envenomed, which keeps increasing damage taken from future Deluges. Don't let one tank build this forever.
Ithraz's Stone Breaker applies Fractured, increasing damage taken from subsequent slams by 33% per stack.
Coordinate swaps so you're not sending a tank with a pile of Fractured stacks into another full Stone Breaker set, and make sure every white impact has somebody standing in it.
Also make sure both Vexhul and Ithraz always have somebody in melee range.
Healer Notes
This fight gets harder every cycle because Eternal Venom keeps stacking across the raid. That's the soft enrage.
The big healing moments include Caustic Deluge on the tank, the unavoidable hit from Venomous Emergence, Stir the Depths, and especially the three Ravenous Feast soaks.
Keep an eye on players with high Eternal Venom stacks and make sure they're assigned to an upcoming Ravenous Feast group whenever possible.
During Coiling Ichor, the targeted players take increasingly heavy damage while running out, so don't lose them just because they're standing near the edge.
DPS Notes
This is a two-target cleave fight, but the bosses have separate health bars. Keep Vexhul and Ithraz as even as possible throughout the encounter.
When Venomous Emergence summons Spawns of Vexhul, swap and kill them quickly. Every extra Corrosive Spit is another chance for somebody to collect an unnecessary Eternal Venom stack.
Once one boss gets low, stop blindly cleaving and balance their health before the kill. If one serpent dies too early, Uncoiled Wrath starts giving the survivor 25% increased damage every 4 seconds, and that gets out of control very quickly.
The encounter also has a hard end point. If you reach the third 100-energy cycle without killing them, the bosses effectively turn the arena into nonstop Vile Flood and Sanguine Storm. So keep both health bars even, use your cleave well, and finish them together.
The Coiled Altar Tactics
The Coiled Altar is a three-phase fight where you first face Zul'jan, then Hex Lord Malacrass, and finally both of them together.
Phase 1 is about moving poison globules into Zul'jan's frontal. Phase 2 replaces those with ghosts, mind controls, and soul fragments. Phase 3 combines mechanics from both phases, so that's where the fight gets properly spicy.
Bloodlust or Heroism is good during the Soulbinding intermission, when Zul'jan takes 100% increased damage.
Here’s a quick look at the main abilities used during the fight:
|
Enemy |
Ability |
Description |
|
Zul'jan |
Creates Coalesced Venom globules around the arena. |
|
|
Coalesced Venom |
Can be picked up and moved into Zul'jan's frontal. |
|
|
Coalesced Venom |
Raidwide damage when a globule is destroyed. Heroic adds a stacking DoT. |
|
|
Tank frontal that destroys Coalesced Venoms. |
||
|
Requires at least 5 players to soak before everyone runs away from the axe. |
||
|
Zul'jan |
Raidwide damage that also fills parts of the arena with Noxious Ground. |
|
|
Mind controls players and makes them walk toward the edge. |
||
|
Manifestation of Dread |
Ghost moves while its target looks away and stops when they face it. |
|
|
Tank frontal used to destroy Manifestations of Dread. |
||
|
Large Shadow circles that need to be spread. |
||
|
Interruptible cast that fears the entire raid. |
||
|
Break the shield, then interrupt the cast. |
||
|
Revives Zul'jan and starts the transition into Phase 3. |
||
|
Fragment of Malacrass |
Heals Zul'jan for 10% if the fragment reaches him. |
|
|
Killing one boss early gives the survivor 500% increased damage and attack speed. |
||
|
Zul'jan |
Phase 3 frontal that destroys both venom globules and ghosts. |
Phase 1: Zul'jan
The main mechanic is dealing with the Coalesced Venoms created by Toxic Deluge.
Walking into a Coalesced Venom attaches it to you for a few seconds. Move it toward the area where the tank plans to aim the next Sever, then let it drop there.
There's no extra action button. Touch blob, move blob, drop blob.
The tank then aims Sever through the pile to destroy them. Each one triggers Venom Rupture, dealing raidwide damage. On Heroic, it also adds a stacking DoT, so don't clear a gigantic pile all at once unless the healers are ready.
Sever also increases damage taken from another Sever by 200%, so tanks swap between casts.
Zul'jan also casts Guillotine. At least five players need to soak the initial hit. After that, everyone runs away from the axe before Widow's Kiss explodes around it.
On Heroic, soaking Guillotine increases damage taken from another one by 500%, so use two soak groups and alternate them.
Finally, Fangs of the Coiled Altar deals raidwide damage and fills the sides of the room with Noxious Ground, temporarily forcing everyone toward the middle. The pools are a little bigger than they look, so don't hug their edges.
Keep moving venom, clearing it with Sever, handling Guillotine, and dodging the roaming axes until Zul'jan goes down.
Phase 2: Hex Lord Malacrass
Once Zul'jan is defeated, Hex Lord Malacrass becomes active.
Dreadmarch mind controls several players and forces them toward the edge. Break their absorb shields quickly before they walk off the platform.
Breaking Dreadmarch creates Manifestations of Dread. Each one fixates a player through Unnerving Fixation.
If you're fixated, the ghost moves while you're looking away and stops when you face it. Use that to lead your ghost toward the boss, then stare at it to keep it parked where the tank can hit it with Soul Sever.
Soul Sever destroys the ghosts but also gives anyone hit Gravebound. If you get Gravebound, quickly run through all of your Soul Fragments before the effect expires or you die.
Tanks also swap after each Soul Sever because it increases damage taken from another cast by 200%.
Gloombomb puts big purple circles on several players. Spread them away from the raid. On Heroic, getting hit also applies Gravebound, so collect your fragments afterward.
Spiritcackle summons Abandoned Soulcoilers. Kill them and interrupt every Wail of Terror, or the entire raid gets feared.
At full energy, Hex Lord Malacrass casts Eternal Nightfall behind a Veil of Twilight shield.
Break the shield, dodge the falling shadow effects, then interrupt Eternal Nightfall. That's priority number one whenever it happens.
Intermission: Soulbinding
At 1 health, Hex Lord Malacrass starts Soulbinding and brings Zul'jan back.
For 35 seconds, Zul'jan heals for 2% of his maximum health every second through Ghastly Regeneration, but he also takes 100% increased damage.
This is a great Bloodlust or Heroism window. Burn Zul'jan as hard as possible.
At the same time, Fragments of Malacrass move toward him. Players need to step on them before they reach the boss.
Each fragment that reaches Zul'jan uses Reclaim Essence, healing him for 10%.
Stepping on one destroys it but causes raidwide damage through Spirit Erasure. Don't pop several at exactly the same time. Spread the soaks out enough for healers to keep up.
Phase 3: Coiled Union
Now both Zul'jan and Hex Lord Malacrass are active, and mechanics from both earlier phases start overlapping.
They also gain Soulbound. If one boss dies first, the other gains 500% increased damage and attack speed, so keep their health close and kill them together.
The main new interaction is Blighted Sever.
This frontal destroys both Coalesced Venoms and Manifestations of Dread.
So now you combine the first two phases: move the poison globules into the frontal lane, guide your fixating ghosts there too, then let the tank aim Blighted Sever through everything.
Guillotine returns as Grim Guillotine. At least five players still need to soak, Heroic still requires alternating groups, and everyone still needs to run away afterward. This version also puts a healing absorb on the soak group.
Meanwhile, Hex Lord Malacrass keeps using Dreadmarch, Gloombomb, Spiritcackle, and Eternal Nightfall.
So your priorities are pretty simple even if the screen isn't:
- Break Dreadmarch mind controls.
- Move venom and ghosts into Blighted Sever.
- Handle Grim Guillotine with alternating soak groups.
- Interrupt Wail of Terror.
- Break Veil of Twilight and interrupt Eternal Nightfall.
- Keep both bosses at roughly the same health.
It gets chaotic, but most of Phase 3 is just mechanics you've already seen happening at the same time.
Tank, Healer, and DPS Notes
Tanks: Swap after every Sever, Soul Sever, or Blighted Sever. Good frontal positioning is the biggest tank responsibility in this fight.
Healers: Be ready for Venom Rupture stacks, Guillotine soaks, fragment soaks during Soulbinding, and the heavy healing absorbs in Phase 3.
DPS: Break Dreadmarch quickly, kill Abandoned Soulcoilers, destroy Veil of Twilight, burn Zul'jan during Soulbinding, and balance both bosses' health in Phase 3.
Ula'tek Tactics
Ula'tek is the eighth and final boss of The Venomous Abyss, and unlike every other boss in the raid, she wasn't publicly tested on the PTR. So, there isn't really a proven Normal or Heroic strategy yet. What we do have is a pretty detailed Dungeon Journal that gives us the main idea of the fight.
It's a three-phase encounter with an intermission before the final phase. The big theme is add control and space management. Ula'tek keeps spawning eggs around the platform, poison waves can hatch those eggs into stronger adds, and later in the fight she starts breaking pieces of the arena entirely.
The other really important mechanic is Rage of the Shackled. Whenever this happens, Ula'tek's Venomous Heart becomes exposed for 20 seconds and takes 200% increased damage. That's your obvious burn window, so save major cooldowns for it. Bloodlust or Heroism will probably be used during one of these Heart windows, but the best exact timing is something that still needs live testing.
Here’s a quick look at the main abilities used during the fight:
|
Enemy |
Ability |
Description |
|
Sends venom waves across the platform. Hitting Blightscale Spawn instantly hatches them. |
||
|
Hatching a Blightscale Viper adds a permanent ticking Nature damage effect to the raid. |
||
|
Knocks the tank back and repeatedly bites them, applying Stone Venom and a heavy slow. |
||
|
Heavy raidwide damage reduced by the number of players standing at the impact location. |
||
|
Heroic mechanic that prevents players who soaked one Spectral Coils from helping with the next. |
||
|
Raidwide damage and falling debris that exposes the Venomous Heart for 20 seconds. |
||
|
Turns nearby Blightscale Spawn into a growing Blightscale Clutch. |
||
|
Interruptible cast that deals massive raidwide damage. |
||
|
Damages and slows targeted players. Breaking it applies Blight Vein. |
||
|
Heroic mechanic that starts Writhing Gestation on remaining Blightscale Spawn on that side. |
||
|
Basically a wipe if a Doomscale finishes gestating normally. |
||
|
Destroys part of the platform and permanently reduces the available space. |
||
|
Poisons players who need help removing the effect before they become Calcified Corpses. |
||
|
Final enrage that rapidly kills the raid. |
Phase 1: Fury of the Serpent Mother
The main thing you're dealing with in Phase 1 is Blightscale Spawn, basically eggs that keep appearing around the arena.
The dangerous interaction is Caustic Waves. Ula'tek sends venom waves across the platform, and anyone standing in them takes heavy damage plus a stacking DoT.
More importantly, if a wave hits a Blightscale Spawn, that egg instantly hatches into a Blightscale Viper.
You really don't want that happening.
Every Blightscale Viper hatched this way gives the entire raid Putrid Membrane, which is a permanent ticking Nature damage effect. So unnecessary hatches basically become a soft enrage for your healers.
Players can interact with Blightscale Spawn through Malignant Shell, which attaches the egg to the player and deals ticking damage while it's being carried. The exact live positioning strategy isn't known yet, but the obvious goal is to keep the eggs away from incoming Caustic Waves instead of letting them hatch all over the place.
If an egg gets broken early, it creates a much weaker Blightscale Rawling instead. On Heroic, these adds use Poisonous Bite, so tanks and healers need to watch the stacking poison while DPS cleans them up.
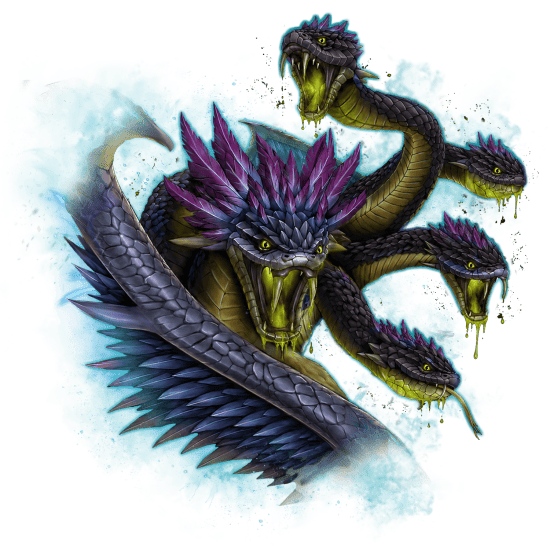 Spectral Coils
Ula'tek also attacks with Spectral Coils.
This is basically a giant group soak. The hit damages the entire raid, but that damage is reduced for every player standing within 10 yards of the impact point. So when the coil comes down, stack into it.
On Heroic, there's a catch. Anyone who helped reduce one Spectral Coils hit gets Soul Constrictor, preventing them from helping mitigate the next one.
So the obvious Heroic solution is to split the raid into two groups and alternate soaks. Group 1 takes one coil, Group 2 takes the next, and repeat from there.
There's also Mephitic Thrash, which hits and knocks back players near the tail while punishing players who are too far away with additional damage and a DoT. So don't wander halfway across the room unless a mechanic actually requires it.
Mother's Wrath
Mother's Wrath is the main tank mechanic.
Ula'tek knocks the active tank away, then starts biting them as long as they're within reach. Each bite adds Stone Venom and leaves the tank heavily slowed.
The important part is keeping somebody in melee range. If Ula'tek can't reach her current target, Mother's Wrath starts hitting the entire raid instead.
So after the knockback, the tank needs to get back into position, and the other tank should be ready to take over as the Stone Venom stacks build.
Rage of the Shackled
Eventually Ula'tek uses Rage of the Shackled.
This deals raidwide damage for 20 seconds while chunks of the arena fall around the group. Dodge the Falling Debris and heal through the ticking damage.
But this is also your big DPS moment.
Rage of the Shackled exposes Ula'tek's Venomous Heart, which takes 200% increased damage for 20 seconds.
Everyone swaps and blasts it.
Save major cooldowns for these windows. This is also the most obvious place for Bloodlust or Heroism, although the exact best Heart window will depend on the live fight timing.
Phase 2: Children of the Doomscale
Phase 2 is basically the add-management phase.
You now have Doomscale Wardens, Doomscale Eggs, and more Blightscale Spawn to worry about.
The Doomscale Wardens are priority targets. Their Warden's Protection prevents players from safely interacting with nearby Doomscale Eggs, so kill the Warden first.
They also cast Malice. Interrupt this every time. If it goes through, you're looking at huge raidwide damage for several seconds.
The other big mechanic is Writhing Gestation, which turns nearby Blightscale Spawn into a Blightscale Clutch.
Those clutches need to die quickly because the creatures inside keep growing stronger while they're allowed to gestate. In plain terms, if something is turning into a giant snake nursery, stop DPSing whatever else you're hitting and kill it.
On Heroic, Doomscale Wardens also use Grasping Fangs, damaging and heavily slowing targeted players. Breaking the fangs applies Blight Vein, so healers need to be ready when those effects are cleared.
Doomscale Eggs
Once a Doomscale Warden is dead, you can deal with its Doomscale Egg.
You don't want a Ravenous Doomscale coming out normally. A fully gestated one can cast Dread Roar, which repeatedly damages and stuns the entire raid for 20 seconds. That sounds about as survivable as you'd expect.
Disrupting the gestation instead gives the Ravenous Doomscale Defect: Weakened, making it take 100% increased damage and preventing Dread Roar.
So that's the version you want.
On Heroic, disturbing a Doomscale Egg also triggers Mass Gestation, causing the remaining Blightscale Spawn on that side to start Writhing Gestation.
So before you mess with the egg, make sure DPS is ready for the resulting clutches. Otherwise, you solve one snake problem by creating six more snake problems.
Keep working through the Wardens, eggs, and clutches while dodging Virulent Spit around the room.
Intermission: The Shattering
Once the brood phase is over, Ula'tek starts destroying the arena.
The main mechanic here is another round of Spectral Coils, but now you're also taking constant damage from Necrotic Vapors.
Stack into the coil impacts to reduce their raid damage.
On Heroic, keep alternating your soak groups because of Soul Constrictor. If Group 1 just handled one coil, Group 2 needs to take the next.
This is mostly a survival check. Healers should plan raid cooldowns here because Necrotic Vapors keeps ticking while the big coil hits are coming in.
Phase 3: Ula'tek's Ascension
Phase 3 brings back a lot of the earlier mechanics, except now Ula'tek starts deleting pieces of your platform.
Circling Prey destroys part of the arena and knocks players around it. Move away from the section being destroyed and start treating the remaining safe space like a resource, because you aren't getting that part of the room back.
At the same time, Caustic Waves return, so you're now dodging venom with less and less room to work with.
Call of the Serpent brings down more of Ula'tek's children, including more clutches, Blightscale Rawlings, and Blightscale Vipers.
Kill the clutches quickly before they can grow out of control. On Heroic, Blightscale Vipers also use Petrifying Sting, turning players around the impact into stone and giving them a huge healing absorb. Spread the targeted hits and heal those players out quickly.
Serpent's Bite
Serpent's Bite targets several players with poison.
If that venom is allowed to run its full duration, the player becomes a Calcified Corpse, which is basically death with extra steps.
Other players can move close to the poisoned target and help leech the venom away. The assisting players then get Volatile Purge.
A few seconds later, Volatile Purge explodes around that player, so once you've helped clear somebody's poison, move away from everyone else before your own effect expires.
So the mechanic is basically: help the poisoned player, then spread out yourself.
Final Burn
Mother's Wrath, Necrotic Vapors, add spawns, and Rage of the Shackled continue in the final phase.
That means you get more Venomous Heart damage windows. Every time it appears, swap immediately and unload while it takes 200% increased damage.
The longer Phase 3 goes, the worse everything gets because Circling Prey keeps eating the arena.
Eventually Ula'tek casts Fury Unleashed, immediately hitting the entire raid and then dealing massive Nature damage every second.
That's the hard enrage.
So by the end, forget being cute with cooldowns. Kill the giant snake before she runs out of prison to destroy.
Tank, Healer, and DPS Notes
Tanks: Never leave Ula'tek without a melee target, or Unchecked Rage starts punishing the raid. Be ready to swap around Mother's Wrath and its Stone Venom stacks. In Phase 2, pick up and face the Ravenous Doomscales away from the group for Desperate Thrash.
Healers: Every Blightscale Viper hatched by poison adds permanent Putrid Membrane pressure. Save raid cooldowns for Spectral Coils, Rage of the Shackled, and the Necrotic Vapors intermission.
DPS: The big priority is stopping eggs from turning into stronger adds, killing Blightscale Clutches before they finish growing, interrupting Malice, and swapping immediately to the Venomous Heart whenever Rage of the Shackled exposes it.
The Venomous Abyss Loot
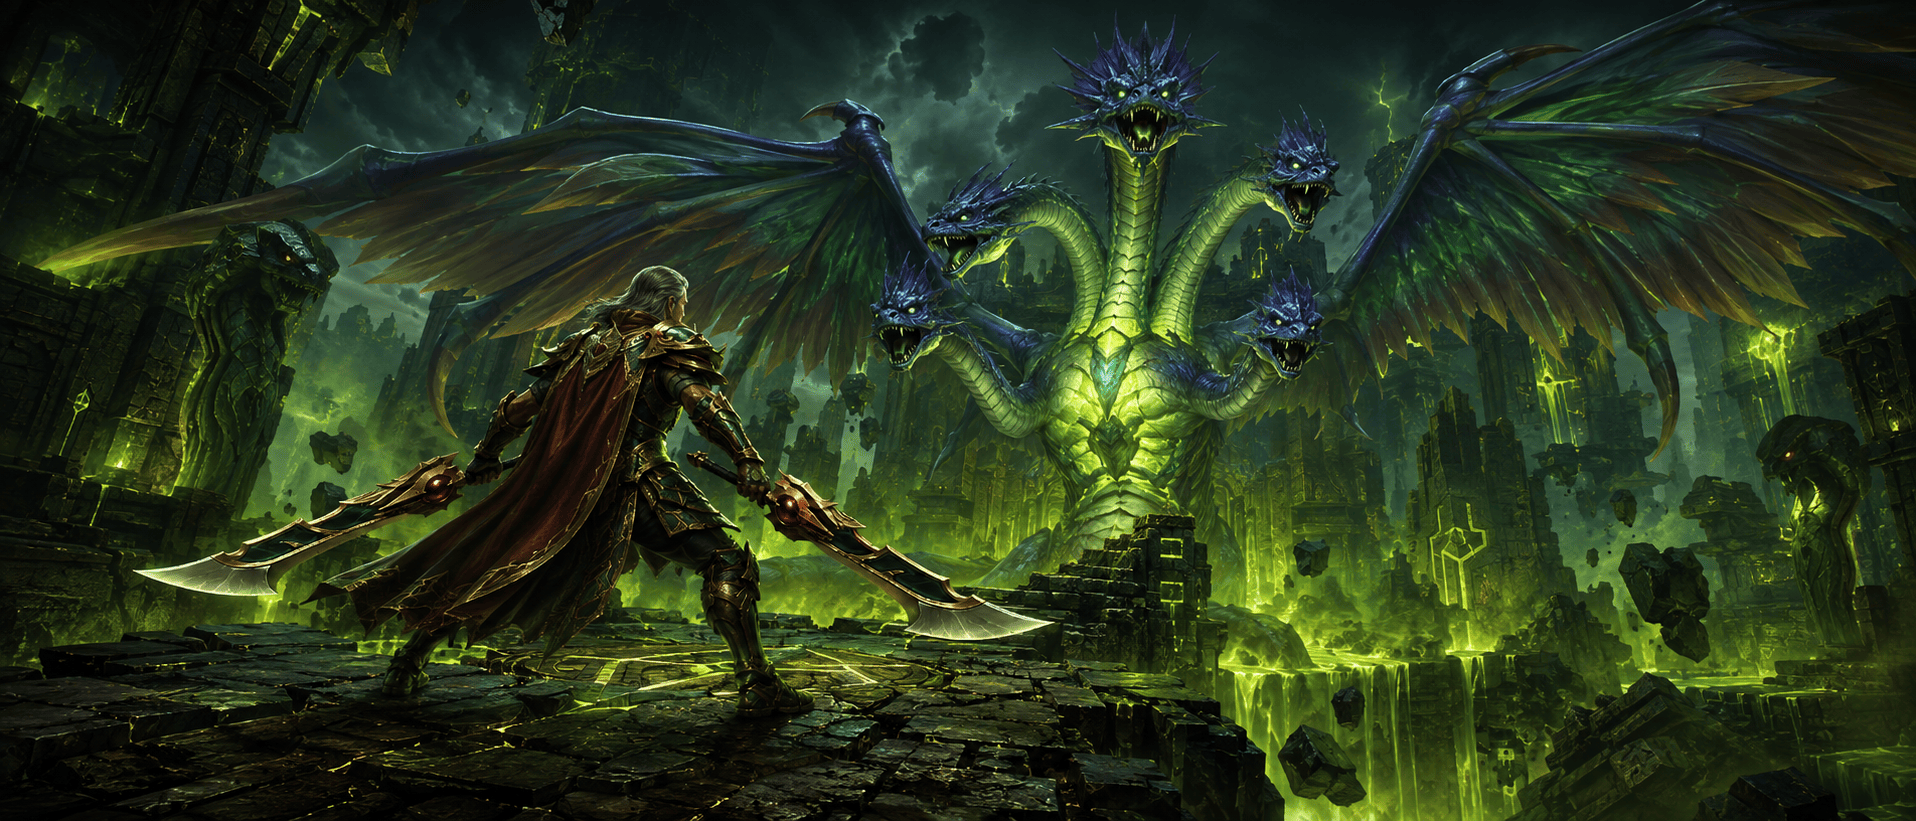
The reward pool is also pretty typical for the kind of activity this is. I would especially pay attention to what ilvl drops from what difficulty and on what boss. The table for that is right below. And feel free to check out the complete drop pool table for each encounter in the raid.
The Venomous Abyss Item Levels
Item level increases as you progress deeper into The Venomous Abyss. The first boss has the lowest reward bracket; bosses 2-3 move one upgrade level higher, bosses 4-6 another one, and the final two bosses have the highest drops.
|
Difficulty |
Boss 1 |
Bosses 2-3 |
Bosses 4-6 |
Bosses 7-8 |
Crest |
|
Raid Finder |
279 |
282 |
285 |
289 |
|
|
Normal |
292 |
295 |
298 |
302 |
|
|
Heroic |
305 |
308 |
311 |
315 |
|
|
Mythic |
318 |
321 |
324 |
344 |
The Venomous Abyss Tier Set Tokens
Tier Set armor starts dropping from the second boss. Entombed Sentinels through The Twin Fangs each drop tokens for one armor slot, divided between Cloth, Leather, Mail, and Plate wearers.
Ula'tek works differently. Instead, she drops the Slumbering Coil Curio, which can be exchanged for any Tier Set armor piece.
|
Boss |
Slot |
Cloth |
Leather |
|
Plate |
|
Entombed Sentinels |
Hands |
||||
|
The Lost Explorers |
Shoulders |
||||
|
Vashnik the Malignant |
Chest |
||||
|
Sszorak |
Legs |
||||
|
The Twin Fangs |
Helm |
||||
|
Ula'tek |
Any |
The Venomous Abyss Gear Drops
The full raid has a huge regular armor table, so this table focuses on the more interesting pieces to target: weapons, trinkets, jewelry, Very Rare drops, and Ula'tek's special Venomcursed gear.
|
Item |
Item Type |
Boss |
|
1H Axe |
Nek'zali the Soulcoiler |
|
|
1H Dagger |
Nek'zali the Soulcoiler |
|
|
1H Fist Weapon |
Nek'zali the Soulcoiler |
|
|
Shield |
Nek'zali the Soulcoiler |
|
|
Off-Hand |
Nek'zali the Soulcoiler |
|
|
Ring |
Nek'zali the Soulcoiler |
|
|
Healer Trinket |
Nek'zali the Soulcoiler |
|
|
1H Dagger |
Entombed Sentinels |
|
|
2H Mace |
Entombed Sentinels |
|
|
Off-Hand |
Entombed Sentinels |
|
|
Neck |
Entombed Sentinels |
|
|
Trinket |
Entombed Sentinels |
|
|
1H Mace |
The Lost Explorers |
|
|
Ranged Gun |
The Lost Explorers |
|
|
Shield |
The Lost Explorers |
|
|
Tank Trinket |
The Lost Explorers |
|
|
Trinket |
The Lost Explorers |
|
|
2H Staff |
Vashnik the Malignant |
|
|
2H Sword |
Vashnik the Malignant |
|
|
Ring |
Vashnik the Malignant |
|
|
Trinket |
Vashnik the Malignant |
|
|
Trinket |
Vashnik the Malignant |
|
|
1H Warglaive |
Sszorak |
|
|
1H Mace |
Sszorak |
|
|
Ring |
Sszorak |
|
|
Trinket |
Sszorak |
|
|
Trinket |
Sszorak |
|
|
1H Dagger |
The Twin Fangs |
|
|
Neck |
The Twin Fangs |
|
|
Healer Trinket |
The Twin Fangs |
|
|
Trinket |
The Twin Fangs |
|
|
1H Sword |
The Coiled Altar |
|
|
Very Rare 1H Axe |
The Coiled Altar |
|
|
Very Rare 2H Axe |
The Coiled Altar |
|
|
Trinket |
The Coiled Altar |
|
|
Trinket |
The Coiled Altar |
|
|
Venomcursed Cloth Helm |
Ula'tek |
|
|
Venomcursed Leather Helm |
Ula'tek |
|
|
Venomcursed Mail Chest |
Ula'tek |
|
|
Venomcursed Plate Legs |
Ula'tek |
|
|
1H Sword |
Ula'tek |
|
|
2H Polearm |
Ula'tek |
|
|
Ranged Bow |
Ula'tek |
|
|
Very Rare 1H Dagger |
Ula'tek |
|
|
Very Rare 1H Dagger |
Ula'tek |
|
|
Neck |
Ula'tek |
|
|
Trinket |
Ula'tek |
|
|
Trinket |
Ula'tek |
The raid also has nine Bind-on-Equip drops, including the Bound Serpent's Jade Eye necklace.
The Venomous Abyss Mount and Bonus Rewards
There are a couple of mounts and housing decor items worth chasing:
|
Reward |
Type |
Source / Requirement |
|
Mount |
Defeat Ula'tek on Mythic |
|
|
Mount |
Complete Glory of the Venomous Raider |
|
|
Helm Transmog |
Bonus Loot from Nek'zali |
|
|
Helm Transmog |
Bonus Loot from The Coiled Altar |
|
|
Helm Transmog |
Mythic The Coiled Altar |
|
|
Companion Pet |
Nek'zali |
|
|
Companion Pet |
Complete No Egg Scramble |
|
|
Housing Decor |
Ula'tek |
|
|
Housing Decor |
Higher-difficulty Ula'tek clears |
Read our other WoW guides:
F.A.Q.
Is The Venomous Abyss raid difficult?
The difficulty of this raid stems from the number of boss encounters and the kind of strategy each one requires. An experienced raiding party should not have too many problems steamrolling through each boss, while a less experienced party may struggle. The key is to learn the general strategy for each encounter.
How long does The Venomous Abyss raid take to beat?
Typically, it should take you about an hour or more, depending on the skill and readiness of the players in your party.
What bosses are in The Venomous Abyss raid?
There are 8 bosses in this raid:
- Nek'zali the Soulcoiler
- Entombed Sentinels
- The Lost Explorers
- Vashnik the Malignant
- Sszorak
- The Twin Fangs
- The Coiled Altar
- Ula'tek
Where is the Venomous Abyss raid entrance?
It’s inside the Vaults of Atal'Utek, the exact coordinates are 47.2, 21.7
What item level gear does The Venomous Abyss drop?
The ilvl depends on the chosen difficulty you queue up for:
- Raid Finder: 279-289
- Normal: 292-302
- Heroic: 305-315
- Mythic: 318-344
What item level do you need for The Venomous Abyss Raid Finder?
You need at least 273 item level to queue for The Venomous Abyss Raid Finder. You also need to be level 90.