 Dallon Avery
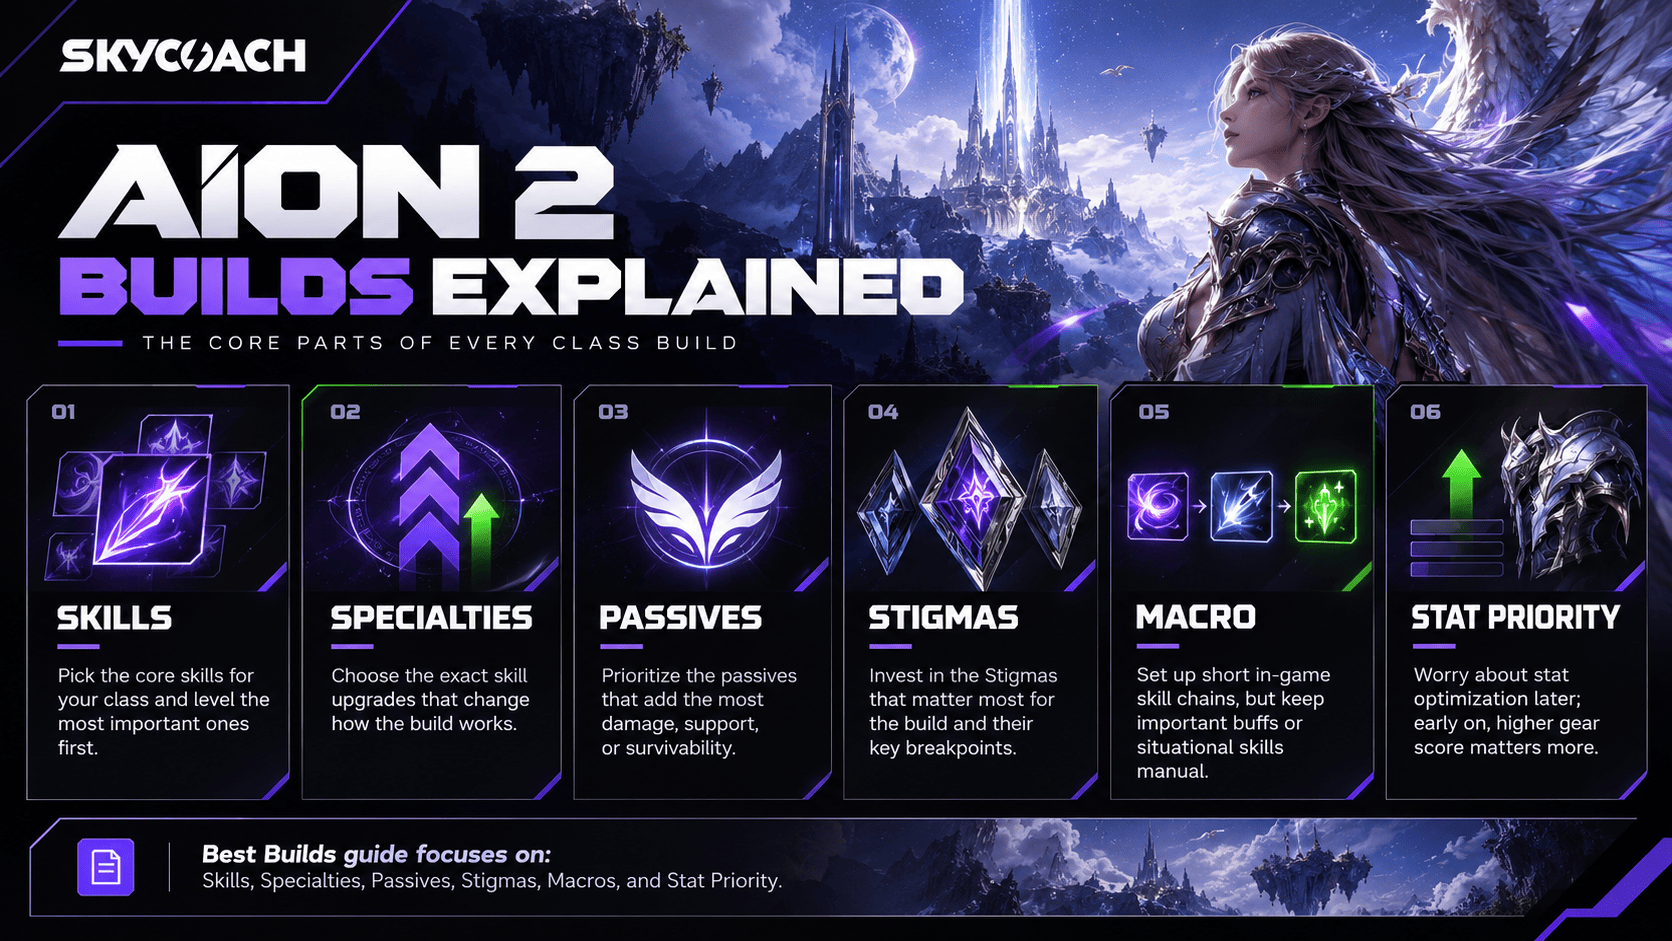
AION 2 Best Builds Quick Overview:
- A class build includes everything you need to get through leveling and farm gear score
- You need specific Skill specialties unlocked to make the class work
- There are usually around 4 Stigmas that you unlock for a build, not more.
- Arcana, Pantheon, Soulstones, and other stats and gear upgrades are not part of a build, but they are a part of a class guide
- You can still use the same skill macros for early game even if some key stigmas are missing
Need help making the right build? Buy AION 2 Powerleveling at Skycoach and enjoy a fully developed character with access to stigmas, all Daevation boards, Arcana, and Panetheon. Take your build to the next level!


Read closely 
Browse our hottest Aion 2 Boosting services








Best Templar Build
Templar is the dedicated tank in the game, while Gladiator can also tank; that class is usually an off-tank, so a good Templar build not only needs to deal damage, but also have enough “aggro” and survivability to sustain longer boss fights. In PvP, you mostly want crowd-control and survivability. You pull someone in and hunker down while your allies kill them. That’s not to say that you can’t frag players as a Templar; it’s just that your power comes from other things that all other classes are lacking. That being able to stack Enmity (aggro) on the enemy.
Templar is AION 2’s dedicated tank, but its PvE build still puts a lot of emphasis on dealing damage while maintaining aggro and party utility. The core of the build revolves around triggering Judgment through shield skills, keeping Punishment available for burst damage, and filling downtime with repeatable melee attacks. The goal for the early game, as you get to level 45 and then to a 1000 gear score, is to get the important skills to level 12 and 16 to unlock not one but two specialty slots so you can equip the most impactful ones.
Skills and Specialties
| Icon |
Skill |
Target Level |
Skill Description |
Specialties |
 |
Judgment |
16+ |
Deals damage to a target within 4m and increases Enmity. 5 Stagger Gauge Damage. |
Extra damage on hit; Critical Hit on hit; Remove cooldown |
 |
Vicious Strike |
12+ |
Deals damage to up to 4 enemies within 4m and increases Enmity. Restores 100 MP. |
+20% MP restored; -2s [Warding Strike] cooldown on hit |
 |
Warding Strike |
12+ |
Deals damage to up to 4 enemies within 5m of the caster. Immediately restores HP and grants Warding to the caster for 10s. Triggers [Judgment] for 2s. Warding: Increases PvE Damage Tolerance by 20% and PvP Damage Tolerance by 10%. 5 Stagger Gauge Damage. |
-5s cooldown or +100 Block during Warding; Adds PvE Damage Tolerance and PvP Damage Tolerance increase effect when more targets hit to Warding |
 |
Shield Smite |
12+ |
Deals damage to up to 4 enemies within 4m. Has a 60% chance to inflict Stun on the target for 3s. Triggers [Judgment] for 2s. 100% chance to inflict Stun on NPC targets. 10 Stagger Gauge Damage. |
50% chance to trigger [Debilitating Smash] on hit; -2s cooldown |
 |
Annihilate |
12+ |
Deals damage to a target afflicted with Stun or Knockdown within 4m with a 30% chance to inflict Knockdown for 3s. 100% chance to inflict Knockdown on NPC targets. Has a 5% chance to trigger when attacking a target with Incapacitated Immunity. 10 Stagger Gauge Damage. |
+100% damage to targets with Incapacitated Immunity; -10s cooldown |
 |
Punishment |
16+ |
Selects a target within 20m and deals damage to up to 4 enemies within 4m of the target and grants the Executor effect to the caster for 20s. Executor: Increases Accuracy by 200, PvE Damage Boost by 20%, and PvP Damage Boost by 10%. Max 3 Charge Levels. 20–35 Stagger Gauge Damage. |
Inflicts Damage over Time to target on hit; +30% Skill Speed; Ignores Block and Evasion and lands as a Critical Hit |
First, get to Judgment Lv. 16, because its cooldown-removal Specialty lets the build capitalize on every Judgment trigger instead of waiting for the normal cooldown. Go for Judgment before Warding Strike, Vicious Strike, and Annihilate first.
Level up Vicious Strike because its Lv. 12 Specialty reduces Warding Strike cooldown by 2 seconds every time it hits. That interaction is one of the main reasons this version of Templar can trigger Judgment so frequently.
Passives
| Icon |
Passive |
Priority |
Skill Description |
 |
Fury |
Highest |
Increases Front Attack Damage Boost by 0.3% for the caster, and increases PvE Damage Boost by 5.5% and PvP Damage Boost by 2.75% for 20s for the caster and party members on Block. Cooldown: 1s. |
 |
Ironclad Defense |
High |
Increases the caster's Defense by 7% and Endurance by 1%. |
 |
Insulting Roar |
High |
Increases Enmity Boost by 100% for the caster and increases Attack by 5.5% for 5s on landing a Front Attack. Cooldown: 5s. |
 |
Impact Hit |
High |
Increases the caster's Impact-type Chance by 11.2% and Double Chance by 0.3%. |
Fury is a super important passive here because Templar naturally blocks while tanking, turning that defensive action into a party-wide damage buff. Next in line are Ironclad Defense, Insulting Roar, and Impact Hit.
Stigmas
| Icon |
Stigma |
Target Level |
Skill Description |
 |
Doom Shield |
Priority |
Rushes to a target within 20m and deals damage. Has a 75% chance to inflict Knockdown for 3s. Grants a Protective Shield that blocks damage equaling 5% Max HP for 5s on hit. Triggers [Judgment] for 3s. 100% chance to inflict Knockdown on NPC targets. 20 Stagger Gauge Damage. |
 |
Battlefield Banner |
Priority |
Increases Attack proportional to Defense for 10s. |
 |
Taunt |
Utility |
Deals damage to a target within 20m and increases Enmity. Inflicts Shrink for 15s on hit and has a 50% chance to inflict Taunt for 3s if the target is a player. Shrink: Reduces Accuracy by 200 and Attack by 10%. 20 Stagger Gauge Damage. |
 |
Empyrean Lord’s Punishment |
Damage |
Selects a target within 20m and deals damage to up to 4 enemies within 4m of the target. Has a 50% chance to inflict Stun for 3s. 100% chance to inflict Stun on NPC targets. 50 Stagger Gauge Damage. |
Battlefield Banner becomes considerably better with investment. Its Stigma upgrades add +10% Multi-Hit Chance, +10% Weapon Damage Boost, +20% Attack increase proportional to Defense, and eventually -30s cooldown.
The main point here is not that these are the only Stigmas a Templar should unlock. They are the Stigmas this PvE build prioritizes for the active loadout and investment.
Macro
If you’re new to AION 2 skill chains and in-game macros, check out my AION 2 Macros Guide first.
The build keeps  Vicious Strike on LMB and runs the
  Judgment-focused skill chain through the macro. The idea is simple: keep using Vicious Strike while the macro cycles through shield skills that trigger Judgment.
Stat Priority
For this offensive Templar build, the main focus is Combat Speed and offensive stats, while still maintaining enough Accuracy for current PvE content. Block remains useful because it directly activates Fury, but this version of Templar is not built as a pure Block-stacking tank.
Accuracy to requirement → Combat Speed → Attack / Damage Boost → Block
The good news is - you don’t really need to worry about stats until you start farming that 1400 gear score. That’s when you can start rerolling those stats to get whichever you need, but even at that point, you’d be mostly doing it to get a higher gear score rather than actual stats that you want on a build.
Best Gladiator Build
As a Gladiator main myself, this one’s for me. Gladiator’s PvE build revolves around Overhead Slam, Rending Blow, and the buffs that let you use those skills as often as possible. The class generates Enmity through its core attacks, so it can naturally tank when needed, but most of this build’s investment still goes into damage and cooldown interactions. It all revolves around Overhead Slam and Rending Blow which you level up first so that you can spam the Overhead Slam nonstop instead of chaining it with Keen Strike. At later stages, Mana won’t be much of an issue, unlike on low-levels, so, the light attacks can be skipped completely. You can make your own build at the Skill Builder website.
Skills and Specialties
| Icon |
Skill |
Target Level |
Skill Description |
Specialties |
 |
Overhead Slam |
16 |
Deals damage to a target afflicted with Knockdown within 4m and increases Enmity. Has a 7% chance to trigger when attacking a target with Incapacitated Immunity. 5 Stagger Gauge Damage. |
Adds [Upward Strike] Chain Skill; Critical Hit on hit; Remove cooldown |
 |
Rending Blow |
16 |
Deals damage to up to 4 enemies within 4m and increases Enmity. 2 Stagger Gauge Damage. |
Changes to mobile skill; Deals up to 12% more damage when less targets are hit; Restores 50 MP on landing a Critical Hit |
 |
Ruinous Blow |
16 |
Rushes to a target within 7.5m to deal damage to up to 4 enemies nearby and grants Prepare for Battle for 20s. Prepare for Battle: Increases PvE Damage Boost by 20%, PvP Damage Boost by 10%, Critical Hit by 100, and Status Effect Chance by 15%. 25 Stagger Gauge Damage. |
+20% Skill Speed; Extra damage on hit; Ignores Block and Evasion and lands as Multi-Hit |
 |
Sword Aura Rampage |
16 |
Deals damage to a target afflicted with Stagger within 4m. |
Absorbs 5% HP; Multi-Hit on hit; -1s all skill cooldowns on hit |
 |
Leaping Slam |
8 |
Leaps to a target within 20m and deals damage. 10 Stagger Gauge Damage. |
Resets cooldown on defeating an enemy |
 |
Rush Strike |
8 |
Moves to a target within 10m and deals damage with a 30% chance to inflict Knockdown for 3s after using [Dodge] or while flying. 100% chance to inflict Knockdown on NPC targets. 10 Stagger Gauge Damage. |
+10m range |
 |
Defiance |
8 |
Removes Stun, Knockdown, Airborne, Grab, Frost, and Fear from the caster and grants Tenacity for 5s. Tenacity: Grants Status Effect Immunity. Unaffected by cooldown reduction effects. |
Restores 20% HP on using [Defiance] |
The first priorities are Overhead Slam and Rending Blow at Lv. 16. Removing Overhead Slam’s cooldown is what lets Rage Burst turn into a window where you can repeatedly use Overhead Slam and Upward Strike. Rending Blow’s Lv. 16 MP restoration is great because it allows the developed build to rely much less on Keen Strike for MP generation.
Ruinous Blow and Sword Aura Rampage can follow afterward. They are useful improvements, but they do not change the basic rotation as dramatically as the first two Lv. 16 breakpoints.
Passives
| Icon |
Passive |
Priority |
Skill Description |
 |
Experienced Counterstrike |
Highest |
Increases Front Attack Damage Boost by 0.4%. Increases PvE Damage Boost by 5.4%, PvP Damage Boost by 2.7% for 20s for the caster and party members on Block. PvE Damage Boost and PvP Damage Boost does not stack with Templar's [Fury] effect. |
 |
Attack Preparation |
Highest |
Increases the caster's PvE Damage Boost by 5.5%, PvP Damage Boost by 2.75%, Defense by 2%, and Accuracy by 100. |
 |
Impact Hit |
High |
Increases the caster's Impact-type Chance by 11.2% and Double Chance by 0.3%. |
 |
Murderous Burst |
High |
Grants a stack of Menace for 3s when landing an attack. Removes Menace at 5 stacks and deals damage to up to 4 enemies within 5m of the caster and increases the caster's Critical Damage Boost by 5.5% for 3s. |
Experienced Counterstrike and Attack Preparation should get most of the attention first. Experienced Counterstrike is bonkers because Gladiator normally fights from the front while tanking, and a successful Block can also provide a damage buff to the entire party.
Next in line are Impact Hit and Murderous Burst become better once the character is developed enough to take advantage of Double Chance, Critical Hits, and frequent attacks. Basically you wanna get every passive that increases your damage, but also get that one for Enmity, which is what AION 2 calls aggro.
Stigmas
| Icon |
Stigma |
Target Level |
Skill Description |
 |
Rage Burst |
5 first |
Deals damage to a target within 4m. Inflicts Wounded for 10s on hit, reducing the enemy's Attack by 10%, and increases the caster's PvE Damage Boost by 10% and PvP Damage Boost by 5% for 10s. Triggers [Overhead Slam] on the target for 10s on hit. Wounded does not stack with the Shrink effect from the Templar skill [Taunt]. 20 Stagger Gauge Damage. |
 |
Focused Block |
5 first |
Temporarily increases Block Damage Reduction by 100% and guarantees Parry. Restores MP and Stamina once on Parry. |
 |
Lunge Stance |
20 priority |
Increases the caster's Combat Speed by 20% for 10s. |
 |
Zikel’s Blessing |
Secondary |
Increases the caster's Attack by 20% and Accuracy by 100 for 10s. |
Start by taking Rage Burst and Focused Block to Lv. 5. Rage Burst gets a major cooldown reduction at this breakpoint, while Focused Block gains an additional use.
After that, Lunge Stance is the main investment priority. Its Lv. 20 effect gives Critical Hits a chance to reduce skill cooldowns by 1 second, which dramatically increases how often Gladiator can cycle through its buffs and Rage Burst windows.
Macro
The main Gladiator macro is:
 Rage Burst →
  Overhead Slam →
  Rending Blow
Once Overhead Slam and Rending Blow reach Lv. 16, Keen Strike becomes much less important in the regular rotation. Keep  Lunge Stance, Zikel’s Blessing,
  Ruinous Blow, and
  Focused Block outside the macro and use them manually when needed.
Stat Priority
For PvE, Gladiator mainly wants enough Accuracy for the content it is running, followed by offensive stats that complement its frequent attacks and Critical Hit interactions.
Accuracy to requirement → Crit → Double → Attack / Damage Boost
Once you get to the point where you actually need to roll for specific stats, these are the ones you want for this class.
Best Assassin Build
Assassin is a burst-oriented melee DPS that gets most of its value from Critical Hits, Insignia stacks, and attacking from behind. He is also currently the S-rank DPS class in the game, meaning this is the class capable of doing the most amount of damage.
This build focuses on Heart Gore, Insignia Explosion, and the skills that keep both available as often as possible. The class is very fast once it gets going, but it rewards positioning and timing more than simply pressing everything on cooldown.
Skills and Specialties
| Icon |
Skill |
Target Level |
Skill Description |
Specialties |
 |
Heart Gore |
16 |
Triggers on landing a Critical Hit, dealing damage to up to 4 enemies within 4m and restores 100 MP. 5 Stagger Gauge Damage. |
Multi-Hit on hit; Resets [Heart Gore] cooldown on landing a Critical Hit |
 |
Insignia Explosion |
16 |
Selects a target within 20m and deals damage to up to 4 enemies within 4m, inflicting Stun for 3s. Stun chance is doubled on NPC targets. Damage and Stun chance increase based on Insignia stacks. 1 stack: 10% Stun chance. 2 stacks: 20% Stun chance. 3 stacks: 30% Stun chance. 4 stacks: 40% Stun chance. 5 stacks: 50% Stun chance. 7 Stagger Gauge Damage. |
+50% Multi-Hit on hit; Keep 2 stacks of Insignias after [Insignia Explosion]; -3s cooldown |
 |
Quick Slice |
16 |
Deals damage to up to 4 enemies within 4m and restores 100 MP. |
+20% MP restored; -1s [Insignia Explosion] cooldown on hit; Ignores Block and Evasion and lands as a Critical Hit |
 |
Savage Roar |
8 |
Deals damage to up to 4 enemies within 4m and engraves 1 Insignia for 10s. 2 Stagger Gauge Damage. |
+20% Skill Speed |
 |
Shadowstrike |
8 |
Moves behind a target within 20m and deals damage, rotates, and inflicts Stun for 3s. 10 Stagger Gauge Damage. |
+20% caster Critical Damage Boost for 10s on hit |
 |
Ambush |
8 |
Deals damage to a target within 4m. Increases damage by 30% on landing as a Back attack. 7 Stagger Gauge Damage. |
Engraves 2 Insignias for 10s on landing as a Back attack |
 |
Infiltrate |
8 |
Moves behind a target within 10m and deals damage with a 50% chance to inflict Blind for 3s after using [Dodge] or while flying. 100% chance to inflict Blind on NPC targets. 10 Stagger Gauge Damage. |
+10m [Infiltrate] range |
The most important breakpoint is Heart Gore at Lv. 16. The skill only becomes available after a Critical Hit, and the build becomes much faster once its cooldown can be repeatedly reset through crits. Insignia Explosion and Quick Slice at Lv. 16 are the next big goals because they improve the two other parts of the combo: detonating Insignias and feeding those detonations back through repeated basic attacks.
Savage Roar does not need the same level of investment early on. Its main job is applying Insignias quickly, so the +20% Skill Speed Specialty is enough for this stage of the build.
Passives
| Icon |
Passive |
Priority |
Skill Description |
 |
Exploit Weakness |
Highest |
Increases caster's Critical Hit by 100. Has a 25% chance to increase Attack by 5.5% for 10s, and a 7% chance to summon up to 5 clones on landing a Critical Hit. Each clone deals damage and inflicts Insignia that lasts for 10s, up to 5 Insignia stacks. Clone cooldown: 1s. Attack increase cooldown: 1s. |
 |
Rear Smite |
Highest |
Increases the caster's Back Attack Damage Boost by 3%, PvE Damage Boost by 3%, and PvP Damage Boost by 1.5%. |
 |
Assault Stance |
High |
Increases the caster's Critical Damage Boost by 6%. |
 |
Impact Hit |
High |
Increases the caster's Impact-type Chance by 11.2% and Double Chance by 0.3%. |
Exploit Weakness is super important because it ties Critical Hits directly into the Insignia mechanic. Its clones can add Insignia stacks for you, which means Insignia Explosion does not have to rely entirely on manual stacking. Rear Smite is just as important in boss fights because Assassin naturally wants to stay behind the target whenever possible.
Stigmas
| Icon |
Stigma |
Target Level |
Skill Description |
 |
Triniel’s Dagger |
10 first |
Deals heavy single-target damage, increases the target’s skill cooldowns, and deals 30% more damage from behind. At Lv. 10, it gains -10% all skill cooldowns on hit. |
 |
Illusive Clone |
Main priority after |
Removes Heart Gore’s cooldown and deals 20% of your damage as extra damage for 10s. |
 |
Swift Contract |
High |
Increases Combat Speed by 20% for 10s. |
 |
Savage Fang |
High |
Deals heavy damage and immediately engraves 5 Insignias for 10s. |
The main burst window comes from Illusive Clone + Swift Contract. Illusive Clone removes Heart Gore’s cooldown, while Swift Contract increases Combat Speed, so this is when you want to stay behind the boss and spend as many Critical Hit-driven Heart Gore activations as possible. Triniel’s Dagger is worth taking to Lv. 10 early because its cooldown reduction effect helps bring the entire burst cycle back faster.
Macro
The Assassin macro is pretty short:
 Insignia Explosion →
  Heart Gore →
  Savage Roar
Keep  Quick Slice on LMB and hold it alongside the macro key. Use
  Illusive Clone,
  Swift Contract, Triniel’s Dagger,
  Shadowstrike, and
  Ambush manually, since those are better timed around burst windows and positioning rather than fired automatically.
Stat Priority
Assassin benefits more from Critical Hit than most classes because crits directly activate Heart Gore and several passive effects. Back Attack-related bonuses are also especially valuable because the class naturally plays behind bosses.
Accuracy to requirement → Crit → Back Attack Damage Boost → Critical Damage Boost / Weapon Damage Boost
Browse our hottest Aion 2 Boosting services








Best Ranger Build
Ranger is a ranged DPS class built around keeping its buffs active, maintaining Marking Shot, and cycling Deadshot with a fast two-line macro. It’s a pretty simple ranged class; all you really have to do is hold down a button, which is why I picked him as my first alt.
This build prioritizes Deadshot, Gale Arrow, Drill Dart, and Snipe as its main damage skills, while Tempest Shot and several utility skills stop at lower breakpoints. By the way, I'm using aion2app database to find info on all skills and passives.
Skills and Specialties
| Icon |
Skill |
Target Level |
Skill Description |
Specialties |
 |
Deadshot |
20 |
Deals Wind damage to a target within 20m and deals 35% more damage while Precision is active. It can be charged up to three levels. |
+30% Skill Speed; Changes to mobile skill; Extra damage on hit |
 |
Gale Arrow |
20 |
Deals Wind damage to up to 4 enemies and grants Gale for 10s, increasing Combat Speed, PvE Damage Boost, and PvP Damage Boost. |
Changes to mobile skill; Increases Combat Speed, PvE Damage Boost, and PvP Damage Boost when less targets hit; -10s cooldown |
 |
Drill Dart |
20 |
Deals Fire damage, restores 100 MP on a Critical Hit, and inflicts Bleed for 6s while reducing Incoming Heal. |
+20% Skill Speed; Multi-Hit on hit; Activates [Drill Dart] 1 extra time |
 |
Snipe |
20 |
Deals Wind damage to a target within 20m and restores 120 MP. |
+50% Multi-Hit on hit; -1s [Deadshot] cooldown on hit; Adds [Tempest Arrow] Chain Skill |
 |
Tempest Shot |
16 |
Deals Wind damage to up to 4 enemies within 4m of the target. |
Deals up to 12% more damage when less targets are hit; +20% Skill Speed |
 |
Snare Shot |
12 |
Deals Earth damage to up to 4 enemies and inflicts Slow, reducing Move Speed by 40% for 5s. |
+20% Skill Speed; Adds [Shackling Arrow] Chain Skill |
 |
Marking Shot |
12 |
Deals Wind damage, moves the Ranger in the input direction, and grants Precision for 10s. Precision increases Critical Hit by 300. |
+5% Perfect Chance for the duration; +5s duration |
 |
Burst Arrow |
12 |
Deals Wind damage to targets affected by Slow or Root. |
+50% Multi-Hit on hit; Deals up to 20% more damage when less targets are hit |
 |
Defiance |
16 |
Removes crowd control and grants Tenacity for a short duration. |
Restores 20% HP on using [Defiance]; +50% PvE Damage Tolerance and +25% PvP Damage Tolerance for Tenacity duration |
Deadshot and Gale Arrow should be the first Lv. 20 priorities. Deadshot gets one of its most important damage Specialties at that breakpoint, while Gale Arrow becomes much easier to cycle thanks to the cooldown reduction. Drill Dart and Snipe are the next skills worth pushing to Lv. 20 once enough additional skill levels become available.
Tempest Shot only needs Lv. 16 for this PvE build. Even though it contributes a lot of damage, skill levels are mainly valuable because they unlock Specialties rather than because of the relatively small base damage increase from each level.
Passives
| Icon |
Passive |
Priority |
Skill Description |
 |
Focused Eye |
Highest |
Increases Ranger’s damage output and scales well with the class’s offensive stats. |
 |
Hunter’s Resolve |
Highest |
Increases Critical Damage Boost. |
 |
Hunter’s Soul |
High |
Adds another offensive boost and becomes the next passive worth developing after the main two. |
 |
Concentrated Fire |
Secondary |
Improves Ranger’s sustained ranged damage. |
 |
Rooting Eye |
Secondary |
Adds further offensive value after the main passive priorities are covered. |
 |
Melee Fire |
Secondary |
Provides another damage-oriented passive once the important passives are already developed. |
Focused Eye and Hunter’s Resolve are the two main passive priorities. These should get most of the early investment, followed by Hunter’s Soul. The remaining offensive passives can be developed afterward as more points become available.
Stigmas
| Icon |
Stigma |
Target Level |
Skill Description |
 |
Vaizel’s Authority |
20 priority |
Provides a major offensive buff. At higher levels, Critical Hits gain a chance to reduce all skill cooldowns by 1 second. |
 |
Bow of Blessing |
20 after |
Grants an offensive buff and gains additional Multi-Hit, Critical Damage Boost, and Double Chance as it levels. |
 |
Supporting Fire |
20 after |
Summons an additional attack source that fires alongside the Ranger for a limited duration. |
 |
Griffon Arrow |
20 after |
Deals damage and applies Crimson Flames, adding Damage over Time and additional offensive effects as the Stigma is upgraded. |
Level these Stigmas fairly evenly at first to reach their early breakpoints. Once you have enough points, reset the distribution and push Vaizel’s Authority to Lv. 20 first. Its cooldown-reduction effect has the biggest impact on how quickly the entire Ranger rotation cycles.
After that, continue developing Bow of Blessing, Supporting Fire, and Griffon Arrow instead of spreading resources across every Stigma you unlock.
Macro
Ranger uses two main skill lines:
 Griffon Arrow →
  Snare Shot →
  Burst Arrow
 Gale Arrow →
  Drill Dart →
  Tempest Shot
Add both lines to the in-game macro with a 10 ms delay. Keep  Deadshot and
  Marking Shot separate, use the main buffs manually, and reapply Marking Shot before Precision expires.
Stat Priority
Ranger needs to balance Accuracy and Critical Hit before stacking pure damage stats. Marking Shot already gives +300 Critical Hit while Precision is active, so reaching the Crit requirement is generally easier than reaching the Accuracy requirement.
Accuracy to requirement → Crit to requirement → Attack → Double / Damage Boost
Best Sorcerer Build
Sorcerer is an easy ranged DPS, which makes it sound like it's the same class as ranger, but they’re not the same. Either way, this build is built around maintaining Fire-related buffs, reducing Hellfire’s cooldown through Firestorm and Wish of Concentration, and keeping enough MP to preserve Sorcerer’s passive damage bonuses.
Skills and Specialties
| Icon |
Skill |
Target Level |
Skill Description |
Specialties |
 |
Wish of Concentration |
16 |
Grants a temporary offensive buff and becomes one of Sorcerer’s main cooldown tools at higher levels. |
+10% additional Attack; +10% Combat Speed; -10s all skill cooldowns |
 |
Blaze |
16 |
Deals Fire damage and benefits from Fire Mark interactions. It also helps restore MP and becomes part of the main Fire rotation. |
Delayed Damage after 3s; Multi-Hit on hit; -3s [Wish of Concentration] cooldown on hit |
 |
Flame Arrow |
16 |
Deals Fire damage and restores MP. At higher levels, it also applies Fire Mark through Pyroclasm and can reset Blaze. |
+50% Multi-Hit on hit; +5% Fire Damage Boost for 10s on activating [Pyroclasm]; Reset [Blaze] cooldown on landing [Pyroclasm] |
 |
Hellfire |
16 |
Charges up to three levels and deals heavy Fire damage in an area. It is one of Sorcerer’s main burst skills. |
+30% Skill Speed; Ignores Block and Evasion and lands as Multi-Hit; -15s cooldown |
 |
Firestorm |
16 |
Fires multiple Fire projectiles and is one of the main ways to reduce Hellfire’s cooldown during sustained damage. |
+20% Skill Speed; -2s [Hellfire] cooldown per fireball; +15% damage per fireball, up to +75% |
 |
Winter’s Shackles |
16 |
Deals Water damage to up to 4 enemies, inflicts Slow, and provides an offensive buff through its Specialties. |
+20% PvE Damage Boost and +10% PvP Damage Boost for 5s on landing [Winter’s Shackles]; Adds [Winter’s Illusion] Chain Skill; -15s [Winter’s Shackles] cooldown |
 |
Bittercold Wind |
16 |
Summons a Water-based attack that contributes damage and control while feeding the Sorcerer’s wider cooldown cycle. |
+1s summon duration; Ignores Block and Evasion and lands as a Critical Hit; -1s [Frost] cooldown |
The first Lv. 16 priorities are Wish of Concentration, Blaze, and Flame Arrow. After those, Hellfire, Firestorm, Bittercold Wind, and Winter’s Shackles become the next important upgrades.
The most important interaction is Firestorm reducing Hellfire’s cooldown. Each Firestorm projectile can cut Hellfire by another 2 seconds, while Wish of Concentration later removes another 10 seconds from all active cooldowns. Together, those effects are what let the Sorcerer move from occasional burst casts into a much faster Fire rotation.
Passives
| Icon |
Passive |
Priority |
Skill Description |
 |
Robe of Flame |
Highest |
Increases offensive stats including Accuracy, PvE Damage Boost, PvP Damage Boost, and Double Chance. |
 |
Grace of Enhancement |
Highest |
Increases PvE and PvP Damage Boost while MP remains above the required threshold and can add extra damage on hit. |
 |
Vitality Evaporation |
High |
Increases damage against targets while their HP remains above a certain threshold. |
 |
Fire Mark |
High |
Applies and improves the Fire Mark mechanic that several Sorcerer Fire skills interact with. |
 |
Robe of Earth |
Secondary |
Increases Max MP and MP regeneration, and grants additional Critical Hit while enough MP is maintained. |
The main thing to remember is that MP is effectively an offensive resource for Sorcerer. Grace of Enhancement loses value when your MP drops too far, while Robe of Earth also rewards maintaining a healthy MP bar. That is why several early Specialties reduce MP costs or restore extra MP before the build has enough stats to sustain itself comfortably.
Stigmas
| Icon |
Stigma |
Target Level |
Skill Description |
 |
Element Enhancement |
Main priority |
Increases Fire and Water damage and improves several Sorcerer passive effects as it levels. |
 |
Delayed Explosion |
High |
Deals delayed damage, restores MP, and applies a damage-increasing effect that is useful before major burst skills. |
 |
Fire Wall |
High |
Creates an area that repeatedly deals Fire damage to enemies standing inside it. |
 |
Cold Storm |
High |
Creates an area that repeatedly deals Water damage and works well against bosses that remain in place. |
Element Enhancement is the main Stigma investment because it directly buffs Sorcerer’s Fire and Water damage and gains further passive interactions at higher levels. Delayed Explosion, Fire Wall, and Cold Storm fill out the main PvE damage package and work well together during burst windows. Use Element Enhancement manually before starting a fight, while the remaining offensive Stigmas are tied into the opening and macro sequence.
Macro
The main macro starts with:
 Element Enhancement → Winter’s Shackles →
  Blaze
Blaze
Keep  Flame Arrow on LMB and hold it together with the macro key to fill animation gaps.
  Hellfire,
  Wish of Concentration, Flame Scattershot, Steel Barrier, and Divine Burst stay manual so they can be timed around charges, cooldown reductions, Stagger windows, and boss mechanics.
Stat Priority
Sorcerer cares about Cooldown Reduction and Combat Speed more than many other classes because so much of its damage comes from repeatedly cycling Hellfire, Firestorm, and its buffs. Accuracy still needs to be high enough for the content you are running, while Attack and Crit become more valuable once those basic requirements are covered.
Accuracy to requirement → Cooldown Reduction → Combat Speed → Attack → Crit / Double
Best Elementalist Build
Elementalist is a ranged DPS class built around managing summons rather than relying on one traditional rotation. Every spirit contributes toward Elemental Fusion, while skills such as Dimensional Control and Jointstrike: Curse add damage around those summons. The goal is to generate Fusion activations quickly, keep your main spirit buffs active, and use Ancient Spirit as the centerpiece of your bigger damage windows.
In other words Elementalist is a mage that can summon various spirits to help in combat. Pretty cool.
The build is specifically tagged for Global PvE DPS and centers on spirit uptime, Elemental Fusion, and scaling the Ancient Spirit as progression opens more Stigma levels.
Skills and Specialties
| Icon |
Skill |
Target Level |
Skill Description |
Specialties |
 |
Cold Shock |
20 |
Deals Water damage and restores MP, making it one of Elementalist’s main repeatable attacks. |
+20% MP restored; +2% Attack on hit; Multi-Hit Chance |
 |
Combustion |
20 |
Deals Fire damage at the cost of a significant amount of MP. |
-50% MP Consumption early; switch to +20% Skill Speed once MP is comfortable; damage-oriented Specialty at the final breakpoint |
 |
Jointstrike: Curse |
20 |
Commands the active spirit to attack and applies Damage over Time to the target. |
+2s duration; -2s cooldown; additional damage Specialty at higher level |
 |
Dimensional Control |
20 |
Activates around spirit summons and applies additional delayed damage to enemies. |
Extra damage after 3s; Guaranteed Multi-Hit |
 |
Elemental Fusion |
20 |
Becomes available after building four Fusion stacks through spirit skills and summons. It is one of Elementalist’s largest direct damage hits. |
Prioritize the damage-oriented Specialties that improve repeated Fusion activations. |
 |
Summon: Water Spirit |
16 |
Summons a single-target spirit that also restores MP to the Elementalist. |
+10% Skill Activation Chance; damage-oriented Specialty at the next breakpoint |
 |
Summon: Fire Spirit |
12 |
Summons an AoE-focused spirit that can attack several enemies. |
+10% Skill Activation Chance |
 |
Summon: Earth Spirit |
12 |
Summons a durable spirit that generates Enmity and can tank enemies for you. |
+10% Skill Activation Chance |
 |
Summon: Wind Spirit |
12 early |
Summons a spirit with healing utility and provides another easy way to generate a Fusion stack during early progression. |
+10% Skill Activation Chance |
The biggest priorities are Cold Shock, Combustion, Jointstrike: Curse, Dimensional Control, and Elemental Fusion. These are the skills that directly contribute to the normal damage cycle rather than simply changing which spirit you have active.
The spirit skills work a little differently. Water Spirit is the most useful single-target option, Fire Spirit is better for multiple enemies, and Earth Spirit trades damage for tanking utility. Wind Spirit is useful early because summoning it contributes another Elemental Fusion stack, but it becomes less important once your spirits attack quickly enough to generate Fusion consistently without cycling through all four summons.
Passives
| Icon |
Passive |
Priority |
Skill Description |
 |
Spirit Strike |
Highest |
Improves the offensive performance of your summoned spirits, including their PvE and PvP damage. |
 |
Spirit Descent |
Highest |
Gives your summons a chance to deal additional damage for several seconds after a spirit is summoned. |
 |
Consecutive Countercurrent |
High |
Adds additional damage against enemies already affected by Elementalist debuffs or Damage over Time. |
 |
Spirit Protection |
Secondary |
Improves the defensive stats of the Elementalist and its spirits. |
 |
Elemental Unification |
Later priority |
Increases Critical Damage Boost and becomes more valuable once you have enough Critical Hit to activate it consistently. |
Spirit Strike should get the most attention first because the entire build relies on your summons contributing meaningful damage. Spirit Descent is another natural priority since you are constantly rotating or resummoning spirits anyway.
Crit-related passives are much weaker during early progression. Once your gear starts supplying enough Critical Hit for them to activate consistently, they become much more worthwhile.
Stigmas
| Icon |
Stigma |
Target Level |
Skill Description |
 |
Summon: Ancient Spirit |
20 first |
Summons Ancient Spirit for 30s. Its attacks repeatedly contribute toward Elemental Fusion, making it the main Stigma behind the build’s damage cycle. |
 |
Flame Blessing |
20 after |
Provides an offensive buff for the Elementalist and strengthens the main damage window. |
 |
Jointstrike: Destructive Attack |
20 after |
Commands the spirits to perform an additional heavy attack. |
 |
Jointstrike: Corrode |
20 last |
Commands the active spirits to attack and applies Corrode, increasing the value of continued spirit damage. |
The leveling order matters more here than simply unlocking all four. Start with Ancient Spirit Lv. 5, Flame Blessing Lv. 5, Corrode Lv. 5, and Destructive Attack Lv. 7, then go for Destructive Attack to Lv. 10. From there, Ancient Spirit goes toward Lv. 15 and eventually Lv. 20 first, followed by Destructive Attack, Flame Blessing, and finally Corrode.
Ancient Spirit is the centerpiece of the build. Improving it reduces the amount of time between the spirit’s major effects and gives you more opportunities to trigger Elemental Fusion during its uptime.
Macro
Elementalist works well with two short skill chains:
- Water Spirit → Corrode → Earth Spirit → Fire Spirit
- Jointstrike: Curse →
 Elemental Fusion →
  Dimensional Control →
  Combustion
Keep Summon: Ancient Spirit and your main buffs manual so you can activate them together at the start of the damage window instead of letting the macro fire them at an awkward time.
Stat Priority
Elementalist benefits a lot from Combat Speed, because faster spirit attacks mean faster stack generation and more frequent Elemental Fusion activations. Accuracy still has to meet the requirement for whatever PvE content you are running, while Crit becomes much more important later once your Crit-based passives begin activating reliably.
Accuracy to requirement → Combat Speed → Attack → Crit → Double / Damage Boost


You got -20% OFF 
Best Cleric Build
Cleric is the dedicated healer in AION 2, but its PvE build is not about standing back and healing nonstop. It’s a unique class as far as healers go. A lot of its value comes from keeping enemy debuffs active, dealing damage between mechanics, and using healing only when the party actually needs it. I picked Cleric as my second alt because I love playing healers and getting insta-invited into instances. I also love the mace and shield weapon combo. Surprisingly, Cleric is not a melee, but a ranged caster class.
This build leans into that hybrid role, with Condemnation and Chain of Torment forming the main damage combo while Healing Light covers the most important early healing breakpoint.
Skills and Specialties
| Icon |
Skill |
Target Level |
Skill Description |
Specialties |
 |
Judgment Thunder |
16 |
Deals Wind damage to up to 4 enemies within 4m of the target. |
Deals up to 12% more damage when less targets are hit; Activates [Divine Punishment] 1 extra time |
 |
Earth’s Retribution |
16 |
Deals Earth damage to a target within 20m and restores MP. |
Prioritize the MP-focused Specialty early; swap toward the cooldown-oriented option once MP is no longer a problem. |
 |
Condemnation |
16 |
Deals Earth damage to enemies afflicted with Chain of Torment. |
Up to +12% damage when less targets hit; Resets cooldown on landing a Critical Hit with [Condemnation]; Multi-Hit on hit |
 |
Divine Aura |
16 |
Summons a stationary Divine Aura that repeatedly attacks a selected target. |
+50% [Divine Aura] attacking speed; +3s [Divine Aura] duration; -10s cooldown |
 |
Chain of Torment |
16 |
Deals Earth damage, applies Damage over Time, and reduces the target’s PvE Damage Tolerance. |
+3s Damage over Time; +10% PvE Damage Tolerance reduction and +5% PvP Damage Tolerance reduction; Ignores Block and Evasion and reduces Damage over Time interval by 50% |
 |
Healing Light |
16 |
Restores HP to the Cleric and the party member with the lowest HP within 40m. |
Prioritize the Specialties that allow repeated healing and improve HP restoration. |
The most important damage interaction is Chain of Torment → Condemnation. Chain of Torment applies the debuff Condemnation requires, while Condemnation’s Critical Hit reset Specialty lets you cast it repeatedly whenever the build forces or naturally lands Crits. Chain of Torment itself also reduces PvE Damage Tolerance, so keeping it active helps the whole party rather than just the Cleric.
Healing Light Lv. 16 is the main healing priority. This is the one healing skill worth pushing early so the Cleric can comfortably handle its dungeon role while the remaining investment goes toward damage skills.
Passives
| Icon |
Passive |
Priority |
Skill Description |
 |
Empyrean Lords’ Grace |
Highest |
Increases Critical Hit and adds additional damage when attacks land. |
 |
Earth’s Grace |
High |
Increases Critical Damage Boost. |
 |
Healing Enhancement |
High |
Improves how strongly Cleric healing scales from Attack. |
Unlike some other classes, this particular build does not prioritize passive nodes during early progression. Take them when they are conveniently on the path, while putting most early investment into active skill breakpoints first.
Once those active skills are developed, Empyrean Lords’ Grace, Earth’s Grace, and Healing Enhancement are the most useful passive priorities. The first two reinforce Cleric’s damage output, while Healing Enhancement keeps its healing competitive without requiring the entire build to become defensive.
Stigmas
| Icon |
Stigma |
Target Level |
Skill Description |
 |
Earth’s Punishment |
5 first |
Deals damage and makes Condemnation land as a Critical Hit, enabling repeated cooldown resets. |
 |
Light of Protection |
High |
Grants PvE Damage Boost and PvE Damage Tolerance to the Cleric and nearby party members. |
 |
Noble Aura |
High |
Summons an aura that adds consistent damage during combat. |
 |
Resurrection |
Utility |
Revives a fallen party member during PvE content. |
Earth’s Punishment is the key offensive Stigma because it directly enables the Condemnation combo. Once it guarantees Condemnation Crits, every Crit can trigger Condemnation’s reset Specialty, allowing repeated casts during the Stigma window.
The other slots are more flexible. Light of Protection gives useful party-wide offense and defense, while Noble Aura adds more sustained damage. Resurrection is difficult to give up in progression content, but once a group is comfortable with mechanics, one of the utility options can be replaced with a more offensive Stigma.
Macro
Cleric can stack its main debuffs and damage skills into one short chain:
 Chain of Torment → Debilitating Mark →
  Condemnation →
  Judgment Thunder
Keep healing, cleansing, Earth’s Punishment, and the main party buffs manual. Those skills are too situational to let a macro fire them automatically.
Stat Priority
Cleric wants enough Accuracy for current PvE content, followed by stats that improve both its damage output and the speed of its casts. Crit is particularly useful because Condemnation and several passives benefit from Critical Hits, while Combat Speed makes both offensive casts and emergency healing feel much smoother.
Accuracy to requirement → Combat Speed → Crit → Attack → Double / Damage Boost
Best Chanter Build
Chanter is a melee support/DPS class whose main purpose is to provide buffs that increase damage. It is not the dedicated healer class like Cleric, but the buffs make all the difference. You wouldn’t believe it until you see it, but chanters actually use Staves and some kung-fu style moves! Overall, it looks pretty unique.
This PvE build revolves around maintaining Dark Crush access, cycling Spinning Strike and Impactful Crush, and keeping your party-wide buffs active during the important damage windows. Chanter also has useful healing and defensive tools, but this build prioritizes the damage and support skills that matter most in group PvE.
Skills and Specialties
| Icon |
Skill |
Target Level |
Skill Description |
Specialties |
 |
Dark Crush |
20 |
Deals damage to a target within 20m. It becomes available through several Chanter skills and is one of the main attacks in the PvE rotation. |
Critical Hit on hit; Adds [Piercing Strike] Chain Skill; Removes [Dark Crush] cooldown |
 |
Spinning Strike |
20 |
Deals damage to up to 4 enemies, increases Critical Damage Boost by 15% for 30s, stacks twice, and activates Dark Crush for 2s. |
-5s cooldown; Up to +20% damage when less targets hit; Ignores Block and Evasion and lands as a Critical Hit |
 |
Impactful Crush |
20 |
Deals damage to a target within 20m, has a 60% Stun chance and guarantees Stun against NPCs. It also activates Dark Crush for 2s. |
Changes to mobile skill; +30% Skill Speed; +20% [Impactful Crush] Stun Chance |
 |
Incandescent Blow |
16 |
Deals damage to up to 4 enemies within 4m and works as one of Chanter’s main filler attacks. |
Deals up to 12% more damage when less targets are hit; Ignores Block and Evasion and lands as Multi-Hit |
 |
Onslaught |
12 |
Deals damage to up to 4 enemies and restores 100 MP. |
+20% MP restored or +50% Multi-Hit on hit; -1s [Spinning Strike] cooldown on hit |
 |
Wave Blow |
16 |
Deals damage to a Stunned target and inflicts Knockdown. It can also activate against targets with Incapacitated Immunity. |
Multi-Hit on hit; -15% target PvE Damage Boost and -7.5% PvP Damage Boost for 10s; -5s cooldown |
 |
Recuperation |
16 |
Restores HP, removes a debuff from party members within 40m, and applies healing over time. |
+1 consecutive use and Heal over Time can stack up to 2 times; +5% HP restored; -3s cooldown |
The most important skill is Dark Crush at Lv. 16+, because removing its cooldown lets you use every activation window from Spinning Strike and Impactful Crush instead of being held back by the normal cooldown. Spinning Strike is another major priority because it both opens Dark Crush and gives you a stacking Critical Damage Boost.
Incandescent Blow and Onslaught are much simpler. Incandescent Blow is your reliable filler during Dark Crush downtime, while Onslaught restores MP and reduces Spinning Strike’s cooldown through its Lv. 12 Specialty.
Passives
| Icon |
Passive |
Priority |
Skill Description |
 |
Attack Preparation |
Highest |
Increases PvE Damage Boost, PvP Damage Boost, Defense, and Accuracy. |
 |
Earth’s Promise |
Highest |
Applies an offensive effect that reduces enemy Damage Tolerance, increasing the damage your party deals. |
 |
Impact Hit |
High |
Improves Impact-related effects and adds offensive value to Chanter’s repeated skill chains. |
 |
Raging Spell |
High |
Improves Chanter’s personal offensive output during sustained combat. |
 |
Inspiring Spell |
High |
Adds party-oriented offensive support alongside Chanter’s personal damage. |
Attack Preparation is the safest first investment because it gives you PvE Damage Boost and Accuracy while also adding some defense. Earth’s Promise is particularly valuable in group content because lowering the boss’s Damage Tolerance benefits everyone, not just the Chanter.
Stigmas
| Icon |
Stigma |
Target Level |
Skill Description |
 |
Undefeated Mantra |
20 priority |
Increases PvE Damage Boost and Damage Tolerance for the Chanter and nearby party members. Its upgrades add Critical Hit, Accuracy, Critical Damage Boost, and Double Chance. |
 |
Power of the Storm |
High |
Increases Combat Speed and reduces cooldowns for the Chanter and nearby party members. |
 |
Marchutan’s Wrath |
High |
Adds another offensive attack to the main melee chain and works well inside Chanter’s damage macro. |
 |
Fracturing Blow |
High |
Reduces the target’s Defense for a short period, creating a burst window for the entire party. |
Undefeated Mantra is the main long-term investment because every breakpoint adds another useful party stat. At Lv. 20, it provides additional Critical Hit, Accuracy, Critical Damage Boost, and Double Chance on top of the base PvE Damage Boost and Damage Tolerance
Power of the Storm and Fracturing Blow are your main burst-window tools. Use them when the group is ready to unload damage instead of pressing them randomly as soon as they become available.
Macro
The main Chanter macro uses two skill lines:
 Spinning Strike
 Dark Crush → Marchutan’s Wrath →
  Impactful Crush →
  Incandescent Blow
Keep  Onslaught on LMB and use it between macro activations.
  Power of the Storm,
  Undefeated Mantra,
  Fracturing Blow,
  Recuperation, and other support tools should stay manual so you can use them when the party actually needs them.
Stat Priority
Chanter benefits from Combat Speed because it spends most of its time cycling melee skills and reacting to Dark Crush activations. Accuracy still needs to meet the current PvE requirement, while Attack and Crit become more valuable once those basics are covered.
Accuracy to requirement → Combat Speed → Attack → Crit → Damage Boost / Double
Read our other AION 2 guides:
F.A.Q.
How to make a build in AION 2?
There isn’t much build variety for classes in this game; most players will use similar builds for PvE. A build is about skills, specialties, passives, and stigmas. How you use your skills and stigmas in a Macro also matters. Additionally, once you’re done chasing gear score, you’ll be rolling for specific stats on your gear.
What is the best Gladiator build in AION 2?
The best Gladiator build always revolves around Overhead Slam with no cooldown along with Rending Blow, as well as a few buffs on top of it. After a while, you’ll be using Keen Strike less and less.
What’s the difference between early-game and endgame builds in AION 2?
The most obvious difference is the availability of stigmas and specialties in unlocked skills, which come from leveling said skills to a certain level. Getting to max level isn’t an issue, so early-game builds are purely educational.
Do I have to use combat macros in AION 2?
While you don’t have to use macros in AION 2, using them allows you to benefit from more skills at the same time, therefore making your character deal more DPS compared to when you’re not using macros.
Can you save builds in AION 2?
There’s no build or loadout save option in AION 2. If you wish to try out different skill and stigma combinations, you need to manually reset and reallocate skill points.