 Wayne Halkett
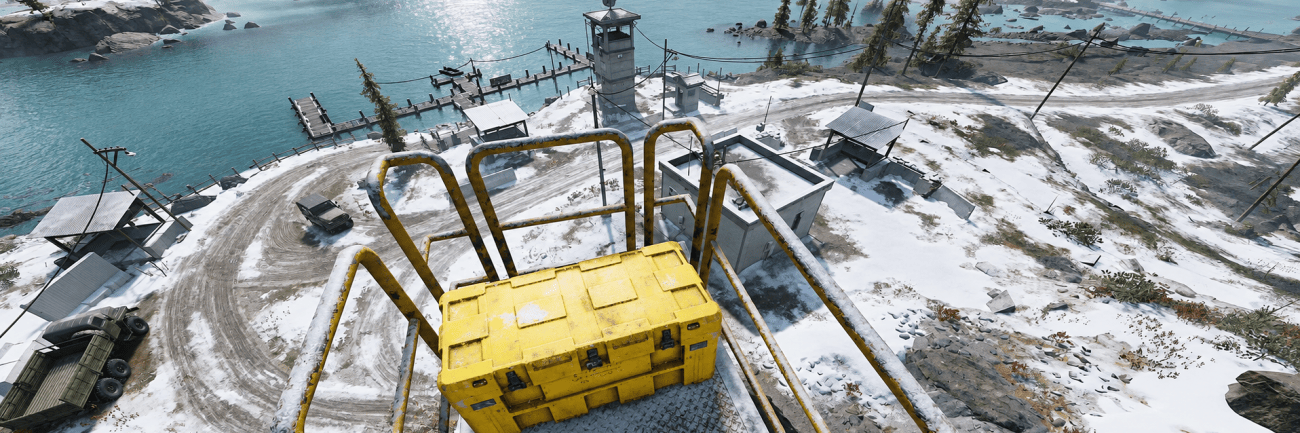
All Notes and Yellow Crates Locations in Modern Warfare 4 Stranded Quick Overview:
- There are 58 Notes and 26 Yellow Supply Crates on the Stranded map, most of which have fixed locations.
- Notes are mostly there to provide some lore and guide you to the crates. Crates contain valuable supplies and weapons.
- The order in which you open crates is irrelevant — the rewards are always based on the number of crates opened.
Like the open-world gameplay but hate feeling underpowered? Skycoach’s Call of Duty DMZ Boosting Services can fix this problem and enable you to play on your own terms.


Read closely 
Browse our hottest Call of Duty Boosting services





Modern Warfare 4 Stranded Collectibles
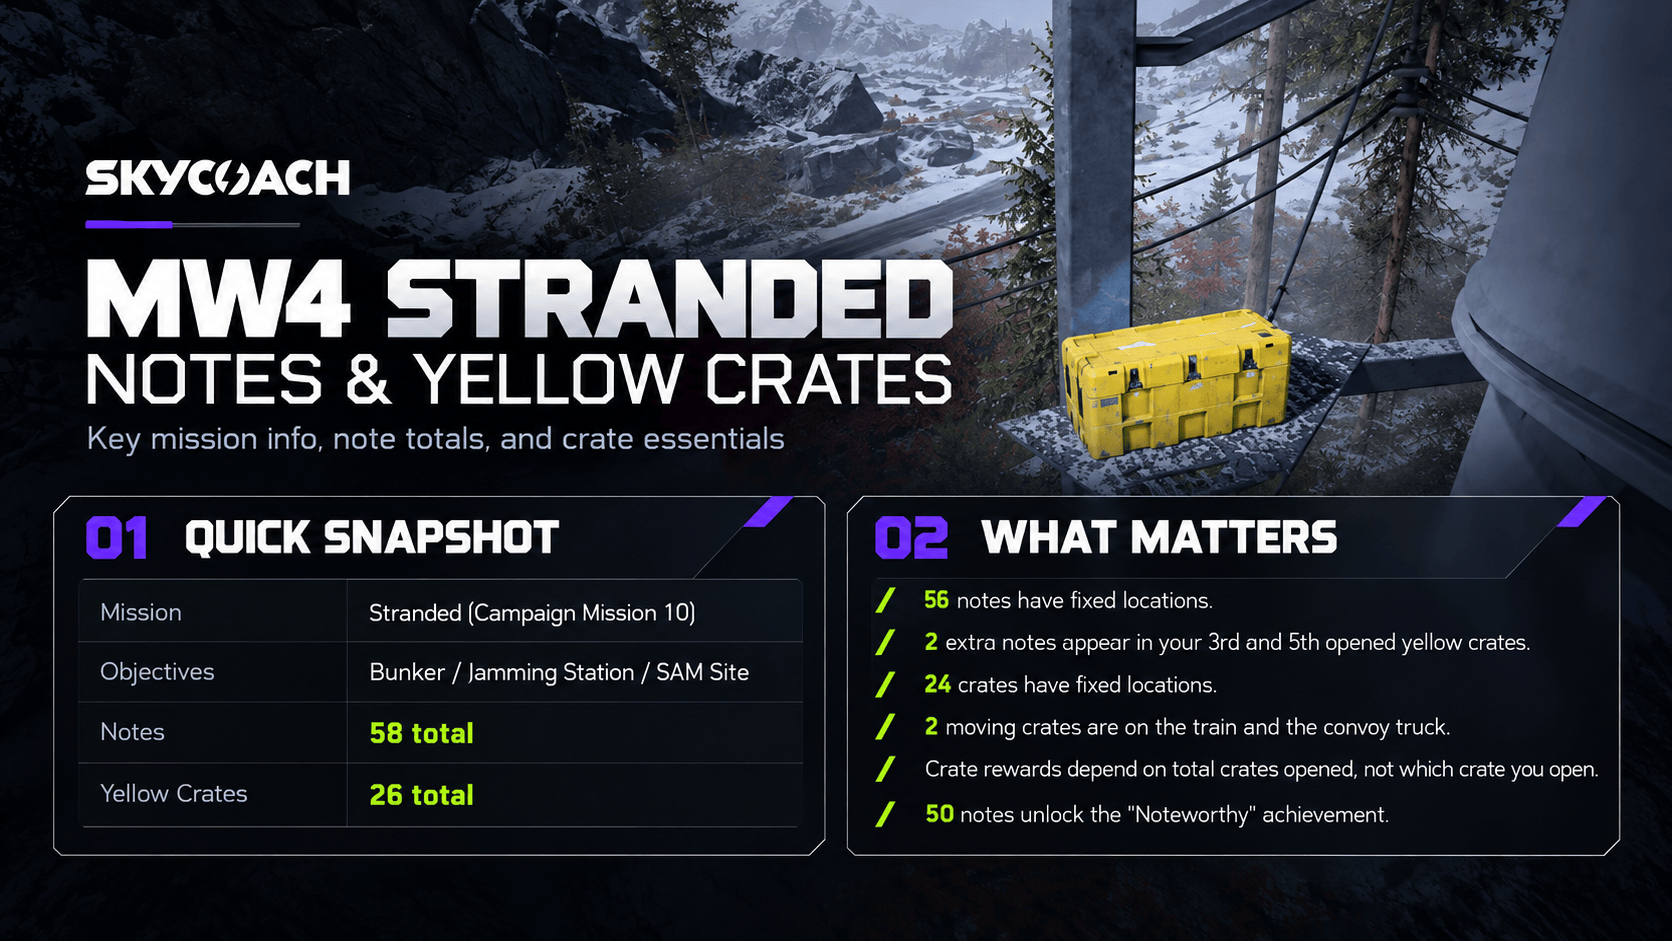
The 10th Modern Warfare 4 campaign mission, Stranded, is an open-world sandbox that allows players to freely roam the area in order to complete three key objectives: Bunker, Jamming station, and SAM site. To keep players busy (and help them out with extra supplies), the devs placed 58 notes and 26 supply crates across the map. While the map is relatively large, you are free to use vehicles as well as a few fast travel options.
Collecting notes mostly helps you learn a bit more about the game’s lore and get some clues concerning supply crates. If you manage to obtain 50 notes over the course of the campaign, you’ll be rewarded with a “Noteworthy” achievement. Opening the crates, however, will have a direct impact on your gameplay, since they contain useful weapons, attachments, and, well, supplies.
Even if you aren’t specifically searching for these collectibles, many will be very noticeable and difficult to pass on. However, some are hidden, and others — namely, eight supply crates — require solving small number-based puzzles first.
All Notes Locations in Modern Warfare 4 Stranded
With 58 notes scattered across the map, you’ll have to spend quite some time in the 10th mission if you plan to get all of them. While the devs made a nice gesture by enabling you to track how many notes you’ve found already, it’s still very difficult to get all of them on your own without a guide.
While most of the notes are going to be at their designated spots, there are two that have no fixed location at all. Both of them are going to be placed inside your open third and fifth yellow crates — make sure not to miss them.
|
Coordinates |
Note Name |
Location |
|
644, 158 |
Base Camp Keypad Note |
Can be found attached to the front of the shipping container. |
|
644, 158 |
Radio Tower Note |
Located in the middle section of the radio tower. |
|
644, 158 |
Top of Radio Tower Note |
Located on top of the radio tower. |
|
653, 162 |
Smuggler House Note |
Can be found in the smuggler house. Look for a white house with a large blue line drawn on it. |
|
652, 163 |
Cargo Container Note |
Look for it in the shed right next to the smuggler house. |
|
640, 166 |
Water Treatment Note |
Located inside a white and blue water treatment building. Take a left from the entrance — it will lie there around a bunch of supplies. |
|
639, 164 |
Sewers Note |
There is a ladder in the same Water Treatment room leading downstairs. Climb down and you’ll see the note. |
|
639, 165 |
Sewer Smuggler Remains Note |
Continue following the narrow corridor in the same sewer location until you find a cardboard sign with arrows drawn on it. These are your instructions. Get into the hole, turn right on the first intersection, then turn left at the next one. Move forward until you stumble upon a skeleton. Turn left and move forward until you get to the ladder at the end of the tunnel. When you climb the ladder, you’ll be greeted with a new set of arrows. Get into the tunnel ahead of you. Turn right at the first intersection, then turn left, then left again. Turn right at the next intersection, then left. Pass one intersection by moving forward, but then turn left at the next intersection. Congratulations, you’ve found the secret room containing the note. |
|
615, 169 |
Island Hidden Bunker Note |
Attached to the wall near the keypad of the locked bunker. |
|
615, 169 |
NW Bunker Note |
Located inside the bunker, which can be unlocked using code 0008. |
|
638, 179 |
Top of Southern Monument Note |
Located right on top of the monument. You can climb it using red ledges. Not sure if I'm the problem, but it took me a few minutes to figure this out. |
|
643, 165 |
Under Bridge Note |
Located directly under the bridge. |
|
651, 179 |
Southwest Village Note |
Located on the desk inside a white house right next to the road. |
|
654, 183 |
Imninban (Social Police) Report |
Located in the room inside of a white building with an orange fence and a children’s playground. |
|
652, 187 |
South East Village Keypad Note |
Attached to the front of the green shipping container. |
|
659, 206 |
Provision |
Can be obtained during the bunker objective. Located on the desk in the corner of the room that Kal opens with the crowbar. |
|
653, 208 |
Mutiny |
Can be obtained during the bunker objective. Located on top of the destroyed stairs in the room right to the entrance. You’ll have to push a yellow cart there so you can climb it. |
|
656, 208 |
Discipline |
Found underground when doing the bunker objective. Located on a desk in the room that you get in to progress the plot — which is just a few seconds after the previous note. |
|
657, 204 |
Traitors |
Found at the end of the bunker objective. Located on the desk in the room you get into after the swimming section. |
|
667, 188 |
Work Camp Escapee Journal |
Located in the front train car. |
|
668, 187 |
Train Boxcar Note |
Located in the rear train car. |
|
670, 120 |
Cliffside Dead Soldier Note |
Found next to the dead soldier at the end of the path. |
|
679, 123 |
Jamming Station Quarters Note |
Found during the Jamming Station objective. Located inside the large blue building. Go straight through the entrance, move to the opposite wall, jump down, then move in the opposite direction (facing the original entrance) until you stumble upon a desk with the document. |
|
673, 123 |
Jamming Station Helipad Note |
Found during the Jamming Station objective. Located on one of the barrels placed on the helipad. |
|
673, 118 |
Jamming Station Main Room Note |
Found during the Jamming Station objective. It is placed on the wooden bench inside the main room entrance. |
|
672, 119 |
Jamming Station Entry Room Note |
Found during the Jamming station Objective. Placed on one of the smaller desks in the first building, right next to the jamming devices. |
|
671, 119 |
Jamming Station Locker Room Note |
Found during the Jamming Station objective. You can find it on the floor in the corner of the locker room. |
|
657, 118 |
North East Outpost Note |
Found on the desk inside the guardhouse. |
|
666, 125 |
South of Jamming Station Keypad Note |
Attached to the front of the green storage container. |
|
666, 126 |
Exiled in Snow |
Found inside the other storage container in the same area, right next to the closed one. |
|
660, 127 |
NE Statue Note |
Found on the dead soldier's body located right in front of the statue. |
|
653, 131 |
Cultural Traitor |
Located inside the bedroom of the red-roof house. |
|
651, 135 |
Bombed House Note |
Found on the floor inside the house with a crashed airplane stuck in its roof. Climb on top of the building and jump through the hole created by the crash. |
|
646, 149 |
Cliff Near Base Camp Note |
Attached to the front of the shipping container. |
|
637, 135 |
Shed Near Hub Note |
Located on the desk inside the destroyed shed. |
|
626, 146 |
River Shed Note |
Located on the desk inside the guardhouse, right under the portraits. |
|
634, 136 |
Big Sign Keypad Note |
Attached to the front of the shipping container. |
|
634, 136 |
Big Sign Patrol Note |
Attached to the right side of the same shipping container. |
|
636, 137 |
Big Sign Smuggling Note |
Found on top of the right side of the gate entrance. |
|
631, 127 |
Farm Field Hidden Bunker Keypad Note |
Located on top of the keypad. |
|
631, 127 |
Farm Field Hidden Bunker Note |
Found inside the bunker. You can unlock it using code 0330. |
|
618, 132 |
Small Island Keypad Note |
Attached to the shipping container. |
|
615, 141 |
Elevator Controls Note |
Attached to the left side of the elevator entrance. |
|
617, 142 |
Helipad Outpost Note |
Located on the desk inside the small green guardhouse. |
|
606, 137 |
Northwest Abandoned House Note |
Found on the desk inside the abandoned building. |
|
606, 136 |
Family Affair |
Found on the hallway desk inside the same abandoned building. |
|
609, 114 |
Farmer's Note |
Located on the floor inside the white house next to the rice paddy. |
|
606, 114 |
Booby-Trapped Store Note |
Located in the right room of the store at the top of the hill. Requires using something explosive to activate the tripwires before entering the building. I'd recommend throwing grenades in every room first, just in case. It's not like you can damage anything. |
|
598, 124 |
Change of Plans |
Found during the SAM site objective. Located in the blue room near the stairs. |
|
608, 125 |
SAM Site Note About Bunkers |
Found during the SAM site objective. Located on concrete blocks not far away from the monument. |
|
610, 125 |
SAM Site Note About Helipad |
Found during the SAM site objective. Located on a wooden box above the yellow crate. |
|
646, 156 |
Grenade Launcher Info |
Found at Base Camp on the Desk left of the entrance. |
|
646, 156 |
Tactical Gloves Info |
Found at Base Camp on the Desk left of the entrance. |
|
646, 156 |
Tactical Boot Info |
Found at Base Camp on the Desk left of the entrance. |
|
646, 156 |
Snow Ghillie Suit Repair Note |
Found at Base Camp on the Desk left of the entrance. |
|
646, 156 |
Silenced Repair Note |
Found at Base Camp on the Desk left of the entrance. |
Browse our hottest Call of Duty Boosting services






All Yellow Crates Locations in Modern Warfare 4 Stranded
Yellow crates and Notes are often paired up, with the latter leading to the former. If you’ve followed the notes guide so far, you’ve probably found most (if not all) of the crates on your own already. Still, if you’ve missed some along the way, here are all of the locations.
|
Crate Coordinates |
Location Notes |
|
Not defined |
Found on the train circling the map. |
|
Not defined |
Found on an enemy convoy truck that circles the Base Camp mountain. |
|
672, 141 |
Found in the grey building with a red star located in the Infantry Checkpoint #3 outpost. |
|
671, 121 |
Can be found during the Jamming Station objective. Located at the base of the communications tower. |
|
668, 183 |
Found in the grey building next to the guardhouse in the Logistics Station #10 outpost. |
|
667, 125 |
Located inside the shipping container. Can be accessed by using code 8609. |
|
664, 167 |
Located inside the grey house next to the guard tower in the Infantry Checkpoint #2 outpost. |
|
657, 205 |
Found during the Bunker objective. Located at the entrance to the bunker in the Infantry Checkpoint #4 outpost. |
|
657, 118 |
Located in the grey building in the Logistics Station #20 outpost. |
|
652, 187 |
Found inside a shipping container, which can be opened using code 0078. |
|
651, 134 |
Located in the bombed house, which can be accessed through the hole in the roof. |
|
648, 192 |
Located on the tower. Can be accessed by climbing the copper pipes. |
|
646, 170 |
Located inside the grey house in the Artillery #7 outpost. |
|
646, 158 |
Located inside the shipping container, which can be opened using code 0600. |
|
644, 158 |
Located on top of the radio tower. |
|
640, 131 |
Located inside the storage container in the Artillery Battery #6 outpost. Can be accessed by blowing up the crates blocking the entrance. |
|
639, 165 |
Located in the sewers after following the smuggler's directions. |
|
636, 189 |
Located in the garage in the Logistics Station #200 outpost. |
|
634, 136 |
Located inside the shipping container, which can be accessed using code 1234. This one is so straightforward that it is actually confusing for people who are focused on finding some addition- and subtraction-based patterns. It took me way longer than I'd like to admit. |
|
631, 169 |
Located inside a white and green colored guard building in the Infantry Checkpoint #1 outpost. |
|
622, 121 |
Located inside the grey building across the road from the guard tower in the Infantry checkpoint #5 outpost. |
|
618, 132 |
Located inside the shipping container, which can be accessed using code 6789. |
|
616, 141 |
located on top of the broken stairs next to the elevator in the Logistics Station #100 outpost. |
|
616, 168 |
Located in the bunker, which can be accessed using code 0008. |
|
610, 125 |
Located near the base of the statue after clearing out the SAM site. |
|
605, 115 |
Located in the left room of the booby-trapped store at the top of the hill. Can be accessed by blowing up the traps from a safe distance. I used grenades, but some prefer self-destructing drones. No difference, since the explosion will set off a chain reaction. |
Yellow Crates Rewards
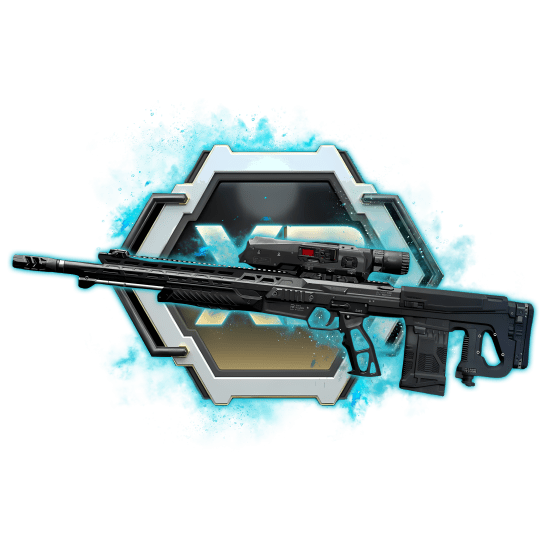
Yellow crates offer some cool rewards to those who found them. Note that the rewards are always provided in the same order, no matter which crates you open first or last. There is no trick to getting this X-Void ahead of time — you’ll have to do basically everything the map has to offer to unlock it.
|
Crates Opened |
Reward |
|
1 |
Wz .55 Striga Rampage SMG |
|
2 |
Scout Drone |
|
3 |
Sang 9mm Silenced, Supply Crates Weapon Inventory Note |
|
4 |
Tracking Device, 2x Thermite |
|
5 |
Backpack Upgrade, Supply Crates Equipment Inventory Note |
|
6 |
Heartbeat Sensor |
|
7 |
Kastov 762 Extended Mag |
|
8 |
Rezi 12 Shotgun with Explosive Rounds |
|
9 |
Kastov 762 with Grenade Launcher |
|
10 |
Supplies +10 |
|
11 |
Type 73 LMG |
|
12 |
Supplies +10 |
|
13 |
Kastov 762 Silenced |
|
14 |
Mosin-Nagant Marksman Rifle with ACOG Scope |
|
15 |
Warlord Shotgun Silenced |
|
16 |
Supplies +10 |
|
17 |
Supplies +10 |
|
18 |
Supplies +10 |
|
19 |
Hyeon Burst Assault Rifle Silenced with Thermal Scope |
|
20 |
Supplies +10 |
|
21 |
2x Drill Charge |
|
22 |
Supplies +10 |
|
23 |
Supplies +10 |
|
24 |
Supplies +10 |
|
25 |
X-Void SMG with Subsonic Rounds |
|
26 |
Supplies +10, Time to Crate Achievement |


You got -20% OFF 
Read our other Modern Warfare 4 guides:
F.A.Q.
How many crates are there in Modern Warfare 4 Stranded?
There are a total of 26 yellow supply crates in MW4’s Stranded mission. 24 of them have fixed locations, while the other 2 are constantly moving through the map since they are located on a train and a convoy truck.
What are the rewards for finding crates in Modern Warfare 4 Stranded?
Opening the yellow supply chests will provide new weapons, attachments, supplies, and two extra notes. The rewards are tied to the number of crates opened, with some of the better ones (like X-Void SMG with Subsonic Rounds) being available only after opening the majority of them.
How many notes are there in Modern Warfare 4 Stranded?
There are 58 notes available in the Stranded campaign mission in Modern Warfare 4. However, you only need to find 50 to get the Noteworthy achievement, and that includes the other campaign missions. Still, Stranded contains the vast majority of notes, so if you aim to obtain the achievement, you’ll have to collect lots of them here.
How to find the crate codes in Modern Warfare 4 Stranded?
The clues for crate codes are mostly contained in the nearby notes. These are usually simple number puzzles, providing a short sequence so that you can understand the pattern and apply it to unlock containers and bunkers hiding yellow supply crates.