 Dallon Avery
Mount Hyjal Raid Guide Quick Overview:
- Mount Hyjal is a 25-player raid that releases with TBC Anniversary Phase 3 on August 27, 2026.
- There are five bosses, and all of them must be defeated in a fixed order.
- You need to complete The Vials of Eternity attunement quest before entering the raid.
- The first four bosses are preceded by eight scripted trash waves, so clearing trash is a major part of the raid.
- Azgalor drops Tier 6 Glove tokens, while Archimonde drops Tier 6 Helm tokens.
- Regular boss and trash epics are ilvl 141, Tier 6 tokens are ilvl 146, and Archimonde drops ilvl 151 gear.
Want to get your Tier 6 pieces without spending the night repeating trash waves after a wipe? The Mount Hyjal raid boost at Skycoach can help you clear the raid and get its rewards with an experienced TBC Anniversary team.


Read closely 
Browse our hottest TBC Anniversary Boosting services








Mount Hyjal Raid Overview
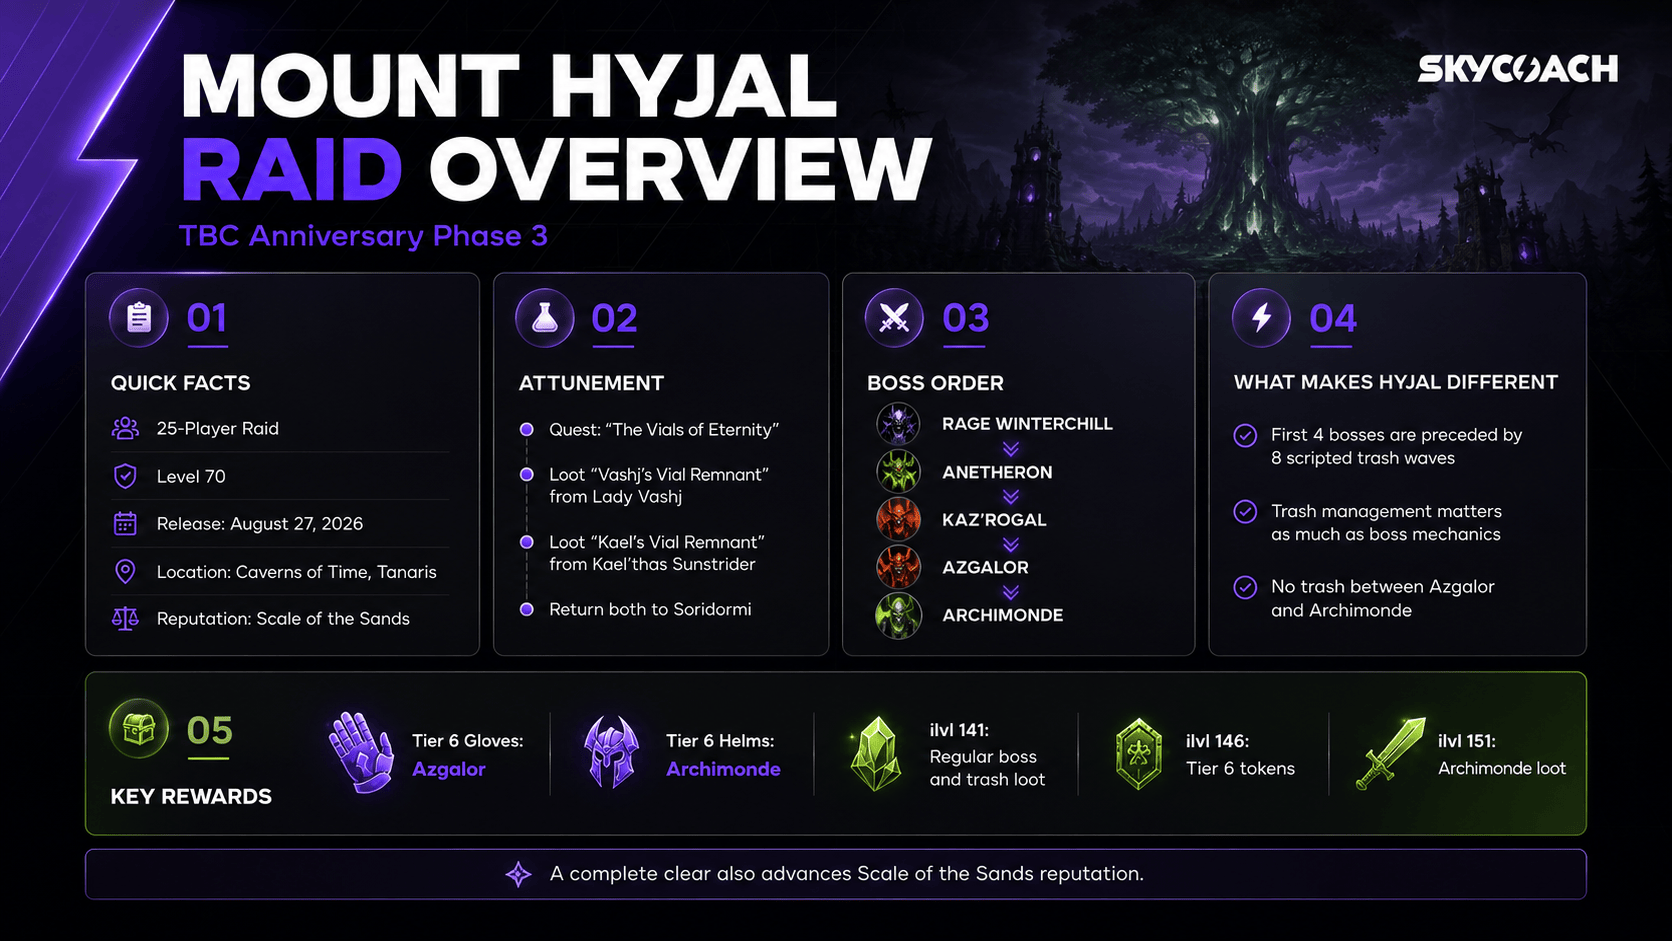
Mount Hyjal, also called Hyjal Summit or The Battle for Mount Hyjal, is one of the two main raids coming with TBC Classic Anniversary Phase 3. It releases alongside Black Temple on August 27, but story-wise, Hyjal comes first. In fact, progressing through Mount Hyjal is also part of the Black Temple attunement chain.
The raid takes us back in time to one of the most important events from Warcraft 3. The Burning Legion is attacking Mount Hyjal, and we help Jaina Proudmoore, Thrall, Tyrande Whisperwind, and their armies defend the World Tree from Archimonde. So, unlike most raids where you invade someone's fortress, here the enemies mostly come to you.
|
Raid Info |
Details |
|
Phase |
TBC Anniversary Phase 3 |
|
Release Date |
August 27, 2026 |
|
Raid Size |
25 players |
|
Minimum Level |
70 |
|
Bosses |
5 |
|
Boss Order |
Linear |
|
Lockout |
Weekly |
|
Location |
Caverns of Time, Tanaris |
|
Attunement |
The Vials of Eternity |
|
Reputation |
The Scale of the Sands |
|
Regular Loot |
ilvl 141 |
|
Tier 6 Tokens |
ilvl 146 |
|
Archimonde Loot |
ilvl 151 |
The biggest difference between Mount Hyjal and raids like Tempest Keep is the trash. You don't spend most of your time walking through corridors and pulling groups one at a time. Instead, you defend several camps from predetermined waves of enemies. The first four bosses only appear after you survive eight waves, which means trash mistakes can waste just as much time as mistakes during a boss fight.
Mount Hyjal also introduces two Tier 6 armor slots. Azgalor drops the Glove tokens, while Archimonde drops Helm tokens. The remaining Tier 6 pieces come from Black Temple, so anyone looking to start their Tier 6 set will have a reason to clear both Phase 3 raids.
Mount Hyjal Attunement Guide
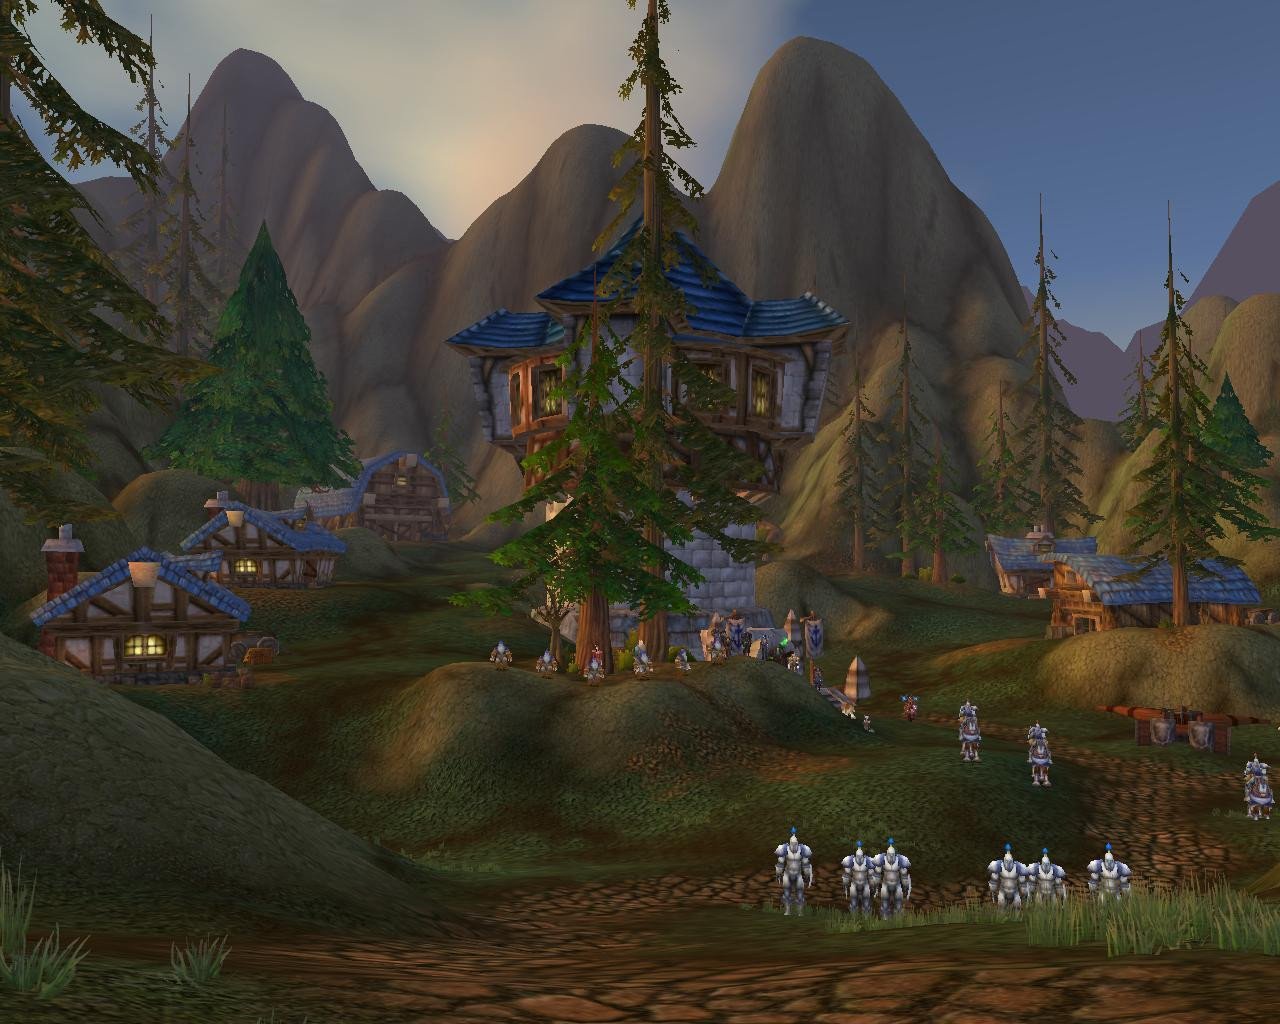
Compared to the Tempest Keep attunement, getting into Mount Hyjal is refreshingly simple. There isn't a huge quest chain with Heroic dungeons and multiple prerequisites. Instead, you need to complete one quest called The Vials of Eternity.
You can pick it up from Soridormi inside the Caverns of Time. Older TBC guides say you need Revered reputation with the Keepers of Time before the quest becomes available. However, this has changed for TBC Classic Anniversary, and players have confirmed being able to pick it up at Honored. So, if you're already Honored from running Old Hillsbrad Foothills and The Black Morass, go check Soridormi before grinding any more reputation.
The quest itself has only two objectives:
- Defeat Lady Vashj in Serpentshrine Cavern and loot Vashj's Vial Remnant.
- Defeat Kael'thas Sunstrider in Tempest Keep and loot Kael's Vial Remnant.
Once you have both remnants, return to Soridormi and turn in The Vials of Eternity. That's it. You can now enter Mount Hyjal.
Of course, saying "just kill Vashj and Kael'thas" makes the whole thing sound a little easier than it actually is. Both are final bosses of Phase 2 raids, and Kael'thas in particular is one of the longest encounters in TBC. Still, if you have already been raiding Phase 2, there is a good chance you're almost done with this attunement anyway.
Completing the quest also gives you 3,000 reputation with The Scale of the Sands, which brings you to Friendly and lets you start working toward their reputation rewards. Most importantly, raid attunements are account-wide in TBC Classic Anniversary, so you only need to complete the entire requirement once. Your alts don't need another Vashj and Kael'thas kill just to enter Hyjal.
Mount Hyjal Location and Map
[Mount Hyjal location map]
Mount Hyjal is located inside the Caverns of Time in eastern Tanaris. If you're coming normally, fly to Gadgetzan and head east toward the Caverns of Time. The closest flight masters are Bera Stonehammer for Alliance and Bulkrek Ragefist for Horde, both in Gadgetzan.
Once you're inside the Caverns of Time, descend into the main cavern and look for the forested section with Night Elf architecture and glaive throwers. The Hyjal entrance is in this part of the cavern. You can use the following waypoint while inside the Caverns of Time:
/way 57.0 50.0
Follow the forested path north and west until you reach the instance entrance. It's pretty hard to confuse this one with the other Caverns of Time instances once you see all the Night Elf scenery.
The raid itself is divided into three main areas. You start at the Alliance base with Jaina Proudmoore, then move to the Horde base with Thrall, and finally travel toward the World Tree for the fight against Archimonde.
How Mount Hyjal Raid Progression Works
This is where Hyjal gets weird compared to almost every other TBC raid. For the first four bosses, you don't walk up to the boss and pull whenever your raid is ready. Instead, you speak with the NPC leader at the current camp and begin a scripted defense event.
Before each boss, you have to defeat eight waves of trash. These waves are fixed, so you will always get the same enemies in the same wave. That makes the raid much easier once everyone learns the pattern, but it also means you can't simply skip a particularly annoying pack.
The basic progression looks like this:
- Defend the Alliance base through eight waves.
- Defeat Rage Winterchill.
- Defend the Alliance base through another eight waves.
- Defeat Anetheron.
- Move to the Horde base.
- Defend the Horde base through eight waves.
- Defeat Kaz'rogal.
- Defend the Horde base through another eight waves.
- Defeat Azgalor.
- Move toward the World Tree and defeat Archimonde.
Archimonde is the exception. There are no eight scripted waves immediately before his encounter, so once the raid reaches his area, you can focus entirely on the boss.
The annoying part is what happens when you wipe. If the raid fails during one of these encounters, you generally have to repeat the preceding trash waves before getting another boss attempt. This is why Hyjal can feel either extremely fast or painfully slow depending on how clean your group is. A boss that takes three minutes to kill can still cost you a lot of time if you need to sit through eight more waves before every retry.
You also have NPC armies helping during the defense events. Jaina and the Alliance soldiers fight with you during the first section, while Thrall and the Horde forces help later. They definitely make the waves easier, but I wouldn't treat them as replacement tanks. Your raid still needs to control dangerous mobs properly instead of letting everything run into the camp.
Mount Hyjal Boss Order
Mount Hyjal has five bosses and no optional encounters. The order is completely linear, so there's no deciding whether you want to clear one wing first like in some other raids.
- Rage Winterchill - The first boss and probably the easiest introduction to Hyjal. Most of the fight revolves around avoiding Death and Decay and reacting to Icebolt and Frost Nova.
- Anetheron - A Dreadlord encounter with Carrion Swarm, Sleep, and Towering Infernals. He is the final boss fought at the Alliance base.
- Kaz'rogal - The first boss at the Horde base. His main gimmick is draining the raid's mana with Mark of Kaz'rogal, making mana management much more important than usual.
- Azgalor - The last wave-based boss and the first source of Tier 6 gear. He uses Doom on raid members and can silence the entire raid with Howl of Azgalor.
- Archimonde - The final boss of Mount Hyjal. This is mostly a survival and personal-responsibility fight, with mechanics like Doomfire, Fear, Grip of the Legion, and Air Burst punishing individual mistakes very heavily.
I'll get into each of these mechanics later. Before that, there are a few things I would prepare specifically for Hyjal, because coming here with a normal boss-only raid setup can make the trash way more annoying than it needs to be.
Mount Hyjal Raid Composition
There isn't one mandatory raid composition for Mount Hyjal, and you definitely don't need to rebuild your entire Phase 2 roster for it. Still, the amount of AoE trash, crowd control, fears, curses, and add tanking means some classes are noticeably more useful here than others.
For a first clear, something around this setup should work well:
|
Role |
Recommended Amount |
Notes |
|
Tanks |
3-4 |
Three dedicated tanks are usually enough, but a fourth tank or tank-capable hybrid makes trash waves much smoother |
|
Healers |
6-7 |
Six is a good baseline; bringing seven can make early progression safer |
|
DPS |
14-16 |
A mix of melee and ranged works, but strong AoE and ranged damage are especially useful |
I would absolutely try to bring a Protection Paladin. Hyjal has huge packs of enemies, and this is exactly the type of content where Paladin AoE threat becomes ridiculous. They are also very useful for controlling the Towering Infernals during Anetheron.
Warrior tanks have their own advantages, especially once you reach Archimonde and start dealing with Fear. Druids are perfectly viable as well, so there isn't a reason to exclude any tank class.
Shamans are another class you want plenty of. Bloodlust and Heroism are obviously great, but Tremor Totem becomes extremely important on later encounters. Ideally, most groups will have access to one.
Mages and Druids provide important curse removal, while Warlocks have Banish for some of the demon trash. Hunters are great for Misdirection and dealing with airborne enemies. Priests bring Prayer of Shadow Protection, which gets increasingly useful later in the raid.
None of these are hard requirements. Hyjal is not a raid where you need one extremely specific class composition to get through the door. It just gets noticeably easier when your raid has good AoE, several forms of crowd control, and enough utility to handle Fear and curses.
Mount Hyjal Consumables and Preparation
Bring your normal TBC raid consumables, but I would stock a little heavier than usual. Hyjal can burn through consumables quickly because a failed boss attempt can also mean repeating eight trash waves.
Flasks are especially convenient for progression because they last for two hours and remain active after death. If your group already has Mark of the Illidari from Phase 2 raids, the Shattrath versions of the standard flasks work inside Mount Hyjal as well.
Here's a practical starting point:
|
Role |
Flask / Elixir |
Weapon Consumable |
Food |
Potions / Extras |
|
Tanks |
Flask of Fortification |
Class-dependent |
Spicy Crawdad or other Stamina food |
Ironshield Potion, Super Healing Potion, Free Action Potion |
|
Physical DPS |
Flask of Relentless Assault; Elixir of Demonslaying against demons |
Adamantite Sharpening Stone or Adamantite Weightstone where applicable |
Strength or Agility food |
Haste Potion, Super Healing Potion |
|
Caster DPS |
Flask of Pure Death or Flask of Blinding Light depending on spell school |
Superior Wizard Oil or Brilliant Wizard Oil |
Blackened Basilisk or spec-specific spell food |
Destruction Potion, Super Mana Potion |
|
Healers |
Flask of Mighty Restoration or healing/mana elixirs |
Superior Mana Oil or Brilliant Mana Oil |
Golden Fish Sticks or Blackened Sporefish |
Super Mana Potion, Dark Rune / Demonic Rune |
The exact best consumable depends on your class, obviously. A Fire Mage and Shadow Priest aren't going to use the same flask, and neither will a Rogue and Hunter necessarily want the same temporary weapon buff. Treat the table as a packing list rather than a universal BiS setup.
For a normal progression night, I would bring roughly:
- 2-3 flasks, depending on how long your raid usually lasts.
- 20 or more combat potions if you plan to use them aggressively.
- 10 or more Dark Runes or Demonic Runes on mana-heavy classes.
- 20-40 pieces of your preferred buff food.
- Enough weapon oils, sharpening stones, or weightstones for the whole raid.
- 5-10 Free Action Potions if your class benefits from them.
- Super Healing Potions even if you're a DPS player. There are several mechanics here where saving yourself is better than waiting for a healer.
- Major Shadow Protection Potions and Major Fire Protection Potions are situational options rather than something every player needs to chug constantly.
Free Action Potions deserve a special mention here. They're genuinely useful during Hyjal trash because Abominations can Knockdown their tank, and they also have some boss-specific uses later. I wouldn't burn one on every wave, but having a stack available is much better than realizing you need them halfway through the raid.
Physical DPS can also get a lot of value from Elixir of Demonslaying. It gives 265 attack power against Demons for five minutes, and several important Hyjal enemies are demons. Since it is a Battle Elixir, using it means giving up your normal flask during that period, but the damage increase can be worth it if you're trying to squeeze more damage out of a specific encounter.
Do You Need Resistance Gear for Mount Hyjal?
Not for the entire raid. This isn't a situation where all 25 players should arrive wearing a full resistance set.
There are a few exceptions. Anetheron's Infernal tank can benefit from a Fire Resistance set, with roughly 200-250 Fire Resistance being a reasonable target if your strategy keeps the Infernals alive. Some Shadow Resistance can also help on later encounters such as Azgalor, but I wouldn't sacrifice a huge amount of useful gear just to stack it.
Basically, keep any decent Fire and Shadow Resistance pieces you already own. We can get into exactly who should equip them when we reach those encounters.
Mount Hyjal Trash Waves and Important Mobs
I normally wouldn't spend this much time talking about trash in a raid guide, but Hyjal doesn't really give us a choice. You have eight waves before each of the first four bosses, and knowing which enemies can safely be AoE'd and which ones need immediate attention makes a huge difference.
There are no random wave compositions. If a wave contains four Abominations and four Necromancers, it will contain those same mobs every time you repeat it. After a few clears, your tanks and DPS should already know where everything is coming from and what needs to die first.
Here are the enemies worth learning:
|
Enemy |
Main Threat |
What to Do |
|
Ghoul |
Frenzy increases attack speed |
Gather them on a tank and AoE them down |
|
Crypt Fiend |
Ranged attacks can make them awkward to gather |
Let tanks drag them into the main pack; generally low priority |
|
Shadowy Necromancer |
Shadow Bolt and Unholy Frenzy |
Interrupt, stun, and kill quickly; don't let several free-cast |
|
Abomination |
Disease Cloud and a hard-hitting Knockdown |
Keep them controlled; tanks can use slows, stuns, kiting, and Free Action Potions |
|
Banshee |
Banshee Curse and Anti-Magic Shell |
Decurse immediately; physical DPS are useful while Anti-Magic Shell is active |
|
Gargoyle |
Starts airborne and attacks from range |
Ranged players should establish aggro and help bring them into a manageable position |
|
Frost Wyrm |
Frost Breath damages and slows players around its target |
Spread around the target and kill it quickly |
|
Giant Infernal |
Constant AoE Fire damage from Immolation |
Use a suitable tank and avoid stacking too many on top of melee |
|
Fel Stalker |
Mana Burn |
Crowd control or kill them quickly before they empty healer and caster mana bars |
Shadowy Necromancers are one of the first enemies I would pay attention to. Their Shadow Bolts already hurt, but Unholy Frenzy can double another enemy's attack speed. If several Necromancers are standing at range and casting freely while the tanks are holding a pile of Abominations, things can get ugly pretty fast.
Abominations are the other obvious problem. Their Knockdown stuns the current target for two seconds while also dealing a large physical hit. Tanking a big pile of them without any control can create some nasty damage spikes. Stuns, slows, roots, and kiting all help, and this is one of the places where Free Action Potions earn their inventory slot.
Banshees are mostly annoying because of Banshee Curse. It reduces physical hit chance by 66% for five minutes, which basically turns a physical DPS player into decoration until somebody removes it. Druids and Mages should be ready to decurse quickly. Their Anti-Magic Shell can also absorb an enormous amount of magic damage, so melee and Hunters are usually better at finishing them while it's active.
The airborne mobs require a slightly different approach. Gargoyles can be awkward for melee until they are pulled lower, while Frost Wyrms have an AoE Frost Breath around their target. Ranged DPS should pay attention to these instead of blindly continuing to AoE whatever is standing on the tanks.
Once you reach the Horde section, Fel Stalkers and Giant Infernals make mana and tank positioning more important. Fel Stalkers can burn around 1,140 mana per cast, so leaving several of them alive for too long is a great way to start the next wave with half your healers already dry.
One last tip: start drinking the moment a wave ends. The next pack isn't going to politely wait for everyone to type "r" in raid chat. Hyjal rewards groups that reset quickly, get tanks into position, and use every small downtime window to recover mana.
Once your raid understands these trash mobs, the wave sections become much more predictable. And that's good, because nobody wants to wipe to a three-minute boss and then spend another eight waves getting back to it.
Mount Hyjal Boss Tactics
The five Mount Hyjal bosses are all single-phase encounters, but they get noticeably less forgiving as you progress. Rage Winterchill and Anetheron are mostly about positioning and keeping people alive through predictable sources of damage, while Kaz'rogal introduces a soft DPS check through mana drain. Azgalor is considerably more healing-intensive, and Archimonde is almost entirely an execution fight where one player's mistake can quickly snowball into a wipe.
Rage Winterchill Strategy
Rage Winterchill is the easiest boss in Mount Hyjal and only requires one tank. There is no real DPS check here, so your main priorities are keeping players alive through Icebolt and moving out of Death & Decay before it eats through your health.
|
Ability |
What It Does |
|
Hits a random player for 4,250-5,750 Frost damage, stuns them for 4 seconds, and deals another 2,500 Frost damage every second during the stun. |
|
|
Creates a huge 20-yard ground AoE for 15 seconds. Anyone inside loses 15% of their maximum health every second. |
|
|
Deals 2,775 Frost damage and roots everyone within 20 yards for up to 10 seconds. |
|
|
Gives Winterchill 3,000 Armor and 75 Frost Resistance. Melee attackers can also be slowed by 50% and have their attack speed reduced by 25%. |
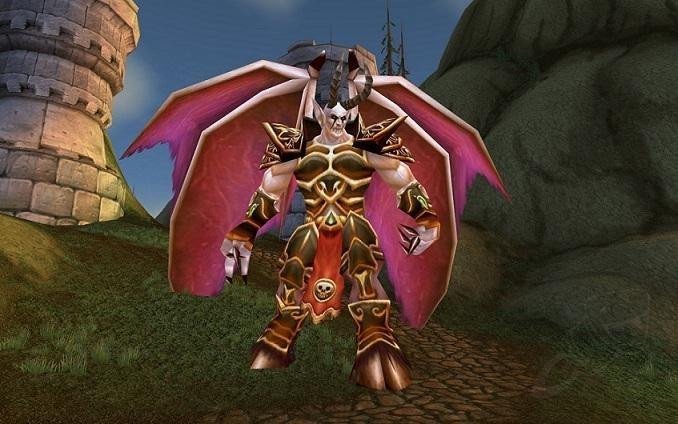 You can tank Rage Winterchill close to where he enters the Alliance base or bring him farther into the camp so Jaina and the Alliance NPCs help with damage. Either works, but pulling him back makes the fight even easier. Give your tank a moment to establish threat before everyone starts unloading.
The mechanic healers need to watch most closely is Icebolt. A targeted player takes a large initial hit followed by 10,000 damage over the next four seconds, so have one or two raid healers ready to immediately switch to them. Don't have every healer panic and swap, though, since Winterchill can still hit the tank while this is happening.
A Living Action Potion can remove the Icebolt stun after it lands and also stops the remaining damage-over-time effect. PvP trinkets can serve the same purpose. A Free Action Potion works differently: you need to use it before the mechanic lands, but it can prevent Icebolt's stun as well as the slows from Frost Nova and Frost Armor. You don't necessarily need these consumables to kill Winterchill, but they are nice insurance during early clears.
Death & Decay is much simpler. As soon as you see the large ground effect, get out. Its radius is bigger than it looks, and staying inside for only a few seconds is enough to kill almost anyone. The tank may also need to reposition Winterchill if the effect lands underneath them.
The dangerous combination is Frost Nova followed by Death & Decay. Anyone who can remove the root should do so immediately if players are trapped inside the ground effect. Priests are especially useful for quickly clearing roots from the melee group.
Finally, Frost Armor mostly matters for melee. It isn't dangerous by itself, but its attack-speed and movement penalties are annoying and can make getting out of Death & Decay slower. If your raid has the dispels or immunity effects available, clean it up.
There really isn't much more to Rage Winterchill. Keep the tank alive, react quickly to Icebolt, and don't try to squeeze another cast out while standing in Death & Decay. After the kill, anyone working on Black Temple attunement should also remember to loot the Time-Phased Phylactery. Forgetting that one means coming back next reset.
Anetheron Strategy
Anetheron is another single-phase encounter, but this time you'll want two tanks. One handles Anetheron, while the second deals with the Towering Infernals that spawn throughout the fight. Positioning matters considerably more here because bad Carrion Swarms can cripple several healers at once.
|
Ability |
What It Does |
|
Fires a large cone toward a random player, dealing 4,250 Shadow damage and reducing healing done by affected players by 75% for 20 seconds. |
|
|
Summons a Towering Infernal at a random player's location roughly once per minute. The initial impact briefly stuns the targeted player. |
|
|
Puts three random players to sleep for 10 seconds. Damage wakes them up. |
|
|
Heals Anetheron for 300% of the melee damage he deals. Nearby Infernals can also benefit from the aura. |
You can use roughly the same part of the Alliance camp that worked for Rage Winterchill. Tank Anetheron in the middle with the boss facing away from most of the raid, then spread healers and ranged players around him rather than creating one giant stack.
That spread is mainly for Carrion Swarm. Anetheron targets one player and sends a wide cone in their direction, so stacking five healers together is asking for all five to lose 75% of their healing output at the same time. Try to keep your tank healers on different sides of the boss so one Carrion Swarm cannot cripple both of them.
It is also worth remembering exactly what the debuff does: it reduces healing done, not healing received. If one healer gets hit, another unaffected healer should temporarily pick up more of their assignment. This is especially important if the affected player was responsible for either tank.
Around once per minute, Anetheron casts Inferno on a random player and summons a Towering Infernal at their position. The targeted player should move away from the main group and toward the Infernal tank during the cast. A Protection Paladin works especially well for this job, but any properly prepared off-tank can do it.
The Infernal tank should stay well away from Anetheron and preferably wear around 200-250 Fire Resistance. The Infernals deal constant close-range Fire damage, and because this tank spends most of the fight away from the boss anyway, sacrificing some normal offensive stats for Fire Resistance doesn't cost much. Keep the Infernals at least 25 yards from Anetheron as well, since his Vampiric Aura can affect them when they get too close.
Your raid can either kill each Infernal with ranged DPS or have the off-tank collect them while everyone burns the boss. Early groups with lower DPS will probably find killing them safer. Once your raid's damage improves, ignoring them and ending the encounter faster becomes much more realistic.
Sleep is mostly annoying rather than deadly. Three players are disabled for 10 seconds, and the effect ends if they take damage. The real problem is when it lands on an important healer at the same time Carrion Swarm has already weakened another one. Healers should pay attention to who is asleep and be ready to cover each other's assignments.
The final mechanic is Vampiric Aura. Since Anetheron heals for triple the melee damage he deals, keep a healing-reduction effect active on him. Wound Poison, Mortal Strike, or Aimed Shot can all do the job.
Anetheron is a Demon, so physical DPS can also get excellent value from Elixir of Demonslaying. Once everyone is spread properly and your Infernal tank knows where to stand, this fight becomes pretty straightforward.
Browse our hottest TBC Anniversary Boosting services







Kaz'rogal Strategy
Kaz'rogal is the first boss fought at the Horde base. The encounter is still only one phase, but this is the first real soft DPS check in Mount Hyjal. The longer Kaz'rogal stays alive, the faster he casts Mark of Kaz'rogal, and eventually mana users simply won't be able to keep up.
|
Ability |
What It Does |
|
Drains 600 mana every second for 5 seconds. If the spell tries to drain mana you don't have, you explode for 10,213-11,287 damage to yourself and players within 15 yards. |
|
|
Deals 22,800 Physical damage divided evenly among targets hit in front of Kaz'rogal. |
|
|
Hits everyone within 15 yards and stuns them for 5 seconds. |
|
|
Reduces movement speed, attack speed, and Strength by 50% for 12 seconds. |
Pull Kaz'rogal toward the Horde NPCs so you get some extra help from Thrall and his army, but turn the boss away from them once he's in position. Anyone standing in front of Kaz'rogal can be hit by Malevolent Cleave, so the only people who belong there are your assigned tanks.
The Cleave deals 22,800 damage divided across its targets. Two tanks can handle it, but running three is considerably more comfortable for an early clear. Have all assigned tanks stack tightly in front of Kaz'rogal so the hit is consistently split between them, while everyone else attacks from behind.
The actual fight revolves around Mark of Kaz'rogal. It drains exactly 3,000 mana over five seconds, and if you run out before the effect finishes, you explode and hit everyone within 15 yards. One person blowing up can easily kill nearby players and turn a completely clean pull into another eight-wave trash clear.
The first Mark comes fairly late into the fight, and subsequent casts become progressively more frequent. This is why you want to plan your mana restoration instead of waiting until you're almost empty. Use Super Mana Potion and Dark Rune early enough that their cooldowns can become available again, and stagger your class-based mana recovery instead of using everything at once.
A simple rule is to stay comfortably above 3,000 mana before every Mark. If you know you're going to run dry anyway, move at least 15 yards away from everyone before you explode. Losing one player is much better than losing six.
Mana-free classes obviously don't care about the Mark, while Warlocks have a much easier time keeping their resource high. Mana-using melee, especially Enhancement Shamans and Retribution Paladins, need to pay more attention because they are normally standing right on top of several other players. Mages can also use Ice Block to remove one Mark in an emergency.
War Stomp is a 5-second stun around Kaz'rogal, so melee and tanks will eat it regularly. A pre-used Free Action Potion can prevent the stun if you want cleaner uptime. Cripple is less dangerous and mostly slows the affected player down.
Kaz'rogal is also a Demon, making Elixir of Demonslaying a strong option for physical DPS. Overall, the strategy is very simple: stack the tanks correctly, spend mana efficiently, and kill the boss before the Marks start coming faster than your raid can recover.
Azgalor Strategy
Azgalor is a sizeable step up from the first three bosses. He hits tanks hard, regularly silences the entire raid, forces melee to deal with heavy Fire damage, and permanently removes one player roughly every 50 seconds with Doom. I'd strongly consider six healers for an early progression kill.
|
Ability |
What It Does |
|
Marks a random player for death. After 20 seconds they die and spawn a Lesser Doomguard. The effect cannot be removed by immunities. |
|
|
Creates a 15-yard Fire AoE for 10 seconds, dealing 1,619-1,881 Fire damage every 2 seconds. It only targets players within 30 yards of Azgalor. |
|
|
Applied by Rain of Fire, dealing another 1,250 Fire damage every second for 5 seconds even after you leave the ground effect. |
|
|
Silences the entire raid for 5 seconds. It is a Shadow spell and can be resisted. |
|
|
Frontal attack that can hit the tank and nearby players. |
|
|
Used by Lesser Doomguards to reduce movement speed, attack speed, and Strength by 50%. |
|
|
Lesser Doomguards stun nearby players for 5 seconds. |
Pull Azgalor toward Thrall so the Horde NPCs can help, then turn the boss away from everyone else. Only the main tank should ever be in front of him because Cleave will make very short work of a DPS player who wanders into the wrong place.
Ranged DPS and healers should ideally stand more than 30 yards away. Rain of Fire only selects targets within 30 yards of Azgalor, so most ranged classes can completely remove themselves from its target pool. Anyone who needs to play closer should stay separated from the melee group where possible.
Melee should stack loosely behind Azgalor, preferably toward one side. When Rain of Fire appears underneath them, move together to the other side instead of scattering everywhere. Get out immediately because the ground effect itself isn't the only problem. Every hit also applies Unquenchable Flames, which continues ticking after you escape.
The nasty part is when Rain of Fire overlaps with Howl of Azgalor. The Howl silences healers for five seconds, and Azgalor continues hitting the main tank very hard during that window. Keep the tank topped off and use heal-over-time effects before expected silences whenever possible. Shadow Resistance is useful here because Howl is a Shadow spell and can be resisted.
The other major mechanic is Doom. Roughly every 50 seconds, one random player receives a 20-second debuff that is going to kill them. There is no clever immunity trick here. When the timer expires, that player dies and a Lesser Doomguard appears where they died.
Assign one off-tank to handle these Doomguards somewhere away from the main raid. When you get Doom, immediately move toward that tank, but don't stand directly on top of them. The Doomguard can instantly use War Stomp after appearing, and there is no reason for your dying player to take the off-tank or nearby healers with them.
Keep the Doomguard tank more than 30 yards from Azgalor so they aren't also dealing with Rain of Fire. The adds can use Cripple and War Stomp, but you don't necessarily need to kill every Doomguard immediately. Your off-tank's main job is simply keeping them away from everyone else until Azgalor dies.
This fight is mostly a healer check and positioning check. Don't have every healer switch to a melee player who touched Rain of Fire, because Azgalor can kill the tank very quickly while everyone is distracted. Assign raid healing beforehand, keep dedicated tank healers focused on their job, and be especially careful whenever Rain of Fire and Howl happen close together.
Like Anetheron and Kaz'rogal, Azgalor is a Demon, so Elixir of Demonslaying is useful for physical DPS. More importantly, don't get greedy. Surviving a bad Rain of Fire overlap is worth far more than squeezing out another couple of attacks.
Archimonde Strategy
Once Azgalor is dead, the good news is that you're finally done with trash. The bad news is that Archimonde is waiting at the World Tree, and he's easily the most punishing boss in Mount Hyjal.
Before pulling him, speak with Tyrande Whisperwind and pick up Tears of the Goddess. Put it somewhere very easy to reach on your action bar. You will need it to survive Air Burst, and figuring out where you put the item while falling to your death is not a great way to learn the fight.
|
Ability |
What It Does |
|
Creates moving trails of fire that chase players. Standing in them deals heavy Fire damage and applies a decreasing damage-over-time effect. |
|
|
Fears the entire raid for 8 seconds, roughly every 40 seconds. |
|
|
Deals 3,000 Nature damage to the target and everyone within 13 yards, then launches them high into the air. |
|
|
A curse dealing 2,500 Shadow damage every 2 seconds. It lasts 5 minutes unless removed. |
|
|
Deals 20,000 Shadow damage to a random player. Archimonde only starts using it if nobody is in melee range. |
|
|
Triggered when a Priest, Mage, or Warlock dies. Deals 4,500 Fire damage to the raid and silences everyone for 4 seconds. |
|
|
Deals 4,500 Physical damage to the raid and increases damage taken by 50% for 8 seconds. |
|
|
Drains 2,250 mana and deals 4,500 Nature damage to every player over 8 seconds. |
Archimonde is a one-tank fight and, more than anything else, a survival check. There is technically an enrage timer, but damage isn't normally what stops groups from killing him. Players dying to mechanics and triggering Soul Charges is.
Split the raid into loose groups around the boss. Ideally, each group should have access to a Shaman and someone capable of removing curses. Keep players close enough to benefit from Tremor Totem and receive healing, but more than 13 yards apart whenever possible so one Air Burst doesn't launch half the group.
Your main tank stays on Archimonde at all times. A Warrior is especially convenient because Berserker Rage gives them a reliable answer to Fear. Priests can also rotate Fear Ward on the tank as extra protection. Losing tank control to Fear is particularly dangerous because if nobody remains in melee range, Archimonde starts casting Finger of Death and the pull usually falls apart immediately.
Doomfire is the mechanic you will spend most of the fight watching. The fire starts near Archimonde and moves around the arena while leaving a burning trail behind it. Don't just move one step out and assume you're safe. Give active Doomfires plenty of room, especially when Fear is approaching, because getting feared straight back into the fire is one of the easiest ways to die.
Melee should be willing to stop attacking and move if Doomfire gets too close. There is no meaningful reason to gamble your life for a few seconds of uptime. The tank should also watch where the fires are and gradually reposition Archimonde if melee starts running out of safe space.
Fear lasts eight seconds and is used roughly every 40 seconds. Keep Tremor Totem active throughout the encounter rather than trying to place it at the last second. Tremor removes Fear in pulses, so there's always a possibility that the timing isn't instant. This is another reason to stay well away from Doomfire even if you currently feel safe.
When Air Burst targets you, move away from nearby players before it goes off. Anyone within 13 yards gets launched as well. Once you're flying through the air, wait until you're fairly close to the ground and then activate Tears of the Goddess. Using it immediately after being launched is a mistake because its slow-fall effect only lasts briefly. Use it too early and you can still regain normal falling speed before reaching the ground.
Grip of the Legion should be removed immediately. It deals 2,500 Shadow damage every two seconds and lasts five minutes, so ignoring it is not an option. This is why you want curse removal spread throughout the raid rather than having all your decursers standing in one group.
The mechanic that makes Archimonde so unforgiving is Soul Charge: Caster, Soul Charge: Warrior/Rogue/Paladin, and Soul Charge: Druid/Shaman/Hunter. Every player death gives Archimonde a new raid-wide attack based on that player's class. One Soul Charge is survivable. The problem is that its damage or debuff can kill another player, which creates another Soul Charge, which kills somebody else, and suddenly a single mistake has turned into a wipe.
That's why this is not a fight where topping the damage meter matters much. Stay away from Doomfire, make sure you're in range of your group's Fear protection, decurse Grip quickly, and use Tears correctly after Air Burst. If everyone is alive, Archimonde's health will go down just fine.
Once Archimonde reaches 10% health, the real fight is essentially over. The raid receives Protection of Elune, making everyone immune to attacks and spells while the wisps finish Archimonde for you. At that point, you've cleared Mount Hyjal.


You got -20% OFF 
Mount Hyjal Loot
Mount Hyjal is where you can start collecting Tier 6 gear in TBC Anniversary Phase 3. Most Epic-quality items dropped by bosses and trash are ilvl 141, Tier 6 tokens are ilvl 146, and Archimonde drops higher-quality ilvl 151 gear.
|
Loot Source |
Item Level |
|
Boss and Trash Epics |
141 |
|
Tier 6 Tokens |
146 |
|
Archimonde Loot |
151 |
Two Tier 6 slots are available in Mount Hyjal. Azgalor drops glove tokens, while Archimonde drops helm tokens. The remaining chest, leg, and shoulder pieces come from Black Temple.
There are three token groups:
- Conqueror, shared by Paladins, Priests, and Warlocks.
- Vanquisher, shared by Rogues, Mages, and Druids.
- Protector, shared by Warriors, Hunters, and Shamans.
Azgalor can drop Gloves of the Forgotten Conqueror, Gloves of the Forgotten Vanquisher, and Gloves of the Forgotten Protector. Archimonde drops the corresponding Helm of the Forgotten Conqueror, Helm of the Forgotten Vanquisher, and Helm of the Forgotten Protector.
You can exchange these tokens with Tydormu near the Mount Hyjal entrance. Here's the full loot table for the raid.
Mount Hyjal Boss Loot Table
|
Item |
Slot |
Type |
Boss |
|
Wrist |
Cloth Armor |
Rage Winterchill |
|
|
Wrist |
Cloth Armor |
Rage Winterchill |
|
|
Wrist |
Leather Armor |
Rage Winterchill |
|
|
Wrist |
Leather Armor |
Rage Winterchill |
|
|
Wrist |
Mail Armor |
Rage Winterchill |
|
|
Wrist |
Mail Armor |
Rage Winterchill |
|
|
Feet |
Mail Armor |
Rage Winterchill |
|
|
Shoulder |
Plate Armor |
Rage Winterchill |
|
|
Wrist |
Plate Armor |
Rage Winterchill |
|
|
Wrist |
Plate Armor |
Rage Winterchill |
|
|
Held In Off-hand |
Off-hand Frill |
Rage Winterchill |
|
|
One-Hand |
Dagger |
Rage Winterchill |
|
|
No slot |
Quest Item |
Rage Winterchill |
|
|
Waist |
Cloth Armor |
Anetheron |
|
|
Feet |
Cloth Armor |
Anetheron |
|
|
Shoulder |
Cloth Armor |
Anetheron |
|
|
Feet |
Leather Armor |
Anetheron |
|
|
Waist |
Leather Armor |
Anetheron |
|
|
Feet |
Mail Armor |
Anetheron |
|
|
Chest |
Mail Armor |
Anetheron |
|
|
Shoulder |
Plate Armor |
Anetheron |
|
|
Two-Hand |
Staff |
Anetheron |
|
|
One-Hand |
One-Handed Sword |
Anetheron |
|
|
One-Hand |
One-Handed Sword |
Anetheron |
|
|
Shield |
Shield |
Anetheron |
|
|
Feet |
Cloth Armor |
Kaz'rogal |
|
|
Legs |
Cloth Armor |
Kaz'rogal |
|
|
Waist |
Cloth Armor |
Kaz'rogal |
|
|
Shoulder |
Leather Armor |
Kaz'rogal |
|
|
Feet |
Leather Armor |
Kaz'rogal |
|
|
Waist |
Leather Armor |
Kaz'rogal |
|
|
Shoulder |
Mail Armor |
Kaz'rogal |
|
|
Legs |
Mail Armor |
Kaz'rogal |
|
|
Waist |
Mail Armor |
Kaz'rogal |
|
|
Waist |
Plate Armor |
Kaz'rogal |
|
|
Main Hand |
One-Handed Mace |
Kaz'rogal |
|
|
Shield |
Shield |
Kaz'rogal |
|
|
No slot |
Armor Token |
Azgalor |
|
|
No slot |
Armor Token |
Azgalor |
|
|
No slot |
Armor Token |
Azgalor |
|
|
Chest |
Leather Armor |
Azgalor |
|
|
Legs |
Leather Armor |
Azgalor |
|
|
Legs |
Mail Armor |
Azgalor |
|
|
Waist |
Plate Armor |
Azgalor |
|
|
Chest |
Plate Armor |
Azgalor |
|
|
One-Hand |
Dagger |
Azgalor |
|
|
No slot |
Armor Token |
Archimonde |
|
|
No slot |
Armor Token |
Archimonde |
|
|
No slot |
Armor Token |
Archimonde |
|
|
Chest |
Cloth Armor |
Archimonde |
|
|
Legs |
Cloth Armor |
Archimonde |
|
|
Chest |
Leather Armor |
Archimonde |
|
|
Chest |
Mail Armor |
Archimonde |
|
|
Legs |
Plate Armor |
Archimonde |
|
|
Chest |
Plate Armor |
Archimonde |
|
|
Shield |
Shield |
Archimonde |
|
|
Two-Hand |
Staff |
Archimonde |
|
|
Two-Hand |
Two-Handed Sword |
Archimonde |
|
|
Main Hand |
One-Handed Sword |
Archimonde |
|
|
Ranged |
Bow |
Archimonde |
|
|
Held In Off-hand |
Off-hand Frill |
Archimonde |
Archimonde's loot is particularly good because his non-token drops are ilvl 151 rather than the ilvl 141 gear found on the first four bosses. Items like Cataclysm's Edge, Tempest of Chaos, and Antonidas's Aegis of Rapt Concentration can remain relevant well into the next stage of TBC progression.
Mount Hyjal Boss Jewelcrafting Designs
Every Mount Hyjal boss also has a chance to drop one of eight Epic Jewelcrafting designs. These are separate from the recipes sold by the Scale of the Sands vendor.
|
Design |
Mount Hyjal Trash Loot
Considering just how much trash you're going to kill in Mount Hyjal, at least there are some decent drops to look forward to. Trash mobs can drop the following Epic BoP items:
|
Item |
Slot |
Type |
|
Back |
Cloak |
|
|
Back |
Cloak |
|
|
Neck |
Amulet |
|
|
Neck |
Amulet |
|
|
Feet |
Cloth Armor |
|
|
Chest |
Mail Armor |
|
|
Main Hand |
Fist Weapon |
|
|
Off Hand |
Fist Weapon |
|
|
Main Hand |
One-Handed Mace |
Claw of Molten Fury and Fist of Molten Fury are especially interesting because they form the Molten Fury fist-weapon pair. Since these items come from trash rather than a specific boss, you at least have plenty of chances to see them during repeated clears.
Scale of the Sands Reputation
Mount Hyjal is also the only real place to farm reputation with the Scale of the Sands. Completing The Vials of Eternity gives you 3,000 reputation, immediately pushing a fresh character from Neutral to Friendly. From there, practically all of your reputation comes from clearing Mount Hyjal.
Most regular trash mobs give 12 reputation, Frost Wyrms give 60, the first four bosses give 375 each, and Archimonde gives 1,500. A complete Mount Hyjal clear is worth roughly 8,500 reputation, so you'll need several clears to reach Exalted.
The main reason everyone cares about this reputation is the ring questline. At Friendly, Soridormi lets you choose one of four versions of the Band of Eternity depending on your role. The ring is then upgraded at Honored, Revered, and finally Exalted.
|
Path |
Friendly |
Honored |
Revered |
Exalted |
|
Physical DPS |
||||
|
Spell DPS |
||||
|
Tank |
||||
|
Healer |
The Exalted versions are the ones you're ultimately working toward. You don't have to find a lucky boss drop for them either, so the ring is essentially a guaranteed long-term reward for continuing to clear the raid.
F.A.Q.
How do you unlock Mount Hyjal in TBC Anniversary?
You need to complete The Vials of Eternity. The quest requires Vashj's Vial Remnant from Lady Vashj in Serpentshrine Cavern and Kael's Vial Remnant from Kael'thas Sunstrider in Tempest Keep. Return both to Soridormi in the Caverns of Time to complete your Mount Hyjal attunement.
What level do you need for Mount Hyjal?
Mount Hyjal is a level 70, 25-player raid. You should be level 70 and have the required attunement completed before entering.
How many bosses are in Mount Hyjal?
Mount Hyjal has five bosses: Rage Winterchill, Anetheron, Kaz'rogal, Azgalor, and Archimonde. None of them are optional.
What is the Mount Hyjal boss order?
The boss order is completely linear:
- Rage Winterchill
- Anetheron
- Kaz'rogal
- Azgalor
- Archimonde
You cannot skip ahead to another boss if your raid gets stuck. You have to clear them in this order.
Who is the final boss of Mount Hyjal?
Archimonde is the fifth and final boss. Unlike the first four encounters, you don't need to clear another set of eight scripted trash waves immediately before fighting him.
What Tier 6 gear drops in Mount Hyjal?
Mount Hyjal drops Tier 6 gloves and helms. Azgalor drops Gloves of the Forgotten Conqueror, Gloves of the Forgotten Vanquisher, and Gloves of the Forgotten Protector. Archimonde drops Helm of the Forgotten Conqueror, Helm of the Forgotten Vanquisher, and Helm of the Forgotten Protector.
What item level gear drops from Mount Hyjal?
Most Epic boss and trash drops are ilvl 141. Tier 6 tokens are ilvl 146, while Archimonde's regular loot is ilvl 151.
Where do you exchange Mount Hyjal Tier 6 tokens?
You exchange the tokens with Tydormu, who can be found near the entrance to Mount Hyjal inside the Caverns of Time.
How do you farm Scale of the Sands reputation?
After completing The Vials of Eternity and reaching Friendly, you farm the rest of your reputation by clearing Mount Hyjal. Both trash and bosses give reputation all the way to Exalted, and a full raid clear provides roughly 8,500 reputation.