 Dallon Avery
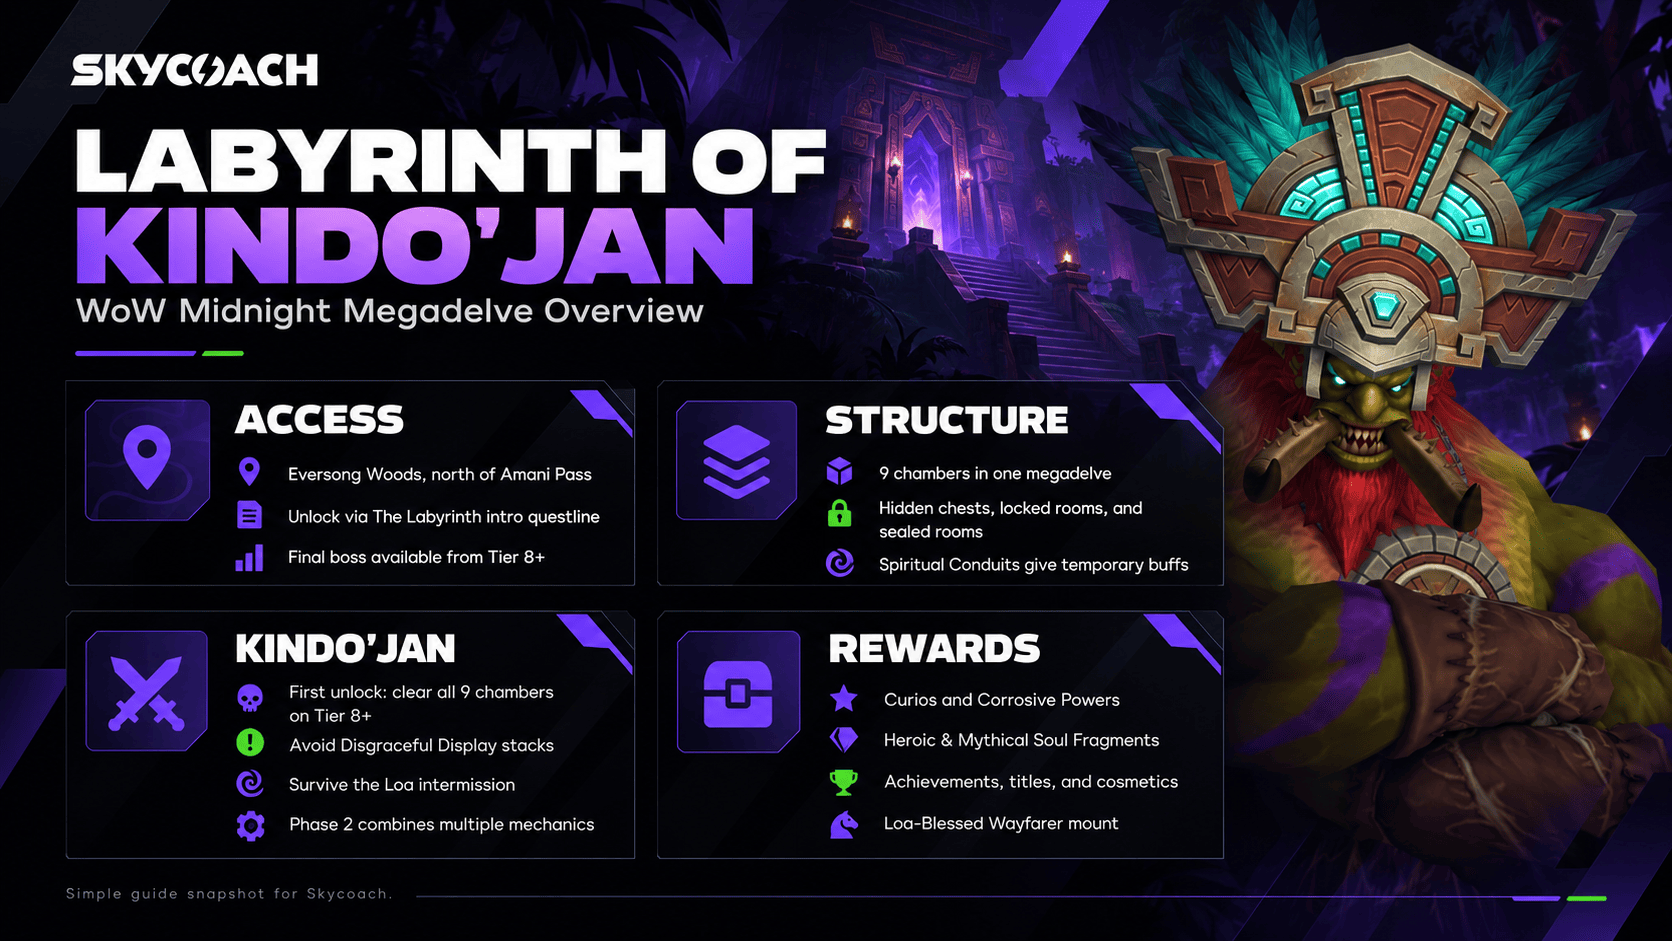
Labyrinth of Kindo'jan Guide Quick Overview:
- Labyrinth of Kindo'jan delve (63.0 72.2) can be found near the border with Zul'Aman, to the north of Amani Pass.
- You must complete the “The Labyrinth” questline in order to unlock access to it.
- Labyrinth of Kindo'jan has 9 chambers, but you don’t need to complete them all to get rewards.
- The final boss is only available from difficulty Tier 8+ and requires the completion of all chambers
- The rewards include Curios, the Loa-Blessed Wayfarer mount, titles, achievements, and gear.
Need help clearing the new delve and claiming all rewards? Buy WoW The Labyrinth of Kindo'Jan service at Skycoach. Pick the tier and the number of chambers you want cleared and our professional, veteran WoW players will help you farm this delve until you get everything you want from it!


Read closely 
Browse our hottest WoW Boosting services







How to Access the Labyrinth of Kindo'jan
Labyrinth of Kindo'jan is a new type of delve that’s been announced at BlizzCon this year. Its biggest difference is its size. Basically, it’s like multiple delves in one, and you get to pick where you go when you’re inside. You still need to clear the entire thing, but at least you can choose the encounters, instead of just going from point A to point B like in regular delves.
To access the Labyrinth of Kindo'jan, you need to complete a short introductory questline that takes you to the entrance and introduces the basic mechanics. The megadelve has 11 difficulty tiers, similar to regular Delves, but you won't be able to challenge its final boss until Tier 8. Fortunately, you don't need to complete the entire Labyrinth every time you enter, and its main unlock is shared across your Warband.
Labyrinth of Kindo'jan Location
The Labyrinth of Kindo'jan entrance is in southeastern Eversong Woods, north of Amani Pass. You can reach it by traveling toward the Zul'Aman border, where you'll find the entrance to the Amani temple complex.
The exact entrance coordinates are 63.0, 72.2. You can paste this command into chat if you're using TomTom:
/way #15968 63.0 72.2 Labyrinth of Kindo'jan Entrance
How to Unlock the Labyrinth of Kindo'jan
You can begin the introductory questline through the Midnight campaign or by picking up The Labyrinth from Kul'amara the Fierce at Tokka's Landing on the Coiled Isle. Both routes eventually take you to Valeera Sanguinar at the entrance.
Here's what you need to do:
- Progress through the campaign to The Long Way Around, or pick up The Labyrinth from Kul'amara the Fierce.
- Travel to the Labyrinth entrance and speak with Valeera Sanguinar.
- Accept Dangers Untold and Hardships Unnumbered and clear the Chamber of Rites.
- Speak with Kinduru to unlock access to the next chambers.
- Finish the introductory objectives and return to Kul'amara to unlock the full Labyrinth experience.
After completing the introduction, you can return to the megadelve whenever you want. You'll also get Kinduru's Spiriting Quill, a toy that lets you leave the Labyrinth and claim the rewards you've earned.
One thing I'd recommend is completing the introduction before attempting a serious Tier 8 run. That way, you can focus on clearing chambers, gathering buffs, and eventually reaching Kindo'jan rather than dealing with the introductory objectives.
Labyrinth of Kindo'jan Structure
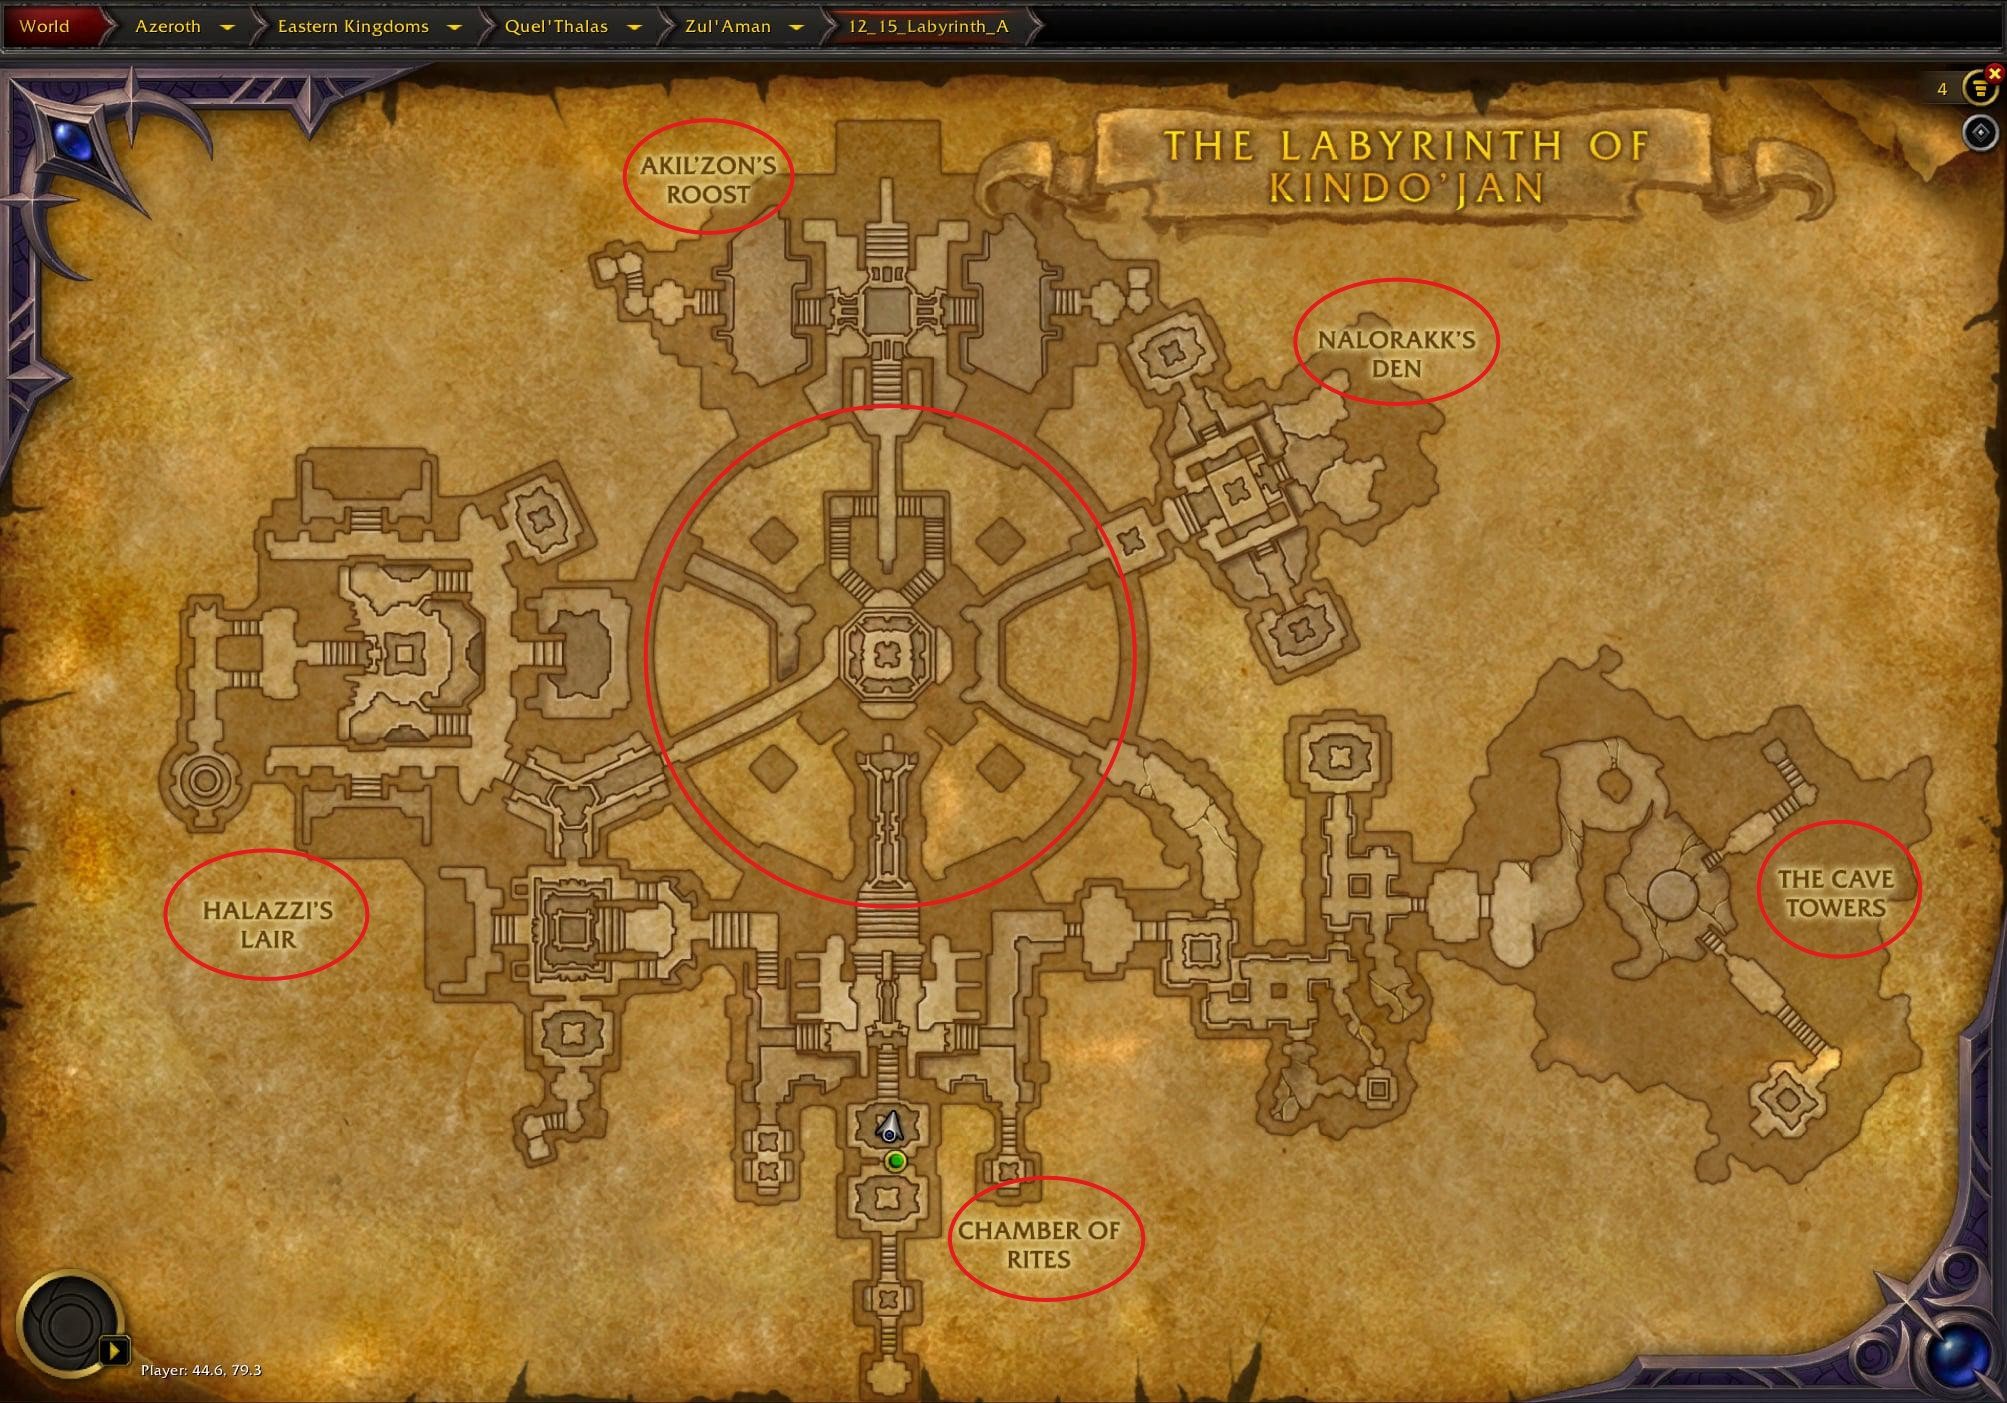
Like I said in the beginning, the Labyrinth of Kindo'jan is basically several delves put together into a single map. You’re not going in a linear corridor; instead, you’re exploring this massive complex where each path takes you to one of the chambers with its own objectives. These can involve killing enemies, defeating minibosses, solving small puzzles, or completing other challenges. The more chambers you clear in one run, the more rewards you receive when you leave.
Here's an overview of all nine chambers:
|
Chamber |
Location and description |
|
Chamber of Rites |
You always start here |
|
The Reliquary |
Southwestern chamber containing guarded treasures |
|
Halazzi's Lair |
Western chamber with all kinds of rituals |
|
The Central Chamber |
Kind of like a hub connecting much of the Labyrinth |
|
The Catacombs |
Southeastern chamber filled with undead enemies |
|
The Cave Towers |
Eastern chamber featuring unusual challenges and trials |
|
Akil'zon's Roost |
Northern chamber leading to Kindo'jan's boss arena |
|
Jan'alai's Refuge |
Northwestern chamber with combat and movement objectives |
|
Nalorakk's Rest |
Northeastern chamber featuring necromancers and other enemies |
You always start in the Chamber of Rites. From there, you can proceed toward the Reliquary or the Catacombs, eventually gaining access to the Central Chamber and other areas. However, you must complete your current chamber before unlocking another one. I recommend checking the map after each chamber rather than blindly picking a direction. If your goal is simply to reach Kindo'jan on a repeat run, you can take a shorter route toward Akil'zon's Roost instead of clearing all nine chambers again.
Browse our hottest WoW Boosting services








Locked Rooms, Ancient Chests, and Hexmasks
There's a lotta stuff to discover in the Labyrinth outside the main chamber objectives. You've got 44 Ancient Chests, hidden rooms, collectible Hexmasks, and special doors that only open once you've made enough progress through the Labyrinth Journey. You definitely won't find everything on your first run, so don't worry about exploring every corner right away.
Here's what you should know about these extra mechanics:
|
Feature |
How it works |
|
Ancient Chests |
44 one-time treasures with cosmetics, currencies, and other rewards |
|
Random chests with currencies, Journey progress, and temporary bonuses |
|
|
Locked Room |
Requires an Archaic Amani Key dropped by the Keeper of the Key |
|
Elemental Hexmasks |
Three collectible masks that follow you around and help in combat |
|
Loa-Sealed Rooms |
Special treasure rooms you unlock through Labyrinth Journey progression |
|
Flooded Chamber |
Hidden area behind waterfalls in the Central Chamber, with five Ancient Chests |
The Locked Room and Hexmasks become available at Labyrinth Journey Level 2. As you progress further, you'll open more Loa-Sealed Rooms where you can find permanent bonuses, glove enchants, and extra treasure. Personally, I'd go after the Hexmasks if you're planning to fight Kindo'jan. They give you extra combat abilities, and having more damage or crowd control can make a big difference during a long boss fight.
Spiritual Conduits and Labyrinth Journey
The Labyrinth also has its own nine-level Journey progression system. It works separately from your regular Delves Journey, and you unlock more stuff as you play through the megadelve. One of the better unlocks is Spiritual Conduits, which become available at Labyrinth Journey Level 6. These objects give you temporary buffs when you activate them, and you'll find four of them in each run.
|
Spiritual Conduit |
Effect |
|
Increases combat speed by 25% |
|
|
Deals periodic AoE Fire damage |
|
|
Reduces damage taken by 50% |
|
|
Instantly kills non-boss enemies below 20% health |
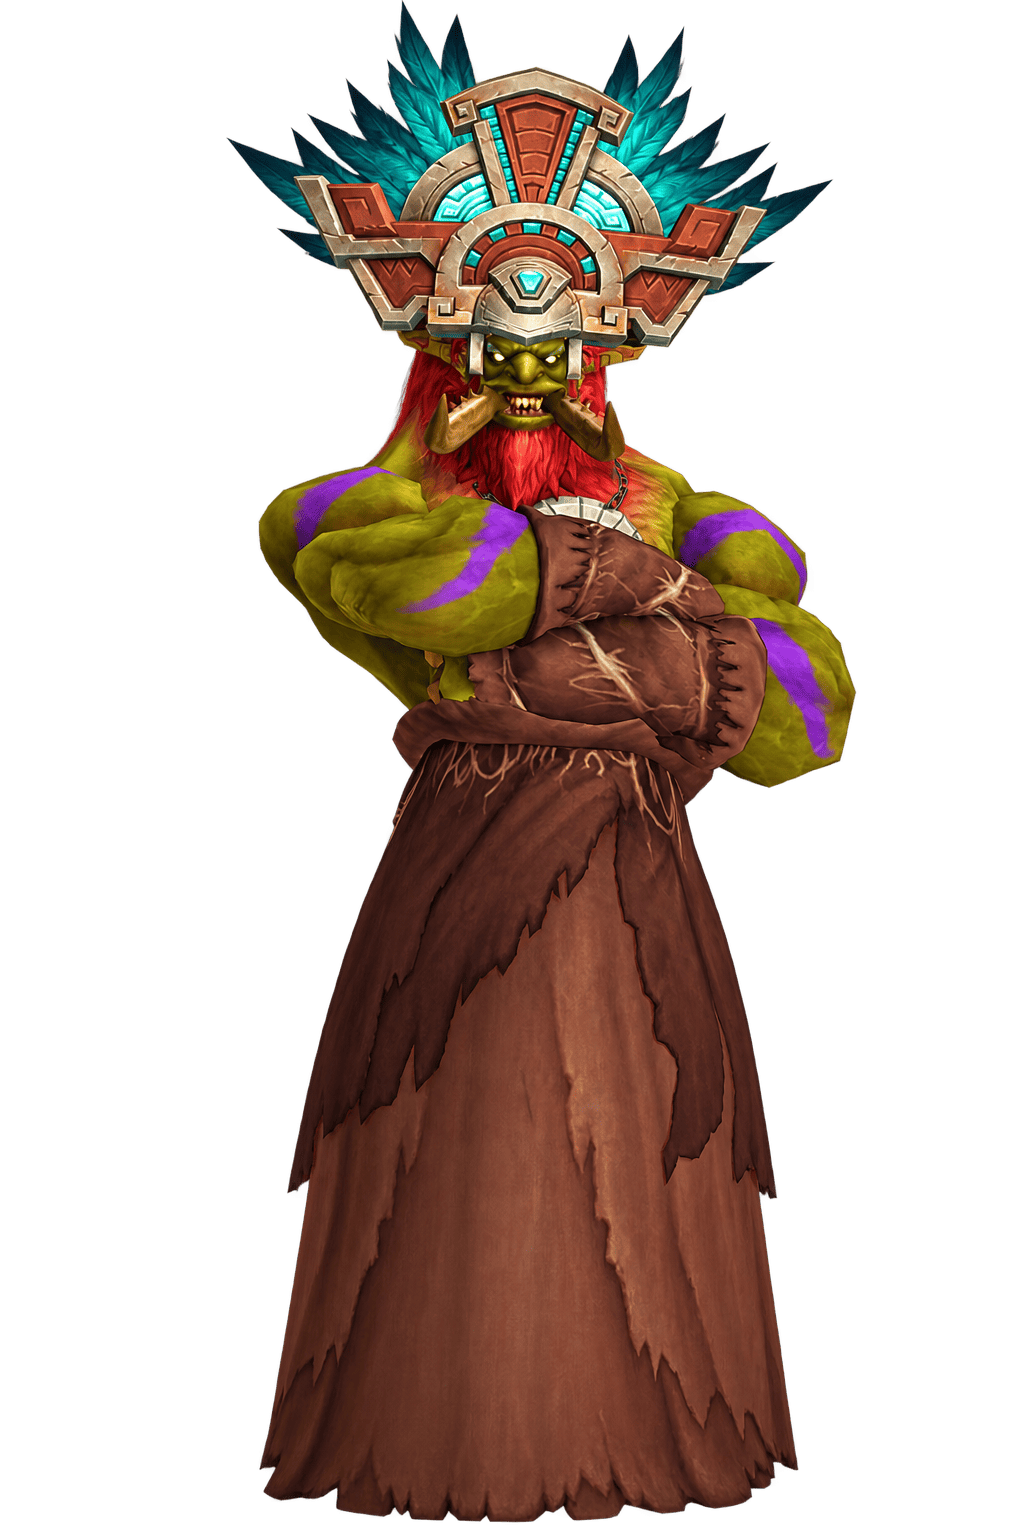
The buffs last two minutes, so I'd just use them whenever I find one rather than trying to save it for later. And remember, you don't have to clear every optional room or loot every chest to progress through the Labyrinth. That said, if you're after as many rewards as possible, I'd definitely consider doing full clears. Finishing all nine chambers gets you a lot more treasure than leaving after just a couple of rooms.
How to Beat Kindo'jan in WoW Midnight
Kindo'jan is the final boss of the Labyrinth and probably the biggest challenge you'll find here. This is pretty much like fighting the seasonal Delve Nemesis, no less. You've got a bunch of mechanics to learn, and messing up too many of them can instantly end your attempt. The boss throws AoE attacks, adds, knockbacks, and abilities borrowed from four Amani loa at you. The fight has three main stages, with the last one combining pretty much everything you've dealt with before.
The main thing you gotta watch is Disgraceful Display. Every time certain avoidable attacks hit you, you get one stack of this debuff. Reach three stacks within five minutes, and you're instantly dead, no matter how much health you've got left. There's also a 10-minute enrage timer, so you can't spend the whole fight running around without dealing damage.
How to Reach Kindo'jan
To unlock Kindo'jan for the first time, you gotta complete all nine Labyrinth chambers in a single run on Tier 8 or higher. Once you've cleared them, the entrance to the Speaker's Chamber opens up inside Akil'zon's Roost, at the northern end of the Labyrinth. Inside, you'll find Den'Zara, who's trying to claim Kindo'jan's power for herself. Kill her, and Kindo'jan will show up to start the actual boss fight. You'll also find a waystone and an Altar of Corrosion near the entrance, so make sure you're ready before pulling the boss.
The good news is that you only need to clear all nine chambers once. On your next attempts, you can head straight toward Akil'zon's Roost, clearing only the rooms you need to get there. That's a lot less running around, especially if you're planning to farm the boss or practice the Tier 11 fight.
Kindo'jan Abilities
Before we get into the actual strategy, I wanna go over all the abilities you'll be dealing with. Most of them aren't too complicated on their own, but things get a lot messier when several attacks happen at once during Phase 2.
|
Ability |
Effect and how to counter it |
|
Certain avoidable attacks give you a stack. Get three stacks within five minutes, and you're instantly dead. |
|
|
Creates AoE circles and leaves permanent Erratic Mojo puddles. Drop them near the edges so you don't cover the middle of the arena. |
|
|
Summons four spinning spectral axes that move around the arena. Keep an eye on their paths and dodge them. |
|
|
Summons four Amani Headhunters that spam Axe Barrage. Kill them before they fill the arena with more AoEs. |
|
|
Creates a dangerous melee-area attack and summons an Amani Juggernaut. Get out of the impact area and deal with the add. |
|
|
The Amani Juggernaut charges you and knocks you backward. Make sure you're not standing somewhere you'll get thrown off the platform. |
|
|
The Juggernaut reduces damage taken by nearby allies by 33%. Interrupt this whenever possible. |
I'd pay extra attention to Whirling Axes and Phalanx Charge. Both can catch you while you're trying to dodge something else, and getting knocked off the platform is a pretty annoying way to lose an otherwise good attempt.
Phase 1: Kindo'jan and Amani Adds
At the start of the fight, Kindo'jan stays near the northern side of the platform and begins cycling through his abilities. This part isn't too bad once you know what you're doing, but positioning is super important. You wanna leave as much empty space as possible for the later phases rather than covering the whole arena with puddles.
Here's what I'd recommend doing:
- Drop Eruption of Mojo near the edges. The puddles stay on the ground, so don't place them in the middle. Trust me, you'll want that space when the Loa mechanics start.
- Watch for Whirling Axes. Keep track of where they're going and move out of the way. Don't try squeezing between several axes unless you really have to.
- Kill the Amani Headhunters. Their Axe Barrage keeps dropping circles beneath you, and the longer they're alive, the more annoying the fight becomes.
- Deal with Amani Juggernauts. Their knockbacks are especially dangerous if you're standing close to the edge.
- Interrupt Amani Aegis. Otherwise, the Juggernaut and nearby enemies take a lot less damage, which just makes the fight longer.
I'd say the Juggernauts are the most annoying adds here. Their charge doesn't necessarily hurt that much, but getting knocked into another mechanic or straight off the platform is a completely different story. My advice is not to chase every Headhunter around the edges while the axes are spinning. Give yourself enough room to move and kill them when you've got a safe opening. Once Kindo'jan gets down to around 70% health, he'll disappear and start the intermission. This is where you stop worrying about DPS for a bit and focus on surviving four Loa mechanics in a row.
Intermission: Four Amani Loa Mechanics
During the intermission, Kindo'jan disappears, and you can't damage him. Instead, you gotta deal with four Amani loa mechanics in the same order every time: Akil'zon, Halazzi, Nalorakk, and Jan'alai. There's no reason to worry about your damage rotation here. I'd focus entirely on staying alive and doing each mechanic correctly.
|
Loa |
Mechanic |
What to do |
|
Akil'zon |
Strong winds push you around while dangerous sections appear on the platform. Move against the wind and stay in the safe areas. |
|
|
Halazzi |
Four shadows trap Valeera. Find the correct connecting line and stand in its path to free her. |
|
|
Nalorakk |
Rows of spectral bears charge across the arena. Stand in the gaps and get ready to move again when the next row comes. |
|
|
Jan'alai |
Two soak circles appear. Valeera takes one, so you gotta stand inside the other. |
Akil'zon is easily the one I'd be most careful with. You've got the wind pushing you around while parts of the platform become deadly, so even a small mistake can end your attempt. Try to stay in the safe areas and keep moving against the wind. Halazzi is more about paying attention. Don't just run through every line you see. Find the correct connection and break it. For Nalorakk, I'd stay somewhere around the middle of the arena so you can see the bears coming and find a gap. Once the first row passes, turn around and get ready for the next one. Jan'alai is probably the easiest of the four. Just watch Valeera, see which soak circle she takes, and stand in the other one. The nice thing is that these mechanics always happen in the same order during the intermission. Once you've seen them a couple of times, you'll know exactly what's coming. You'll definitely want to learn them now, because Phase 2 is where things get messy.
Phase 2: Combined Mechanics
Once the intermission ends, Kindo'jan comes back, and this is where the real fight starts. He keeps using everything from Phase 1, but now he'll also throw random Loa mechanics into the mix. You can end up dodging axes, dealing with adds, and trying to complete a Loa mechanic all at the same time. I'd save Bloodlust or Heroism for the beginning of Phase 2. This is by far the hardest part of the encounter, and the faster you get through it, the fewer chances you'll have to mess something up and get another Disgraceful Display stack.
You still gotta dodge Eruption of Mojo, watch the axes, kill dangerous adds, and interrupt Amani Aegis. The difference is that you now need to do all of that while dealing with the Loa mechanics.
Here are the combinations I'd watch out for the most:
- Akil'zon + Phalanx Charge: The wind is already pushing you around, and a knockback can easily send you off the platform. Try to position yourself so the charge won't throw you into a dangerous area.
- Nalorakk + Whirling Axes: You've got bears and spinning axes moving across the arena. Check where both are going before you pick a spot to stand.
- Jan'alai + Phalanx Charge: A Juggernaut can knock you right out of your soak circle. Watch for the charge before committing to a position.
- Halazzi + Eruption of Mojo: Try not to cover the area around Valeera with puddles, because you'll need to reach her to break the shadow connection.
Kindo'jan can also teleport between different sections of the arena during this phase. I wouldn't immediately chase him every time he moves, especially if that means running straight through another mechanic. What makes Phase 2 difficult isn't really any single attack. It's having to deal with a bunch of them at once. Personally, I'd rather lose a few seconds of DPS than get another Disgraceful Display stack and have to start the whole fight again. Keep killing the adds, dodge whatever Kindo'jan throws at you, and repeat the Loa mechanics until he's dead.
Best Curios and Powers for Kindo'jan
Valeera Sanguinar helps you throughout the fight, and you can choose whether she acts as your healer or DPS companion. Both options work, so I'd pick whichever makes more sense for your class.
I'd go with Healer Valeera if you're having trouble staying alive. If your class has enough self-healing, though, I'd switch her to DPS to make the fight shorter. She can also help interrupt Amani Aegis, which is a nice bonus. For Curios and Corrosive Powers, here's what I'd use:
|
Slot |
Recommended choice |
Why I'd use it |
|
Combat Curio |
Corrosive Bile Sphere |
Deals a lot of single-target damage to Kindo'jan |
|
Alternative Combat Curio |
Erebos's Curse |
Another option if you don't have Corrosive Bile Sphere |
|
Utility Curio |
Soul Cracking Dream Catcher |
Gives you some extra utility during the fight |
|
Poison Curio |
Bursting Tototoxin |
Adds a good amount of extra damage |
|
Corrosive Power |
Ula'tek's Gift |
Great for dealing damage over a longer fight |
|
Second Corrosive Power |
Insidious Venom |
Helps Ula'tek's Gift ramp up faster |
If you've unlocked two Corrosive Power slots, I'd definitely pair Ula'tek's Gift with Insidious Venom. They work really well together, especially since Kindo'jan can take a while to kill. Other than that, I'd focus on whatever helps you stay alive and deal with adds quickly. Just remember that healing won't save you if you reach three Disgraceful Display stacks.


You got -20% OFF 
Labyrinth of Kindo'jan Rewards
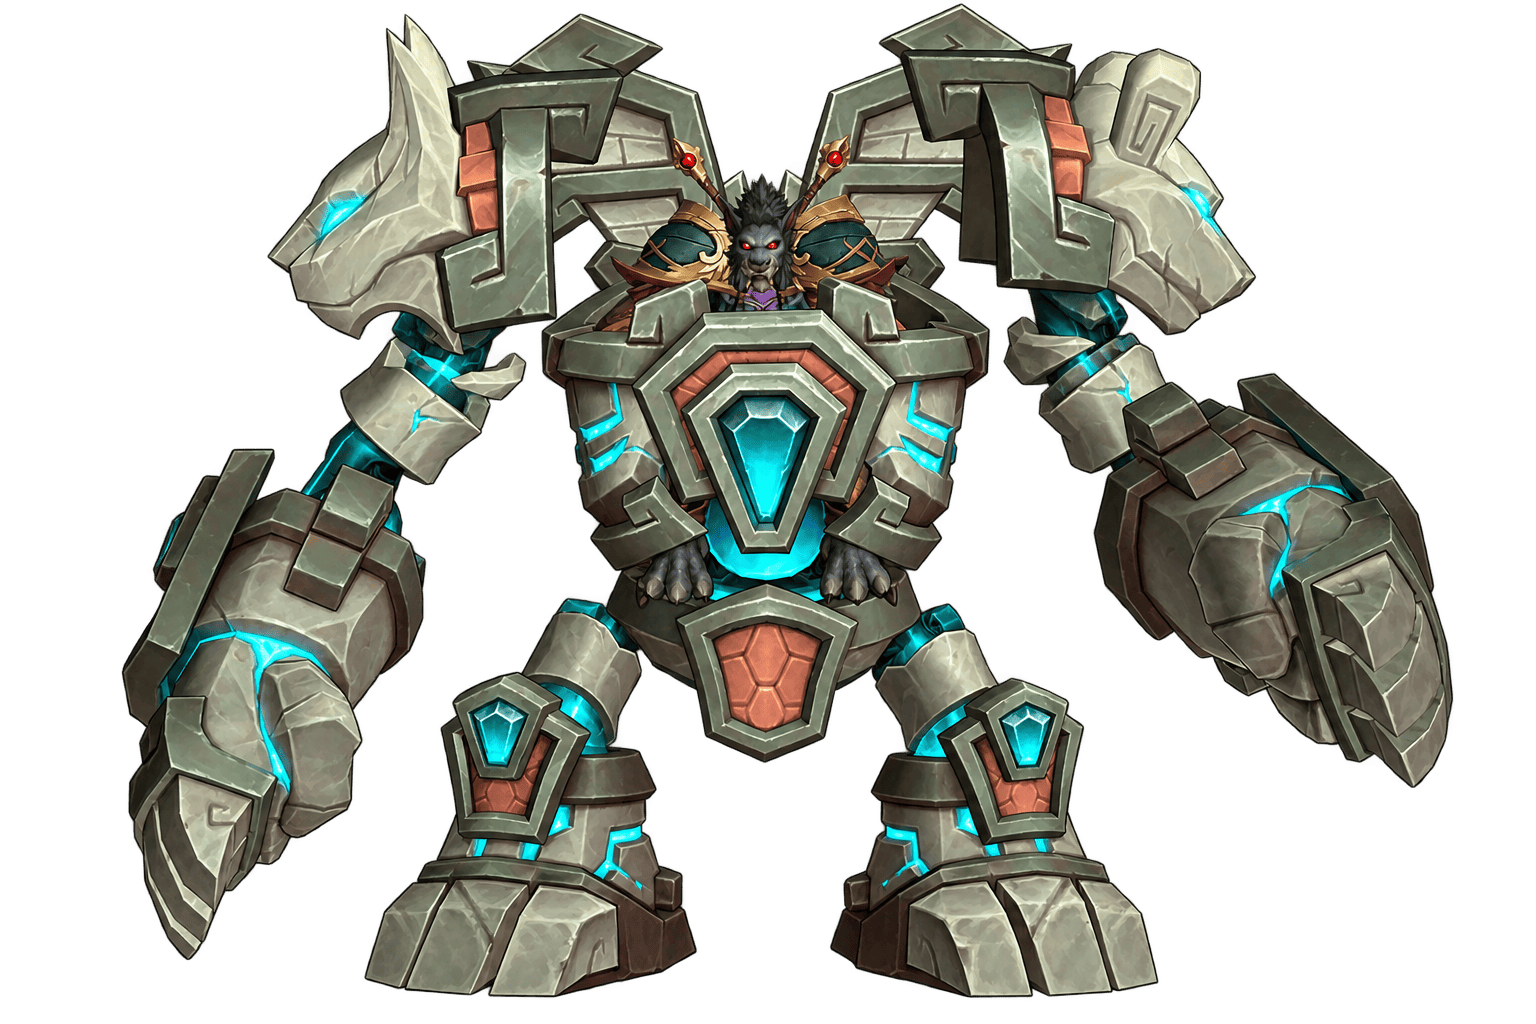 The Labyrinth of Kindo'jan has a pretty big reward pool, and there's a lot more to get here than just gear. You've got currencies, Curios, cosmetics, titles, toys, and even a mount if you're willing to tackle the final boss on Tier 11 solo. The best part is that you don't actually have to kill Kindo'jan to get something useful. Clearing chambers already gives you treasure, while beating the boss gets you extra loot from his Ancestral Bounty.
There are also a bunch of achievements tied to the Labyrinth, including some pretty tough solo challenges. Here's what you can earn.
Chamber Completion Rewards
The more chambers you clear, the more treasure you'll get when you finish your run. Clearing all nine gives you the maximum number of reward chests, but you can leave earlier and still walk away with loot.
|
Reward |
How to get it |
|
Up to 3 after clearing all nine chambers |
|
|
Up to 6 after clearing all nine chambers |
|
|
Earned from Labyrinth reward chests and other activities |
|
|
Earned from limited quests involving Wah'du |
|
|
Ancient Chest rewards |
Explore chambers and open hidden treasure rooms |
|
Labyrinth Journey progress |
Complete activities and collect rewards around the Labyrinth |
|
Great Vault progress |
Every three cleared chambers count as one Delve completion |
You can combine three Heroic Soul Fragments into a Blessed Loa Armament, which you can exchange for Hero-track gear. Three Mythical Soul Fragments give you a Venerated Loa Armament instead, which gets you Myth-track gear. The Myth-track reward starts at item level 318 (1/6 Myth), so there's definitely a reason to come back for the weekly activities even if you've already beaten the boss. Personally, I'd do full clears when farming gear and currencies. But if you're just trying to beat Kindo'jan or practice his Tier 11 fight, I'd stick to shorter runs after unlocking him.
Kindo'jan Boss Rewards
Defeating Kindo'jan on Tier 8 or higher gets you his Ancestral Bounty, which contains extra loot on top of whatever you earned from the chambers.
|
Reward |
Amount or requirement |
|
Hero Mistcrests |
10 |
|
10 |
|
|
1 additional fragment |
|
|
Rank 5 Curio |
1 random unowned Curio |
|
2 |
|
|
Labyrinth Journey progress |
500 |
|
Delve Journey progress |
300 |
|
Toy from the boss bounty |
|
|
Mount for defeating Kindo'jan solo on Tier 11 during Season 2 |
I'd say the mount is probably the main prize here, but the currencies and gear rewards are pretty good too. Even if you have no plans to push Tier 11 solo, there's still a reason to farm Kindo'jan on Tier 8.
Labyrinth of Kindo'jan Achievements and Titles
The Labyrinth also has a bunch of achievements, ranging from collecting treasures to beating Kindo'jan solo without dying. Some give you titles, and one gets you the Loa-Blessed Wayfarer mount.
|
Achievement |
Requirement |
Reward |
|
The First Hash'ey |
Defeat Kindo'jan |
Loa-Blessed title |
|
Defeat Kindo'jan solo on Tier 11 during Midnight Season 2 |
Loa-Blessed Wayfarer mount |
|
|
The Labyrinth of Kindo'jan: One-Champion Army |
Clear all nine chambers and defeat Kindo'jan solo on Tier 11 without losing a life during Season 2 |
Lone Raider title |
|
Fabled Let Me Solo Him: Kindo'jan |
Defeat Kindo'jan solo on Tier 11 during his first available reset |
Fabled Vanquisher of The First Hash'ey title |
|
Clear all nine chambers on Tier 11 in one run |
Maze Runner title |
|
|
Kindo'jan's Labyrinth Discoveries |
Find all 44 Ancient Chests |
Treasure Hound title |
|
Open the hidden locked room 20 times |
Lockpickin' title |
If you're comfortable soloing high-tier Delves, I'd definitely aim for the Loa-Blessed Wayfarer mount. All you gotta do is defeat Kindo'jan solo on Tier 11 during Midnight Season 2. Well, I say all you gotta do, but the fight itself is anything but easy. There's also the Fabled Let Me Solo Him: Kindo'jan achievement, which is only available during the first reset when the boss goes live, October 13–20, 2026. If you want that exclusive title, you've only got a week to earn it.
Other Cosmetic Rewards
There's also a lotta cosmetic stuff hidden throughout the Labyrinth, including transmogs, toys, and housing decorations. Most of these come from Ancient Chests or special Loa-Sealed Rooms rather than Kindo'jan himself.
|
Reward |
Type |
Where to get it |
|
Transmog |
Akil'zon-sealed room, Chamber of Rites |
|
|
Transmog |
Akil'zon-sealed room, Chamber of Rites |
|
|
Transmog |
Jan'alai-sealed room, Jan'alai's Refuge |
|
|
Transmog |
Halazzi-sealed room, Halazzi's Lair |
|
|
Toy |
Akil'zon-sealed room, Akil'zon's Roost |
|
|
Toy |
Jan'alai-sealed room, Halazzi's Lair |
|
|
Toy |
Nalorakk-sealed room, Reliquary |
|
|
Toy |
Halazzi-sealed room, Catacombs |
|
|
Housing decor |
Ancient Chests |
|
|
Housing decor |
Ancient Chests |
Keep in mind that some of these treasures are locked behind Labyrinth Journey levels. You won't be able to grab everything on your first visit, no matter how thoroughly you explore. I'd recommend working on your Labyrinth Journey and collecting the permanent upgrades before going after the harder solo achievements. You'll unlock more cosmetics along the way, and those extra bonuses can make future runs a lot easier.
Read our other WoW guides:
F.A.Q.
How to get the Loa-Blessed Wayfarer mount in WoW Midnight?
You gotta defeat Kindo'jan solo on Tier 11 during Midnight Season 2 to earn the Let Me Solo Him: Kindo'jan achievement. You can bring Valeera along, but other players aren't allowed if you want the mount.
Where is the Labyrinth of Kindo'jan entrance in WoW?
You'll find the entrance in southeastern Eversong Woods, near the border with Zul'Aman, at coordinates 63.0, 72.3. If you're using TomTom, just type /way #15968 63.0 72.2 to mark the location.
How do you unlock Kindo'jan in the Labyrinth?
To reach Kindo'jan for the first time, you gotta clear all nine chambers on Tier 8 or higher. After that, you can take a shorter route through Akil'zon's Roost to reach the boss on future runs.
Can you solo the Labyrinth of Kindo'jan?
Yeah, you can complete the whole megadelve solo, including its final boss, although higher tiers are pretty tough. I'd recommend bringing Valeera as a healer if your class has trouble staying alive, especially when learning Kindo'jan's mechanics.
How many chests are in the Labyrinth of Kindo'jan?
There are 44 Ancient Chests hidden throughout the Labyrinth, including some behind doors that require Labyrinth Journey progress. Collecting all of them gets you the Kindo'jan's Labyrinth Discoveries achievement and the Treasure Hound title.