 Dallon Avery
Black Temple Raid Guide Quick Overview:
- Black Temple is a 25-player raid that releases with TBC Anniversary Phase 3 on August 27, 2026.
- The raid contains nine bosses, ending with Illidan Stormrage.
- Black Temple requires a long attunement chain that passes through Serpentshrine Cavern, Tempest Keep, and Mount Hyjal.
- After Supremus, Shade of Akama, Teron Gorefiend, Gurtogg Bloodboil, and Reliquary of Souls can be tackled with some route flexibility, but all four must die before Mother Shahraz.
- Mother Shahraz drops Tier 6 Shoulder tokens, the Illidari Council drops Leg tokens, and Illidan drops Chest tokens.
- Regular boss and trash epics are ilvl 141, Tier 6 tokens are ilvl 146, and Illidan drops ilvl 151 gear, including the legendary Warglaives of Azzinoth.
Want to clear Black Temple without losing an entire raid night to resistance checks, Council assignments, or Illidan progression? The Black Temple raid boost at Skycoach can help you defeat every boss and collect Phase 3 rewards with an experienced TBC Anniversary team.


Read closely 
Browse our hottest TBC Anniversary Boosting services








Black Temple Raid Overview
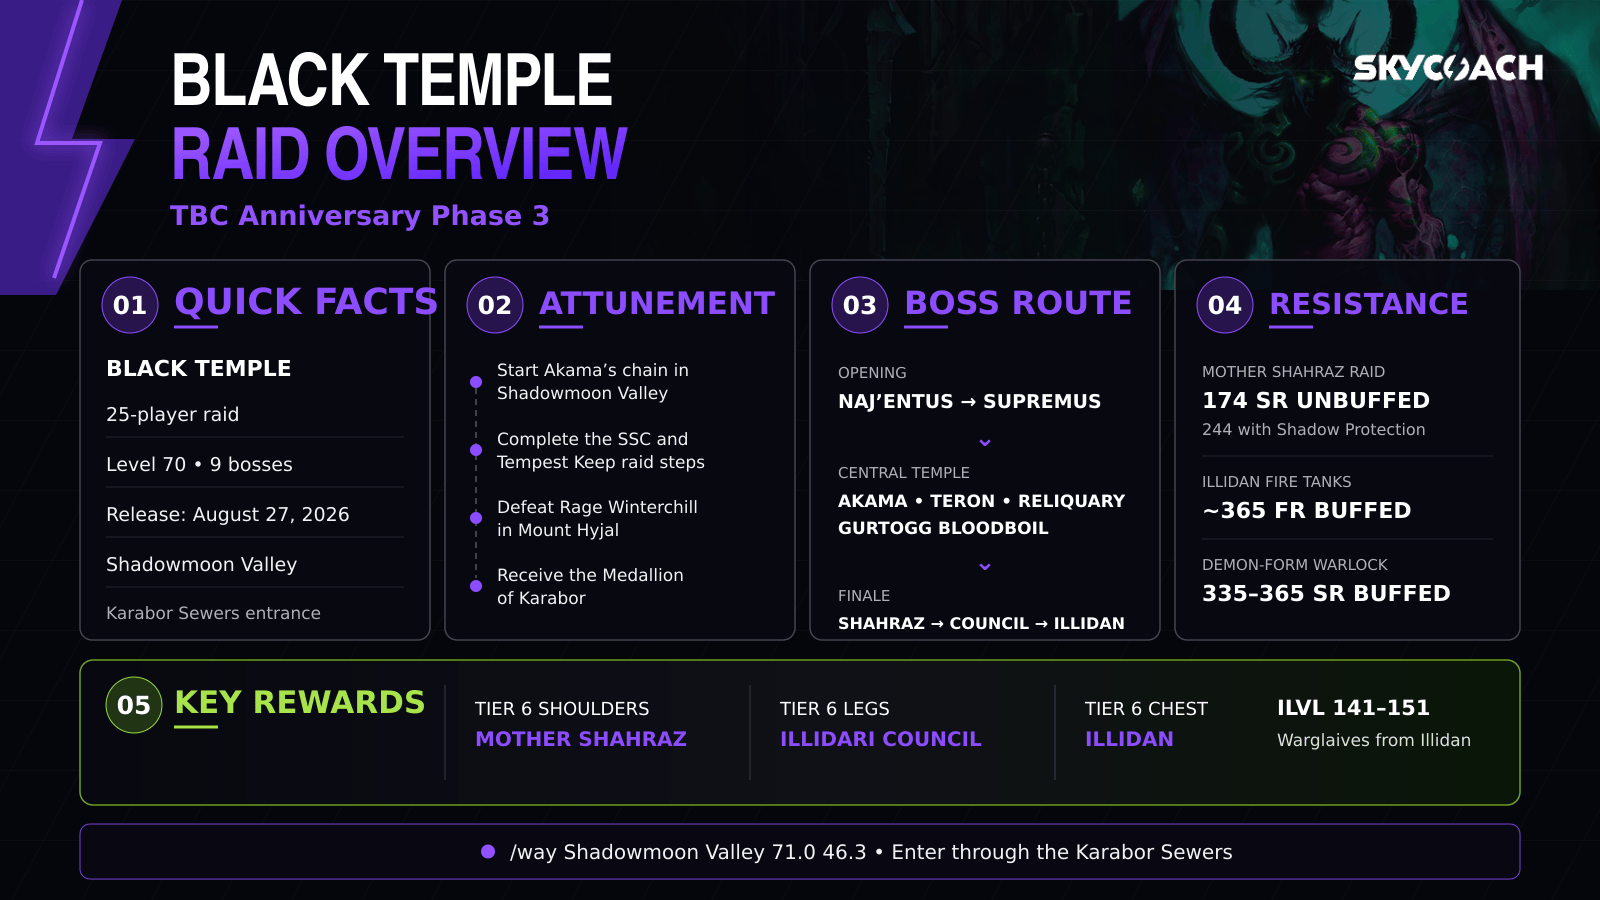
Black Temple is the larger of the two raids released with TBC Classic Anniversary Phase 3. It opens globally on August 27, 2026, alongside Mount Hyjal. Mount Hyjal is a compact five-boss defense event, while Black Temple is a full nine-boss assault on Illidan Stormrage's fortress in Shadowmoon Valley. The instance begins in the Karabor Sewers, continues through the temple's courtyards and sanctums, and ends at the summit.
The temple was originally known as Karabor, a sacred Draenei site. Gul'dan and the Shadow Council transformed it during the Horde's occupation of Draenor, Magtheridon later claimed it, and Illidan took control after arriving in Outland. The Phase 3 raid follows Akama's attempt to free his people and remove Illidan from the temple.
|
Raid Info |
Details |
|---|---|
|
Phase |
TBC Anniversary Phase 3 |
|
Release Date |
August 27, 2026 |
|
Raid Size |
25 players |
|
Minimum Level |
70 |
|
Bosses |
9 |
|
Final Boss |
Illidan Stormrage |
|
Lockout |
Weekly |
|
Location |
Eastern Shadowmoon Valley |
|
Attunement |
Required |
|
Entry Item |
|
|
Reputation |
Ashtongue Deathsworn |
|
Regular Loot |
ilvl 141 |
|
Tier 6 Tokens |
ilvl 146 |
|
Illidan Loot |
ilvl 151 |
Black Temple is mechanically broader than Mount Hyjal. Some encounters are straightforward tank-and-move fights, but the later half introduces unusual assignments. Teron Gorefiend temporarily turns players into ghosts, Reliquary of Souls disables normal healing during one phase, the Illidari Council requires four separate tanking and interrupt teams, and Illidan needs Fire Resistance tanks plus a Warlock prepared to tank Demon Form. The raid also supplies three core Tier 6 slots. Mother Shahraz drops Shoulder tokens, the Illidari Council drops Leg tokens, and Illidan drops Chest tokens. Gloves and Helms come from Mount Hyjal, so a complete five-piece Tier 6 set requires progress through both Phase 3 raids.
Black Temple Attunement Guide
Black Temple has the longest attunement in TBC Anniversary Phase 3. It begins with faction-specific quests in Shadowmoon Valley and eventually sends you through The Arcatraz, Serpentshrine Cavern, Tempest Keep, and Mount Hyjal.
The opening quest depends on your Shattrath faction:
- Aldor players start Tablets of Baa'ri with Anchorite Ceyla at the Altar of Sha'tar around /way 62.6 28.4.
- Scryer players start their version of Tablets of Baa'ri with Arcanist Thelis at the Sanctum of the Stars around /way 56.2 59.6.
The full chain is lengthy, but its progression can be summarized as follows:
- Complete Tablets of Baa'ri, Oronu the Elder, The Ashtongue Corruptors, and The Warden's Cage in Shadowmoon Valley.
- Complete Proof of Allegiance, meet Akama, and accept Seer Udalo.
- Enter The Arcatraz and inspect Seer Udalo in the room before Harbinger Skyriss.
- Return to Akama, complete A Mysterious Portent and The Ata'mal Terrace, then finish Akama's Promise in Shattrath.
- Defeat Fathom-Lord Karathress in Serpentshrine Cavern. Speak with Seer Olum afterward and accept The Secret Compromised.
- Complete Ruse of the Ashtongue by defeating Al'ar in Tempest Keep while wearing the Ashtongue Cowl.
- Complete An Artifact From the Past by defeating Rage Winterchill in Mount Hyjal and looting the Time-Phased Phylactery.
- Finish The Hostage Soul, Entry Into the Black Temple, and A Distraction for Akama.
- Receive the Medallion of Karabor, which grants access to Black Temple and provides 40 Shadow Resistance.
You can finish most of the chain before Phase 3 opens. The main release-day gate is An Artifact From the Past because it requires a Rage Winterchill kill in Mount Hyjal. Every prospective raider should reach that step in advance.
Completed raid attunements are account-wide in TBC Anniversary. Partial progress is not copied between characters. There is also an important gearing distinction: the account-wide unlock lets an alt enter, but it does not automatically place a Medallion of Karabor in that character's bags. Any alt that wants the necklace's 40 Shadow Resistance should complete the chain personally.
Black Temple Location and Map
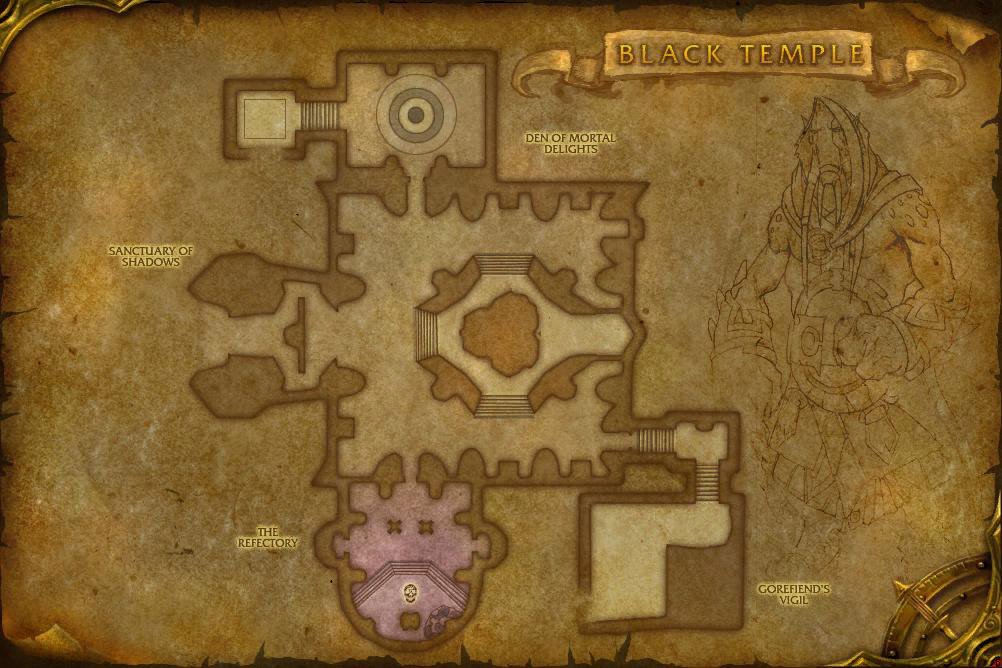
Black Temple is located at the eastern end of Shadowmoon Valley. Alliance players can fly to Wildhammer Stronghold, while Horde players can use Shadowmoon Village. Both factions then travel east toward the enormous temple complex.
The actual raid portal is not behind the sealed front gate. It is inside a breach in the southern outer wall that leads into the Karabor Sewers. Use this waypoint:
/way Shadowmoon Valley 71.0 46.3 Black Temple Entrance
Follow the cracked wall into the sewer approach and enter the green raid portal. The Medallion of Karabor is required unless the account-wide Anniversary attunement unlock already applies to that character.
Later in the attunement storyline, the necklace can be upgraded to the Blessed Medallion of Karabor. That version can teleport its owner directly to the Black Temple entrance, which saves travel time on future lockouts.
How Black Temple Raid Progression Works
Black Temple is not completely linear from room to room, even though all nine bosses are required for a full clear. The opening and ending are fixed, while the central section gives the raid some freedom.
The basic progression looks like this:
- Enter the Karabor Sewers and defeat High Warlord Naj'entus.
- Clear into the courtyard and defeat Supremus.
- Enter the central temple section.
- Defeat Shade of Akama, Teron Gorefiend, Reliquary of Souls, and Gurtogg Bloodboil. The exact order of these four can vary with your route.
- Continue into the Den of Mortal Delights and defeat Mother Shahraz.
- Defeat the Illidari Council.
- Complete Akama's summit event and defeat Illidan Stormrage.
Supremus is the gate into the middle of the raid. Once he dies, your group can choose a route based on progression goals, available time, or which boss your roster is best prepared to handle. Shade of Akama is commonly killed first because it is short and relatively forgiving. Teron Gorefiend is another frequent early target, while Reliquary of Souls and Gurtogg Bloodboil usually demand more coordination.
All four central encounters must be cleared before the door to Mother Shahraz opens. From Shahraz onward, progression becomes completely linear again.
The Spirit of Olum near the entrance provides deeper teleport destinations as the raid advances. Use these checkpoints after wipes instead of making 25 players run from the sewers every time. Black Temple is a large instance, and wasted corpse runs add up quickly during progression.
Black Temple Boss Order
Black Temple has nine bosses. A typical clear follows this order:
- High Warlord Naj'entus - A raid-wide healing check built around Impaling Spine, Tidal Shield, and Tidal Burst.
- Supremus - Alternates between a tank phase and a Fixate phase filled with volcanoes and Molten Flame trails.
- Shade of Akama - A short add-control encounter where the raid frees Akama's shade before burning it down.
- Teron Gorefiend - Marked players become ghosts and must kill Shadowy Constructs before they reach the raid.
- Reliquary of Souls - A three-phase encounter with disabled healing, reflected damage, mandatory interrupts, and escalating raid damage.
- Gurtogg Bloodboil - Rotates between a three-tank threat phase, Bloodboil group assignments, and Fel Rage targets.
- Mother Shahraz - The raid's Shadow Resistance check, with Fatal Attraction and Saber Lash punishing poor positioning.
- The Illidari Council - Four bosses share one health pool and require separate tanks, interrupts, dispels, and movement plans.
- Illidan Stormrage - A five-phase final encounter requiring Fire Resistance tanks, a Shadow Resistance Warlock tank, precise add control, and clean transitions.
Shade of Akama, Teron Gorefiend, Reliquary of Souls, and Gurtogg Bloodboil can be completed in a different internal order, but none can be skipped if you want to reach Mother Shahraz.
Black Temple Raid Composition
Black Temple does not demand one exact class roster, but several encounters require specialized assignments. A raid that arrives without those jobs prepared may clear the opening bosses and then stop abruptly at Council or Illidan.
For a first clear, use something close to this setup:
|
Role |
Recommended Amount |
Notes |
|---|---|---|
|
Tanks |
3 |
One main tank and two off-tanks cover most encounters; Illidan also needs two Fire Resistance tanks |
|
Healers |
6 |
Five can work for optimized groups, but six makes Reliquary, Council, and Illidan progression safer |
|
DPS |
16 |
Bring a balanced mix with reliable interrupts, dispels, crowd control, and ranged damage |
Prepare these special assignments before raid night:
|
Assignment |
Recommended Preparation |
|---|---|
|
Mother Shahraz raid |
Around 174 unbuffed Shadow Resistance on non-tanks, reaching 244 with Prayer of Shadow Protection |
|
Illidan Phase Two |
Two tanks approaching 365 buffed Fire Resistance |
|
Illidan Demon Form |
One Warlock with roughly 335-365 buffed Shadow Resistance and a large health pool |
|
Illidan main tank |
Reliable block or avoidance coverage against Shear; Warriors and Paladins are particularly convenient |
|
Illidari Council |
A Mage ready to tank High Nethermancer Zerevor by maintaining Spellsteal and ranged threat |
|
Teron Gorefiend |
Every eligible player should practice the ghost action bar before the pull |
A Protection Paladin is excellent for trash and Shade of Akama adds. Warrior tanks are convenient for Illidan because Shield Block provides reliable coverage against Shear. Feral Druids can handle many conventional tank assignments, although the raid should reserve the most mechanically suitable tanks for Illidan.
Bring several Shamans. Bloodlust or Heroism matters on nearly every boss, while Tremor Totem is valuable against dangerous trash fears. Mages provide Spellsteal for Reliquary of Souls and the required Zerevor tank for Council. Warlocks bring Banish, Healthstones, Soulstones, curses, and the ranged tank needed for Illidan's Demon Form.
Priests contribute Fear Ward and Prayer of Shadow Protection. Druids and Mages handle curses. Paladins and Priests provide important dispels. Hunters simplify awkward pulls with Misdirection. The roster does not need to be perfect, but every special assignment should have a primary player and at least one backup.
Black Temple Consumables and Preparation
Black Temple progression consumes more supplies than Mount Hyjal because it contains nine bosses, long trash sections, and several late encounters that may take many attempts. Stock for a full four-hour raid rather than bringing only enough for the opening wing. Flasks are convenient because they last two hours and persist through death. If you have Marks of the Illidari, the Shattrath flask versions work inside Black Temple. Players using Elixir of Demonslaying should remember that it is a Battle Elixir and therefore cannot be combined with a flask.
Here is a practical packing table:
|
Role |
Flask / Elixir |
Weapon Consumable |
Food |
Potions / Extras |
|---|---|---|---|---|
|
Tanks |
Class-specific threat enhancement or Adamantite stone |
|||
|
Physical DPS |
Flask of Relentless Assault; Elixir of Demonslaying for Demon bosses |
Adamantite Sharpening Stone or Adamantite Weightstone where applicable |
Roasted Clefthoof, Grilled Mudfish, Warp Burger, Spicy Hot Talbuk, or Ravager Dog |
|
|
Fire, Frost, or Shadow caster |
||||
|
Arcane or Nature caster |
||||
|
Healers |
||||
|
Shadow Resistance user |
Flask of Chromatic Wonder if extra resistance is needed |
Normal role-specific enhancement |
Broiled Bloodfin or role-specific food |
For one four-hour progression night, bring approximately:
- 2 flasks and 1 spare.
- 20-25 pieces of buff food.
- 5 one-hour weapon applications per weapon. Dual-wielders need separate applications for both weapons.
- 20-30 Super Mana Potions for healers and mana-heavy casters.
- 10-15 Dark Runes or Demonic Runes for mana users.
- 10-20 Haste Potions or Destruction Potions if you use offensive potion cooldowns aggressively.
- 15-20 Ironshield Potions for tanks expecting repeated physical-damage attempts.
- 5-10 Major Shadow Protection Potions for Reliquary, Mother Shahraz, and Illidan.
- 5 Major Fire Protection Potions for Illidan's Flames of Azzinoth phase.
- 5 Free Action Potions and 2-5 Living Action Potions for trash emergencies.
- 5-10 Nightmare Seeds for dangerous progression windows.
- 3-4 Field Repair Bot 110Gs distributed across the raid.
Superior Wizard Oil provides 42 spell damage. Brilliant Wizard Oil provides 36 spell damage and 14 spell critical strike rating. Healers can choose Brilliant Mana Oil for healing plus mana regeneration or Superior Mana Oil for stronger mana regeneration. Rogues and Shamans should use their normal poisons and weapon imbues instead of replacing an essential class effect with a generic stone or oil.
Physical DPS can use Elixir of Demonslaying for 265 attack power against Demons. It is particularly strong against Supremus, Mother Shahraz, and Illidan, but replacing Flask of Relentless Assault only makes sense when enough of the elixir's five-minute duration is spent attacking a Demon.
Major protection potions absorb roughly 2,800-4,000 damage of their school. They are not mandatory on every pull, but they can prevent deaths while the raid is learning Fatal Attraction, Reliquary transitions, or Illidan's Fire and Shadow phases. A Cauldron of Major Shadow Protection can supply the entire raid before Mother Shahraz.
Free Action Potion does not prevent Fear. Use Tremor Totem, Fear Ward, Will of the Forsaken, Berserker Rage, or other class tools against fear mechanics. Refresh Healthstones whenever possible and make sure everyone brings class reagents, ammunition, pet food, poisons, resistance pieces, and repair money.
Do You Need Resistance Gear for Black Temple?
Yes, but not on every player for every boss. Black Temple uses three distinct resistance assignments.
The largest raid-wide requirement is Mother Shahraz. A practical starting target for non-tanks is 244 buffed Shadow Resistance. Prayer of Shadow Protection gives 70, so players need about 174 from gear before the raid buff. The Medallion of Karabor contributes 40. Tanks usually prioritize survivability and threat because they are not selected by Fatal Attraction while actively tanking.
Crafted Shadow Resistance sets are sold through recipes from Okuno, the Ashtongue Deathsworn quartermaster. They require Hearts of Darkness from Black Temple and Mount Hyjal. Do not wait until the raid reaches Shahraz to discover that half the roster never crafted its set.
Illidan requires two Fire Resistance tanks for the Flames of Azzinoth. Aim for roughly 365 buffed Fire Resistance while preserving enough health and defensive stats to survive melee hits. Auras, totems, and buffs can contribute part of the total.
Illidan's Demon Form is normally tanked by a Warlock in Shadow Resistance gear. Around 335-365 buffed Shadow Resistance and approximately 12,000 health provide a comfortable progression target. The Warlock also needs reliable threat, so do not replace every offensive stat with resistance if it makes control unstable.
Black Temple Trash Packs and Important Mobs
Black Temple contains much more conventional trash than Mount Hyjal. Most packs are manageable with marking, crowd control, and careful pulls, but several enemies can wipe the raid if ignored.
|
Enemy |
Main Threat |
What to Do |
|---|---|---|
|
Booming Voice dramatically accelerates nearby allies |
Kill first and keep nearby casters interrupted |
|
|
Hooks players and disrupts positioning |
Control or kill before it drags healers into melee |
|
|
Shell Shield reflects magic damage |
Casters stop attacking during the shield; physical DPS finish it |
|
|
Raid-wide Fear and heavy area damage |
Maintain Tremor Totem and Fear Ward coverage; avoid pulling patrols together |
|
|
Fear, cleave, and dangerous tank pressure |
Face away, control Fear, and never combine several accidentally |
|
|
Spell Absorption can lead into lethal Chaotic Retribution |
Make it the hard kill priority and stop uncontrolled spell spam |
|
|
Chaotic Light frontal and Whirling Blade |
Face away from the raid and move from the spinning weapon |
|
|
Freezing Trap and Silencing Shot |
Dispel roots quickly and keep healers spread |
|
|
Meteor-style shared damage |
Stack the assigned group to split the hit |
|
|
Whirlwind |
Disarm where possible and move out immediately |
|
|
Interrupt or stun, purge Bloodlust, and kill Windfury Totems instantly |
||
|
Arcane Charge can reach lethal stacks |
Track the target and pre-shield or heavily heal them |
The Coilskar packs before Naj'entus and Supremus are dangerous because their support abilities multiply each other. Crowd control the casters, keep Dragon Turtles facing away, and announce Shell Shield so casters do not kill themselves through reflected damage.
After Supremus, the Ashtongue packs mix Battlelords, Mystics, Primalists, Stormcallers, and Feral Spirits. Mystics are usually the first target because Chain Heal and Windfury Totem can extend the pull or suddenly kill a tank. Purge hostile Bloodlust immediately. The Ashtongue become friendly after Shade of Akama dies, so killing Shade early reduces the amount of trash you may need to fight later.
Before Teron Gorefiend, face Shadowmoon Champions away from the raid and dispel Freezing Traps from Houndmasters. The halls around Reliquary of Souls contain tightly packed patrols and a spirit gauntlet. Keep the raid moving during the soul waves, but do not let the front group enter the boss room before everyone has recovered.
The Den of Mortal Delights contains some of the raid's most annoying trash. Use Tremor Totem against Nightlords, remove poisons from Ashtongue Stalkers, and avoid pulling patrolling Sisters into Mother Shahraz. Before Council and Illidan, prioritize Shadowmoon Reavers and Promenade Sentinels. One missed Chaotic Retribution or an unhealed Arcane Charge can erase a full-health player.
Black Temple Boss Tactics
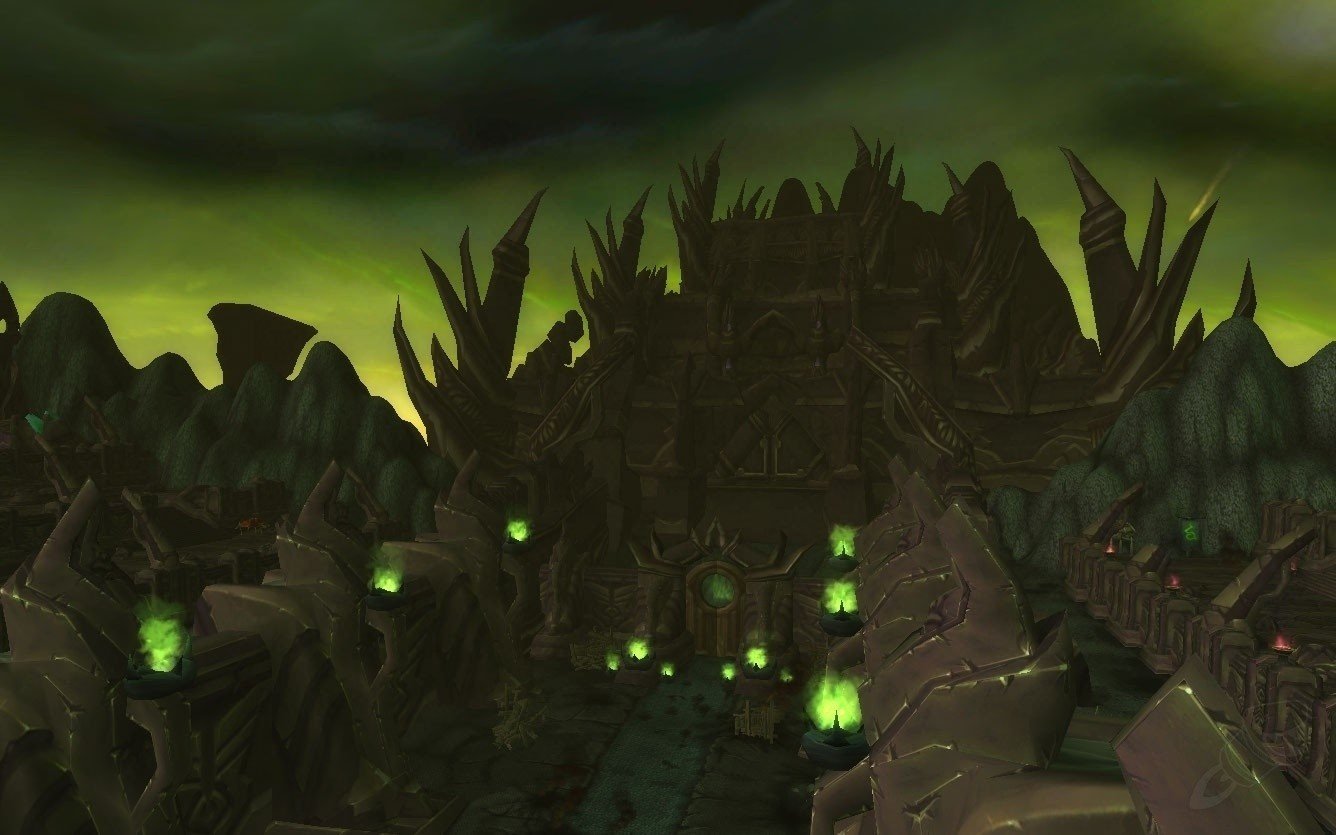
The following strategies cover the core mechanics and assignments for all nine encounters. The exact damage and resistance requirements may feel easier as Phase 3 gear improves, but the positioning and failure conditions do not change.
High Warlord Naj'entus Strategy
High Warlord Naj'entus is the first boss and a raid-wide health check. Every player should have approximately 10,000 health after buffs so Tidal Burst cannot kill them from full health. Spread around the boss by at least six yards without outranging healers.
|
Ability |
What It Does |
|---|---|
|
Hits a random player and nearby allies for physical damage |
|
|
Pins a player in place, deals initial damage, and continues damaging them until another player removes the spine |
|
|
Makes Naj'entus immune and restores health until a collected spine breaks the shield |
|
|
Deals about 8,500 Frost damage to the entire raid when Tidal Shield breaks |
|
|
Greatly increases Naj'entus's damage if the encounter lasts too long |
The tank should hold Naj'entus in the middle of the room and face him away from the raid. Melee can spread around his large hitbox instead of stacking on one point. Ranged players and healers should also keep six-yard gaps so Needle Spine does not strike several people.
When Impaling Spine pins a player, somebody standing nearby must click the visible spine to remove it. The rescuer receives a Naj'entus Spine item. Do not remove it from the action bar or throw it immediately. The raid needs that spine for the next Tidal Shield. Naj'entus periodically surrounds himself with Tidal Shield. He becomes immune to damage and begins recovering health. Healers must top the entire raid before the assigned player uses the collected spine on the shield. Breaking it triggers Tidal Burst and deals approximately 8,500 Frost damage to every player. Do not break the shield while someone is low. The extra seconds of healing gained by waiting are worth more than the small amount of boss health restored by Tidal Shield. Use Healthstones, Super Healing Potions, and personal defensives if your health is not safe when the raid leader calls for the throw. Use Bloodlust or Heroism on the pull. There is no later vulnerability phase worth saving it for, and front-loading damage reduces the number of shields the raid must survive. Once the group handles the spine, top-off, and shield-break sequence consistently, Naj'entus becomes a simple repeating encounter.
Supremus Strategy
Supremus alternates between a 60-second tank phase and a 60-second movement phase. The encounter has very few abilities, but volcanoes and poor Fixate kiting can kill players almost instantly.
|
Ability |
What It Does |
|---|---|
|
Hits the nearby high-threat player with the highest current health, usually an off-tank |
|
|
Creates a moving fire trail that deals heavy damage to anyone standing inside it |
|
|
Makes Supremus chase a random player during Phase Two |
|
|
Spawns a volcano beneath a player and deals rapidly escalating Fire damage nearby |
|
|
Punishes a Fixate target who moves too far away from Supremus |
During the tank phase, the main tank holds Supremus near the middle of the courtyard. Two off-tanks stay in melee range, remain high on threat, and keep their health topped so Hateful Strike lands on them instead of a melee DPS player. Healers should assign direct coverage to all three tanks. Move Supremus gradually when Molten Flame runs through the melee position. Do not drag him across the whole courtyard. Ranged players spread around the room and stay far enough from melee that new ground effects do not block the tank group. When Phase Two begins, Supremus ignores normal threat and fixates random players. The targeted player runs away while everyone else continues attacking from safe positions. Keep moving, but do not kite more than roughly 40 yards from the boss. Excessive distance can trigger Charge and kill the target.
Volcanoes are the main danger. Their damage ramps up extremely quickly, so move the instant a volcano forms under or near you. Do not finish a cast, wait for a heal, or try to squeeze through a narrow gap. Move sideways into open ground and resume attacking only after reaching safety.
Threat resets when the movement phase ends. DPS must stop until the main tank has control. A clean transition is more important than a few early attacks. Bloodlust or Heroism works well during the first tank phase, when the entire raid has stable uptime.
Shade of Akama Strategy
Shade of Akama is a two-part add-control encounter. Six Ashtongue Channelers hold the Shade in place while waves of enemies enter from the side doors. Once the channels are broken, the raid must kill the Shade before it defeats Akama.
|
Enemy or Mechanic |
What It Does |
|---|---|
|
Maintains the binding channel on Shade of Akama and does not fight back |
|
|
Runs to the Shade and replaces a dead Channeler |
|
|
Side-door adds |
Elementalists, Spiritbinders, Rogues, and Defenders pressure tanks and healers |
|
Becomes active after the channels end and attacks Akama directly |
Assign one tank and a small control team to each side entrance. Pick up incoming Defenders before they reach healers. Interrupt Spiritbinders and Elementalists, then use stuns, traps, fears, and AoE to keep the mixed packs under control.
The main DPS group focuses the six Channelers. Cleave nearby adds when it does not reduce Channeler damage, but do not let the entire raid turn around for every small spawn. The goal is to end the channeling phase before the side groups become overwhelmed. Ashtongue Sorcerers periodically run toward the Shade and begin channeling. Mark and kill them immediately. Every active Sorcerer delays the transition, giving the side doors more time to fill the room.
Once every channel ends, the Shade moves toward Akama. Players cannot tank it normally because Akama holds its attention. Use Bloodlust or Heroism and burn the Shade before Akama dies. Tanks continue controlling leftover adds, but almost every damage dealer should switch to the boss. Defeating Shade of Akama also makes many Ashtongue enemies in the surrounding section friendly. This is one reason raids commonly kill Shade first after Supremus.
Teron Gorefiend Strategy
Teron Gorefiend is a personal-responsibility fight. The normal boss mechanics are manageable, but every player who receives Shadow of Death must use the temporary ghost abilities correctly or their Shadowy Constructs will reach the raid.
|
Ability |
What It Does |
|---|---|
|
Kills the target after 55 seconds, turns them into a ghost, and summons four Shadowy Constructs |
|
|
Moves toward living players and can quickly wipe the raid if it escapes the ghost |
|
|
Applies a dispellable Fire damage-over-time effect |
|
|
Increases Shadow damage taken by affected players |
|
|
Summons a stationary blossom that attacks random raid members |
The tank should hold Teron in a fixed position. Melee stack behind him, while ranged players and healers spread around the assigned side of the room. Keep the back corners clear for Shadow of Death targets. Dispel Incinerate immediately. Crushing Shadows makes any additional Shadow damage more dangerous, so affected players should use a Healthstone or defensive if their health drops. Doom Blossoms contribute steady random damage but are normally healed through rather than attacked. When Shadow of Death appears, the marked player has enough time to finish a normal damage cycle before moving. At about ten seconds remaining, run to the assigned far corner. Dying beside the raid causes the Constructs to start too close to their targets. After death, the player gains a temporary ghost action bar. Immediately place the area slow or root on the spawning Constructs, use the area attack, and then tab between targets with the single-target lance. Keep all four controlled and kill them before the ghost expires. Do not tunnel one Construct while the other three walk out of the slow. Every eligible raider should practice the ghost controls before progression. A simulator, WeakAura, or target-dummy practice setup is more useful than hearing the explanation for the first time after receiving Shadow of Death. Use Bloodlust or Heroism early so every living player benefits before deaths begin. Teron is a pure execution check: if every marked player kills their Constructs, the boss usually dies; if even one wave escapes, the pull often collapses.
Reliquary of Souls Strategy
Reliquary of Souls contains three different essences separated by waves of Enslaved Souls. Each phase changes the basic rules of combat, so the raid needs separate tank, interrupt, and cooldown plans for all three.
|
Phase |
Main Mechanics |
|---|---|
|
Healing is disabled, armor becomes ineffective, and the nearest player receives Fixate |
|
|
Damage is reflected, maximum mana drains over time, Rune Shield must be stolen, and Spirit Shock must be interrupted |
|
|
Raid damage escalates continuously while Spite and Soul Scream punish poor threat and positioning |
Phase One: Essence of Suffering
Aura of Suffering prevents all healing and reduces armor to zero. Since damage cannot be restored, the goal is to distribute melee hits across several durable players rather than letting one tank absorb the entire phase The Essence fixates the nearest player. Begin with the main tank directly in front and the backup tanks a step behind. When the active tank's health becomes unsafe, they move back and the next tank steps closer to take Fixate. Keep the swaps controlled so the boss does not turn into melee. Dispel Soul Drain quickly. It damages the target and transfers health to the boss, wasting limited player health and extending the phase. When the Essence enrages, use Evasion, defensive cooldowns, avoidance, and planned tank rotations rather than trying to heal through it.
Browse our hottest TBC Anniversary Boosting services
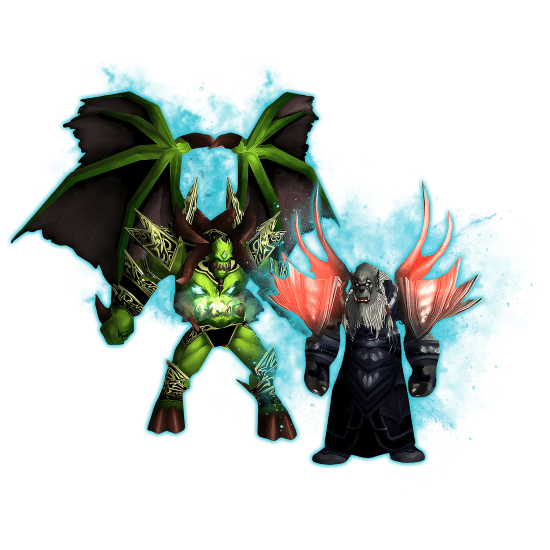







Phase Two: Essence of Desire
Aura of Desire reflects a portion of all damage back to the attacker and gradually reduces maximum mana. Every damage dealer must watch their own health. Stop attacking before reflected damage kills you, especially during large critical hits or execute abilities. Assign a strict kick rotation to Spirit Shock. One missed cast can kill the tank or destabilize the phase. Apply Curse of Tongues to make the cast easier to manage, but do not rely on the slow as a replacement for assigned interrupts. The Essence periodically casts Rune Shield. A Mage should Spellsteal it immediately. Until the shield is removed, interrupts may fail and the boss absorbs damage. Deaden increases damage taken by the Essence, so call controlled burst during the debuff while players remain conscious of reflected damage.
Phase Three: Essence of Anger
The final Essence deals steadily increasing raid damage. Give the tank a clear threat lead because the boss punishes threat mistakes aggressively. Soul Scream deals damage and removes rage or mana from targets in front, so keep the boss faced away from the raid. Spite targets players with a short immunity followed by lethal damage when the effect expires. Affected players need immediate focused healing as the immunity ends. Use personal defensives if available. Activate Bloodlust or Heroism and rotate healing cooldowns as the aura ramps. Do not spend every raid cooldown in the opening seconds. The final part of the phase is the dangerous one, and the raid must kill the Essence before the increasing damage becomes unhealable. Between essences, Enslaved Souls stream into the room. Stack them for AoE, but do not let tanks overextend away from healers. Killing the souls restores health and mana, making these short transitions essential recovery periods.
Gurtogg Bloodboil Strategy
Gurtogg Bloodboil alternates between a normal tank phase and a Fel Rage phase. He cannot be controlled by an ordinary Taunt, so all three tanks must build threat and execute swaps without relying on a forced target change.
|
Ability |
What It Does |
|---|---|
|
Stacking bleed and armor reduction applied to the current tank |
|
|
Targets the five farthest players and applies a stacking damage-over-time effect |
|
|
Frontal Nature damage that must be aimed away from the raid |
|
|
Damages and disorients the current tank, allowing the next threat target to take over |
|
|
Knocks back a tank and reduces their threat |
|
|
Fixates a random player and gives both the target and Gurtogg powerful temporary effects |
Phase One: Bloodboil
Use three tanks and keep all of them near the top of the threat table. Acidic Wound stacks on the current tank and lowers armor, so rotate around seven or eight stacks. Since Gurtogg is not conventionally tauntable, the next tank must already have enough threat to take control when the current tank backs off or receives Bewildering Strike. Face Gurtogg away from the raid so Fel Acid Breath never clips melee. Tanks should stand close enough to maintain threat but avoid placing unnecessary players in front of the boss. Split 15 ranged players and healers into three Bloodboil groups of five. The active group moves farthest from Gurtogg before the cast, receives the debuff, and then steps closer while the next group moves out. Five Bloodboil casts occur in a cycle, so a simple rotation is Group 1, Group 2, Group 3, Group 1, Group 2. Distance, not a manually selected target, determines who receives Bloodboil. All players outside the active group must stand clearly closer to the boss. One person drifting behind the assigned line can take an unintended stack and ruin the rotation.
Phase Two: Fel Rage
Gurtogg selects a random player for Fel Rage. That player gains a large increase to health, armor, healing received, damage, and threat, allowing them to survive as the temporary tank. They should stand in front of Gurtogg and keep attacking throughout the phase. Assign several healers to the Fel Rage target immediately. The normal tanks continue receiving enough support to survive leftover effects but do not attempt to take the boss back until Fel Rage ends. The target must not Vanish, Feign Death, use Ice Block, Divine Shield, or otherwise remove themselves from combat. Breaking the fixation can send Gurtogg into the raid. Everyone else should reduce threat and avoid overtaking the target. At the end of Fel Rage, the normal threat table returns. DPS slows down while the tanks regain control and re-establish the Acidic Wound rotation. Use Bloodlust or Heroism during a stable damage window rather than during a chaotic transition.
Mother Shahraz Strategy
Mother Shahraz is the raid's Shadow Resistance and positioning check. Non-tanks should begin progression with around 244 buffed Shadow Resistance. The fight becomes less punishing with better gear, but Fatal Attraction can wipe even a well-equipped group if its targets move poorly.
|
Ability |
What It Does |
|---|---|
|
Deals enormous physical damage divided between up to three tanks in front of Shahraz |
|
|
Teleports three players together and repeatedly damages them and nearby allies until they separate |
|
|
Silences players within 18 yards |
|
|
Random Beams |
Applies recurring Shadow effects that damage, drain mana, or disrupt players |
|
Increases damage taken from one magic school while reducing damage taken from another |
Three tanks stack tightly in front of Mother Shahraz. Saber Lash is divided between them. If one tank moves too far away, the remaining tanks can receive an unsurvivable hit. Keep Shahraz stationary unless Fatal Attraction or room geometry forces a controlled adjustment. The rest of the raid spreads behind and around the boss. Melee should stand at maximum melee range when possible, while ranged players maintain enough space to react to teleports without crossing through the tank group. Fatal Attraction selects three non-tanks and teleports them to the same location. All three immediately run in different directions until the effect ends. Standing together causes rapidly repeated Shadow explosions. Mark three escape directions before the pull so players do not hesitate or run through the main raid. If Fatal Attraction places the group near a wall, do not all follow the same open route. One player can move along the wall while the other two split toward the room. Healthstones, Major Shadow Protection Potions, and instant self-healing can buy time, but movement is the real solution. Silencing Shriek affects players within 18 yards. Ranged healers stay outside that radius, while melee accepts the short silence and continues moving for other mechanics. Keep the Saber Lash tanks topped before each silence so a brief interruption does not become a tank death. The random beams provide steady raid damage throughout the encounter. Shadow Resistance reduces much of this pressure and makes Fatal Attraction more forgiving. Use Bloodlust or Heroism after positioning is stable, then prioritize clean teleports over damage uptime.
The Illidari Council Strategy
The Illidari Council consists of Gathios the Shatterer, Veras Darkshadow, Lady Malande, and High Nethermancer Zerevor. They share one health pool, but each requires a separate tanking or control assignment. The pull itself is one of the hardest moments of the encounter.
|
Council Member |
Main Threats |
Primary Assignment |
|---|---|---|
|
Consecration, seals, judgments, auras, and heavy melee damage |
Conventional tank plus melee damage group |
|
|
Vanish, Deadly Poison, and Envenom |
Physical tank who re-establishes control after every vanish |
|
|
Interrupt team and focused dispels |
||
|
Mage tank maintaining Spellsteal and ranged threat |
Have the Mage tank initiate on Zerevor or establish control immediately with Misdirection support. Other Hunters can direct Gathios and Veras toward their assigned tanks. Malande does not need conventional tanking, but her interrupt team should reach her quickly without standing in Zerevor's area damage.
Gathios the Shatterer
A conventional tank holds Gathios away from the other Council members and slowly moves him out of Consecration. Gathios hits extremely hard, so assign dedicated healers and prioritize health over aggressive threat gearing. Melee normally attack Gathios because he is the safest sustained target. Dispel his harmful judgments and remove beneficial effects where possible. When he uses Blessing of Protection or Blessing of Spell Warding, the appropriate physical or magical damage dealers switch targets instead of wasting attacks into immunity.
Veras Darkshadow
A second physical tank handles Veras. He periodically Vanishes, removes himself from normal targeting, and reappears to poison a raid member. The poison target needs immediate healing because Deadly Poison followed by Envenom can deal a large burst. Veras resets or disrupts threat through his vanish cycle. The assigned tank must be ready to pick him up when he reappears. Other players should not chase him across the room or drag themselves through Consecration, Blizzard, or Flamestrike.
Lady Malande
Apply Curse of Tongues and assign at least two reliable interrupters to Malande. Circle of Healing must not complete. Since the Council shares health, one successful heal restores a meaningful amount to the entire encounter. Malande also uses Reflective Shield. Physical attacks against the shield can reflect damage, while the shield may prevent the interrupt team from functioning normally. Purge or dispel it immediately and have damage dealers stop attacking if removal is delayed.
High Nethermancer Zerevor
A Mage tanks Zerevor at range by Spellstealing Dampen Magic and generating threat with spells. Dedicated healers stay in range of the Mage without moving close enough to be hit by Arcane Explosion. The entire raid avoids Blizzard and moves out of Flamestrike as soon as its first visual appears. Zerevor should remain isolated from the other Council members so his area effects do not overlap the melee group. Use Bloodlust or Heroism after all four assignments are stable. Council is not a burst race. Maintain interrupts, keep the four enemies separated, move out of every ground effect, and let shared-health damage accumulate safely.
Illidan Stormrage Strategy
Illidan Stormrage is a five-phase encounter that uses every specialized assignment prepared for the raid. You need one conventional main tank, two Fire Resistance tanks for the Flames of Azzinoth, and one Shadow Resistance Warlock for Demon Form.
|
Phase |
Main Mechanics |
|---|---|
|
Phase One |
|
|
Phase Two |
Two Flames of Azzinoth, Eye Blast, Blaze, Fireball, and Dark Barrage |
|
Phase Three |
Phase One mechanics plus Agonizing Flames |
|
Phase Four |
Demon Form, Shadow Blast, Flame Burst, Aura of Dread, and Shadow Demons |
|
Phase Five |
Maiev's traps, Illidan's Enrage, and the returning ground-phase mechanics |
Phase One: The Betrayer
The main tank faces Illidan away from the raid. Shear is the key tank mechanic. If it lands, it reduces maximum health by 60% and normally leads to a death. Shear cannot miss, but it can be dodged, parried, or blocked. Warriors should maintain Shield Block coverage, while Paladins use an avoidance and block setup that prevents the hit from landing unmitigated. Flame Crash creates a fire patch under the tank area. Move Illidan out of it without turning the boss into melee. The raid remains behind and to the sides, allowing healers to cover both the tank and scattered players. Parasitic Shadowfiend applies a debuff that later spawns two parasites. Marked players move to an assigned edge or controlled add location before expiration. Kill the Shadowfiends immediately, because their attacks can infect additional players and multiply the problem. Illidan also uses Draw Soul in a frontal cone and heals for part of the damage dealt. This is another reason nobody except the tank should stand in front.
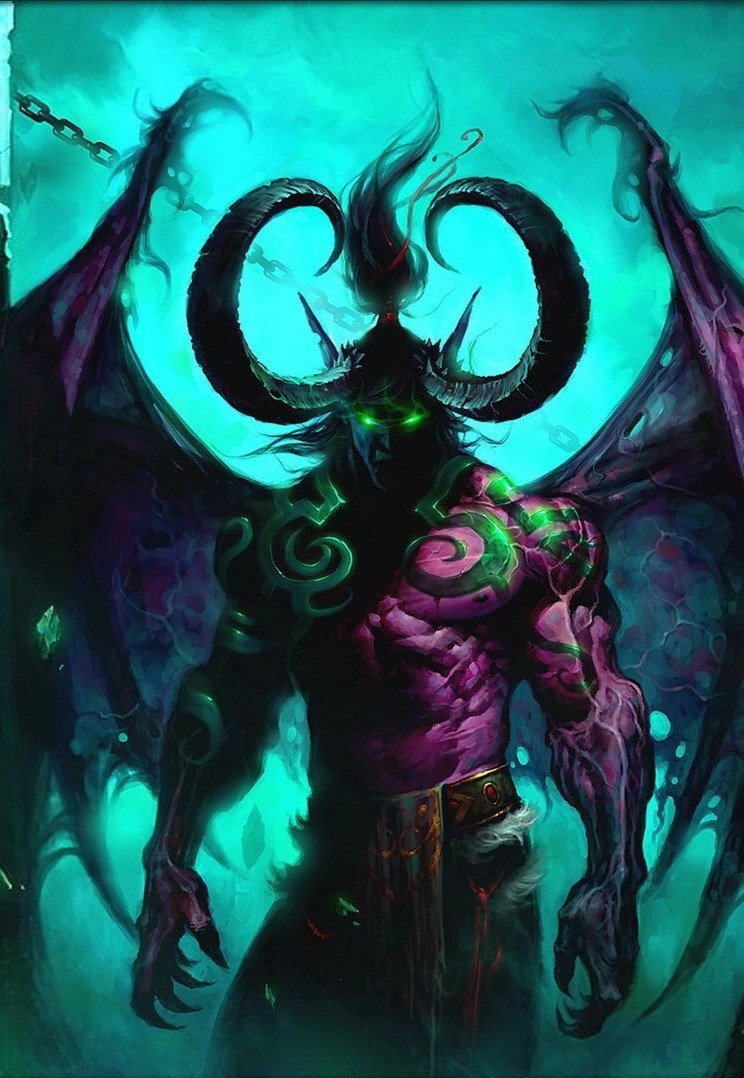
Phase Two: Flames of Azzinoth
At 65% health, Illidan flies into the air and throws down the two Blades of Azzinoth. Each blade summons one Flame of Azzinoth. The Fire Resistance tanks pick up one Flame each and position them near their corresponding blades. Never move a Flame more than approximately 25 yards from its blade. Excessive distance triggers an enormous charge and escalating damage that usually kills the tank. The two Flames must also remain separated so one tank does not receive both enemies. Each Flame leaves Blaze patches under itself. Tanks move gradually around the blade while keeping a safe route open. Ranged players split into loose groups between the two sides and focus one Flame or balance their health according to the raid plan. Eye Blast sweeps a line across the platform and leaves a lethal blue fire trail. Watch Illidan's position in the air and move before the beam reaches your group. Do not cross the lingering trail afterward. Dark Barrage targets one player with intense Shadow damage. Healers respond immediately, and the target uses a defensive or Healthstone if available. Fireballs and other aerial attacks keep the entire raid under pressure, so maintain spacing without outranging healers. Kill both Flames close together, then collapse toward the normal tanking position while Illidan lands. Threat resets during the transition.
Phase Three: Agonizing Flames
Allow the main tank to regain control before attacking. Illidan again uses Shear, Flame Crash, Draw Soul, and Parasitic Shadowfiend. Agonizing Flames targets a random player and deals heavy Fire damage to them and nearby allies. Ranged players spread, and healers focus the target through the damage-over-time effect. Do not let Agonizing Flames overlap the parasite drop group. Use Bloodlust or Heroism here and push Illidan toward 30%. Strong damage can shorten the number of Demon Form cycles, but never sacrifice parasite control or tank safety for extra uptime.
Phase Four: Demon Form
When Illidan transforms, melee players move well away. Aura of Dread damages nearby players and increases their Shadow damage taken, making melee range unsafe. The Shadow Resistance Warlock takes control from range and tanks Illidan's Shadow Blasts. Assign dedicated healers to the Warlock and keep other players spread so the Shadow Blast splash does not hit several targets. Flame Burst deals recurring Fire damage to the raid and increases Fire damage taken. Healers prepare group healing while the raid avoids stacking unnecessarily. Illidan summons Shadow Demons that fixate players and paralyze them. Kill or control the demons before they reach their targets. Stuns, slows, and focused ranged damage are essential. A demon reaching its player can kill them and destabilize the entire transition. When Demon Form ends, stop damage until the main tank regains Illidan. Phases Three and Four repeat until the boss reaches 30% health.
Phase Five: Maiev Shadowsong
At 30%, Maiev joins the fight. Illidan continues using Shear, Flame Crash, Agonizing Flames, Draw Soul, and Parasitic Shadowfiend, so the raid cannot abandon its earlier assignments. Illidan periodically becomes Enraged and deals dramatically increased damage. Maiev creates a trap nearby. The main tank kites Illidan over the active trap to remove Enrage and make him vulnerable. The raid follows carefully without walking through Flame Crash or parasite positions. Do not drag Illidan toward a trap before it fully activates. Tanks should call the route, healers should move early, and DPS should stop if threat becomes unstable during the reposition. Repeat the trap cycle until Illidan reaches zero health. The cleanest kills come from treating every landing, Demon Form ending, and trap movement as a threat reset. Waiting two seconds for control is better than losing the tank during the final minute.
Black Temple Loot
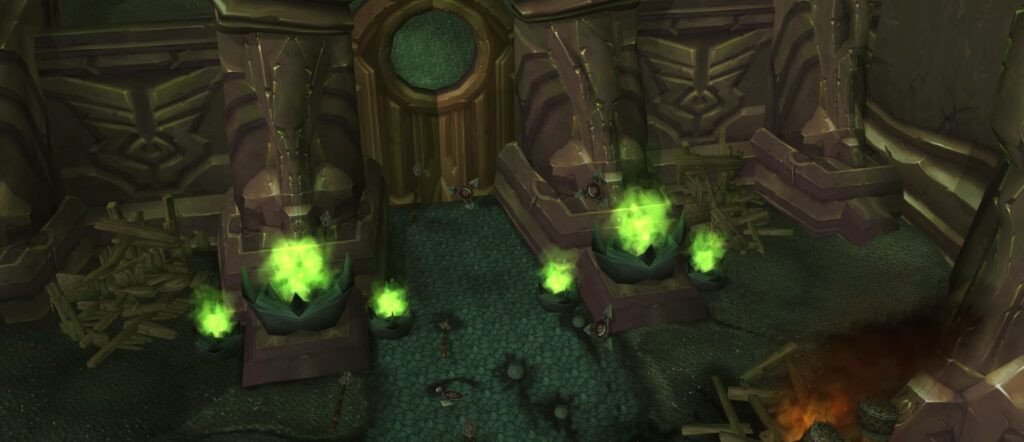
Black Temple is one of the main gearing sources in TBC Anniversary Phase 3. Most Epic items from the first eight bosses and trash are ilvl 141. Tier 6 tokens are ilvl 146, while Illidan's regular armor and weapons are ilvl 151.
|
Loot Source |
Item Level |
|---|---|
|
Boss and Trash Epics |
141 |
|
Tier 6 Tokens |
146 |
|
Illidan Stormrage Loot |
151 |
Black Temple contains three of the five core Tier 6 slots. Mother Shahraz drops Shoulders, the Illidari Council drops Legs, and Illidan Stormrage drops Chests. Azgalor and Archimonde provide Gloves and Helms in Mount Hyjal.
The three token groups are:
- Conqueror, shared by Paladins, Priests, and Warlocks.
- Vanquisher, shared by Rogues, Mages, and Druids.
- Protector, shared by Warriors, Hunters, and Shamans.
You exchange Black Temple tokens with Tydormu near the Mount Hyjal entrance inside the Caverns of Time. The following table collects the complete boss loot list in one place.


You got -20% OFF 
Black Temple Boss Loot Table
|
Item |
Slot |
Type |
Boss |
|---|---|---|---|
|
Finger |
Ring |
High Warlord Naj'entus |
|
|
Finger |
Ring |
High Warlord Naj'entus |
|
|
Feet |
Cloth Armor |
High Warlord Naj'entus |
|
|
Head |
Leather Armor |
High Warlord Naj'entus |
|
|
Shoulder |
Leather Armor |
High Warlord Naj'entus |
|
|
Head |
Mail Armor |
High Warlord Naj'entus |
|
|
Hands |
Mail Armor |
High Warlord Naj'entus |
|
|
Feet |
Mail Armor |
High Warlord Naj'entus |
|
|
Wrist |
Plate Armor |
High Warlord Naj'entus |
|
|
Feet |
Plate Armor |
High Warlord Naj'entus |
|
|
Feet |
Plate Armor |
High Warlord Naj'entus |
|
|
One-Hand |
One-Handed Axe |
High Warlord Naj'entus |
|
|
Main Hand |
Dagger |
High Warlord Naj'entus |
|
|
Two-Hand |
Polearm |
High Warlord Naj'entus |
|
|
Finger |
Ring |
Supremus |
|
|
Neck |
Amulet |
Supremus |
|
|
Relic |
Idol |
Supremus |
|
|
Waist |
Cloth Armor |
Supremus |
|
|
Chest |
Leather Armor |
Supremus |
|
|
Waist |
Mail Armor |
Supremus |
|
|
Wrist |
Mail Armor |
Supremus |
|
|
Wrist |
Mail Armor |
Supremus |
|
|
Shoulder |
Plate Armor |
Supremus |
|
|
One-Hand |
One-Handed Axe |
Supremus |
|
|
One-Hand |
One-Handed Mace |
Supremus |
|
|
Ranged |
Crossbow |
Supremus |
|
|
Shield |
Shield |
Supremus |
|
|
Finger |
Ring |
Shade of Akama |
|
|
Shoulder |
Cloth Armor |
Shade of Akama |
|
|
Wrist |
Cloth Armor |
Shade of Akama |
|
|
Wrist |
Cloth Armor |
Shade of Akama |
|
|
Legs |
Leather Armor |
Shade of Akama |
|
|
Waist |
Leather Armor |
Shade of Akama |
|
|
Shoulder |
Mail Armor |
Shade of Akama |
|
|
Hands |
Mail Armor |
Shade of Akama |
|
|
Waist |
Mail Armor |
Shade of Akama |
|
|
Feet |
Plate Armor |
Shade of Akama |
|
|
Hands |
Plate Armor |
Shade of Akama |
|
|
Legs |
Plate Armor |
Shade of Akama |
|
|
Wrist |
Plate Armor |
Shade of Akama |
|
|
Held In Off-hand |
Off-hand Frill |
Shade of Akama |
|
|
Back |
Cloak |
Teron Gorefiend |
|
|
Relic |
Totem |
Teron Gorefiend |
|
|
Head |
Cloth Armor |
Teron Gorefiend |
|
|
Chest |
Cloth Armor |
Teron Gorefiend |
|
|
Hands |
Leather Armor |
Teron Gorefiend |
|
|
Wrist |
Leather Armor |
Teron Gorefiend |
|
|
Feet |
Mail Armor |
Teron Gorefiend |
|
|
Hands |
Plate Armor |
Teron Gorefiend |
|
|
Waist |
Plate Armor |
Teron Gorefiend |
|
|
Two-Hand |
Two-Handed Axe |
Teron Gorefiend |
|
|
Ranged |
Gun |
Teron Gorefiend |
|
|
Thrown |
Thrown Weapon |
Teron Gorefiend |
|
|
Neck |
Amulet |
Reliquary of Souls |
|
|
Hands |
Cloth Armor |
Reliquary of Souls |
|
|
Hands |
Leather Armor |
Reliquary of Souls |
|
|
Shoulder |
Mail Armor |
Reliquary of Souls |
|
|
Feet |
Plate Armor |
Reliquary of Souls |
|
|
Head |
Plate Armor |
Reliquary of Souls |
|
|
Ranged |
Wand |
Reliquary of Souls |
|
|
Held In Off-hand |
Off-hand Frill |
Reliquary of Souls |
|
|
Two-Hand |
Two-Handed Mace |
Reliquary of Souls |
|
|
Finger |
Ring |
Gurtogg Bloodboil |
|
|
Back |
Cloak |
Gurtogg Bloodboil |
|
|
Shoulder |
Cloth Armor |
Gurtogg Bloodboil |
|
|
Chest |
Cloth Armor |
Gurtogg Bloodboil |
|
|
Waist |
Leather Armor |
Gurtogg Bloodboil |
|
|
Chest |
Mail Armor |
Gurtogg Bloodboil |
|
|
Legs |
Plate Armor |
Gurtogg Bloodboil |
|
|
Waist |
Plate Armor |
Gurtogg Bloodboil |
|
|
Waist |
Plate Armor |
Gurtogg Bloodboil |
|
|
One-Hand |
Dagger |
Gurtogg Bloodboil |
|
|
Two-Hand |
Staff |
Gurtogg Bloodboil |
|
|
Ranged |
Wand |
Gurtogg Bloodboil |
|
|
Trinket |
Trinket |
Gurtogg Bloodboil |
|
|
No slot |
Armor Token |
Mother Shahraz |
|
|
No slot |
Armor Token |
Mother Shahraz |
|
|
No slot |
Armor Token |
Mother Shahraz |
|
|
Neck |
Amulet |
Mother Shahraz |
|
|
Relic |
Libram |
Mother Shahraz |
|
|
Legs |
Cloth Armor |
Mother Shahraz |
|
|
Feet |
Leather Armor |
Mother Shahraz |
|
|
One-Hand |
One-Handed Sword |
Mother Shahraz |
|
|
Chest |
Plate Armor |
Mother Shahraz |
|
|
No slot |
Armor Token |
The Illidari Council |
|
|
No slot |
Armor Token |
The Illidari Council |
|
|
No slot |
Armor Token |
The Illidari Council |
|
|
Back |
Cloak |
The Illidari Council |
|
|
Waist |
Cloth Armor |
The Illidari Council |
|
|
Head |
Mail Armor |
The Illidari Council |
|
|
Head |
Plate Armor |
The Illidari Council |
|
|
Trinket |
Trinket |
The Illidari Council |
|
|
Shoulder |
Leather Armor |
The Illidari Council |
|
|
No slot |
Armor Token |
Illidan Stormrage |
|
|
No slot |
Armor Token |
Illidan Stormrage |
|
|
No slot |
Armor Token |
Illidan Stormrage |
|
|
One-Hand |
Dagger |
Illidan Stormrage |
|
|
Main Hand |
One-Handed Mace |
Illidan Stormrage |
|
|
Two-Hand |
Staff |
Illidan Stormrage |
|
|
Main Hand |
One-Handed Sword |
Illidan Stormrage |
|
|
Off Hand |
One-Handed Sword |
Illidan Stormrage |
|
|
Back |
Cloak |
Illidan Stormrage |
|
|
Finger |
Ring |
Illidan Stormrage |
|
|
Head |
Cloth Armor |
Illidan Stormrage |
|
|
Head |
Leather Armor |
Illidan Stormrage |
|
|
Head |
Plate Armor |
Illidan Stormrage |
|
|
Ranged |
Bow |
Illidan Stormrage |
|
|
Shield |
Shield |
Illidan Stormrage |
|
|
Trinket |
Trinket |
Illidan Stormrage |
|
|
Trinket |
Trinket |
Illidan Stormrage |
Illidan's non-token drops are ilvl 151 rather than the ilvl 141 items found on the earlier bosses. The Warglaives roll independently as a main-hand and off-hand weapon, so collecting the full set requires both versions to drop. In TBC, Warriors and Rogues can equip them.
Black Temple Boss Profession Recipes
Black Temple bosses and many trash mobs can drop Phase 3 profession recipes. These recipes create powerful bind-on-pickup bracers and use raid materials such as Hearts of Darkness.
|
Recipe |
Profession |
|---|---|
|
Blacksmithing |
|
|
Blacksmithing |
|
|
Leatherworking |
|
|
Leatherworking |
|
|
Leatherworking |
|
|
Leatherworking |
|
|
Tailoring |
|
|
Tailoring |
These are different from the Shadow Resistance recipes sold by Okuno. The resistance recipes are reputation rewards, while the bracer patterns above are random raid drops.
Black Temple Trash Loot
Nearly every major trash section has a chance to drop ilvl 141 bind-on-pickup epics. Black Temple trash also supplies Hearts of Darkness, Marks of the Illidari, rare epic gems, profession recipes, and Ashtongue Deathsworn reputation.
|
Item |
Slot |
Type |
|---|---|---|
|
Finger |
Ring |
|
|
Finger |
Ring |
|
|
Finger |
Ring |
|
|
One-Hand |
One-Handed Mace |
|
|
Waist |
Plate Armor |
|
|
Hands |
Plate Armor |
|
|
Feet |
Leather Armor |
|
|
Shield |
Shield |
|
|
Back |
Cloak |
The most important crafting material is Heart of Darkness. It is required for the crafted Shadow Resistance sets used on Mother Shahraz. Early Hearts should normally be controlled by the guild and assigned to raiders who still need their resistance gear.
Mark of the Illidari can be exchanged for Shattrath flasks that work inside Black Temple, Mount Hyjal, Serpentshrine Cavern, and Tempest Keep. The raid can also drop Crimson Spinel, Empyrean Sapphire, Lionseye, Shadowsong Amethyst, Pyrestone, and Seaspray Emerald.
Ashtongue Deathsworn Reputation
Black Temple is the primary place to farm Ashtongue Deathsworn reputation. The faction is unlocked naturally during the attunement chain, and completing the required quests brings a new character to Friendly before their first full raid clear.
The non-repeatable questline provides approximately 4,850 reputation in total. Inside Black Temple, regular trash typically gives 15-25 reputation and bosses provide approximately 200-250. A complete clear is worth around 7,700 reputation, so reaching Exalted normally takes about five full clears after the attunement quests. Okuno is the Ashtongue Deathsworn quartermaster inside Black Temple. After Supremus dies, the Spirit of Olum can teleport players to his area. Okuno sells crafted Shadow Resistance recipes at Friendly and Honored, followed by one class-specific trinket for every class at Exalted.
|
Reputation |
Important Rewards |
|---|---|
|
Friendly |
Plans: Shadesteel Bracers, Plans: Shadesteel Girdle, Boots and Bracers of Shackled Souls patterns, Redeemed Soul Cinch and Legguards patterns, Soulguard Bracers and Girdle patterns |
|
Honored |
Plans: Shadesteel Greaves, Plans: Shadesteel Sabots, Greaves and Waistguard of Shackled Souls patterns, Redeemed Soul Moccasins and Wristguards patterns, Soulguard Leggings and Slippers patterns, Pattern: Night's End |
|
Exalted |
One class-specific Ashtongue Talisman |
The Exalted trinkets are:
|
Class |
Reward |
|---|---|
|
Druid |
|
|
Hunter |
|
|
Mage |
|
|
Paladin |
|
|
Priest |
|
|
Rogue |
|
|
Shaman |
|
|
Warlock |
|
|
Warrior |
The trinkets are not equally valuable for every specialization, but they are guaranteed long-term rewards rather than random boss drops. Even when a class does not use its talisman permanently, reputation remains important because the earlier recipes enable the raid's Shadow Resistance gear.
F.A.Q.
How do you unlock Black Temple in TBC Anniversary?
Complete the attunement chain that begins with Tablets of Baa'ri in Shadowmoon Valley. The later steps require Fathom-Lord Karathress in Serpentshrine Cavern, Al'ar in Tempest Keep, and Rage Winterchill in Mount Hyjal. The final quests award the Medallion of Karabor and access to Black Temple.
What level do you need for Black Temple?
Black Temple is a level 70, 25-player raid. You should be level 70 and have the required attunement completed before entering.
Is the Black Temple attunement account-wide?
Yes. Once the full raid attunement is completed in TBC Anniversary, the entry unlock applies account-wide. Partial quest progress does not transfer. Alts also need to complete the chain personally if they want their own Medallion of Karabor for its 40 Shadow Resistance.
How many bosses are in Black Temple?
Black Temple has nine bosses: High Warlord Naj'entus, Supremus, Shade of Akama, Teron Gorefiend, Reliquary of Souls, Gurtogg Bloodboil, Mother Shahraz, the Illidari Council, and Illidan Stormrage.
What is the Black Temple boss order?
The opening order is Naj'entus followed by Supremus. Afterward, the raid must defeat Shade of Akama, Teron Gorefiend, Reliquary of Souls, and Gurtogg Bloodboil. Those four allow some route flexibility. Mother Shahraz, the Illidari Council, and Illidan Stormrage form the final linear sequence.
Who is the final boss of Black Temple?
Illidan Stormrage is the ninth and final boss. His encounter has five phases and requires two Fire Resistance tanks, a Shadow Resistance Warlock tank, and a conventional main tank.
How much Shadow Resistance do you need for Mother Shahraz?
Around 244 buffed Shadow Resistance is a practical progression target for non-tanks. Prayer of Shadow Protection supplies 70, leaving approximately 174 to obtain from gear. The Medallion of Karabor provides 40 Shadow Resistance.