 Dallon Avery
Super Easter Egg Guide Quick Overview:
- Complete the Main Quest on all six BO7 Zombies maps.
- Return to each map and finish its new Super Easter Egg quest.
- Collect five toys and successfully Exfil with each one.
- Get the final Warden Toy on Rex Infernus.
- Complete the Boss Rush to unlock the major Super Easter Egg rewards.
Need help collecting all the toys from all the maps? Buy Black Ops 7 Super Easter Egg service at Skycoach and get them all collected for you. You can select the ones you haven't collected yet and the final price will adjust, which is super handy!


Read closely 
Browse our hottest Call of Duty Boosting services




What is the Super Easter Egg Quest in CoD BO7?
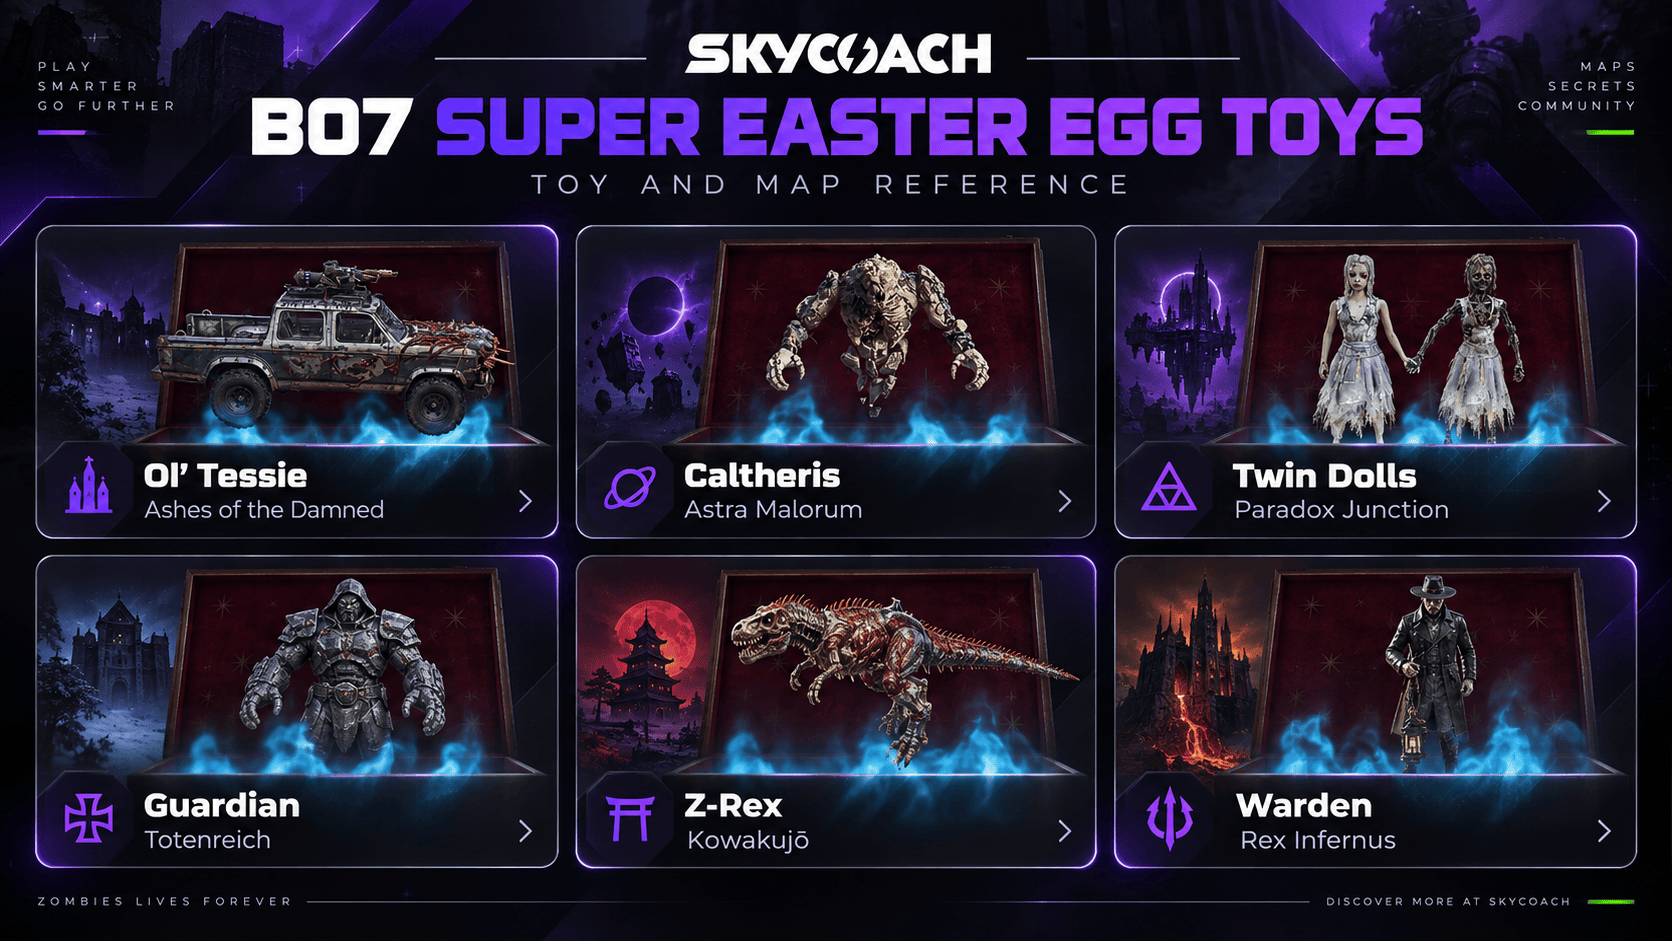
The Black Ops 7 Super Easter Egg is the final Zombies quest connecting all six Round-Based maps. Instead of taking place on one map, it sends you back through Ashes of the Damned, Astra Malorum, Paradox Junction, Totenreich, Kowakujō, and Rex Infernus.
Each map received an additional Super Easter Egg quest. These are separate from their original Main Quests. Completing each one rewards you with a unique toy tied to that map. You must collect and successfully Exfil with the first five toys before you can finish the final stage on Rex Infernus.
Once all five previous toys are registered, Rex Infernus becomes the finale. You will complete another hidden quest to obtain the Warden Toy, place all six toys on the shelf inside Her House, and unlock the final Boss Rush encounter. The Boss Rush brings back several major Zombies bosses before ending with The Warden.
You do not need to collect the toys in release order. You can complete the five preliminary map quests in whichever order you prefer. Once you successfully Exfil with a toy, it is permanently registered on the Rex Infernus shelf.
Super Easter Egg Hunt Requirements
Before you can start the Super Easter Egg hunt, you must first complete the Main Quest on every BO7 Round-Based Zombies map:
If you still need to complete any of these maps, there is a full Skycoach Main Quest walkthrough for each one. The linked guides cover the required steps, Wonder Weapons, puzzles, and boss fights. This walkthrough focuses on the new Super Easter Egg objectives instead of repeating each Main Quest from scratch.
You can complete the six prerequisite Main Quests in Standard, Cursed, or Directed Mode. However, you cannot complete the new Super Easter Egg steps in Directed Mode. Use Standard or Cursed Mode for the toy quests.
There are a few general rules you should know before starting:
- Successfully Exfil with each toy. Picking it up is not enough.
- You can collect the five preliminary toys in any order.
- Each toy remains registered after a successful Exfil. You do not need to collect them all in one session.
- Some quests require progress through the original Main Quest. This includes Wonder Weapons, map areas, and quest-specific mechanics.
- Avoid Save & Quit during solo toy runs. The safest option is to complete the map's toy quest and Exfil in one continuous match.
Several Super Easter Egg steps reuse mechanics from the original Main Quests. Whenever one of those steps comes up, this walkthrough will point you to the relevant Skycoach map guide if you need more detailed instructions.
Ashes of the Damned Super Easter Egg Walkthrough
Ashes of the Damned is your first stop in the Super Easter Egg hunt. Your goal is to complete a new side quest involving the ghostly Twins, the Necrofluid Gauntlet, and several crystals hidden inside Monolith Forest. At the end, you will receive the Ol’ Tessie Toy, which you must successfully exfil with before it counts toward the final quest.
Before you begin, pick up a Fumigator as early as possible. There is an easy one available near spawn, and having it beforehand avoids potential issues once you reach the crystal step. You will also need the Necrofluid Gauntlet and a charged Dark Flare Field Upgrade later in the quest. Decoys, Monkey Bombs, or Aether Shroud are also useful because one of the steps takes place inside the fog-covered Monolith Forest.
If you need help obtaining the Wonder Weapon or progressing through the map, follow our Ashes of the Damned Main Quest walkthrough.
Find the Twins
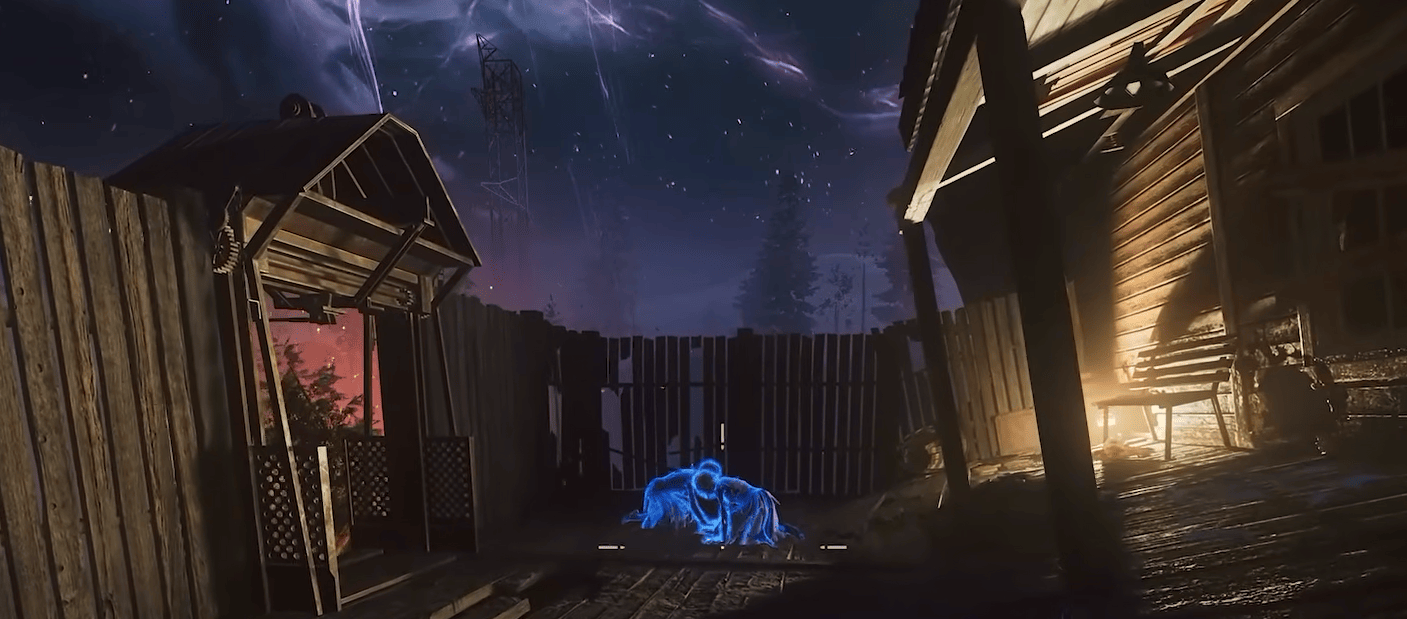
Your first objective is to locate the Twins. Their starting location changes between matches, so you will need to check several possible spots around the map. The known locations include the crashed boat between Vandorn Farm and Ashwood, the cabin area between Blackwater Lake and Ashwood, and the upper section of Ashwood near the far zipline. Some runs may also place them along the fog road between Blackwater Lake and Ashwood.
Walk up to the Twins when you find them. They will disappear and move to Vandorn Farm. When you arrive there, you should see them standing on the barn and looking toward a floating Toy Box above the nearby windmill. If the box and Twins do not appear, return to the possible spawn locations and make sure you actually triggered their first appearance.
Bring Down and Open the Toy Box
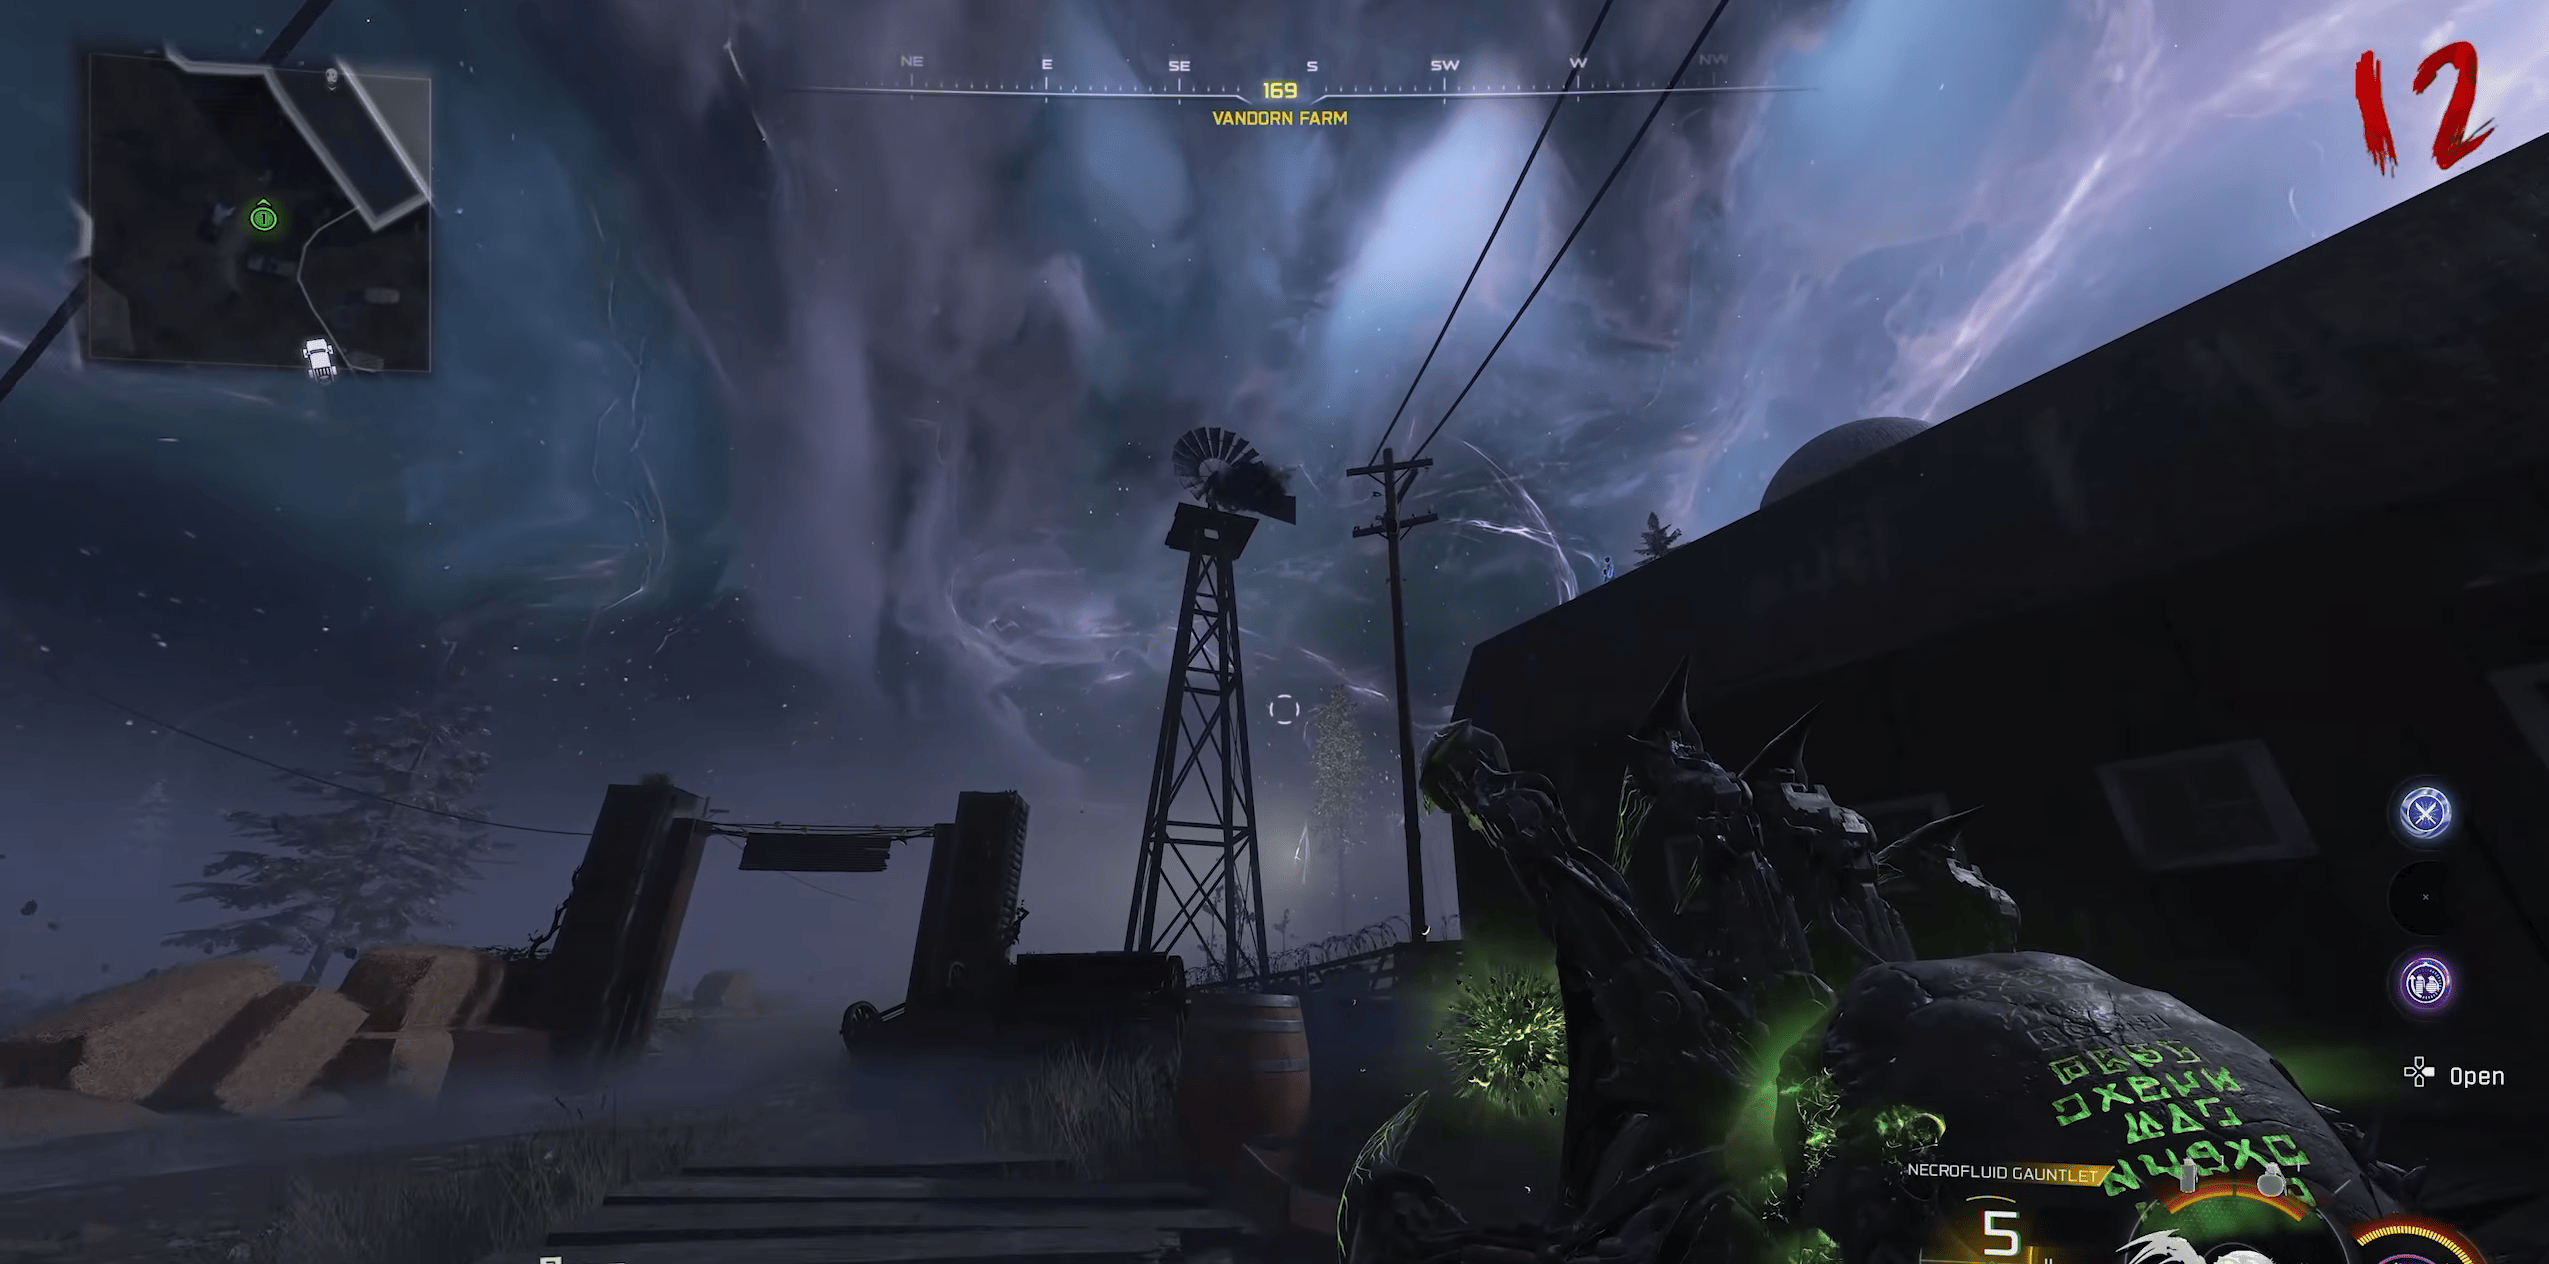
You now need the Necrofluid Gauntlet. If you have not built it yet, complete the usual Main Quest steps until you obtain it.
At Vandorn Farm, shoot the floating Toy Box with the Necrofluid Gauntlet and retract the projectile to pull the box down from the windmill. Once it reaches the ground, activate Dark Flare and hit the box with the Field Upgrade until it opens. The Twins will appear beside it and indicate that they need a toy.
Find the Three Monolith Forest Crystals
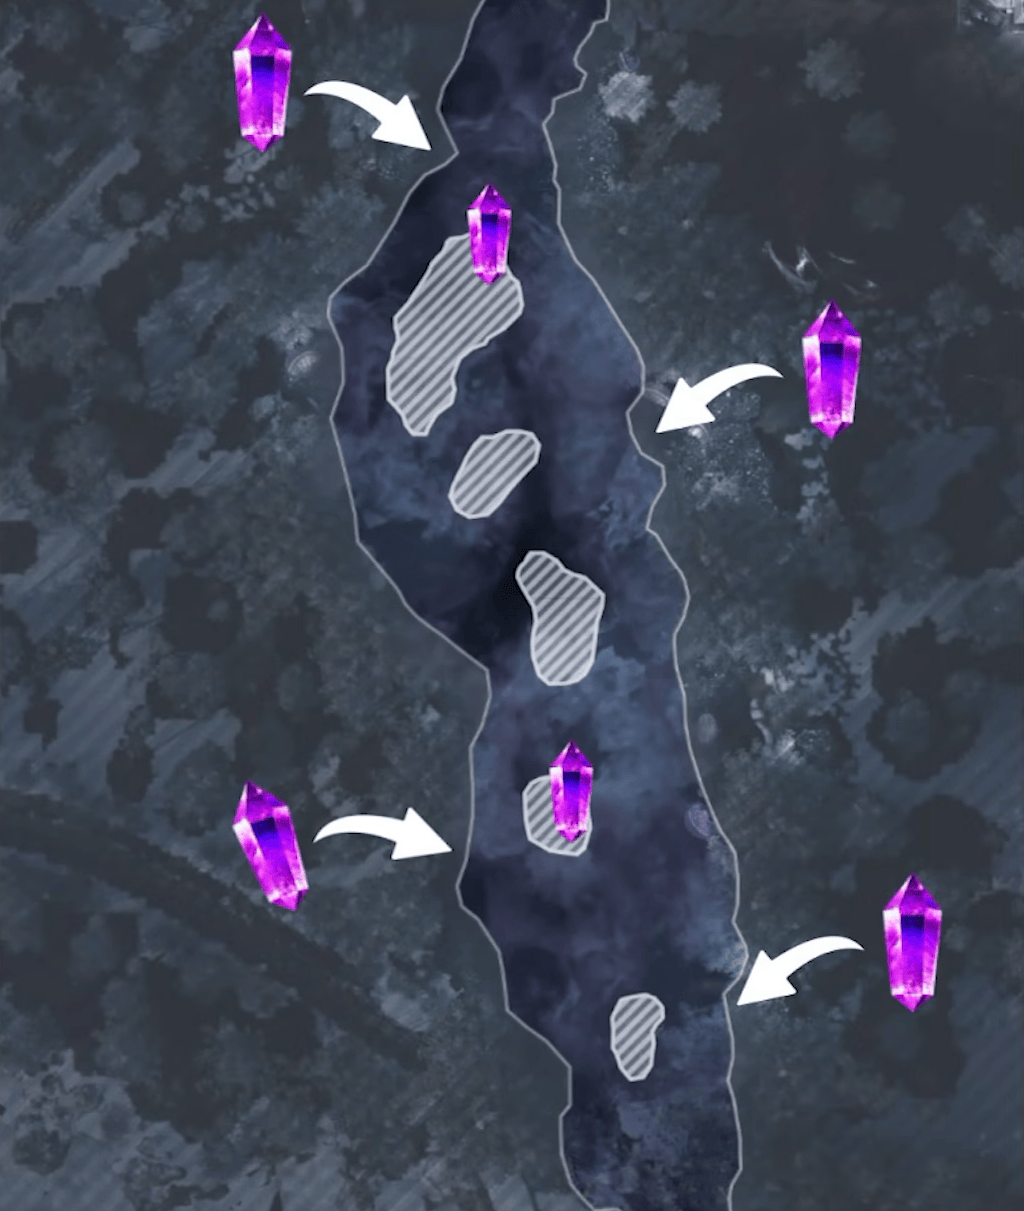
Head into Monolith Forest, between Blackwater Lake and Janus Towers. Three pink or purple crystals will be attached to the large monolith pillars somewhere inside the fog. Their positions are randomized, and they can be difficult to spot because some appear high above the ground.
Several creators repeatedly tested this step and identified six commonly observed spawn positions, although there may be additional locations. The safest approach is to scan the upper and middle portions of every monolith while moving through the forest.
When you find a crystal, shoot it with the Necrofluid Gauntlet and retract the projectile to pull it down. Once it lands, approach it with the Fumigator and interact. The crystal will glow and release a beam into the sky. Repeat the same process until you have fumigated all three crystals.
This is one of the more dangerous Ashes of the Damned steps because you need to search while fighting inside the fog. Keep moving rather than standing beneath one pillar for too long. Aether Shroud, Monkey Bombs, or Decoys can give you enough breathing room to interact with the crystals safely.
Fumigate the Meteor
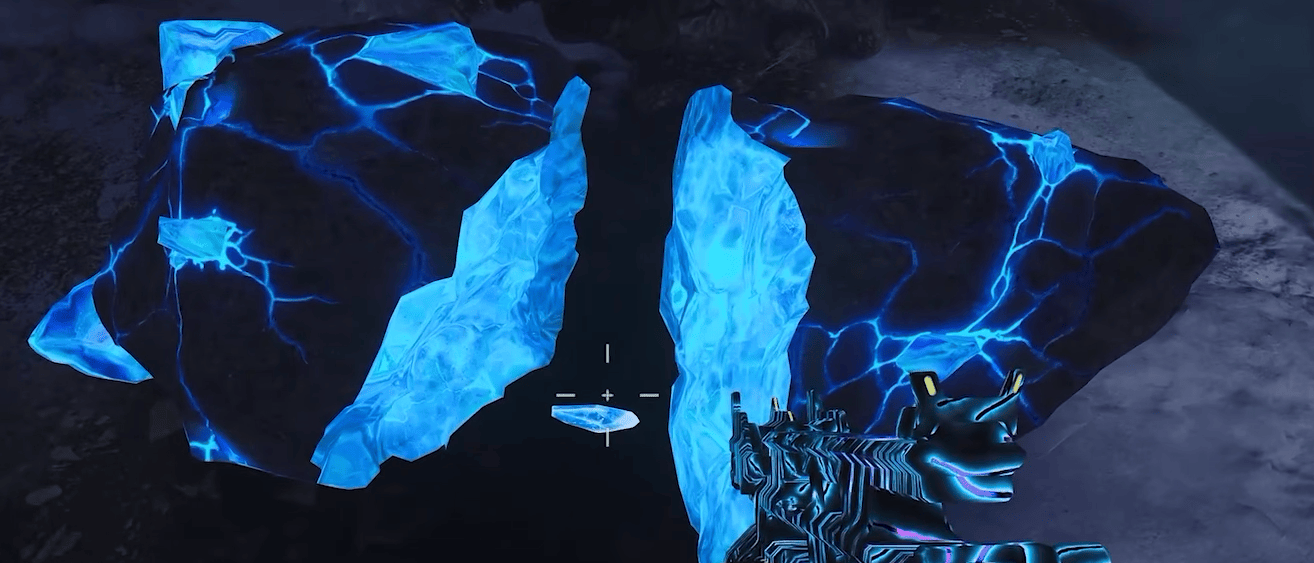
After you finish the third crystal, your screen will flash, and a meteor will crash near the edge of Blackwater Lake, close to the entrance to Monolith Forest. Approach it with the Fumigator and interact with the meteor.
Advance to the next round. The meteor will split open, revealing a smaller crystal shard inside. Pick up the shard and return to the Toy Box at Vandorn Farm.
Place the shard inside the box. You will receive several rewards, followed by the Ol’ Tessie Toy. Pick up the toy before leaving the area.
Exfil with the Ol’ Tessie Toy
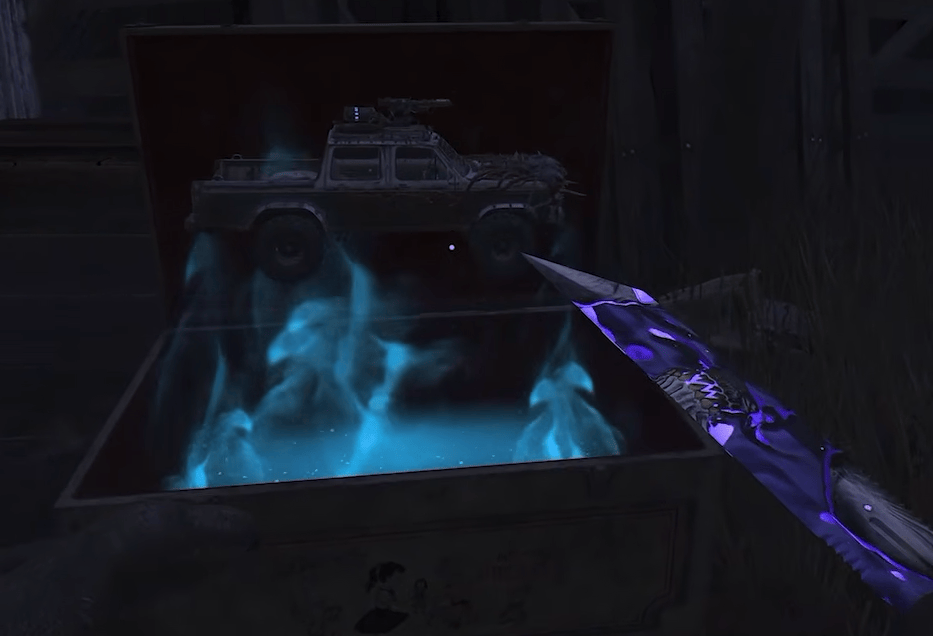
Getting Ol’ Tessie is not enough on its own. You must successfully Exfil with the toy for it to register toward the Super Easter Egg.
Continue playing until the next Exfil round and activate the Exfil. You should see the Ol’ Tessie Toy floating inside the Exfil booth, confirming that the game has recognized it. Defeat the HVT within the time limit and complete the Exfil normally.
After a successful Exfil, Ol’ Tessie will appear on the toy shelf inside Her House on Rex Infernus. You do not need to visit Rex Infernus immediately to verify it; if the toy appeared in the Exfil booth and you successfully escaped, it should be registered.
Astra Malorum Super Easter Egg Walkthrough
Astra Malorum has the longest and most involved toy hunt of the five preliminary maps. You will need to progress through most of the original Main Quest, including obtaining the LGM-1, unlocking the telescope, and eventually reaching Mars. If you need help with any of those steps, use our Astra Malorum Main Quest walkthrough. This section only covers the additional steps needed to obtain the Caltheris Toy.
You will also need an explosive, a Kazimir, the DG-2 turret for Ol’ Tessie, and two Shock Charges. Starting with the Super Easter Egg steps early is useful because several of them can be completed while you work through the regular Main Quest.
Bring Down the Toy Box
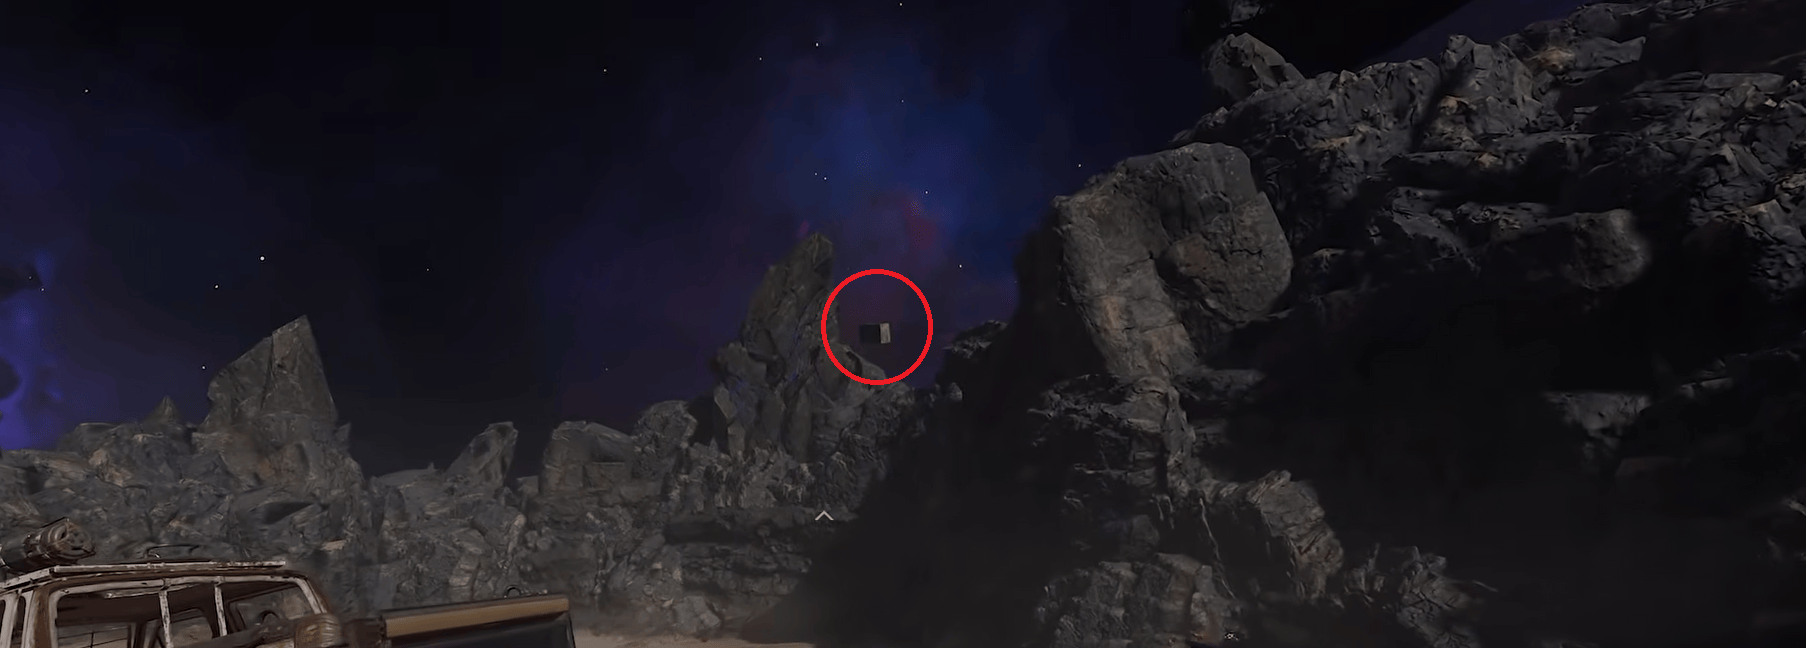
The Toy Box initially floats outside the playable area near the Luminarium. Hit it with an explosive grenade or explosive weapon, and it will move to another out-of-bounds location on the opposite side, toward spawn. Hit it with another explosive, and it will travel to the Crash Site near Ol’ Tessie.
At its final location, throw a Kazimir underneath the box. The grenade will pull it down onto the playable area, but the box will remain covered in electricity. You now need to remove that charge before it can open.
Get the DG-2 Turret and Kill O.S.C.A.R.
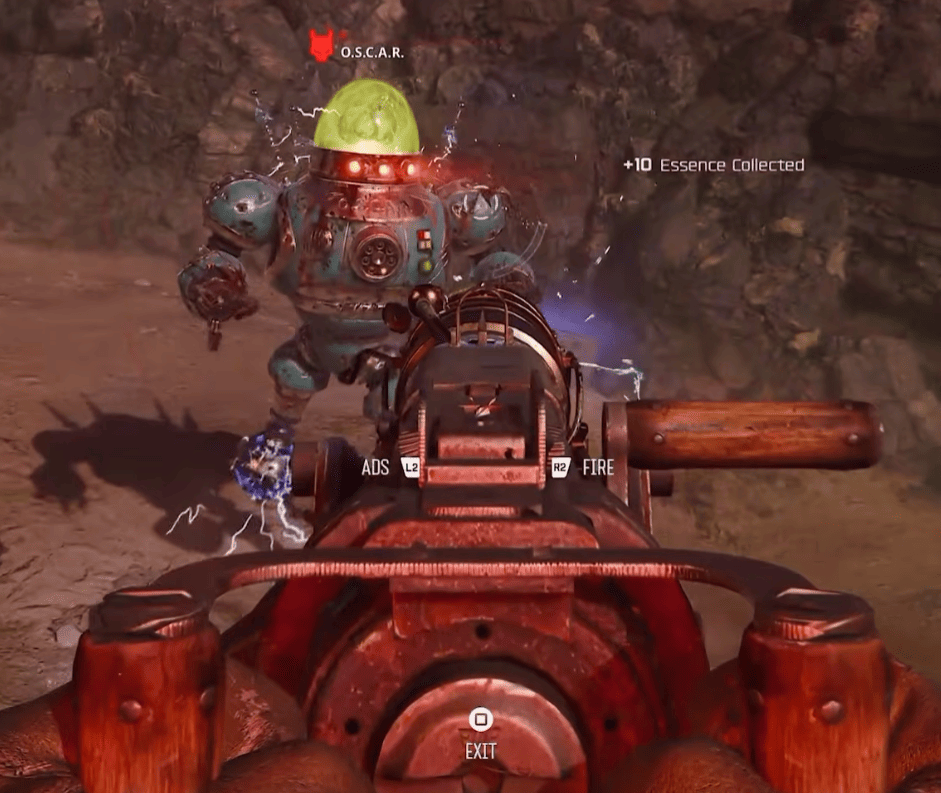
Head toward Abyssal Rim near Wisp Tea and look for the floating rock outside the map. Hit the rock with an explosive to pull it closer, then wall-jump from it to enter the zero-gravity side Easter Egg. While floating through space, interact with the DG-2 turret to pick it up. You will eventually return to the Crash Site, where you can install the turret on the back of Ol’ Tessie.
You now need O.S.C.A.R. to spawn. If you are progressing through the normal Main Quest at the same time, make sure you first listen to his playback and record the code required for the later Main Quest steps. Once you have what you need from him, weaken O.S.C.A.R. until he has very little health left and lure him toward the Toy Box.
Finish O.S.C.A.R. using Ol’ Tessie’s DG-2 turret while he is close to the box. His energy should discharge the electricity surrounding it and cause the Toy Box to open. The DG-2 turret can occasionally bug out; repeating the zero-gravity launch or getting off and back onto the turret has been reported to fix it.
Find the Shooting Star

Once you have access to the telescope in the Observatory Dome, look through it and watch for a shooting star crossing the view. Follow it with the telescope until you hear the Twins react. If you miss it, wait for it to pass through the view again.
This is separate from the UFO you need to find in the next step.
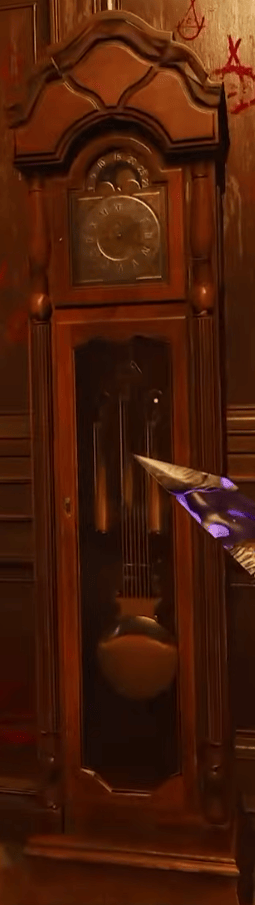
Activate the Five Grandfather Clocks
You now need to trigger the warped-time side Easter Egg by meleeing five grandfather clocks around Astra Malorum in quick succession. The clocks are spread between Museum Infinitum, the Luminarium, Machina Astralis, and the nearby Perk rooms.
The easiest route is to start with the clock in Museum Infinitum, continue into the Luminarium, then move through Machina Astralis to hit the remaining clocks around the Stamin-Up area, teleporter controls, and upper floor. You do not need Melee Macchiato for this step; you simply need to hit all five quickly enough.
When successful, your vision will distort, and you will hear a ticking effect. Return to the Observatory Dome and look through the telescope again. This time, find the UFO moving across the view and keep your crosshair over it. The UFO will stop, its lights will flash, and a Twins quote will confirm that you completed the step.
Progress to Mars
Continue through the regular Astra Malorum Main Quest until you reach Mars. You need to progress far enough to obtain and place the Ascendant Eye and activate the Resonance Pillars using the LGM-1. You do not need to continue into the normal Caltheris boss fight.
Once the pillars are active, look in the back-right section of Mars for two glowing blue circular plates. You will return to these shortly, but first you need to prepare the Wisp puzzle back on Astra Malorum.
Complete the Nine-Lantern Wisp Puzzle
There are nine lanterns spread across the Crash Site, Luminarium routes, and surrounding sections of Astra Malorum. Eight will initially be dark, while one contains a faint white Wisp.
Aim down sights at the glowing lantern for around three seconds until your screen shakes and the Wisp begins orbiting you. Move to another unlit lantern, aim at it, and melee to transfer the Wisp. Then take the Wisp back out of that lantern and repeat the process with the next one. Your goal is to spread the energy across all nine lanterns.
The lanterns are distributed as follows:
- two around the Crash Site;
- three along the Luminarium route toward Jugger-Nog;
- two on the Abyssal Rim side;
- two near the route toward Machina Astralis.
Once all nine have been activated, advance one round. The lanterns will now contain upgraded orange or golden Wisps that you can collect by aiming down sights at them. You need four Wisps for the next puzzle, although you can carry five, and taking an extra one gives you room for error.
Browse our hottest Call of Duty Boosting services
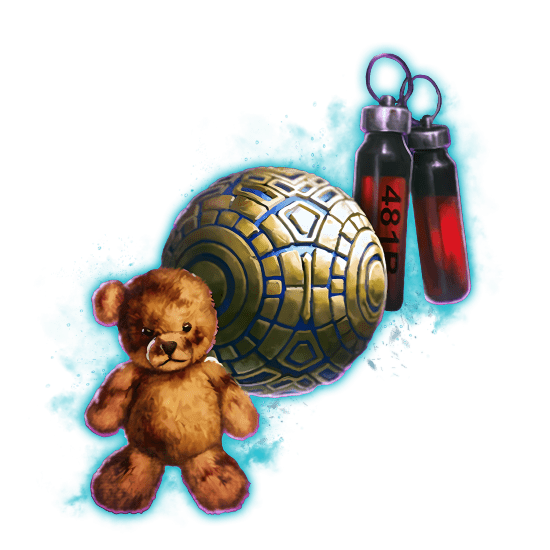






Spawn the UFO on Mars

Craft two Shock Charges and return to Mars. Throw one Shock Charge directly onto each of the two glowing blue plates in the back-right section of the arena. When a charge lands correctly, you should hear a sound and see the surrounding equipment react.
After both plates have been activated, a UFO will appear above Mars.
Solve the UFO Object Puzzle
 The UFO flashes a Morse-code sequence that tells you the intended order for four strange objects found together in the corner of Mars:
- Flamingo
- Toilet
- Space suit
- Lava lamp
Each part of the code represents the first letter of one object. Short flashes are dots, long flashes are dashes, and the long pause between sequences tells you when the code is restarting. There is no time limit here, so watch the pattern for as long as you need before attempting the puzzle.
With at least four upgraded Wisps orbiting you, melee one of the objects to fire a Wisp into it. If you chose the correct object, it will fall into the arena and the UFO will fly over to collect it. Repeat this with the remaining objects in the displayed order.
You can also brute-force the sequence. An incorrect object simply will not fall, so you can test the remaining choices until you find the correct one. Doughnuts also found that all four objects could still be delivered without following the Morse-code order, although doing the intended sequence gives better bonus rewards. Following the code is therefore the safest approach.
After the UFO takes the fourth object, it will drop a small alien. Pick it up and return to the Toy Box near the Crash Site. Place the alien inside, collect the rewards, and pick up the Caltheris Toy that appears afterward.
Exfil with the Caltheris Toy
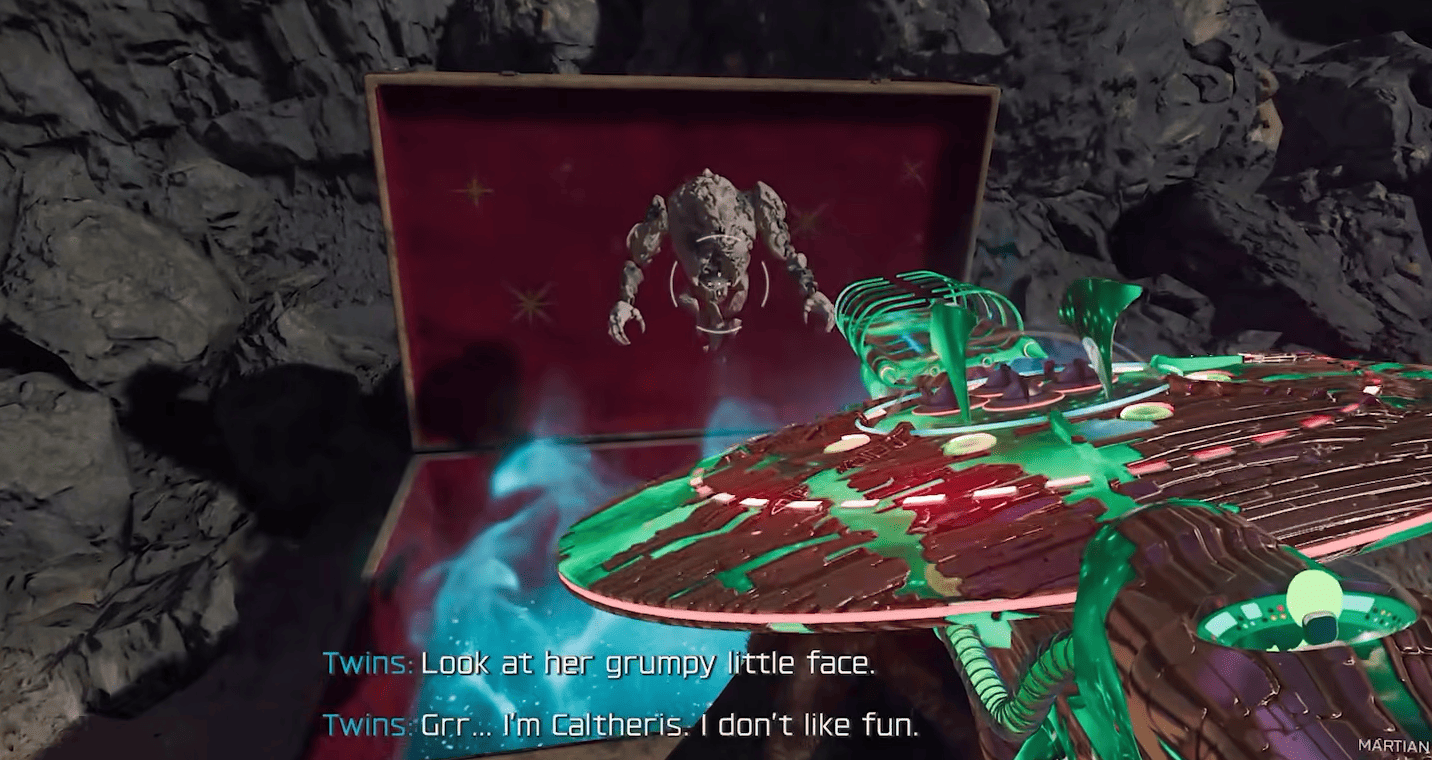
Continue until the next Exfil round and start the Exfil normally. Caltheris should appear inside the booth, confirming that you are carrying the toy. Defeat the Uber Klaus HVT within the time limit and successfully Exfil.
Once you escape, the Caltheris Toy will be permanently added to the shelf in Her House on Rex Infernus.
Paradox Junction Super Easter Egg Walkthrough
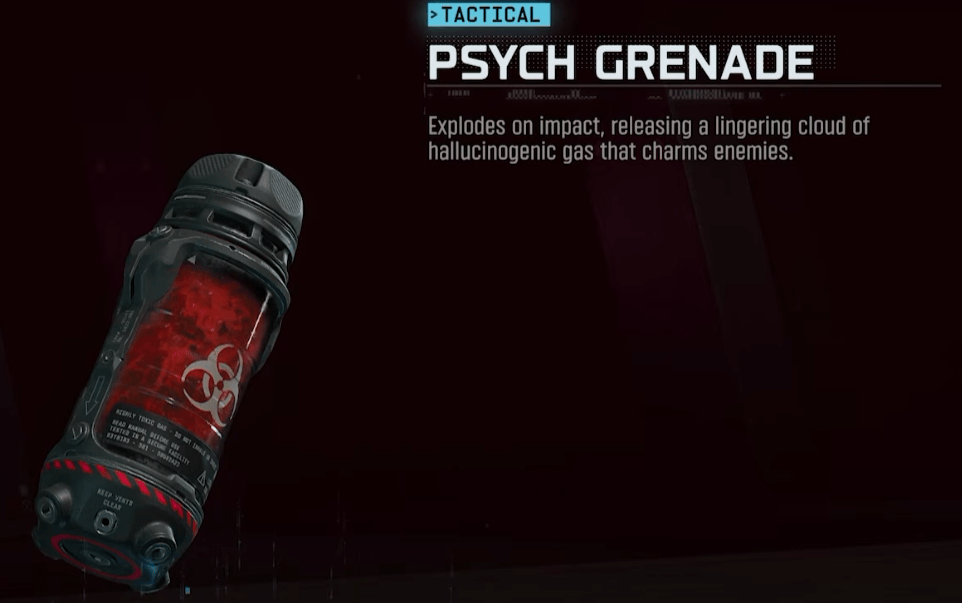
Paradox Junction is much shorter than Astra Malorum. Your goal is to materialize the Toy Box, recover three missing Mr. Peeks parts, complete a timed chase around Nuketown, and collect the Twin Dolls. Before loading in, equip a Psyche Grenade so you do not have to spend Salvage crafting one later.
You will need to progress far enough to reach the intact version of Nuketown and activate Pack-a-Punch. If you need help getting there, use our Paradox Junction Main Quest walkthrough.
Materialize the Toy Box
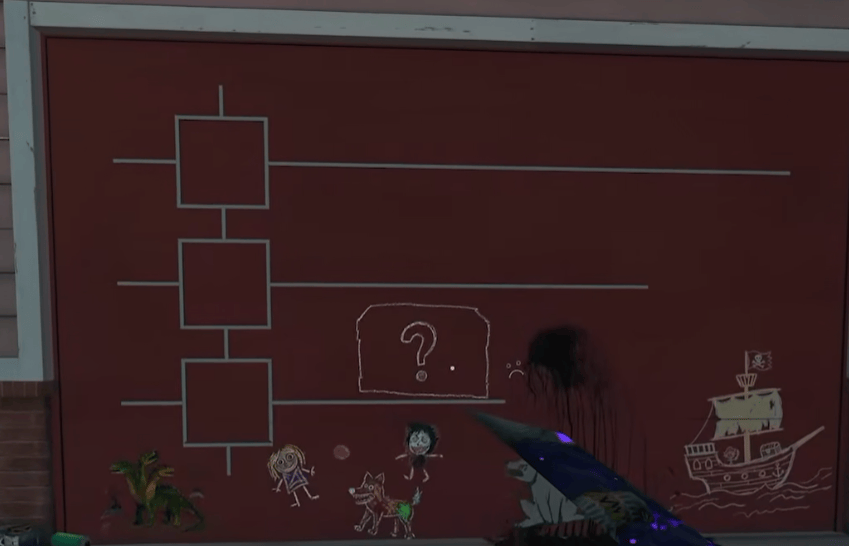
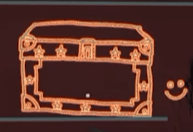
Once you reach the intact version of Nuketown, head toward the garage near the cul-de-sac and interact with the chalk drawing on its door. The drawing will change into a more detailed Toy Box with a padlock.
 Go upstairs inside the Yellow House and find the chalk question mark on the wall near the bedroom window. Throw a Psyche Grenade at it. While affected by the grenade, the question mark will transform into a chalk key. Interact with it to pick up the key, then return to the garage and use it on the Toy Box drawing. The drawing will materialize into a real Toy Box and open.
The Twins will now ask you to recover their missing toy pieces.
Find Three Mr. Peeks Parts
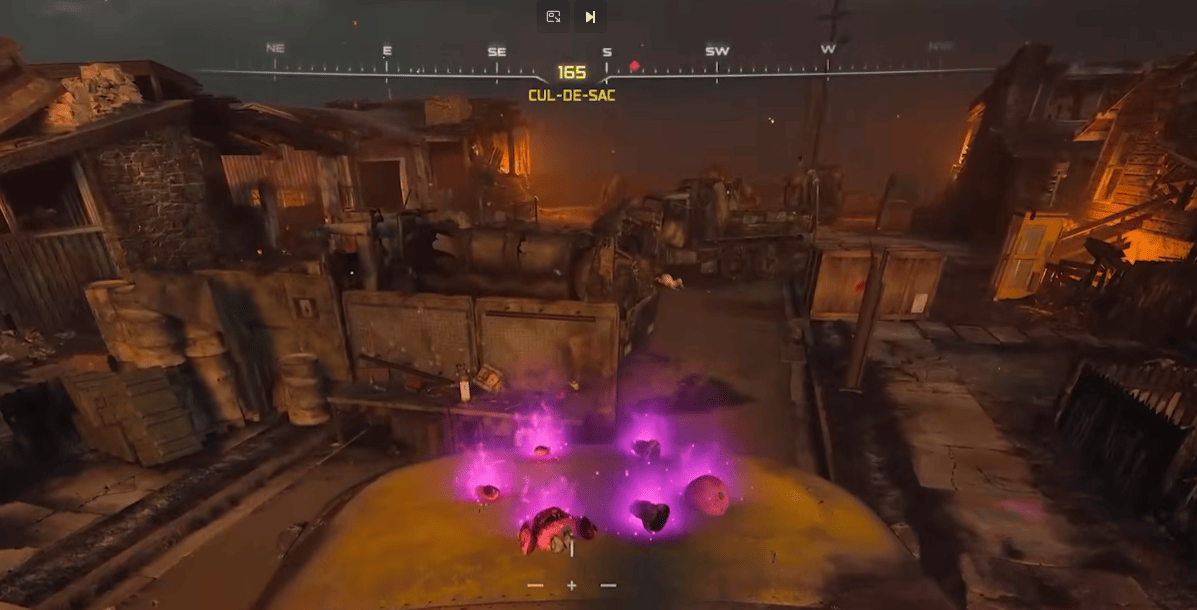
Travel to the destroyed version of Nuketown and look at the pieces already lying on top of the bus. You need to find three additional Mr. Peeks parts. The three parts are randomly selected from six possible spawn locations, so you may need to check every spot.
The known locations are:
- on top of the bunker behind the Green House;
- on the roof of the first house on Trinity Avenue;
- on another rooftop farther down Trinity Avenue;
- inside the bed of the truck near Pack-a-Punch;
- upstairs in the Yellow House, on the furniture behind the chair;
- inside the locked garage opened through the RC-XD side Easter Egg.
Shoot or interact with a part when you find it. It will disappear and reappear with the other pieces on top of the bus.
The garage location requires you to complete the RC-XD side Easter Egg. The RC-XD controller can spawn in three places: the Green House backyard, the Yellow House garage, or around the Pack-a-Punch side of Nuketown. Once you find it, complete the RC-XD route and detonate the vehicle at the garage door to open it. The missing part can appear on the hooks along the wall inside.
If you cannot find the third part after opening the garage, listen for the squeaky-toy sound when the RC-XD explodes. The blast can apparently collect the part automatically, meaning it may already be waiting on the bus.
Complete the Mr. Peeks Chase
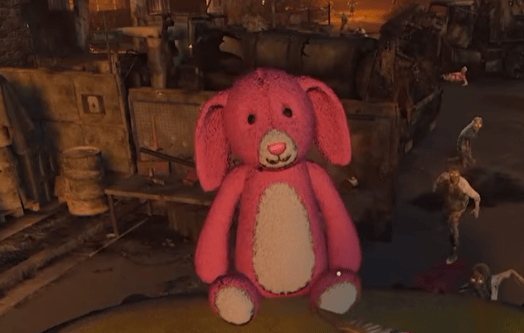
Once all three missing pieces have returned to the bus, climb onto it and interact with the glowing parts. This starts a timed minigame where a purple Mr. Peeks stuffed animal appears somewhere around Nuketown.
Run into it, and it will immediately teleport to another location. Keep chasing and touching it before the timer expires. Listening for its sound can make the next location much easier to find, especially when it appears somewhere outside your field of view.
You have more time to complete the chase in solo. In co-op, the timer is less forgiving, so spreading out around Nuketown can help you reach each new location faster. If you fail the challenge, advance one round and try again.
When you complete the chase, return to the bus and pick up the restored stuffed animal.
Get the Twin Dolls and Exfil
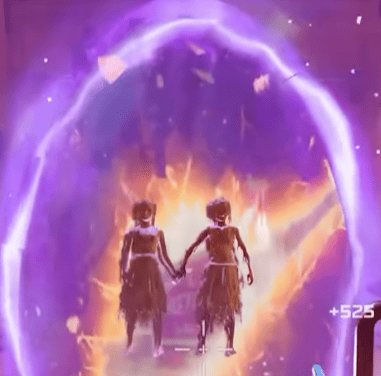
Take the completed stuffed animal back to the intact version of Nuketown and place it inside the Toy Box. The box will give you several rewards, followed by the Twin Dolls.
Pick up the Twin Dolls and continue until the next Exfil round. Start the Exfil and confirm that the toy appears inside the booth. Defeat the HVT and successfully leave the map to register it for the Super Easter Egg.
After the Exfil, the Twin Dolls will appear alongside your other collected toys on the shelf inside Her House on Rex Infernus.
Totenreich Super Easter Egg Walkthrough
Totenreich is one of the easier Super Easter Egg maps, but there are two important pieces you need: Wildfire and the hidden Silent Heir crossbow. Your goal is to retrieve the Toy Box from the iceberg, kill King Draugvald with the crossbow, and use his crown to obtain the Guardian Toy.
If you need help progressing through the map or reaching the lighthouse, use our Totenreich Main Quest walkthrough.
Before starting, equip Wildfire and pick up a fishing rod somewhere on the map.
Pull in the Iceberg
Head to the dock at Eidskallen Square, facing Northwest, close to the antique shop, and look toward the large iceberg in the water. Place your fishing rod at the fishing spot first, then activate Wildfire so the rod catches fire.
Wait until the line begins moving, then interact with it to reel the iceberg toward the dock. Do not interact too early, since this step can soft-lock if you pull the rod before the iceberg is properly hooked.
Once the iceberg reaches the dock, melt it with fire damage. Wildfire can do this if it is still active, and Molotovs also work. The melted iceberg reveals the Toy Box.
Get the Silent Heir Crossbow
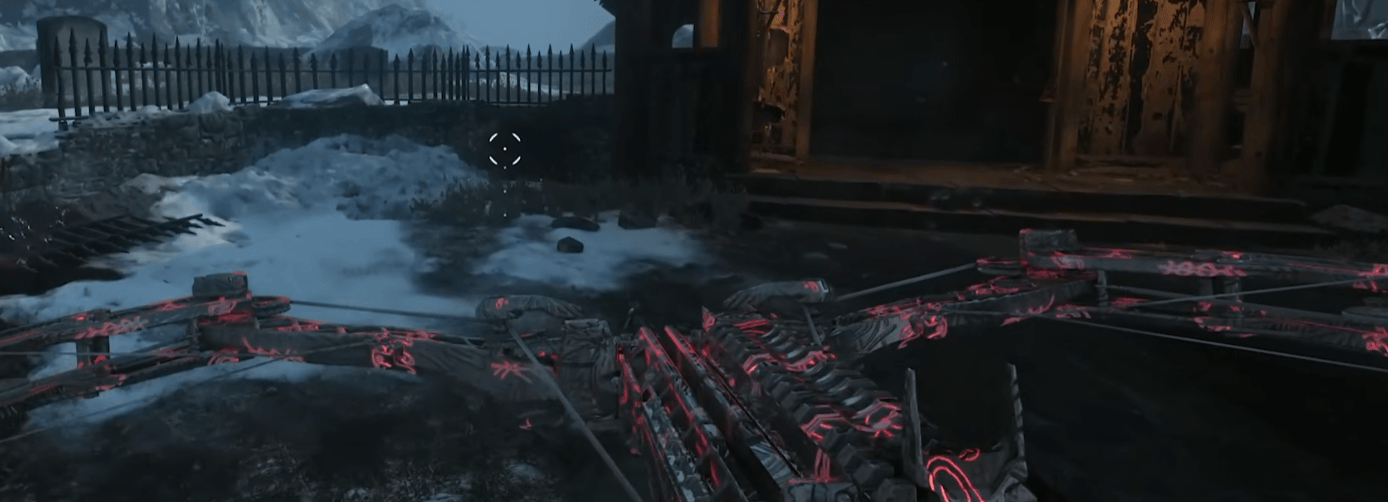
You now need to reach the lighthouse. This overlaps with the normal Totenreich Main Quest, so continue the usual progression until you can access it.
On the first level of the lighthouse, look near the damaged edge of the structure and go prone. A hidden interaction prompt lets you pick up the Silent Heir, a special crossbow used specifically for this Super Easter Egg step.
The crossbow starts weak, so upgrading its rarity and Pack-a-Punch level will make the next step much easier.
Kill King Draugvald with the Silent Heir

Head to the Burial Grounds. King Draugvald, a heavily armored frozen zombie wearing a golden crown, will spawn once the Toy Box has been revealed and you enter the area.
He has a large health pool and regenerates health if you stop damaging him for too long. You can weaken him with another weapon first, but the killing blow must come from the Silent Heir. A headshot is not required.
If you accidentally kill King Draugvald with another weapon, advance one round and return to the Burial Grounds. He should respawn, allowing you to try again.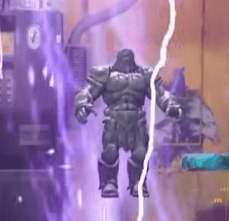
When he dies correctly, he drops his golden crown. Pick it up and return to the Toy Box.
Get the Guardian Toy and Exfil
Place King Draugvald’s crown inside the Toy Box. After the reward drops, the box will give you the Guardian Toy. Pick it up and continue until the next Exfil round. Start the Exfil, defeat the HVT, and successfully leave the map with the Guardian Toy. Once registered, the Guardian will appear on the toy shelf inside Her House on Rex Infernus.
Kowakujō Super Easter Egg Walkthrough
Kowakujō has one of the shortest Super Easter Egg quests. You only need to activate the Toy Box, guide a bird across several cherry blossom trees, and bring an origami figure back to the box to receive the Z-Rex Toy.
You must first open the map and activate Pack-a-Punch. If you need help reaching that point, use our Kowakujō Main Quest walkthrough.
Bring Down the Toy Box

After activating Pack-a-Punch, head toward the nearby cherry blossom tree and melee it several times until it activates. Stand close to the tree until you gain the overheal glow. While that effect is active, return to the rooftops beneath the floating Toy Box and run in circles. After a few moments, a tornado will form and knock the Toy Box down from the roof. The box will open and release a bird, which will perch nearby. You now need to guide it across the map by activating several cherry blossom trees in the correct order. If you take enough damage to lose the overheal effect, return to an active cherry blossom tree and regain it before continuing.
Guide the Bird Across the Cherry Trees
Start with the cherry blossom tree in the Kitchens area. Melee it several times until it activates. After a short delay, you should hear the bird and see it move toward the tree. Next, activate the tree in the Staging area the same way. Wait for the bird to move again before continuing. The third tree is in the Training area. Melee it until it activates and wait for the bird to arrive there.
The route is:
- Kitchens
- Staging area
- Training area
Do not skip ahead. The bird needs to move to each tree in sequence before the final step will work.
Get the Origami Bird
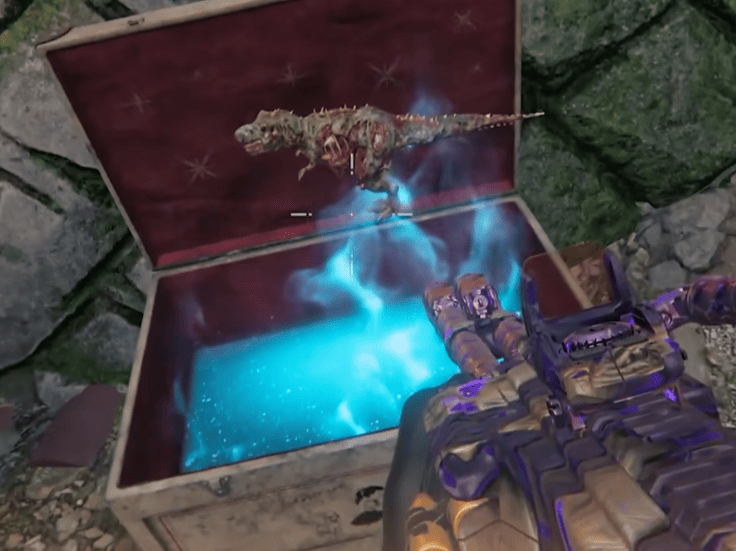
Once the bird reaches the final cherry tree, regain the overheal effect if necessary and head to the large tree in the Central Courtyard. You will find a tree stump nearby. Run in circles around the stump while the overheal effect is active. Another tornado will form, causing the bird to fly toward the large central tree. After a few moments, a glowing origami bird will fall to the ground. Pick it up and return to the Toy Box. Place the origami bird inside. The box will give you several rewards followed by the Z-Rex Toy.
Exfil with the Z-Rex Toy
Pick up the Z-Rex Toy and continue until the next Exfil round. Start the Exfil, defeat the HVT, and successfully leave the map. Once the Exfil is complete, the Z-Rex Toy will be added to the shelf inside Her House on Rex Infernus.
Rex Infernus Super Easter Egg Walkthrough
Rex Infernus is the final stage of the toy hunt. You need to progress far enough through the regular Main Quest to obtain Warden’s Blight, return to Her House, retrieve the Eye, and upgrade your grapple. If you need help with those steps, use our Rex Infernus Main Quest walkthrough. Once you have the upgraded grapple, you can begin the new Super Easter Egg steps.
Find the Hidden Grapple Point
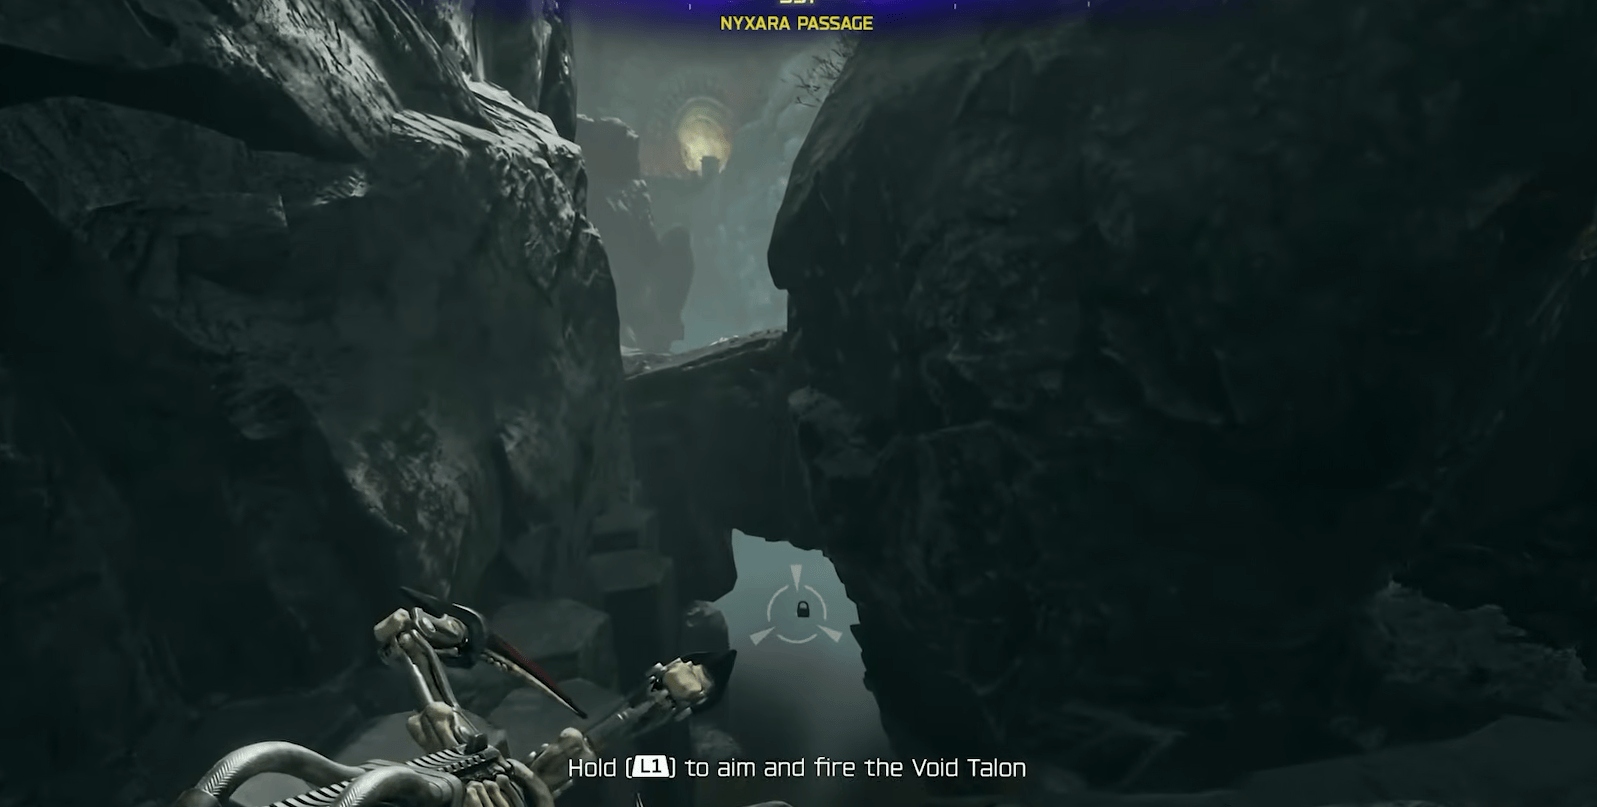
Head to Nyxara’s Passage and look underneath the bridge for a hidden floating lock. It can be difficult to see from most angles, so move around beneath the bridge until your grapple reticle reacts to it. Grapple the lock to enter a timed parkour sequence around Her House.
You have around 90 seconds to follow the floating platforms and reach the Toy Box at the end. There is only one real route through the course, but missing a jump will send you back to the main map. If you fail, advance one round and return to the hidden lock to try again.
Materialize the Toy Box
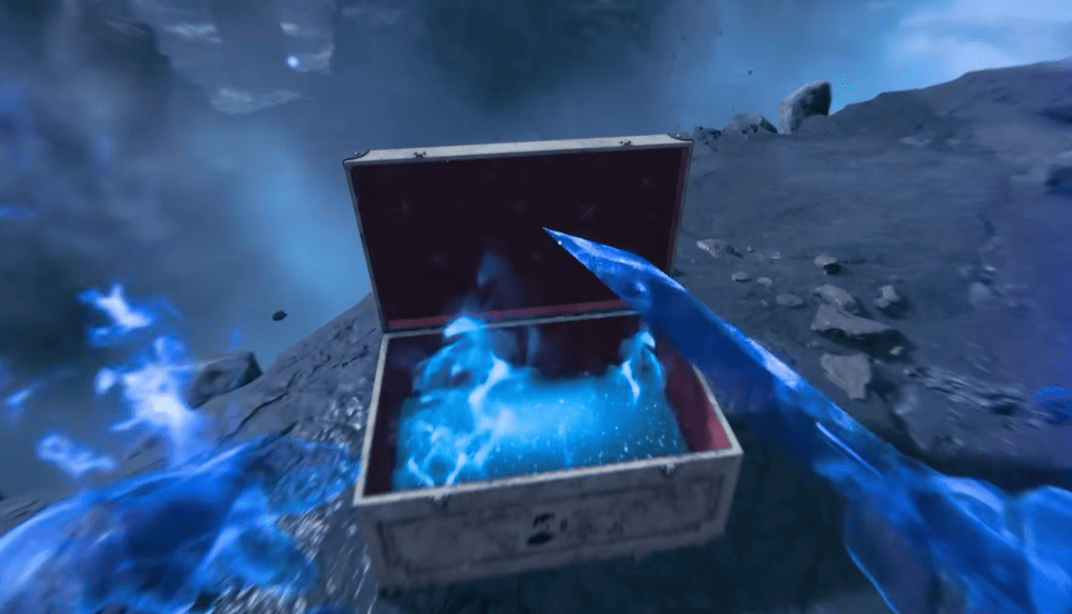
At the end of the parkour course, you will find a ghostly Toy Box resting on a floating platform. Interact with it and remain on the platform until it tips over, dropping both you and the box toward Her House.
When you appear near the box again, activate Aether Shroud and interact with it while the Field Upgrade is active. This brings the Toy Box fully into the map and causes three toy horses to appear above three different Insula areas.
Find the Three Toy Horses
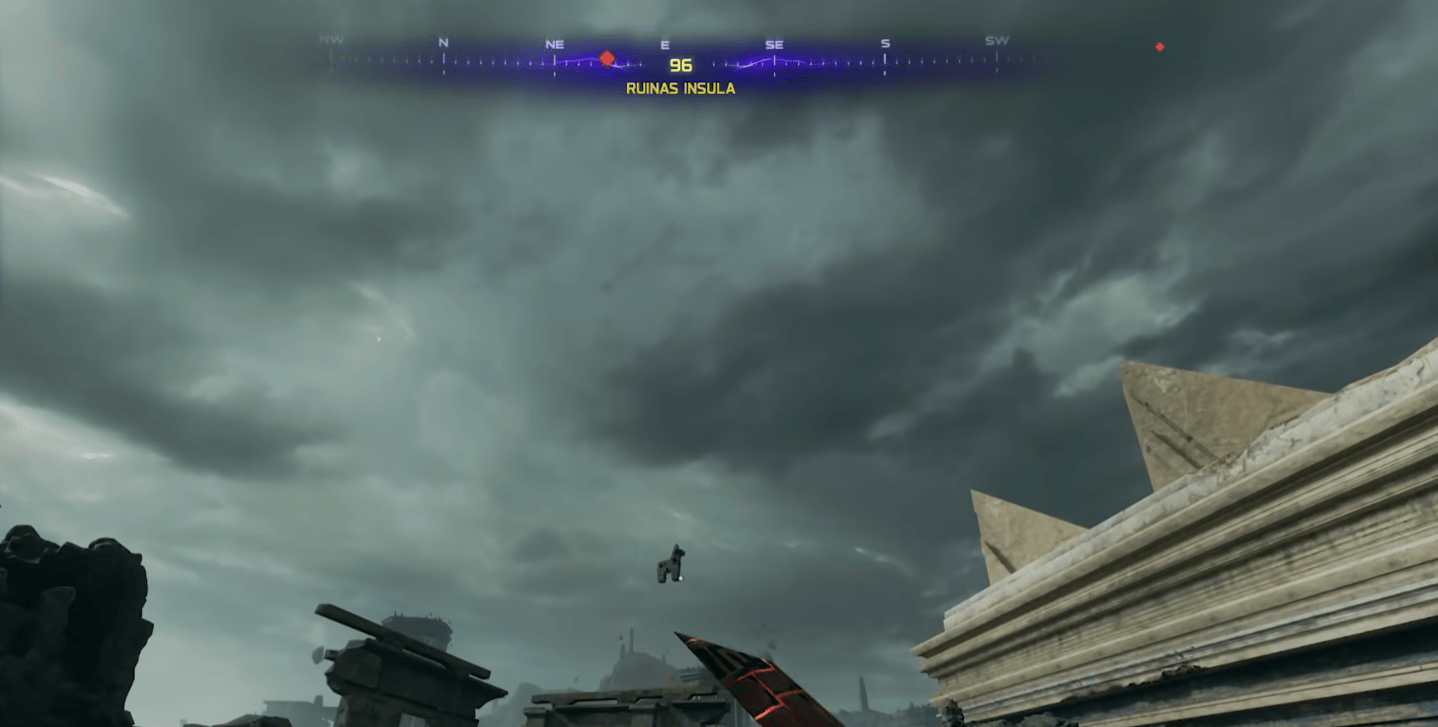
Return to the main map and look high above the islands near Jugger-Nog, Widow’s Wine, and PhD Flopper. Each area contains one floating toy horse. Stand beneath a horse, grapple toward it, and melee it while you are still in the air. If you hit it correctly, the horse will break apart and leave a ghostly item on the ground. The three items are:
- Shoelaces
- Skates
- Shoes
Each of these items acts as a Soul Box, but every one requires a different type of kill. You do not need to complete them in any particular order.
Complete the Three Soul Challenges
The horse at Spyra Insula drops a pair of shoes. Stay close to the item and kill zombies while jumping or otherwise airborne. Continue until the shoes stop appearing ghostly and become a solid object you can pick up.
The horse at Arania Insula drops a pair of skates. For this one, you need PhD Flopper explosion kills. Keep killing zombies with the Perk’s explosive effect until the skates materialize, then collect them.
The final horse drops a pair of shoelaces. Activate Frenzied Guard and kill zombies while the Field Upgrade is active to feed souls into the item. You may need several activations depending on how many kills you get each time, so keep going until the laces become interactable.
There does not appear to be a useful exact kill count for these challenges. The easiest way to track your progress is simply to watch the item. Once it changes from its ghostly state into a physical object, that challenge is complete.
Return to Her House
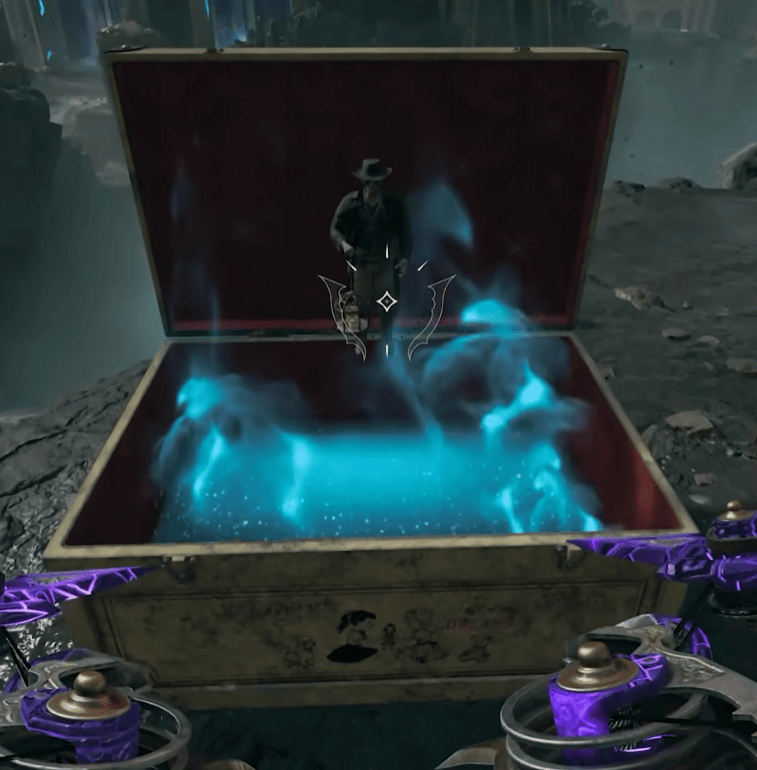
After collecting the shoes, skates, and shoelaces, continue until the next Exfil round. Do not activate the Exfil booth. Instead, head toward Nexus Forge, where a portal appears during the Exfil window and takes you directly back to Her House.
The portal only remains available while the Exfil is active, so do not miss the window. Enter it and return to the Toy Box outside Her House.
Place all three footwear items inside the box. It will give you several rewards, followed by the Warden Toy, the sixth and final toy required for the Super Easter Egg.
Place the Warden Toy on the Shelf
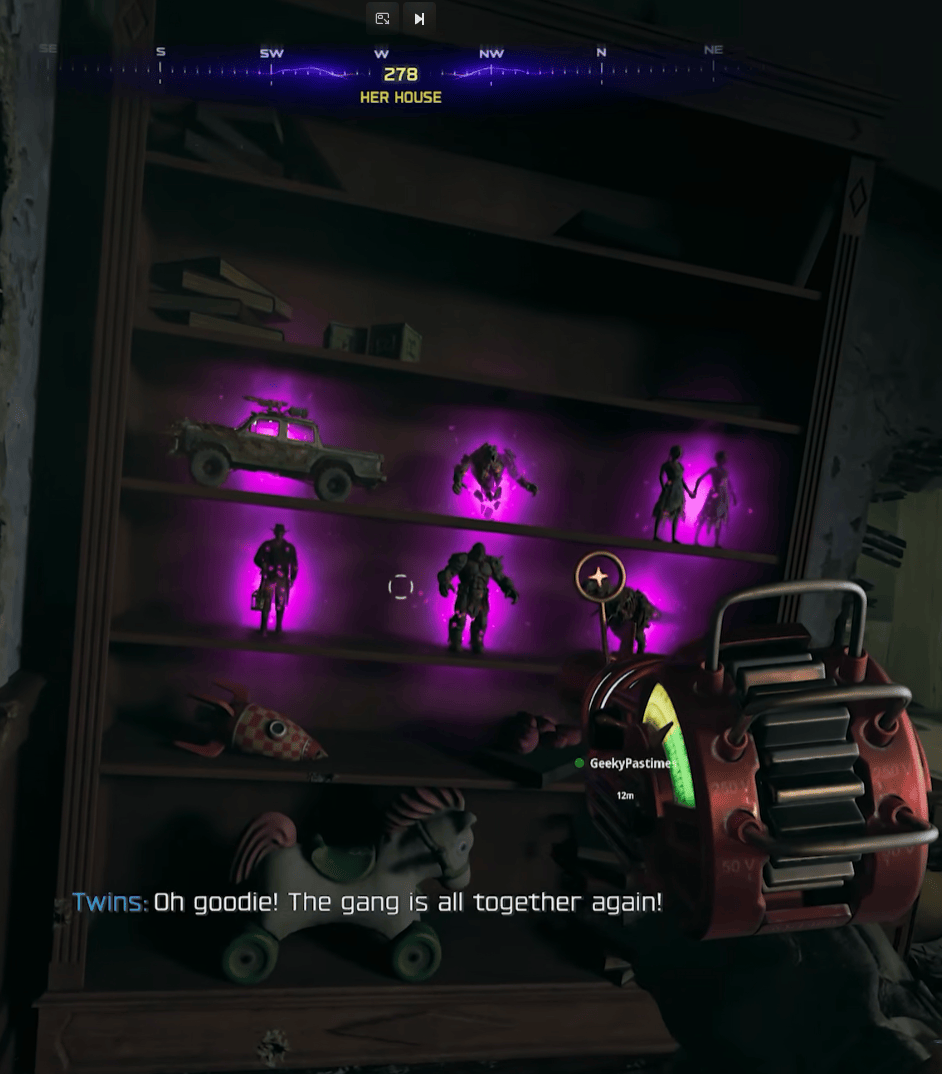
Pick up the Warden Toy and head upstairs inside Her House. Interact with the shelf containing the other five toys to place the Warden beside them. Once all six are present, the collection will begin glowing purple and the final Boss Rush becomes available.
The Boss Rush arena, called Veytharion’s Sepulcher, houses a Pack-A-Punch machine, Arenal, a crafting table, and a wunderfizz machine but no GobbleGum Machine.
The Boss Rush has 5 boss encounters:
- Z-Rex — returning from Shattered Veil.
- The Guardian — returning from Citadelle des Morts.
- Ol’ Tessie Demolition Derby — technically a survival round rather than a boss fight.
- Caltheris the Needle — the Astra Malorum boss.
- The Warden — a modified version of the Rex Infernus final boss.
After each boss is defeated, you’ll have a 1-minute timer counting down to the next “Partytime,” as it were. Use that time to restore ammo and use any facilities you might need to prepare for the next fight.
If you are completing the quest in co-op, make sure every member of the squad gets the Warden Toy registered before starting the finale. The launch version of the quest could fail to award completion to squad members who did not personally register the final toy, so it is safest to make sure everyone has done so before interacting with the shelf again.


You got -20% OFF 
BO7 Super Easter Egg Rewards
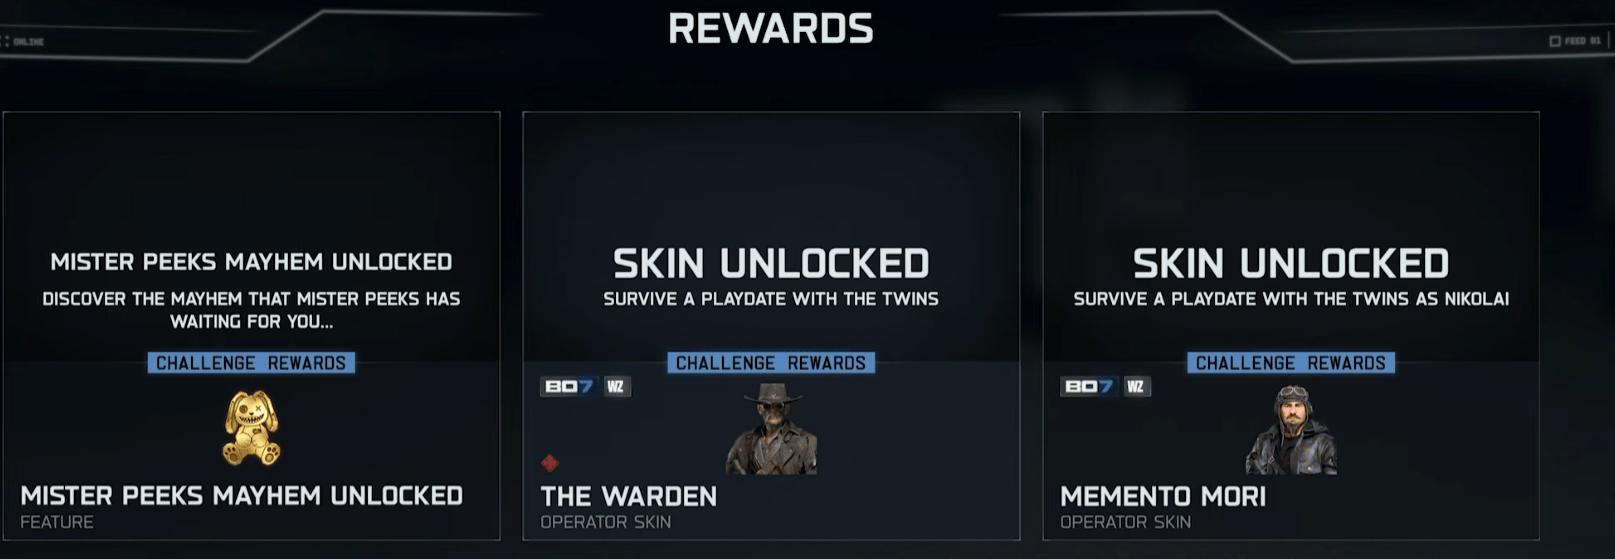
Completing the final Boss Rush unlocks several permanent rewards, including a new Operator, a special Cursed Mode modifier, and an exclusive skin for the character you used during the finale.
The main rewards are:
- Warden Operator — unlocks The Warden as a playable Operator.
- Mr. Peeks Mayhem — a special Cursed Mode reward that activates powerful progression bonuses without requiring you to equip the usual Relics.
- Dark Aether crew skin — unlocks a black-and-purple variant for the BO7 Zombies character you used to complete the Boss Rush.
Mr. Peeks Mayhem is the biggest gameplay reward. When active in Cursed Mode, it gives you access to Tier III-style benefits without equipping the normal Relics. These include Pack-a-Punch IV, Ultra weapon rarity, Golden Armor, cheaper Pack-a-Punch upgrades, improved Mystery Box odds, and more frequent Mr. Peeks appearances with better rewards. Wonderfizz also gives Eternal Perks, although the perk is random and costs more than a normal purchase.
The character skin reward is tied to the crew member you use for the successful Boss Rush completion. All eight BO7 Zombies crew characters have their own Dark Aether-style variant, so you will need to replay the finale with different characters if you want to unlock the full set.
Finishing the Super Easter Egg also gives you the final story sequence, bringing the BO7 Zombies questline to its conclusion.
F.A.Q.
How to complete the Super Easter Egg in CoD Black Ops 7?
Complete the Main Quest on all six Round-Based Zombies maps, then return to each map and finish its new toy quest. After collecting all six toys, place them on the shelf in Her House on Rex Infernus and complete the five-stage Boss Rush.
What are the rewards for completing the Super Easter Egg in CoD Black Ops 7?
Completing the Boss Rush unlocks the Warden Operator, Mr. Peeks Mayhem for Cursed Mode, and a Dark Aether-style skin for the crew character you used. You also unlock the final story sequence tied to the Super Easter Egg.
Can you complete the BO7 Super Easter Egg in Directed Mode?
You can use Directed Mode to complete the six prerequisite Main Quests. However, the new Super Easter Egg toy quests and final encounter must be completed in Standard or Cursed Mode.
Can you complete the BO7 Super Easter Egg solo?
Yes, you can complete the entire Super Easter Egg solo. Some steps are actually easier alone, including the Paradox Junction chase, because the solo timer is more forgiving.
Do you need to collect the Super Easter Egg toys in order?
No, the first five toys can be collected in any order. Once you successfully Exfil with a toy, it stays registered on the Rex Infernus shelf, so you do not need to collect them all in one session.