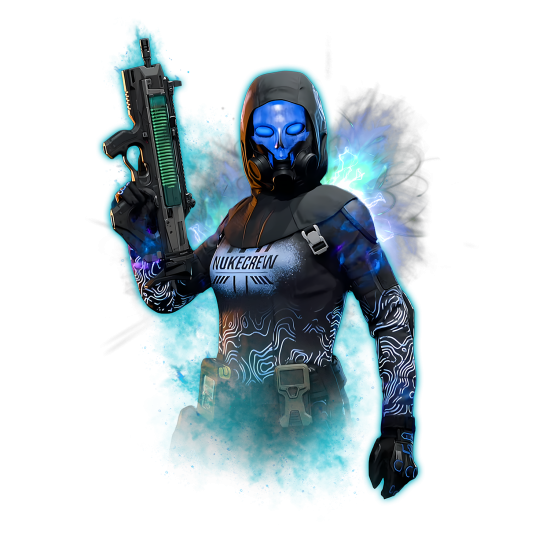
 Dallon Avery
Kowakujō Main Quest Easter Egg Guide Quick Overview:
- This guide is now COMPLETE!
- The map is set in a feudal Japanese castle inside the Dark Aether
- The story continues after Totenreich
- The crew must free the final Shadowsmith and recover the World Seed
- Takeo and Carver’s souls appear to be tied to the map’s story
Don't wait! Buy Kowakujō completion service at Skycoach and enjoy the rewards that include camos, calling cards, experience, and much more!


Read closely 
Browse our hottest Call of Duty Boosting services


Kowakujō Main Quest Walkthrough
Kowakujō is the new Round-Based Zombies map in Black Ops 7 Season 04 Reloaded. It takes place in a feudal Japanese castle surrounded by active volcanoes, lava, ash, and Dark Aether corruption. Basically, a calm family reunion spot. Very normal.
The map is heavily tied to Takeo Masaki. It’s the castle that looks like Takeo’s home, but twisted into something that feels wrong, like a memory rebuilt by the Dark Aether. The crew arrives after Totenreich, where they learned that the Dark Aether is starting to unravel. If they fail here, the material world is in serious trouble.
Their main goal is to free the final Shadowsmith and recover the mysterious World Seed. The quest also points toward Nyxara’s undead army and a curse gripping Takeo’s soul, so this should be one of the more story-heavy Zombies maps in Black Ops 7.
The intro setup also shows the crew crossing a volcanic landscape, nearly falling into lava, and escaping into the Outer Ward while a dragon flies overhead. That does not confirm a dragon boss yet, but the map is clearly leaning into the “place of fire” tease from Totenreich.
Step 1: Unlocking Pack-a-Punch

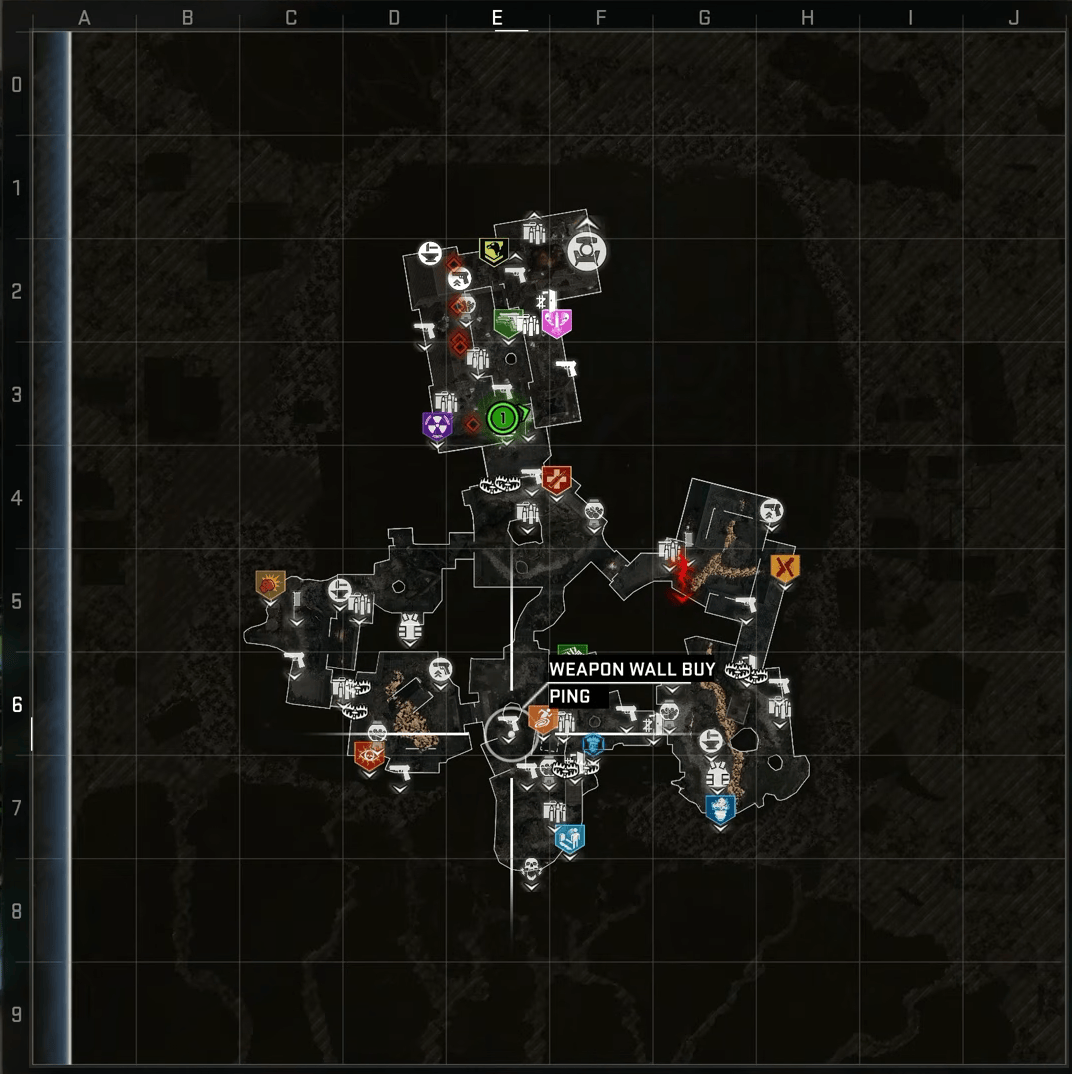
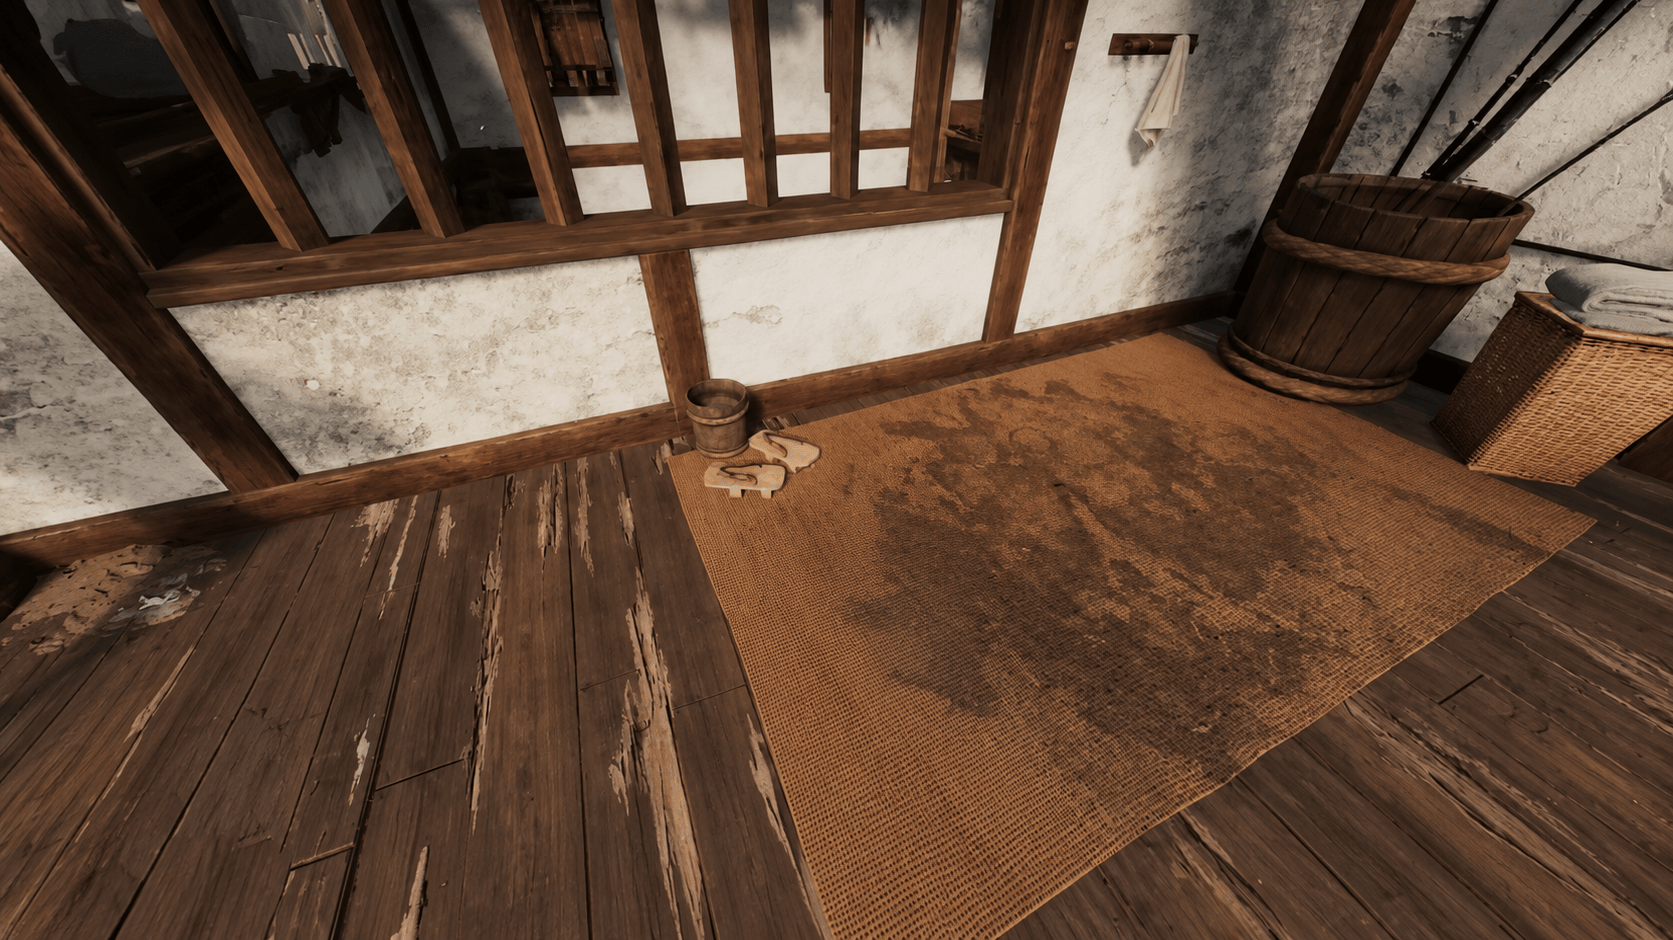
As per tradition, your first step is getting the Pack-a-Punch weapon. The map starts with you and your team in the Outer Ward, and your first objective would be to “Acquire the World Seed”, which is done by “Recapturing 2 Wards”.
Proceed through one of the two marked doors, one of which will lead you through the Staging Area, Stables, and Training Area, where the first Ward will be.
To recapture, interact with the Ward, and stay in the designated area marked by a circle on the ground. The objective will change, helping you track the progress with a bar that fills the longer you stay in the circle.
After the first ward is captured, proceed to the next one, located in the Kitchens area (order doesn’t matter) and repeat the process.
Once the second ward is captured, the objective will change to “Remove the Gate Glyphs”. Proceed to the marked location, making your way to the Central Courtyard, where you’ll find a gate with two red dragon heads on it. Once the gate opens, proceed forward to locate the Shogun’s Sanctum, as that will be your next objective. You’ll have more options in terms of which doors you want to unlock to get to the objective, but you won’t get lost as you’ll be led by the pointer for this part of the Easter Egg.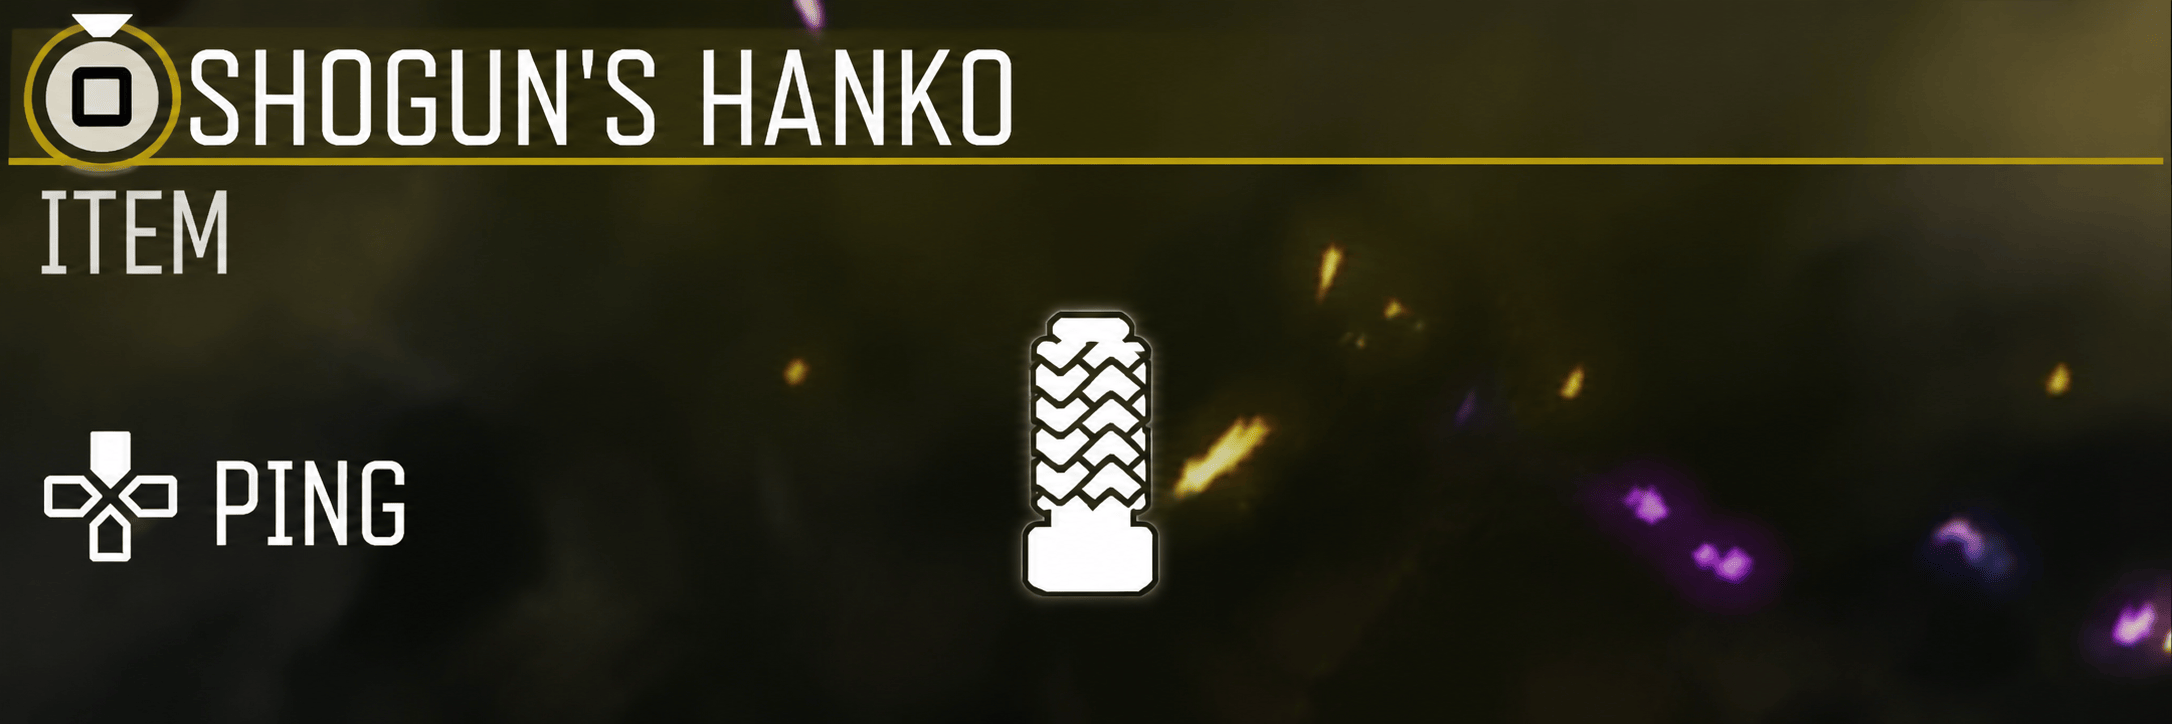
When you enter the War Room in the castle, you’ll see a giant lightning shard that will turn into an enemy called “Oni”. When killed, he will drop an item called Shogun’s Hanko. Pick it up and place that into the Door with the golden dragon sigil. The door will open once more, giving you access to the upper floor called the Shogun’s Sanctum.
In that room, you’ll see the World Seed, but for now, you’ll need to kill marked zombies near it, as the objective suggests. Zombies will start attacking you, but some of them will have a purple hue around them. Those are the marked ones.
Once done, the World Seed will reveal the pack-a-punch machine.
So, to reiterate, this is how you unlock the Pack-a-Punch machine on Kowakujō:
- Recapture the first Ward near the Training Area
- Recapture the second Ward in the Kitchens
- Go to the Central Courtyard and remove the Gate Glyphs
- Enter the War Room and kill the Oni
- Pick up the Shogun’s Hanko
- Use Shogun’s Hanko on the golden dragon door
- Enter Shogun’s Sanctum and kill marked zombies near the World Seed
- The World Seed will reveal the Pack-a-Punch machine
Step 2: Building the Kowakujō Wonder Weapon (Final)
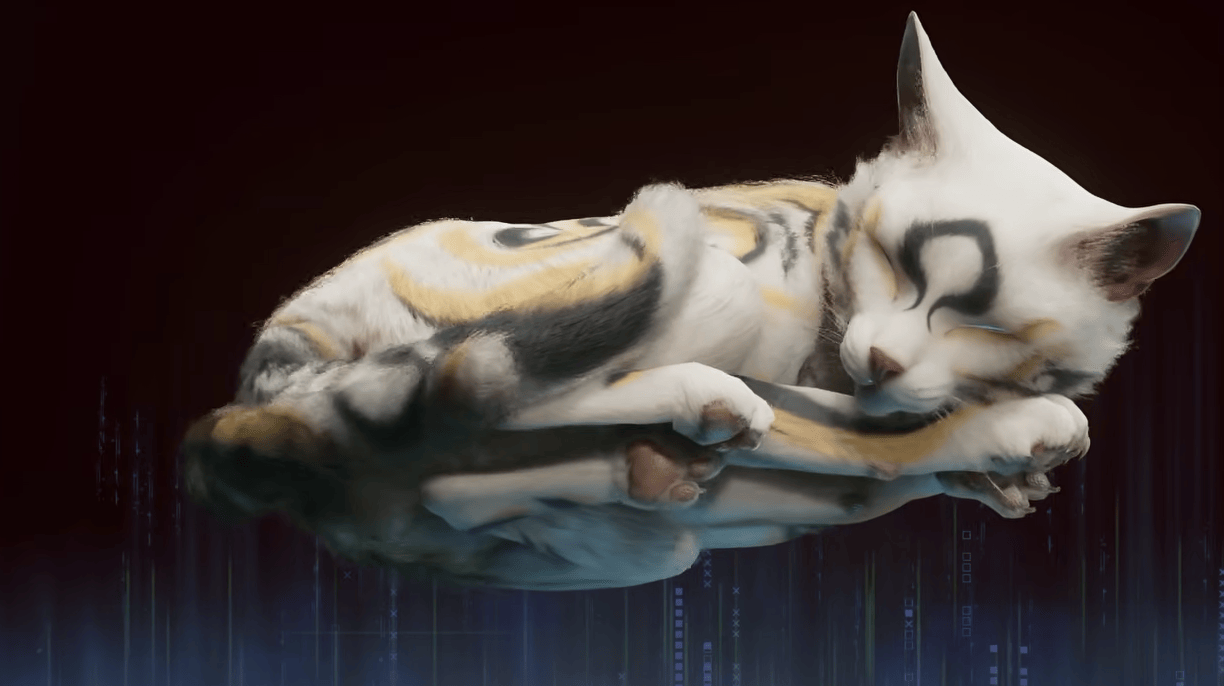
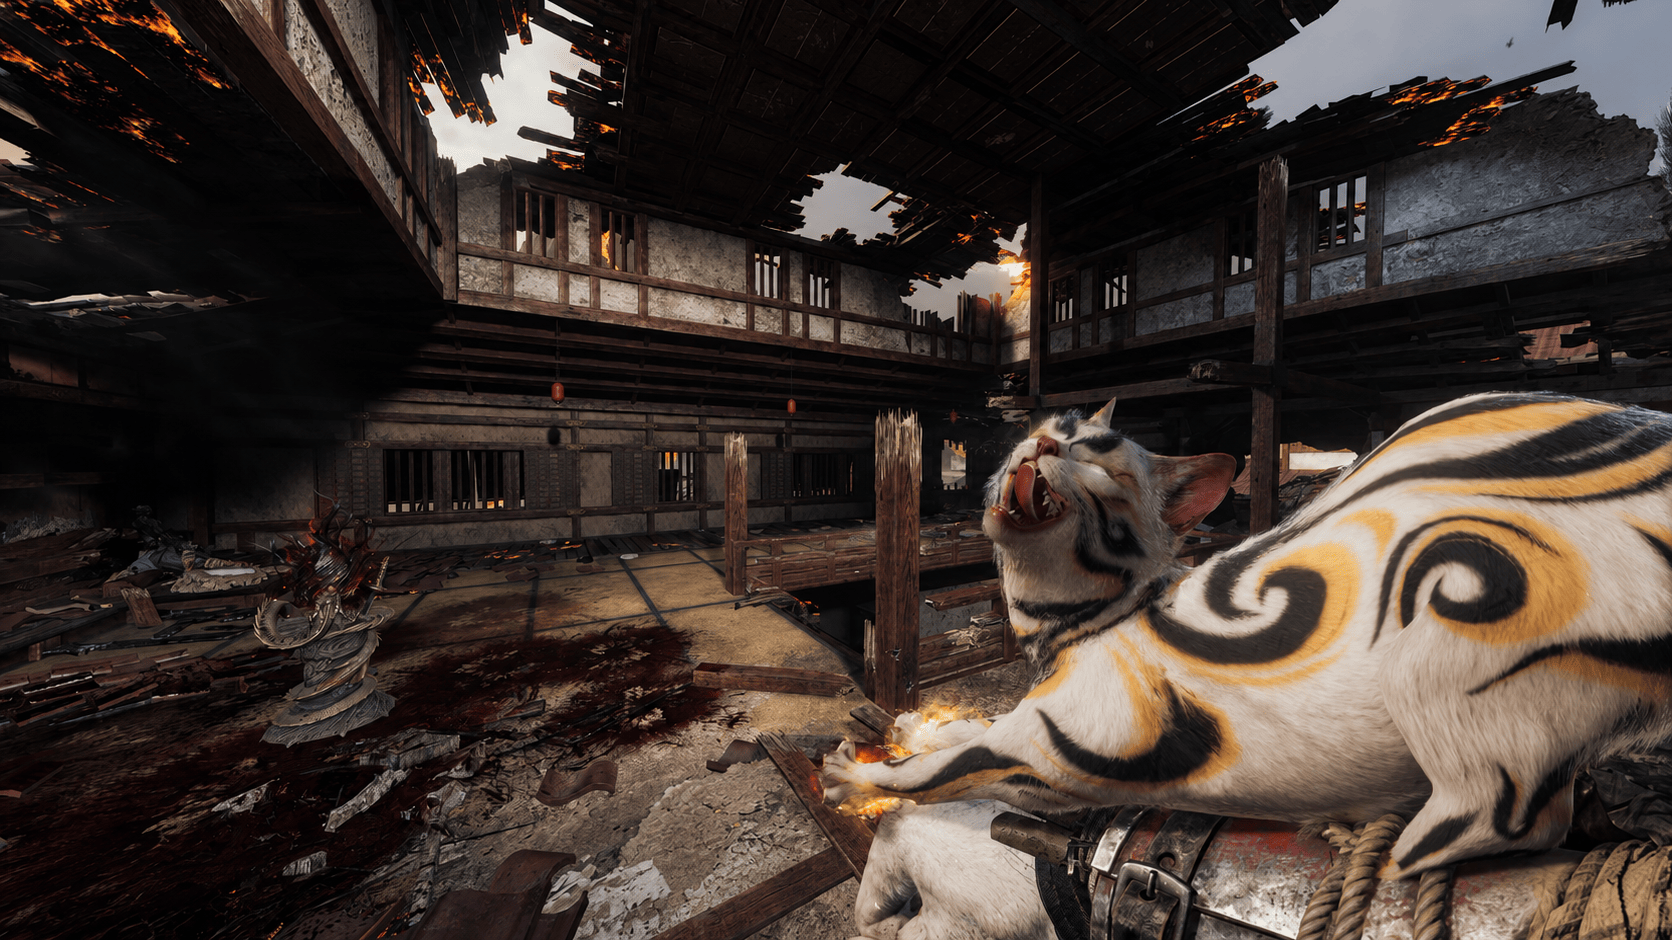
It would seem that the Wonder Weapon for the Kowakujō map is called Nekomancer, and it's "just a cat"! Getting it takes a few different item hunts before the actual cat rescue begins. The whole step revolves around building the Maneki Neko first, then using it to start the hidden cat sequence.
Here’s the quick to-do list for this part:
- Get PhD Flopper
- Drop the cat cage near Tenshu Entrance
- Throw the cage into lava
- Collect the Furin bell
- Collect the Maneki-Neko cat statue
- Collect the Karakuri doll
- Craft the Maneki-Neko at the Workshop
- Reveal and follow the glowing paw prints
- Throw the Maneki-Neko into the final paw print shape
- Kill the Abomination that eats the cat
- Use Death Perception to sneak up on the cat
- Bring the cat to the World Seed
- Melee the World Seed between shockwaves until the cat is freed
- Pick up the Nekomancer Wonder Weapon
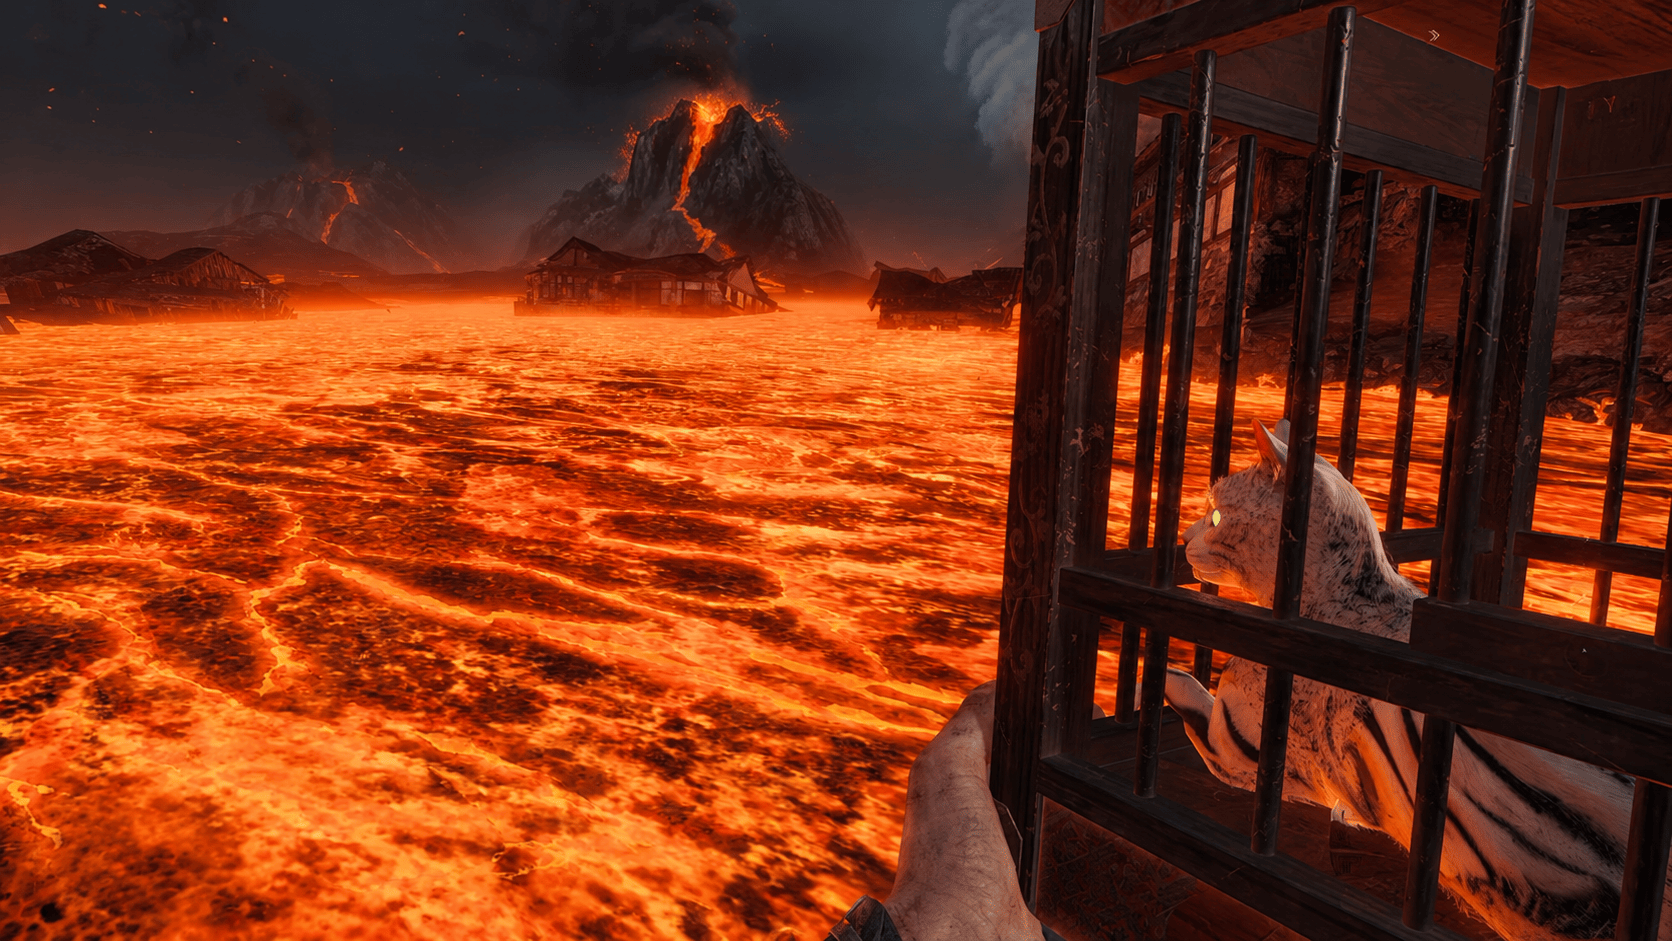
Start by getting PhD Flopper. Once you have the perk, go to the Tenshu Entrance area near the cherry blossom tree. Look for the suspended cage sitting on the ledge. Stand underneath or right beside it and dive to prone with PhD Flopper. The explosion should knock the cage down.
Pick up the cage and carry it to any lava source on the map. Throw the cage into the lava. After a short moment, the cage will melt, and the cat will swim away. Yes, the cat swims through lava. Zombies logic remains undefeated.
After that, you need to collect the three parts required to craft the Maneki-Neko. The first part is the Furin, a small hanging bell. It can spawn in a few different spots, so check the Staging Area, Training Area, and Stables. The easiest way to find it is to listen for the ringing sound. If you hear a bell nearby, check the walls, beams, and hanging spots around that area.
The second part is the Maneki-Neko cat statue. This usually appears around the Kitchens, often on top of barrels, but it can also spawn near the Gatehouse on a barrel. It is a small white cat statue, so it is much easier to notice than the bell.
The third part is the Karakuri doll. This can spawn either in the Storage Rooms or in the Workshop, usually around crates or near the stairs. Once you have the Furin, Maneki-Neko statue, and Karakuri doll, head to the Workshop.
Go to the crafting table near Vulture Aid. It should be on the upper part of the Workshop, to the left of the perk machine. Use the table to craft the Maneki-Neko. This becomes a Tactical Equipment item, so do not throw it randomly. You will need it later for the paw print step.
Once you've thrown the cage into the lava, make sure to switch to the next round for the next step.
Finding Paw Prints And Catching the Cat
There are several possible paw print starting areas, and the correct one changes every match. There are four known gateway spots where the paw print trail can begin, and the correct one changes each match. Kill a few zombies at each gateway and move on if no paw prints appear after several kills.. You are looking for a spot where killing a zombie causes glowing orange paw prints to appear in the blood on the ground. Possible locations are:
- Stables
- Kitchens
- Flower Garden
Once you find the first paw prints, look at the direction they are facing. Move a few steps in that direction and kill another zombie there. If you are in the correct spot, another set of paw prints will appear. Keep following the direction of the newest prints and killing zombies ahead of them.
Repeat this process until the paw prints stop forming a trail and instead create a full shape or circle of blood on the ground. This is the final point of the trail.
Now throw the Maneki-Neko into the middle of the paw print shape. Throw it carefully into the middle of the circle. The grenade can bounce, and this only works if the lava in that area is active. If the lava has cooled over, wait until it becomes fiery again. If done correctly, the cat will appear from a lava pit. Almost immediately, an Abomination will spawn and eat the cat.
Kill the Abomination to free it. This enemy has a lot of health, so do not waste time shooting random body parts. Wait for its mouths to open and shoot them for critical damage. Pack-a-Punched weapons make this part much less annoying, especially if you are doing it solo.
After the Abomination dies, flip the round. The cat will then move to one of the creaky floorboard locations. Before looking for it, make sure you have Death Perception. This perk highlights the dangerous floorboards, which makes the next part much easier.
The cat can spawn in one of three creaky floorboard areas. There is one possible location in the Training Grounds and two possible locations in the Kitchens. Approach these areas carefully. If you run in too fast or step on the creaky boards, you can scare the cat away.
Do not sprint, shoot, use a Field Upgrade, or step on creaky boards near the cat, or it can run away and force you to check again next round.
Crouch-walk toward the cat and watch the floorboards. With Death Perception equipped, the noisy boards will glow orange or red. Avoid stepping on them and slowly make your way to the cat. Once you are close enough, interact with it to pick it up.
After you grab the cat, bring it back to the World Seed next to the Pack-a-Punch machine in Shogun’s Sanctum. When you get close, the cat will automatically jump onto the World Seed.
The World Seed will begin glowing red and releasing damaging shockwaves. Between each shockwave, move in and melee the World Seed. Keep doing this until the cat breaks free.
Once the cat jumps down onto the floor, interact with it to pick up the Nekomancer Wonder Weapon. If you Pack-a-Punch it later, it becomes the Tsunderera-Hime.
Pick it up, and you are ready to continue the Kowakujō main quest.
Step 3: Light the Lanterns with Nekomancer
With the cat tamed, the next thing to do would be using it to light 11 lanterns scattered around the map. Once you activate the first one, you'll have a timer, so you won't have time to do them all if you don't know where they all are. The order in which you shoot them does not matter, so there are different ways to approach this, here's one of them:
| # | Area | Where to look |
|---|---|---|
| 1 | Outer Ward | Near the Mystery Box spawn |
| 2 | Staging Area | Near the hillside/path toward Central Courtyard |
| 3 | Stables | Near the GobbleGum machine |
| 4 | Training Area | Out of bounds near Melee Macchiato |
| 5 | Tea Garden | Near the Mystery Box spawn |
| 6 | Tenshu Entrance | Around the Tenshu Entrance route, likely near the upper castle/exfil side |
| 7 | Central Courtyard | Left side of the big cherry blossom tree |
| 8 | Central Courtyard | Near the Kitchens entrance |
| 9 | Kitchens | Near the stairs |
| 10 | Flower Garden | Near the GobbleGum machine |
| 11 | Gatehouse | Near Speed Cola |
After you light every lantern correctly, go to the War Room. A spirit corpse with a katana stuck in it should appear there. Interact with it to trigger a short in-game cinematic.
Before leaving the War Room, check the spot where the spirit appeared. There should be Ceramic Shards here. If they appear in your run, pick them up. If they do not, continue with the next step, since this part is still being confirmed by the community.
Get the Fox Mask
After the War Room cinematic, head up to the roof and use the Ninja Kite fast travel. As you fly toward the giant cherry blossom tree, push right and keep pressing interact. The Fox Mask is hanging near the roof edge on the right side of the flight path. If you miss it, just take the kite again and retry. Once you grab the Fox Mask, take it to the mask wall in the Storage Rooms near the PhD Flopper side of the castle. Interact with the wall to place the mask and start the next puzzle.
Step 4: Complete the Mask Puzzle and Collect Suspect Evidence
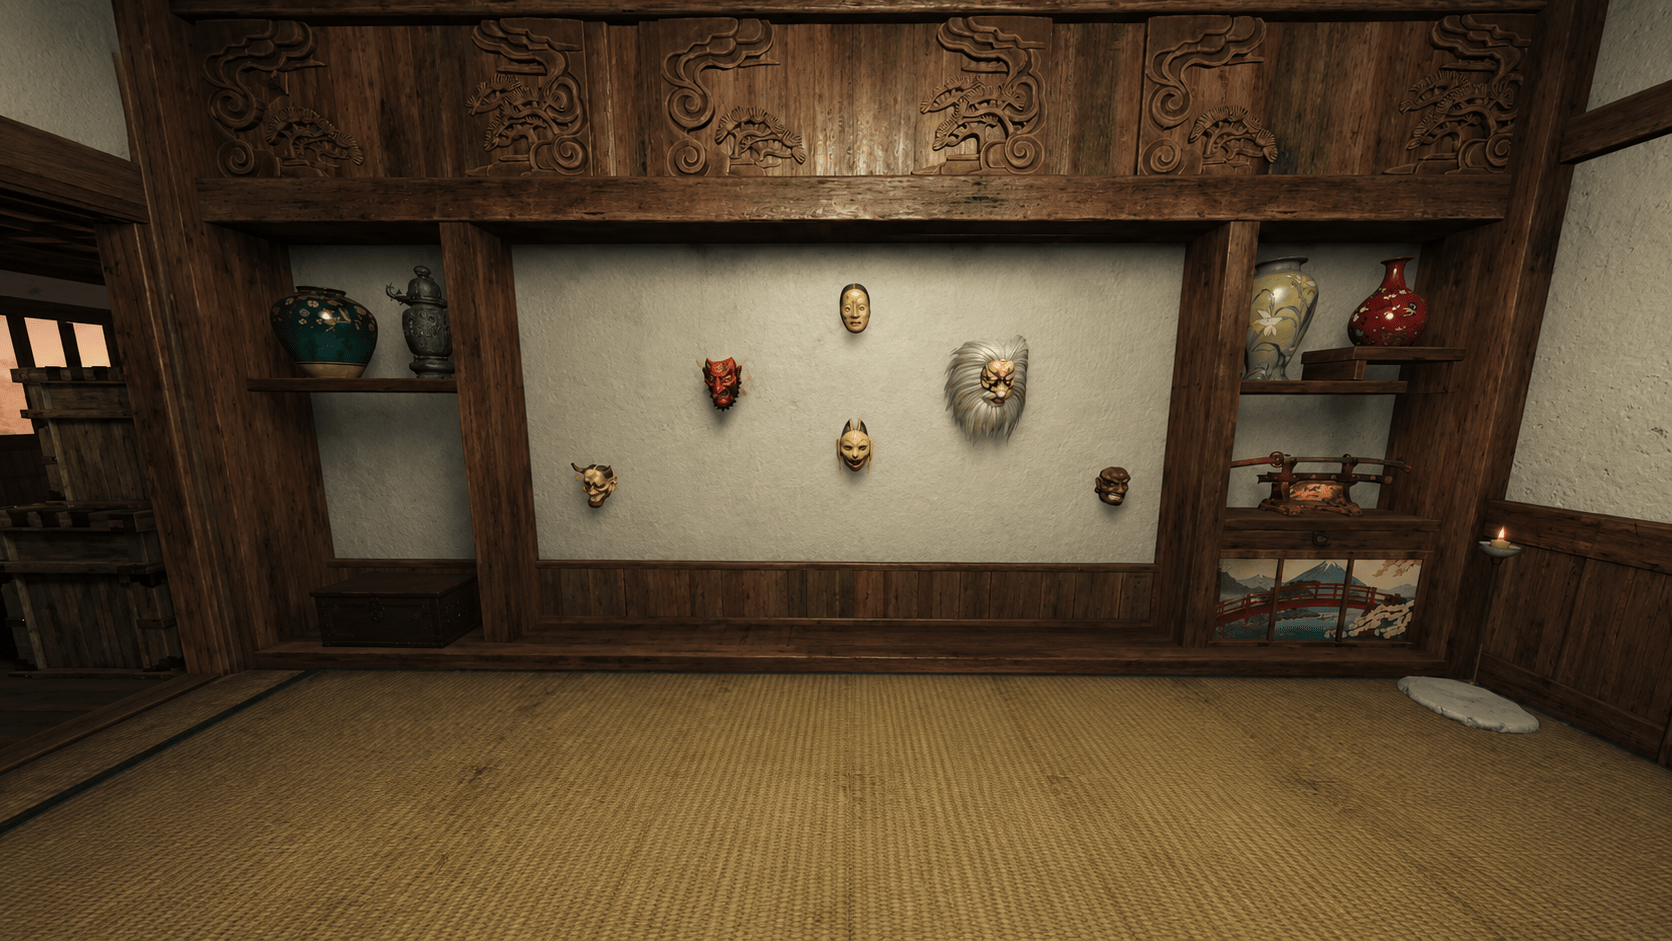
The mask wall puzzle works like "Simon Says", except the game uses masked zombies instead of glowing buttons because of course it does.
Interact with the Fox Mask on the wall. Several masks will glow in a specific order. Remember that order, then kill the zombies wearing the matching masks in the same sequence.
The puzzle has three rounds:
| Round | What Happens |
| 1 | Three masks glow, then you kill three matching zombies in order |
| 2 | Four masks glow, then you kill four matching zombies in order |
| 3 | Five masks glow, then you kill five matching zombies in order |
If you kill the wrong masked zombie, the puzzle fails and you will need to go to the next round before trying again. I highly recommend doing this at the end of a round with one zombie alive. Explosives are risky here, because killing the wrong masked zombie by accident will waste the attempt.
Once you complete all three sequences, the Fox Mask will glow blue. Interact with it to trigger another cinematic.
Collect the Three Suspect Evidence Items
After the cutscene, the Fox Mask will fly around the map and hide in three locations. Shoot the mask at each spot, then pick up the evidence item it drops.
| Evidence | Location |
| Takeshi’s Pipe | Workshop, on the shelf area left of the stairs |
| Takeo’s Case | Collapsed Study, above the beam near the ceiling |
| Mitsuhime’s Comb | Onsen Baths, outside the window left of Elemental Pop |
The Onsen Baths mask is especially annoying to see. Aim toward the top-left part of the window if you are struggling to spot it. After collecting all three items, go to the Meditation Room and interact with the evidence shelves. Placing the Suspect Evidence reveals the first out of five paintings. This unlocks the next evidence category.
Browse our hottest Call of Duty Boosting services


Step 5: Collect the Accomplice Evidence
This section starts with the Coin Purse, then moves into three named zombie mini-steps: Gardener, Merchant, and Nobleman. These can be done in any order after the Coin Purse is handled.
Get the Coin Purse
First, check the Mystery Box locations around the map. One of the Mystery Box platforms will have a small wooden tag near it. This tag marks the box location you need for the Coin Purse step. You need to get the Mystery Box to that exact platform. You can do this by spinning the box until it moves there normally, using Fire Sale, or using Mr. Peeks with the right augment if you are running that setup. Once the Mystery Box is at the tagged location, throw a Maneki-Neko cat grenade on top of or directly in front of the box, then spin the box. If done correctly, a blue Coin Purse will appear. Pick it up. Now return to Outer Ward / spawn. Go to the back of the area near the Rampage Inducer and interact with the ghostly coin pouch. This triggers another short cinematic and unlocks the named zombie evidence steps.
Get the Gardening Shears
To spawn the Gardener, you need a Bucket. Bucket spawns can include:
| Bucket Spawn | Area |
| Cat Cafe | Tea Garden |
| Rooftop | Onsen Baths |
| Behind Speed Cola | Gatehouse |
| Left of Death Perception | Stables |
Pick up the Bucket and fill it with water. You can use the puddle in Tea Garden or the large pool in Onsen Baths. Be careful while carrying it. Sprinting, jumping, getting hit, or moving too recklessly can spill water. If that happens, refill the Bucket before continuing.
Take the filled Bucket to Flower Garden and water three weeds along the cobblestone path. The exact plant positions can shift slightly, but they stay in that Flower Garden path area.
After watering all three, the Gardener will spawn. It starts immune, so do not waste all your ammo dumping into it immediately. Look for the glowing flower pots around Flower Garden and shoot them to remove the immunity window. Once the Gardener becomes vulnerable, burn it down and pick up the Gardening Shears and note it drops.
Return to the Meditation Room and place the evidence on the shelf.
Get the Mercantile Abacus
Go to Kitchens and find the fruit basket near the shelf / cooking area. Melee it to drop a piece of fruit. For the Merchant step, do not jump on this fruit. Leave it on the ground and leave Kitchens. Wait around 60-90 seconds, or go far enough away that the room resets. When you return, a zombie should be eating the fruit and holding it in its mouth. Let that zombie follow you to the Staging Area. Kill it near the shack window between the entrances to Stables and Central Courtyard. If done correctly, the Merchant will climb out of the window. Kill it while it is eating the fruit in the area. It has a lot of health, so bring something that actually hurts. Once it dies, pick up the Mercantile Abacus and the Sales Log note. Deposit both items in the Meditation Room.
Get the Nobleman’s Hat
For the Nobleman step, craft or bring Decoy grenades. Go to the Training Area and look at the building with three shuttered windows above the gate. Throw a Decoy at each shuttered window in quick succession. If done correctly, the windows will open and blue glowing grenades will start flying out. Your job is to throw those grenades back at the correct window where the Nobleman is standing. He moves between windows, so watch carefully and cook the grenade so it explodes near him. If the hit connects, you should see a big damage number.
Repeat this until the Nobleman dies. Pick up the Nobleman’s Hat and the note, then return to the Meditation Room and place them on the shelf. This reveals the second painting.
Step 6: Collect the Poison Evidence
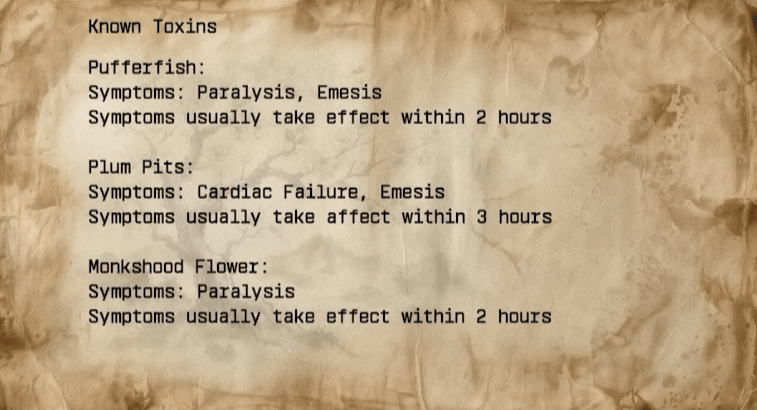 The Poison Evidence chain gives you three items: Monkshood Flower, Plum Pit, and Pufferfish. Some parts can be done early, but the Pufferfish route only opens properly after you have placed the Accomplice Evidence and revealed the second painting.
Pick Up the Poison Compendium
Before working on the poison chain, go to the War Room and pick up the Poison Compendium from the shelf. You will need this information later during the murder deduction step.
Get the Monkshood Flower
Go to Flower Garden and look near the crack in the ground close to the workbench / Wisp Tea side. Pick up the Monkshood plant part from the ground. Take it to Tenshu Entrance and place it in the flower pot near the Exfil phonebooth. Next, go to the Training Area and look above the Ammo Cache / gate beam. Use a charged Nekomancer shot to knock down the Empty Pouch, then pick it up. Now wait for a Fissure event. This is when one area of the map fills with smoke and ash. Stand in the ashy area until your health drops low enough for the Volcanic Ash to be collected into the pouch. With Jugger-Nog, this usually happens around the halfway point of your health bar. Return to the flower pot in Tenshu Entrance and place the Volcanic Ash in it. Now you need the cherry blossom tree buff. Find one of the cherry blossom trees around the map and melee it until it glows. Stand near the tree until your character gets the glowing overheal effect.
With the buff active, return to the flower pot and run in circles nearby until a small tornado / speed boost effect appears. If it happens close enough to the pot, the plant will glow and turn into the Monkshood Flower. Pick it up.
Get the Plum Pit
Go to Kitchens and find the small fruit basket on the shelf near the fire pit. Melee the basket to drop a plum. Now jump on the plum repeatedly until it gets crushed and turns into a Plum Pit. Pick it up. Yes, you are solving a murder mystery by jumping on fruit. Zombies has been like this for years and we all keep coming back.
Get the Pufferfish
To get the Pufferfish, you need to solve the 3x3 scroll puzzle in Storage Rooms. This puzzle only activates after you have placed the Accomplice Evidence and revealed the second painting. The scroll puzzle works like a toggle grid. Meleeing or shooting one scroll changes that scroll and the adjacent scrolls. Your goal is to push all scrolls into the wall so none are sticking out. Once the puzzle is solved, pick up the Pestle and the note that appear. Take the Pestle to Kitchens and place it in the bowl / pot. The green gas tells you what comes next: use a weapon with Brain Rot and kill zombies near the bowl. A charged Nekomancer shot may also help, but Brain Rot is the clean method. Keep feeding zombie kills into the bowl until the soul box is complete. When the Pestle turns ghostly blue, interact with it to trigger another ghost sequence. After the sequence ends, check the nearby cupboard / window area in Kitchens and pick up the Pufferfish. Now return to the Meditation Room and place the Poison Evidence on the shelf. This reveals the third painting.
Step 7: Finish the Evidence Board, Solve the Murder, and Beat the Boss
Step 7 is the longest part of the Easter Egg, so do not go into it undergeared. Before pushing too far, I recommend having a strong Pack-a-Punched ranged weapon, armor, Decoys or Kazimir, Molotovs or explosives, and enough salvage to restock. The final boss is very manageable, but getting there while underprepared is how the run turns into a documentary about bad choices.
Repair the Ceramic Cup
After the third painting appears, look directly at the middle of that painting and interact to pick up a Ceramic Shard. You also need another Ceramic Shard from the War Room / Pack-a-Punch stair area near the blood puddle. If you picked it up earlier after the War Room spirit step, you are fine. If not, grab it now. With both Ceramic Shards collected, go to Tea Garden and interact with the table to repair the ceramic cup. This is basically the Kintsugi step. After repairing it, flip to the next round. The cup should glow blue on the table. Interact with it to trigger another cinematic, then pick it up.
Complete the Cup Defenses
You now need to place and defend the repaired cup in three locations.
| Cup Step | Location | Reward |
| 1 | War Room / Japan map side | Horse Statueette |
| 2 | Collapsed Study / upper castle side | Calligraphy Brush |
| 3 | Cat Cafe in Tea Garden | Tea Whisk |
For the first two spots, place the cup and defend it from blue-eyed zombies until the pulse finishes. If zombies break the cup, you will need to wait until the next round and repair / retry the step. The third location works differently. When you place the cup in the Cat Cafe, a Hellhound steals it and runs around the map. Chase it down, kill it, and pick up the Tea Whisk. Once you have the Horse Statueette, Calligraphy Brush, and Tea Whisk, return to the Meditation Room and place them on the shelf. This reveals the fourth painting.
Get the Netsuke of Brothers
If you have not done this earlier, go to Stables and wait until the lava cools and hardens. A small glowing statue will appear on the hardened lava. Throw a Molotov or explosive at the statue to knock it loose. It will fly out and land nearby. Pick up the Netsuke of Brothers. You should also already have the Shogun’s Hanko from the first Oni you killed while opening Pack-a-Punch. Keep both items for the final evidence category.
Solve the Clock and Flag Puzzle
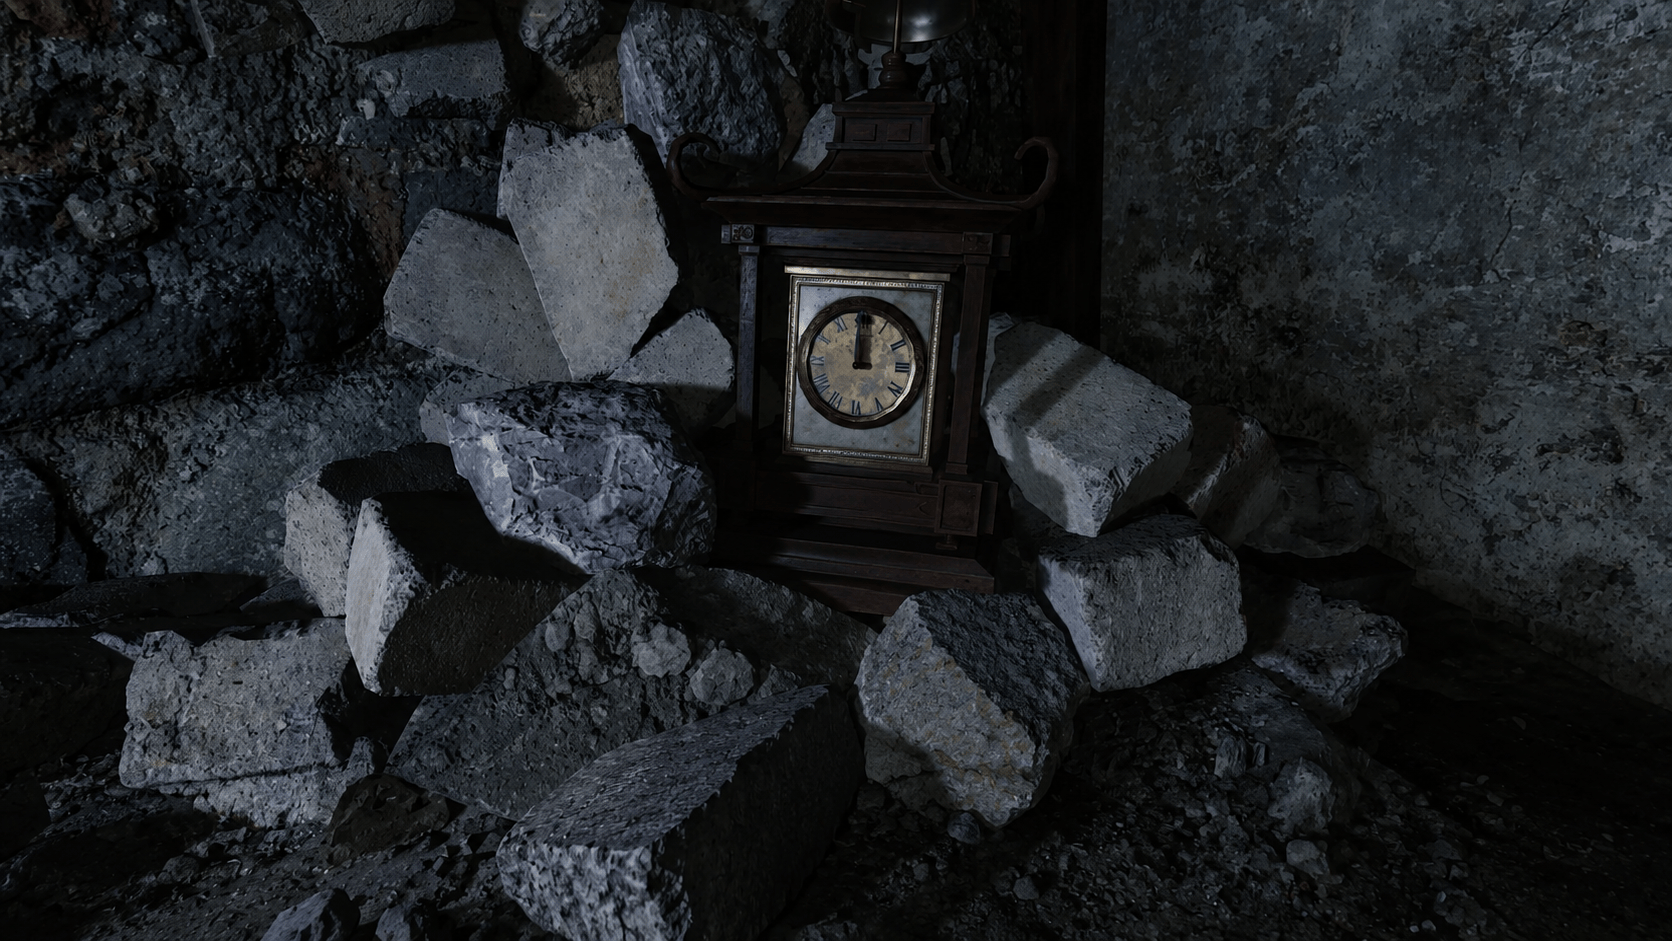
After the fourth painting is revealed, go to the bottom of Storage Rooms near the PhD side. A clock should now be visible where rubble was blocking it before. Interact with the clock and watch the hands. It will show four numbers in sequence. Write them down. If you miss the sequence, interact with the clock again. Now flip to the next round. This should trigger an assault wave. During the assault wave, kill the zombies carrying flags. Finish the wave, then go to Staging Area. The flags will now be available there. Each flag has a value based on the number of symbols on it. A flag with one symbol is worth 1, a flag with two symbols is worth 2, and so on. You also need to find four numbered symbol locations around the map. These locations can include:
| Symbol Location | Area |
| Spawn / Outer Ward | Near the starting area |
| Flower Garden | Near Wisp Tea |
| Central Courtyard | Near the middle tree area |
| Stables rooftop | Upper side of Stables |
These symbols tell you the order of the locations: first, second, third, and fourth. Your clock numbers tell you which total flag value must be placed at each location.
For example, if your clock shows:
- 5
- 3
- 6
- 4
Then you need to place flags totaling 5 at the first symbol location, flags totaling 3 at the second, flags totaling 6 at the third, and flags totaling 4 at the fourth. Place flags at the bamboo shoots beneath each symbol. If a number repeats, you may need to combine flags differently, because used flags are taken out of the pool. So if you used the 6 flag already, another 6 may need to be made with 5 + 1 or 4 + 2. Annoying, but still better than Gorod Krovi valves. Once all flags are placed correctly, return to the clock. If the correct numbers light up, interact with it and pick up the Crest Medallion. Return to the Meditation Room and place the final evidence pieces on the shelf. This reveals the fifth painting.
Find the Accomplice Clue from the Traps
Before solving the murder board, you need one more clue. Activate the Oni / archer traps around the map and get around 15-20 zombie kills during a single trap activation. After enough trap kills, check the nearby ghost soldier. Interact with him and listen carefully. Turn subtitles on for this. The ghost will either say nothing useful or mention one of the possible accomplices:
| Ghost Mentions | Item Needed |
| Merchant | Mercantile Abacus |
| Gardener | Gardening Shears |
| Nobleman / Courtier | Nobleman’s Hat |
If the ghost says nothing useful, try another trap. The relevant traps can be around spawn, Flower Garden, and Central Courtyard.
Solve the Murder Board
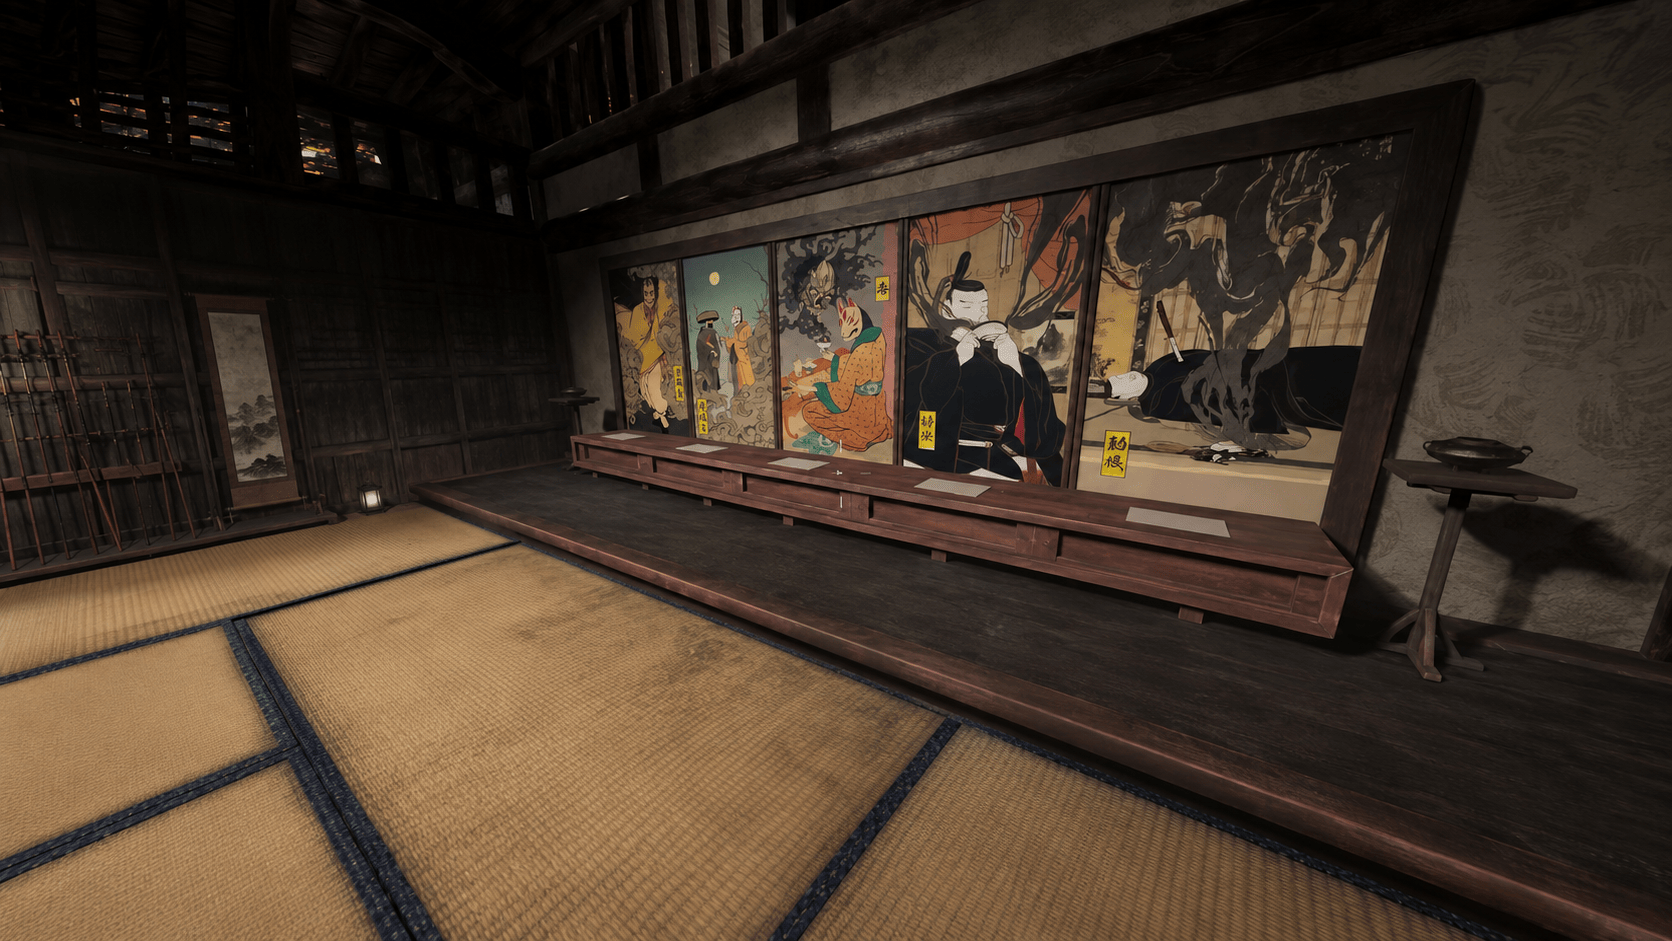
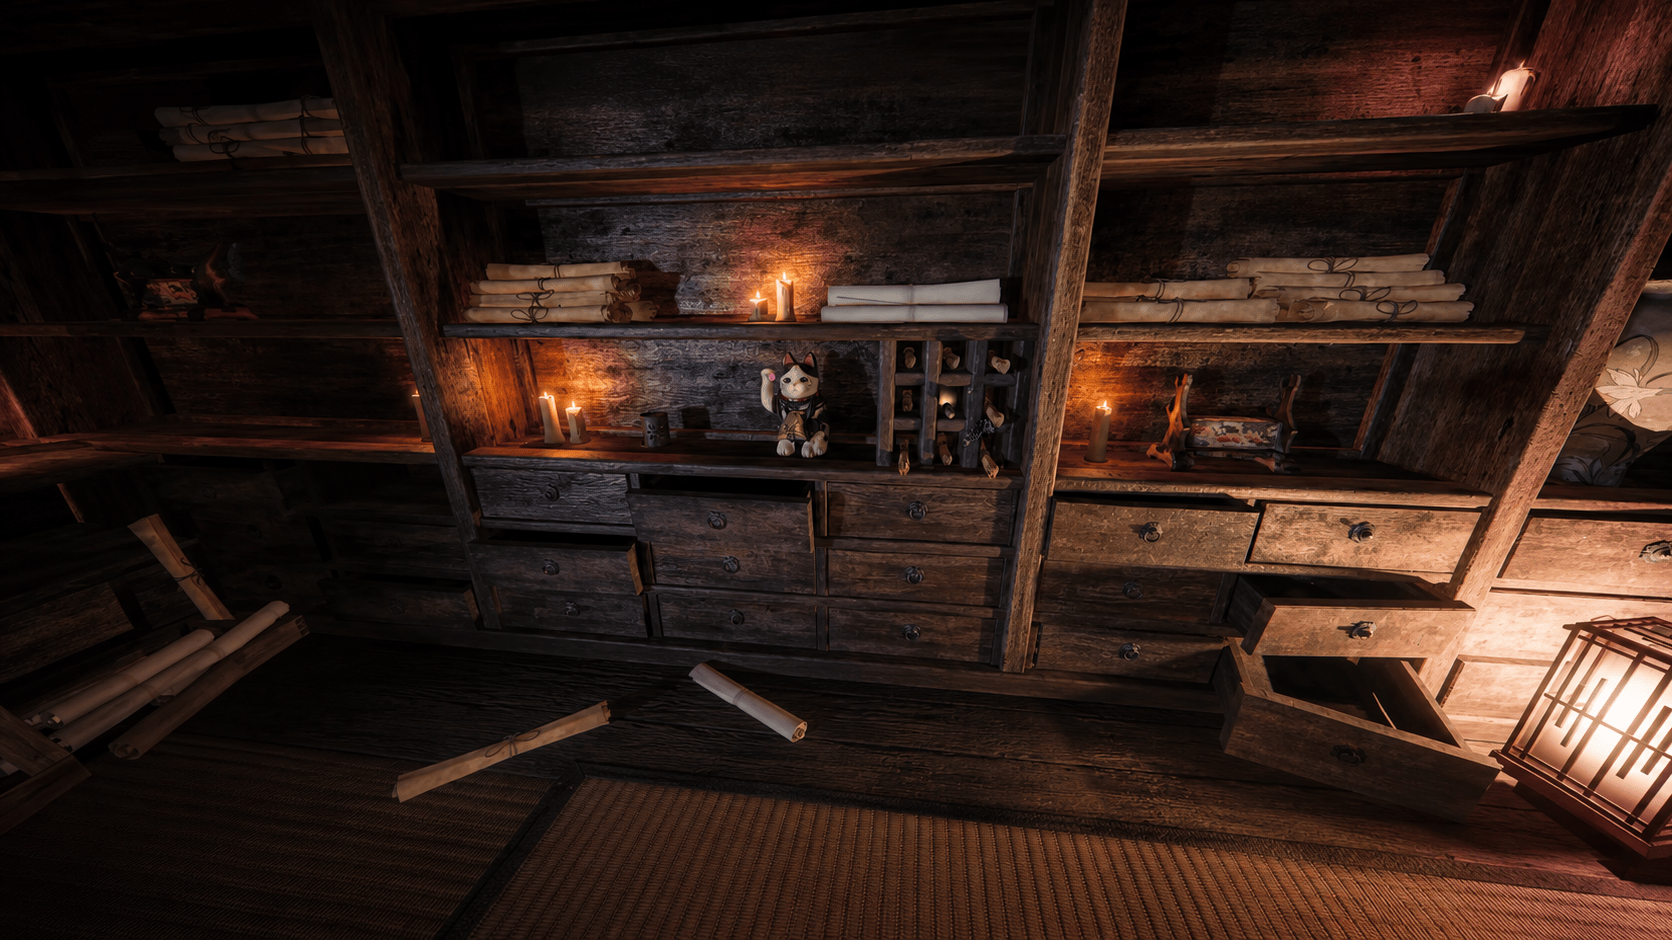
Now return to the Meditation Room. You need to place one item under each painting and set the zodiac dial correctly. Some answers are fixed, while others depend on your run.
| Painting | What to Place |
| 1 | Mitsuhime’s Comb |
| 2 | The accomplice item from the trap ghost clue |
| 3 | The murder weapon from the Doctor’s Note / poison clue |
| 4 | The location item based on the background of the fourth painting |
| 5 | Crest Medallion |
For Painting 2, use the ghost clue:
| Accomplice | Item |
| Merchant | Mercantile Abacus |
| Gardener | Gardening Shears |
| Nobleman / Courtier | Nobleman’s Hat |
For Painting 3, read the Doctor’s Note and match the cause of death to the poison evidence. In most runs, the logic follows this pattern:
| Cause of Death Clue | Item |
| Noxious food / emesis | Pufferfish |
| Noxious or contaminated plant | Plum Pit or Monkshood Flower, depending on the note wording |
| Paralysis | Monkshood Flower |
This is the most variable part of the deduction puzzle, so read the Doctor’s Note and Poison Compendium carefully. If your wording does not cleanly match the table, do not brute-force blindly. Recheck the accomplice clue and poison timing before submitting.
For Painting 4, look at the background image behind the person in the painting:
| Painting 4 Background | Item |
| Fish | Tea Whisk |
| Mountain | Horse Statueette |
| Bird | Calligraphy Brush |
Painting 5 always takes the Crest Medallion.
Set the Zodiac Dial
After placing the poison item for Painting 3, read the Poison Compendium and note how many hours that poison takes to kill. Then read the Doctor’s Note again and look for the animal listed at the time of death. Go to the zodiac dial and find that animal. Now move the dial backward, counter-clockwise, by the number of hours listed for your poison. For example, if the Doctor’s Note says the death time animal is Boar, and your poison takes 1 hour to kill, move the dial one space counter-clockwise from Boar. Some animal names may use close variants, like Boar instead of Pig or Stallion instead of Horse. Same animal family, same idea. Once all five items are placed and the zodiac dial is set, interact with the incense on both sides of the room to submit the solution. If you fail, an elite enemy spawns and you need to wait until the next round to try again. If you succeed, an orange orb flies toward the World Seed.
Purify the Sword and Fight the Oni
After solving the murder board, go to the World Seed and interact with the sword. This starts a mini-boss fight against a stronger Oni in Central Courtyard. Keep moving, avoid the mask projectiles, and burn the Oni down. This fight is not the real finale, but it is enough to punish you if you walk in with trash armor and no ammo. After the Oni dies, you will be returned near Pack-a-Punch. The dragon will land on the roof, then fly away. A new kite / fast travel option will appear for the final boss arena. Do not use it until you are ready. Once you enter the boss fight, you cannot come back.
Upgrade the Neko Grenades
Before starting the final boss, I strongly recommend upgrading your Neko grenades. The upgraded version creates a protective bubble, which is extremely useful during the boss fight.
To upgrade them, do this:
- Activate the trap in Central Courtyard.
- Use a Combat Bow scorestreak.
- Look through the window and shoot the blue target.
- Move around the tree and shoot the remaining targets with the Combat Bow.
- Pick up the white powder that spawns behind the trap.
- Go to Kitchens and pick up the part under the cooker.
- Pick up the Matches near Double Tap on the shelf.
- Return to the original Maneki-Neko crafting table.
- Craft the upgraded Neko grenades.
These are not technically required, but they make the final fight much safer. In solo, I would not skip them.
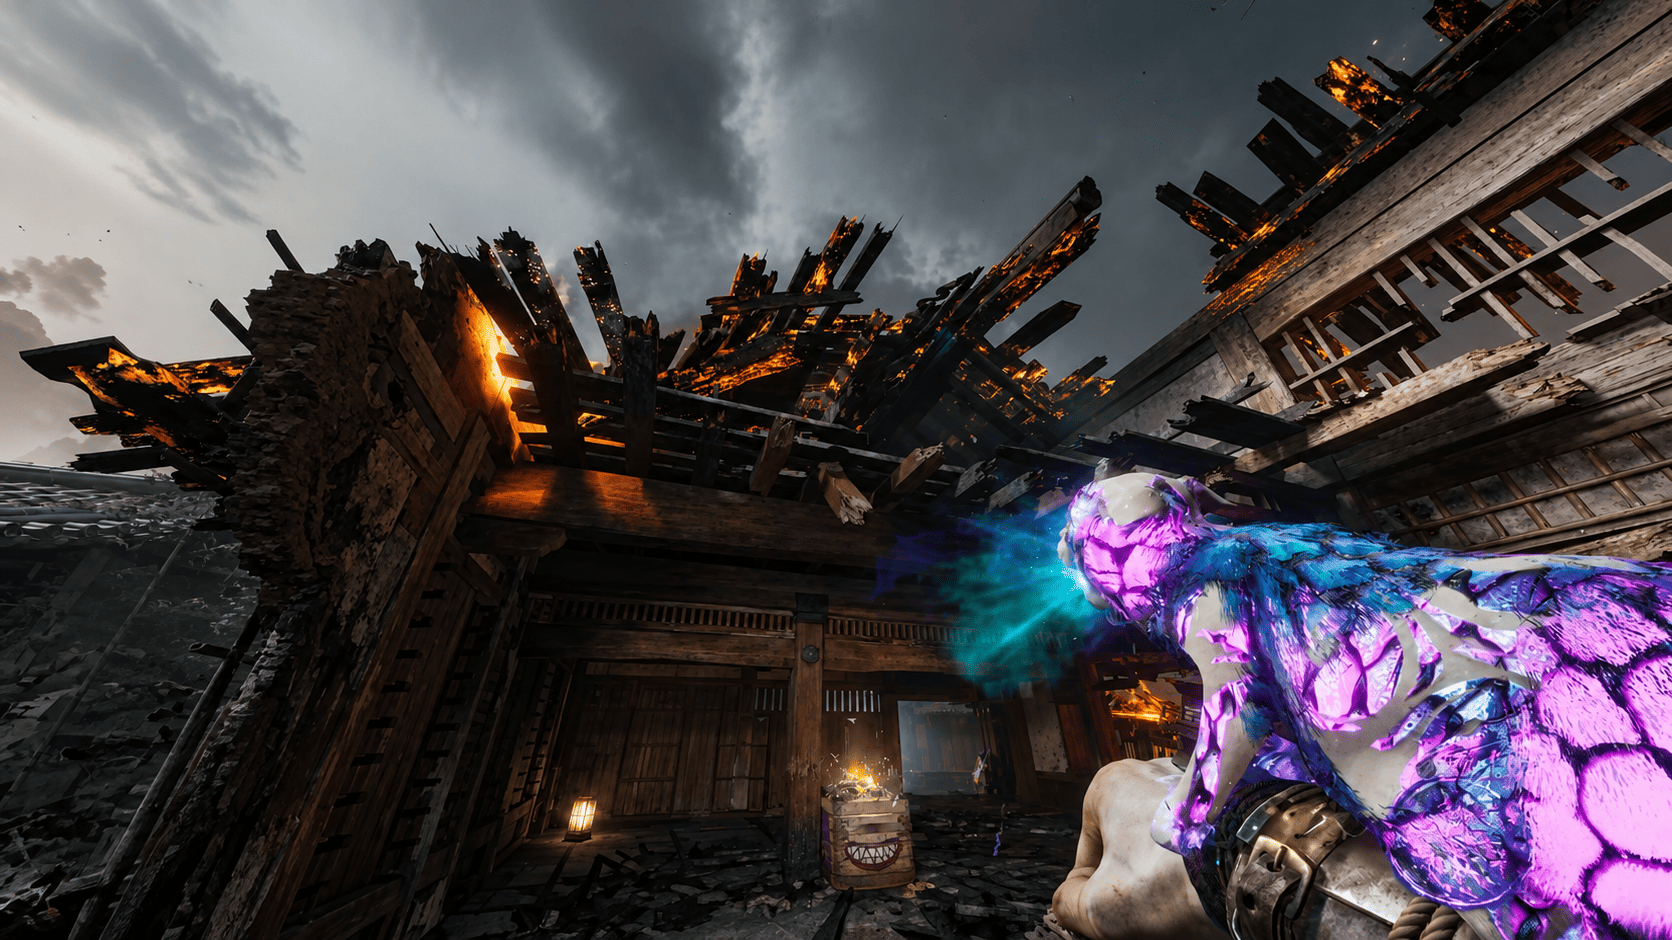
Step 8: Defeat Nyxara, the Dragon Boss
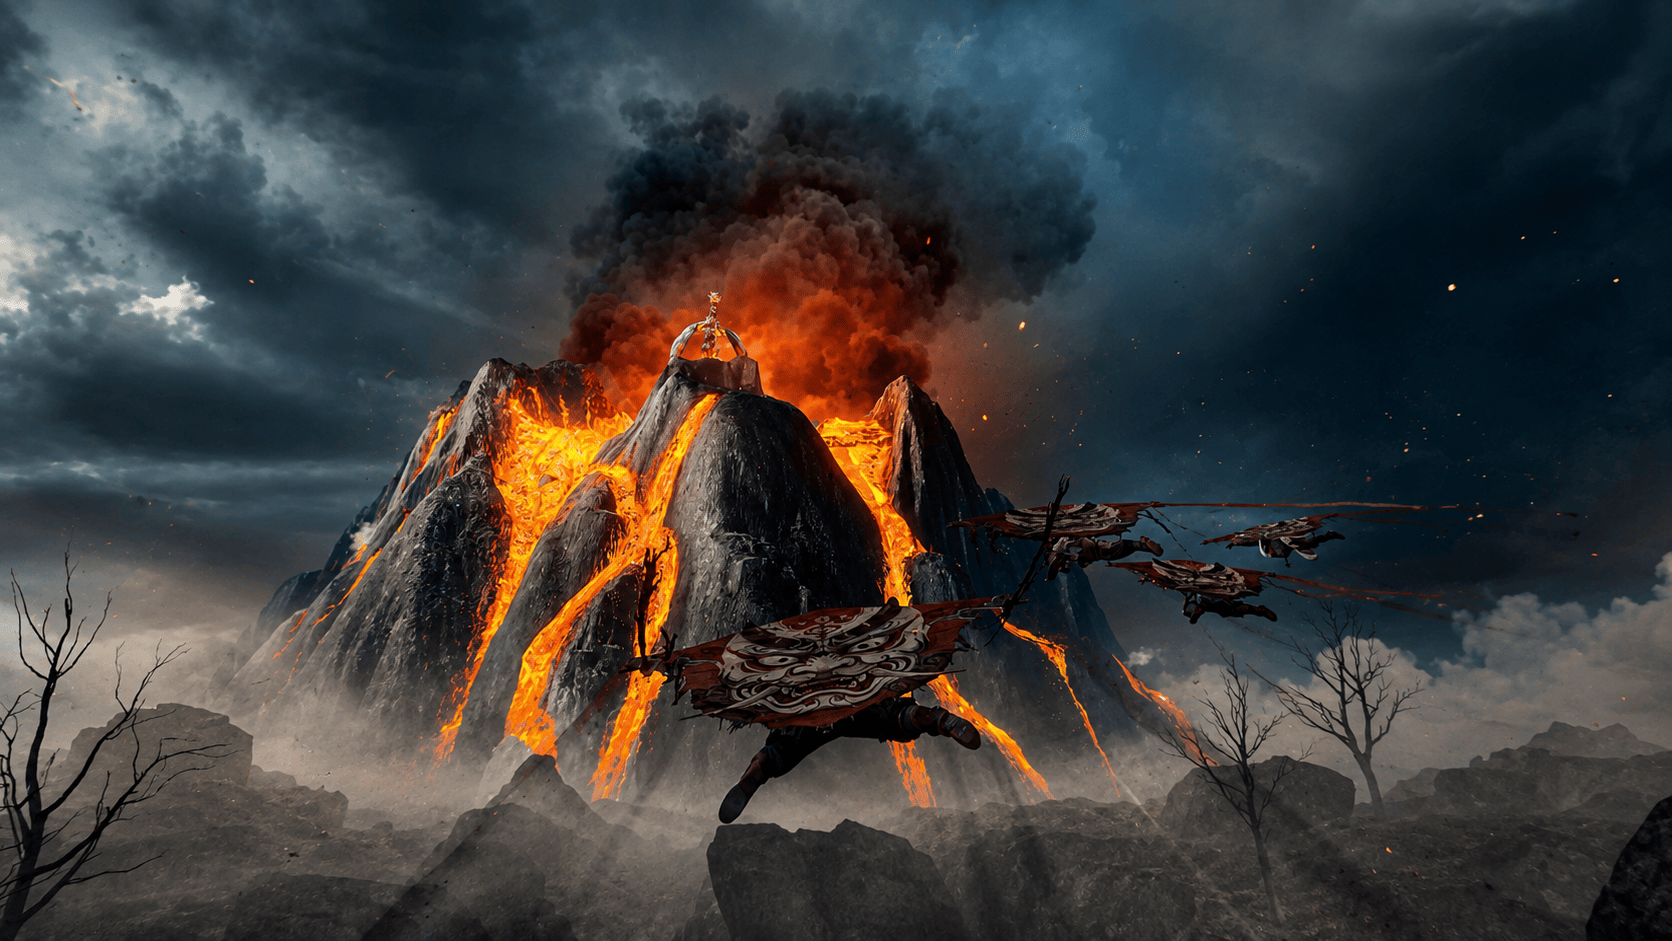
When you are fully stocked, interact with the boss fight kite and confirm the vote if you are in co-op. The final boss arena revolves around killing Oni enemies, picking up their flags, planting those flags in capture zones, and using the blue safety zones to damage the dragon. The dragon has three phases.
Dragon Boss Phase 1
In Phase 1, kill the Onryo with the flag, run through the flag, and plant it in the center zone. Stand in the circle to capture it. Once the blue zone appears, stand inside it and shoot the dragon’s weak spots. The first weak spots are usually around the eyes. The blue zone protects you from the dragon’s attacks, so use that window to dump damage. When the zone fades, keep moving and avoid the lava strips and incoming attacks.
Dragon Boss Phase 2
After losing the first third of its health, the dragon will fly away and return with more attacks. Now you need to capture two Oni flag zones before you get a proper damage window. Kill the flag Oni, grab the flags, plant them, and capture both zones.
The dragon gains more weak spots across its body. It can also summon electrified tornadoes, launch lava attacks, and breathe fire onto parts of the arena. If one side of the arena gets locked off by lava, rotate away and keep your route clean. You should get Max Ammo and armor between phases, so do not be too precious with Decoys, Kazimirs, or Neko grenades.
Dragon Boss Phase 3
In the final phase, you need three Oni flags and three captured zones. This phase adds even more pressure, including fireballs that can down you extremely fast. Keep moving, use cover when the arena catches fire, and save your safest equipment for this phase. The dragon’s weak spots can move to the wings, so track the glowing yellow areas and keep shooting whenever you have a safe window. Use upgraded Neko grenades while capturing zones or reviving teammates. Once the dragon’s health is fully depleted, the Kowakujō Main Quest is complete.


You got -20% OFF 
Kowakujō Cursed Mode Rewards
Cursed mode returns on Kowakujō with no Main Quest guidance, limited HUD, and only a starting pistol. It is basically the map telling you to suffer for cosmetics.
Players can hunt down new Cursed Relics and unlock three Pack-a-Punch camos:
- Flame Cipher Pack-a-Punch Camo, Calling Card, and 15,000 XP
- Toxic Cipher Pack-a-Punch Camo, Calling Card, and 20,000 XP
- Blood Cipher Pack-a-Punch Camo, Calling Card, and 25,000 XP
This mode should be better saved until you know the map layout and core quest steps. Going into it blind sounds funny for about five minutes.
New GobbleGum: Hellping Hound
Kowakujō adds a new Legendary GobbleGum called Hellping Hound. In Zombies, it summons a friendly Hellhound that fights for you for five minutes.
That should make it useful during lockdowns, high-pressure rounds, or early Main Quest attempts where you need one less problem biting your ankles.
New Mystery Box Weapon: PPSh-41
The PPSh-41 arrives as a new Ultra-Rarity legacy weapon in the Mystery Box. It has full Pack-a-Punch progression, Ammo Mod support, a large magazine, and a very high fire rate.
That makes it a very natural fit for Kowakujō, especially with lava routes, Scorched Zombies, and close-range castle areas. If the Wonder Weapon takes time to build, the PPSh-41 may be one of the better early lucky pulls.
Changelog
June 29, 2026 - the map guide has been finished and now includes all steps, all items and clue locations, as well as the final boss tactics. Added helpful guiding screenshots and images.
Check out other CoD guides:
- Totenreich Main Quest Easter Egg Guide
- Call of Duty Won’t Be Coming to Game Pass Anymore
- Black Ops 7 Season 3 Overview
- Avalon Map Guide for Warzone
F.A.Q.
How to unlock Pack-a-Punch on Kowakujō?
To unlock Pack-a-Punch on Kowakujō, recapture both Wards first. One is near the Training Area, and the other is in the Kitchens. After that, go to the Central Courtyard, remove the Gate Glyphs, and enter the War Room. Kill the Oni, pick up Shogun’s Hanko, then use it on the golden dragon door. Inside Shogun’s Sanctum, kill the marked zombies near the World Seed, and the Pack-a-Punch machine will appear.
Who is the main character tied to Kowakujō?
Kowakujō is heavily tied to Takeo Masaki. The map takes place at a distorted version of his family castle and focuses on the curse gripping his soul.
What enemies are on Kowakujō in CoD BO7?
Kowakujō includes Oni, Hellhounds, and Scorched Zombies. The Oni is the main new enemy, using armor, a spiked kanabō, electric attacks, and ranged bolts.
What does lava do on Kowakujō?
Lava damages and slows players. It can also damage zombies, but zombies left in lava for too long can turn into Scorched Zombies.
What is the Ghostly Rifleman Trap?
The Ghostly Rifleman Trap lets players summon spectral riflemen for support. It activates near the dual komainu statues after the power is turned on.
What are the Kowakujō Main Quest rewards?
The Main Quest rewards the Purified Takeo Operator Skin, a Calling Card, and 10,000 XP. Finishing before Directed Mode arrives also gives a unique Calling Card variant.
Is there Cursed mode on Kowakujō?
Yes, Kowakujō has Cursed mode. It removes Main Quest guidance, limits the HUD, starts players with only a pistol, and offers new Pack-a-Punch camo rewards.


