 Dallon Avery
Welcome to the complete Black Ops 7 Zombies Astra Malorum main quest guide. This map drags you into a fractured observatory suspended between realities, where ancient stargazing halls twist into impossible geometry and whole chambers echo with voices from other worlds. Astra Malorum thrives on disorientation. Rooms cycle through cosmic storms, machines speak in riddles, and every corridor hints at something watching from beyond the void. Nothing here stays still for long, and the deeper you travel, the more the map bends familiar Dark Aether logic into something stranger and far more dangerous.
In this BP7 Astra Malorum guide, you’ll find a full step-by-step walkthrough that covers all weapons, puzzles, defenses, planetary alignments, and every hidden mechanic required to reach and defeat the final boss. You’ll have precise directions and screenshot-ready moments for each step, so let’s begin unraveling the horrors sealed inside this observatory.
If you want to complete the map's easter egg in time to get into the leaderboards while the event is active and claim its rewards, buy Black Ops 7 Astra Malorum Boost at Skycoach. This is the best and fastest way to complete the map and also participate in the time-limited event for extra exclusive rewards. Let the Skycoach pros help you with this easter egg!
Read our other Black Ops 7 guides:
- How to Level Up Fast in BO7
- Best Controller Settings
- Best Weapons Tier List
- Best Perks Guide
- Mastery Camos Guide
- Best BO7 Loadouts
- Beta Overview
Note: At Skycoach, you can Buy Black Ops 7 Boost at the best prices with fast delivery. Use our special PROMO CODE (in green) hidden in this article for a 20% DISCOUNT.
Browse our hottest Call of Duty Boosting services


Astra Malorum Main Quest Walkthrough
Zombies main quest BO7 on Astra Malorum opens with a deceptively simple objective: secure power within the shattered observatory dome and stabilize the harmonic systems that control nearly every major mechanic on the map. Just like Ashes of the Damned and Liberty Falls, nothing else can begin until Pack-a-Punch is online and the central hub is functioning. Your early route takes you through the Machina Astralis, Luminarium, and the surrounding outer halls, all of which become crucial locations later when the puzzles, planet code sequences, and Oscar-related objectives begin to unfold.
Step 1: Turning on the Pack-A-Punch Machine
Your first task on Astra Malorum is to push toward the Observatory Dome and activate the Harmonic Oculus. This ancient control device powers the core systems of the observatory, and nothing else in the Easter egg can progress until it is fully restored. Move through the central halls toward the dome and interact with the Oculus to begin the power sequence.
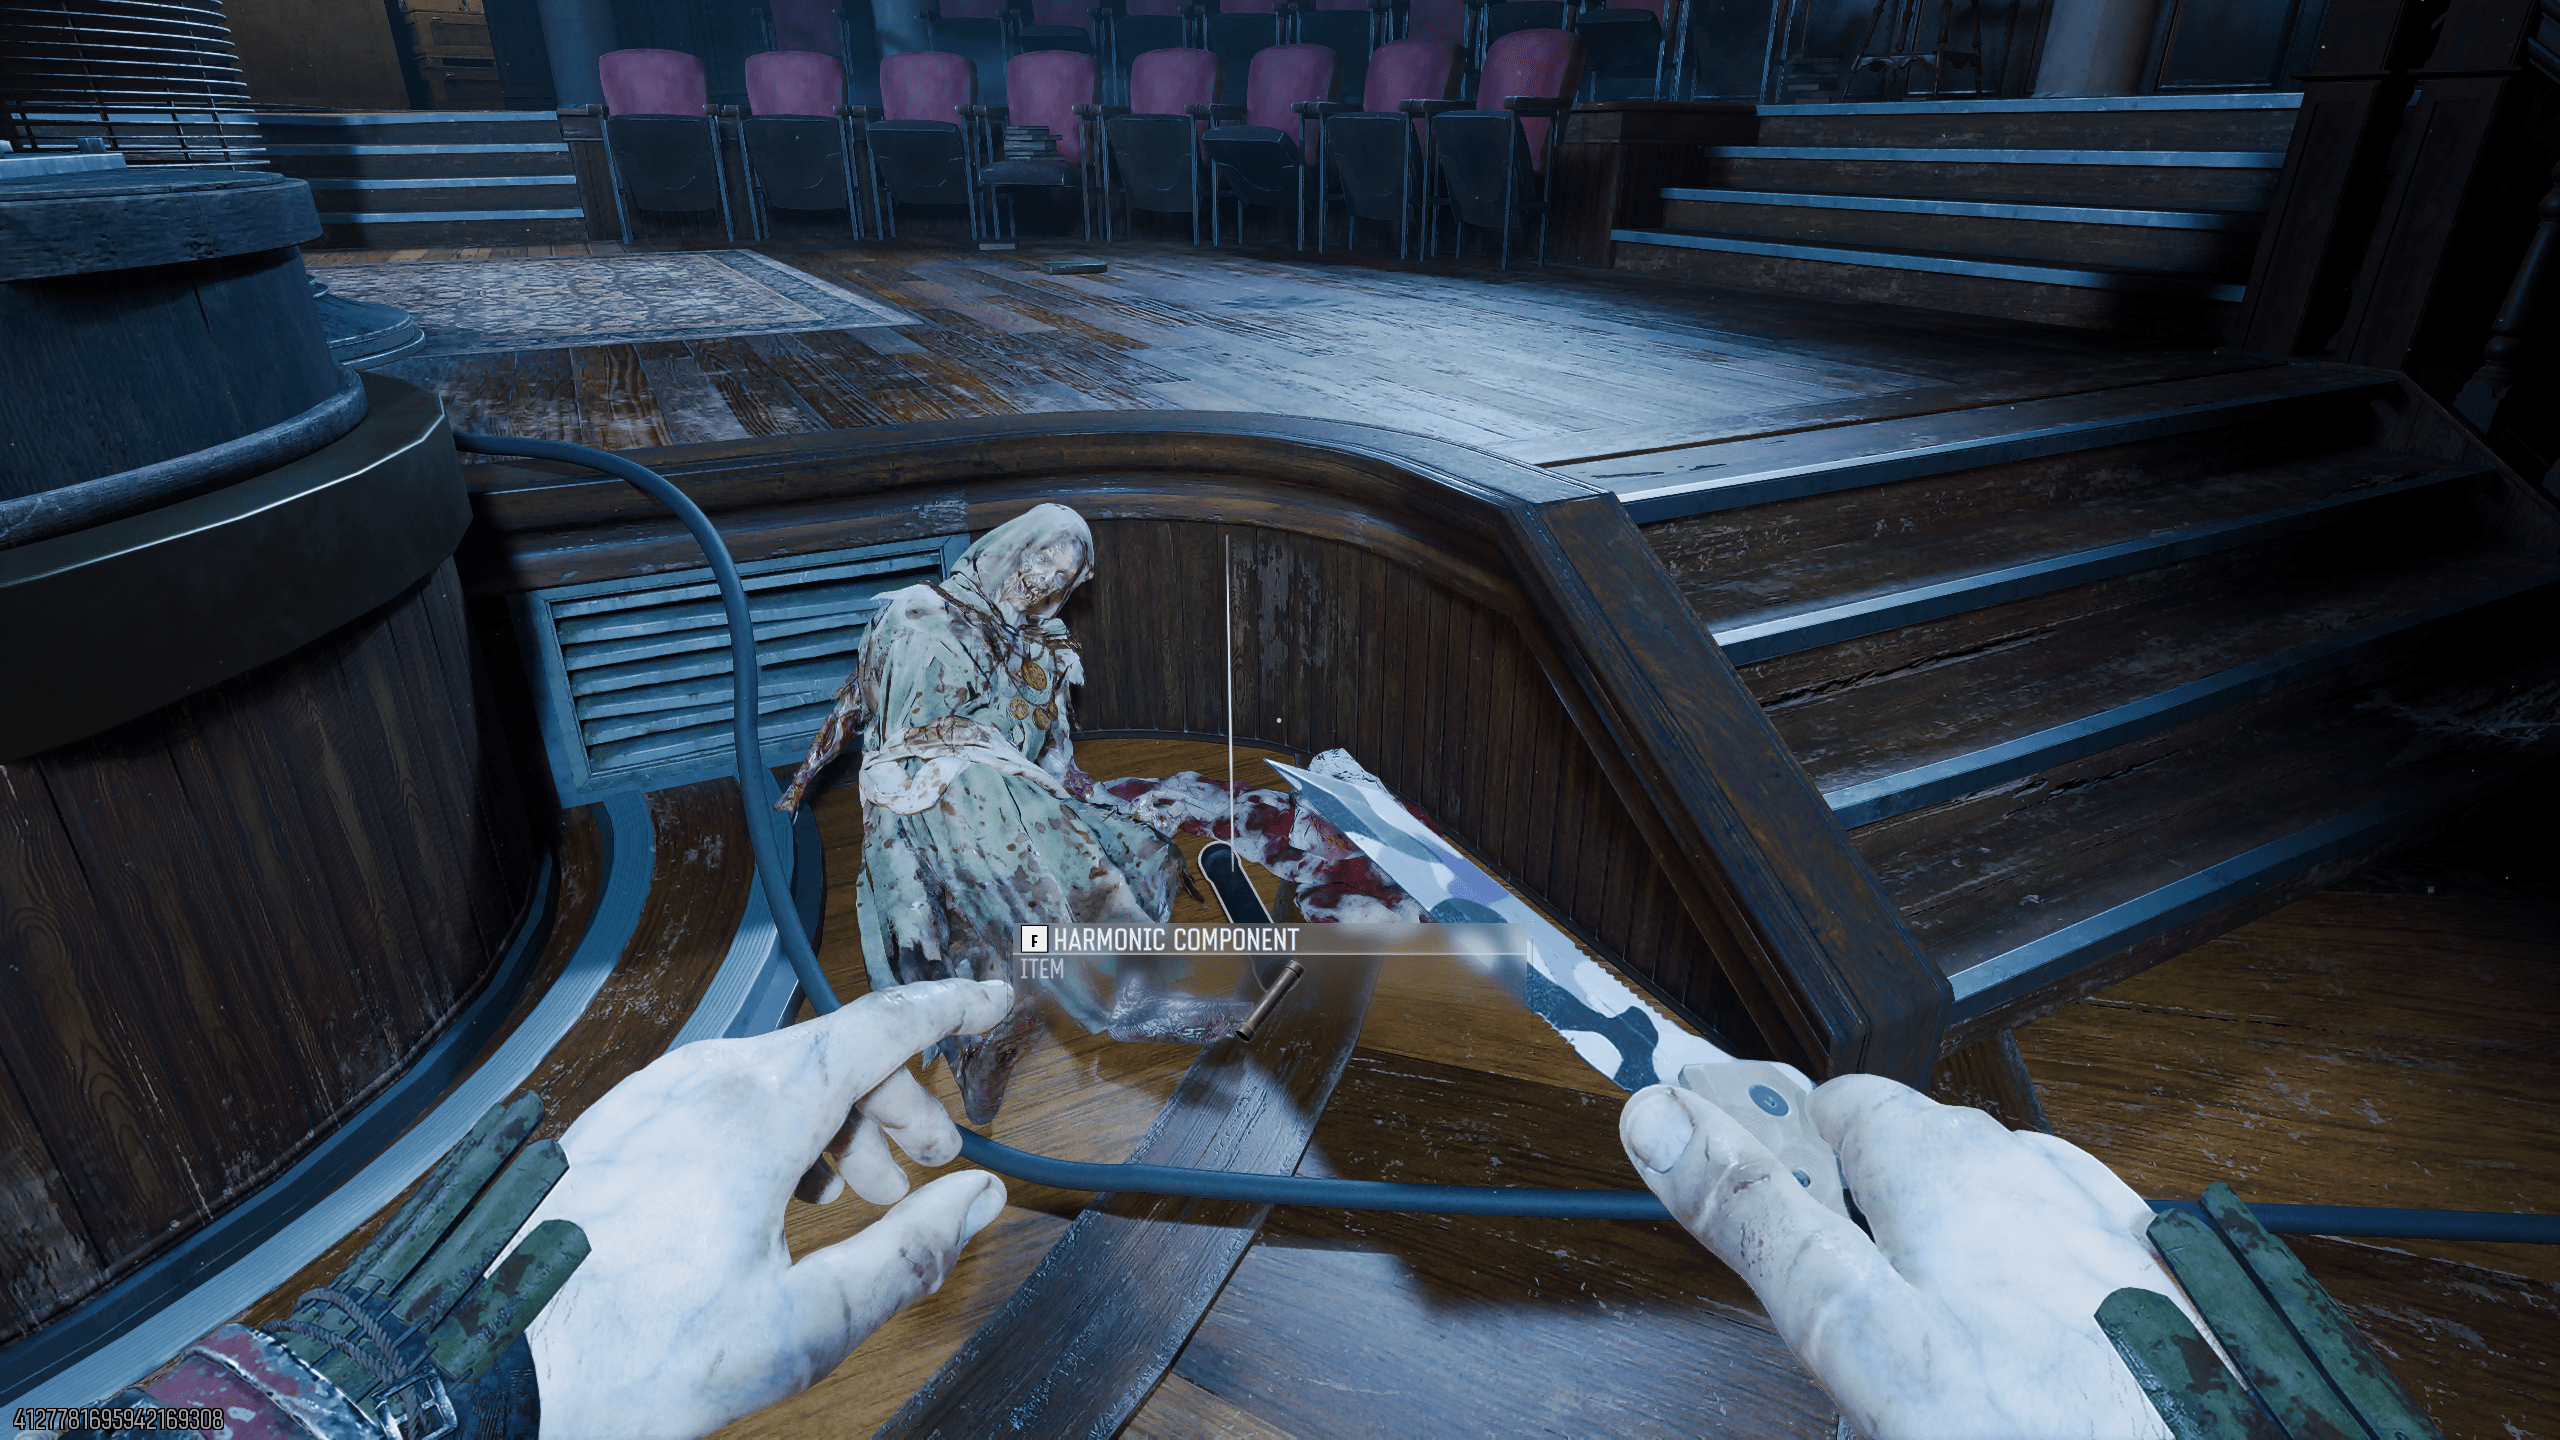
After activating it, the game prompts you to retrieve two missing components scattered across the facility. The first is located inside Machina Astralis, lying beside a collapsed corpse near the main staircase. Pick it up and continue into the next wing of the observatory.
The second component is found inside the Luminarium, again placed beside a fallen zombie on the tiled floor. Collecting this completes the required set. Return to the Observatory Dome and install both pieces into the Harmonic Oculus to initiate a short defensive hold. Zombies will rush the room while the Pack-a-Punch machine descends into place, but the sequence ends quickly once the timer expires. BLOG20
When the defense completes, Pack-a-Punch becomes fully operational, marking the true start of the Astra Malorum Easter egg. So, the BO7 Astra Malorum Pack-a-Punch location is the Observatory Dome.
Step 2: Building the LGM-1 Wonder Weapon

This would be your BO7 Astra Malorum Wonder Weapon guide. Traditionally, a unique wonder weapon is required for one of the final steps of the easter egg. The LGM-1 is central to Astra Malorum’s mid-game puzzles. To build it, you must first collect three components, then kill O.S.C.A.R. using three different traps across the map.
Collecting the Three LGM-1 Parts
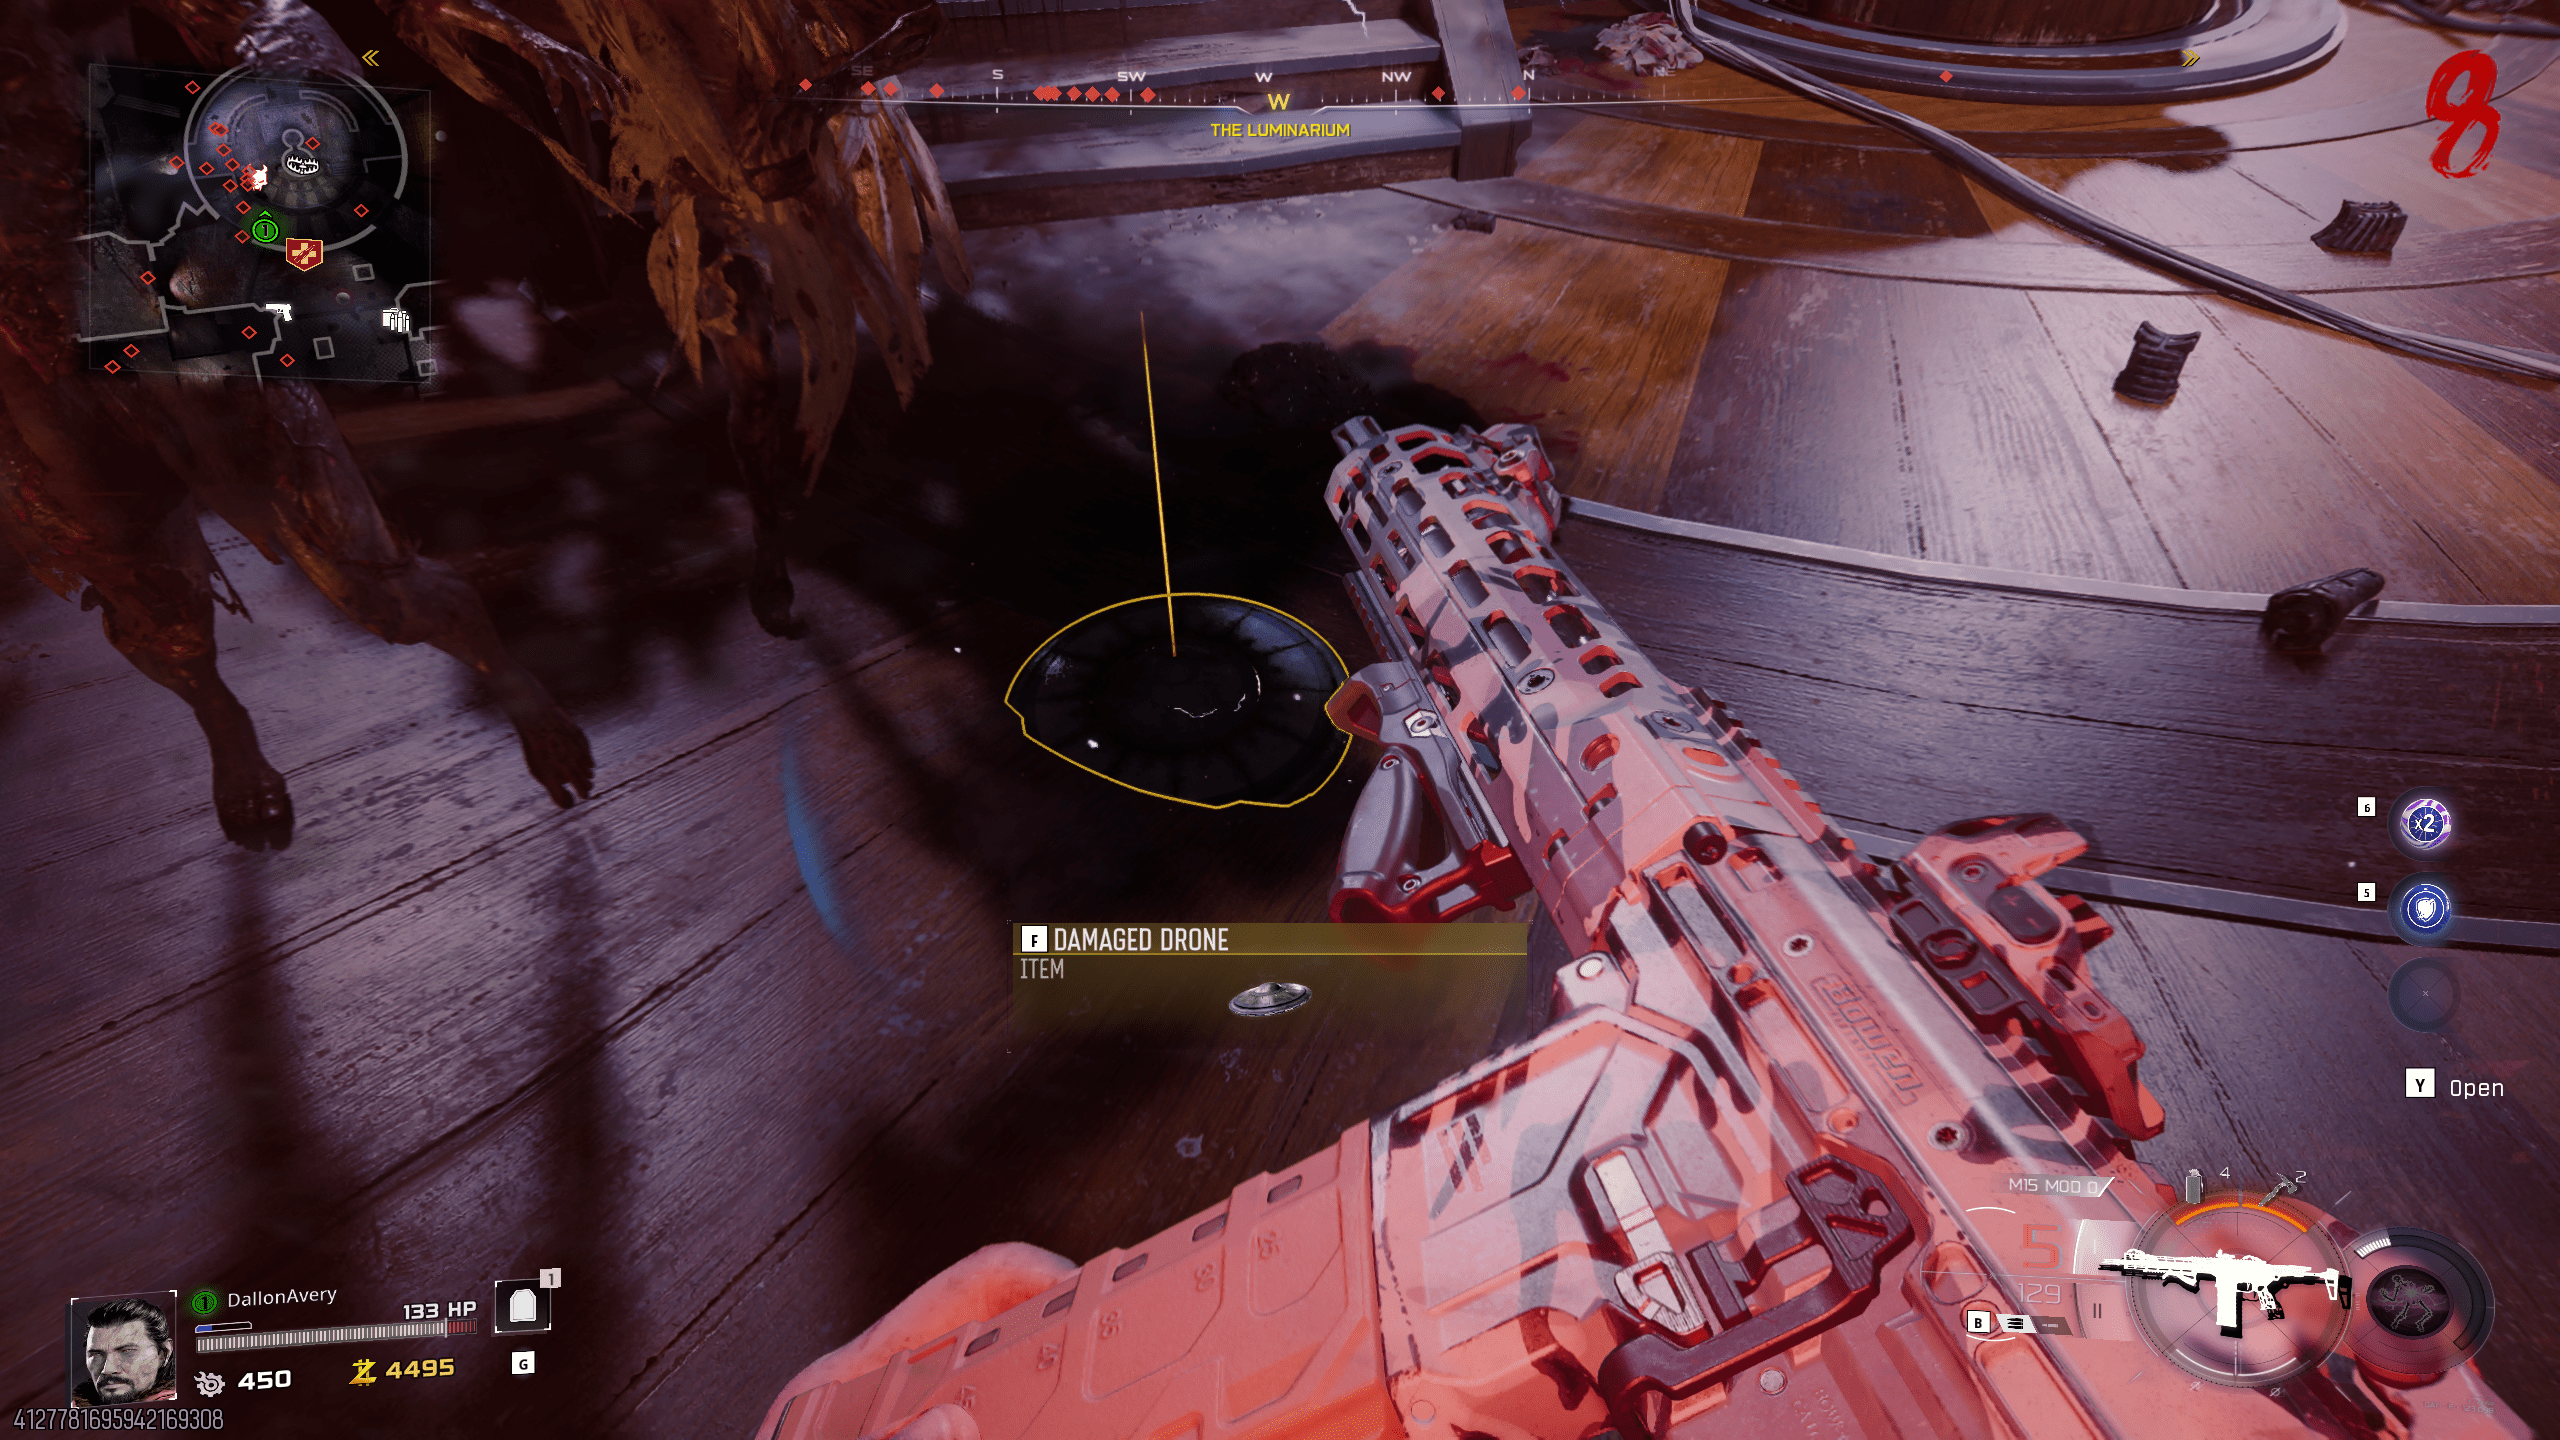
Start by finding O.S.C.A.R. anywhere on the map. Behind him floats a small UFO. Shoot that drone to make the Damaged Drone part drop and pick it up.
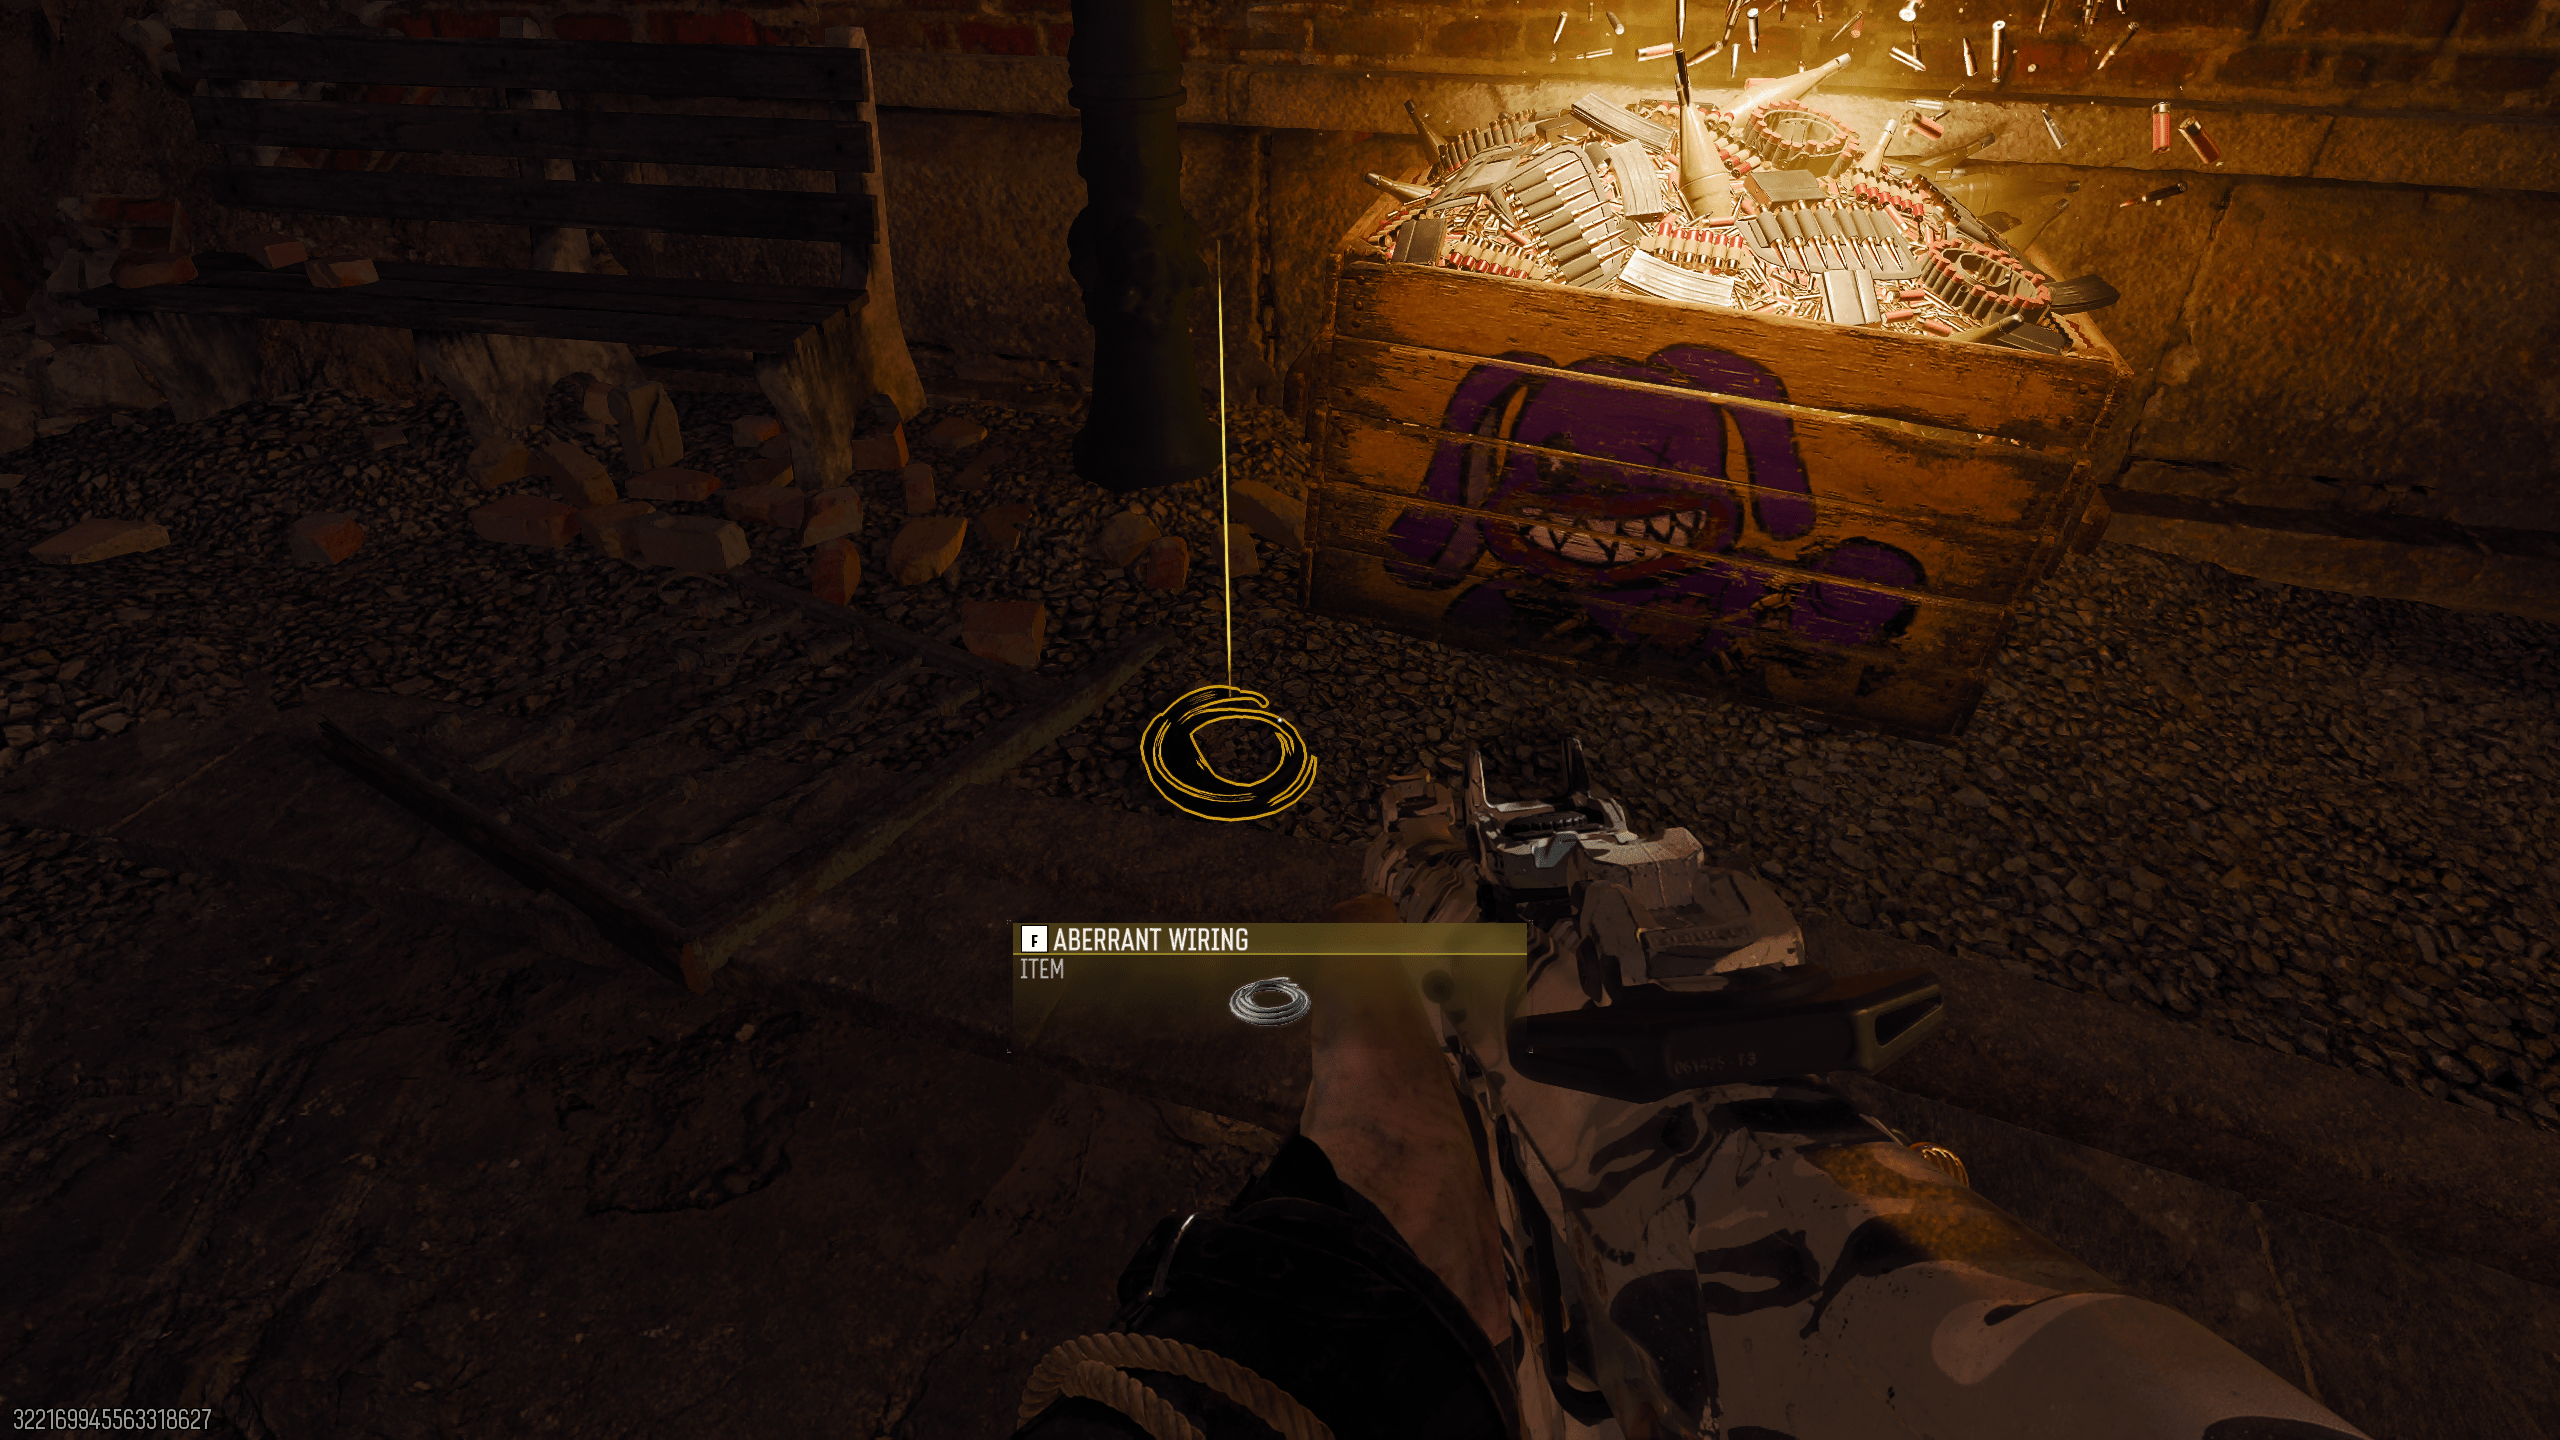
Next, search the outer paths for a blinking lamppost. Only one lamppost will flash. Shoot it and collect the Aberrant Wiring that appears on the ground.
For the final part, Pack-a-Punch any weapon and return to the Crash Site spawn area. Shoot the front of the wrecked Ol' Tessie there. The hood pops open and reveals a Car Battery you can grab.
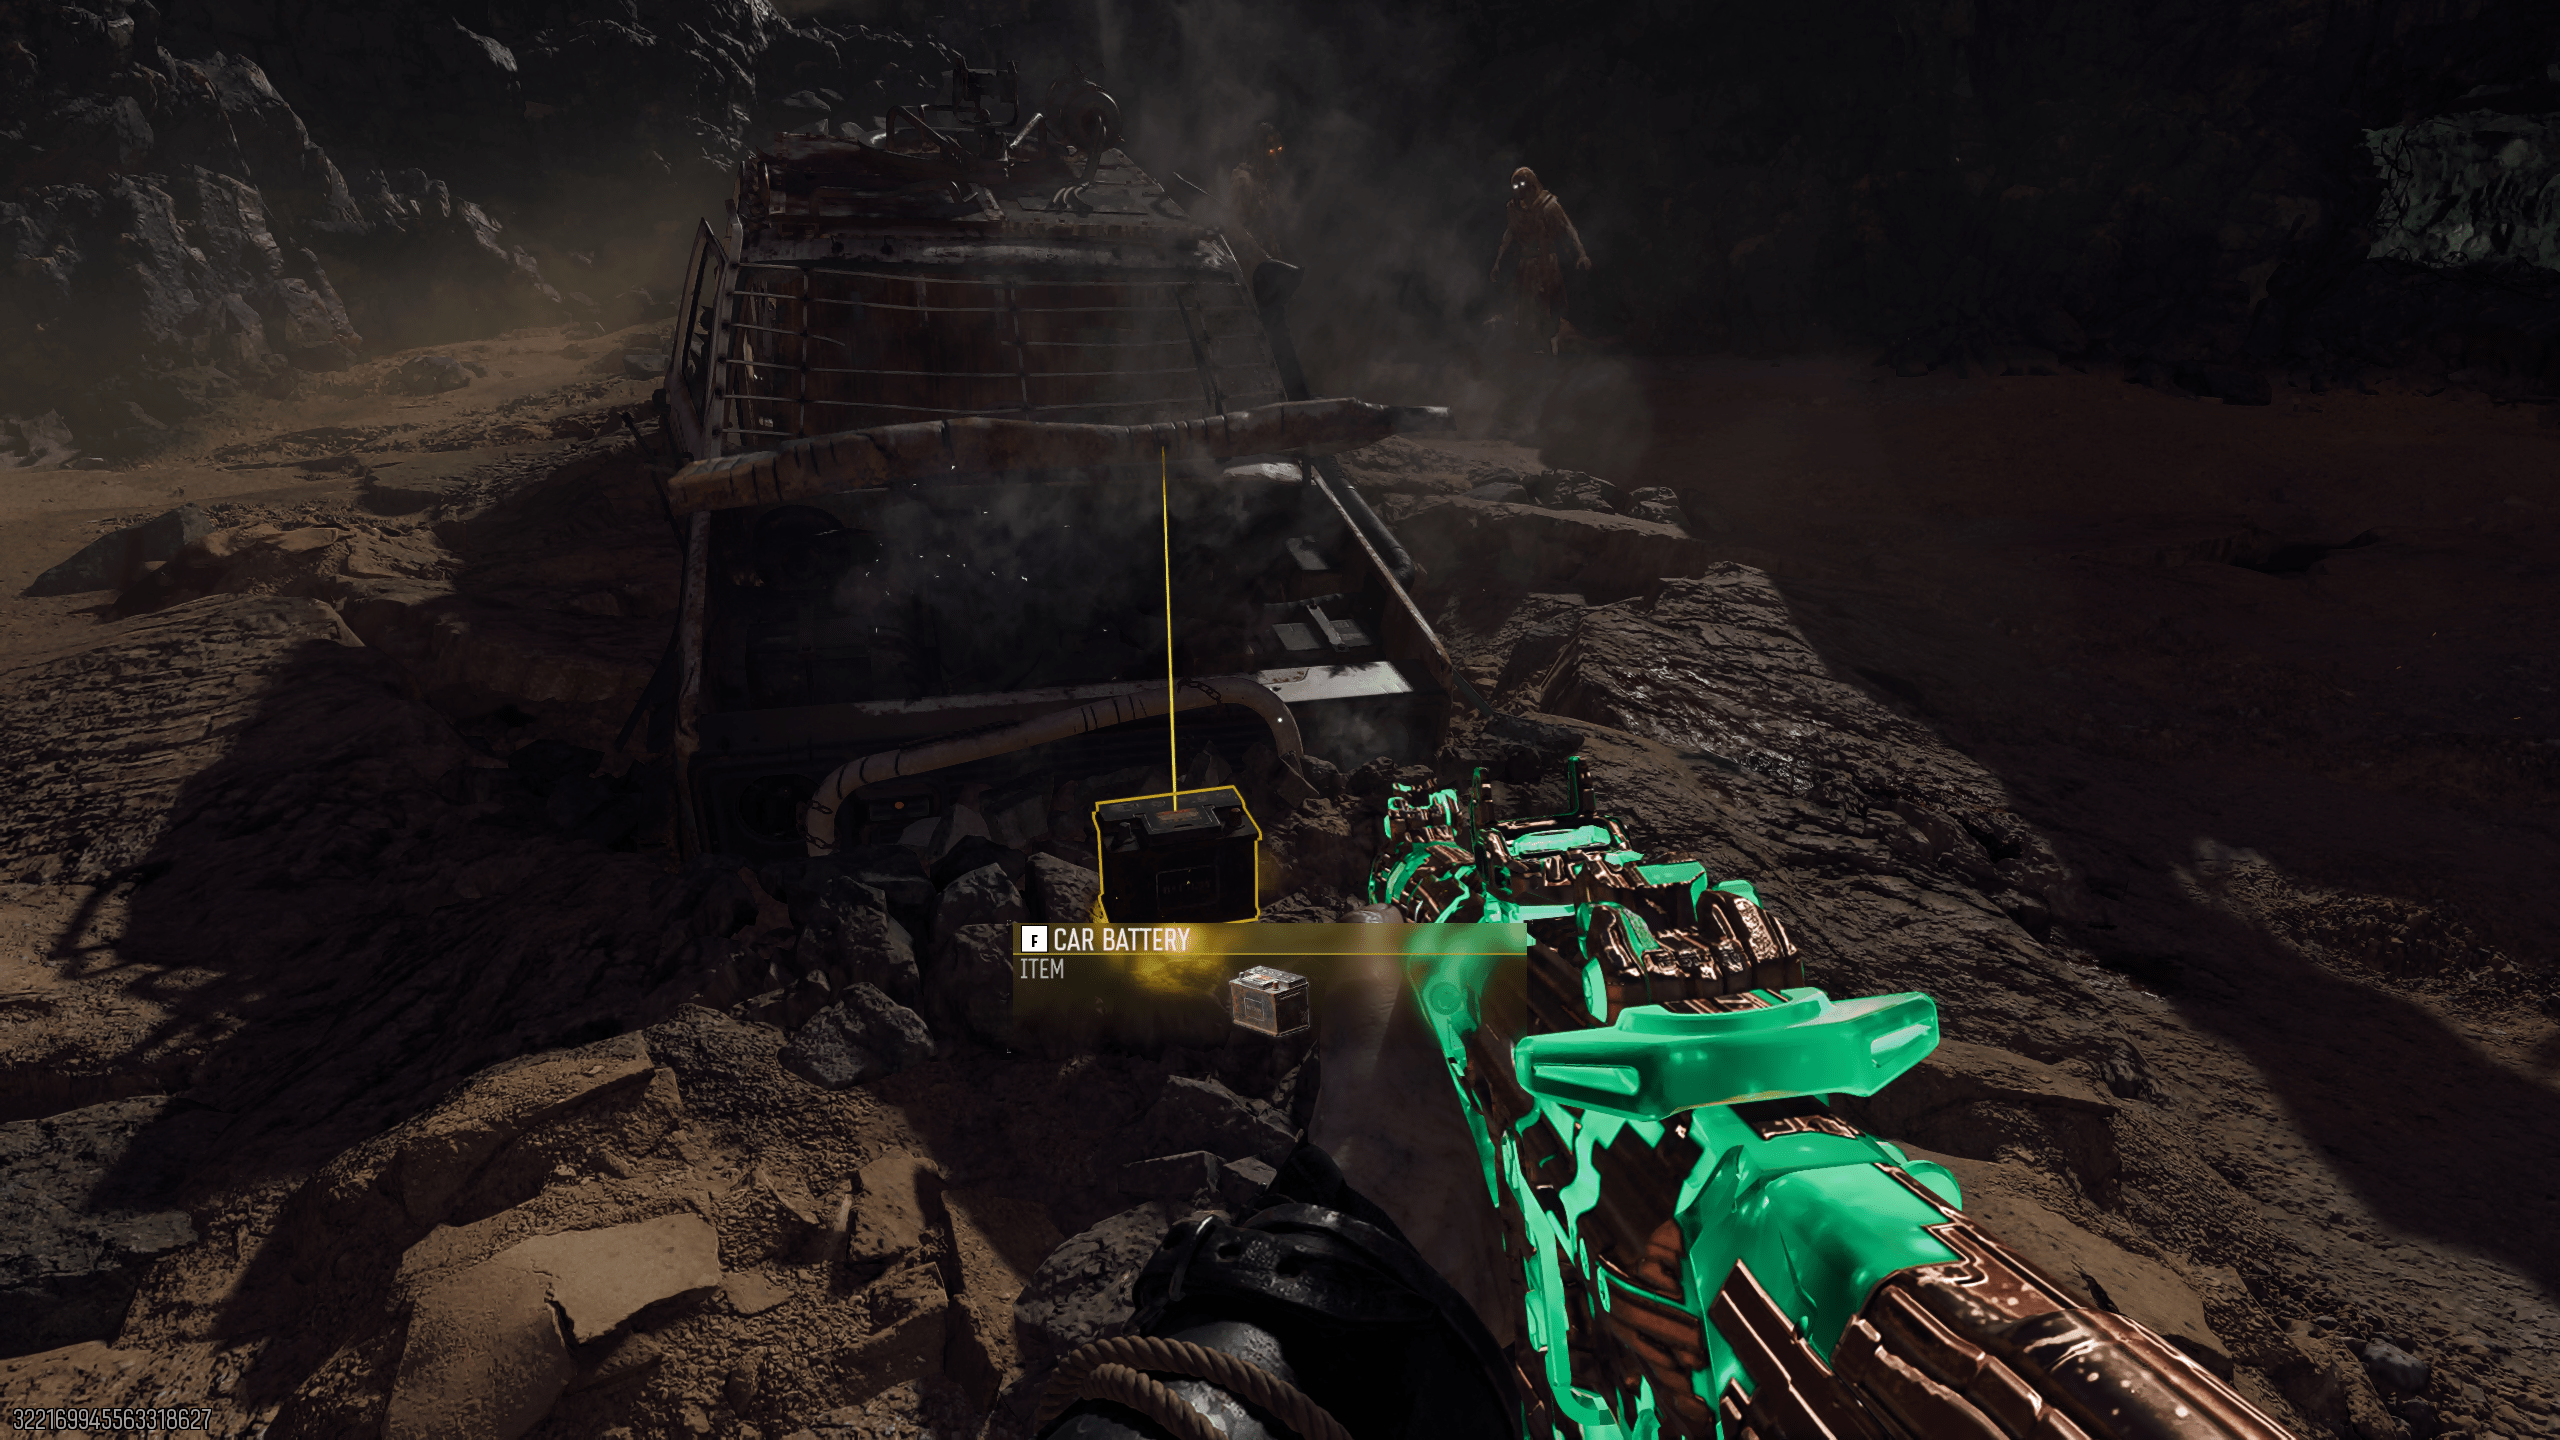
With Damaged Drone, Aberrant Wiring, and the Car Battery secured, you can now move on to the trap kills.
Trap Kill 1: Sunbeam at the Observatory Dome
Head back to the Observatory Dome. Around the room are five small boxes that periodically vent steam. Shoot all five steaming boxes in quick succession. If you take too long, the sequence fails and you’ll need to try again on the next round.
When done correctly, the Harmonic Oculus telescope becomes usable. Interact with it and move the reticle across the sky until you lock onto the sun. Once you find it, the Sunbeam trap activates in the Dome. Lure O.S.C.A.R. into the beam to vaporize him and complete the first trap kill. A Shiny Trinket drops as confirmation, but it isn’t needed for the Easter egg.
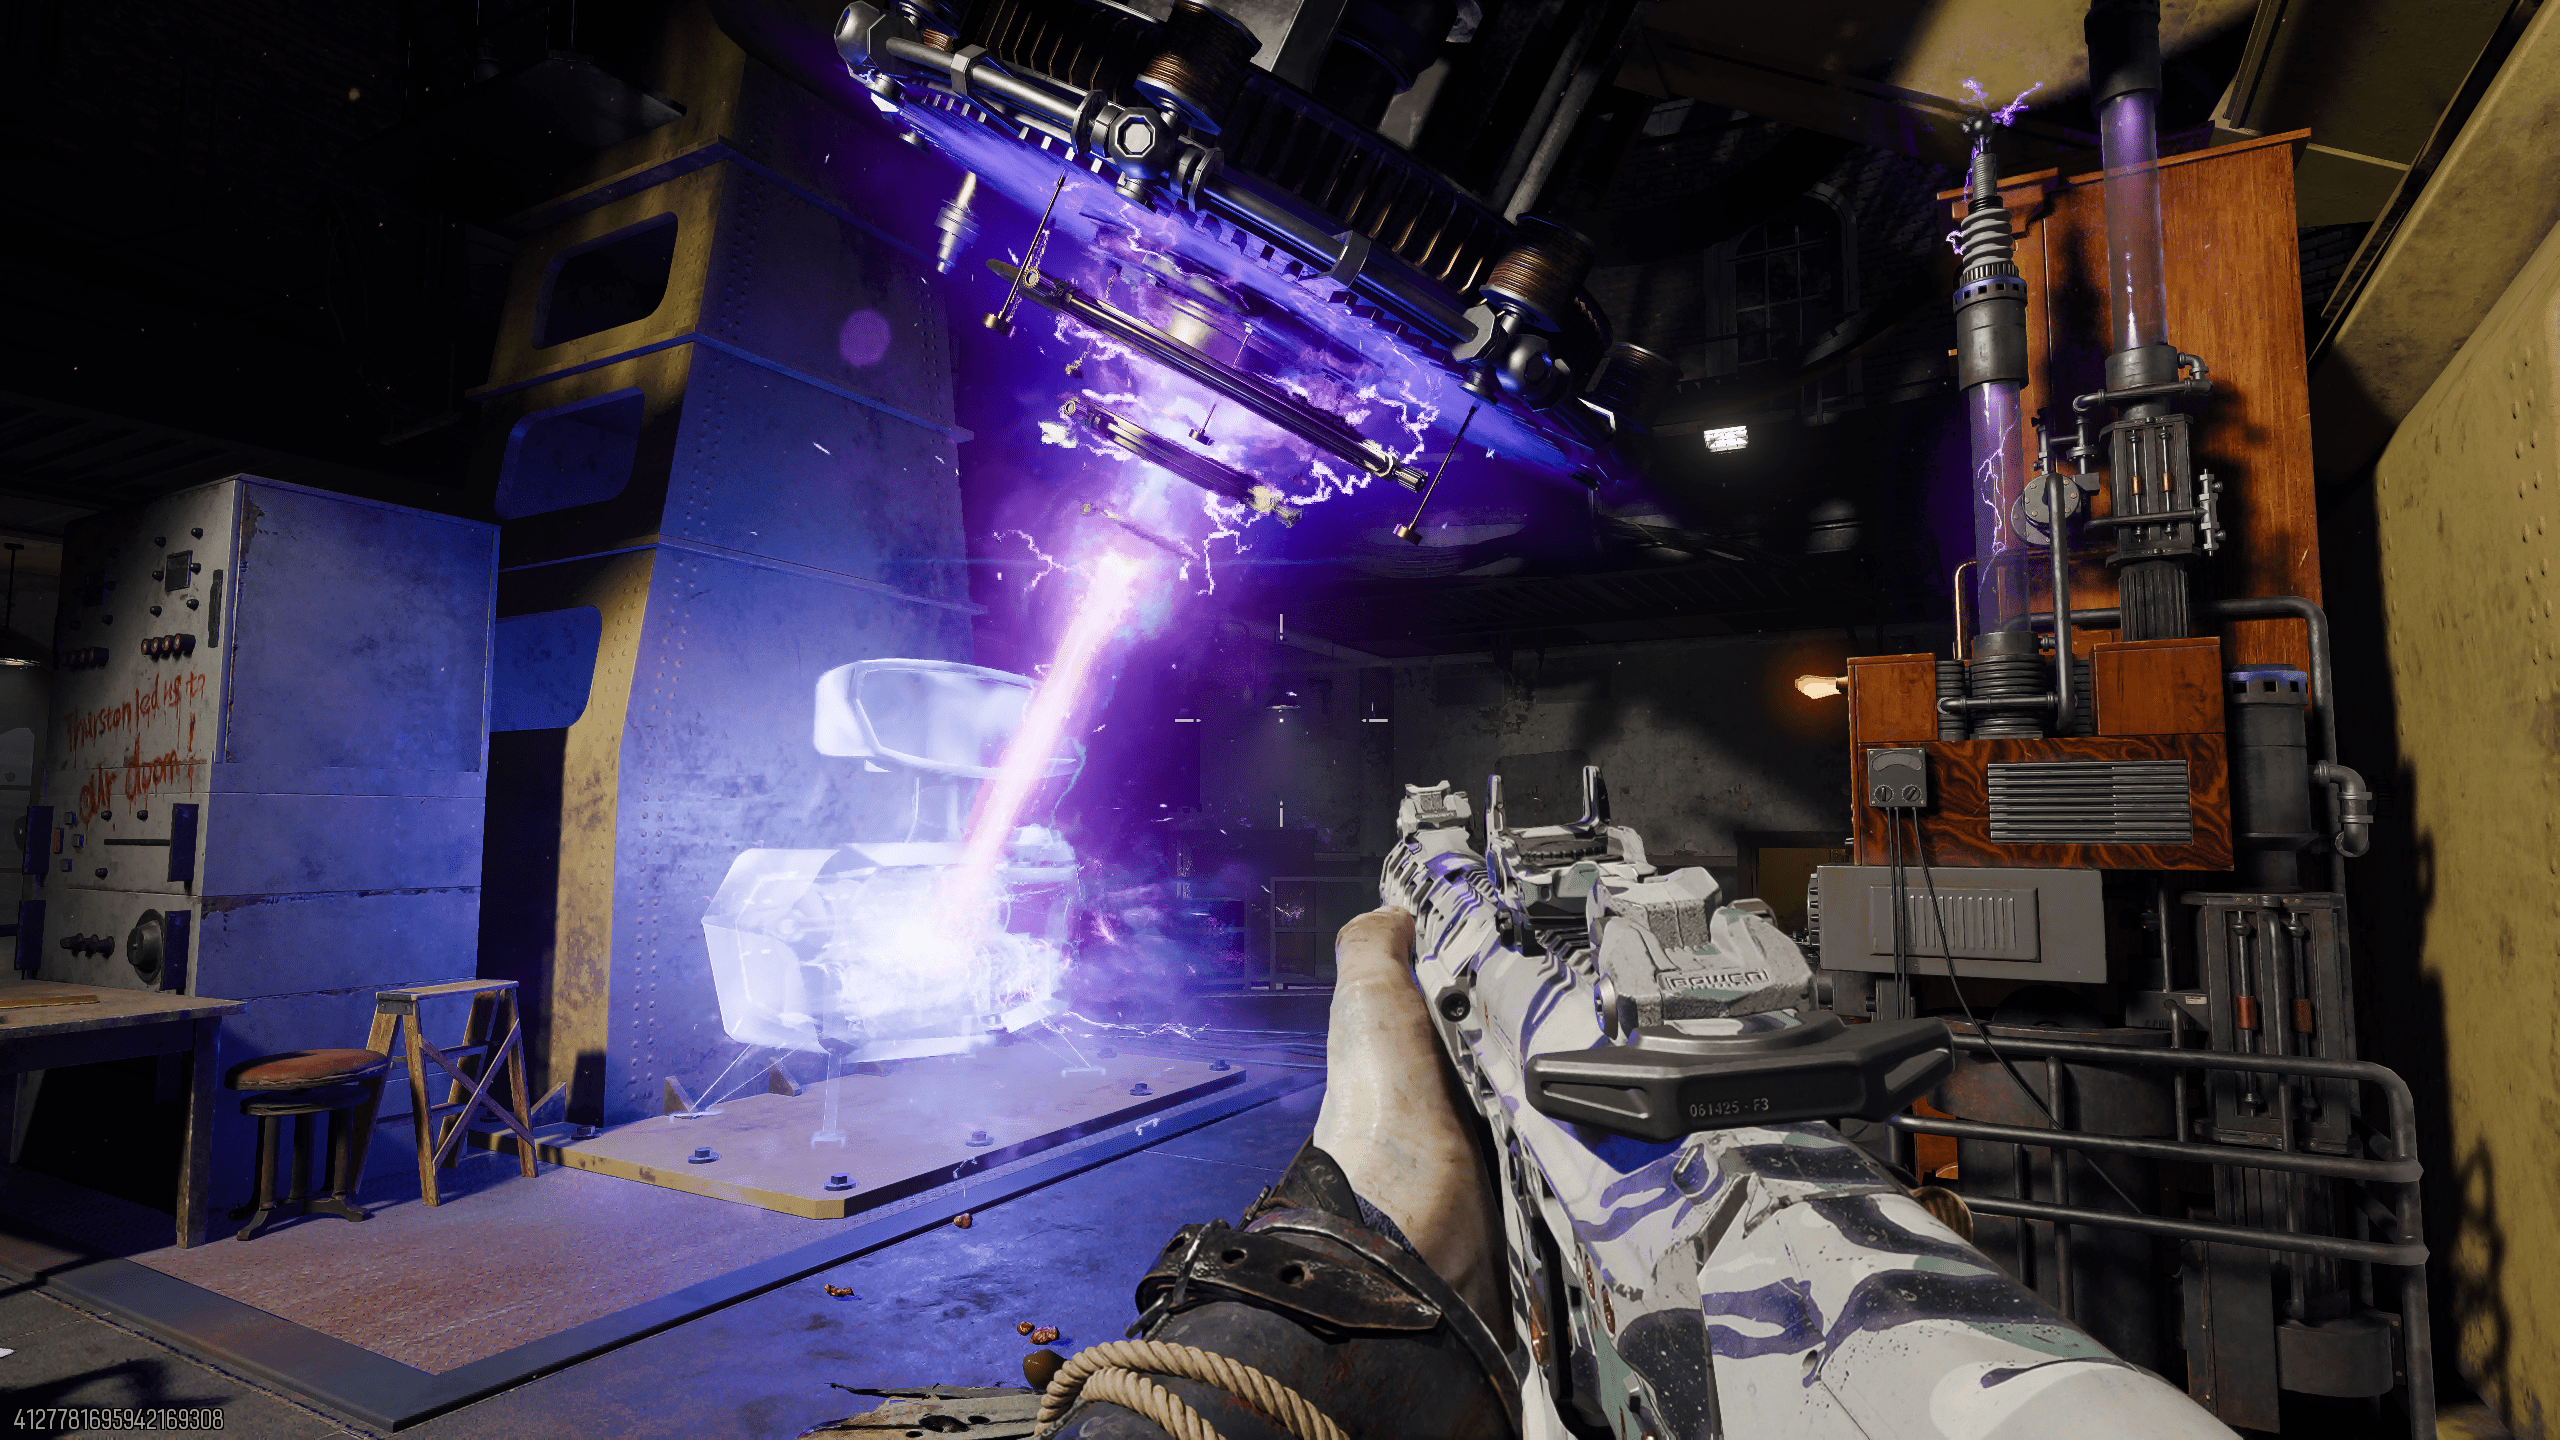
Trap Kill 2: Electro-Volt Projector in the Luminarium
Wait for O.S.C.A.R. to respawn, then bring him into the Luminarium. Approach the large trap device in the center and interact on the right-hand side to insert the disc, then start the Electro-Volt Projector.
The machine begins blasting arcs of energy across the room while spawning small UFOs around O.S.C.A.R. Keep him inside the trap’s area of effect and focus on shooting the mini-UFOs so they don’t overwhelm you. When the progress finishes, your screen flashes and O.S.C.A.R. is destroyed again, dropping another Shiny Trinket.
Trap Kill 3: Absolute Zero at Museum Infinitum
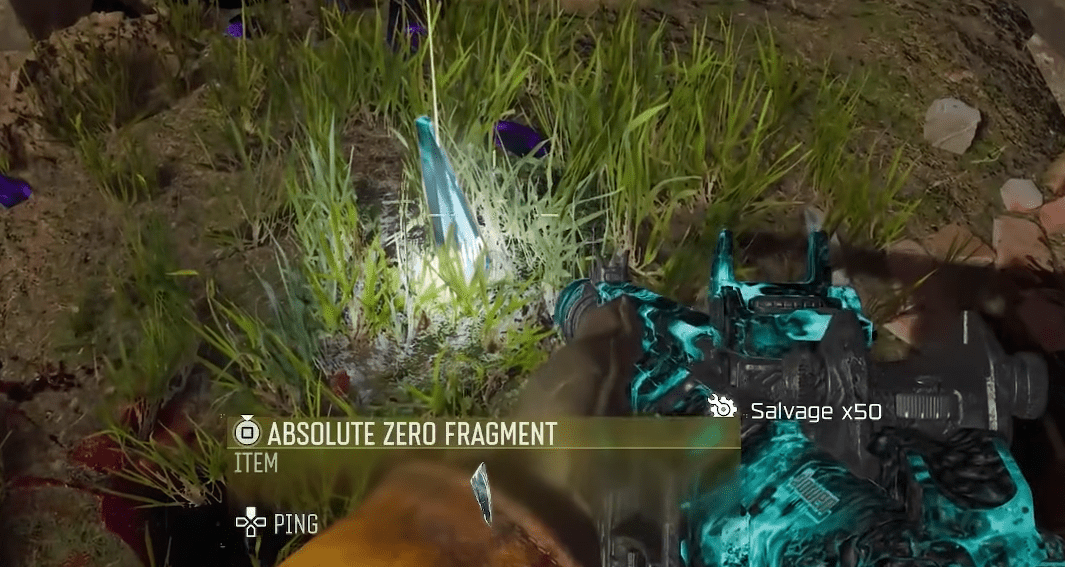
For the final kill, visit any Arsenal machine and buy the Cryo-Freeze ammo mod. Out in the courtyards and alleys you’ll see glowing purple Aether crystals. Shoot them with your Cryo-Freeze weapon to create Absolute Zero Fragments on the ground. Collect three fragments in total.
Once O.S.C.A.R. spawns again, lead him to Museum Infinitum. Interact with the rocket to socket the three Absolute Zero Fragments beneath it. A short countdown begins. Keep O.S.C.A.R. inside the chilling blast zone as the timer expires. If he’s standing in it when it goes off, he freezes and shatters, completing the third trap kill.
When this final trap kill is successful, the LGM-1 Wonder Weapon drops for you to pick up, officially finishing the build step. And now you know how to craft LGM-1 in BO7, which will come in handy later on.
Step 3: O.S.C.A.R. Playback and the Planet Code
With the LGM-1 assembled, the next objective is decoding a three-digit planetary sequence revealed during O.S.C.A.R.’s memory playback. This step is randomized each match, so careful listening is required.
Triggering O.S.C.A.R.’s Playback
When O.S.C.A.R. respawns, follow him closely. After a short walk he begins replaying recorded eliminations in order.
The line to wait for is:
“Elimination Twenty: Dr. Thurston.”
Right after mentioning Dr. Thurston, O.S.C.A.R. lists three planets in a specific order. These three planets form the basis of the combination. Subtitles make this much easier to track.
Planet-to-Number Reference
Each planet corresponds to a number based on its position from the Sun:
- Mercury
- Venus
- Earth
- Mars
- Jupiter
- Saturn
- Uranus
- Neptune
Convert the three planets O.S.C.A.R. says directly into numbers, preserving the exact order.
Example sequence:
- Neptune → 8
- Mars → 4
- Jupiter → 5
This becomes the code 845. Every game generates a different trio.
Entering the Planet Code
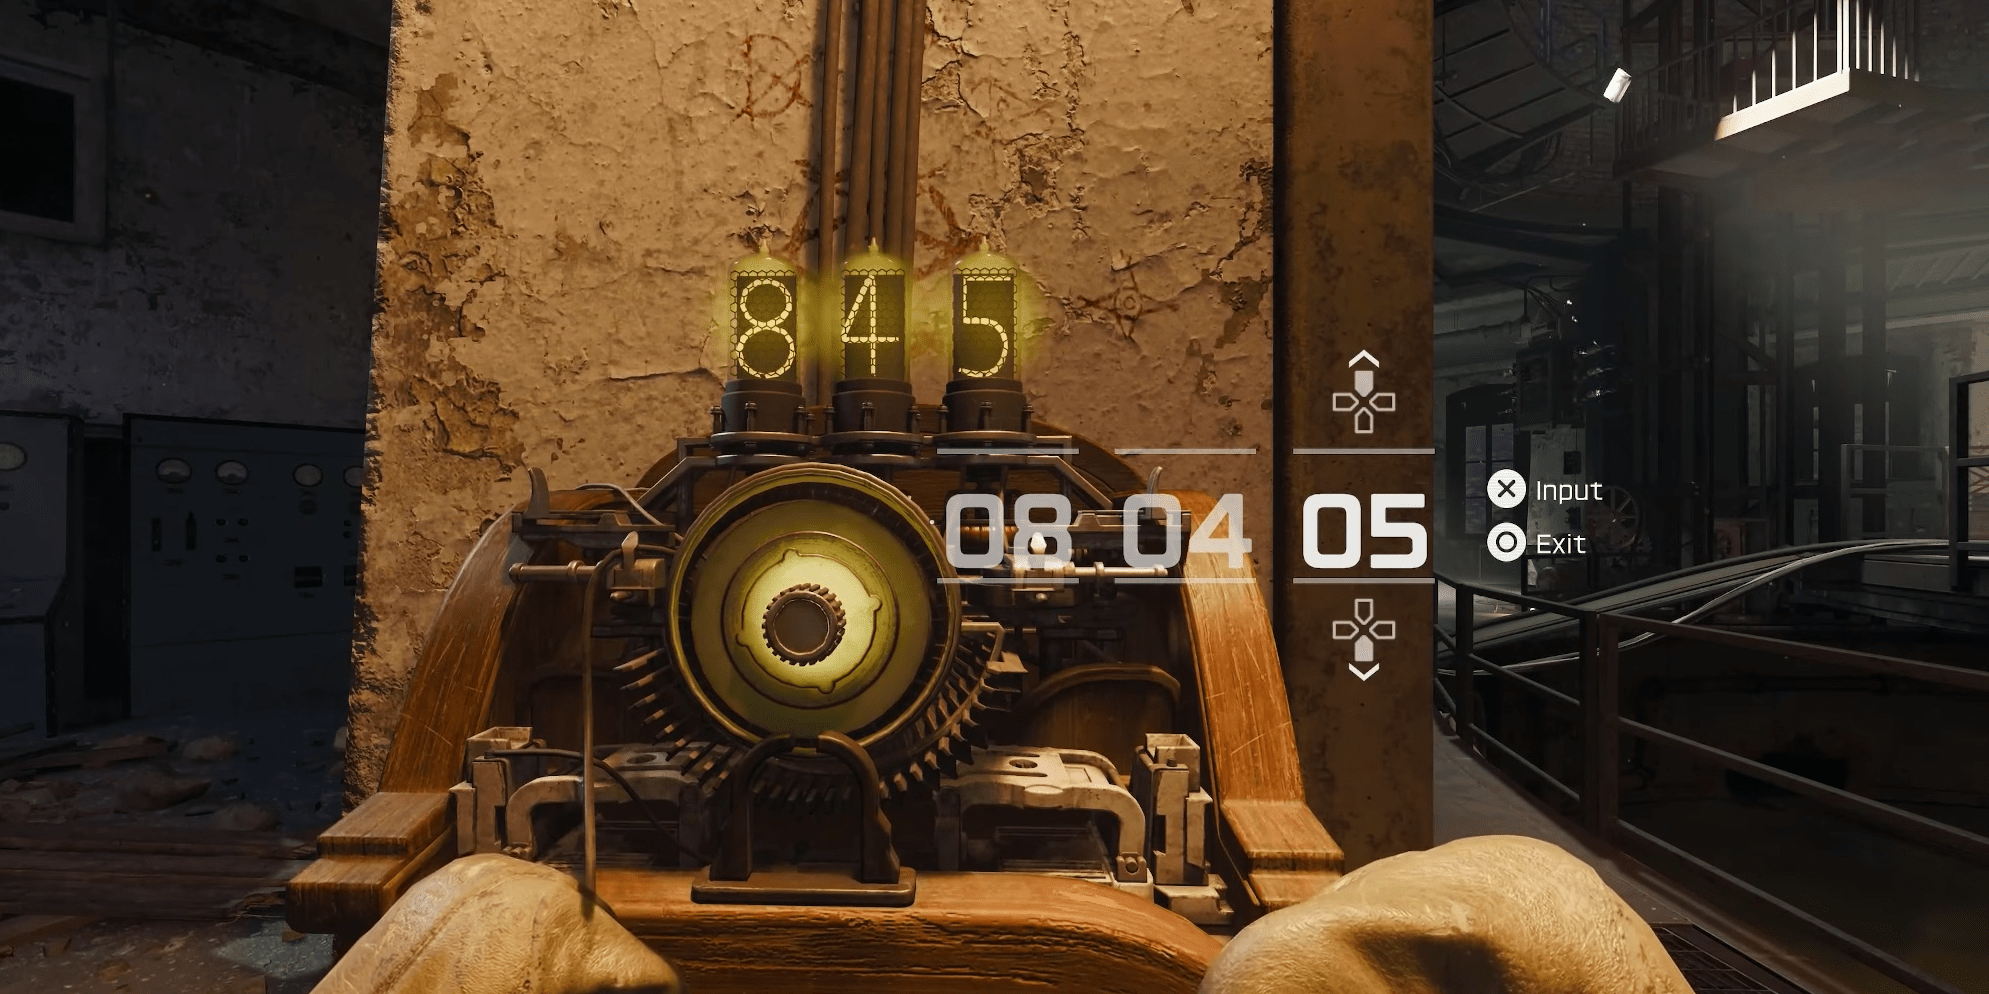
Travel to the Observatory Dome. On the lower platform is the mechanical input device. Enter the three-digit combination.
A correct entry causes the machine to activate, the device to shake, and a hatch above it to drop open. Climb up to retrieve the Cryo Chamber Key lying beside the body.
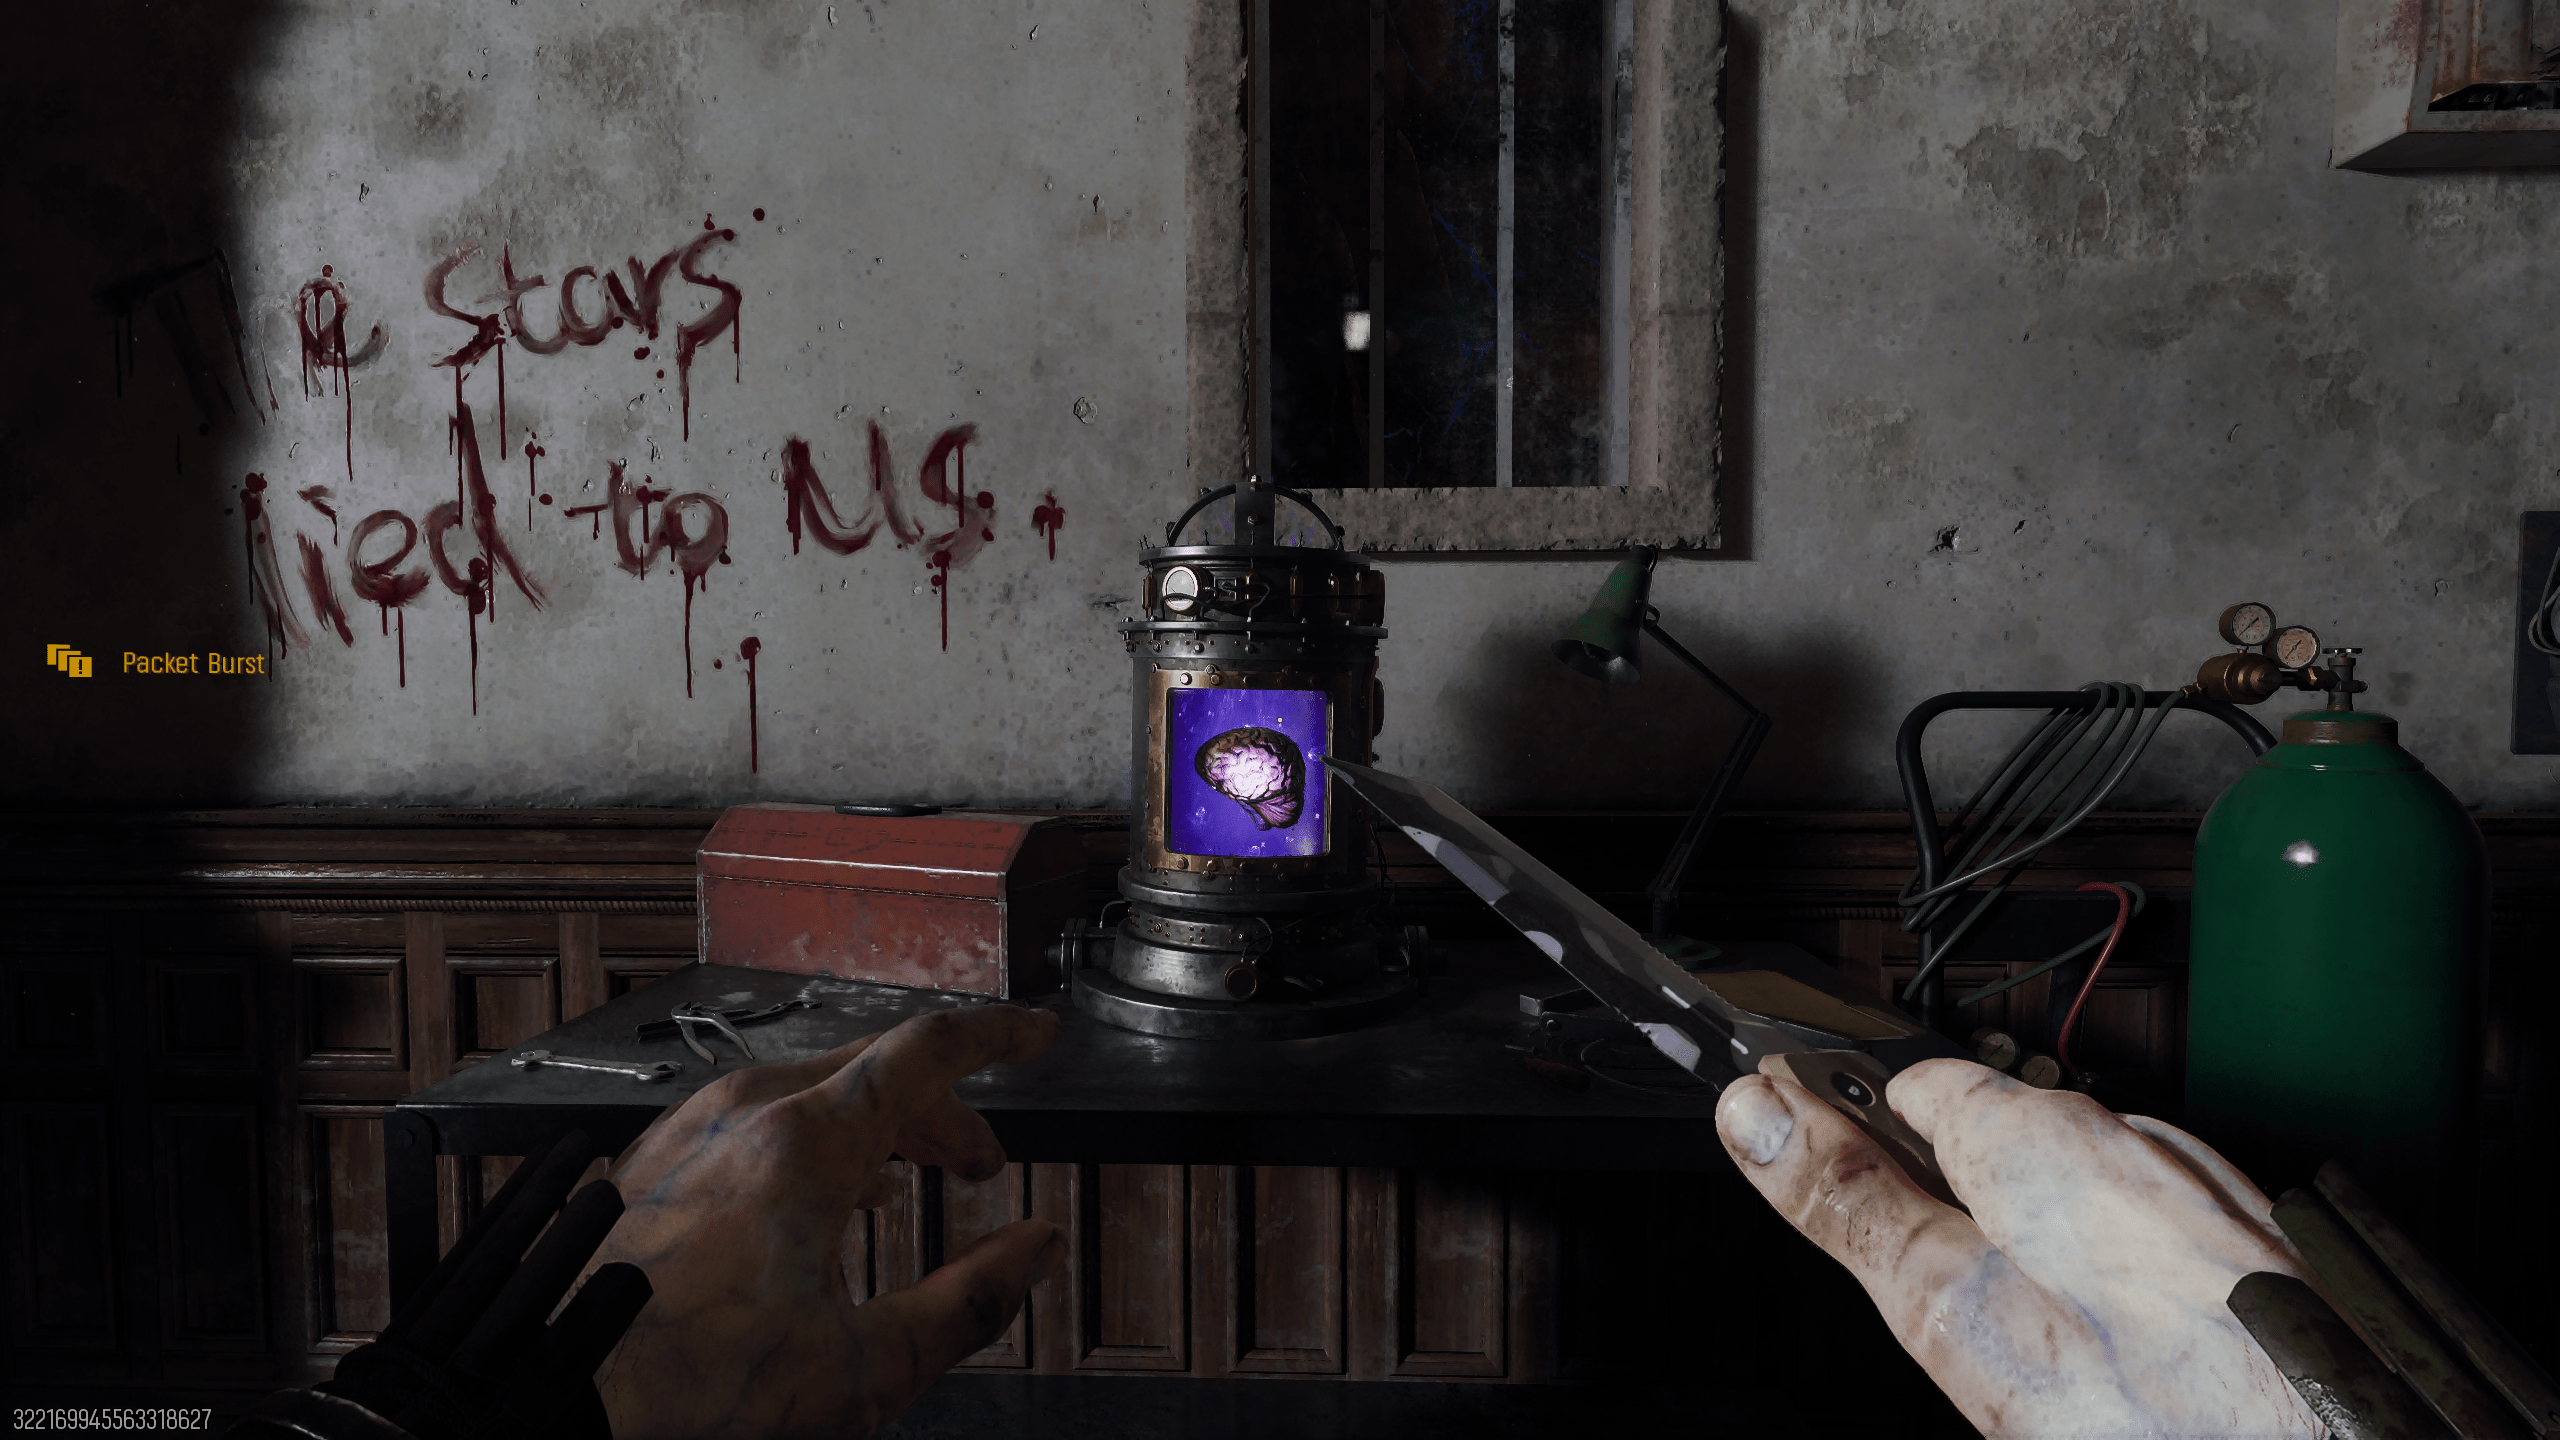
Extracting Dr. Thurston’s Brain
Bring the Cryo Chamber Key to Machina Astralis, where the locked cryo unit containing Dr. Thurston is located.
Use the key to open the chamber, then interact again to operate the Rock Saw, which extracts Dr. Thurston’s Brain.
Carry the brain to the Luminarium and place it into the containment jar. Interact again to start a short lockdown in the room. Zombies attack from all directions and O.S.C.A.R. joins the fight. Survive until the sequence completes, then pick up the Brain Jar.
This brain is required for the next major puzzle step involving celestial alignment and a four-digit code.
Step 4: Mars Alignment and the Four-Digit Code
With Dr. Thurston’s Brain secured, the next objective is obtaining a new four-digit sequence using the Harmonic Oculus. This code sets the coordinates needed to continue the perfusion process and advances the core puzzle chain of Astra Malorum.
Connecting the Brain to the Perfusion Machine
Return to Machina Astralis and place the Brain Jar into the perfusion machine. Interact again to link the system. This activates the Harmonic Oculus for its next calibration.
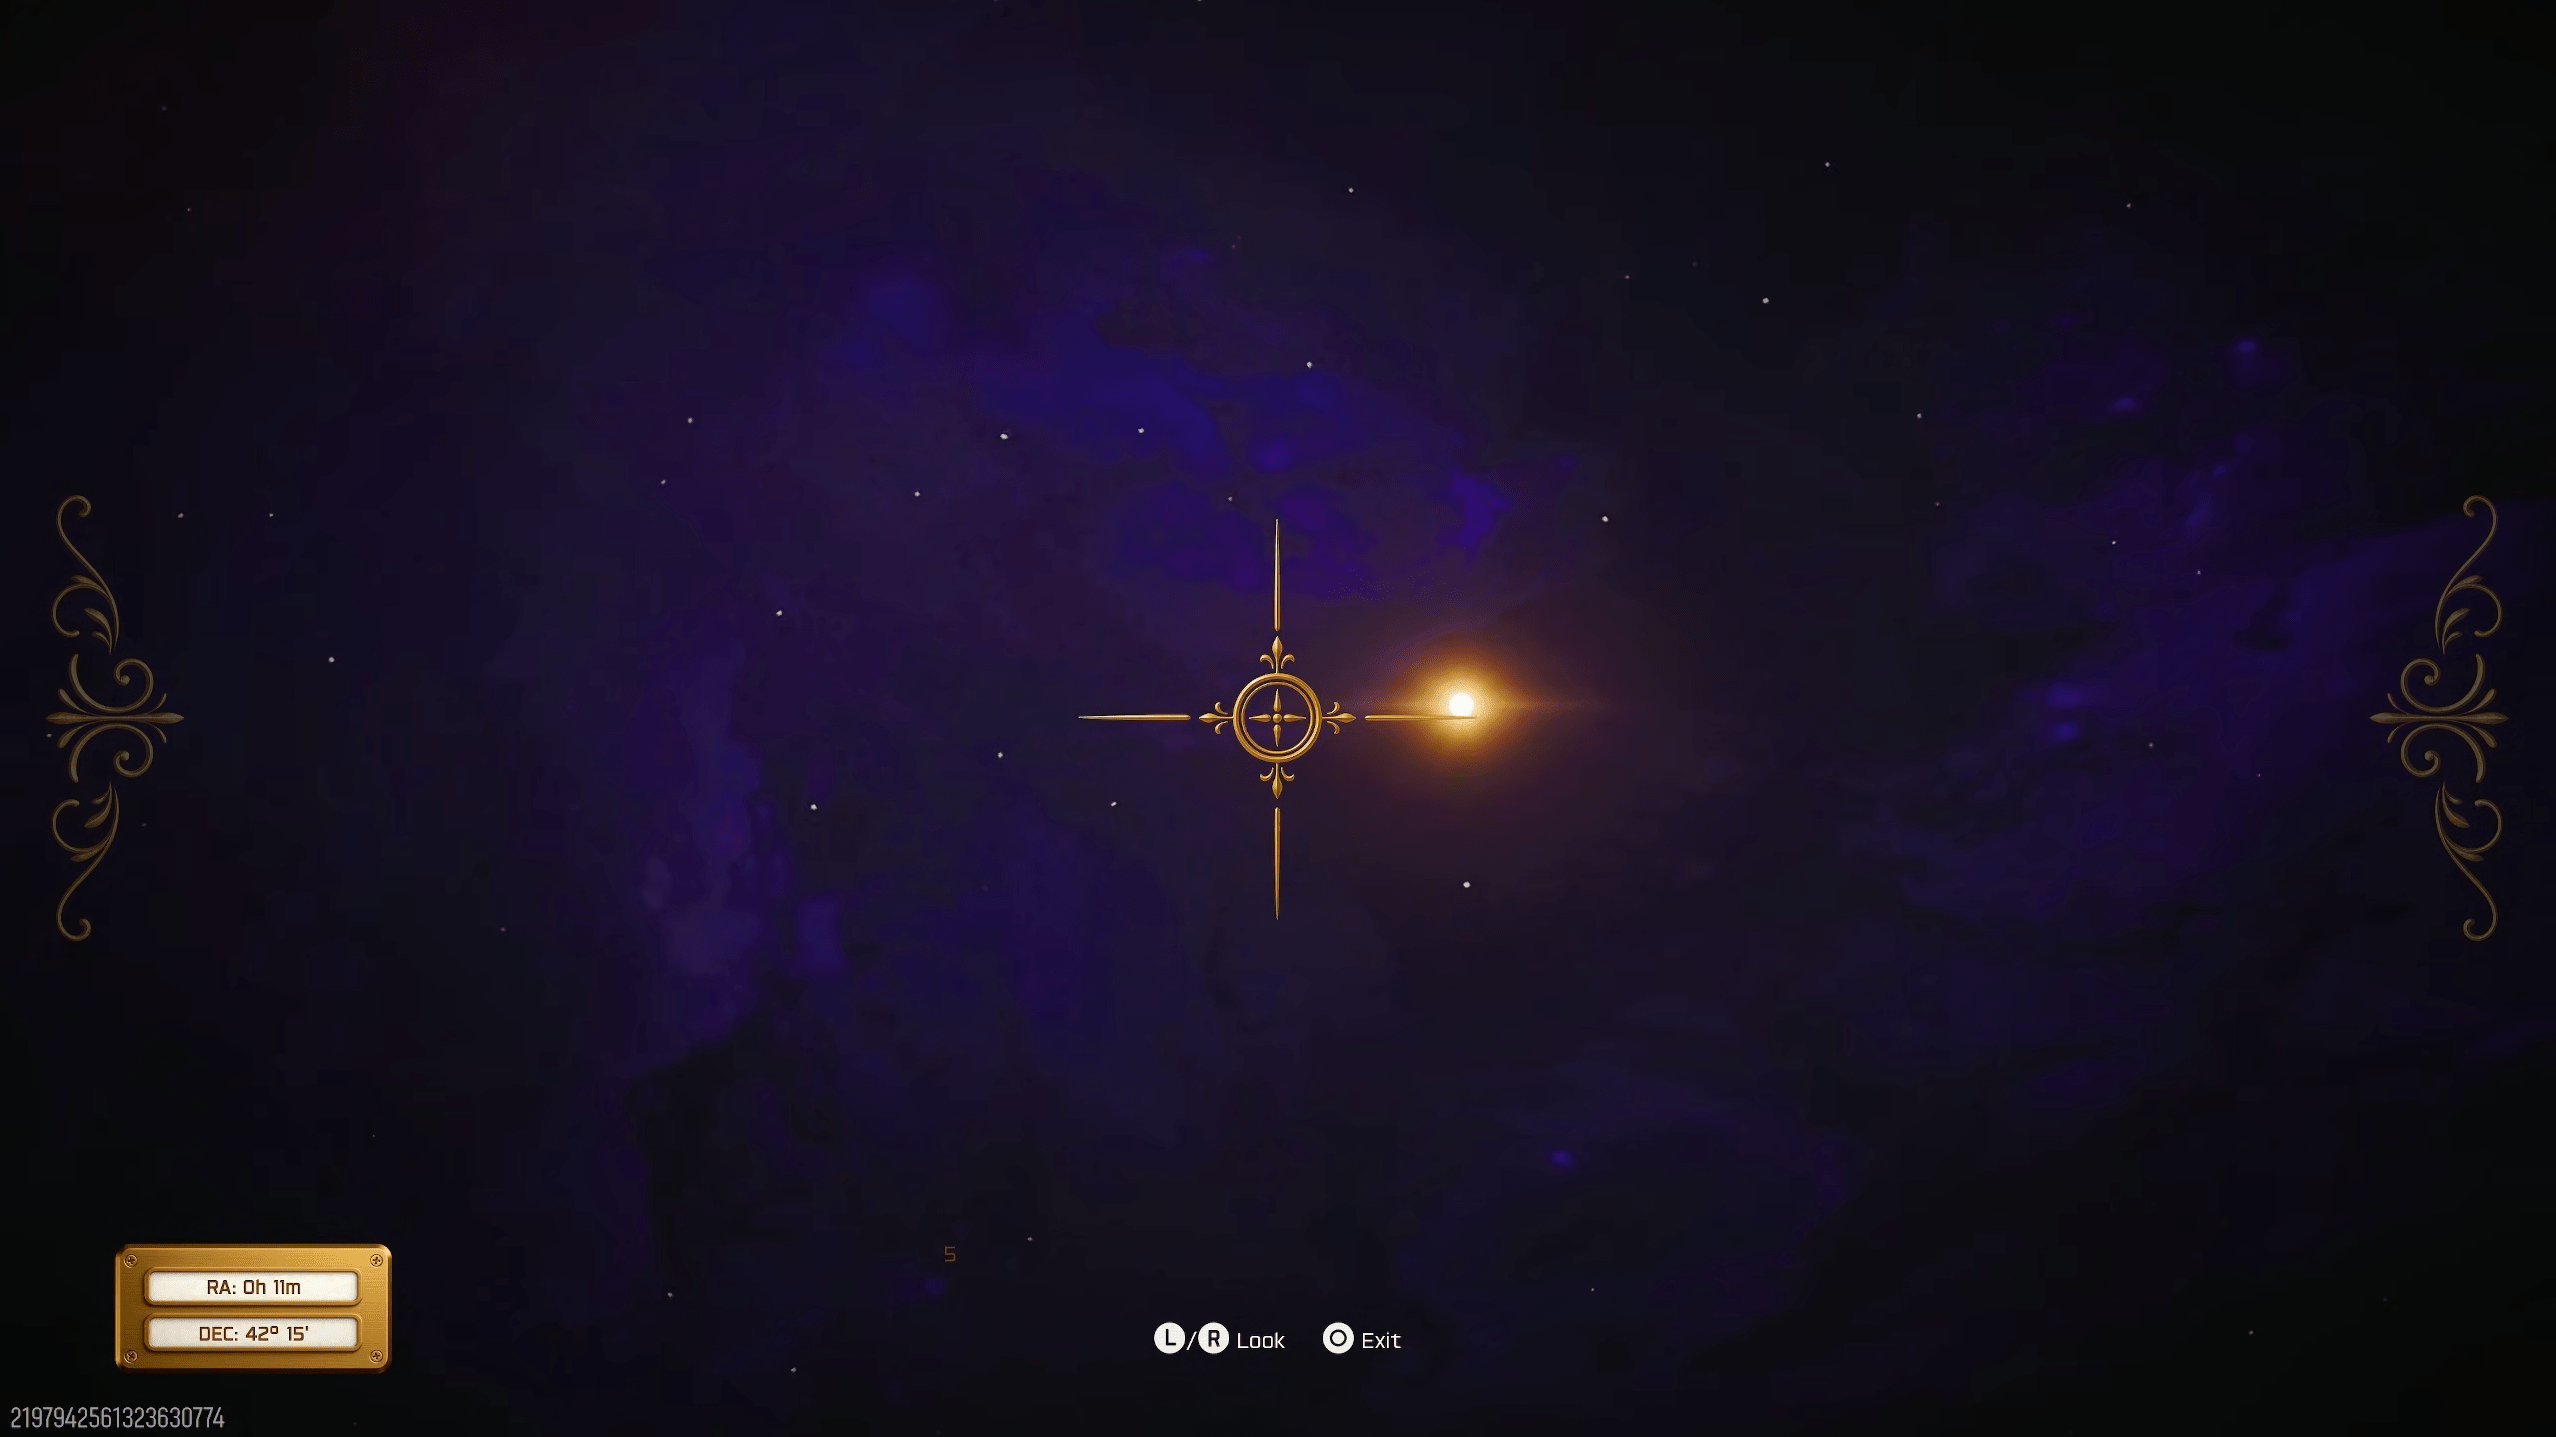
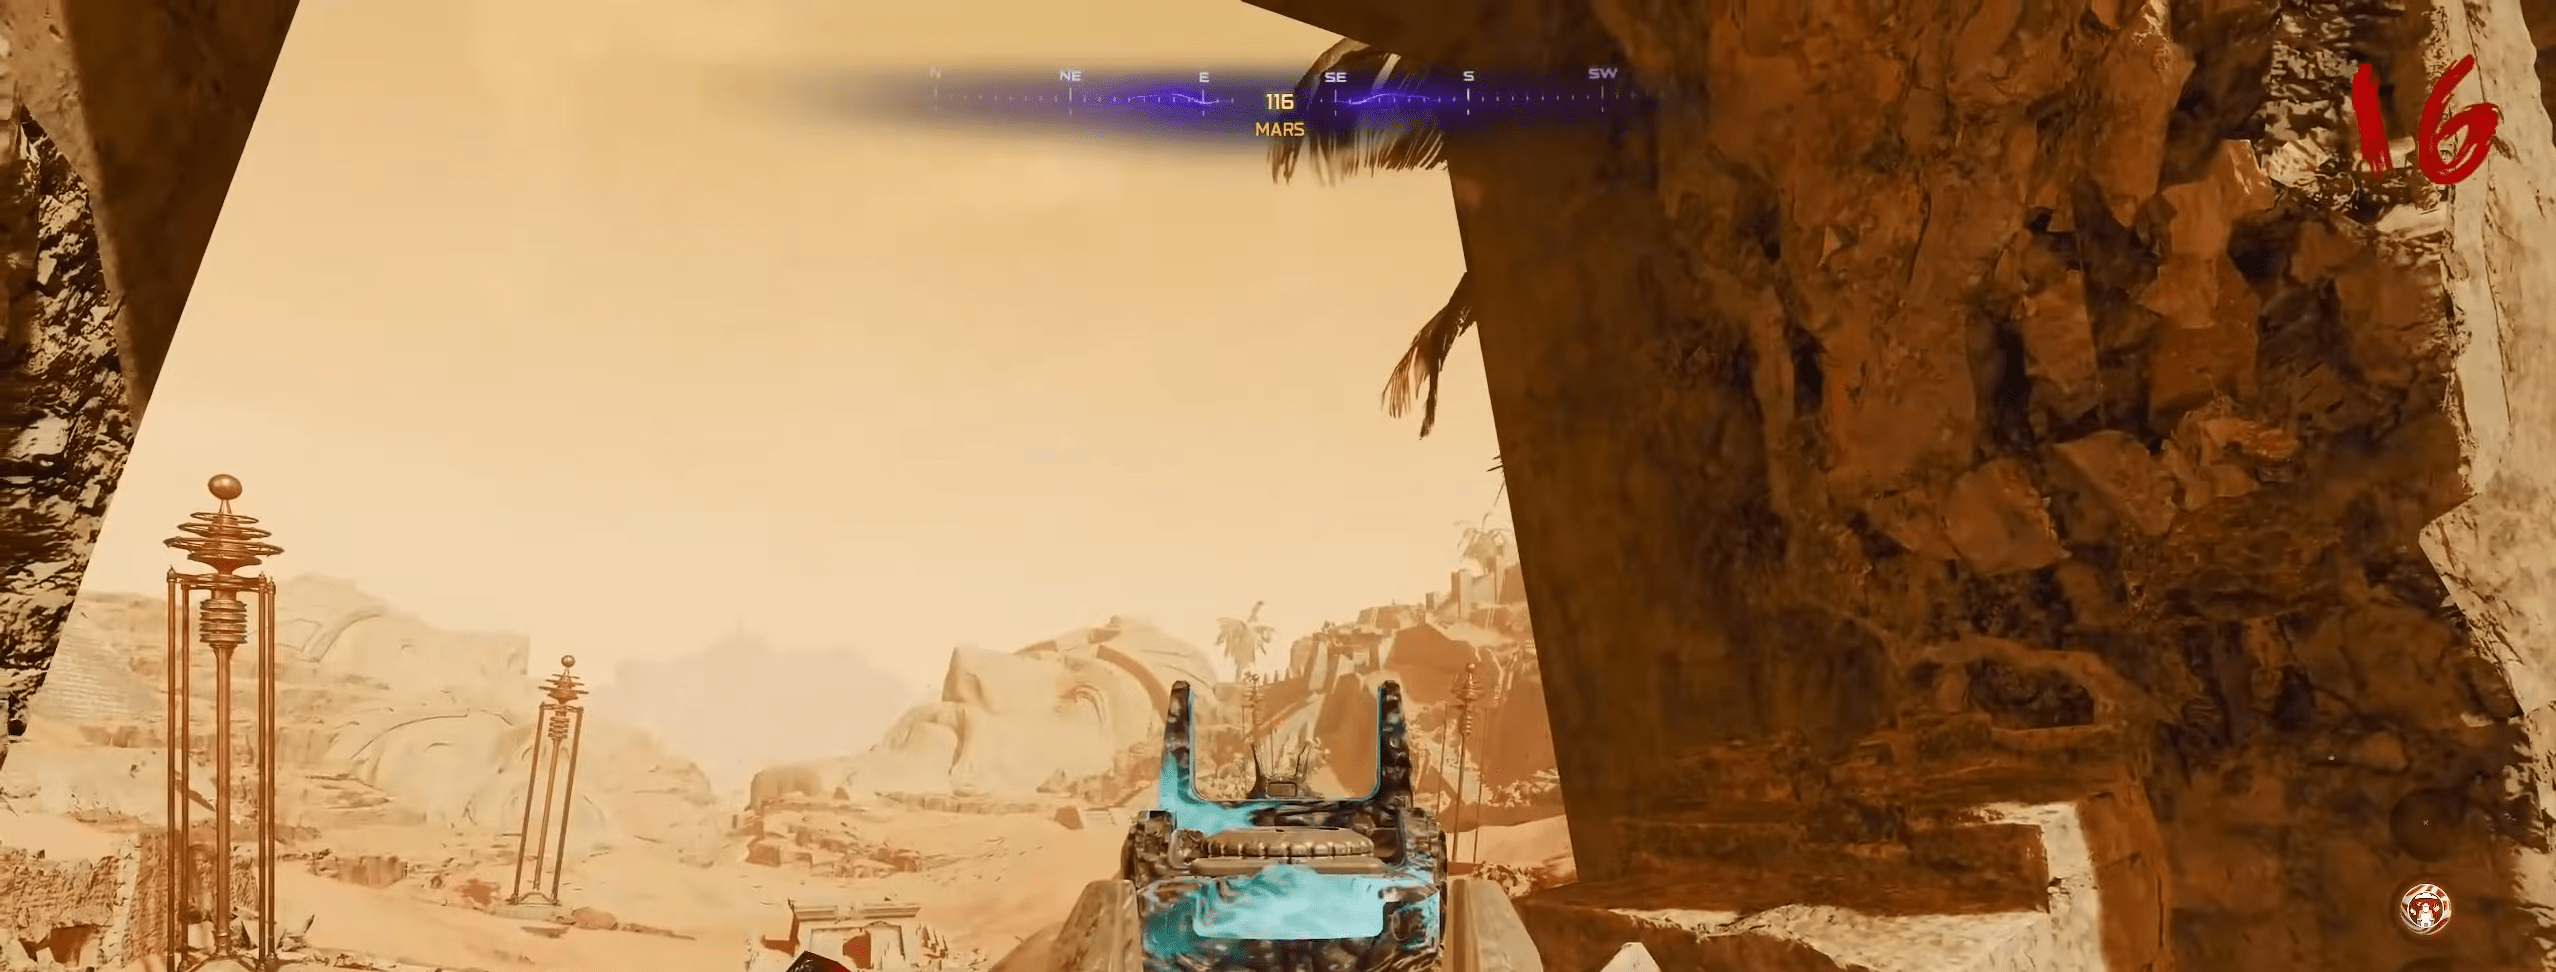
Locating Mars Through the Harmonic Oculus
Head back to the Observatory Dome and interact with the Harmonic Oculus telescope.
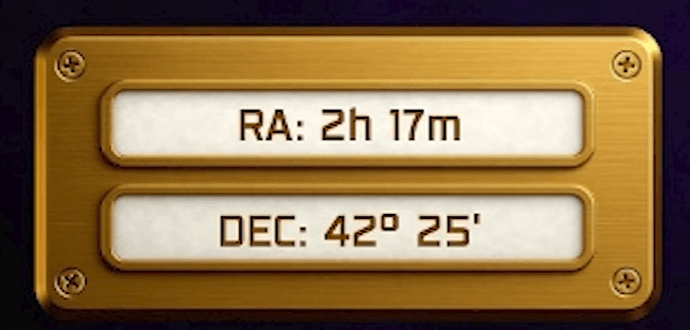
Your goal now is to find Mars.
Mars’ position is different every match, so sweep the sky slowly until the reticle highlights it. Once locked on, look at the bottom-left of the interface. A four-digit number appears in the format:
XXXX
This is your unique Mars code for the run. Record it before exiting.
Entering the Four-Digit Mars Code
Return to Machina Astralis and go up one level to the newly opened keypad box on the railing. Input the four-digit code exactly as it appeared.
A correct entry turns the panel blue, confirms the input, and unlocks the next logic puzzle.
Reading Dr. Thurston’s “Reading List”
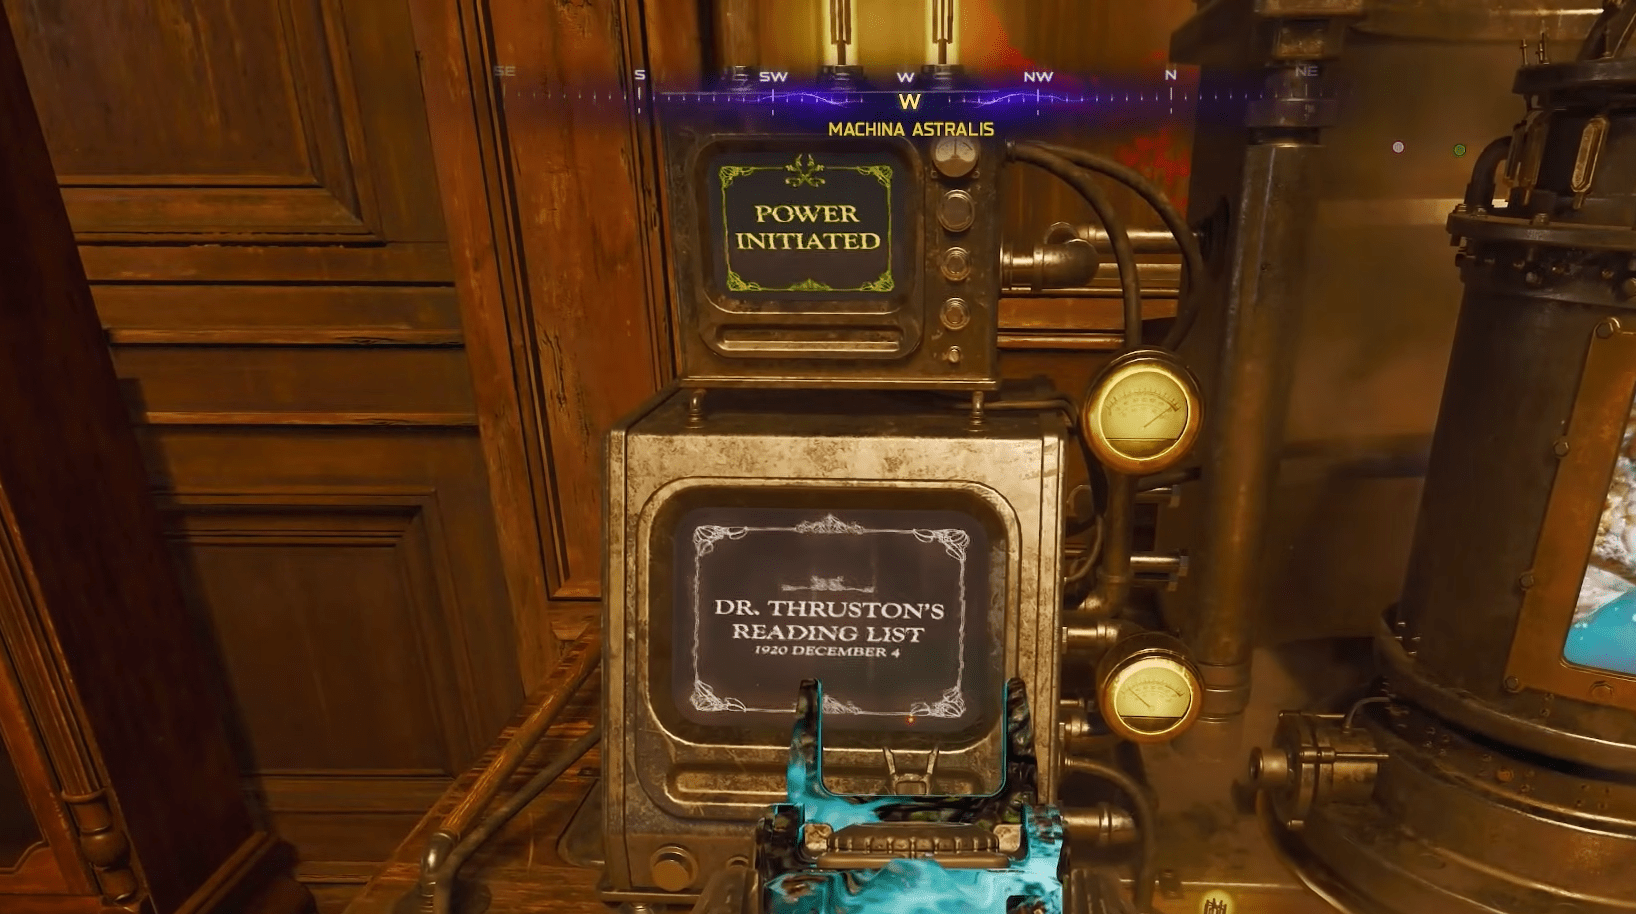
Once the code is accepted, the monitor beside the perfusion machine begins cycling through Dr. Thurston’s Reading List. You will see four, five, or six titles depending on the match.
Book titles include:
- Ash and Bone
- Pyramids of Cydonia
- Witchlight Codex
- The Black Veil
- The Moon Directive
- The Unknowable Void
- Echoes of Andromeda
- Musica Universalis
These correspond to specific shelves in the Archive of Orbis, and each shelf is tied to a statue.
Finding Each Book’s Shelf Location
Enter the Archive of Orbis. Every shelf always holds the same books in the same locations, regardless of match.
Your job is to determine which statue corresponds to each book:
Every statue is tied to the bookshelf on the wall directly behind it. Any book that appears on Dr. Thurston’s Reading List must be matched to the statue linked to its shelf.
Solving the Statue Rotation Puzzle
Rotate each statue once for every matching book on its associated shelf.
Examples:
- If a statue’s shelf contains two books from your list, rotate that statue twice.
- If a statue’s shelf contains one matching book, rotate it once.
- If a statue matches none of your listed books, do not rotate it.
The puzzle must be completed within the first 15 seconds of a new round, and you only get one attempt per round.
When the correct rotations are applied:
- The hatch above the ladder opens
- A new collectible appears: Planet Neptune
Pick up Neptune to advance.
Placing Neptune in the Orrery
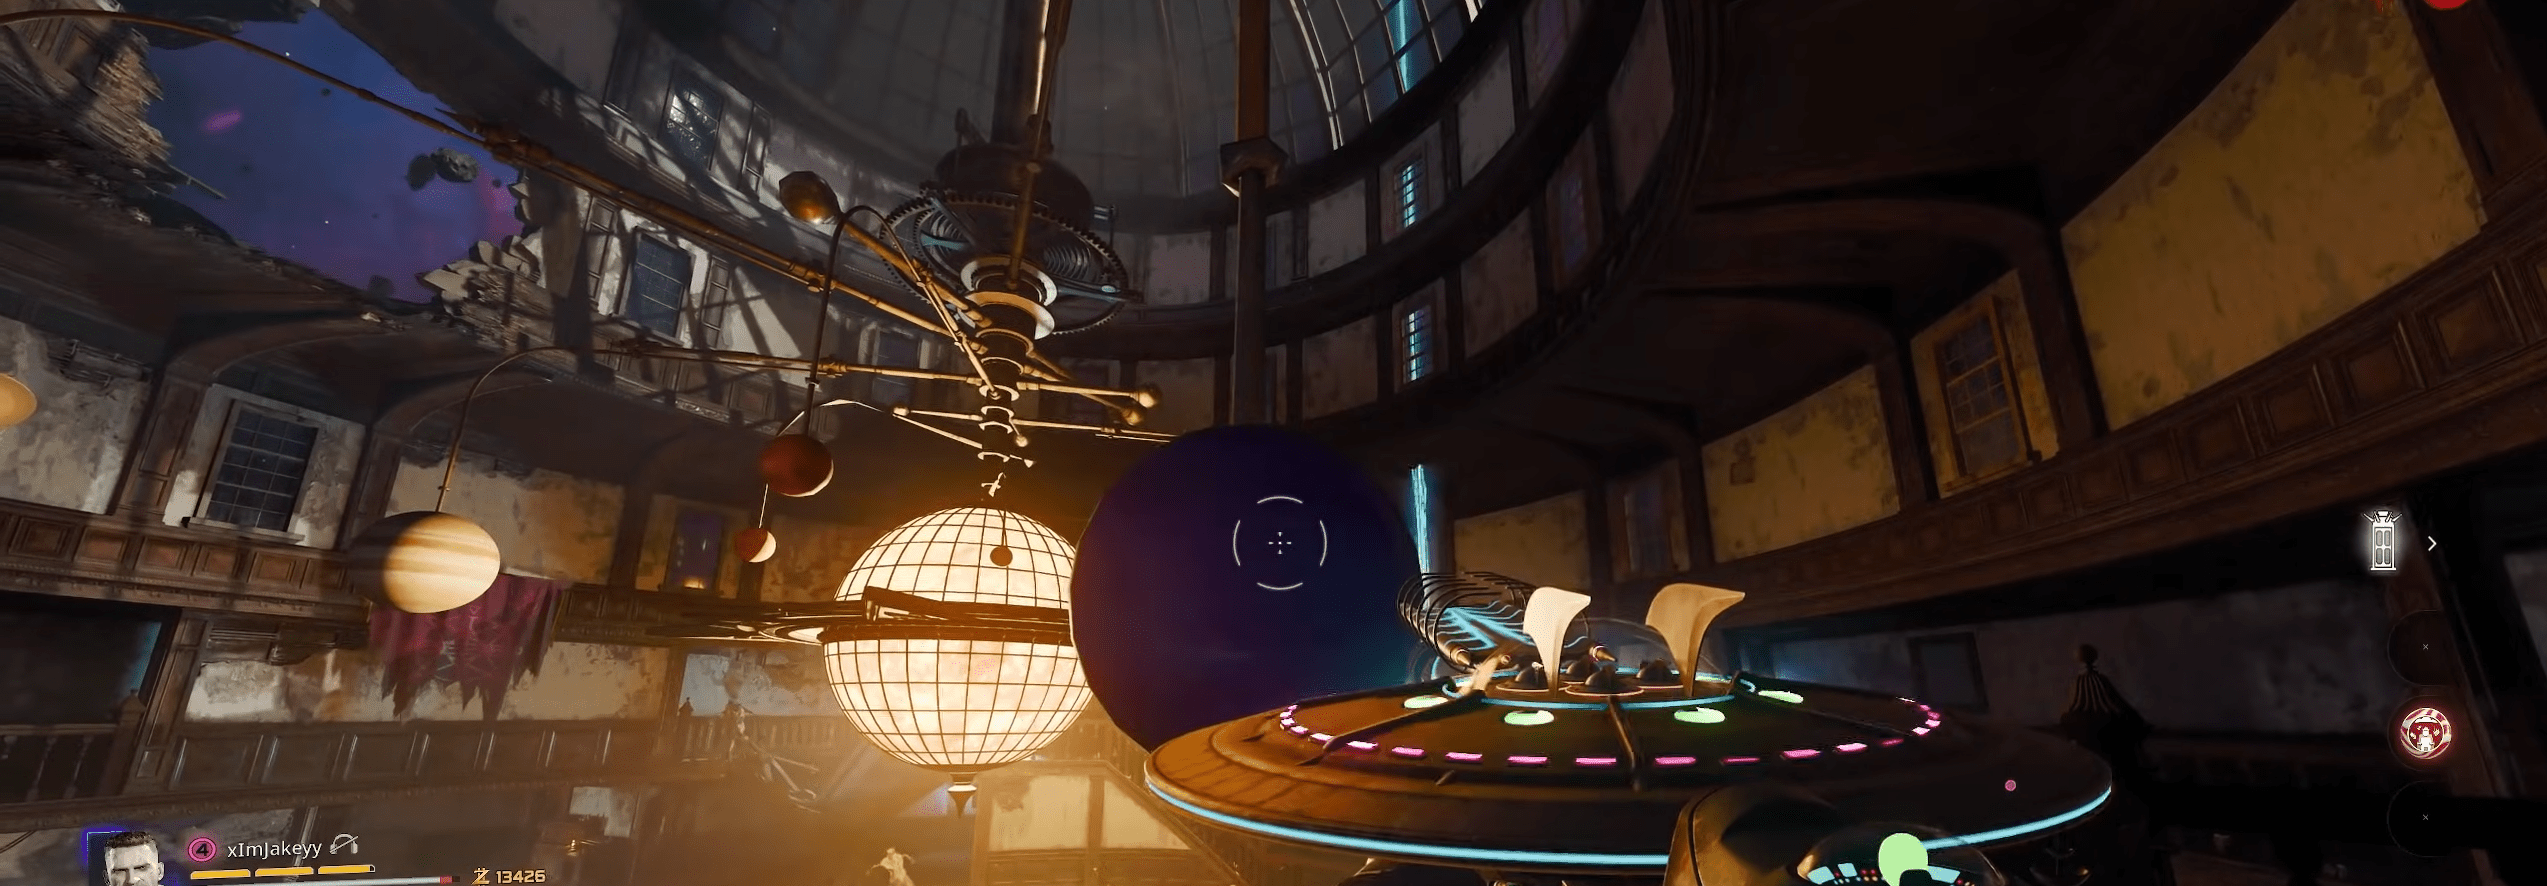
Return to the upper level of Machina Astralis and slot Neptune into the missing mount on the overhead orrery. Once installed, the system activates and unlocks the next astronomy alignment challenge.
The following objective involves orienting three hanging planets based on directional clues scattered throughout the map.
Browse our hottest Call of Duty Boosting services


Step 5: Planet Direction Pages and Orrery Alignment
With Planet Neptune placed into the missing slot of the Machina Astralis orrery, the next objective is to orient three hanging planets so they match specific compass directions. These directions are revealed on pages scattered around the map and change every game.
Finding the Three Direction Pages
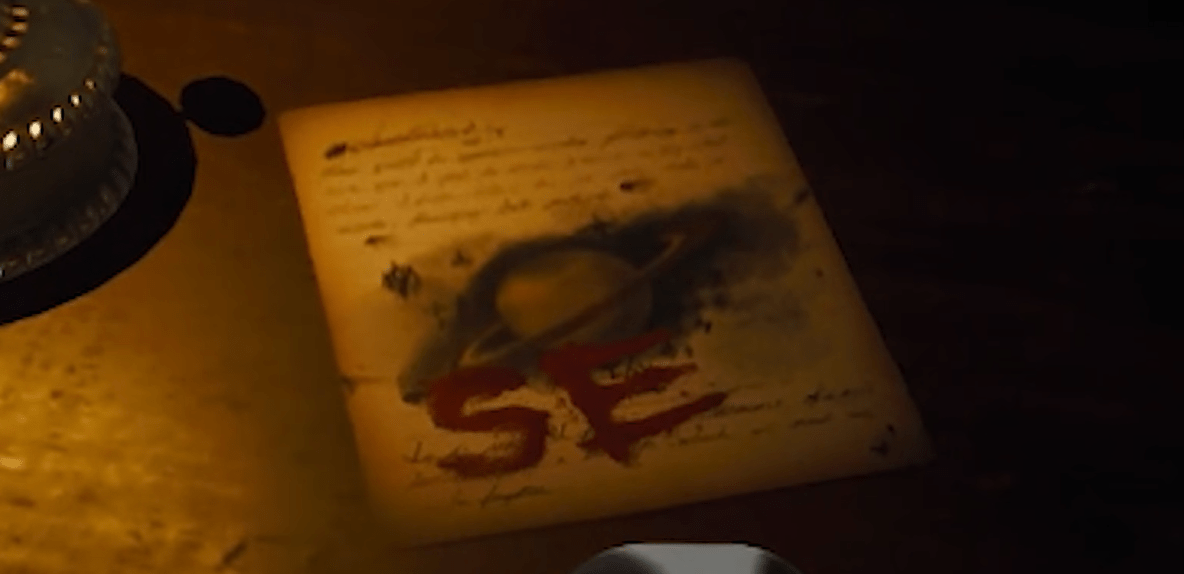
You are looking for three torn pages, each showing:
A specific planet icon
A compass direction written underneath (for example: SE, SW, NE)
The three pages always appear in the same locations, but the directions on them are randomized:
- One page is in Machina Astralis, on a table. This page shows Saturn and its direction.
- One page is in the Archive of Orbis, again on a table. This page shows Mars and its direction.
- One page is in the Luminarium, also on a table. This page shows Neptune and its direction.
Note down the planet and direction pair from each page.
For example:
- Saturn — SE
- Mars — SW
- Neptune — NE
Your directions will be different each match.
Rotating Saturn, Mars, and Neptune
Return to the central orrery in Machina Astralis. Under the large light on the floor, you’ll see a compass layout, and above it hang the three planets you’re aligning: Saturn, Mars, and Neptune.
Each hanging planet can be rotated by shooting it. Every shot nudges the planet to the next compass position.
Use your notes to set each planet correctly:
- Saturn is the large planet with the rings. Rotate it until it lines up with the direction from its page.
- Mars is the medium-sized red planet. Rotate it to match its direction.
- Neptune is the smaller blue planet. Rotate it until it matches its direction as well.
If a planet looks slightly between two points, keep shooting until it is clearly aligned with the correct compass marker. All three need to be as precise as possible for the puzzle to register.
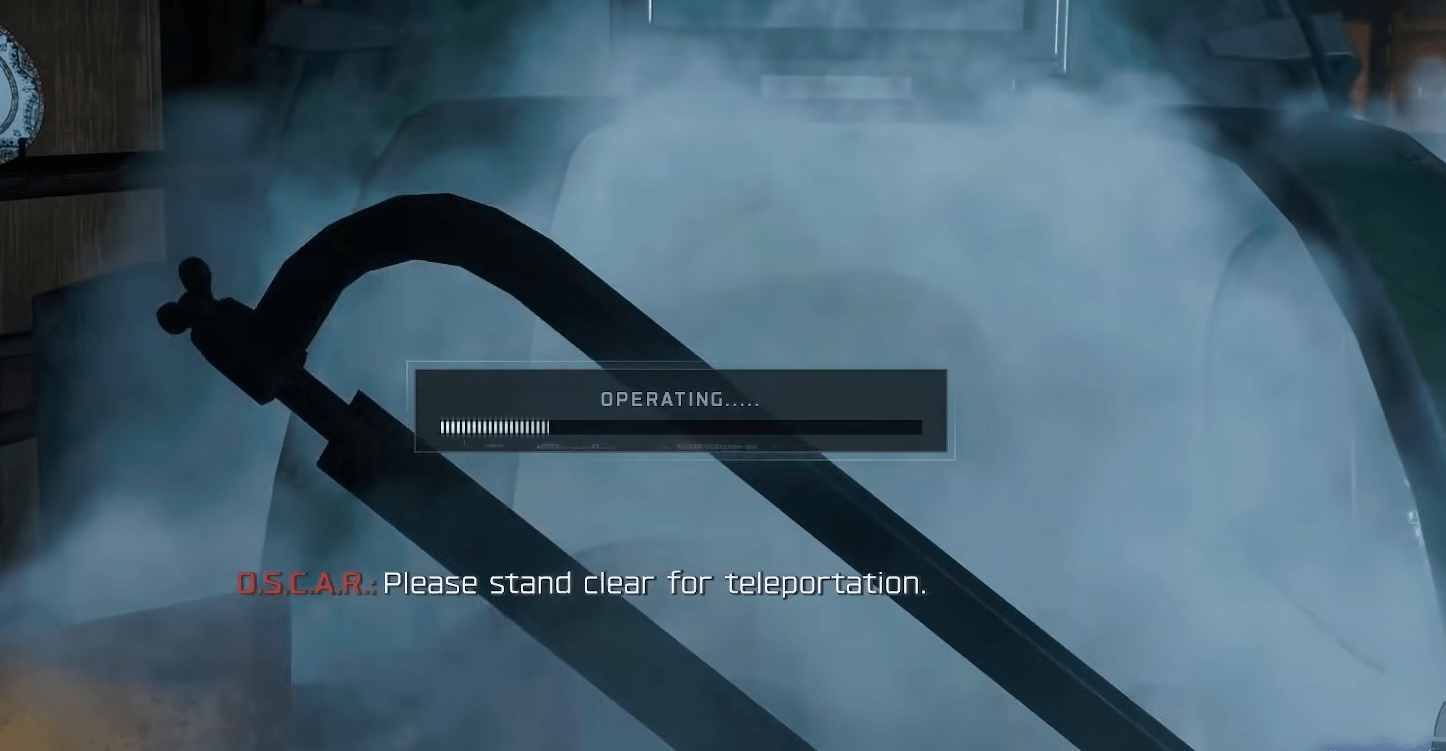
Activating the Teleporter Ring
Once all three planets are correctly aligned, return to the perfusion machine in Machina Astralis and interact with it.
If the alignment is correct:
- The machine accepts the configuration
- A glowing teleporter ring rises into the air above the chamber
- A new lockdown sequence begins, pulling all players into the ring
This lockdown and the resulting teleport are the bridge into the Mars segment of the Easter egg, which continues in the next step.
Step 6: Mars Pylon Puzzle and the Ascendant Eye
After the teleporter sequence finishes, you arrive inside the Mars arena, a low-gravity combat zone that marks the next major stage of the Easter egg. BLOG20
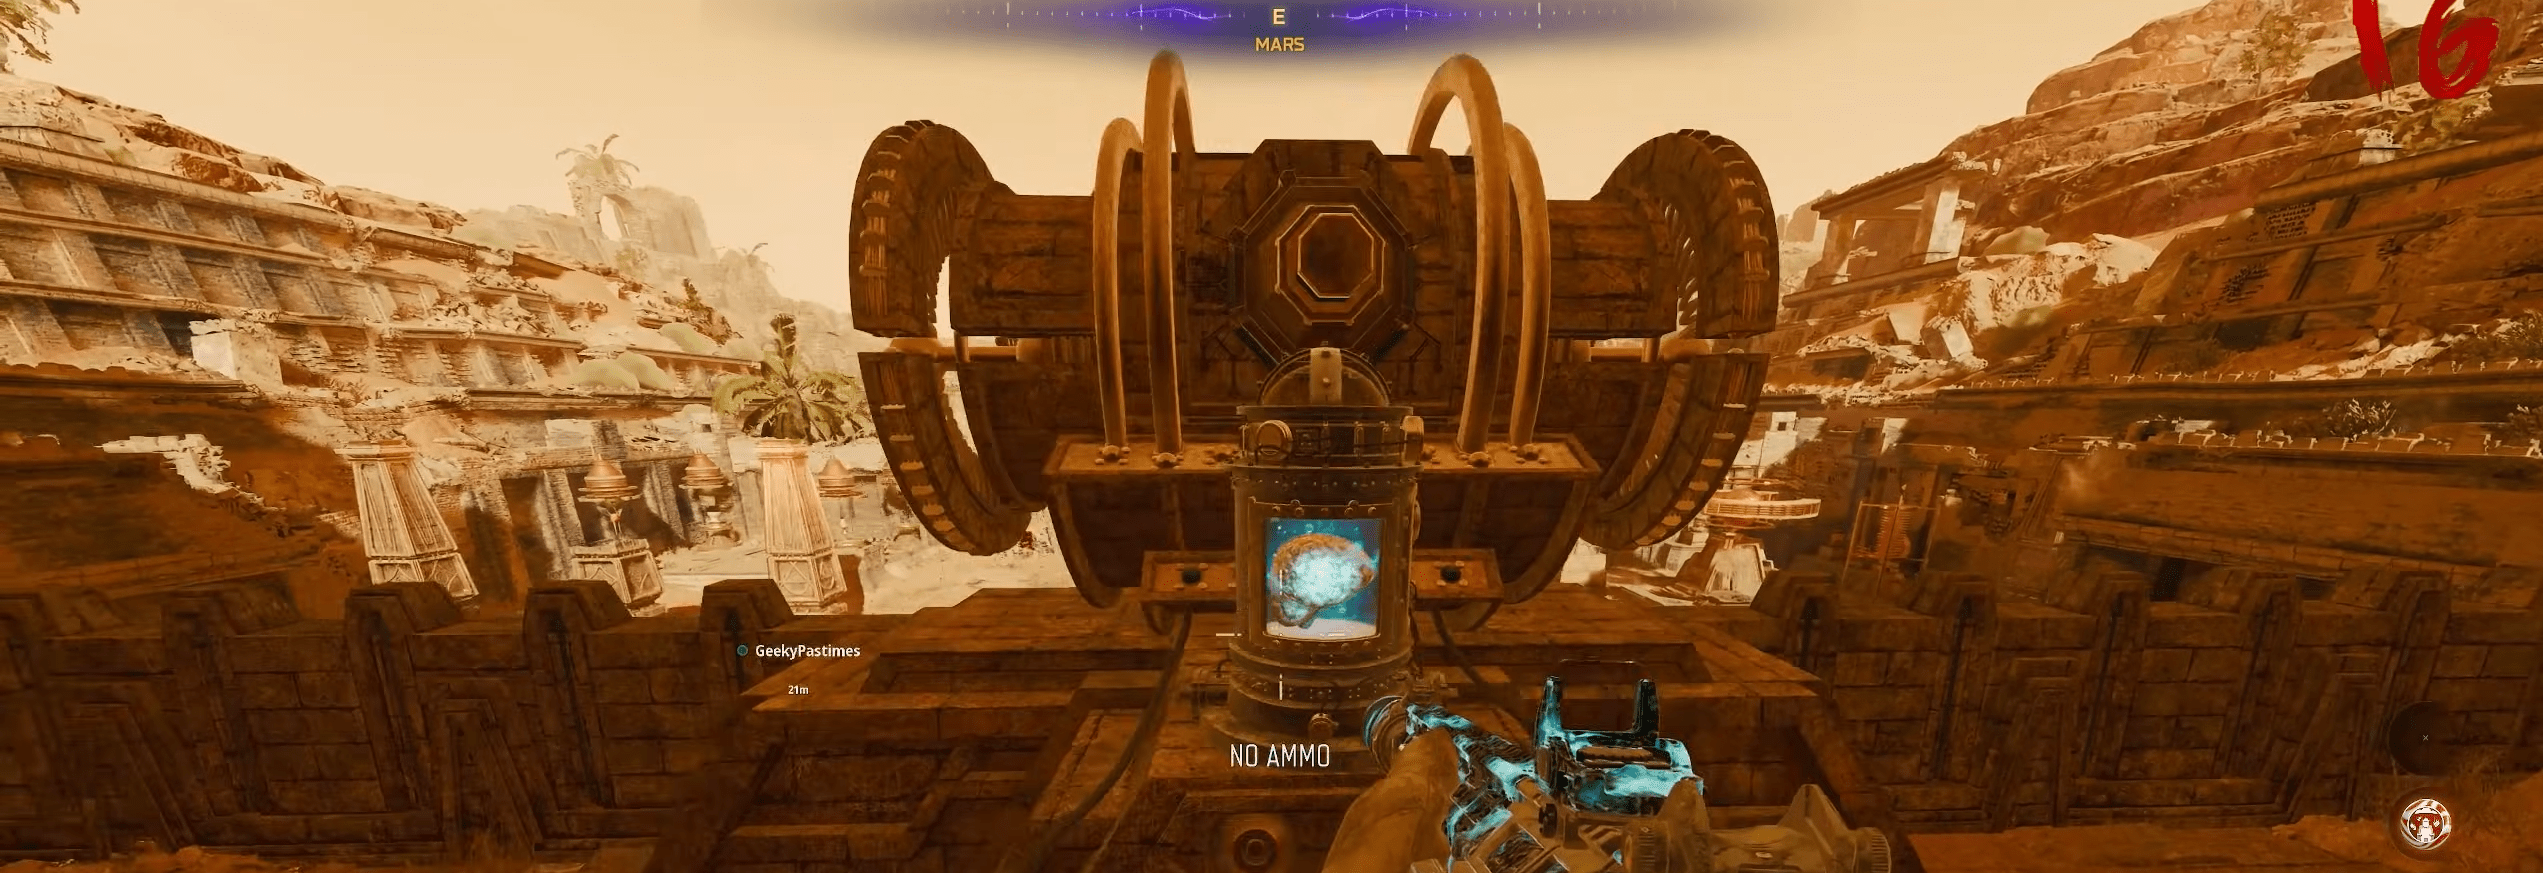
Drop down to the lower central platform. In the middle of the floor, you’ll find the Brain Jar waiting to be collected. Pick it up — it’s required for the Mars perfusion sequence.
Installing the Brain in the Mars Device
Head up the stairs to the raised control platform overlooking the arena. Place the Brain Jar onto the mounted perfusion device.
A character line confirms that a major component is missing. This is expected — the next step provides that missing power source.
Interact again with the device to connect the perfusion machine. This begins a short timing window for the upcoming long-range sequence.
Shooting the Five External Pylons
Move quickly to the bottom-left window of the Mars zone. Several pylons stand outside the playable area, and they will light up one at a time.
You must shoot all five in the correct order:
- Back-right
- Back-left
- Front-right
- Front-left
- The final pylon above the perfusion device
Each successful hit causes a bright electrical discharge. Precision weapons — ARs, LMGs, and snipers — work best here.

If all pylons were hit correctly, the Mars arena generates a floating construct known as the Ascendant Eye. It begins orbiting the room at mid-air height. Because Mars has low gravity, jump upward and drift toward it. Hold interact as you pass through it to collect the Ascendant Eye item.
Powering the Mars Pyramid
Take the Ascendant Eye to the large pyramid structure on the right side of the arena. Interact with the slot on the front panel to place the Ascendant Eye. This powers the pyramid and completes the Mars perfusion stage. The next step becomes available immediately: decoding the Organ Symbols and activating the five Resonance Pillars.
Step 7: The Organ Symbols and Resonance Pillar Activation
With the Ascendant Eye placed into the Mars pyramid, the next objective unlocks: decoding the artifact symbols shown by the Organ in the Observatory Dome and using that sequence to activate five Resonance Pillars on Mars.
This is the final puzzle step before the boss fight.
Reading the Artifact Symbols at the Organ
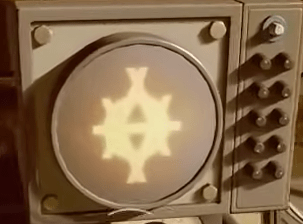
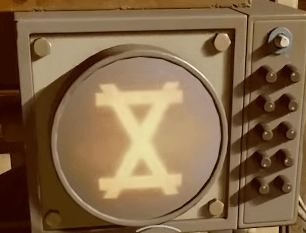
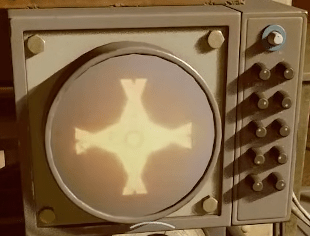
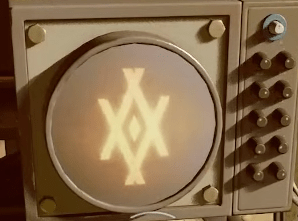
Return to the Observatory Dome and interact with the large Organ. On the right side of the instrument is a display that flashes five total symbols in order:
- Four standard artifact symbols
- One symbol slot that appears as static/interference
You may replay the sequence as many times as needed. Record the symbols exactly in the order they appear, including the position of the static symbol.
This order determines how the Mars pillars must be activated.
Preparing the Resonance Pillars on Mars
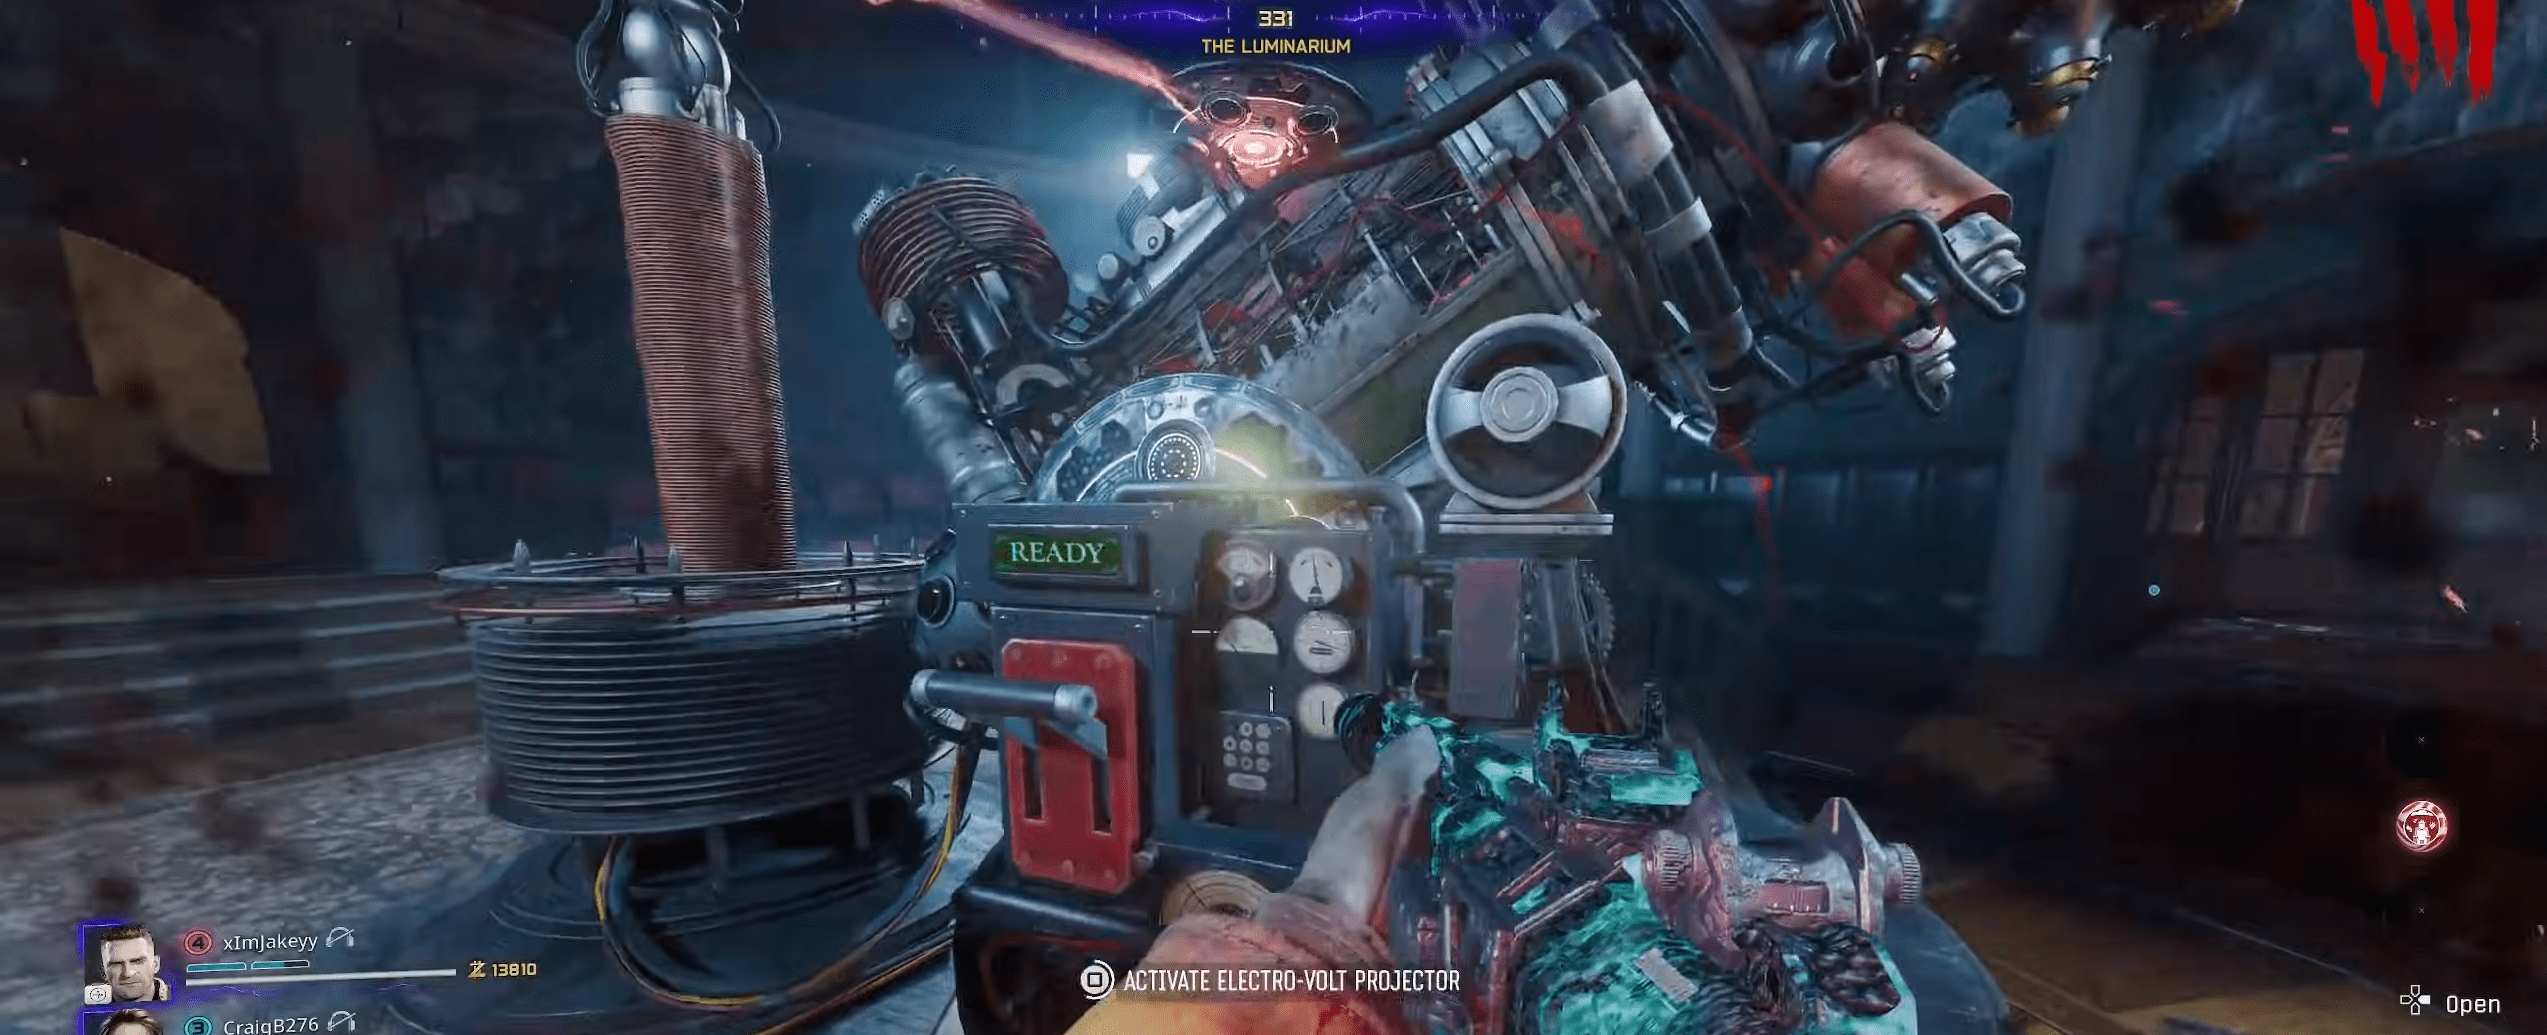
Return to the Mars arena. Whoever holds the LGM-1 Wonder Weapon must shoot the antenna tops on each Resonance Pillar to activate them.
There are five pillars, located in:
- The back-left corner
- The back-right corner
- The upper walkway near the teleporter (two pillars)
- The lower-left area near the window
Shoot the antenna of each pillar with the LGM-1. When a pillar is correctly awakened, floating UFOs begin orbiting it and it emits a unique hum. All five pillars must be activated before the sequence can begin.
Activating the Pillars in Organ Order
Now that all five pillars are active, interact with them in the exact order shown by the Organ symbols.
Important notes:
- The static symbol in the Organ sequence corresponds to the pillar whose symbol did NOT appear in your list.
- You must activate all five pillars correctly within a short time window starting from the first activation.
- Activating a pillar out of order causes it to flash red, forcing you to wait until the next round to try again.
When activated correctly, each pillar plays a clean resonance tone and glows blue.
Completing the Pillar Sequence
When all five pillars have been activated in the correct order:
- The screen flashes white
- Thunderous energy erupts from the arena
- The final objective becomes available
You are now able to initiate the Calferis boss fight, the four-phase finale of Astra Malorum.
Final Encounter: The Battle Against Caltheris

Interacting with the Brain Jar on Mars begins the final encounter. The fight against Caltheris unfolds across four escalating phases, each introducing new mechanics, hazards, and damage windows. The arena remains the same, but the behavior of the boss changes drastically as the fight progresses.
Phase 1 — Caltheris, Astral Form
Caltheris first appears as a towering astral projection suspended beyond the arena boundaries.
You cannot damage him directly.
Instead, you must fill the Soul Pylons located on the left and right sides of the arena.
How Phase 1 Works
- Kill any zombies or mimics anywhere in the arena.
- Their souls automatically travel to the pylon currently active.
- Progress is shown by how much of the pylon glows blue.
Throughout this phase, Caltheris performs one major attack: Laser Sweep.
Caltheris targets every player with a red beam that leads into a full-area laser strike. Stay moving at all times. Stopping for even a moment can result in a down.
Phase 1 Structure
Phase 1 consists of three soul-filling cycles:
- Left Pylon – Fill and fire it to remove 25% of Caltheris’s health.
- Right Pylon – Fill and fire it to remove another 25%.
- Both Pylons Active – The final soul sequence for this phase.
During the third sequence, Caltheris adds two new hazards:
- Acid Gas Clouds on the lower floor
- Lava Spots scattered across the arena
Avoid standing in either, as both deal rapid damage and can slow your movement.
Once the third firing sequence is complete, Caltheris’s astral form collapses — and his physical form emerges.
Phase 2 — Caltheris, Physical Form
Caltheris drops into the arena as a massive physical monster. This phase focuses entirely on critical damage and positioning.
- Shoot the glowing blue armor patches on his body.
- Once broken, Caltheris reveals a bright blue critical weak spot.
- All damage should focus on this crit for maximum effect.
Attacks in Phase 2
- Boulder Throw – He hurls massive stones at a targeted player.
- Melee Swipes – Heavy close-range hits that can trap players.
- Arena Pressure – Zombies spawn at a steady rate.
Keep distance whenever possible and force Caltheris to walk rather than lunge. Once the crit spot takes enough damage, his health bar empties and the phase ends.
Phase 3 — Caltheris Ascendant
Caltheris reappears, now larger and fully armored. This phase resembles Phase 2 but with a much more dangerous moveset.
The boss gets another new attack, the Ground Slam. Watch for him to stop moving and lean backward slightly — this indicates a slam wind-up. Jump the moment he hits the ground.
If you do not:
- All your armor plates break instantly
- Nearby zombies can easily down you
He continues using the Boulder Throw and melee attacks from Phase 2, but slams become the primary threat.
Just like before:
- Shoot away the armor plating
- Reveal the critical weak point
- Focus all fire until his health bar depletes
When Caltheris collapses, he enters his final and most dangerous form.
Phase 4 — Caltheris the Needle
Caltheris now becomes a hyper-aggressive form with electrified attacks and minimal downtime.
Interacting with the Brain Jar provides:
- Max Ammo
- Full Field Upgrade
- A temporary 60-second damage spike that functions almost like an instakill buff
Use this timing window wisely — it is your strongest damage opportunity in the entire fight.
New boss attack, the boulders now leave behind dark purple electric pools that:
- Deal extreme damage
- Down players almost immediately
- Persist on the ground for several seconds
Avoid these zones entirely and keep your movement patterns wide.
Break the remaining armor one last time, expose the final crit, and focus all fire during safe windows while keeping distance and avoiding ground hazards.
When the crit breaks completely, Caltheris collapses, triggering the ending cutscene and completing the Astra Malorum main quest.
Conclusion
Astra Malorum stands out as one of the most ambitious, layered, and mechanically varied Zombies maps in Black Ops 7. From the multi-stage reconstruction of O.S.C.A.R., to the planetary logic puzzles, Mars traversal, and the four-phase Caltheris showdown, the map demands precision, awareness, and adaptability across the entire run. Every step builds toward the final encounter, and once the rhythms of each puzzle click into place, the experience becomes one of the most satisfying Easter egg completions in the series.
With this walkthrough, you should now have every tool needed to complete the Easter egg consistently — solo or co-op. Master the survival sequences, keep track of puzzle progression, and understand each Caltheris phase, and Astra Malorum becomes a showcase of skill rather than confusion. Good luck on your runs, and enjoy the victory cutscene once Caltheris finally falls.
F.A.Q.
How do you start the Astra Malorum Easter egg?
Activate the Harmonic Oculus in the Observatory Dome, collect its two missing components, restore power, and complete the Pack-a-Punch defense. The full questline unlocks once Pack-a-Punch is active.
How do you get the LGM-1 Wonder Weapon?
Gather the Damaged Drone, Aberrant Wiring, and Car Battery, then eliminate O.S.C.A.R. using all three required traps: the Sunbeam trap, the Electro-Volt Projector, and the Absolute Zero crystal trap. The LGM-1 drops after the third trap kill.
Who is mentioned in Elimination 20 in Astra Malorum?
Elimination 20 plays back the killing of Dr. Thurston, not Dr. Fen. When O.S.C.A.R. says “Playback of Elimination 20: Dr. Thurston,” he also names three planets used to generate your unique planet-order code.
How does the planet-order code work?
Match the three planets O.S.C.A.R. mentions to their numeric positions in the “closest to farthest from the sun” chart. Enter the resulting three-digit code in the Observatory Dome to unlock the Cryo Chamber Key.
What triggers the teleport to Mars?
Place Planet Neptune into the Machina Astralis orrery, align Saturn, Mars, and Neptune to their compass directions, then interact with the perfusion machine. This starts the lockdown that leads directly to Mars.
What is the Ascendant Eye for?
After shooting the five pylons on Mars, collect the Ascendant Eye from its orbit path and insert it into the pyramid to unlock the final Organ symbol puzzle.
How do you begin the Caltheris boss fight?
Activate all five Resonance Pillars in the exact order shown on the Organ display, including the missing/static symbol. Completing the sequence enables the Brain Jar prompt that starts the Final Encounter.
Why is the Caltheris fight so difficult?
Each phase adds new hazards — laser tracking, armor-gated crit phases, ground slams that break all armor, and electrified impact pools in the final form. Mastering positioning and timing is crucial.


