 Dallon Avery
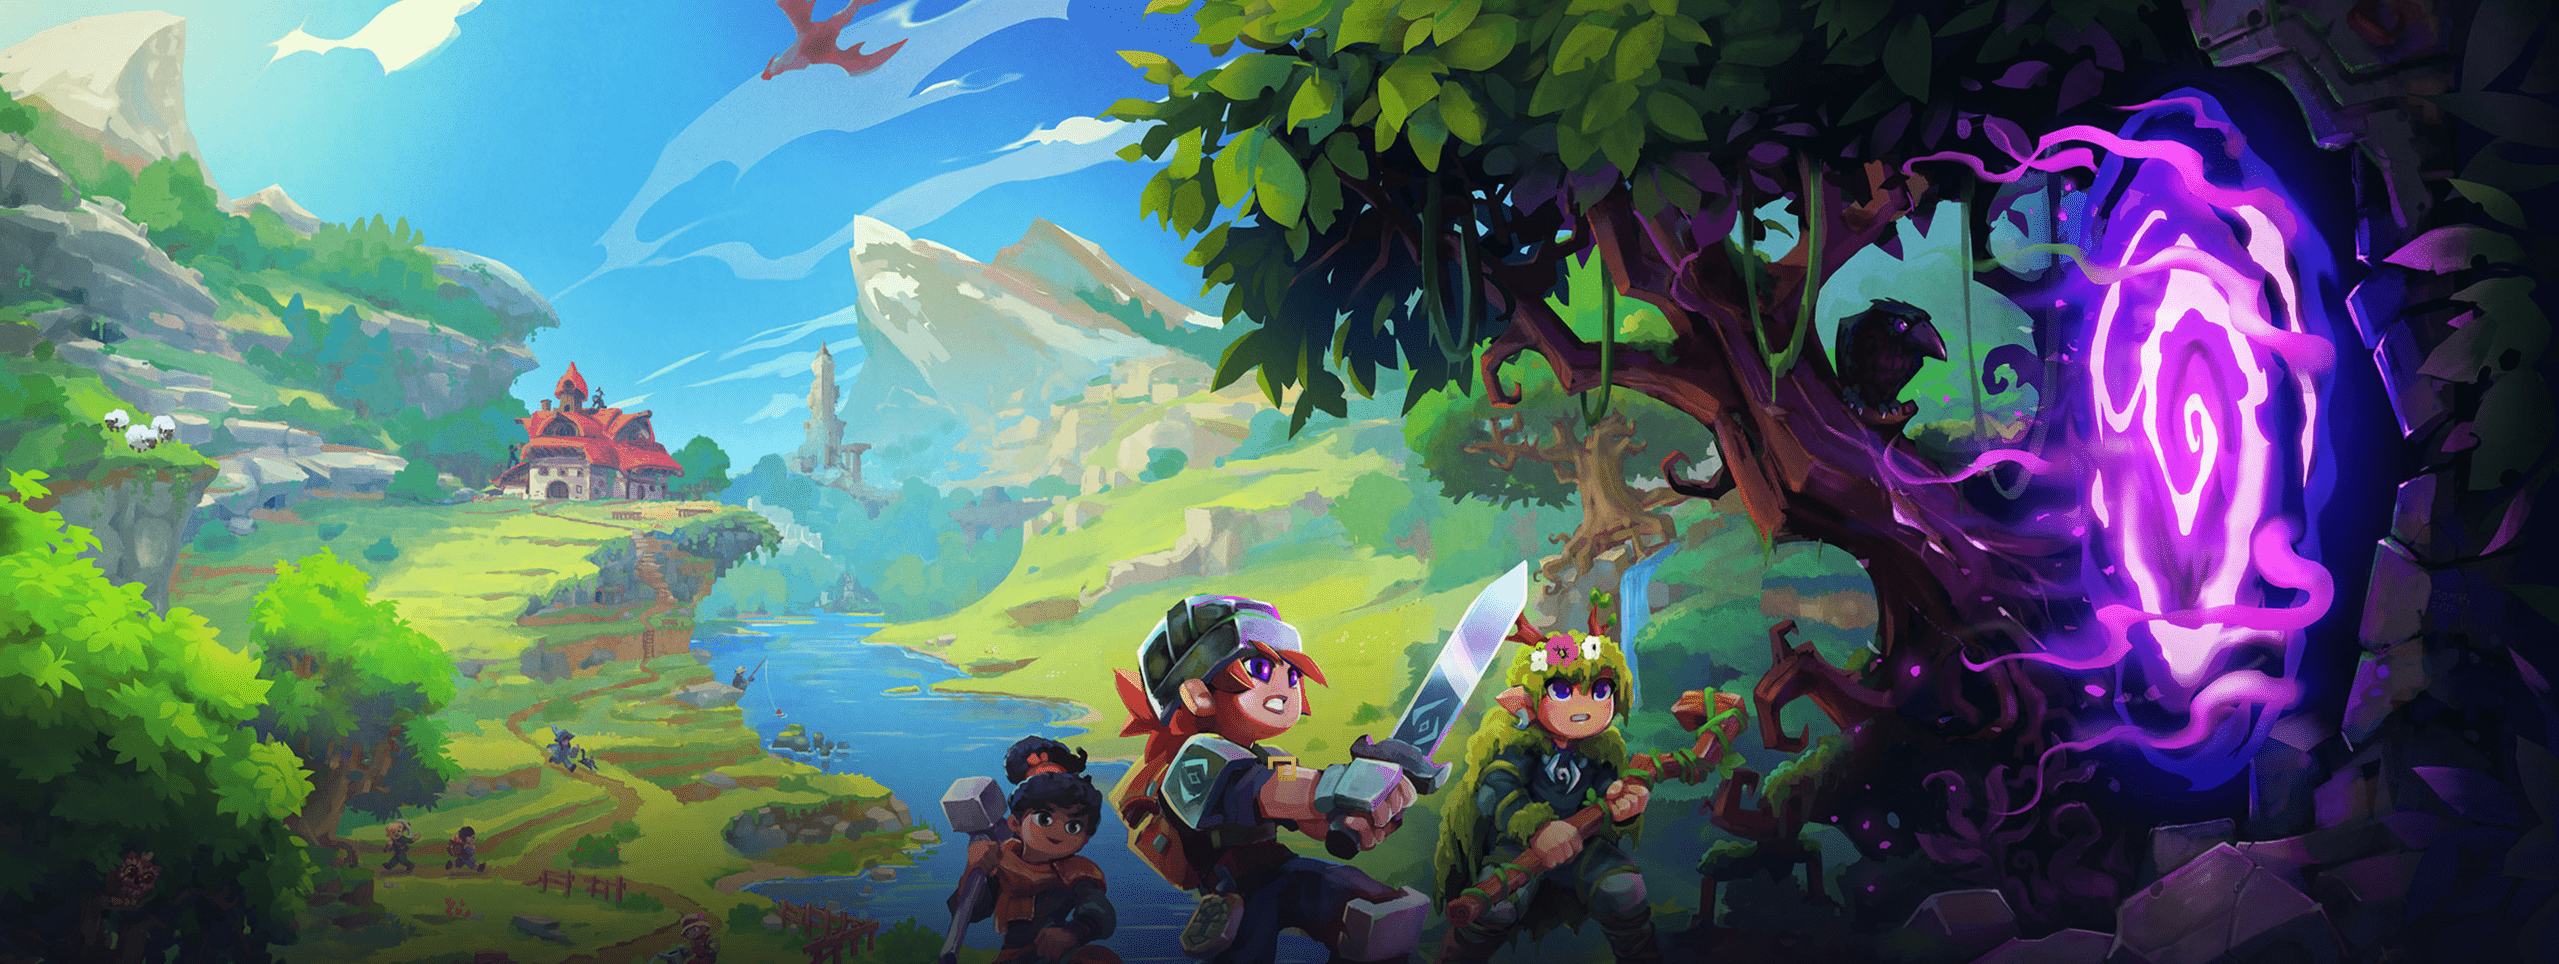
Welcome to the Hytale beginner’s guide. Hytale is a Minecraft fan’s wet dream because it does everything the big brother never could. You could also say that Hytale is a 3D Terraria, and if you know this game, then you know that Hytale is much more immersive, complex, and atmospheric than Minecraft.
If you want to start playing in the best possible way, buy Hytale Accounts at Skycoach. Not only is this a better way to get access to the game, but you can also use a separate account to host your own servers!
Read our other Hytale guides:
Note: At Skycoach, you can Buy Hytale Boost at the best prices with fast delivery. Use our special PROMO CODE (in green) hidden in this article for a 20% DISCOUNT.


How To Start Playing Hytale
Those of you unfamiliar with how survival and crafting games work will learn how to start playing Hytale as a beginner in this section.
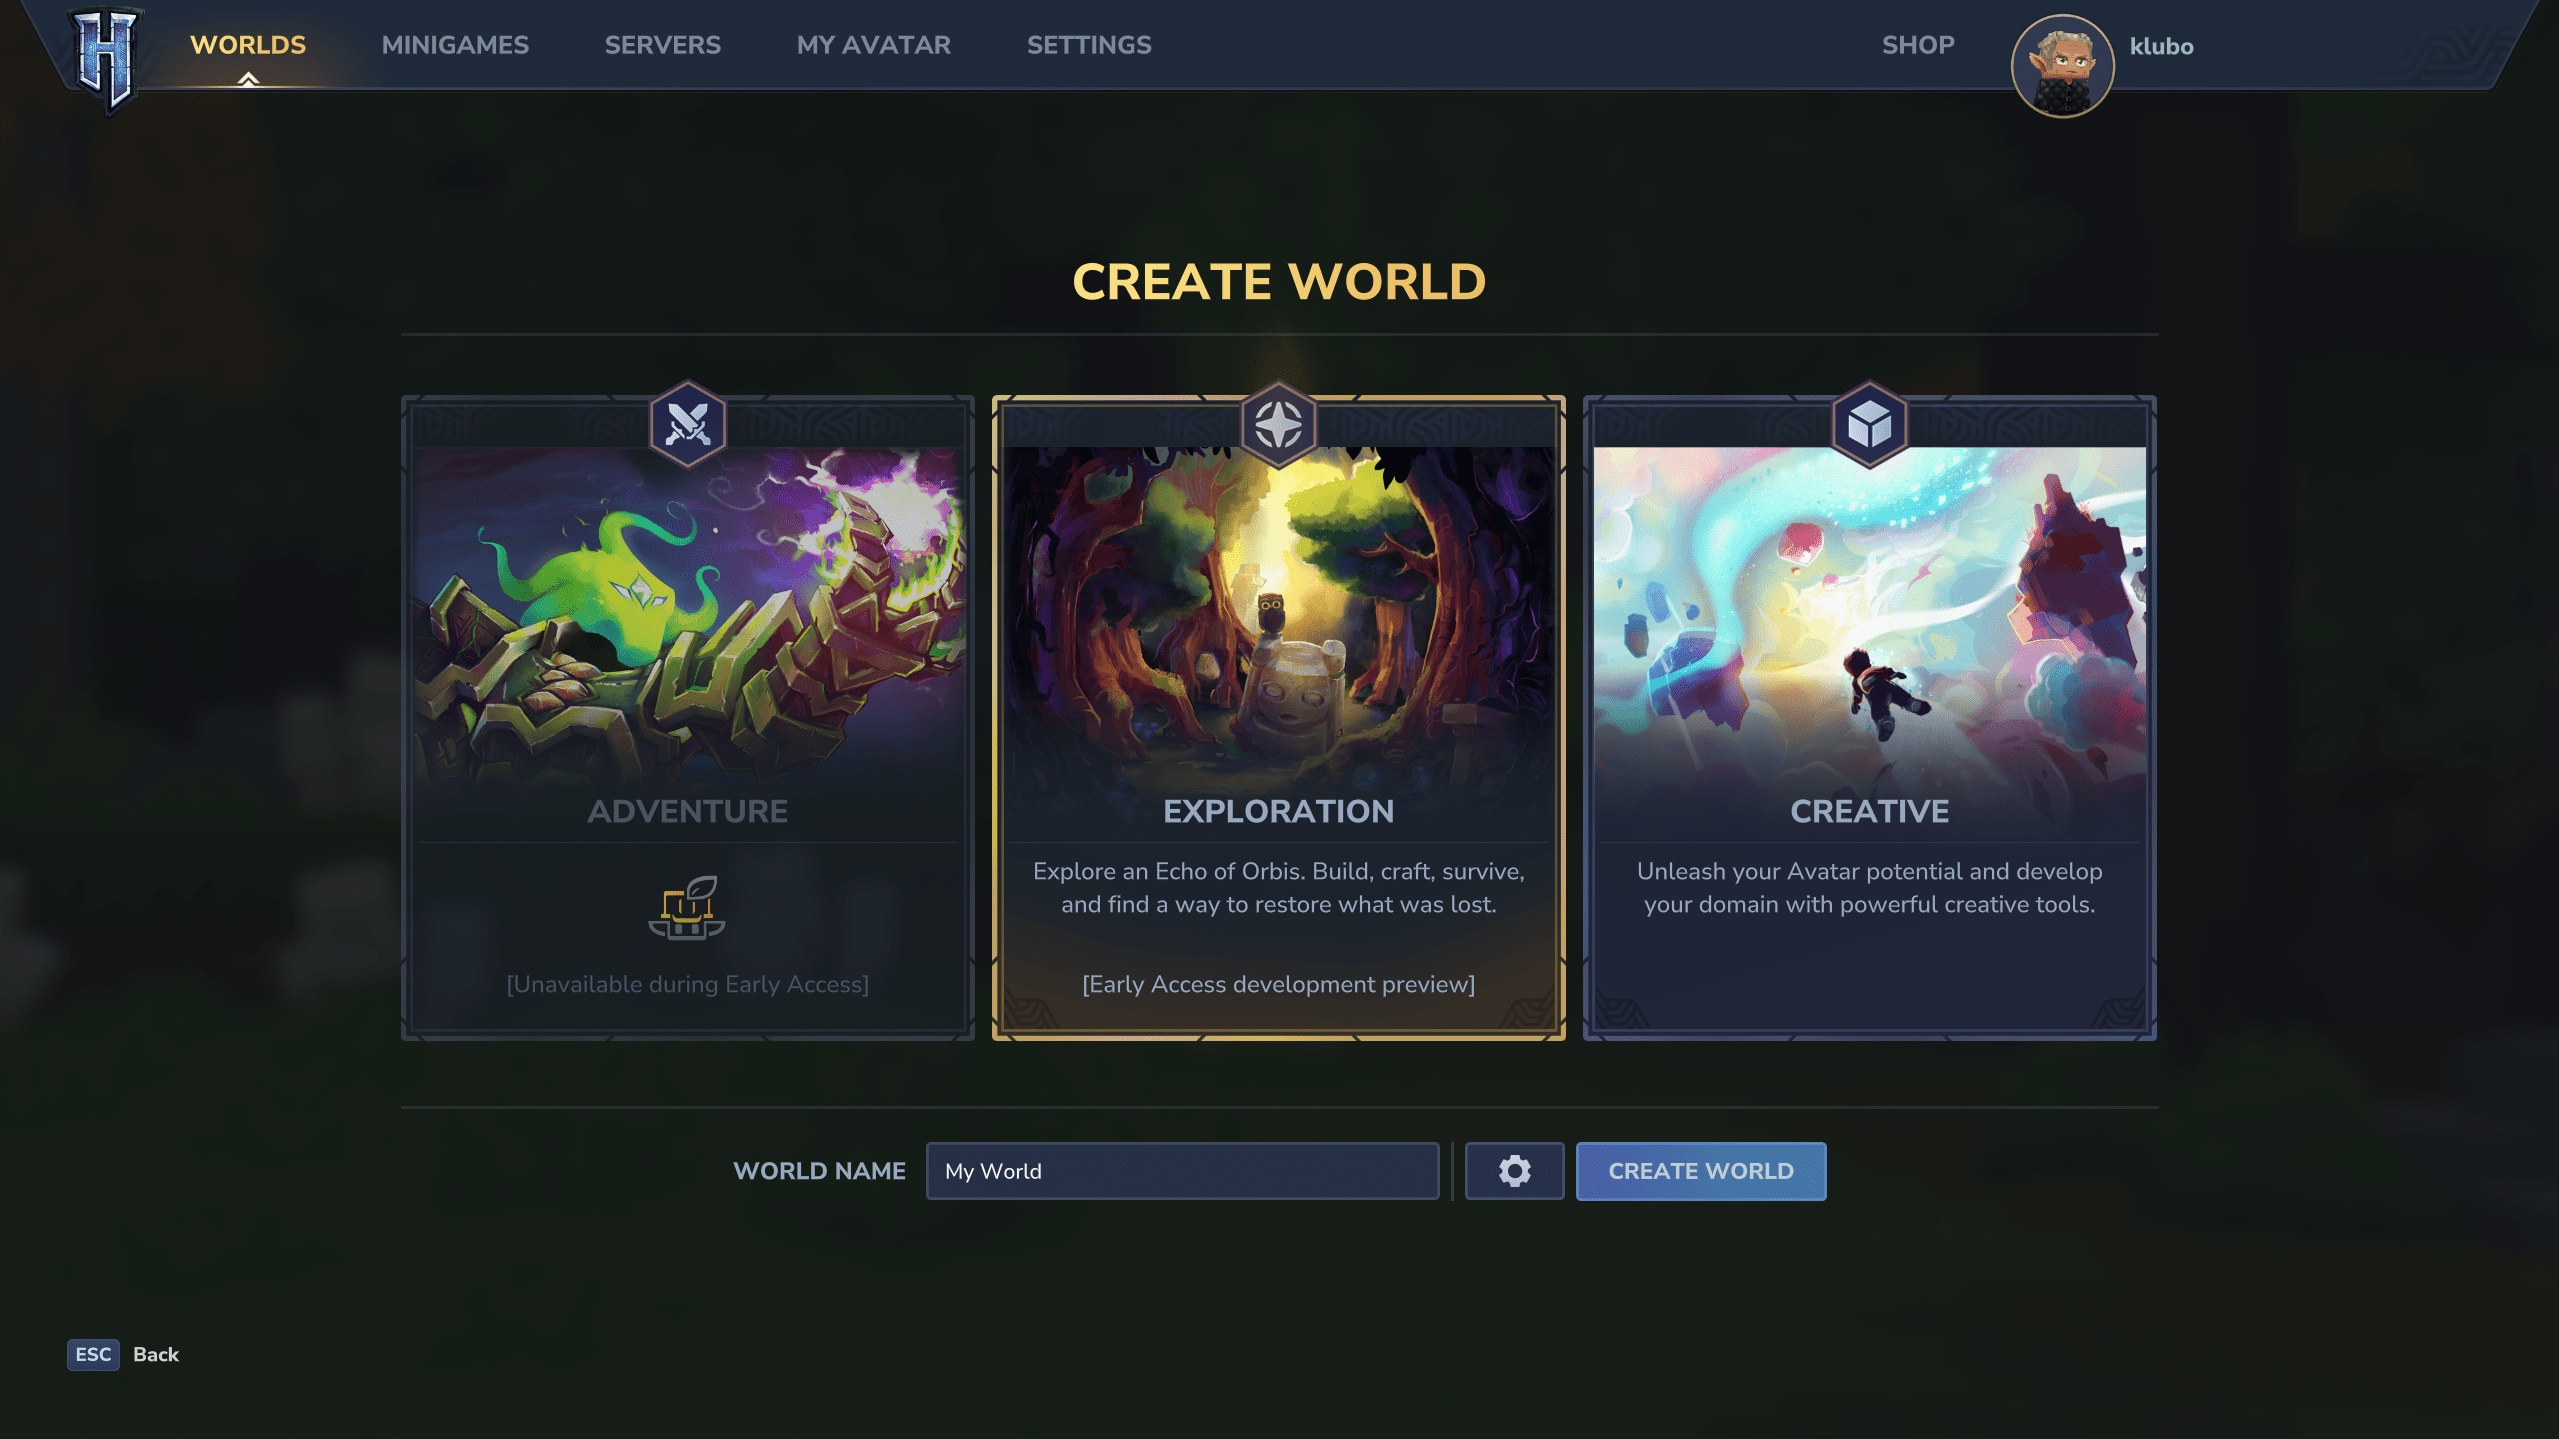
It all starts with generating your own world. From the main menu, click “Worlds,” then select the “Exploration” mode, which is one of two available modes. This mode is your typical survival and crafting mode. Once selected, enter the name of the world. If you want to change some of the world’s settings, click on the cog icon. Available options include:
- PvP toggle - allow or disable PvP if you play online and with other players.
- Fall Damage toggle - enable or disable the damage taken from falling.
- Day/Night Cycle - select the speed at which the day cycles change. Default value is 1x.
- Inventory Penalty on Death - this rule decides what you lose when you die. The default setting is “partial drop”.
- Resource Loss % on Death - decide how many resources in percentage you will lose on death.
- Durability Loss % on Death - decide how badly your gear will get damaged in percentage when your character dies.
These settings are pretty limited in this early access version of the game, and chances are more will be added in the future. Once the world is created, you will start loading into it. The world will be generated almost randomly, except for various points of interest.
Understanding Early Game Progression
Now that you know how to get into the game, let’s learn how to start Hytale walkthrough. If you’ve never played Minecraft or survival games before, you might feel lost not knowing what to do when you spawn into the world. There are no tutorials and no directions in the game, so you either know what to do or you will have to find out on your own. Luckily for you, we’ll explain what to do here.
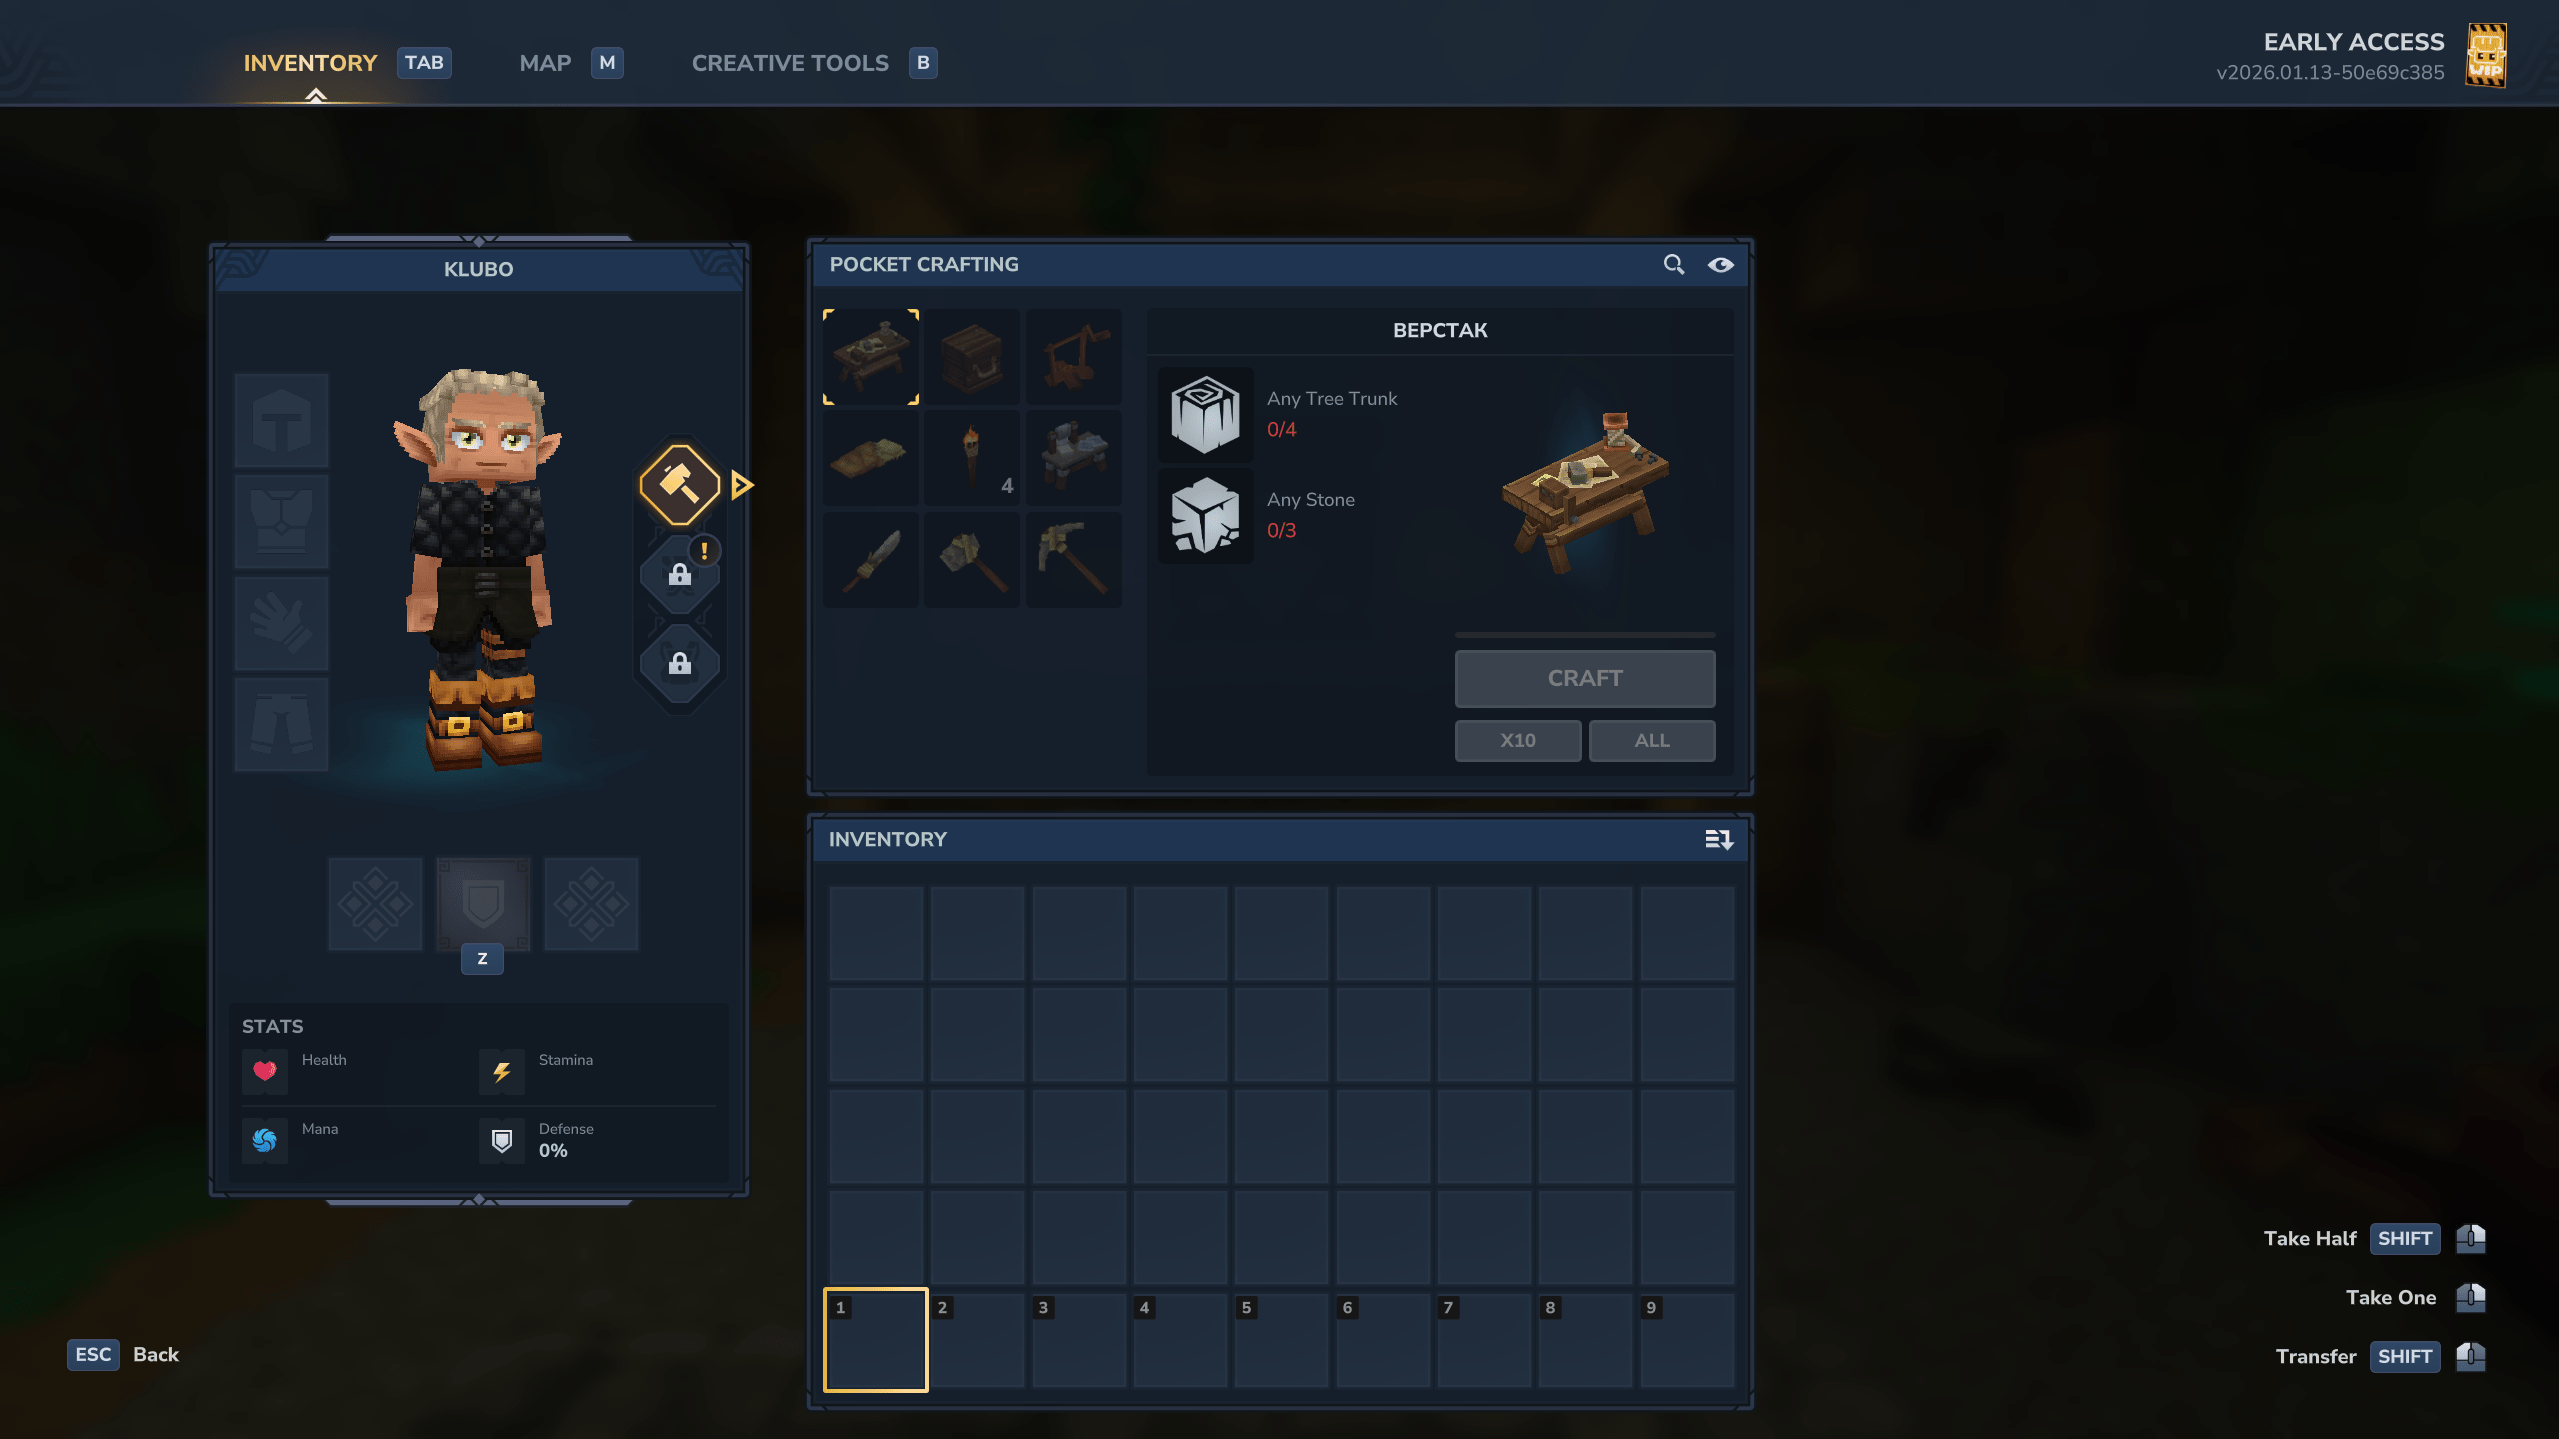
So, here’s the Hytale basics tutorial. The first order of business is making some tools. You’ll need:
- an axe - to cut down trees and get wood
- a pickaxe - to get stone
- a simple sword - to kill monsters
Just smash some things around with your fists, and you should be able to get what you need. Press TAB to see the list of things you can make. BLOG20
Once you have the tools, the next thing to do would be to make your first base, which is to say a house. You don’t need to go out of your way to build the best-looking house. You would likely get lost in all of the building blocks and their purpose. Once you’ve selected the right spot (we’ll talk about how to do that later), all you need is a square shack with a roof over your head, big enough to fit the basic things - a fireplace, a crate for storage, and a mattress for saving.
To get access to building parts, you’ll need the Builder’s Bench, a workstation that you can pretty easily craft. Place it near the place where you want to build. Place any raw material, such as wood or stone, into the bench and select the building parts from the list of available options.
You can use simple raw blocks as your floor and walls, but things such as the doors, roof, stairs, etc., have to be made in that bench.
What Matters Early and What Can Wait
Early progression in Hytale becomes much clearer once you separate mandatory systems from optional ones. The game gives you a lot of freedom, but not everything is equally important at the start. Focusing on the right priorities will prevent wasted time and make later systems easier to understand.
This Hytale guide suggests that your priorities should look like this:
- Craft basic tools and a simple weapon to gather resources and defend yourself
- Set up a small starter base with storage, a fireplace, and a mattress
- Unlock the Memory System by visiting the Forgotten Temple
- Begin exploring more aggressively and interacting with world structures
- Gather resources and materials without worrying about efficiency
- Start unlocking and using core progression systems as they appear
These actions directly affect how fast you progress and how smoothly the game opens up. They also unlock systems that track your actions permanently, meaning delaying them can slow you down later.
What you can safely ignore early on includes advanced gear crafting, large or decorative builds, complex farming setups, and min-maxing weapons or armor. These systems are designed to scale with progression and become more relevant once you understand the world, biomes, and resource flow.
How to Pick the Best Place For Your Base in Hytale
It’s actually pretty important to pick a good place for your first base. You don’t want to build too close to where you spawned, because often times there’s nothing around in terms of resources. So, how do you pick the right place, and where should you build? This part of the Hytale new player guide is dedicated to picking the right spot.
While your first base will most likely not endup being your last, you gotta make sure you start building it somewhere you can reach as many different resources as you can while also staying safe. It might be a good idea to build on the border with the next zone. We’ll talk about those in the next section, but basically, you start in the easiest zone in terms of difficulty, and at the same time, somewhere you can only get the basic, or, as they say, tier 1 resources. So, consider building somewhere you can travel to the next, more difficult zone with better resources in no time.
Hytale Biomes and Zones
Hytale’s world is divided into zones that scale in difficulty the farther you travel from where you start. Each zone has tougher enemies and harsher environments, but also its where you find better resources that are required for long-term progression. Let’s give you a list of those zones and some description.
The zones currently known in Hytale are:
- Zone 1: Emerald Grove
This is the primary starter zone for most players. It features green plains, forests, swamps, lakes, and extensive cave systems. Enemy difficulty is low, resources are basic, and survival is forgiving. This is the best zone to learn combat, gather early materials, and establish your first base. - Zone 2: The Howling Sands
An arid desert environment with little vegetation and limited water. Enemies are tougher than in Emerald Grove, and survival becomes more demanding. This zone introduces higher-tier resources, but traveling here too early can be risky without preparation. - Zone 3: Borea
A cold, snowy region filled with mountains and taiga forests. Enemies are stronger, and environmental hazards become more noticeable. This zone rewards players with advanced materials but is better approached once you are comfortable with combat and have upgraded gear. - Zone 4: Devastated Lands
A volcanic, scorched region dominated by lava and dangerous terrain. While the surface is extremely hostile, deeper underground areas contain valuable resources and unique ecosystems. This zone represents a major difficulty jump and is not intended for early exploration. - Zone 5: Skylands
A placeholder zone associated with the lightning element. Very little is known, but it is expected to feature floating islands and advanced challenges. - Zone 6: Poisonlands
Another placeholder zone with limited information. It is believed to embody the void element and will likely introduce entirely new mechanics and dangers.
Building inside zone 1 makes the most sense as you don’t yet have the good gear to stay safe in the next zone. But, at the same time, you might want to make runs for better resources to the next zone. With that in mind, it might make the most sense to build somewhere on the border between those zones.
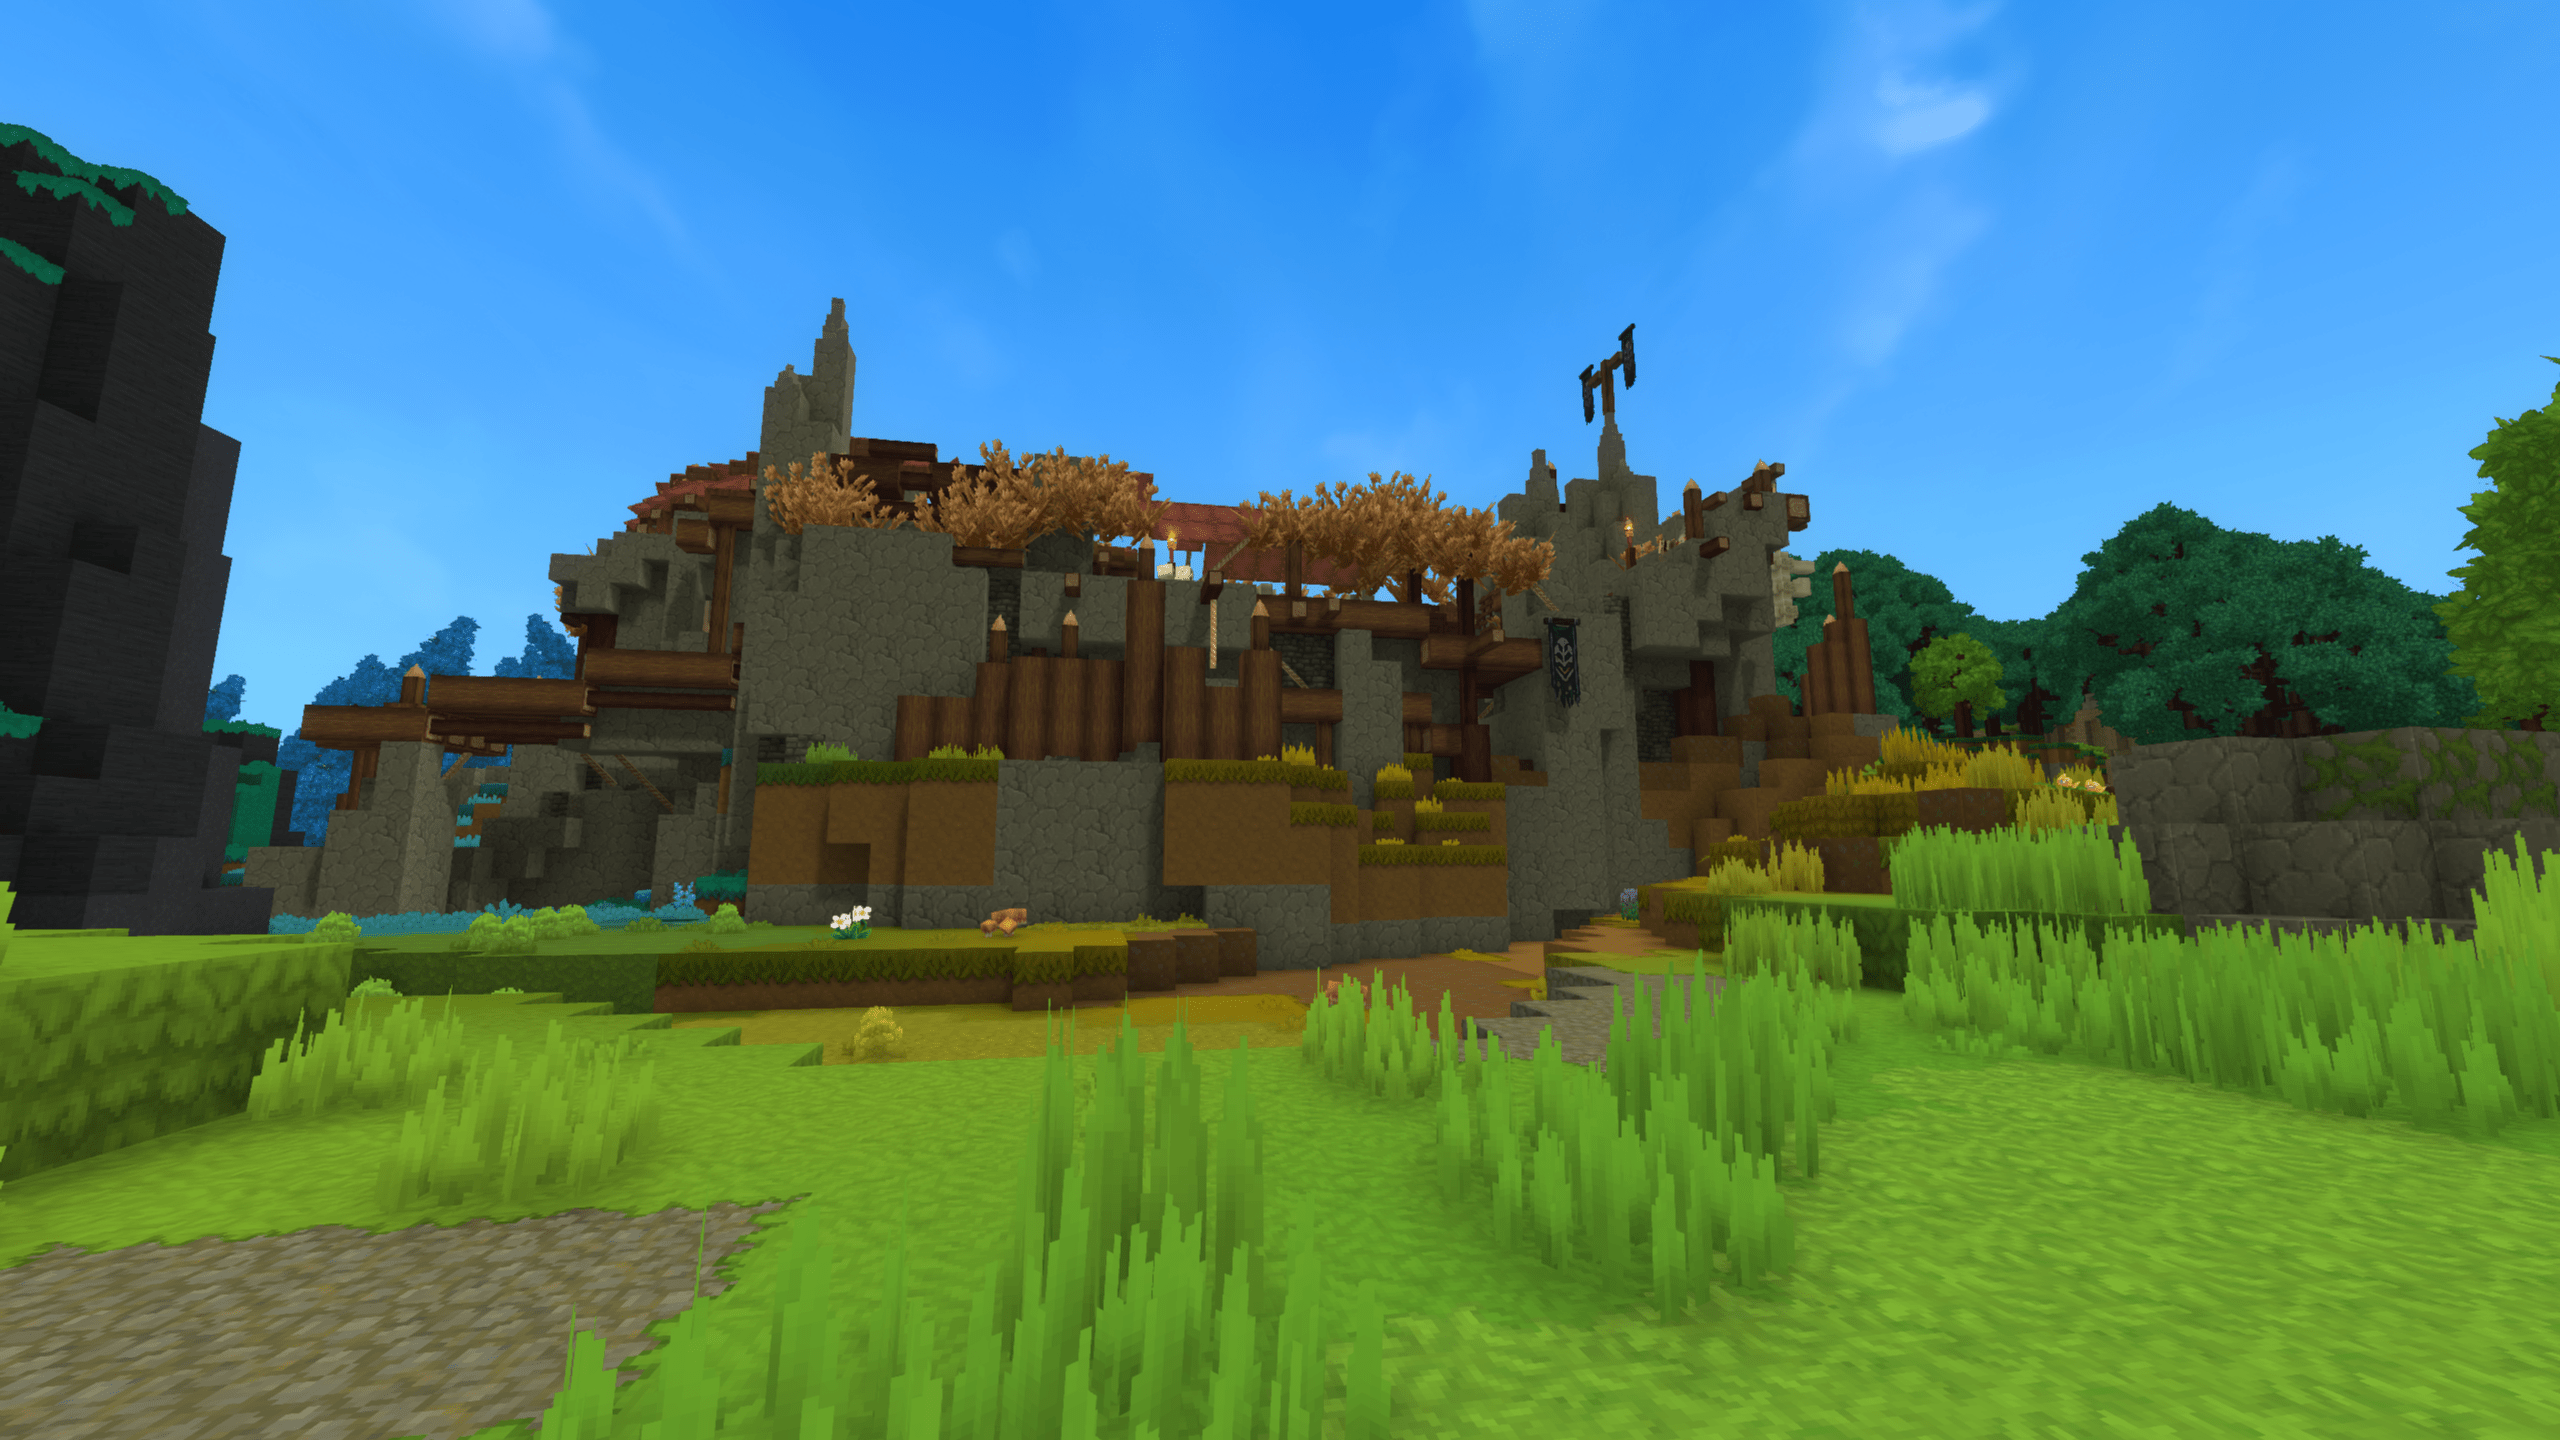
Why Mines Make Strong Early Bases

Mines are some of the best locations to build an early base. These large underground structures often come with multiple access points, existing tunnels, and thick ore veins already exposed. Some mine variants even include built-in forges or rail systems, giving you a massive head start.
Building near or inside a mine means you do not need to dig aimlessly to find resources. You can immediately access copper, iron, and other early materials while expanding deeper as needed. Mines also naturally scale with progression, allowing you to keep using the same base location longer without feeling constrained.
Choosing a mine or structure-adjacent location early gives you flexibility. You gain access to resources, reduce travel time, and set yourself up for smoother progression as the game opens up and demands more from your base.
The Memory System Explained
Now that you have a basic base and a sense of where you are in the world, it is time to engage with the most important progression system in Hytale. The Memory System is not optional, and it is not something you can safely delay. Many players unknowingly miss progress early because this system does not activate automatically. Thus, in this section of the Hytale survival guide, we’ll explain how to use it.
The Memory System acts as a global tracker for your character’s encounters. It records creatures, enemies, and other entities you come close to in the world and turns those encounters into long-term progression. However, none of this tracking happens until you unlock it manually. Any encounters before that point are lost permanently, which is why this system should be unlocked as early as possible.
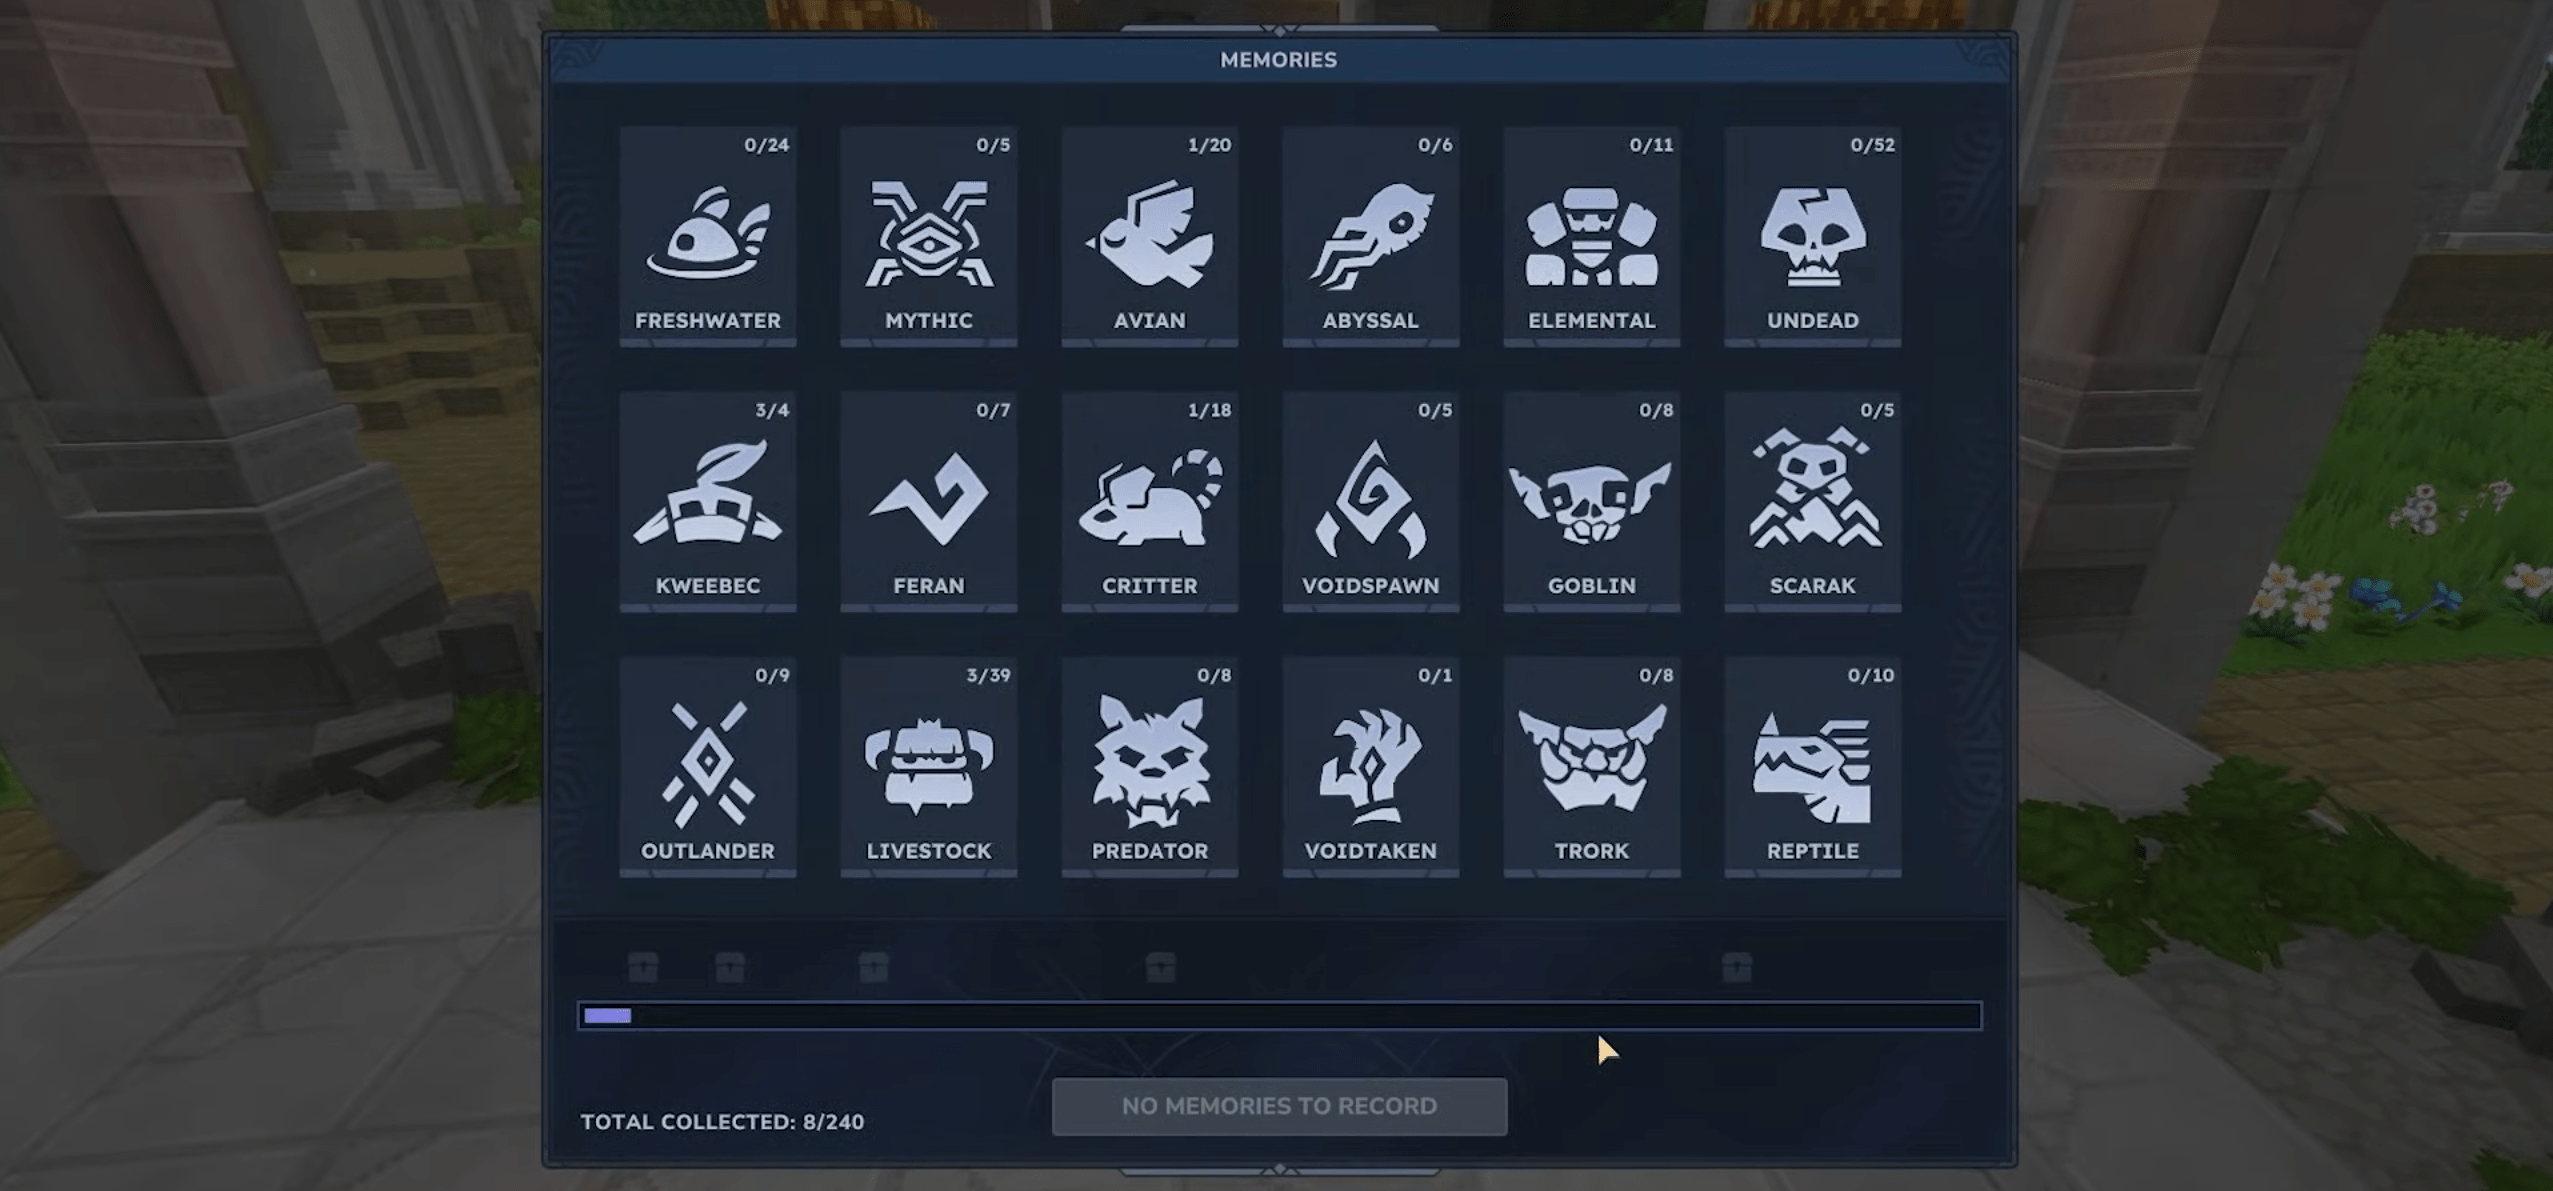
What Memories Track
Memories are earned simply by being near unique mobs, creatures, or entities in the world. You do not need to kill them, interact with them, or complete any special action. Proximity alone is enough to generate a memory once the system is active.
Each creature type is tracked separately, and the system rewards exploration rather than combat. Moving through different biomes, structures, and zones naturally fills your memory collection. This design encourages players to explore broadly instead of farming a single area, which ties directly into Hytale’s progression philosophy.
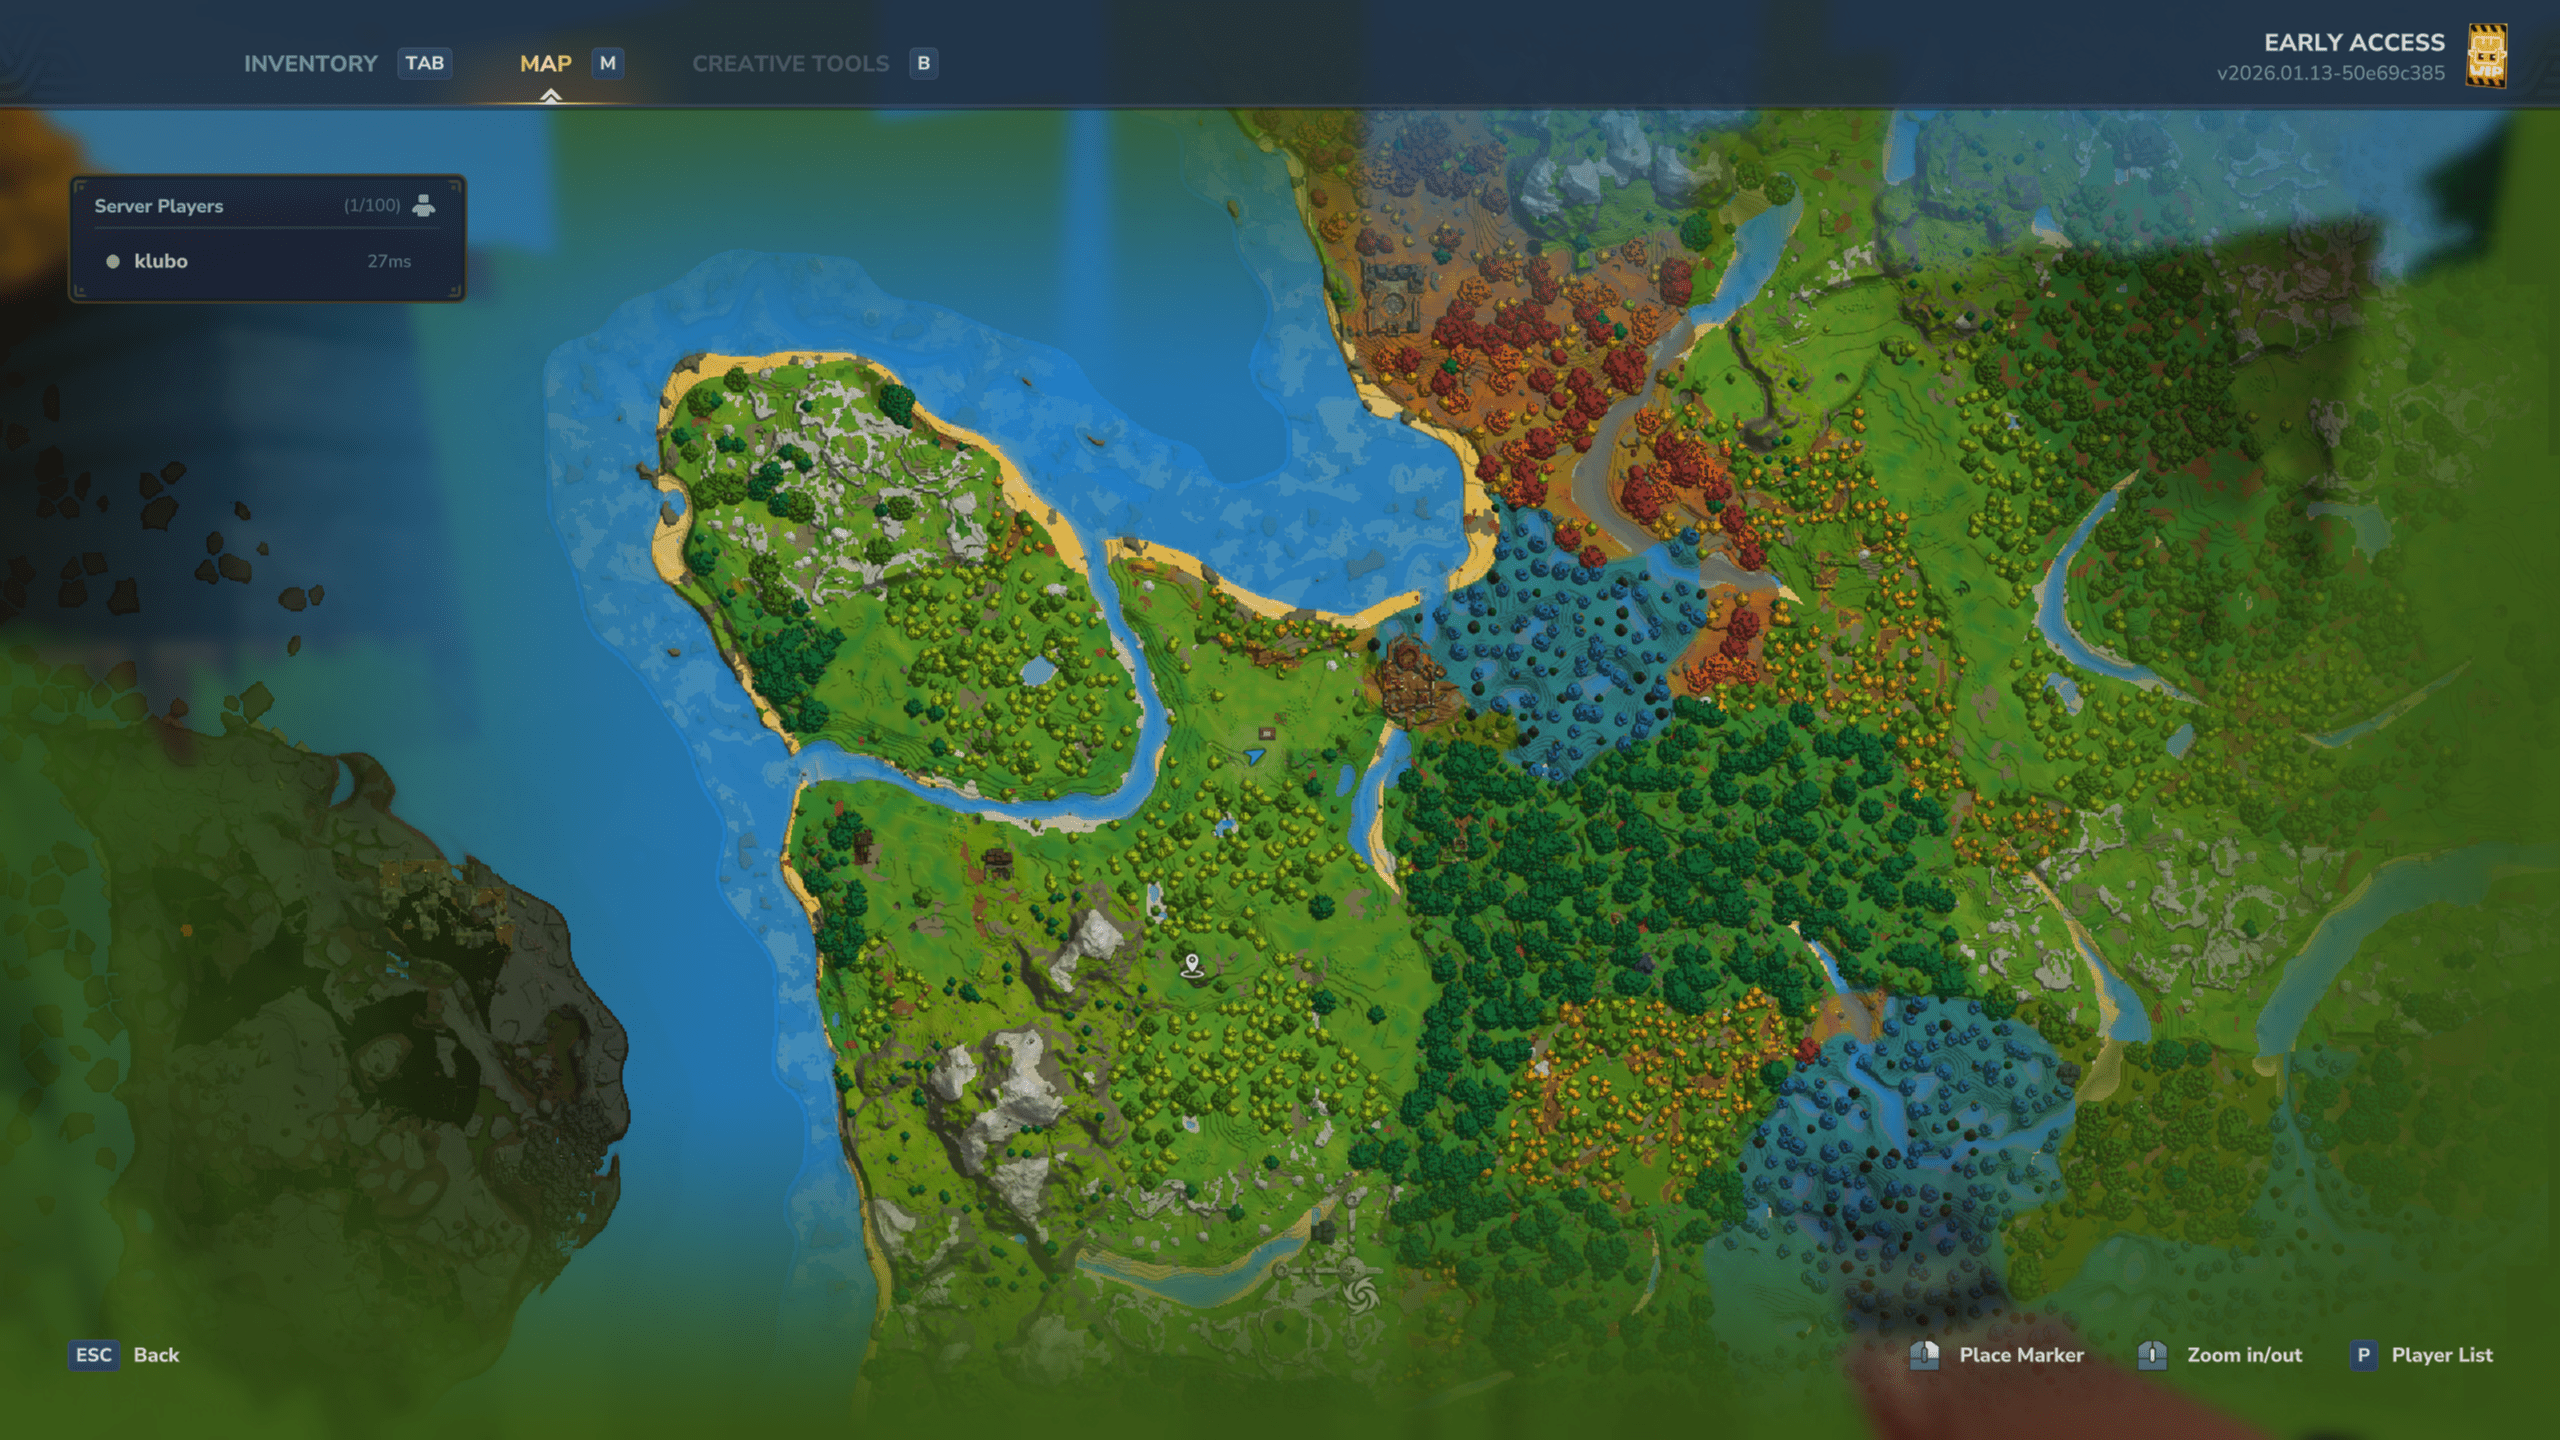
Forgotten Temple Gateway Location

The Memory System is unlocked through a specific structure called the Forgotten Temple Gateway. This structure is visible on the map and stands out from its surroundings, making it easier to locate than most points of interest.
Inside the gateway, you will encounter a hostile enemy guarding access to the portal. The game usually provides nearby loot chests inside the structure, allowing you to gear up before the fight. Once the enemy is defeated, you can enter the portal and reach the Forgotten Temple itself.


Activating the Memory Statue
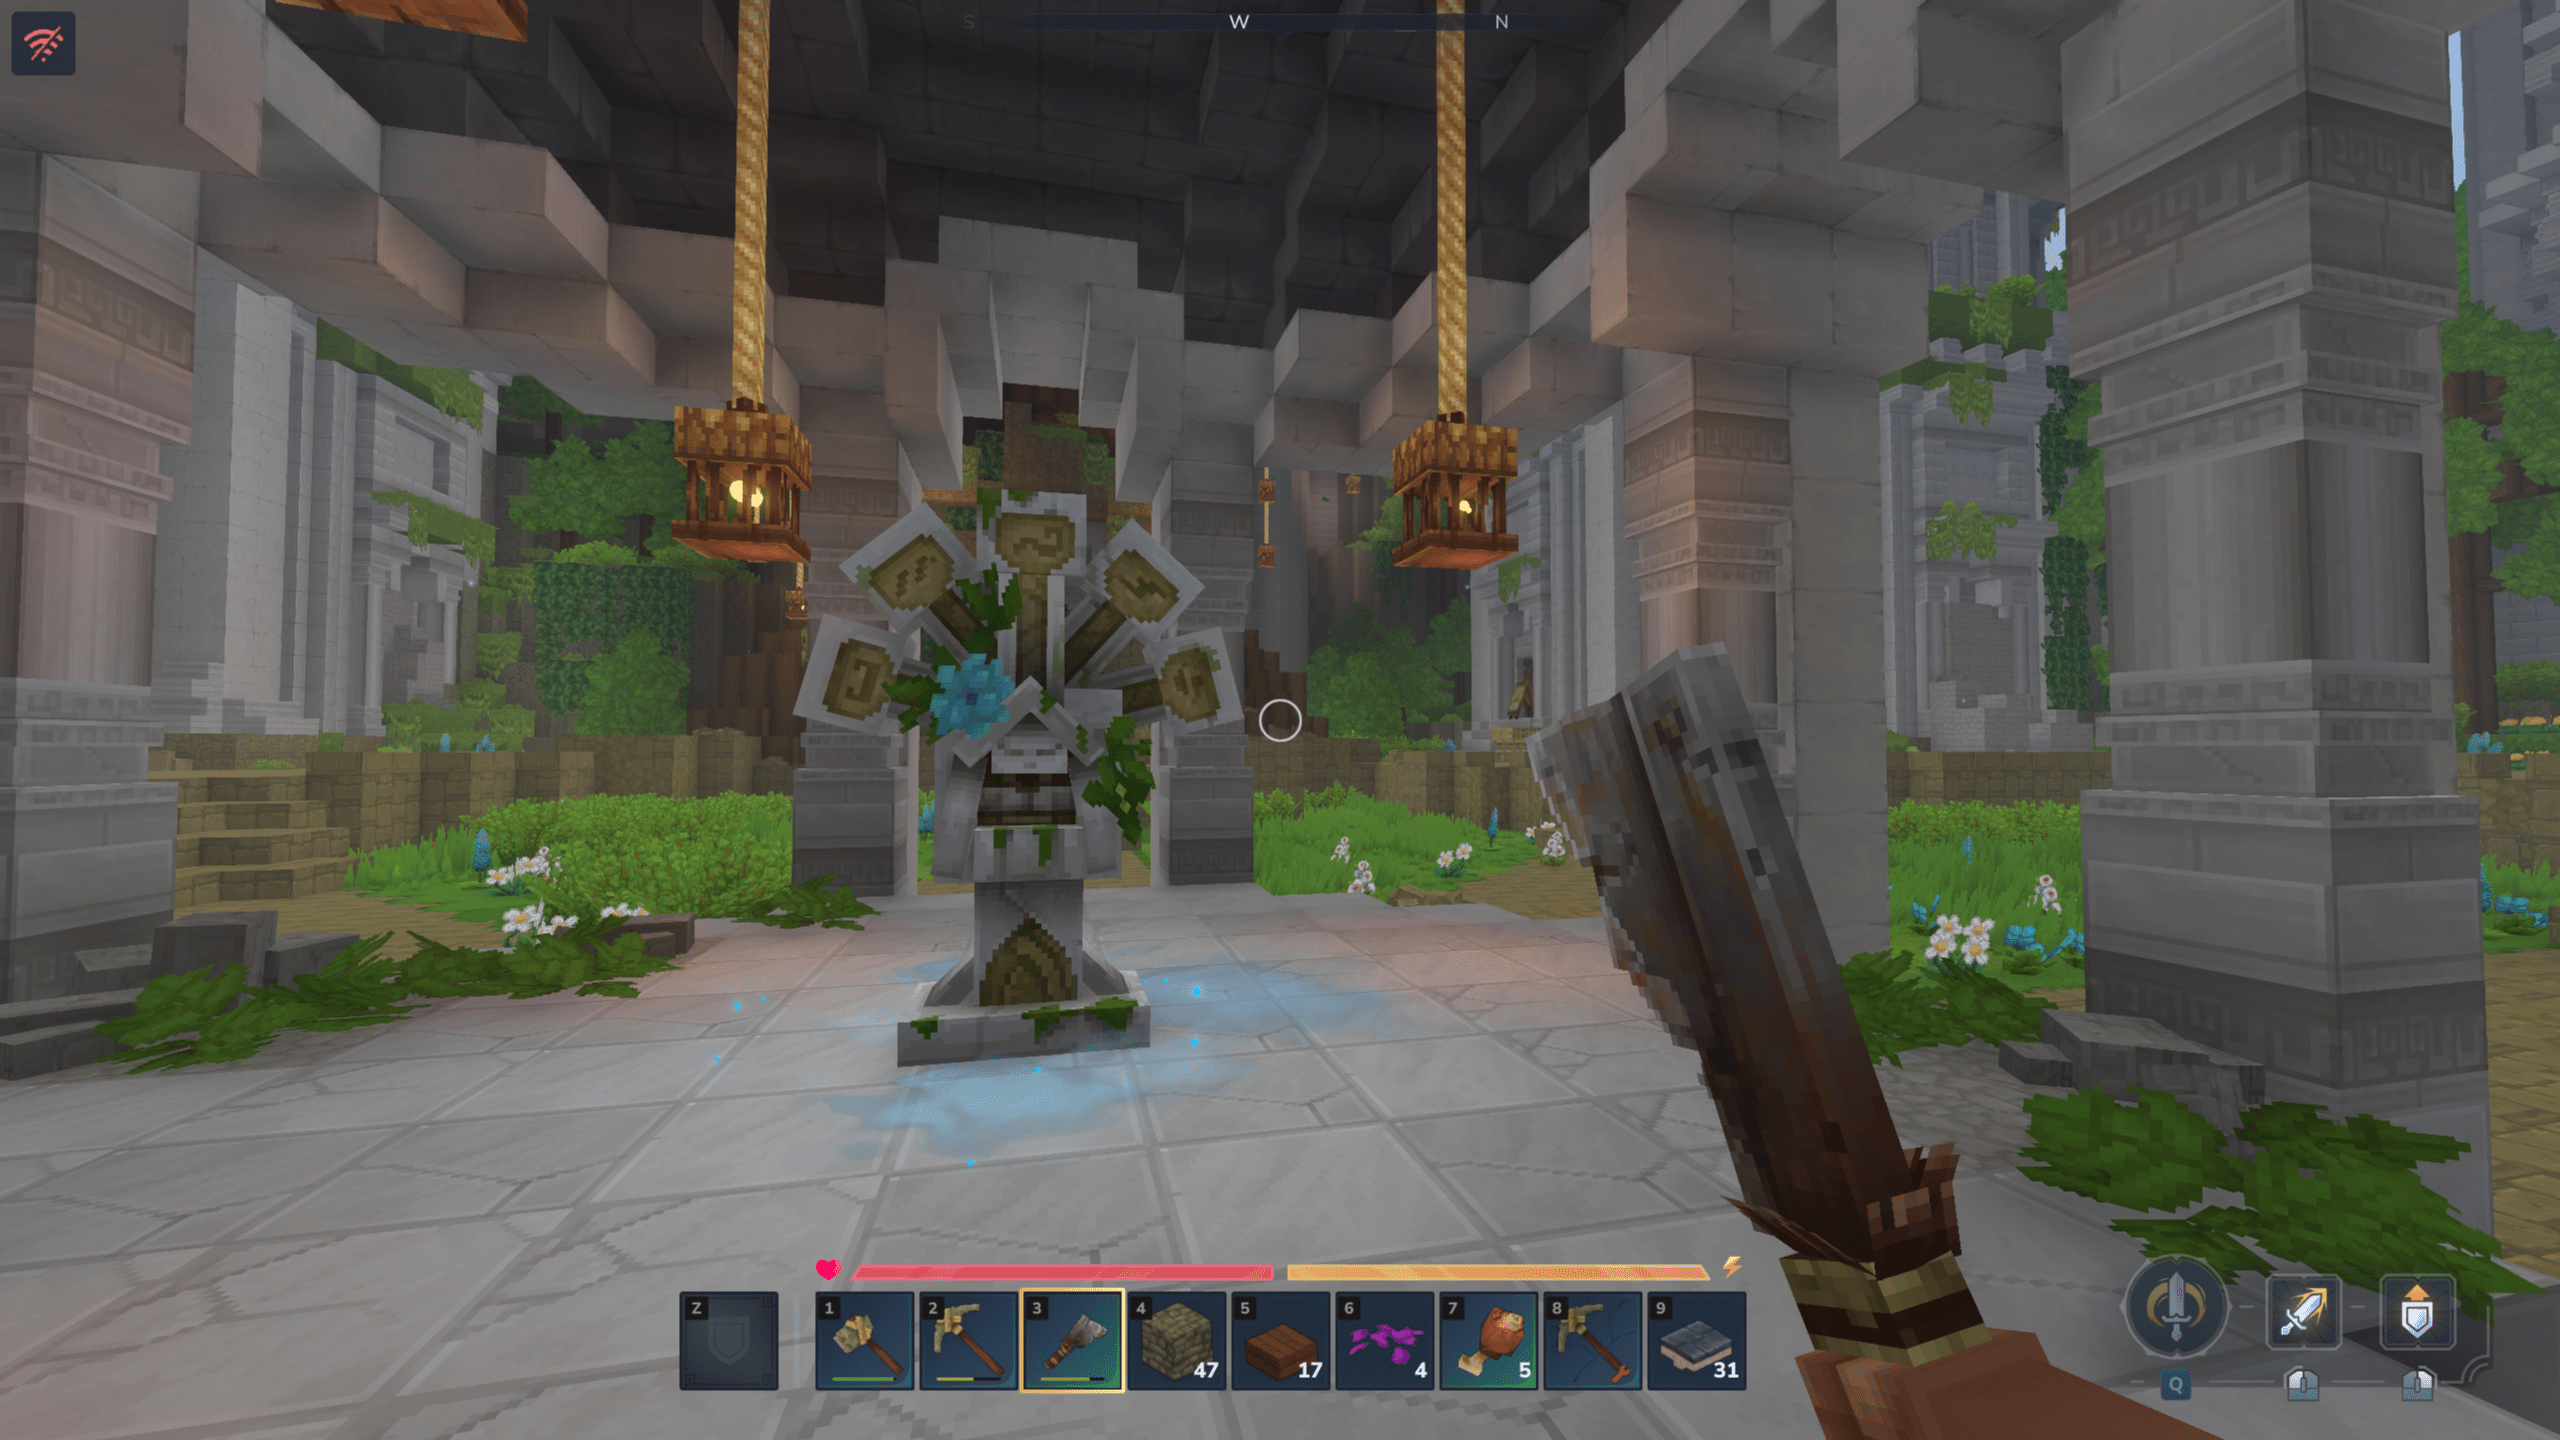
The Forgotten Temple is a safe zone where combat is disabled. At its center is a statue that activates memory tracking for your character. Interacting with this statue is what actually turns the system on.
This step is critical because memory tracking is not retroactive. Any creatures you encountered before touching the statue will not count. From this moment onward, the game begins recording memories whenever you encounter new entities in the world.
Memory Milestones and Rewards
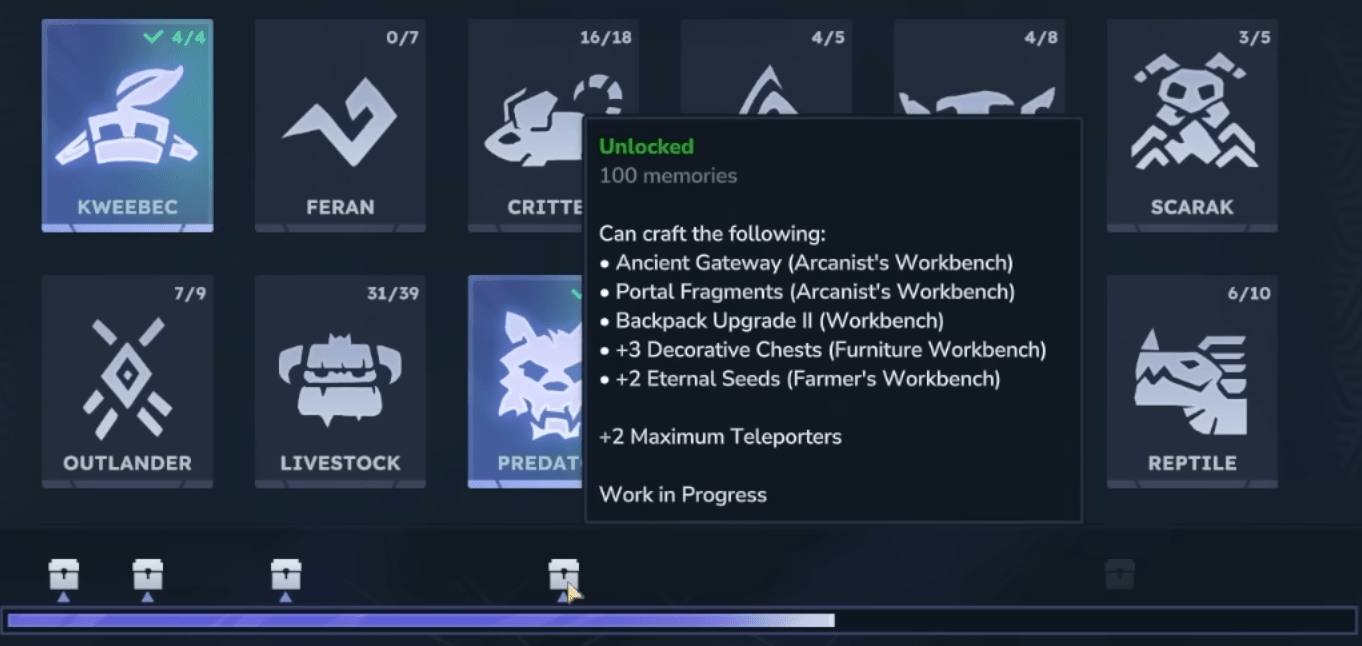
Collected memories can be turned in at the statue to unlock milestones. These milestones provide powerful and permanent rewards that shape how you play the game long term. Some rewards improve exploration and mobility, while others enhance utility and base development.
Key rewards include teleporter slots, which enable fast travel later, eternal seeds used for farming systems, morphs that expand character options, decorative items for base building, and other utility upgrades. Because many of these rewards affect world traversal and progression efficiency, unlocking the Memory System early gives you a massive advantage without requiring combat or grinding.
This is why the Memory System is considered mandatory. It quietly influences nearly every other system in Hytale, and activating it early ensures that all your exploration from that point forward is contributing to meaningful progress.
Teleporters and Fast Travel
This wouldn’t be called a Hytale complete guide if we didn’t cover another crucial mechanic.
After unlocking the Memory System, the next major shift in how the game feels comes from teleporters. Hytale’s world is large, and early movement options are intentionally limited. Without teleporters, traveling between regions quickly becomes one of the biggest time sinks in the game. This is why teleporters are not just a convenience feature, but a core progression tool.

Teleporters tie directly into the memory milestones you unlock at the Forgotten Temple. Once those slots become available, you can start building a travel network that turns long, dangerous journeys into quick and controlled movement between key locations.
Unlocking Teleporter Crafting

Teleporters are unlocked through progression tied to the Memory System. In addition to unlocking teleporter slots, you must craft a specific workstation called the Archinist’s Workbench. This workbench requires materials gathered from multiple biomes, which naturally pushes you to explore beyond the starter area.
Once the Archinist’s Workbench is crafted, it unlocks the ability to create teleporters. This step marks a transition point in progression, where exploration becomes faster and safer, and the world feels significantly more manageable.
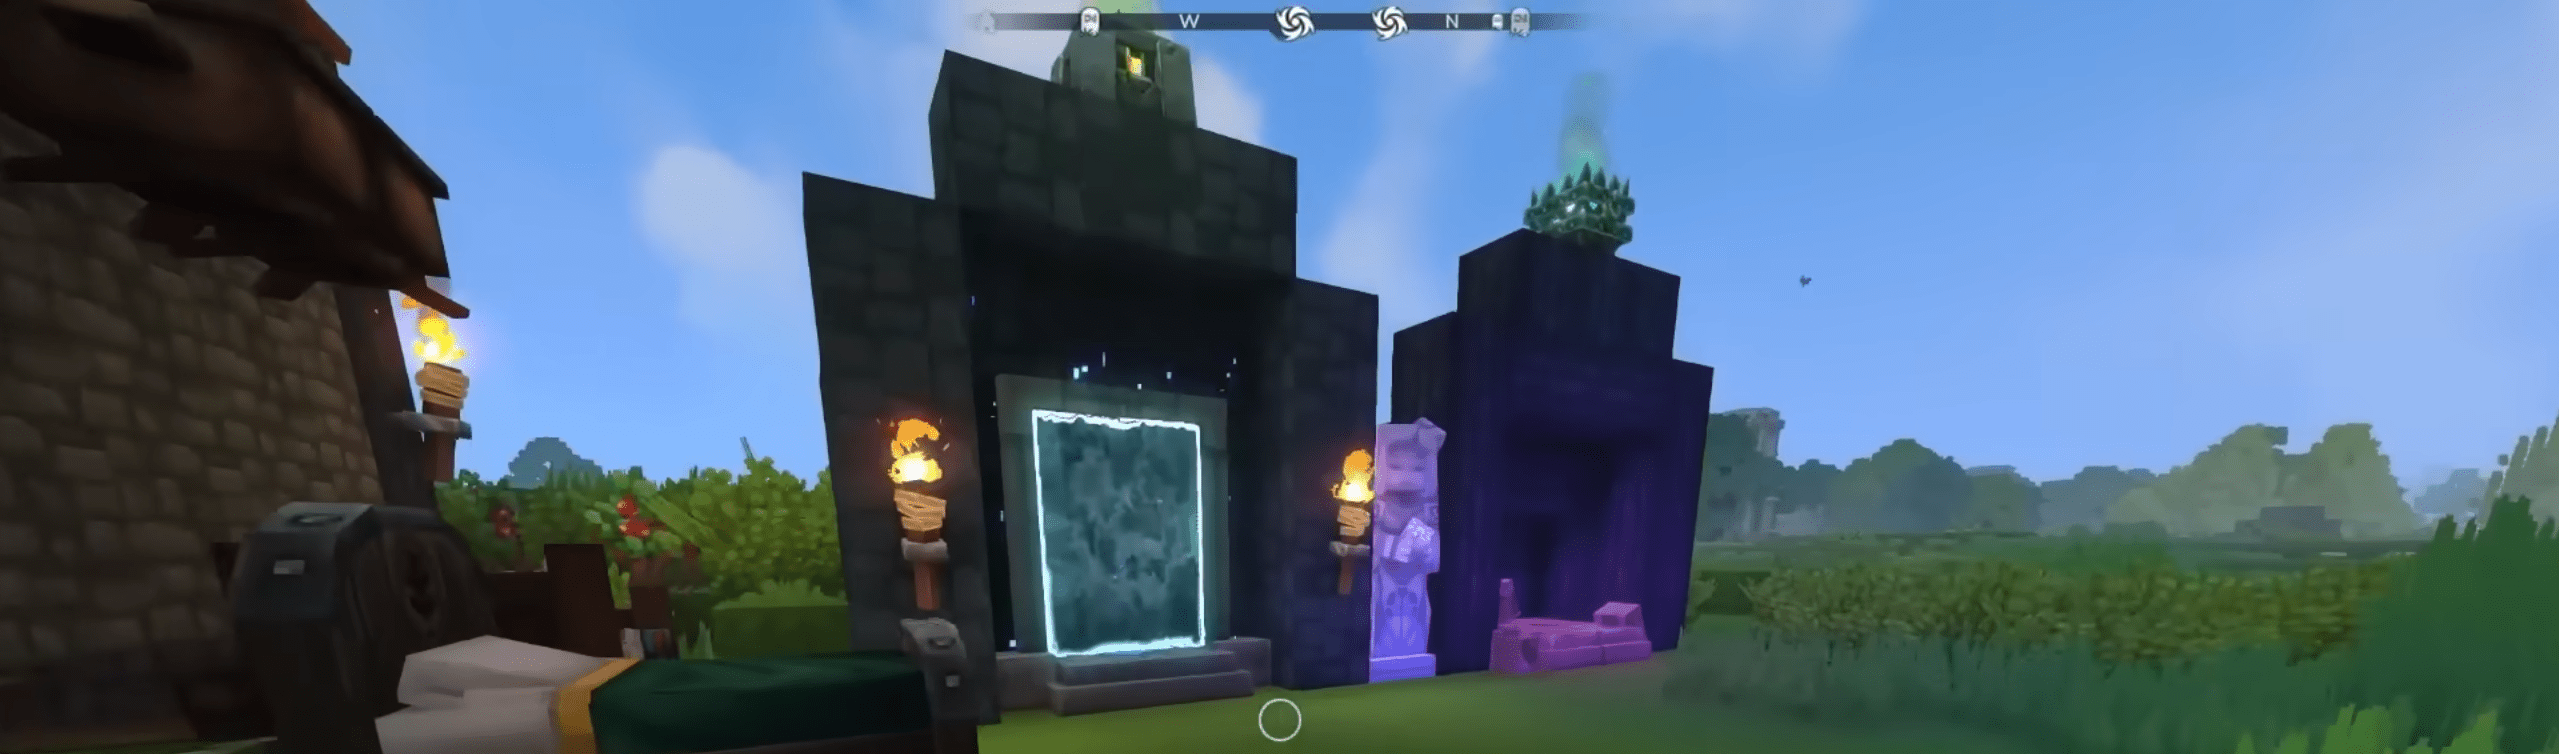
Crafting and Linking Teleporters
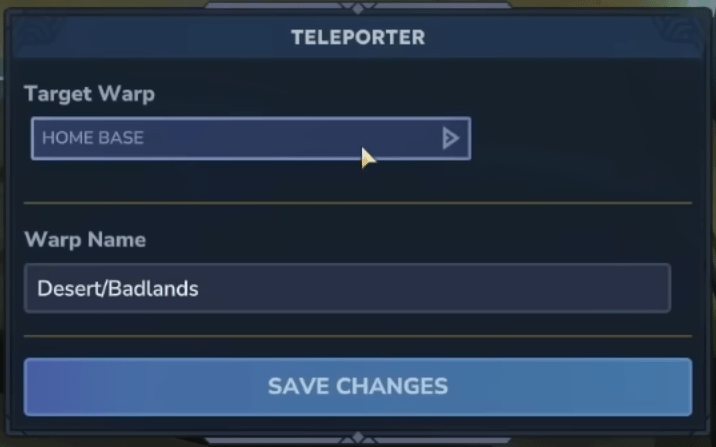
Teleporters are crafted and used in pairs. When placed, each teleporter can be named and assigned a target warp, allowing you to choose where it sends you. To link two locations, you must physically travel to each spot at least once and place the teleporters there. BLOG20
This system encourages intentional placement rather than random use. Teleporters are not meant to be scattered everywhere. Instead, they act as anchors that connect important locations across the world.
Forts and Early Loot Farming
While exploring the overworld early on, forts are some of the best locations to target, especially in plains regions. These stronghold-like structures are packed with loot chests and provide a fast way to gear up without spending resources on crafting.
Don’t just try farming the materials to craft armor; you can actually find a good set if you explore a bit and clear out some forts! Inside each fort, there’s a chest that usually contains some fat loot, which may include a set of armor, some good weapons, or something else. So, save your precious materials on something else and go clear forts!
Forts are also ideal to tackle while traveling with a horse. Secure the mount nearby, clear the structure methodically, and collect all the chests inside. Those chests can be picked up and brought back to your base, giving you both gear upgrades and additional storage from a single location.
Early on, forts should be treated as reliable loot hubs. Actively seeking them out while exploring allows you to gear up faster, save crafting resources, and progress more efficiently than relying on crafting alone.
Weapons and Combat Style
Combat in Hytale is built around movement and weapon identity rather than raw damage alone. Every weapon type behaves differently, and understanding those differences early will make fights far more manageable. While you can experiment freely, some weapons naturally fit the game’s fast, mobile combat loop better than others, especially in the early and mid-game.
Instead of standing still and trading hits, Hytale rewards players who stay mobile, reposition often, and use weapon abilities deliberately. Choosing a weapon that supports this style will make exploration and combat significantly smoother.
Weapon Types and Playstyles
Hytale features a wide range of weapon types, but they can be grouped by how they function in combat:
- Swords
- Daggers
- Bows and Crossbows
- Maces
- Battleaxes
- Staves
- Bombs
- Shields
Swords and daggers are the most beginner-friendly options. Swords offer a balanced playstyle with good reach and reliable forward movement, making them effective in most encounters. Daggers focus heavily on speed and positioning, allowing you to engage quickly, disengage safely, and control fights through movement.
Bows and crossbows provide ranged damage and are useful in specific situations, but they require space and awareness since melee enemies often close the distance quickly. Slower weapons like maces and battleaxes hit harder but demand longer charge times and commitment, which can be punishing when facing multiple enemies early on.
Staves and bombs introduce more specialized playstyles tied to magic and utility. These are powerful but typically shine later, once you understand enemy behavior and resource management. Shields support defensive play and pair well with one-handed weapons, but relying too much on blocking can slow fights down if you are not careful with stamina.
Health, Stamina, and Consumables
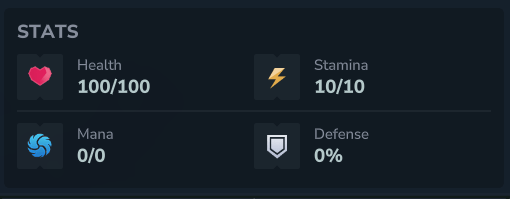
Survival in Hytale is not tied to a traditional hunger system. Instead, the game separates survivability into health, stamina, and consumable effects. Understanding how these systems work together is essential, especially during exploration and combat, where poor resource management can quickly lead to death.
Health determines how much damage you can take, while stamina governs how often you can sprint, block, and use charged attacks. Consumables bridge the gap between the two, providing recovery and temporary bonuses that directly affect how long you can stay active in dangerous areas.
How Health and Stamina Function
![]()
Hytale does not use a hunger bar. Your health does not regenerate on its own, and stamina is a shared resource used for actions such as sprinting, blocking, and charging weapon abilities. Attacking does not drain stamina, which means you can continue fighting even when stamina is low, but defensive actions become more limited.
Stamina regenerates naturally over time, but poor stamina management can leave you unable to block or reposition when needed. Understanding when to sprint, when to block, and when to rely on movement instead is key to surviving longer encounters.
Food Types and Buffs
Food in Hytale provides temporary buffs rather than passive regeneration. Different food types are designed for different situations. Meat-based foods typically grant increased health, health regeneration, or defensive bonuses, making them ideal before or during combat.
Vegetable-based foods focus more on stamina-related bonuses. These are especially useful when traveling long distances, exploring dangerous terrain, or relying heavily on movement-based combat. Choosing the right food for the situation is more important than simply eating whatever is available.
Hytale Best Tips and Tricks
This section focuses on smaller mechanics and quality-of-life details that are easy to miss, especially if you are new to survival or crafting games. None of these Hytale tips for beginners are mandatory for progression, but all of them make the game easier, clearer, or less frustrating once you know they exist.
- Attacking does not consume stamina, so you can keep fighting even when your stamina is low
- Blocking is what drains stamina, so avoid holding block unnecessarily in long fights
- Turn on enemy health bars in the settings to better judge damage and fight pacing
- Hold a torch in your offhand to get constant light without placing it
- Use one-handed weapons if you want to keep a torch or shield active
- Learn the torch-to-shield swap keybind early for quick reactions
- Pick up storage chests you find in the world instead of crafting new ones
- Use natural terrain and structures for cover instead of face-tanking enemies
- Backtracking is normal early, so return to base often instead of pushing too far
- If a fight feels overwhelming, disengage and reset instead of forcing it
- Use signature abilities deliberately rather than as soon as they are available
- Explore vertically as well as horizontally, since many resources are underground
These tips help smooth out the learning curve without changing how you play. Once you understand these smaller mechanics, combat feels more controlled, exploration becomes safer, and the game stops punishing you for things it never clearly explains.
Conclusion
Hytale is the “Minecraft killer” that might actually pull it off. It did just release in early access with a lot of content unavailable, but the scale and ambition of this game are undeniable – it aims to become the ultimate voxel-based survival and crafting MMO on the market. A game like this with actual depth and substance might be the next big thing. For now, though, all you can do is play around in the base mode, get to know the crafting, memory system, and overall progression.
F.A.Q.
How to unlock Memories in Hytale?
Memories are unlocked by visiting the Forgotten Temple Gateway and interacting with the statue inside the Forgotten Temple. Once activated, the game starts tracking creatures and encounters permanently.
Is Hytale better than Minecraft?
Hytale is more complex and system-driven than Minecraft, with deeper combat, progression, and world structure. Which game is better depends on whether you prefer simplicity or layered mechanics and exploration.
Is Hytale free to play?
No, Hytale is not free to play. It is currently available as a paid Early Access title, with future pricing subject to change.
How to start playing Hytale?
Create a new world in Exploration mode, craft basic tools, and build a small starter base. From there, unlock Memories and begin exploring nearby zones.
Are there mounts in Hytale?
You can ride certain animals, but mounts cannot be tamed or kept permanently early on. They are mainly used for temporary travel rather than long-term mobility.

