 Rick Flair
ARC Raiders has a total of 66 quests, with three more added with the release of Stella Montis. ARC Raiders quests do not give XP and aren’t mandatory to do, but they provide some nice rewards. They usually give materials, weapons, ammo, utility items, skins, and, most importantly, blueprints. The ARC Raiders quests are generally pretty simple and can be done very fast. Most of the time, if you’re focusing on doing quests, it is recommended to go in with a free kit. Usually, you’re tasked with visiting a specific place and doing something there. Sometimes you’re asked to bring out certain items, fix something using materials, or kill ARCs. In this guide, we will give a list of all quests in ARC Raiders, as well as a little explanation on what you need to do and where you can do them.
Doing the quests yourself can be a very long and tedious process. Check out our ARC Raiders Quests boost to solve this problem fast!
Read our other ARC Raiders guides:
Note: At Skycoach, you can Buy ARC Raiders Boost at the best prices with fast delivery. Use our special PROMO CODE (in green) hidden in this article for a 20% DISCOUNT.
Browse our hottest ARC Raiders Boosting services


ARC Raiders Quests Guide
What separates ARC Raiders from other extraction shooters is the simplicity of the quests. Another thing about them is how juicy the rewards are for doing them. You will often get much-needed materials and weapons that will help you on your way. In our ARC Raiders quests guide, we will split the quests into locations where you need to complete them, so that you can refer to them easily. Location-specific quests take up two-thirds of the quest list. There are 46 location quests out of 66 available. We highly advise against rushing them; instead, progress steadily.
Try not to ignore them, but don’t push them to the top of the priority list. They work best if you are trying to do a quest every other run. This way, the rewards will be given to you just when you need them. You risk overflowing your inventory with tons of items that you won’t have space for if you rush them. Trust us, it’s a big problem in the early and late stages of your progression. Now with that out of the way, take a look at the ARC Raiders quests list.
Dam Battlegrounds Quests
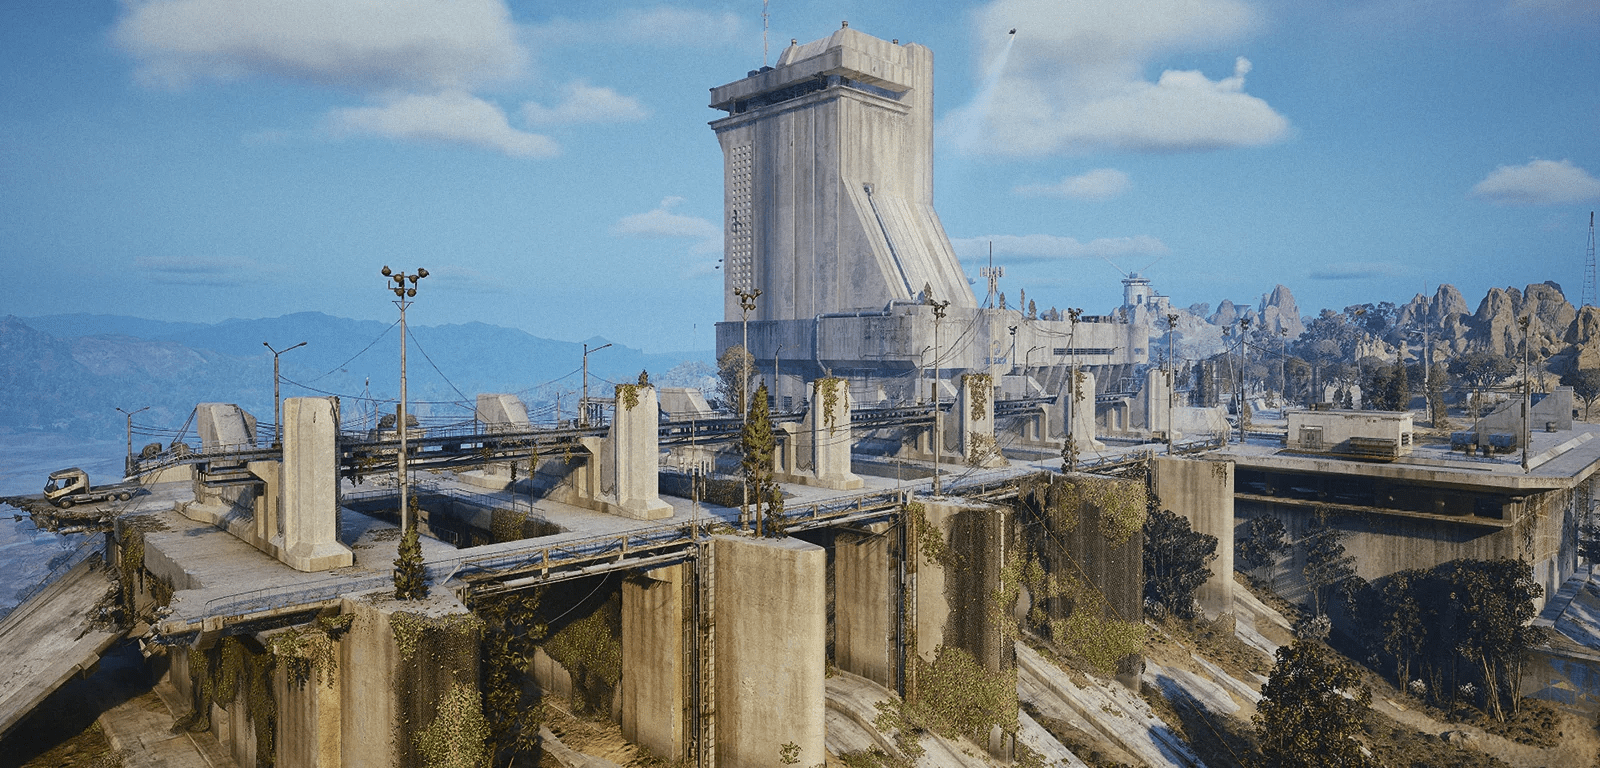
We’re starting with the Dam Battlegrounds, as this is the location where you’ll have the majority of the early quests. It’s also a good place to learn the ins and outs of the game. It has a variety of zones, built for both close-quarter and long-distance fights. There are 14 quests in this location. Here’s a list of all the Dam Battlegrounds quests:
| Name | Objectives | Rewards | Description |
| Broken Monument | Go to the Scrapyard and get First-Wave Compass, Video Tape, and Rations. |
1x Arpeggio I, 1x Compensator II, 80x Medium Ammo. |
It might be challenging to find them, so read the descriptions carefully for where to find the items. Note that you will have to deliver the items after you acquire them, so avoid fighting. |
| Straight Record | Reach Victory Ridge, find the old EMP trap, disable all three power switches, and shut down the EMP trap. |
5x Medium Gun Parts, 3x Advanced Mechanical Components. |
You can find one of the switches North of the trap, on a small hill. The second one is on the East, on the second floor of one of the destroyed buildings. The third one is southwest of the trap, inside the forest. If you have trouble finding them, listen for audio cues. |
| Keeping the Memory | Reach the wreckage in the Formicai Hills, find a helm, and return it to the memorial. | 5x Simple Gun Parts, 5x Duct Tape, 5x Magnet. | The wreckage is a baron husk, which usually has mushrooms spawn on it. It won’t take long to find the place. |
| Echoes of Victory Ridge | Reach Victory Ridge, find the battle plans under the broken highway, and deliver them. |
6x Crude Explosives, 2x Processor, 1x Music Box. |
You can find the place just southwest of the Power Generation Complex. |
| A Symbol of Unification | Reach the Formicai outpost, find the flag, and raise it. |
3x Mod Components, 5x Duct Tape. |
It’s a very simple task. You can find the flag inside the hallway of the outpost, and if you go straight to the dome and continue moving, you’ll find the place to raise the flag. |
| Celeste’s Journal | Retrieve Celeste’s Journal from the South Swamp Outpost and the northern outpost overlooking the Red Lakes. |
1x Magnetic Accelerator, 3x Heavy Gun Parts, 1x Exodus Modules. |
The northern outpost is the outpost you can see from the Power Generation Complex. It’s right on the North of it. |
| A Balanced Harvest | Go to the Research & Administration building and locate Lab 1 on the upper floor. |
3x Advanced Mechanical Components, 3x Medium Gun Parts, 10x Steel Spring. |
The Lab is located on the top floor, which you can reach from the southern side of the R&A building. There’s a set of stairs going up. It’s also sometimes guarded by a Sentinel turret. |
| Untended Garden | Go to the Hydroponic Dome Complex, get the data in one of the domes, and upload it in any Field Depot. |
3x Advanced Mechanical Components, 3x Heavy Gun Parts, 5x Canister. |
The data can be found in the southmost dome. The Field Depot is right outside of this dome. |
| The Major’s Footlocker | Go to Ruby Residences and search for Major’s mementos, then deliver them. | 1x Hullcracker Blueprint. | Go to the building closest to Pale Apartments. Reach the third floor and go to the end of the apartment to find a table. Interact with it, and you’ll get the mementos. |
| Our Presence Up There | Visit the Pattern House, interact with the power switch, and complete the antenna installation. |
1x Buried City Town Hall Key, 1x Raider Hatch Key, 1x Jolt Mine. |
The power switch is on the first floor, in a room next to the stairway. The antenna is on the roof. |
| Water Troubles | Locate the Flood Access Tunnel under the Red Lake Balcony, find the intake, and sample the water. |
3x Mechanical Components, 3x Simple Gun Parts, 3x Steel Spring. |
The flood access tunnel is a big, dried-up sewer gate that you can find right under the Control Tower elevator shaft entrance. It’s the entrance that’s often guarded by a Leaper and leads to the Red Lake Balcony. You won’t miss it. Go in and just follow the path until you reach the intake. |
| Source of the Contamination | Go to the Water Treatment Building and search for any suspicious objects. |
5x Steel Spring, 5x Duct Tape, 1x Mod Components. |
The place you need is in the northwest part of the building. It’s a water intake with muddy water. It’s outside of the building, leading into the forest. |
| Flickering Threat | Find the Generator Room, repair it. Then go to the ventilation shaft and turn on the power switch downstairs. |
5x Medium Gun Parts, 3x Advanced Mechanical Components. |
The place you need is located in the inside part of the Power Generation Complex. You can go in there from the western part of the location. You can also drop down right to the Generator if you go south from the extraction point until you reach the concrete beams. Be sure to take 4 Wires with you, since they are required to fix the generator. The ventilation shaft is a building East of the extraction point. It’s sometimes guarded by a Rocketeer, so be careful. |
| A New Type of Plant | Search for the plant near the Baron husk in the Old Battleground and then deliver it. |
1x Vita Shot, 5x Antiseptic. |
Look for a big husk in the middle of the location. The plant is next to its core part. |
So these are all the quests specific to Dam Battlegrounds. The most dangerous ones to do are the Untended Garden and A Balanced Harvest, purely because they are located in high-traffic zones. You’ll undoubtedly meet a couple of players there. If you’re unsure if you want to take the fight, just do it with a free kit. Next up is Buried City and its quests.
Browse our hottest ARC Raiders Boosting services


Buried City Quests
Buried City is a significant step in difficulty and loot compared to Dam Battlegrounds. This place hides many loot locations that aren’t even in colored map areas. The quests here are not more challenging than in Dam Battlegrounds. Otherwise, nothing changes much. Most of the quests are still go and do this thing/fix this thing/deliver the item. The quests' rewards on this ARC Raiders map are mostly weaponry and materials for it. If you want to get some of the best weapons in the game for PvP, prioritize these quests first. Now let’s take a look at the Buried City quests:
| Name | Objectives | Rewards | Description |
| Marked for Death | Go to Su Durante Warehouses, find a container, and go along the tracks. |
1x Shotgun Choke II, 1x Angled Grip II. |
The container you need to find is outside the building, on its western side. Open it, and you’ll find tracks leading further to the West. They’ll lead you to some iron part you’ll need to interact with. |
| Market Correction | Find a cache near Marano Station. |
1x Silencer II, 1x Extended Light Mag I, 1x Compensator I. |
You’ll need to interact with two trash cans near a building next to the station. If you look at the map, you’ll see three trees in a vertical line. Above them is the place you need. |
| Eyes on the Prize | Find a terrace south-west of the Southern station, look for blue tarps. Rewire the solar panel using three Wires. |
1x Extended Shotgun Mag II, 1x Extended Medium Mag II. |
This quest explains where you need to go pretty well. Search for the building southwest of the Plaza Rosa. Don’t forget to take three Wires with you. |
| Industrial Espionage | Find a weapon cache near the Gas Station and deliver the Burletta there. |
3x Mechanical Components, 3x Simple Gun Parts. |
The Gas Station is north of the Hospital. You’ll need to take Burletta with you to place it in the stache. |
| A Reveal in Ruins | Find an ESR Analyzer in any pharmacy, then deliver it. |
1x Tactical Mk. 3 (Healing), 1x Surge Shield Recharger. |
The ESR Analyzer is located in a Pharmacy near the Piazza Arbusto. It lies on the counter. It takes a slot, so hide it in your safe pocket to ensure it's delivered. |
| The Root of the Matter | Go to the Research building, search for the seed vault, then deliver the seed sample. |
3x Advanced Mechanical Components, 3x Heavy Gun Parts, 3x Canister. |
The quest describes a “room with a great view”. That means that you need to find a room that overlooks Marano Park. This room is located on the second floor. Look for a large cylinder with a snowflake sign. |
| After Rain Comes | Find the flooded solar panels next to the Grandioso Apartments. Repair them using 5 Wires and 2 Batteries. |
5x Blue Light Stick, 3x Antiseptic, 5x Durable Cloth. |
The solar panels are to the right of the Grandioso Apartments. They’re in the inner court, you won’t miss them. You’ll need to repair a solar panel, much like you did in the Eyes on the Prize quest. |
| Espresso | Find an espresso machine to salvage for parts and deliver them. |
1x Coffee Pot, 3x Adrenaline Shot. |
The machine is located in Plaza Rosa. Find a cafe named Cafe da Rosa. Interact with the machine on the counter. The parts occupy a slot. |
| Life of a Pharmacist | Find Arbusto Farmacia and document the things related to the pharmacist. |
1x Defibrillator, 1x Surge Shield Recharger, 3x Sterilized Bandage. |
You’ll need to get to the Pharmacy near the Piazza Arbusto. You need the second and third floors. You’ll find interactable objects there. Once you interact with them, the quest will be complete. |
| Unexpected Initiative | Search for Fertilizer on the rooftop of Grandioso Apartments. Search for a water pump on the rooftop of Piazza Roma. Deliver both. |
1x Il Toro I, 1x Shotgun Choke II. |
This quest is pretty straightforward. Watch out for Pops and Fireballs patrolling the insides of the buildings. Also, watch out for the Rocketeer that frequently spawns there. |
| Communication Hideout | Go to the Red Tower, find a battery cell, install it in a generator, enable it, and boot the terminal. |
1x Anvil III, 40x Heavy Ammo. |
The description of this quest is pretty vague. You need to look for the battery cell in the inner courtyard, where you can find a stairway leading to the metro station. The battery cell will be located near a small structure in the centre of the court. Place it on the generator and turn it on. Climb to the Red Tower and interact with a terminal facing the courtyard. |
| A Warm Place to Rest | Locate the Abandoned Highway Camp, search for any signs of survivors, follow the red markers, and inspect the grave. |
3x Noisemaker, 5x Blue Light Stick. |
You’ll find a backpack near the bus on the Abandoned Highway Camp. Interact with it, then skip the 3rd step and go straight to the grave. You can find it in the Buried Properties location. It’s a small location. If you look at the map, you can find it southeast of the location's name. |
| Digging Up Dirt | Find the Santa Maria Houses, and locate the Dead Drop inside the courtyard. |
2x Advanced Electrical Components, 4x Speaker Component. |
You need to find a rooftop with a tower on it. There’s a dormer window on the northwest side of the building. Go into it, rappel down into the apartments, and search for a broken wall. Inside, you’ll find a Dead Drop you need to interact with. |
| Building a Library | Go to the Library, find 3 books, and deliver them. |
1x Jolt Mine, 1x Heavy Fuze Grenade. |
The books can be located on the first and second floors on the book stands. You won’t miss them; the location is quite small. |
The quests in Buried City are a bit more dangerous than on the Dam, since most of the Buried City is a hot zone. To add to the danger of encountering a player who wants to fight, many boss ARCs are wandering the streets and the sky. Thankfully, there are many covers inside the buildings, so use them. Watch out for pesky ARC balls inside the buildings that will rush towards you as soon as they hear you.
Blue Gate Quests
Blue Gate doesn’t have that many quests compared to other locations (except for Stella Montis). Most of the quests take place on the edges of the map, so the risk of encountering other players is minimal. One of the quests here, titled Armored Transports, can be quite difficult and stressful, though. What makes it so is the need to go to the most active location on the map, where you might lose a key if you die. This means that entering with a free kit is not an option. Let’s break down this and other Blue Gate quests in the table below:
| Name | Objectives | Rewards | Description |
| Reduced to Rubble | Take a photo of the Collapsed Highway, then go to the Broken Earth and investigate unknown ARC machines. |
1x Zipline, 3x Barricade Kit, 3x Doorblockers. |
You don’t need any special equipment to take a photo. As with other quests, you just press the Interact button at a specific place. Then find a Baron husk in the Broken Earth location and go south. You’ll find a part of this husk you need to interact with. |
| With a Trace | Reach the Barren Clearing and find signs of who brought down the ARC machines. | 1x Medium Shield. | This one is a bit tricky to explain. South of the big Baron husk in the Barren Clearing, you’ll find a spherical object. Interact with it, then go to Adorned Wreckage. There’s almost always a Leaper on the loose here, so watch out. You’ll find a big station, south of the location. Near it is a radio you must interact with. |
| Bees! | Go to Olive Grove and search for bee hives around it. |
1x Advanced Electrical Components, 3x Sensors. |
There are three beehives around the Olive Grove. Look for small buildings with chain link walls. |
| Armored Transports | Reach the Checkpoint, search the Guard huts for an Armored Patrol Key Card. Go to a Traffic Tunnel and unlock the door of an armored patrol car. |
3x Smoke Grenade, 3x Defibrillator. |
This one is the trickiest quest on the Blue Gate. First, you gotta be lucky to find a key. It doesn’t have a 100% spawn chance. Secondly, if you die, you might lose it, so always put it in a safe pocket. Then you need to go to the underground tunnel below the Headhouse. There are two cars that you can use the key on. Both are parked in the northern part of the underground tunnel, but it’s often patrolled by either Bastion or Bombardier. It’s a very dangerous mission, so be careful. |
| A First Foothold | Stabilize the observation deck near Ridgeline. Enable the comms terminal near the Olive Grove. Rotate the satellite dishes on the church roof, north of the Data Vault. Nail down the roof plates on the Raider structure near Trapper’s Glade. |
3x Shrapnel Grenade, 3x Snap Blast Grenade, 3x Heavy Fuze Grenade. |
This quest shouldn’t cause any problems with pinning down where each of the things you need to interact with is located. The only problem you may encounter is finding a comms terminal near the Olive Grove. The place is southwest of the location. It looks like a rusted platform with self-made utility. |
Despite being such a large map, there aren’t that many quests on the Blue Gate. It’s quite surprising that there are no quests connected with secret loot locations. If you want to find out more about these locations, peek at our Blue Gate map guide. We cover all the places of interest and explain how to solve the puzzles to get all the fancy loot.
Spaceport Quests
The Spaceport is home to just six quests. All of them are lengthy and quite dangerous, as Spaceport is a PvP-heavy map. The amount of weapons and rare loot you can find is insane. Thus, many don’t think twice to pull the trigger on a raider. By the time you’ll start getting the Spaceport quests, you should already be well prepared. By this point in the game, the loot stress should go down. You already have plenty of weapons and materials to craft them, augments, and shields. Considering how late in the game the Spaceport quests appear, we don’t think you’d have any trouble with them. Let’s cover all of the Spaceport quests now:
| Name | Objective | Rewards | Description |
| A Lay of the Land | Reach the Jiangsu Warehouse, find the shipping notes. Locate the scanners on the upper floor of Control Tower A6 and deliver them. |
1x Dam Testing Annex Key, 3x Zipline, 2x Smoke Grenade. |
One of the more annoying quests, since you need to cover a lot of space in one round. You also need to get to Control Tower A6, which is one of the hottest places on the map. The first half of the quest shouldn’t cause any problems. For the second half, you don’t need to go into a tall tower. Instead, go to the second floor of the offices near it. Find a cubicle with a bicycle nearby, that’s the place with scanners. |
| Switching the Supply | Go down to the tunnels under the Spaceport. Find and turn the valve inside them. | 3x Synthesized Fuel. | A pretty simple task. You can find entrances to the tunnels around the Launch Towers. They’re small shafts that protrude from the ground. You won’t miss the valve, as it emits a loud hissing sound. |
| Lost in Transmission | Go to the top of the Control Tower A6 and establish the connection. | 1x Snap Hook. | You need a Spaceport Control Tower Key to reach the place. That, or you can just wait a bit and then go there. Chances are, the place will be open and looted. Watch out for other raiders, though. Place your key in a safe pocket prematurely. Once you’re in the tower, look to the left. You have to interact with a control panel. |
| Prescriptions of the Past | Go to the Departure Building and find the Medical Exam room. Search for the records there. |
1x Heavy Shield, 1x Tactical Mk. 3 (Healing). |
Go to the second floor of the building. You need the part of the building that’s closer to the Launch Towers. There you’ll find the Exam Room. Look for the writing on the wall. Interact with the records on the table. |
| Power Out | Go to the Electrical Substation and find any signs of the missing engineer. Carry the battery to the Generator and turn it on. |
5x Wires, 5x Explosive Compound, 5x Oil. |
Really simple task. Not much to say here. |
| Turnabout | Go to the North Trench Tower and upload the blackmail files. |
2x Heavy Gun Parts, 2x Medium Gun Parts. |
Another simple task, but you need to take the Spaceport Trench Tower Key with you; otherwise, you won’t be able to get in. Locate a terminal, similar to the one in the Red Tower quest in Buried City. Interact with it, and the quest is done. |
That concludes the Spaceport quests. Not much can be said about the quests here. They feel a bit bland, and the quest that makes you run through the whole map is crazy work. Their rewards aren’t nearly worth the risks you take. Considering these are mostly located closer to the final quests, perhaps the devs didn’t want the player to be too distracted with them? Who knows. Let’s move on to the quests of the newest map that has been released, Stella Montis. BLOG20
Stella Montis Quests
Stella Montis is the latest map added to the ARC Raiders. It’s an “up close and personal” map that tests your survival skills in tight corridors. It’s quite dangerous, but the quests do not add any danger to it. In fact, the quests are some of the most laid-back ones. Check out all three of the Stella Montis quests:
| Name | Objectives | Rewards | Description |
| Snap and Salvage | Snap a photo of a Rover in Robotic Sandbox A. Go to the Security Checkpoint and search the papers. Deliver Magnetron and a Flow Controller. |
1x Burletta III, 1x Silencer II, 1x Extended Light Mag II, 100x Light Ammo. |
You don’t need any extra stuff to snap a photo. Just walk up to any of the rovers and interact with them. The room with the papers that you need is on the bottom floor of the Security Checkpoint, next to a door that should be opened with a key. Magnetrons and Flow Controllers spawn all over the map, but their biggest spawn rate is near the Assembly Workshops. |
| In My Image |
Find and search three androids. |
2x Looting Mk. 2, 5x Green Light Stick, 3x Defibrillator. |
Nothing much we can recommend here. There are plenty of androids all around the complex, so it shouldn’t become a problem. |
| Cold Storage | Search J Kozma Ventures containers and deliver the rare books. |
3x Gas Mine, 1x Raider Hatch Key. |
Go to the Lobby Metro and interact with one of the metal boxes. If you look at the map, you can find one right above the letter Y in the Lobby Metro location name. |
And these are all the map quests in the game. Now we will cover quests split across multiple maps. For the most part, they’re pretty simple both in difficulty and in what you have to do.
Multiple Locations Quests
There is a total of 4 quests that span multiple maps. They are quite easy, as the difficulty in them is that you have to spawn on different maps to finish them. They continue the trend of go there - do that types of quests. Here’s a brief cover of every quest that happens in multiple locations:
| Name | Objectives | Rewards | Description |
| Greasing Her Palms |
Dam Battlegrounds: Visit the locked room in the Water Treatment Control. Spaceport: Scope out the rocket thrusters outside the Rocket Assembly. Buried City: Visit the barricaded area on floor 6 of the Space Travel. |
1x Lure Grenade Blueprint, 3x Speaker Component, 3x Electrical Components. |
The part of this quest that might be difficult is scoping the rocket thrusters. Head south from the Rocket Assembly. There are plenty of rockets there. Walk around them, and eventually the quest will be ticked as completed. For the locked room in the Dam Battlegrounds, you’ll need a Dam Surveillance Key. |
| Back on Top |
Dam Battlegrounds: Mark the Pattern House. Blue Gate: Mark the white Lookout Tower south of the Warehouse Complex. Spaceport: Mark the South Trench Tower. Buried City: Mark the building with the mural in the Buried Properties. |
1x Renegade I, 1x Stable Stock III, 80x Medium Ammo. |
The building with a mural in the Buried City is located North of the Buried Properties. It’s the building with the destroyed billboard. Other locations shouldn’t cause any trouble, as they are pretty directly listed here. |
| Eyes in the Sky |
Dam Battlegrounds: Install a scanner at the top of the Control Tower. Spaceport: Install a scanner at the Communications Tower. Buried City: Install a scanner on top of the Galleria. |
1x Vita Spray, 5x Yellow Light Stick. |
What this quest doesn’t tell you is that you’ll need a Zipline or Snap Hook to get to the top of the Galleria sign. Get on the roof of Galleria and look for an antenna with a letter G on it. That’s where you need to go. Everything else is self-explanatory. |
| What We Left Behind |
Buried City: Search two containers in the raider camp beneath the Parking Garage. Dam Battlegrounds: Search for anything significant in the South Swamp Outpost. Spaceport: Search for anything significant in Bilguun’s Hideout next to the Container’s Storage. |
1x Muzzle Brake II, 1x Vertical Grip II, 1x Stable Stock II. |
Bilguun’s Hideout is found on the wall in a rusted container. Search for the notes there. To get something significant in the South Swamp Outpost, you just need to loot a couple of containers. |
The rest of the quests are pretty simple and do not require an explanation of where to go to do them. Most of these quests require you to either bring out certain items or kill ARCs. One advice we can give for these kinds of quests is to target the weak spots of the ARCs or to loot specific places where the items might be. The colored areas always have loot icons on them, so you can easily find, say, Wires in the Technical loot zone. Always think of your loot route before you do such a quest, and don’t just hope that you’ll get the item randomly. Otherwise, this quest might take you much longer than needed.
Conclusion
This was a list of all missions in ARC Raiders with their explanation. Now that you know all the needed locations and the tricky parts about the quests, doing them won’t be a problem. We hope we’ve been able to help you. The quests, even with all their simplicity, can be quite vague sometimes. Stay tuned for more guides and see you topside!
F.A.Q
How many quests are there in ARC Raiders?
There is a total of 66 quests in ARC Raiders.
Do you have to do all quests to progress in ARC Raiders?
No, you don’t need to do them, but they give some really handy rewards, including blueprints.
What rewards do the quests offer in ARC Raiders?
Usually, they are materials, weapons, healing items, blueprints, and weapon attachments.
Do the quests reset after the Expedition in ARC Raiders?
Yes, the quests will reset after you go into the Expedition
Do the quests give XP in ARC Raiders?
No, they do not give you XP. They do offer various rewards, using which inside the raid brings your character XP.


