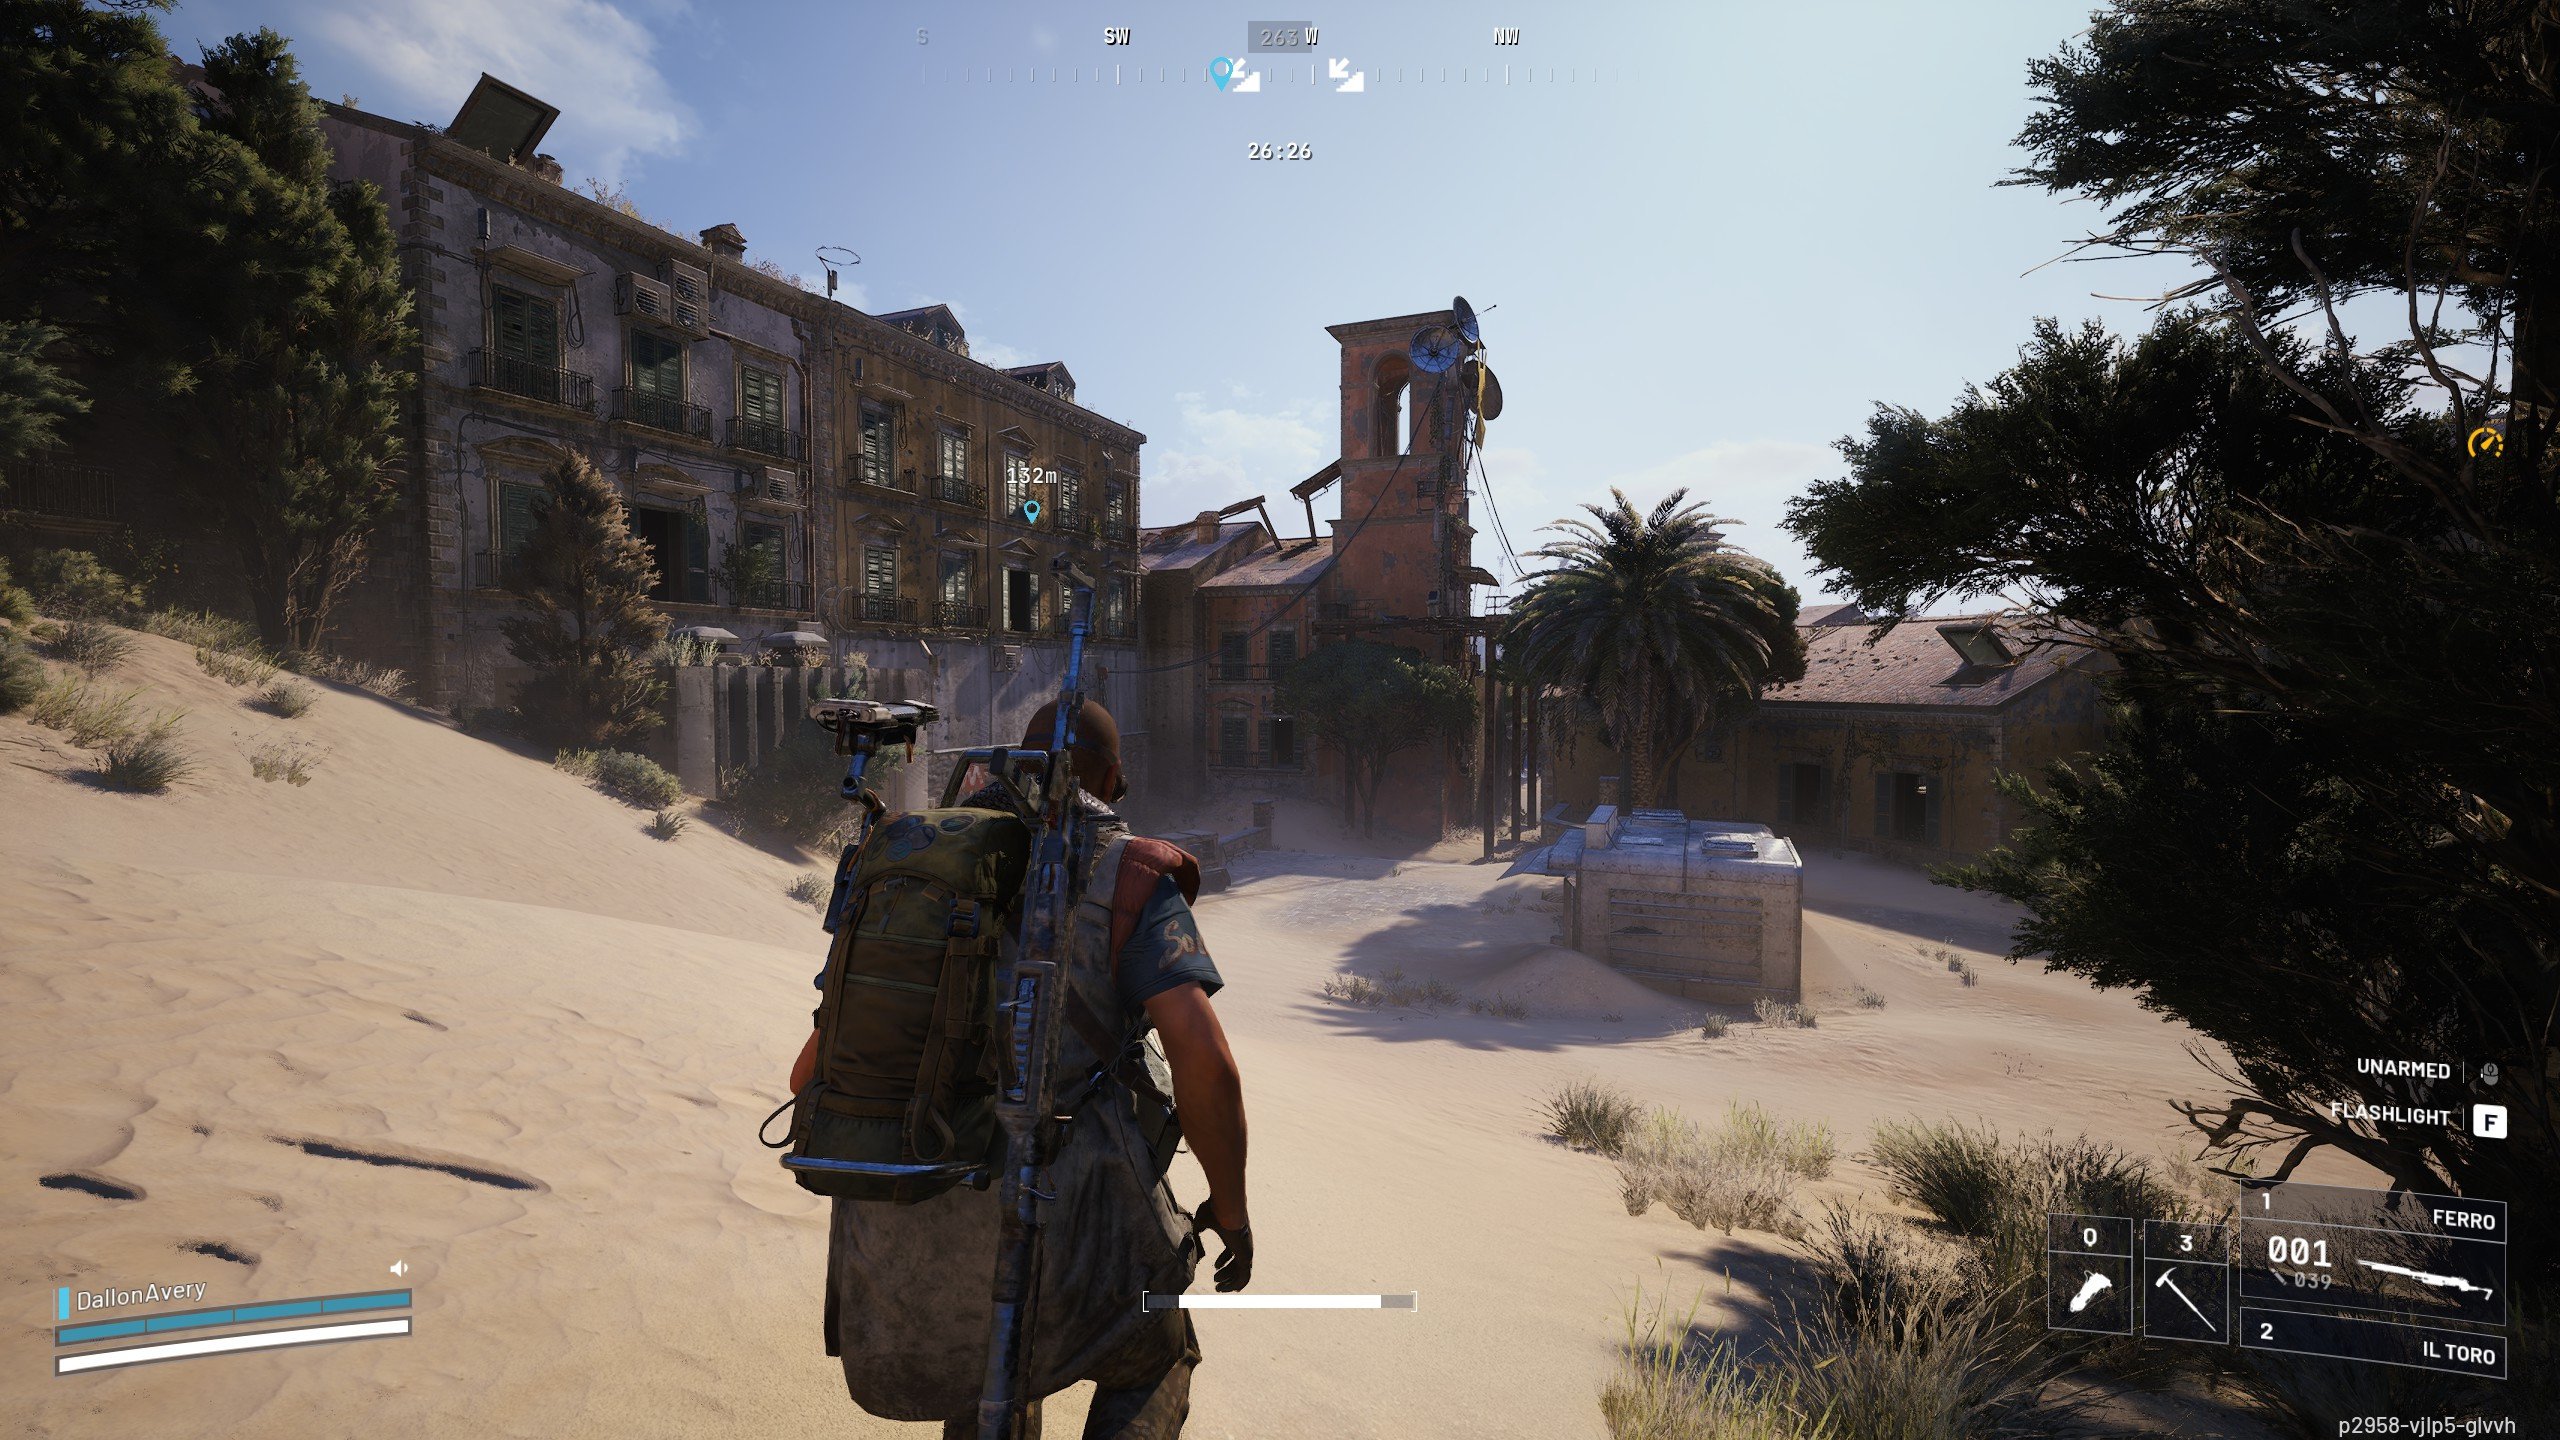
 Dallon Avery
Blueprints are one of the most important parts of progressing in ARC Raiders. They determine which weapons, gear pieces, explosives, and utility items you can craft once your stations are upgraded. Every blueprint you secure expands your options for future raids, and farming them becomes a key part of long-term power growth. Because each blueprint comes from specific containers and high-value locations, the fastest way to grow your collection is to run targeted looting routes instead of hoping for random drops.
The main part of this ARC Raiders Blueprint farming guide is dedicated to listing all notable and relatively safe (low player traffic) areas across all maps. On top of that, we’ll talk about the latest update and the changes it brought to the drop chances of blueprints. We’ll also break down some of the most common myths about blueprints and ways to find them. So, let’s get started.
The easiest way to get blueprints is and always will be buying them at Skycoach. Check out ARC Raiders Blueprints boost that can be used to get any specific blueprint or any amount of random ones without having to risk your own gear.
Read our other ARC Raiders guides:
- Stella Monstis Map Guide
- Beginner's Guide
- How to Farm Coins
- Best Settings
- Weapons Tier List
- Best Builds
- Leveling Guide
- Dam Battlegrounds Map Guide
Note: At Skycoach, you can Buy ARC Raiders Boost at the best prices with fast delivery. Use our special PROMO CODE (in green) hidden in this article for a 20% DISCOUNT.


Patch Notes and Drop Rate Adjustments
The North Line update brought several changes that directly affect how blueprint farming works. Many players assumed blueprint drop rates had been buffed or tied to Stella Montis specifically, but the update actually made more subtle adjustments. The most important note is that blueprint drops from Raider Containers were modified, which influences where you should focus your farming runs.
Here are the key blueprint-relevant adjustments introduced with Update 1.2.0:
- Blueprint drop rates from Raider Containers were adjusted
- Extremely rare blueprints such as Bobcat, Tempest, and Volcano now drop more reliably
- Over-tuned blueprint drops like Bettina were reduced to normal levels
- Map fixes removed unintended exploits and corrected loot access points
- Certain loot rooms were rebalanced or sealed to match their intended risk and reward
- Interacting with Probes, Husks, and Raider Caches now counts toward container-related objectives
Since then, the December patch didn't bring any changes to how the loot is distributed, so this is still very much relevant.
These changes created a more stable baseline for blueprint farming, but they also sparked misconceptions about blueprint “buffs,” Stella Montis exclusivity, and container-specific drops. The next section focuses completely on where to go, which spots are worth your time, and why these updated drop rates matter once you’re in a raid.
ARC Raiders Best Blueprint Farming Spots
Many players looking up ARC Raiders how to get blueprints, eventually learn that the real secret is targeting breach rooms and weapon case spawns instead of relying on random containers. Let us elaborate.
Blueprint farming works best when you focus on locations that consistently spawn high-tier containers. These include weapon cases, medical duffel bags, grenade cylinders, ammo crates, and the black raider containers that players often call blueprint boxes. When a room is locked behind a breachable door, the game treats the entire space as a higher-quality loot zone even if no special containers appear inside. That alone raises your odds of finding a blueprint during each check.
You’ll be visiting a mix of hidden spots, quiet off-path rooms, and dense multi-container spaces. These places are valuable because they regularly produce the containers with the highest blueprint chances.
With that in mind, the following sections break down the most notable ARC Raiders blueprint locations across all maps, one spot at a time.
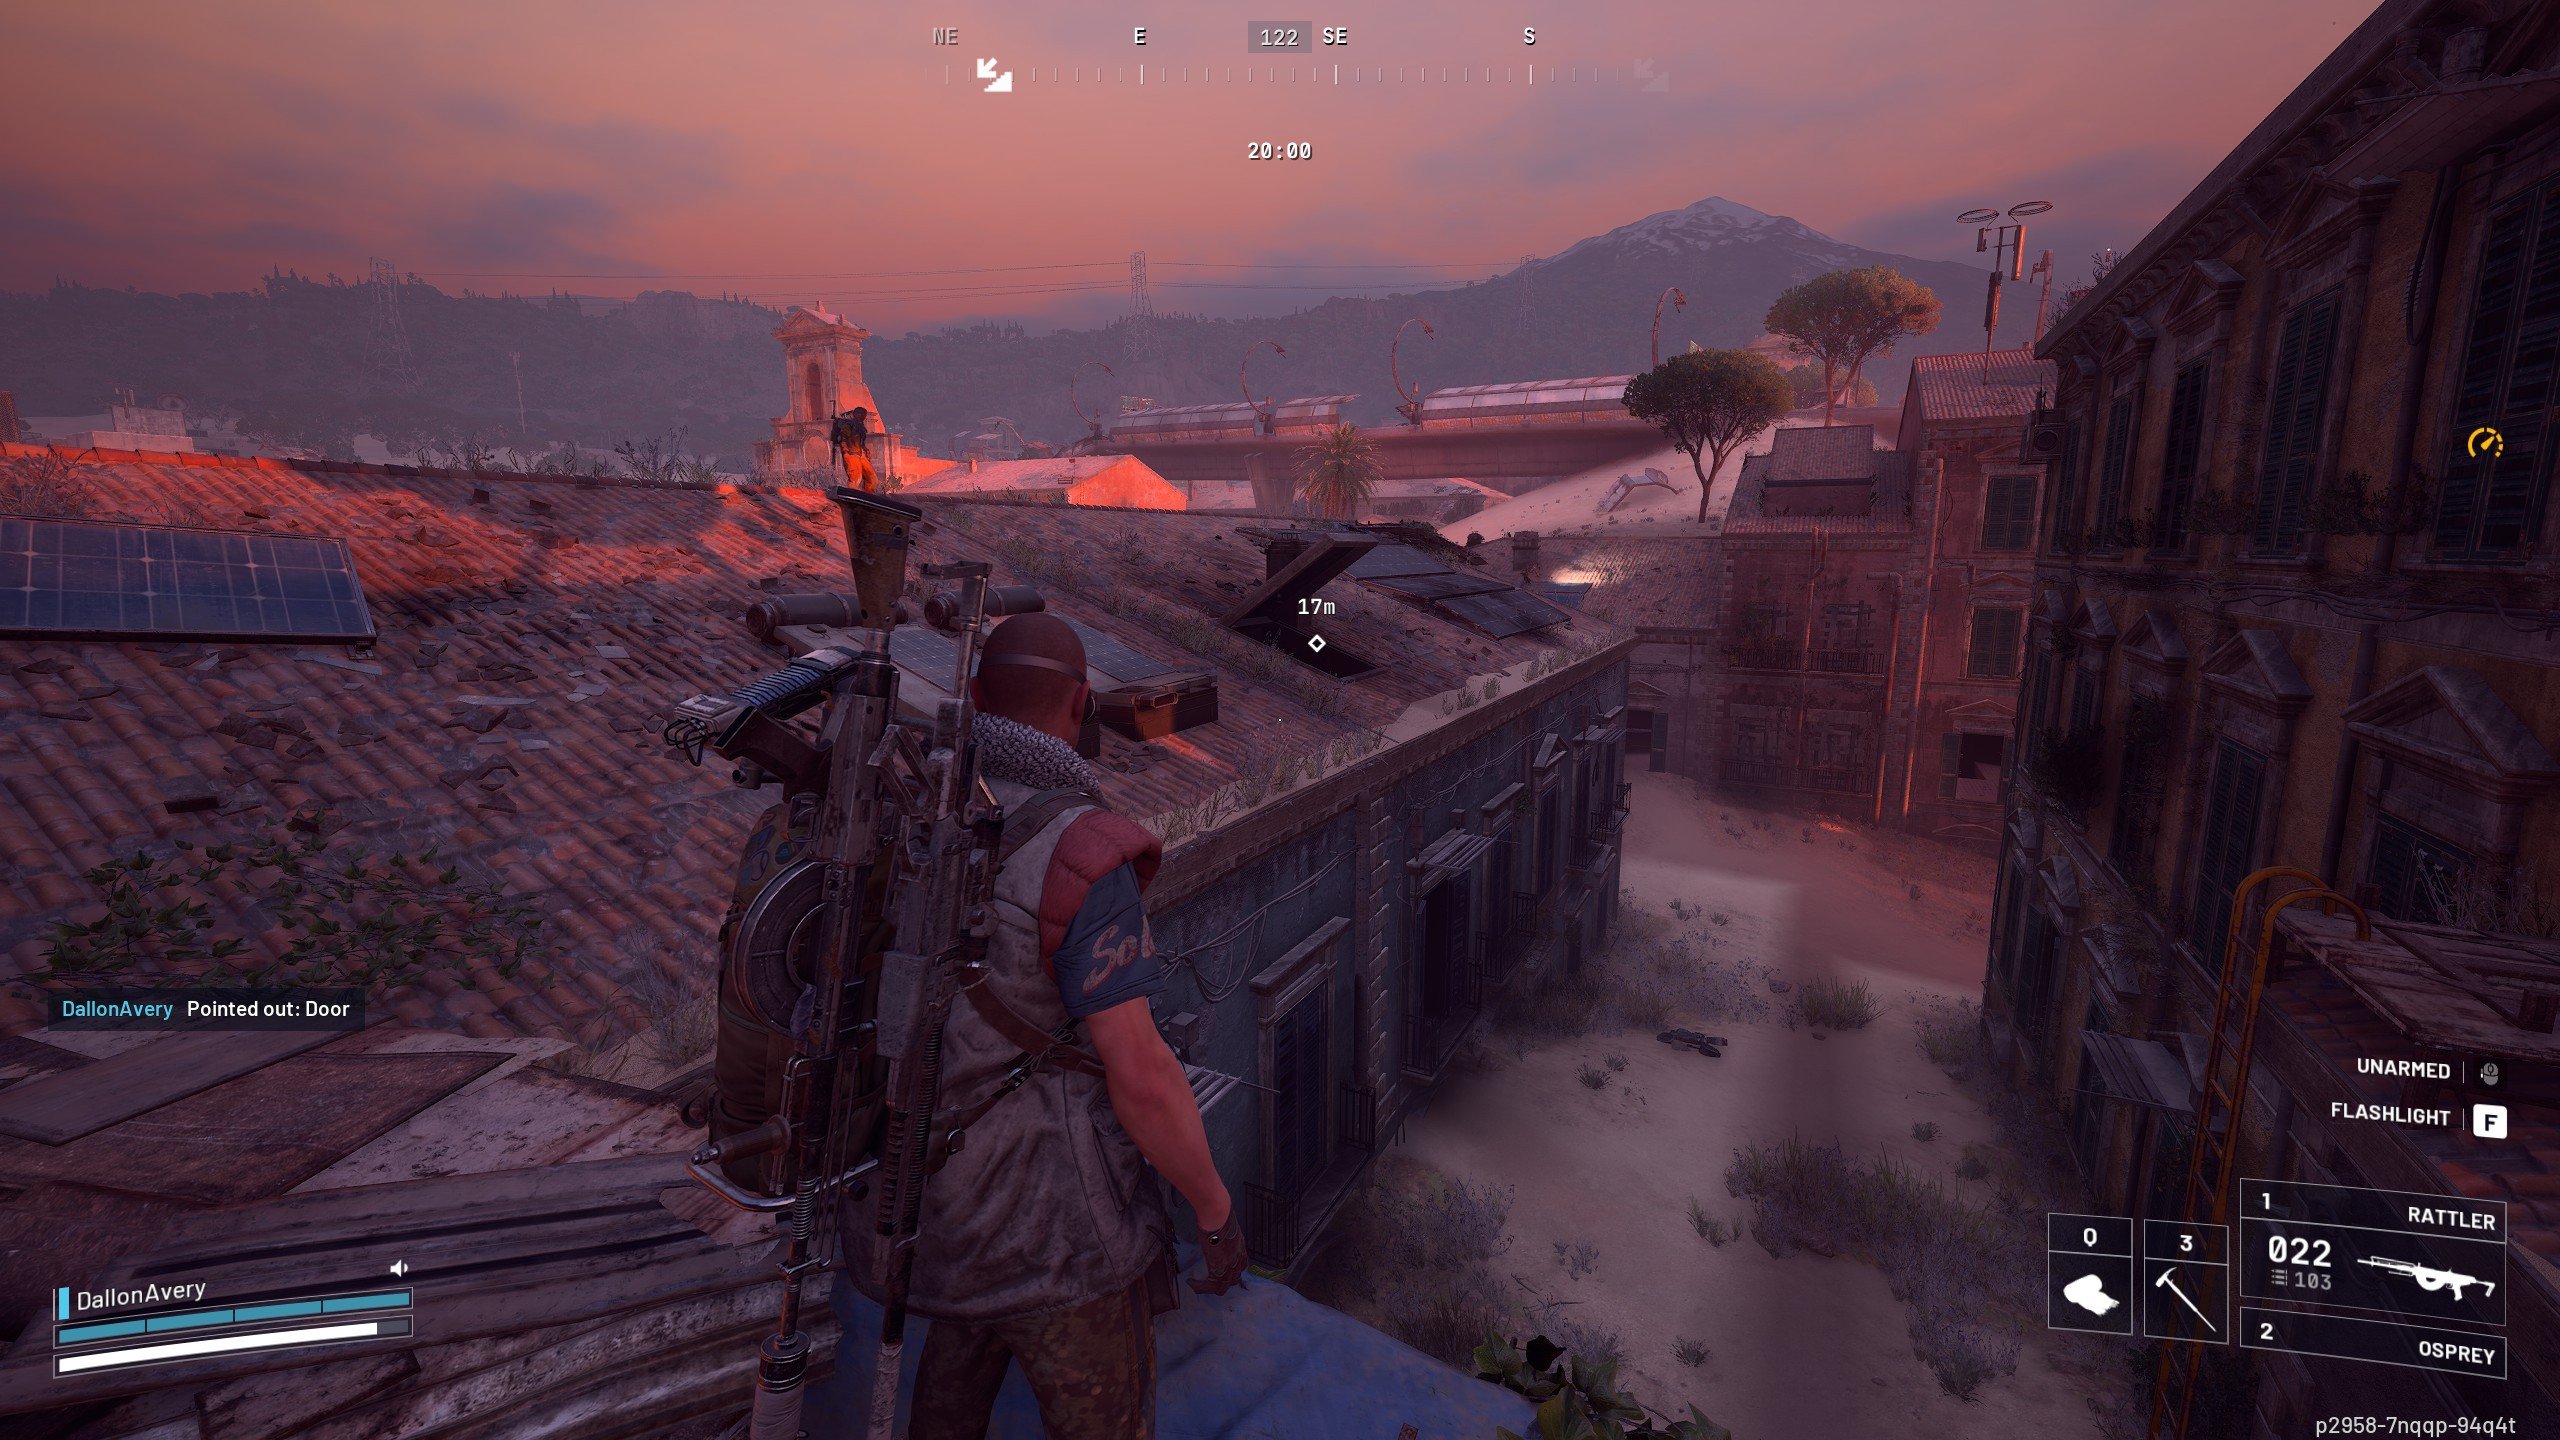
Dam Battlegrounds – West Broken Bridge Hidden Vault
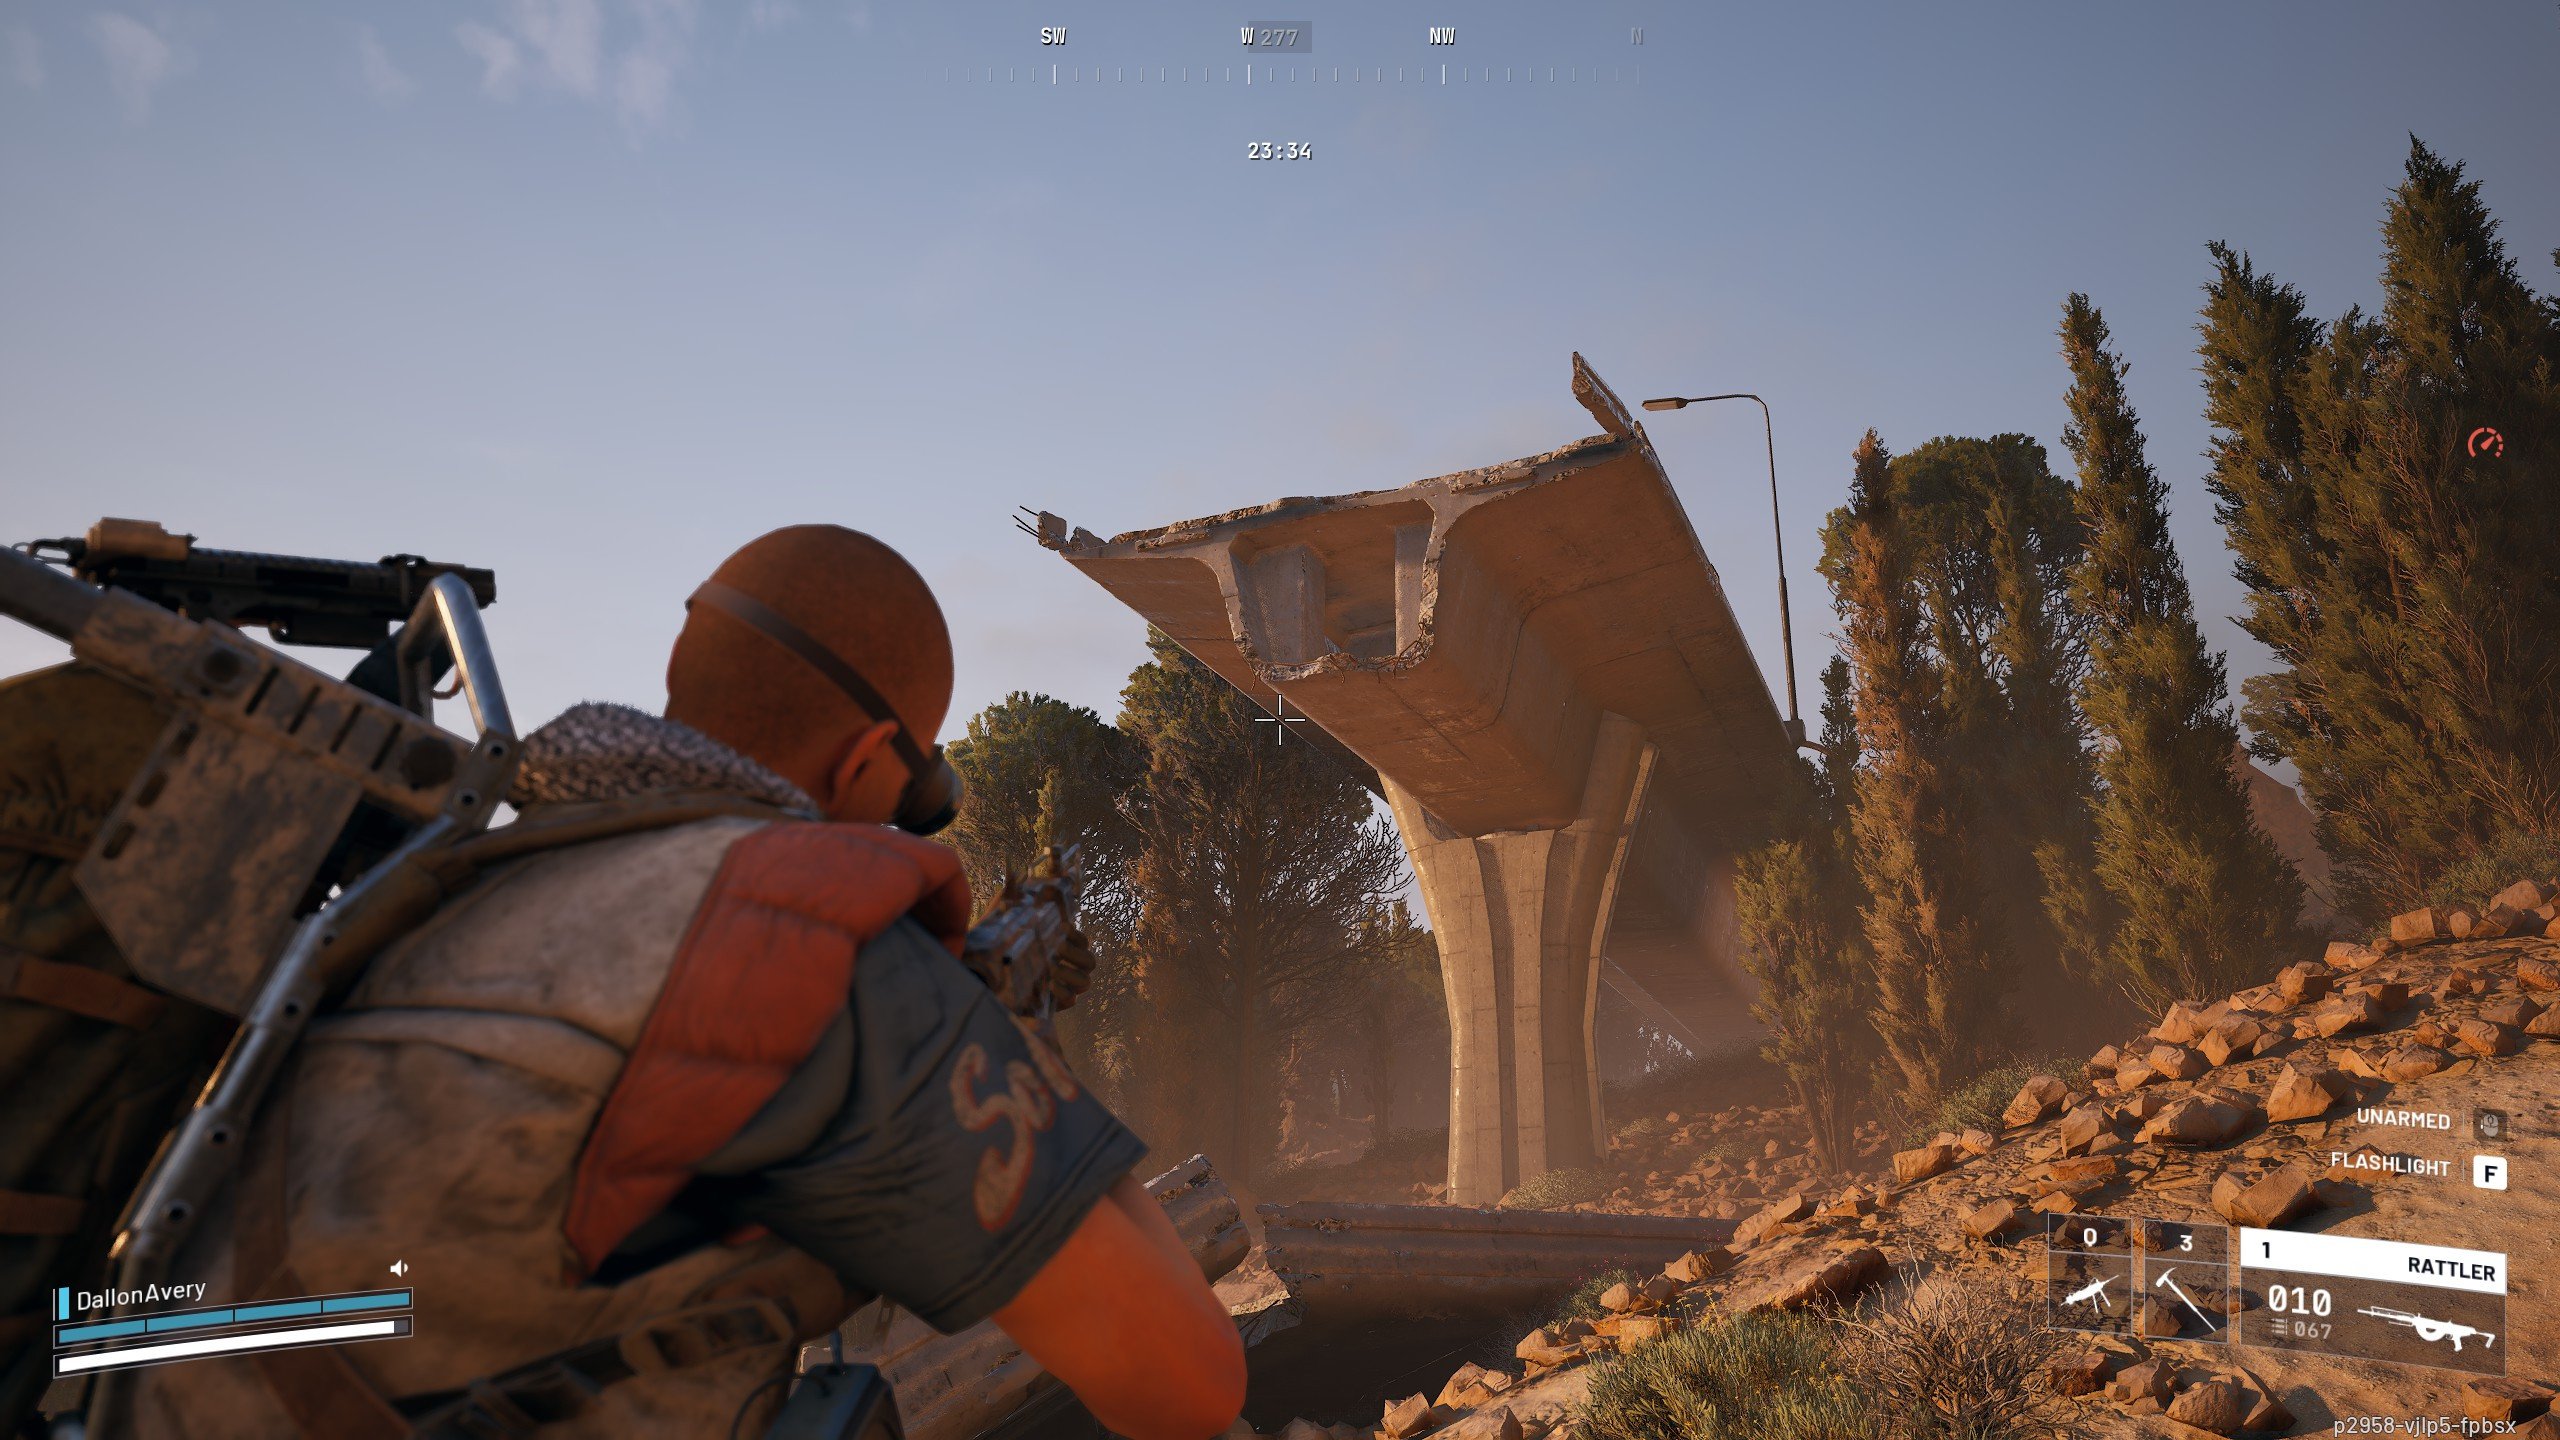
This is one of the ARC Raiders best blueprint spots. It sits at the end of a collapsed bridge and works as one of the simplest blueprint grabs in the entire game. It’s out of the way, rarely contested, and gives you a fast way to check a high-value container without committing to a full raid. You only need a clean drop, a quick movement trick, and you’re inside the vault within seconds.
Once you reach the broken bridge, the entry method is straightforward:
- Stand on the very edge of the broken section
- Tap backward to fall off the lip and press Space to grab onto the ledge
- Press Ctrl to drop down and immediately press Space again to grab the ledge under the bridge leading into the cavity where the cases might spawn.
Inside this small chamber, you can find a weapon case with a surprisingly high spawn rate and several other valuable container types. Medical bags, grenade cases, and the black raider containers can also appear here, all of which have strong blueprint potential. BLOG20
This makes the hidden vault ideal for smash-and-grab farming. You load in with a minimal kit, sprint straight to the bridge, check the room, and extract immediately if you find a blueprint. Even failed runs cost almost nothing, which makes this location one of the most efficient blueprint starters in Dam Battlegrounds.
Dam Battlegrounds – Lower Bridge Support Mechanism Rooms
Another ARC Raiders Dam Battlegrounds blueprint location lies beneath the main concrete bridge and is accessed by lowering the metal bridge supports with the nearby switches. These lower support rooms don’t look like much at first, but they consistently generate high-value containers and are overlooked by most players who pass over the bridge without checking below. Because the entire area is counted as a controlled-access structure, the loot quality inside tends to be higher than the surface level around it.
Once you reach the upper walkway, look for the small control panels built into the sides of the bridge:
- Interact with the nearby switches to drop the support platforms
- Step onto the lowered segment and follow it downward into the under-bridge structure
- Move through the walkway to access the interior rooms where loot spawns
- Check both sides, as some spawns alternate between runs
Inside the support rooms, you can find weapon cases, med bags, ammo crates, and the black raider containers that have a strong chance of holding blueprints. It’s a safe, enclosed space with minimal ARC interference, making it ideal for grabbing a quick blueprint before moving deeper into the map.
There are many more looting places with special container spawns all over the map, we just decided to focus on these two, as it feels like, they are lesser known.
Buried City – Marano Station Breach Room

The first ARC Raiders Buried City blueprint location is a breachable room on the northern side of Marano Station, is one of the most dependable blueprint spots in Buried City. It sits far from the central hotspots, so player traffic stays low, and you can usually reach it uncontested. Because the only way in is through a breachable door, the game tags the entire interior as a high-value loot area, which boosts the quality of every container inside.
 Once you reach the station, the sequence is simple:
- Head to the northern wall of the Marano Station structure
- Breach the door to access the locked interior
- Check the two breach boxes positioned near the back
- Look for a weapon case spawn on the left side
- Scan the room corners for grenade tubes or ammo crates
Even if the weapon case doesn’t appear, the breach boxes alone make this room consistently profitable. Its isolation and low contest rate make it an ideal early check whenever you spawn near the west side of Buried City.
Buried City – East Housing Windows (Attic and Street-Level Rooms)
These two connected rooms sit on the eastern side of Buried City, just south of the Piazza Roma metro exit, and form one of the fastest double-checks you can make during a blueprint run. The attic room provides a safe elevated space with a strong weapon case spawn, while the street-level room across the road gives you a second quick shot at blueprint-eligible containers. Because both locations sit slightly away from the busiest routes, players rarely contest them.
You can clear both rooms quickly by following this sequence:
- Climb onto the rooftop and vault into the open attic window
- Check the weapon case spawn positioned above the interior staircase
- Loot any nearby shelves or drawers for extra blueprint chances
- Drop back outside, cross the street, and vault through the open ground-level window
- Check the weapon case spawn in the corner and scan for secondary containers
Together, these two rooms offer fast, low-risk blueprint opportunities with almost no downtime between them. Their location near Piazza Roma makes them an easy addition to any Buried City run that moves along the eastern side of the map.
Buried City – Kitchen Rope Stairwell Spawn
This interior room sits just south of the East Housing Windows and works as a natural third stop when moving down the eastern side of Buried City. It’s easy to enter, quick to clear, and includes a kitchen area with a reliable weapon case spawn on the counter. The room also contains a rope you can use to reach the upper floor instantly, which speeds up looting without forcing you through the full staircase.
When you reach the building, the flow looks like this:
- Vault through the street-facing window to enter the ground floor
- Head into the kitchen and check the weapon case spawn on the countertop
- Use the rope to zip upward and bypass the staircase
- Loot the upper level for small containers or secondary drops
- Exit through a window to continue moving south along your route
Because it’s so close to the previous two stops, this room completes a tight trio of blueprint checks with very little travel time between them. Its compact layout and clean escape paths make it an efficient mid-route addition for any run through Buried City’s eastern blocks.
Buried City – High-Value Rooftop Zipline Room
This blueprint spot sits above the Grandioso Apartments, reachable by riding the zipline that starts in West Village Piazza Roma. The apartments consist of two tall buildings separated by a narrow gap, and the zipline runs directly through the space between them. As soon as you reach the buildings, the platform you need is on the right-hand building, positioned just below the zipline’s endpoint.
- Reaching the room is simple once you’re set up:
- Ride the zipline from West Village Piazza Roma toward the Grandioso Apartments
- As you pass between the two buildings, drop onto the small rooftop platform on the right
- Enter the breachable high-value room connected to the platform
- Check the two weapon case spawn points inside the room
- Loot any secondary containers such as med bags, grenade tubes, or ammo crates
This room’s value comes from its high-tier classification and its density of blueprint-eligible containers. It can attract players late into a raid, but if you reach it early or notice the area is quiet, the Rooftop Zipline Room offers some of the best blueprint chances in Buried City.
Buried City – Grandioso Rooftops (North and South Buildings)
The rooftops of the two Grandioso Apartment buildings offer two separate weapon case spawn points, but they come with more risk than most Buried City locations. These rooftops sit directly within one of the map’s busiest vertical routes, attracting players who rotate between the Piazza Roma zipline, the surrounding housing blocks, and the nearby high-value spots. Despite the traffic, both buildings provide clean blueprint opportunities if you move quickly.
To check both rooftops efficiently, follow this path:
- Climb to the top of the north Grandioso building and look beside the upper stairwell for a weapon case spawn
- Cross to the south building by moving along the roof edge or dropping to a lower ledge and climbing back up
- On the south rooftop, check the upper corner ledge where a second weapon case can appear
- Keep your head on a swivel, as players often enter from the zipline or upper windows
These rooftops are best treated as opportunistic stops rather than guaranteed blueprint checks. If the area feels quiet or you’ve already passed through after using the zipline, they can add two fast rolls to your run. If the activity level seems high, it’s safer to skip them and continue toward lower-risk loot rooms.
Buried City – Grandioso Southwest Bushes (Raider Cache Spawn)
This small outdoor spot sits just southwest of the Grandioso Apartments, tucked into a cluster of bushes beside a parked vehicle. It’s easy to miss unless you deliberately check it, but it regularly spawns a Raider Cache — one of the best single-container chances for blueprint drops. Because it’s outside and off the main pathways, most players run right past it without listening for the cache’s ticking sound.
When passing the area, the process is quick:
- Approach the bushes southwest of the Grandioso Apartments
- Stand still for a second and listen for the ticking Raider Cache sound
- If you hear the whirring, check the bushes and loot the cache
- If there’s no sound, continue your route immediately
This location is ideal because it adds almost no time to your run. Raider Caches have strong blueprint odds, and with low player traffic in the bushes, this spot is one of the easiest blueprint checks near the Grandioso complex.
Buried City – Western Breach Room (Abandoned Highway Camp)
This breachable room sits on the right side of the Abandoned Highway Camp, directly between the Grandioso Apartments and the Santa Maria Houses. It’s one of the quieter high-value interiors in this part of Buried City, making it a strong mid-route blueprint check when you’re rotating westward or leaving the Grandioso cluster. Because the door must be breached to enter, the entire interior qualifies as a high-tier loot zone.
Reaching and clearing the room is quick:
- Approach the Abandoned Highway Camp from the east and move toward the right-side building
- Breach the closed door to access the high-value interior
- Check the cabinets, drawers, and shelves for blueprint-eligible items
- Look for a possible weapon case spawn inside the room
- Scan for grenade tubes, med bags, or ammo crates depending on the run
This room works best as a follow-up to the Grandioso area since it lies directly on the path toward Santa Maria. It stays relatively uncontested and offers a fast, self-contained blueprint roll without forcing you into dangerous open streets or busy rooftops.
Buried City – Secret Rooftop Jump Loot Room
This next set of ARC Raiders blueprint drops is found in the high-value interior sits in a pair of facing buildings just south of the Western Breach Room, and it’s one of the stronger blueprint spots in Buried City thanks to its controlled entry and tight loot density. To reach it, you jump through a rooftop window on one building, then immediately vault across into the opposite building’s upper window. That second window leads directly into the secret loot room.
The layout makes this room easy to access but harder for other players to stumble into, which keeps it surprisingly low-traffic despite being close to major routes.
The flow to reach and clear the room works like this:
- Climb onto the south rooftop facing the next building
- Jump through the first window, turn 180 degrees, and vault through the opposite window
- Land directly inside the hidden high-value loot room
- Check both weapon case spawn points along the walls
- Loot any med bags, raider containers, or grenade tubes in the corners
- Exit back out the same window or drop to street level to continue your path
Because the entire room is tagged as a high-value zone and compact enough to search in seconds, it’s one of the most efficient blueprint checks along the Buried City west-to-east route.
Buried City – Plaza Rosa Pharmacy
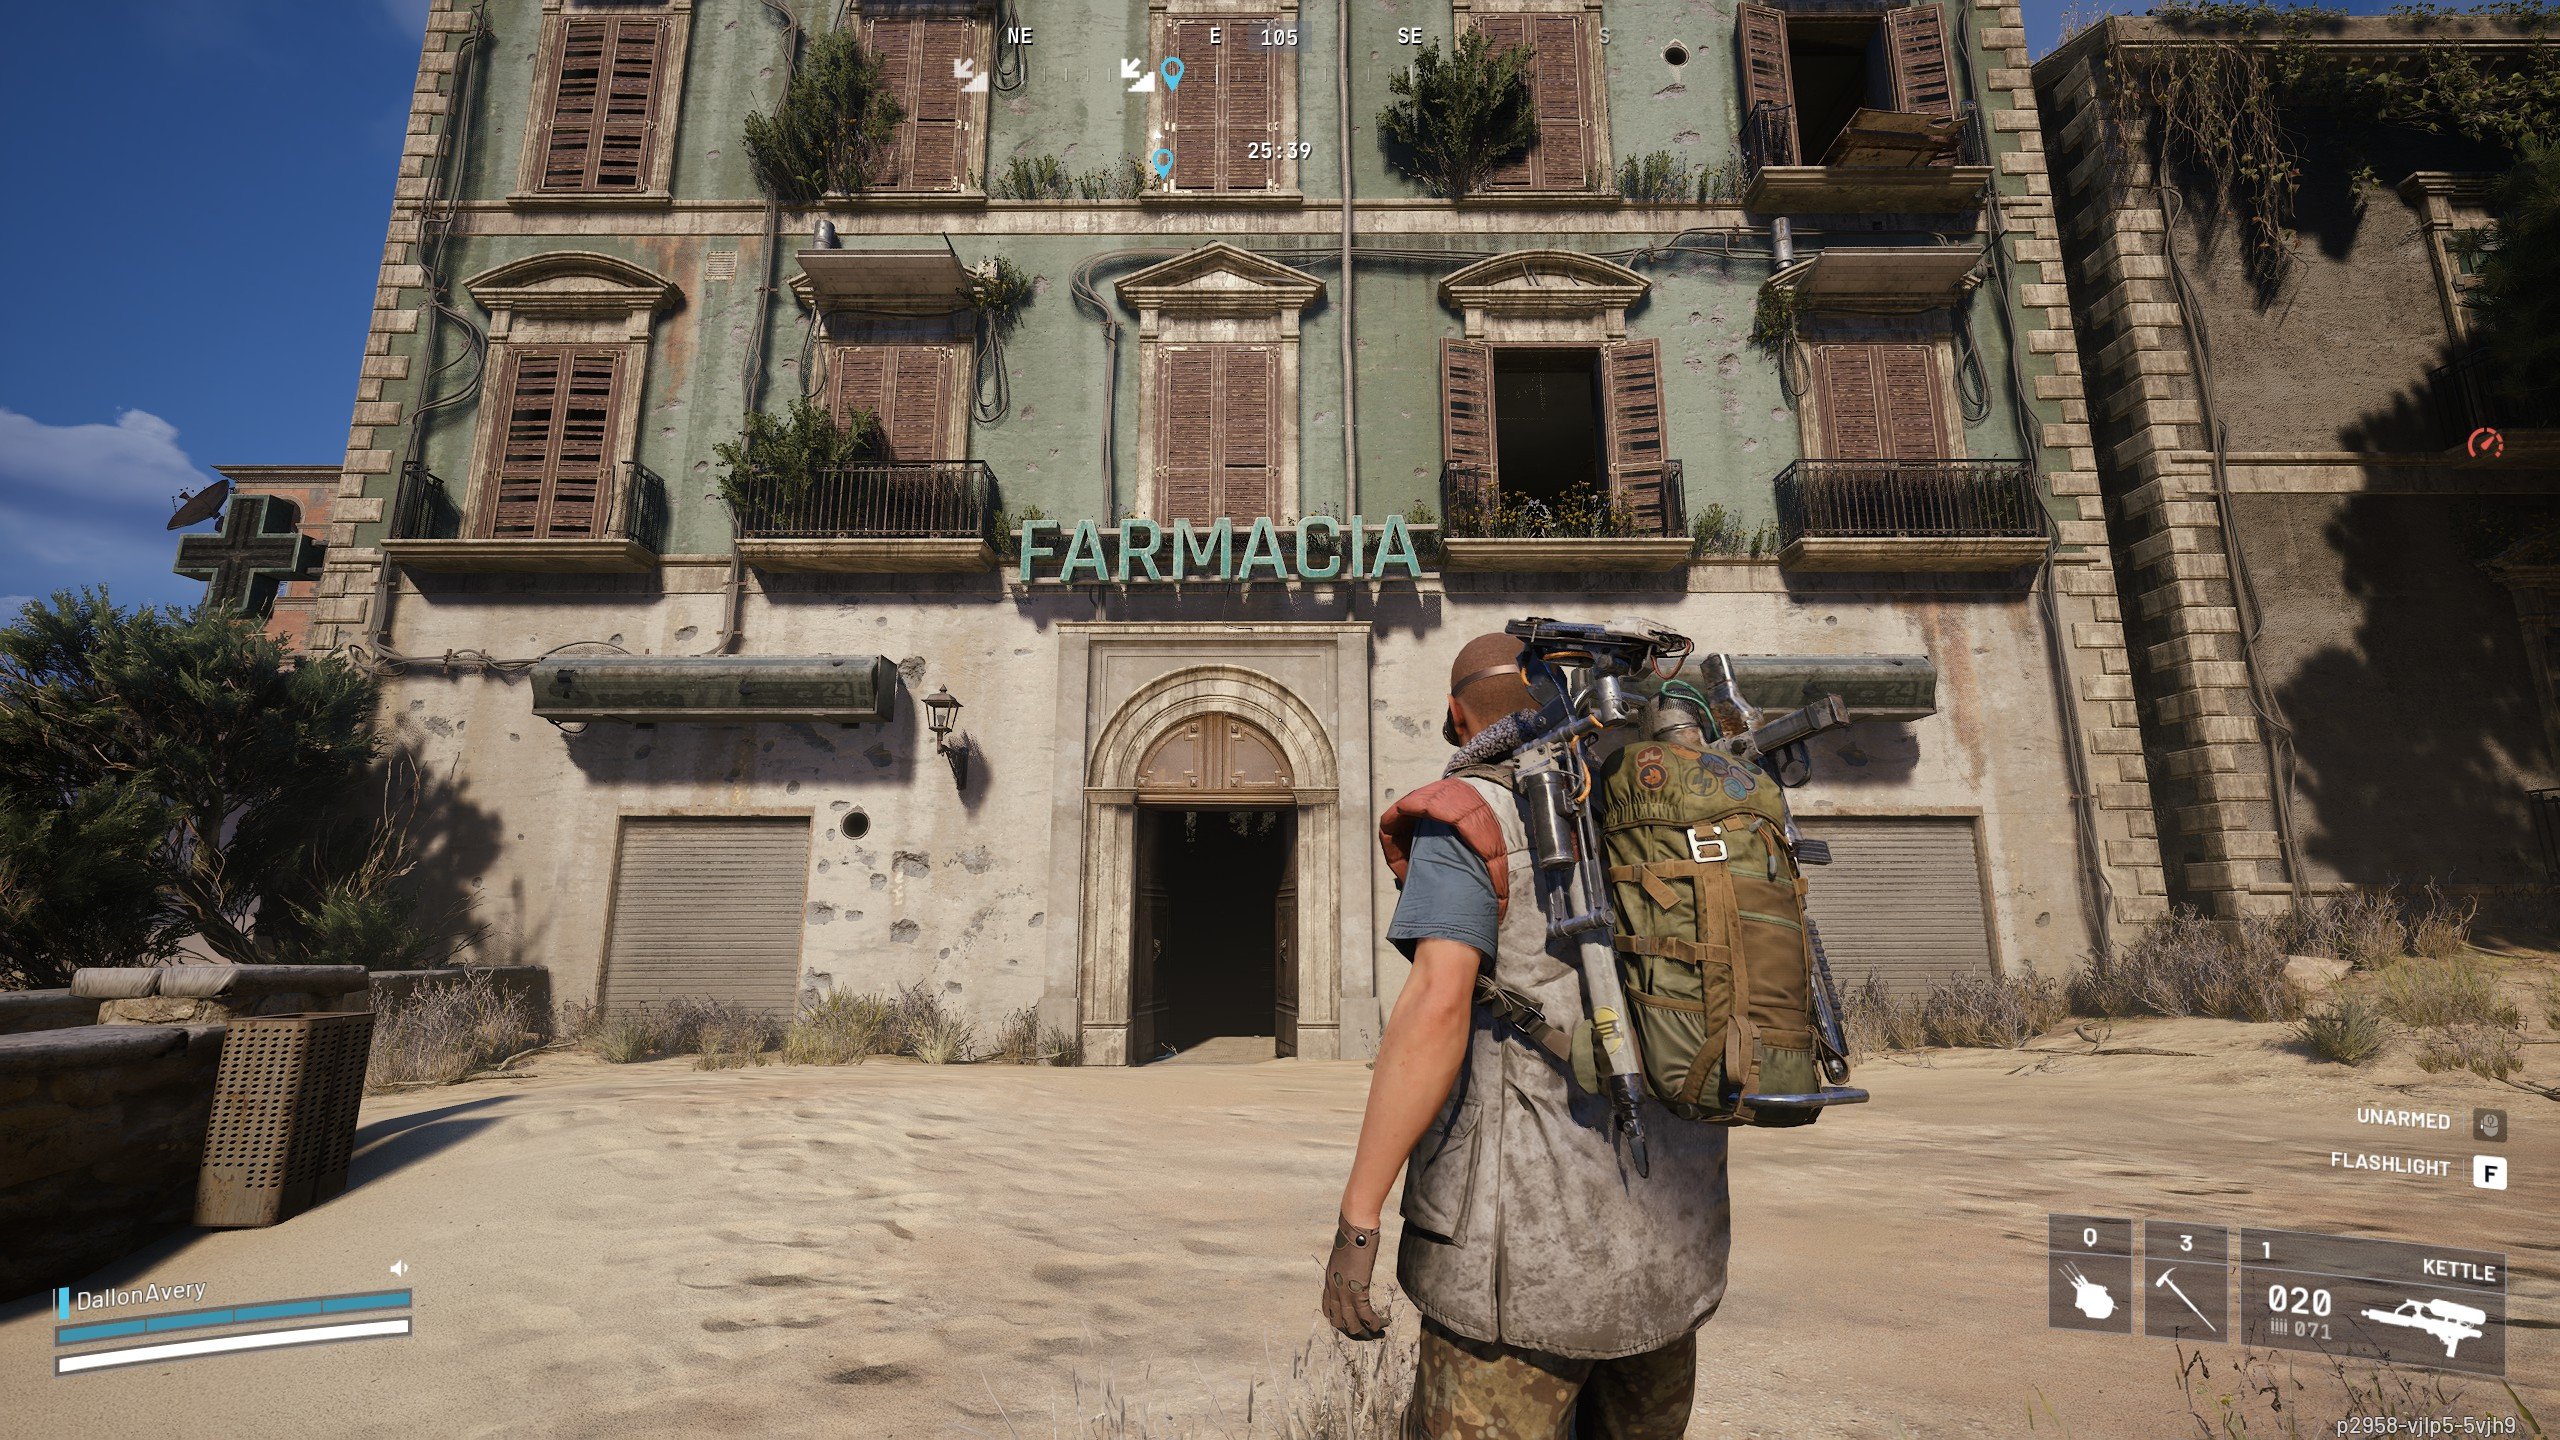
The Plaza Rosa Pharmacy sits on the east side of the Plaza Rosa district, and it remains one of the most container-dense blueprint spots in the entire map. Pharmacies are classified as full high-value zones from top to bottom, meaning every drawer, shelf, cabinet, med bag, and potential weapon case inside carries boosted blueprint odds. Because of that, this location draws steady player traffic, but its multi-floor layout lets you loot quickly and reposition if needed.
The layout makes it a strong stop if you’re willing to manage a bit of risk:
- Breach the main door to enter the pharmacy’s upper floor
- Sweep through the counters, shelves, and medical drawers for blueprint-eligible drops
- Move down through each floor, checking every med bag and container along the walls
- Look for a possible weapon case spawn in the back rooms
- Exit through a side window or the lower doorway to stay mobile and avoid fights
With its stacked container count and consistent blueprint chances, Plaza Rosa Pharmacy is one of the best high-value interior farms in Buried City. It’s ideal when you already have momentum on your run or when you’re pushing toward the eastern half of the map and need a dense, reliable blueprint check before moving on.
Buried City – Red Tower
The Red Tower sits just northeast of Plaza Rosa, standing out with its distinct red exterior and narrow vertical layout. Although smaller than a pharmacy, this structure contains multiple high-value interiors stacked across its upper floors. Each of these rooms can spawn med bags, red lockers, and one or more weapon cases, making the tower a compact but rewarding blueprint stop.
Because the building has multiple entry points and a clean upward path, you can clear it quickly without exposing yourself for long.
A typical sweep looks like this:
- Enter through the east-side window to reach the first high-value room
- Check the red lockers and shelves before climbing the internal stairs
- On the next floor, inspect the weapon case spawn point along the stair railing
- Exit through the hole in the wall and climb the exterior ladder
At the upper rooftop landing, check the second weapon case spawn point tucked along the right-hand wall
The Red Tower has a quest associated with it where you have to reboot a generator, so this place might have some player traffic.
Buried City – Northeastern Rooftop Hole Room (L-Shaped Building Near Piazza Arbusto)
This loot room sits inside the L-shaped apartment block directly south of Piazza Arbusto, making it one of the strongest blueprint checks on the northeastern side of Buried City. You access it from the roof rather than the street: the building has a broken section along the upper wall that acts as a clean entry point. Because of its elevation and its odd shape, most players don't bother climbing up here, which keeps the room surprisingly safe compared to other high-value interiors nearby.
Reaching and clearing the room is quick and efficient:
- Climb onto the roof of the L-shaped building just below Piazza Arbusto
- Move to the broken wall section and drop inside through the rooftop hole
- Check the stairwell railing area where a weapon case can spawn
- Search the small upper rooms for med bags, drawers, and other blueprint-eligible containers
- Exit back through the hole or take a window drop to reposition toward Santa Maria or the eastern streets
This rooftop hole room works well as a calm final blueprint stop before moving deeper into the Santa Maria blocks or heading toward the eastern pharmacies. Its elevated position, combined with a reliable weapon case spawn, makes it a key inclusion in longer Buried City farming routes.


Buried City – Piazza Arbusto Pharmacy
This pharmacy is located on the east side of Piazza Arbusto, and while it’s one of the better blueprint spots in the northeastern district, it’s also riskier than the Plaza Rosa location. The main reason is simple: Lance’s questline sends players here, including his request for photos of how people once lived in these halls. That quest traffic alone can turn the pharmacy into a mid-raid hotspot.
Despite that, the building has one major advantage over most interior loot rooms: there is only a single entrance, and you can block it with a Door Blocker. This gives you full control over the flow of players. Anyone trying to breach the door makes enough noise for you to reposition or extract immediately, making the pharmacy far safer once you’re actually inside.
The layout itself is excellent for blueprint farming:
- Enter through the single front door and place a Door Blocker to secure your position
- Sweep the pharmacy’s ground-floor counters, shelves, and med bags
- Move to the two floors above, which act as old residential areas full of trinkets and smaller containers
- Check for blueprint drops in drawers, cabinets, and occasional med bag spawns
- Exit via the front door only when the area sounds clear, or jump from an upper window if you prefer to rotate out quietly
Piazza Arbusto Pharmacy is a strong pick when you want a contained, defensible blueprint spot that still has multi-floor loot density. If you’re familiar with the quest flow in the area and time your visit well, it becomes one of the safer high-value interiors on the north side of Buried City.
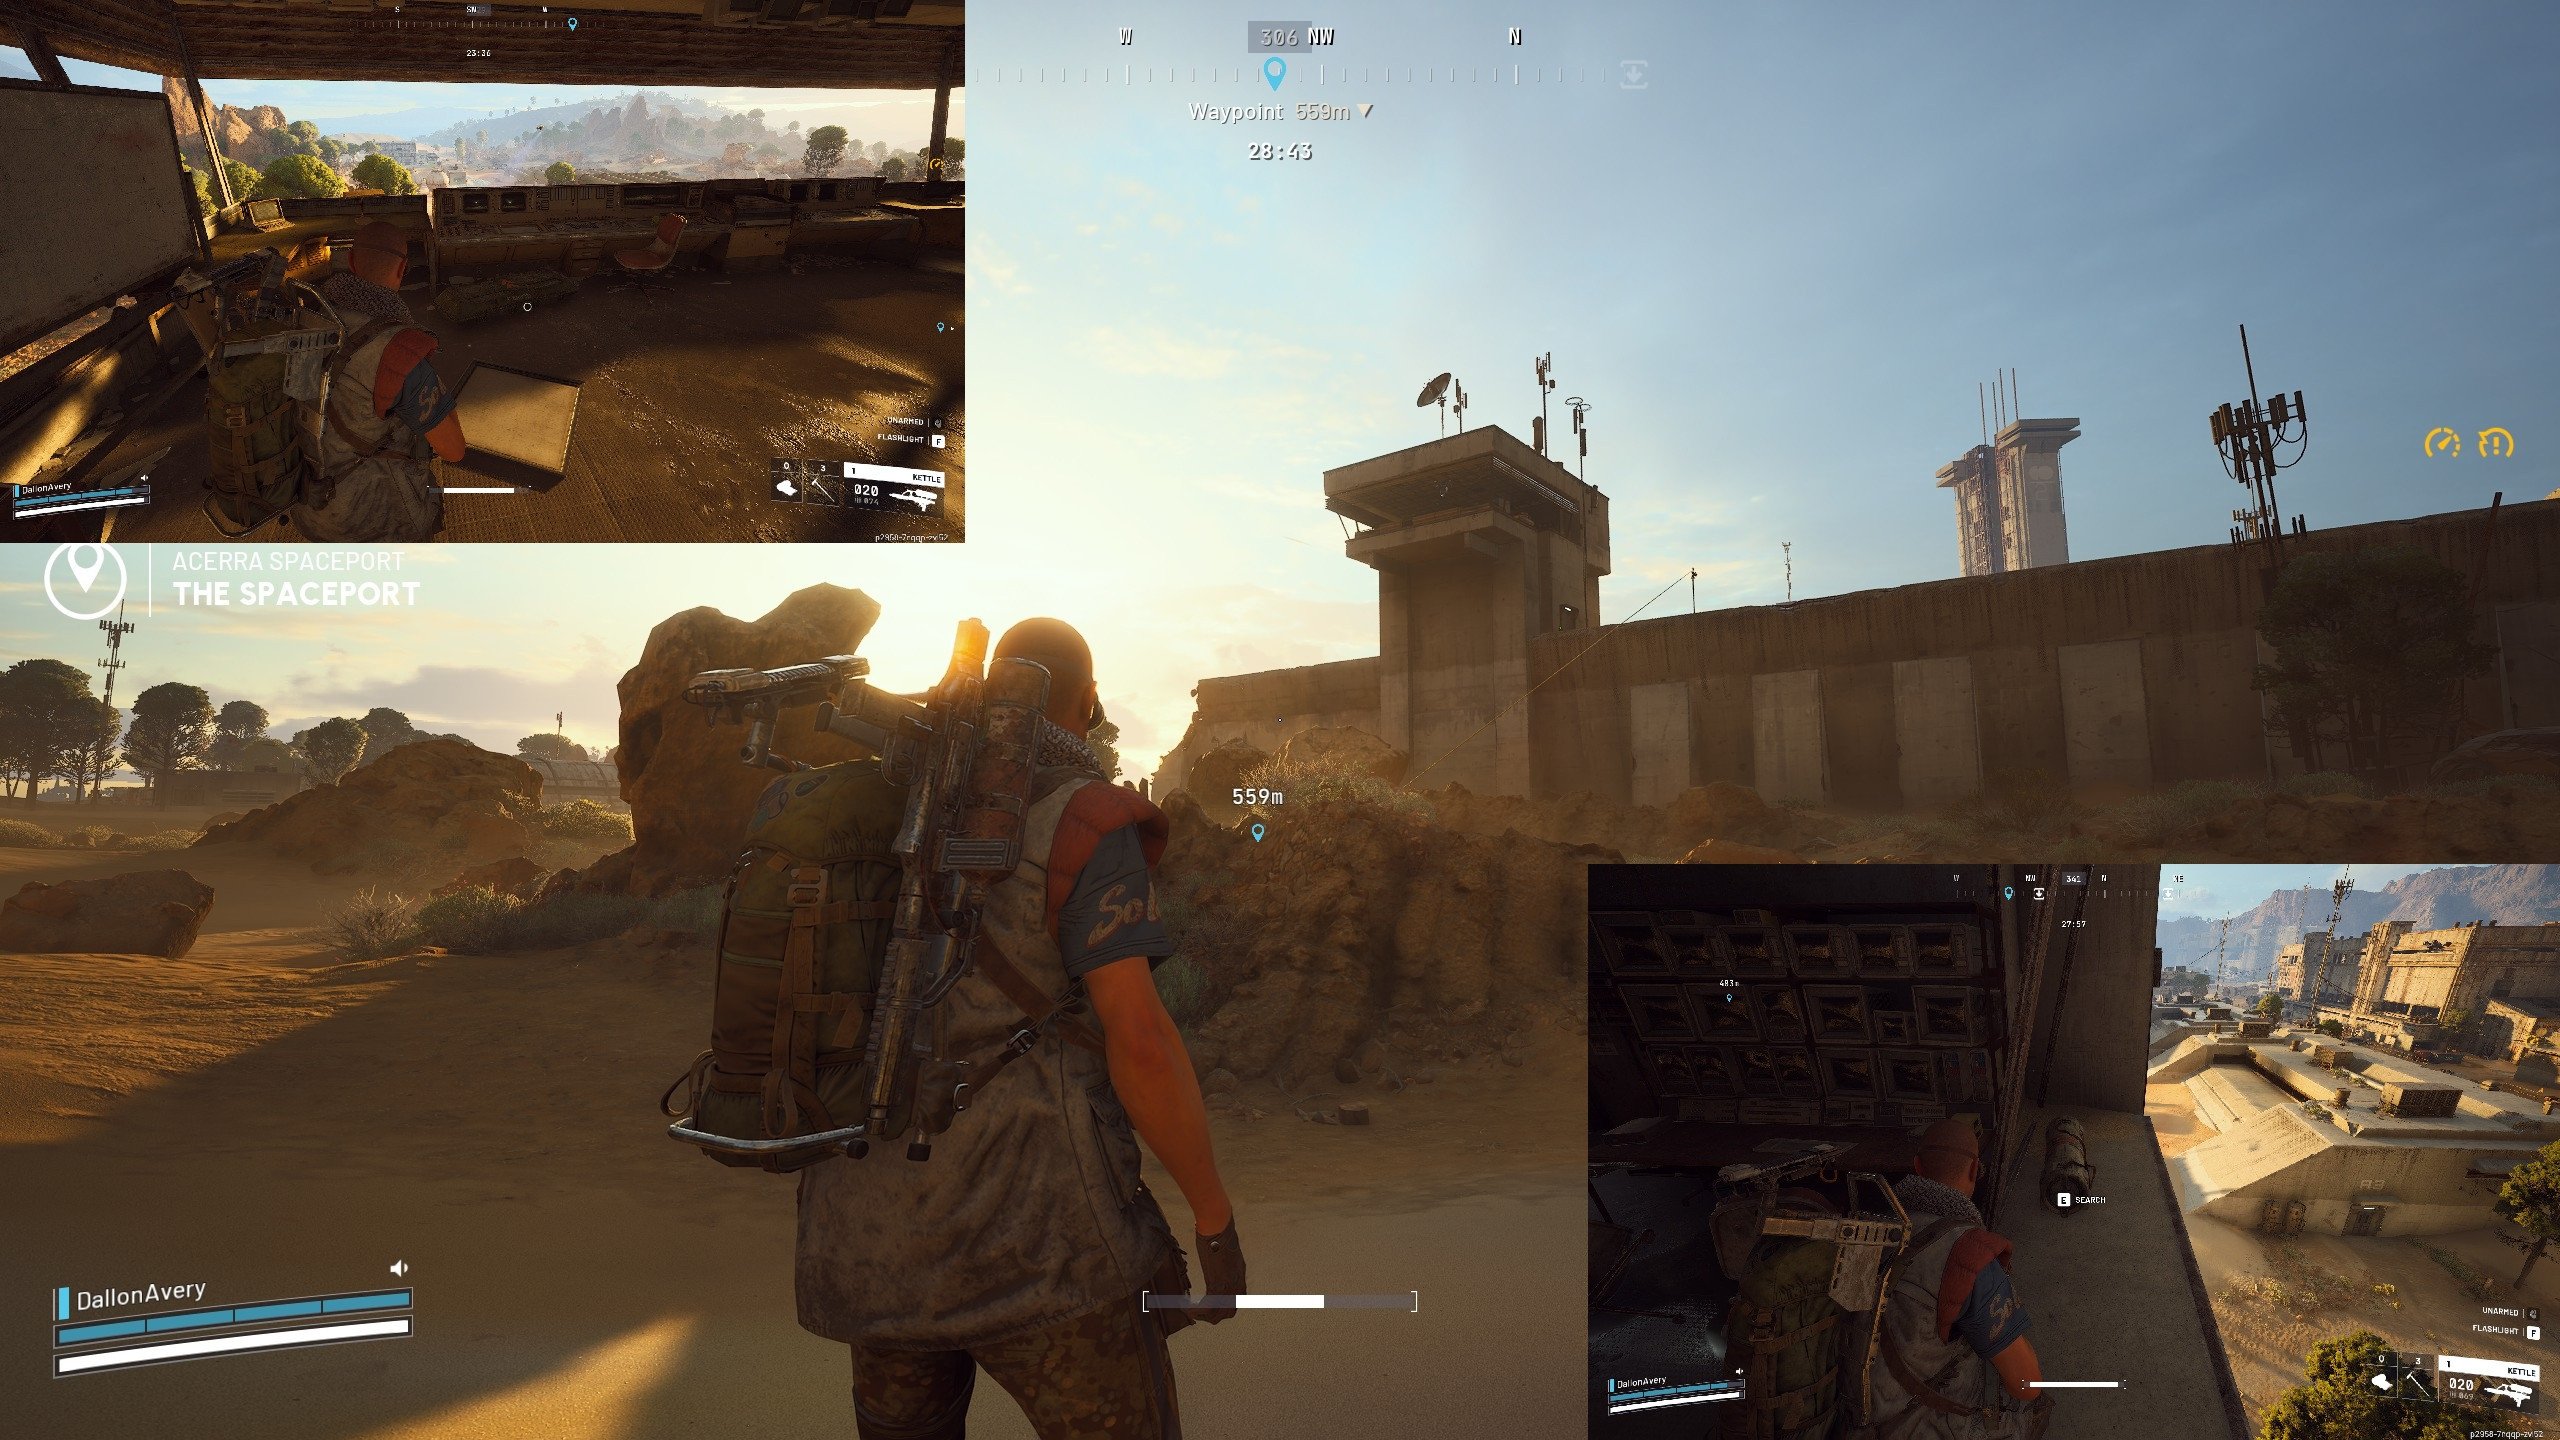
Spaceport – Vehicle Maintenance Upper Level

Vehicle Maintenance sits in the south-central part of Spaceport, directly below Control Tower A6 and west of the Container Storage block. Because it’s surrounded by open ground and doesn’t sit on any major player rotation lane, this building is usually quiet early in a raid. The upper level contains a compact lounge area with couches and storage crates, and this room features a reliable weapon case spawn that is extremely quick to check.
The movement path inside is simple:
- Enter Vehicle Maintenance from the ground level and take the internal stairs to the upper floor
- Head to the back-left corner of that upper level — this is where the weapon case can spawn between the couches and the wall
- Check nearby crates, lockers, and ammo boxes for extra blueprint rolls
- Optional: continue one level up to the small breachable room above, which has high-tier loot classification even without guaranteed weapon case spawns
- Leave through the same staircase or exit out the open side, depending on your next destination (Fuel Lines, Container Storage, or Departure Building)
Because Vehicle Maintenance sits slightly off the main high-traffic corridors, this is one of the safest blueprint checks on the map. It’s a strong opener if you spawn in the southern half of Spaceport or a good mid-route detour when transitioning between Fuel Lines and Control Tower A6.
Spaceport – Fuel Lines Vertical Pipe
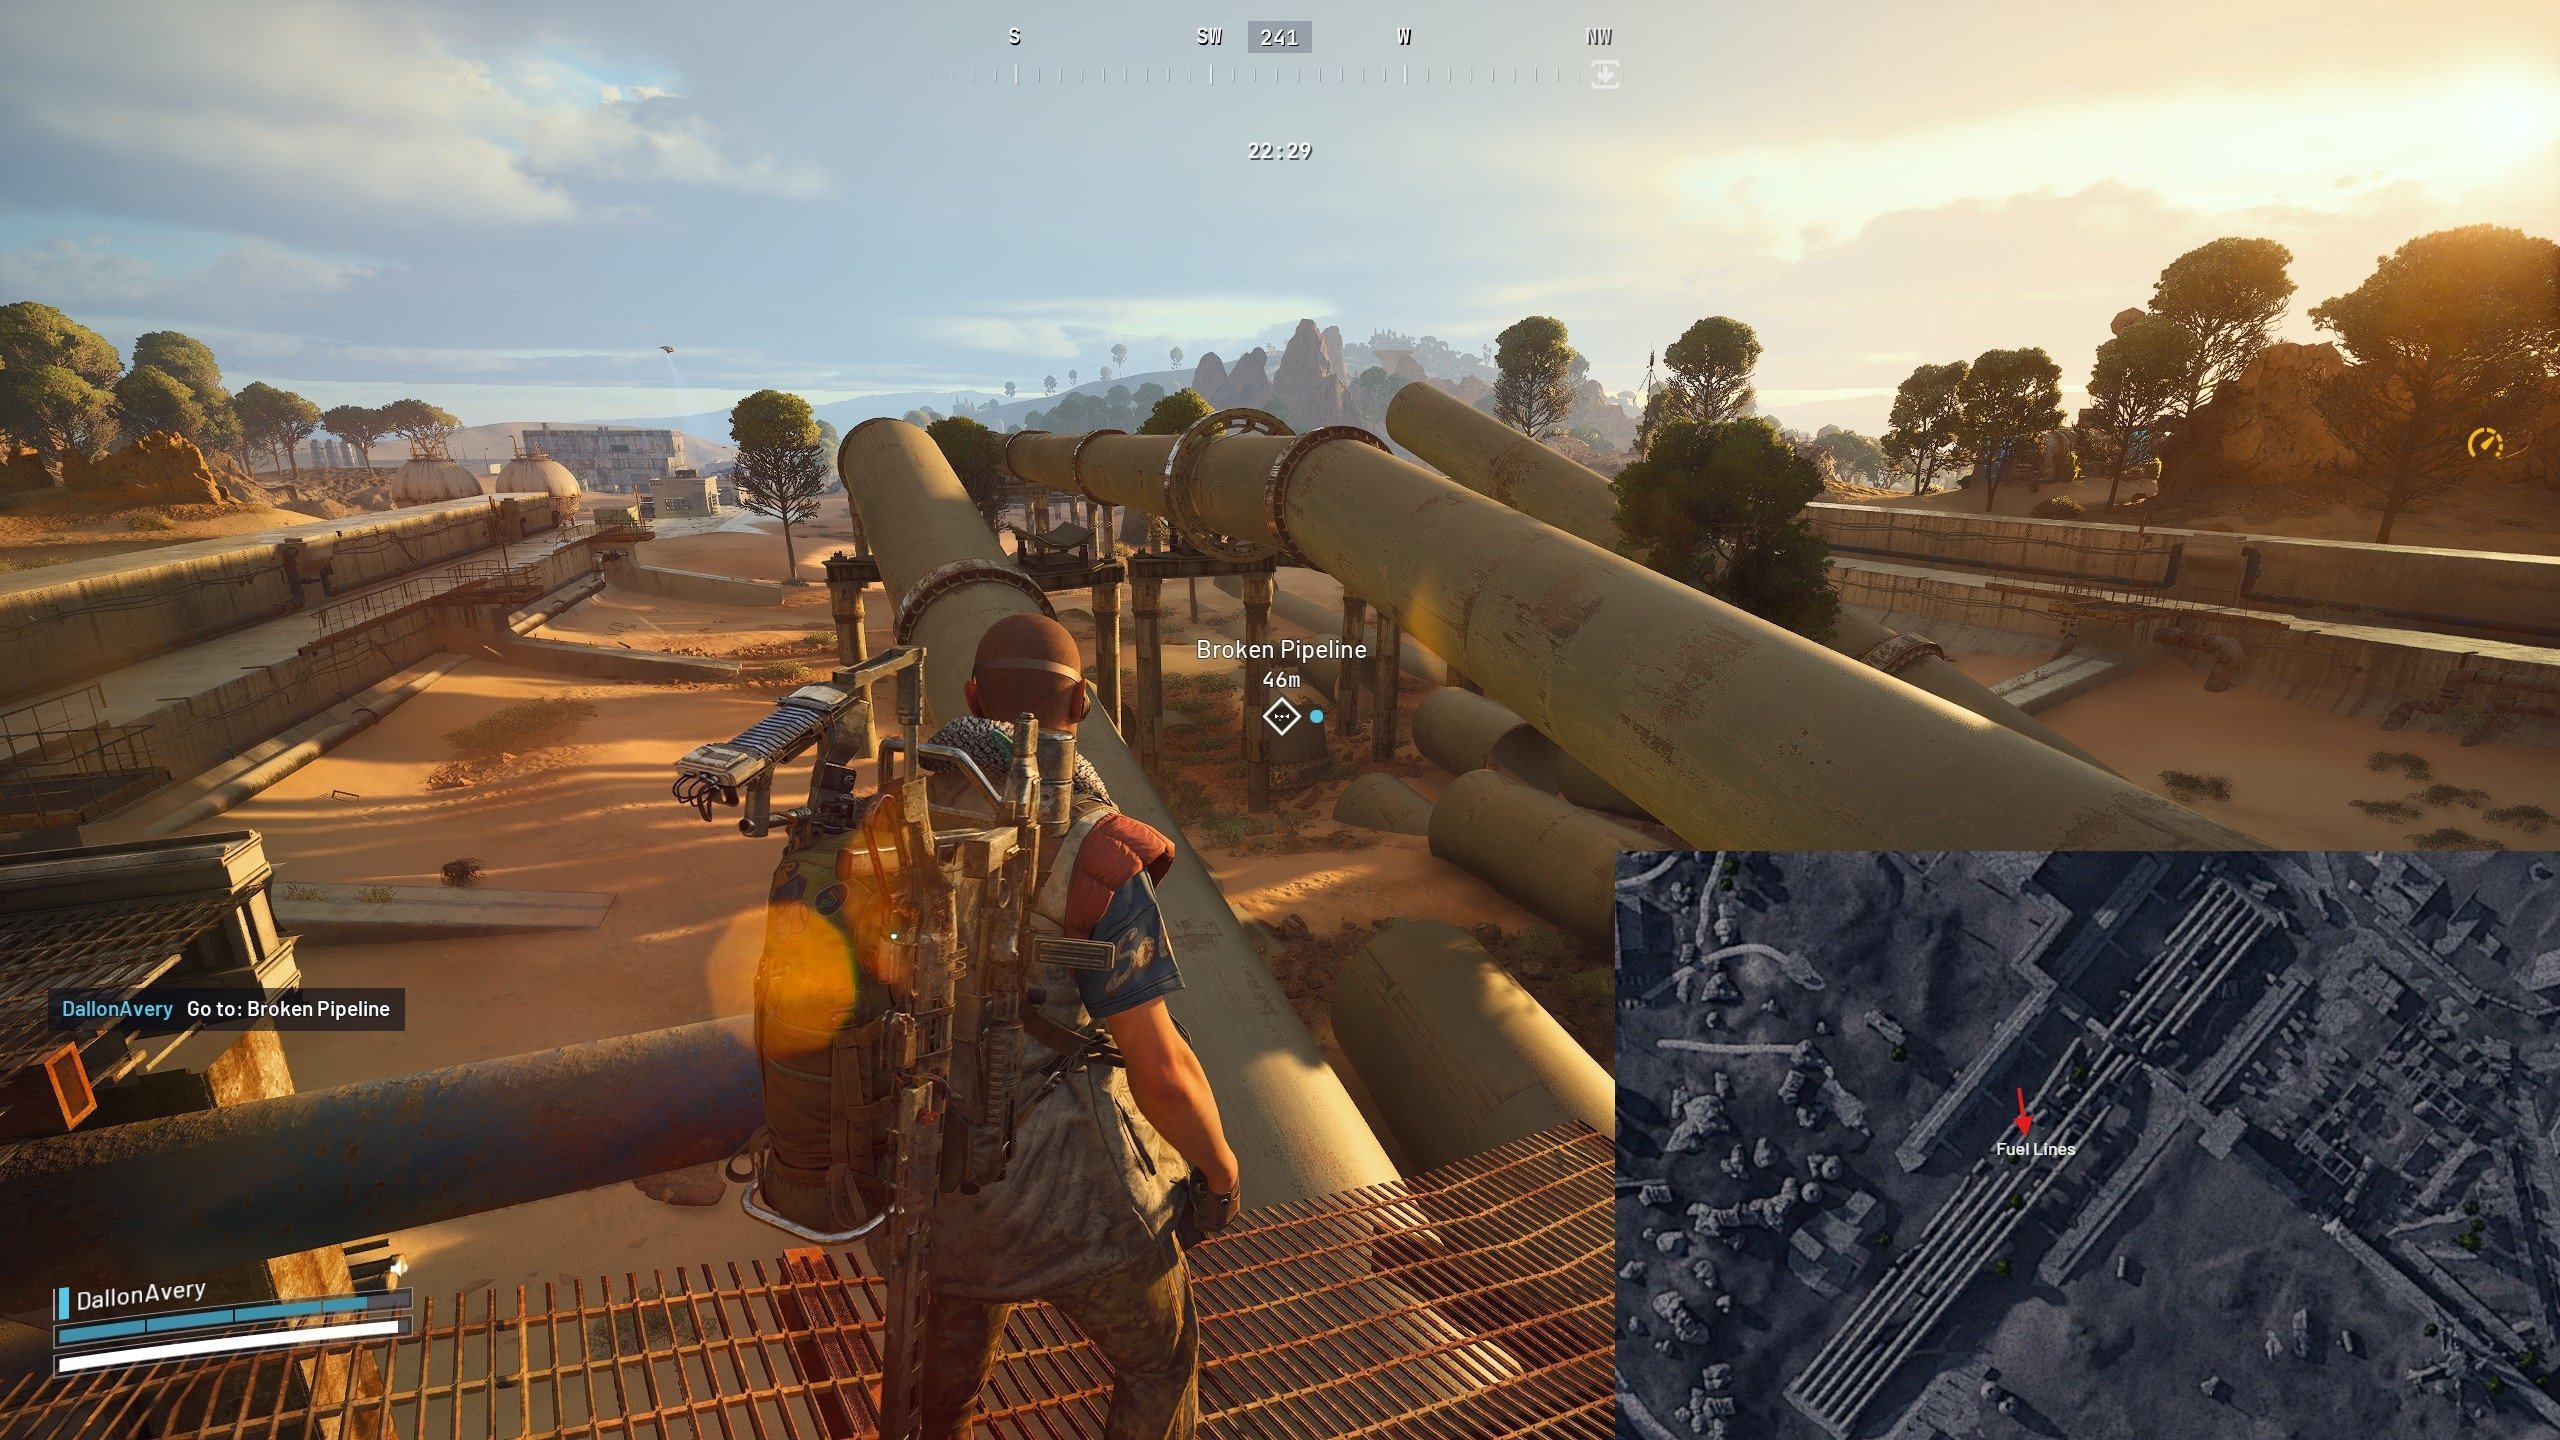
This ARC Raiders Spaceport blueprint location is one of the least known. The Fuel Lines zone runs along the long industrial trench west of Launch Towers, and it contains one of the most overlooked blueprint spots in the entire Spaceport map. Most of the pipes here lie horizontally along the ground, but one distinct vertical pipe stands upright near the center of the area. This pipe has a narrow hollow interior, and a weapon case can spawn inside it, hidden from most players unless they know exactly where to look.
Accessing it takes only a few seconds once you recognize the correct pipe:
- Look for the single vertical pipe sticking up from the otherwise horizontal cluster
- Walk straight into it and vault to pop yourself inside the hollow interior
- Check for the weapon case spawn that appears against the back wall
- Loot and leave quickly — players pass nearby, but almost no one ever checks inside the pipe
This is one of the most consistent blueprint rolls in Fuel Lines, simply because the spawn is so well hidden in plain sight. If you are traveling north–south through Fuel Lines or rotating between Vehicle Maintenance and Departure Building, this pipe is an easy, low-risk stop that often gets you a blueprint before anyone else arrives. BLOG20
Spaceport – Departure Building Staff Bathroom
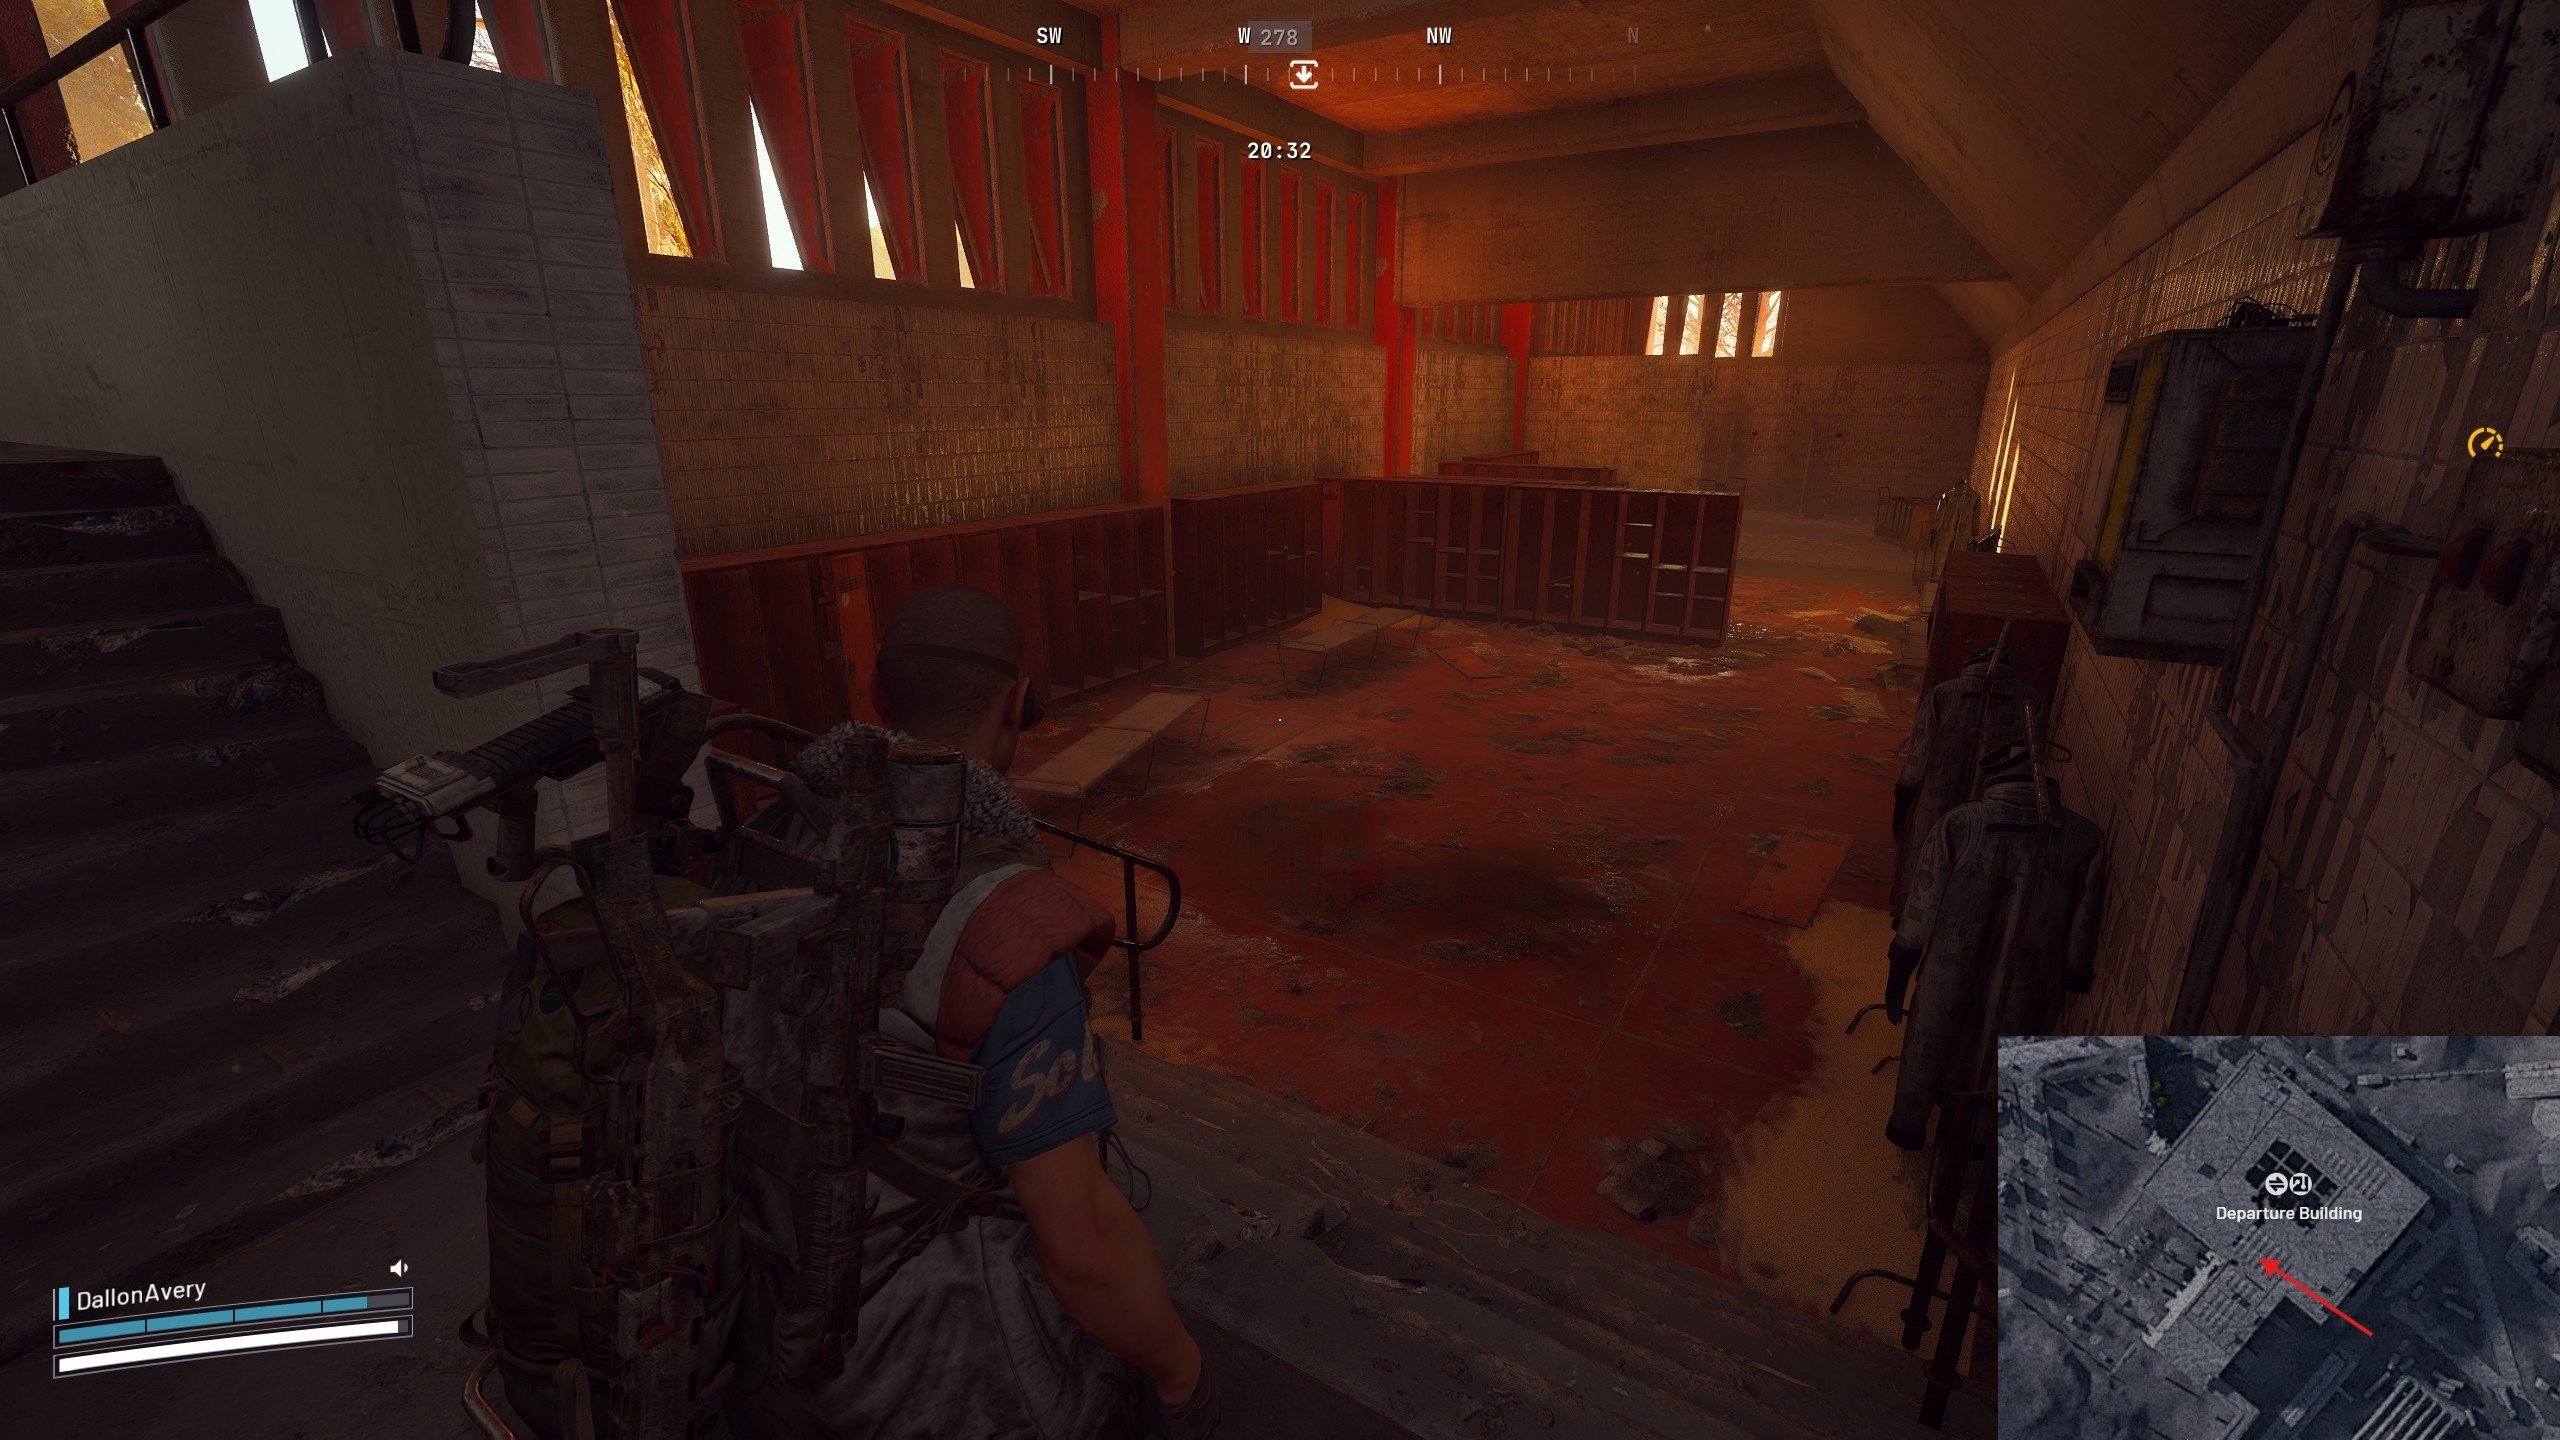
The Staff Bathroom inside the Departure Building is one of the more dangerous blueprint spots on Spaceport simply because of where it sits. The Departure Building is a massive multi-floor POI, packed with players running quests, checking lockers, or rotating toward the Launch Towers. This means the Staff Bathroom will often have footsteps, gunshots, or full squads passing nearby even early into a raid.
Before Patch 1.2.0, the bathroom door opened normally. After the update, it was converted into a breachable door, officially marking it as a high-tier loot room. With that change, the loot inside was upgraded as well, making it a more lucrative but also more contested blueprint opportunity.
Here’s how the spot works:
- Enter the Departure Building from the southwest exterior entrance, staying near the outer edge instead of pushing deep inside
- Just past the entry hall, find the breachable Staff Bathroom door, now marked as a high-value room
- Inside are multiple red lockers, cabinets, and storage shelves, all with boosted loot quality
- A weapon case spawn sits in the back of the room, often appearing inside the shower stall
- Extract quickly, since players frequently check this floor during quests and rotations
The Staff Bathroom remains one of the best blueprint checks on Spaceport thanks to its strong weapon case spawn rate, but its placement inside a popular POI means you should only visit it when you’re confident, well-equipped, or when you’ve confirmed the area is quiet. For low-risk smash-and-grab farming, this spot is high reward but carries significantly more danger than others.
Spaceport – Spaceport Loot Towers
The Spaceport Loot Towers are built directly into the perimeter wall around the central facility, forming the square, elevated guard posts positioned at regular intervals. They’re not marked on the map, but they’re very easy to identify from a distance thanks to their height, their boxy silhouette, and the fact that they interrupt the otherwise continuous wall structure. Every tower in Spaceport shares the exact same internal layout, making them predictable, efficient blueprint spots.
Each tower has three defining elements:
- An exterior face with broken upper windows, which you can see into from the outside and sometimes Snap Hook into directly
- An internal lower doorway on the inside of the perimeter wall, opening into a short hallway
- An internal zipline, which starts on the lower level, passes the mid-level wall corridor, and ends at the top loot room
Because the structure is consistent across all towers, once you’ve mastered one, you’ve mastered them all.
There are multiple ways to reach the top loot room:
- Snap Hook from outside the wall directly into the broken windows at the top (if the angle is workable)
- If the hook can’t reach, Snap Hook onto the perimeter wall itself first, then hook again upward into the tower
- Enter from the inner doorway on the wall side, then take the zipline inside the tower, which leads directly to the top floor
- Alternatively, run along the wall corridor, step inside the tower, and immediately transfer to the internal zipline
Once you reach the top room, you’ll find:
- A weapon case spawn (the main draw for blueprint farming)
- Crates and small containers along the walls
- Occasionally, a security locker (if you have the Security Breach skill)
- Rarely, an automated turret inside the room—so always peek carefully before committing
If you want consistent blueprint rolls with minimal PvP risk on Spaceport, the perimeter Loot Towers are some of the best locations on the entire map.


Spaceport – Arrival Building South Breach Room
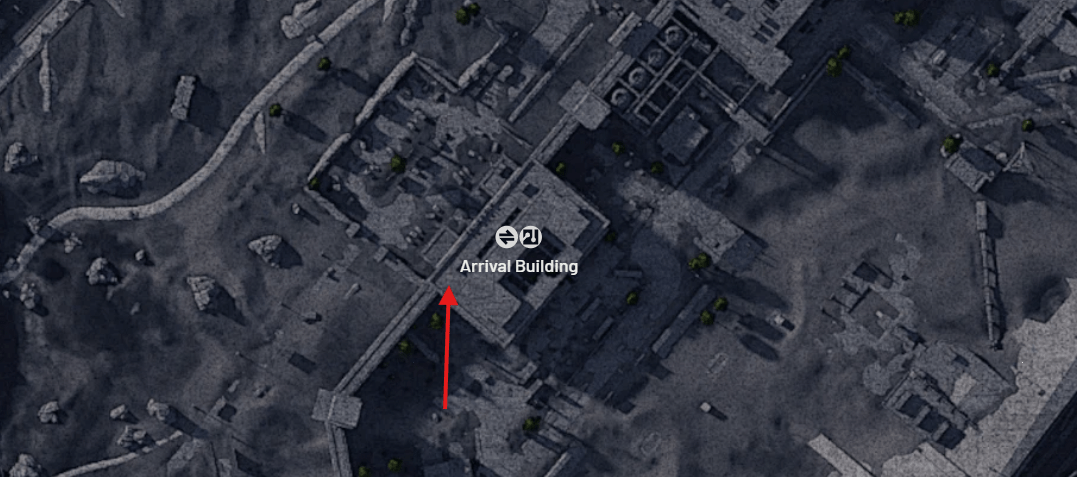
The Arrival Building is another one of the highest-traffic structures on Spaceport, and its South Breach Room sits right on the edge of that activity. The building stands beside one of the perimeter Loot Towers — the tower positioned between the Departure Building and Arrival Building — which already puts it near a natural player rotation path. On top of that, the Arrival Building’s roof is used for one of the Hidden Bunker puzzle dishes, making it a known ambush location. Many players camp the roof or upper windows specifically to catch people attempting the puzzle or rotating between the two major POIs.
Inside the building, the South Breach Room is the most reliable blueprint spot. It’s located on the outer western wall of the Arrival Building, close to the ground-level approach, allowing you to check it without pushing far into the interior. Because the door must be breached, the entire room is classified as high-value loot, which boosts the blueprint chances in every container.
A clean run for this room usually goes like this:
- Approach the west side of the Arrival Building, staying low and listening for rooftop activity
- Locate the breachable door leading into the South Breach Room
- Breach and enter quickly — this room is close enough to common rotations that you may only get a short window of safety
- Check the weapon case spawn on the far desk and the surrounding red lockers for blueprint rolls
Loot the containers, then exit immediately through the door or jump to cover depending on what you hear outside
Because of the Arrival Building’s position between Departure and the puzzle rooftops, this room is almost always riskier than the loot towers or the pipe in Fuel Lines. But the loot quality is consistently high, and the weapon case spawn rate makes it worth checking if you’ve confirmed the exterior is quiet or if you’re already rotating through this lane.
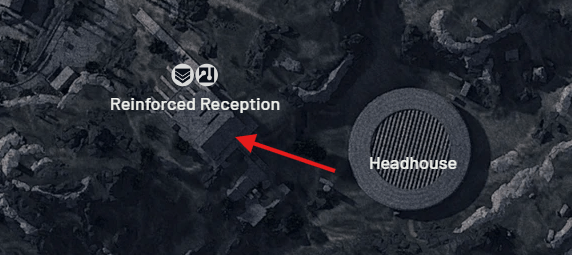
Blue Gate – Reinforced Reception Puzzle Room (Color Terminal Stashes)
This ARC Raiders Blue Gate blueprint location is one of many contained within the underground facility.
The Reinforced Reception feeds directly into the central underground network, which makes it one of the busiest rotation points on Blue Gate. Even with that danger, the color-terminal puzzle here is one of the most consistent high-value loot opportunities on the map. The puzzle is fast, requires no equipment, and can produce top-tier weapons or blueprints if you’re lucky.
Here’s how the puzzle works:
- Ride the zipline down from Reinforced Reception into the underground hub
- Activate the small wall-mounted computer terminal and wait for it to flash its final color
- Match the color to the painted wall markings spread across nearby rooms
- Follow the correct symbol trail to a humming stash panel hidden along the wall
- Loot the stash for high-tier weapons, attachments, and blueprint-friendly containers
- Leave immediately — activating the terminal can alert nearby squads
This is easily one of the best “spawn-and-go” loot checks on Blue Gate. It’s fast, the stash locations rotate between several rooms, and the rewards are worth grabbing even during high-traffic raids.
Blue Gate – Reinforced Reception Breach Room (Lockers + Weapon Case)
Deeper inside Reinforced Reception is a compact breach room stacked with blueprint-capable containers. It’s a strong early-raid target but also one of the first places other players check when moving toward Checkpoint or Warehouse Complex. If you can get in before anyone else, the loot density here is excellent.
Here’s what you’ll find inside:
- A breachable door leading to a small high-value storage room
- Multiple red lockers and standard lockers with boosted rolls
- Black raider containers and utility shelving with higher blueprint chances
- A weapon case spawn point with a strong appearance rate
- Quick access back toward the upper walkways for fast escape
This room is ideal for quick smash-and-grab blueprint farming. The danger comes from its position on a major rotation path, so speed matters more here than anywhere else in the facility.
Blue Gate – Warehouse Complex Vent Stack (Zipline Drop-In Case)
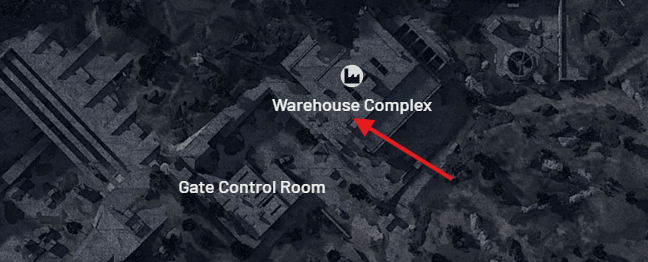
The vent stacks inside the Warehouse Complex are tucked slightly away from the usual player routes, which makes this one of the cleaner blueprint checks in the mid-map region. With the right angle, you can land directly on the vents via zipline and loot without dropping into the chaos below.
Here’s how to hit this spot:
- Approach from the upper catwalks or ridge line above Warehouse Complex
- Take the zipline down toward the large ventilation shafts
- Land on the vent platform partway down the line
- Check for the weapon case on top of the vents
- Loot nearby med bags and grenade containers when they spawn
- Zipline back up or rotate around the roof to extract safely
Because this drop-in is quick and isolated, it’s a great low-risk pickup during early rotations, especially when avoiding the heavy traffic around the outer Warehouse entrances.
There are a lot more locations and puzzles in Blue Gate, but we’re not covering them all today.
Stella Montis – Security Checkpoint (Four Floors)
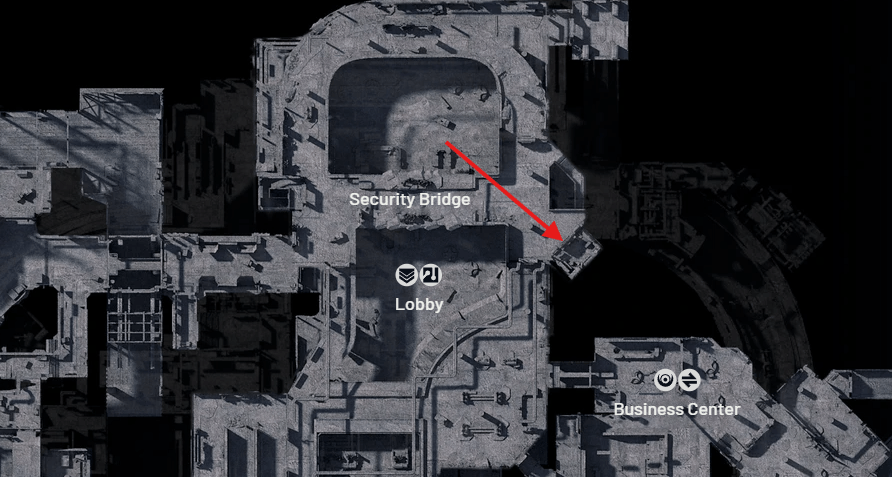
The Security Checkpoint is an ARC Raiders Stella Montis blueprint location, found on the east side of the Lobby inside a yellow-tier loot zone. The entire structure is built vertically around a central staircase with four full floors of rooms, side chambers, and branching hallways. Because every entrance into this area requires breaching, the whole space is marked as high-value from top to bottom. That means higher-tier loot rolls on every container and significantly better blueprint odds than most ordinary rooms in the facility.
What makes this place valuable is not a single container but its density:
- Multiple black raider containers (“blueprint boxes”)
- Possible grenade canisters
- Medical duffel bags
- Ammo crates
- Red lockers and cabinets
- General high-value loose loot scattered throughout
Even if just one or two containers spawn per level, the combined floors create one of the most compact blueprint-rich areas anywhere in the map.
The most important part of the Checkpoint is on the lower floor, where a locked room normally requires a key. Inside, you’ll find:
- A high-probability weapon case spawn
- Multiple black raider containers
- Additional high-value items
This room currently has a two-player clipping exploit, letting you enter without the key. One player sprints into the left corner of the door while another repeatedly jumps into them. The collision pushes them through the doorframe, at which point they can open the door from inside. Until patched, this allows full access to the room’s blueprint-rich loot.
Because Stella Montis is entirely underground, enclosed, and maze-like, there’s no way to avoid players by rotating around the area. You will eventually meet others in the corridors. The good news is that the multi-floor layout of the Security Checkpoint — with its stairs, doors, and branching side rooms — gives you several ways to break line of sight or slip away mid-fight. That vertical layering can often save a run if you know the layout well.
Overall, the Security Checkpoint is one of the most efficient blueprint farming spots on Stella Montis. It offers consistent high-value containers, predictable structure, and a concentration of loot that rivals the Buried City pharmacies or Spaceport’s best breach rooms. If you’re already inside the Lobby or passing through the eastern wing, this is one of the first places worth checking.
Stella Montis – East Lobby Breach Room
On the east side of the Lobby is a compact breach-only room that consistently delivers high-quality loot. Both entrances require breaching, so every container inside benefits from elevated loot rolls. The interior is small but densely packed, making it a quick, efficient stop during any Stella Montis run.
Inside, you’ll typically find:
- Lockers and cabinets with boosted loot
- Possible black raider containers
- Occasional med duffel or grenade canister spawns
- High-tier loose items scattered along the walls
This room doesn’t always spawn a weapon case, but its value comes from how reliably its containers roll high. Even simple lockers here can drop strong attachments or crafting components, and blueprint chances are noticeably better than in ordinary rooms.
Because the room is close to the Lobby and adjacent corridors, other players may pass through while you’re looting — but clearing it is fast. Breach, sweep the containers, and move on. It’s a straightforward blueprint check that rarely wastes time and often pays off.
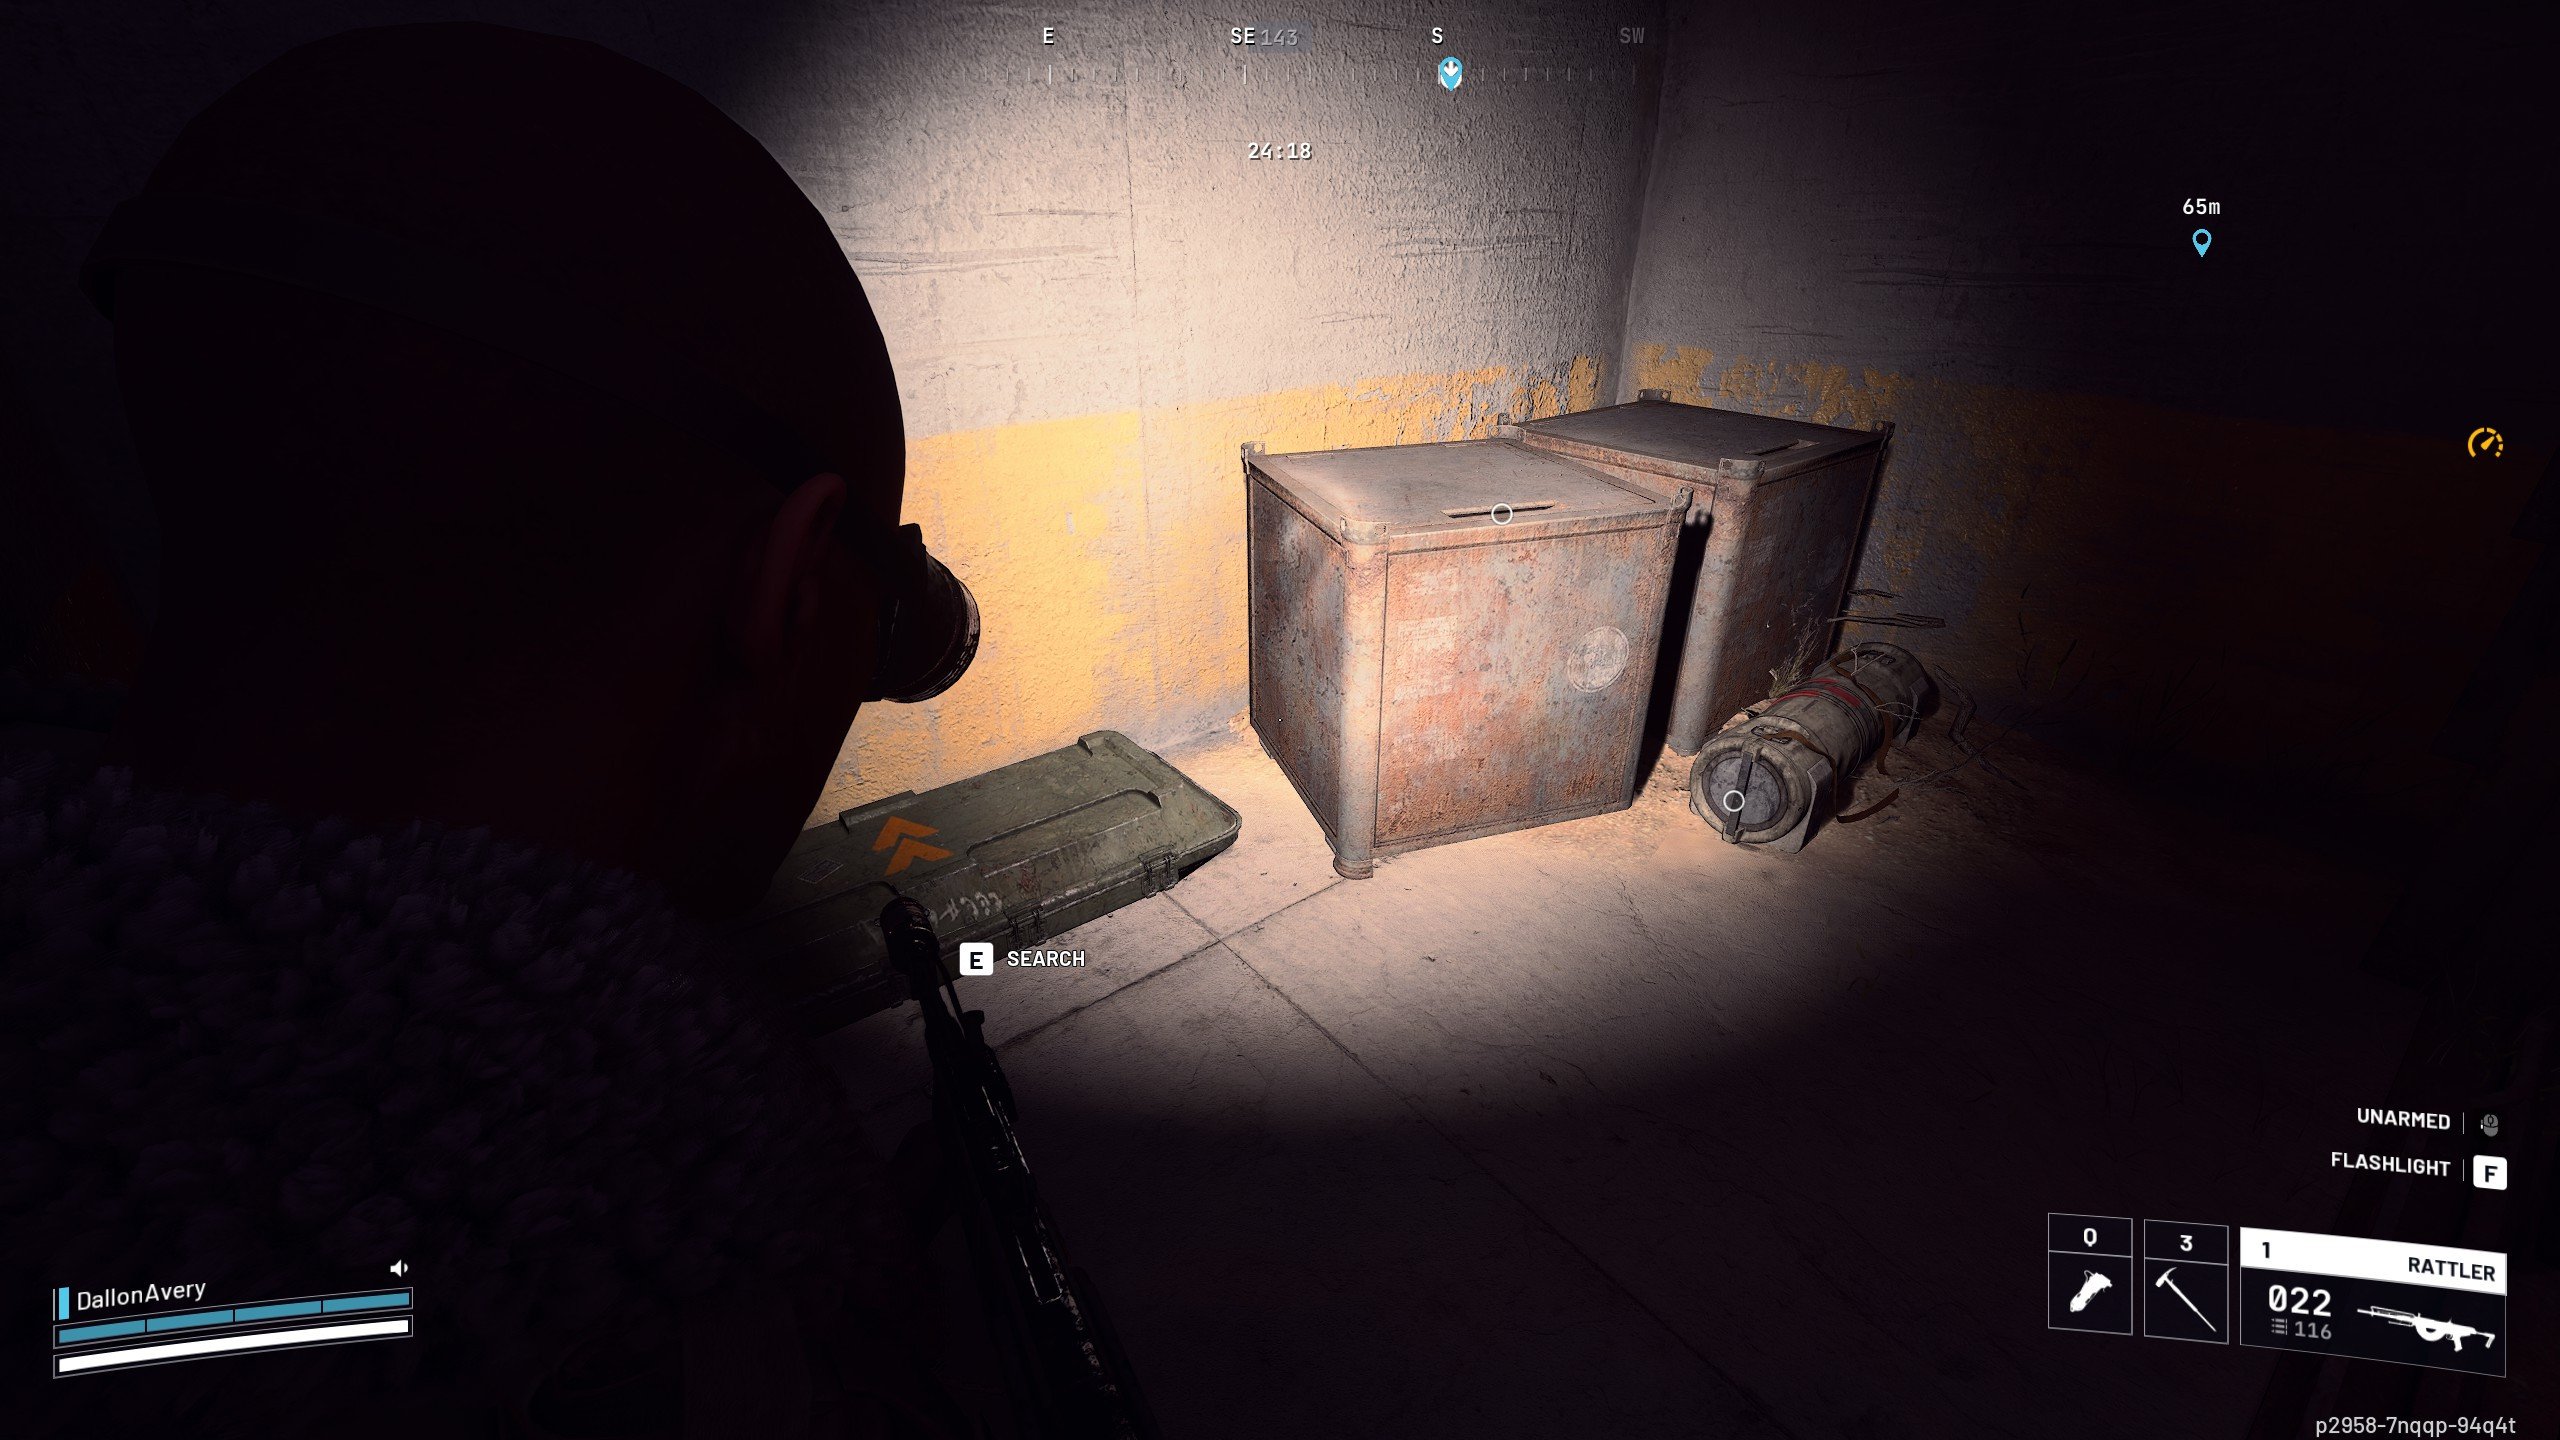
Stella Montis – Exploit Key Room (Temporary)
This locked room sits on the lower floor of the Security Checkpoint area and is meant to require a key, but right now it can be entered without one through a simple two-player clipping trick. Until it’s patched, this makes it one of the most rewarding blueprint spots on the entire map. BLOG20
The room contains:
- A high chance for a weapon case
- Multiple black raider containers (“blueprint boxes”)
- Possible grenade canisters or med duffels
- Strong loose loot scattered around the racks and flooring
The setup is straightforward when you have two players: one sprints into the left corner of the locked door while the other jumps into them repeatedly, forcing them through the doorframe. Once inside, the door can be opened normally from within, letting both players loot freely. Solo players sometimes team up with whoever passes by, but this room is known enough that you may have to compete for it.
Because of its container density and the boosted loot table tied to locked rooms, the key room is one of the strongest blueprint checks you can make in Stella Montis. Just don’t rely on it long-term — once it's fixed, only players with the correct key will be able to enter.
ARC Raiders Blueprint System Explained: What Players Don’t Realize
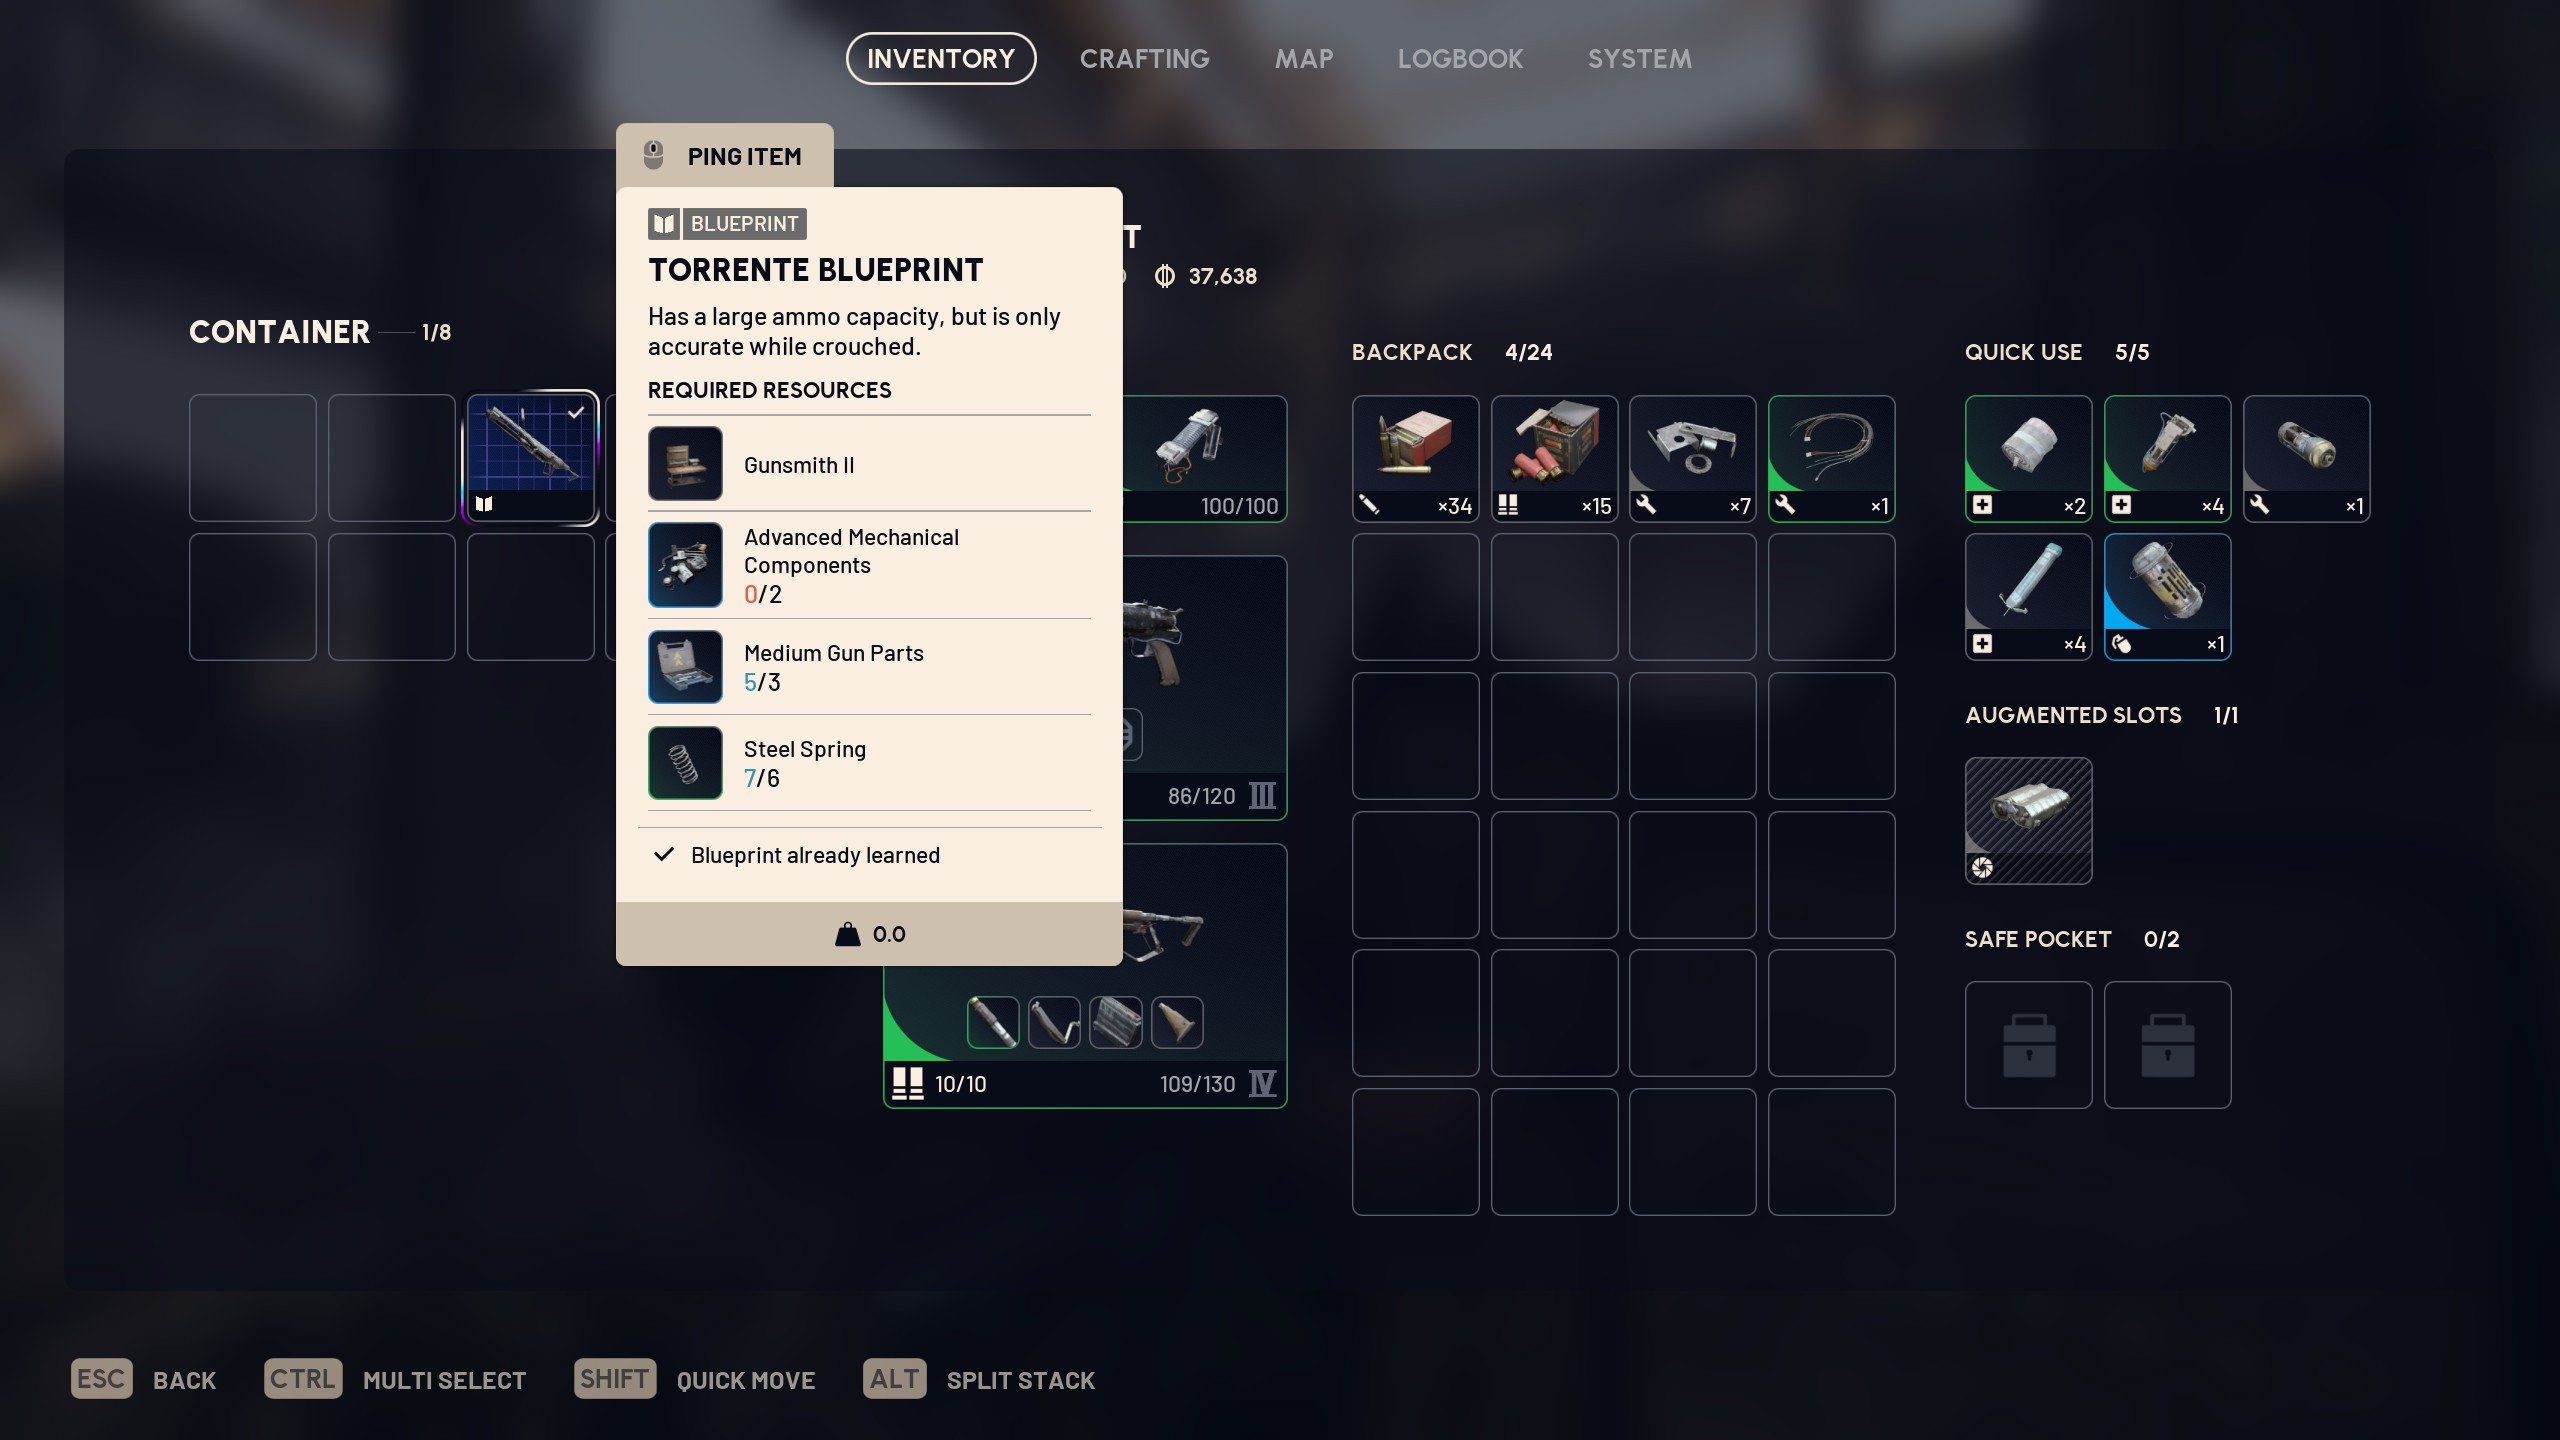
Blueprints are some of the rarest items in ARC Raiders. Even in the “good” containers, they still drop infrequently, and that gap between runs is exactly why the community is full of myths and half-truths about how they work. This section is here to make one thing clear: outside the devs and hard data, most of what people claim is certainty is just pattern-reading on top of RNG.
What we actually know is simple. Blueprints can drop from almost any container, but the base chance is extremely low. The only reliable way to improve your odds is to open containers that roll from higher-tier loot tables. The game does this in a few very consistent ways: rooms that require a breach, a key, a puzzle solution, or awkward parkour access are treated as “high value,” and everything inside them rolls better loot, including blueprints.
Within that layer, some container types are clearly better than others. Weapon cases are the standout; when they spawn, they have noticeably higher blueprint odds than normal crates or lockers. Raider-marked containers are in the same boat: things like raider caches, the black “blueprint boxes,” grenade canisters, and med duffels all sit above standard containers. Raider caches are especially worth hunting, since they’re fixed to potential spawn points and can be tracked by their ticking sound once you tune your audio (Night Mode helps a lot here).
Where most of the confusion starts is when players try to assign hard rules on top of this. You’ll see claims like “this blueprint only drops on this map” or “this gun only comes from this one container type.” The evidence for that just isn’t there. People have found the same blueprint in different containers on different maps. Hidden weighting might exist, but there is no consistent, community-verified pattern that says a specific item is locked to a specific container or location.
There are only a few confirmed exceptions, and those are the ones explicitly tied to other systems. Some examples:
- Quest-locked blueprints: lure grenades, trigger grenades, Hullcracker and its ammo
- Event-locked blueprints: Jupiter and Equalizer from solving the Harvester activity
- Trials rewards: any Trials reward tier has a chance to be a blueprint
Everything else is random. You can improve the quality of your rolls by targeting breach rooms, key rooms, puzzle rooms, weapon cases, and raider containers, but you cannot force a specific blueprint from a specific crate just because someone once saw a drop there.
One last misunderstanding is map favoritism. Players love to believe that a new map is “the blueprint map.” Current experience simply doesn’t back that up. No region is secretly juiced; some maps just give you more access to high-value containers per minute. If you’re opening more breach rooms and more weapon cases in a single run, your blueprint income goes up, but that’s volume, not a hidden drop-rate buff.
ARC Raiders Blueprint Farming Tips & Tricks

Blueprint farming becomes much easier once you focus on habits that consistently create more high-value loot rolls. You can’t control what blueprint drops, but you can absolutely control how many good containers you open per run — and that’s what actually improves your results over time.
Here are the ARC Raiders blueprint farming tips that matter the most:
- Prioritize breach rooms, key rooms, puzzle rooms, and parkour-only entries since these always pull from higher loot tiers.
- Hit every weapon case spawn you pass; even low-percent spawns are worth checking because weapon cases have the strongest blueprint rates in the game.
- Always listen for raider caches and enable Night Mode audio so the ticking sound carries farther.
- Don’t ignore ARC Surveyors. They can drop blueprints despite community debate, but only if you manage to kill them before they roll away. Stun tools like Showstopper grenades, Snap Blast grenades that stick to ARC plating, or high-damage openers like Wolfpack and the new Seeker Grenade make the fight manageable.
- Keep a lightweight “smash-and-grab” kit for quick raids where you sprint to one or two high-value rooms and extract immediately.
- Bring a Looting Mark II augment when possible so you can pocket multiple blueprints safely before leaving.
- Learn the reliable spawn spots for med duffels, grenade canisters, black raider boxes, and other raider-marked containers across every map.
- Avoid pointless fights and detours; every minute spent fighting instead of looting reduces your total blueprint rolls.
- Extract as soon as you secure a blueprint you want — greed loses more blueprints than bad luck.
- Use mobility boosters like adrenaline shots or quick movement routes to reach contested rooms before other players.
- Complete weekly Trials since each reward tier has an independent chance to drop a blueprint.
Farming blueprints are all about volume and efficiency. The more high-value containers you reach per raid, the more often you’ll see rare items appear. These habits keep you focused on the containers that matter and help you get consistent progress without relying on luck alone.
Conclusion
Finding a blueprint is one of the best feelings you can get in this game, right after defeating a squad of enemies in a firefight or bringing down one of those bigger ARCs. The thing about them is that it doesn't even matter if you level up your crafting stations to the max, which seem like the true endgame progression goal at first glance. Those upgrades don't unlock that many new recipes. Hell, you can't even craft the Anvil revolver without a blueprint, not to mention the Torrente machine gun or any of the tier-3 augments.
That's why it’s best to try and memorize these locations by running through them a couple of times, making a habit for yourself to check those places anytime you're passing by, even at the cost of leaving less and less mystery and excitement of discovery in this game.
F.A.Q.
Do blueprint drop rates change after updates?
Sometimes, the developers adjust the blueprint drop rates based on their balancing data. Lately, the overall chance of getting a blueprint has increased.
Where to get specific blueprints in ARC Raiders?
You can't get specific blueprints in any way, unless it's a known quest reward. Even if there's a 100% of a blueprint drop, the exact blueprint is always random and includes those you already learnt.
How many blueprints are in ARC Raiders?
There are technically 75 blueprints, even though the in-game counter shows 74. The Hullcracker and Launcher Ammo blueprints are combined into one entry.
How to farm blueprints in ARC Raiders?
Focus on breach rooms, key rooms, puzzle rooms, weapon cases, and raider-marked containers. Hit several high-value spots per raid and extract as soon as you secure a blueprint you care about.
What are the best places to find blueprints in ARC Raiders?
Look for areas with:
- Breachable doors
- Weapon case spawns
- Raider caches
- Med bags, grenade tubes, black raider boxes
- Puzzle rooms or parkour-only entries
What to do with already learned blueprints in ARC Raiders?
You can sell duplicate blueprints for 5,000 Coins each. There’s no way to reuse or convert them into anything else.
Can you get blueprints from vendors in ARC Raiders?
No. Vendors do not sell blueprints. All blueprints come from loot containers, ARC Surveyors, quests, Trials rewards, or special events.
Are there any guaranteed ways to get blueprints in ARC Raiders?
Only a few:
- Hullcracker + its ammo come from quests
- Trigger ’Nade and Lure Grenade are quest rewards
- Jupiter and Equalizer blueprints are guaranteed from the Harvester event when you complete its puzzle
Everything else is purely chance-based.


