Dallon Avery
Welcome to the Isle of Night raid guide, adventurers! The long-awaited second raid in the game is a tough challenge that requires the maximum level, which has been extended to 70, and a full stack of 10 players in a raid party. But trust us – there’s a good reason for it. You don’t want to go in there unprepared.
In this guide, you’ll learn everything you need to know about the raid. We’ll cover the raid’s location, structure, and full boss list, followed by a complete breakdown of every encounter. You’ll also find a full loot table, armor sets, and all the rewards you can earn inside.
If you want to skip the grind and get your rewards faster, check out our Isle of Night Raid Boosting Service to secure rare drops, tokens, and crafting materials efficiently!
Read our other New World guides:
Note: At Skycoach, you can Buy New World Boost at the best prices with fast delivery. Use our special PROMO CODE (in green) hidden in this article for a 20% DISCOUNT.
Browse our hottest New World Boosting services


What is the Isle of Night in New World?

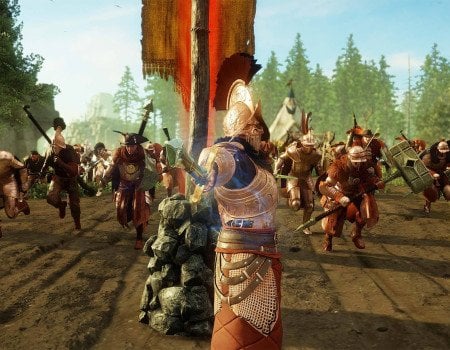
The Isle of Night is a 10-player endgame raid introduced with Season 10: Nighthaven. In this new adventure, players face Commander Thorpe, who has returned, wielding a mysterious relic capable of corrupting Aeternum.
This raid features almost one hundred items in its loot table, but it also challenges players with brand-new twisted mechanics, which will be described later on in this guide. For now, let’s find out where is the Isle of Nightis and how to get there.
Isle of Night Location
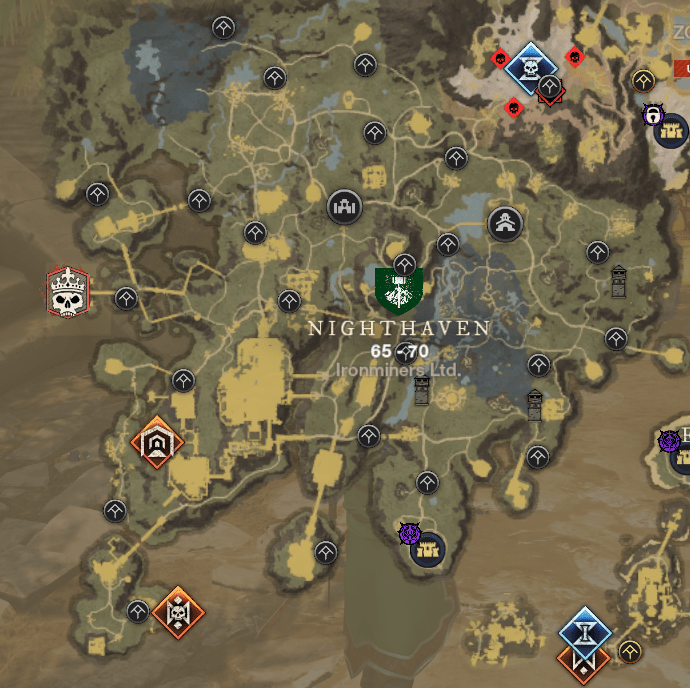
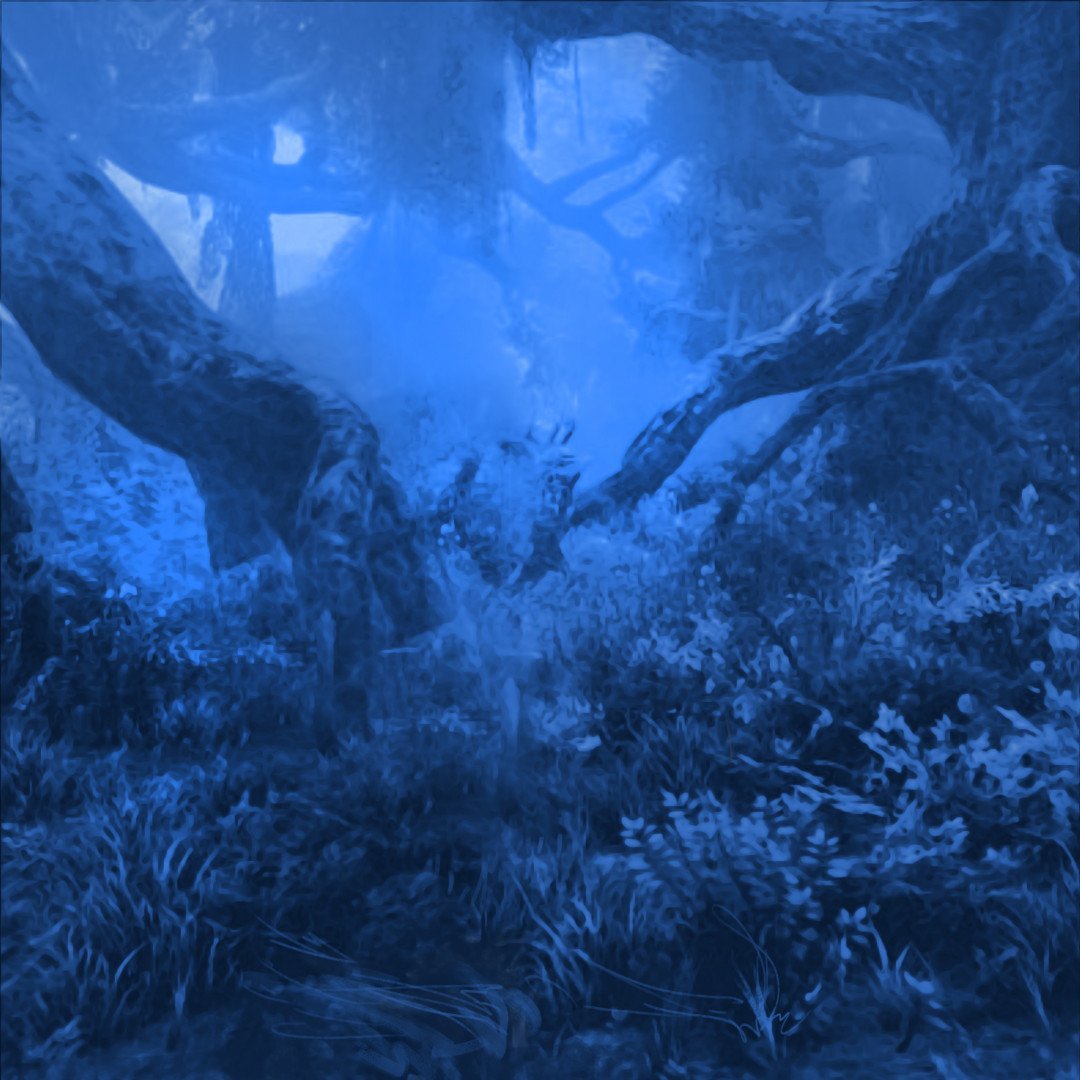
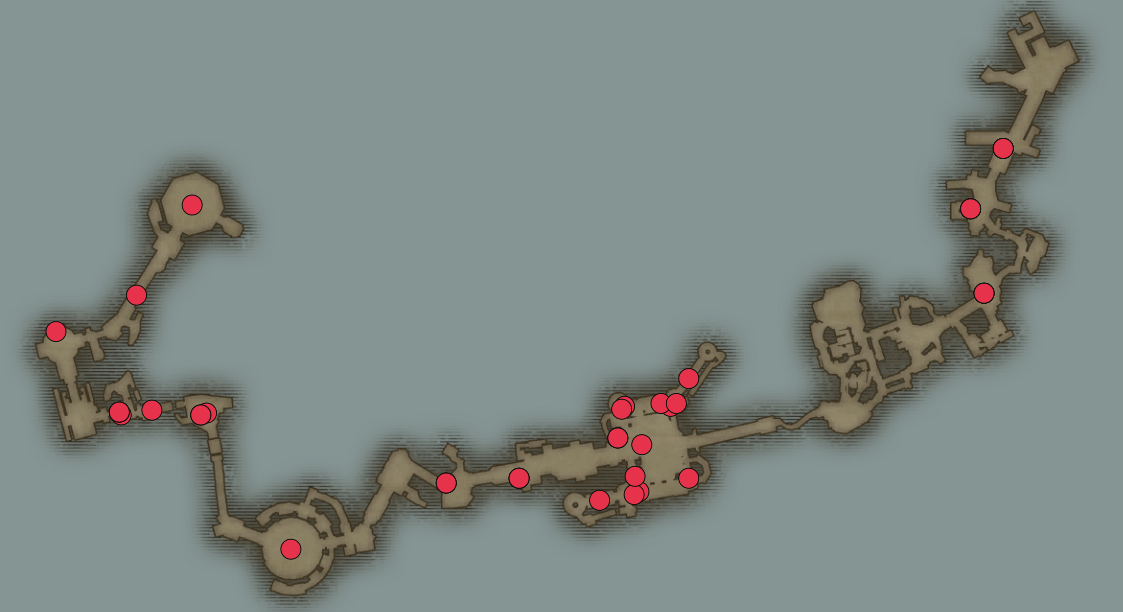
The Isle of Night location is obviously in the Nighthaven zone — a new region covered in mist and steeped in dark energy. The raid entrance can be found near the coastline, accessible via the Group Finder or by physically traveling to its marked entrance on the map. The closest fast travel point is called the Church of Grivaros, which sits at the edge of the shoreline, surrounded by thick mist and corrupted terrain — a fitting gateway to the dark domain where Commander Thorpe has taken refuge. In case you want to RP-walk into the entrance with your group.
Or simply look for Nighthaven’s southmost orange icon with a skull on it if you prefer the Isle of Night location map.
 Entry requirements:
- Minimum Level: 70+
- Minimum Players: 6 (up to 10)
- Must be in a raid group
Now that you know how to get to the Isle of Night raid and you have your team gathered, it’s time to introduce you to the bosses.
Isle of Night Bosses List
Note: This section is "Work in Progress". We'll update it once we beat the raid ourselves!
The raid is divided into several areas, each ending with a unique boss encounter. Every boss introduces new mechanics that demand teamwork and adaptability.
There are three Isle of Night bosses in the Isle of Night raid:
- Boss 1: Twin Jesters – a twisted amalgamation of two clownish bodies fused together.
- Boss 2: Dahut, YS Heiress – a fight with the Heiress and her loyal Palatine Guards.
- Overlord Thorpe – The final fight of the raid, featuring the hardest mechanics and most powerful loot.
We’ll expand this section with full boss mechanics once data becomes available.
Isle of Night Loot Table
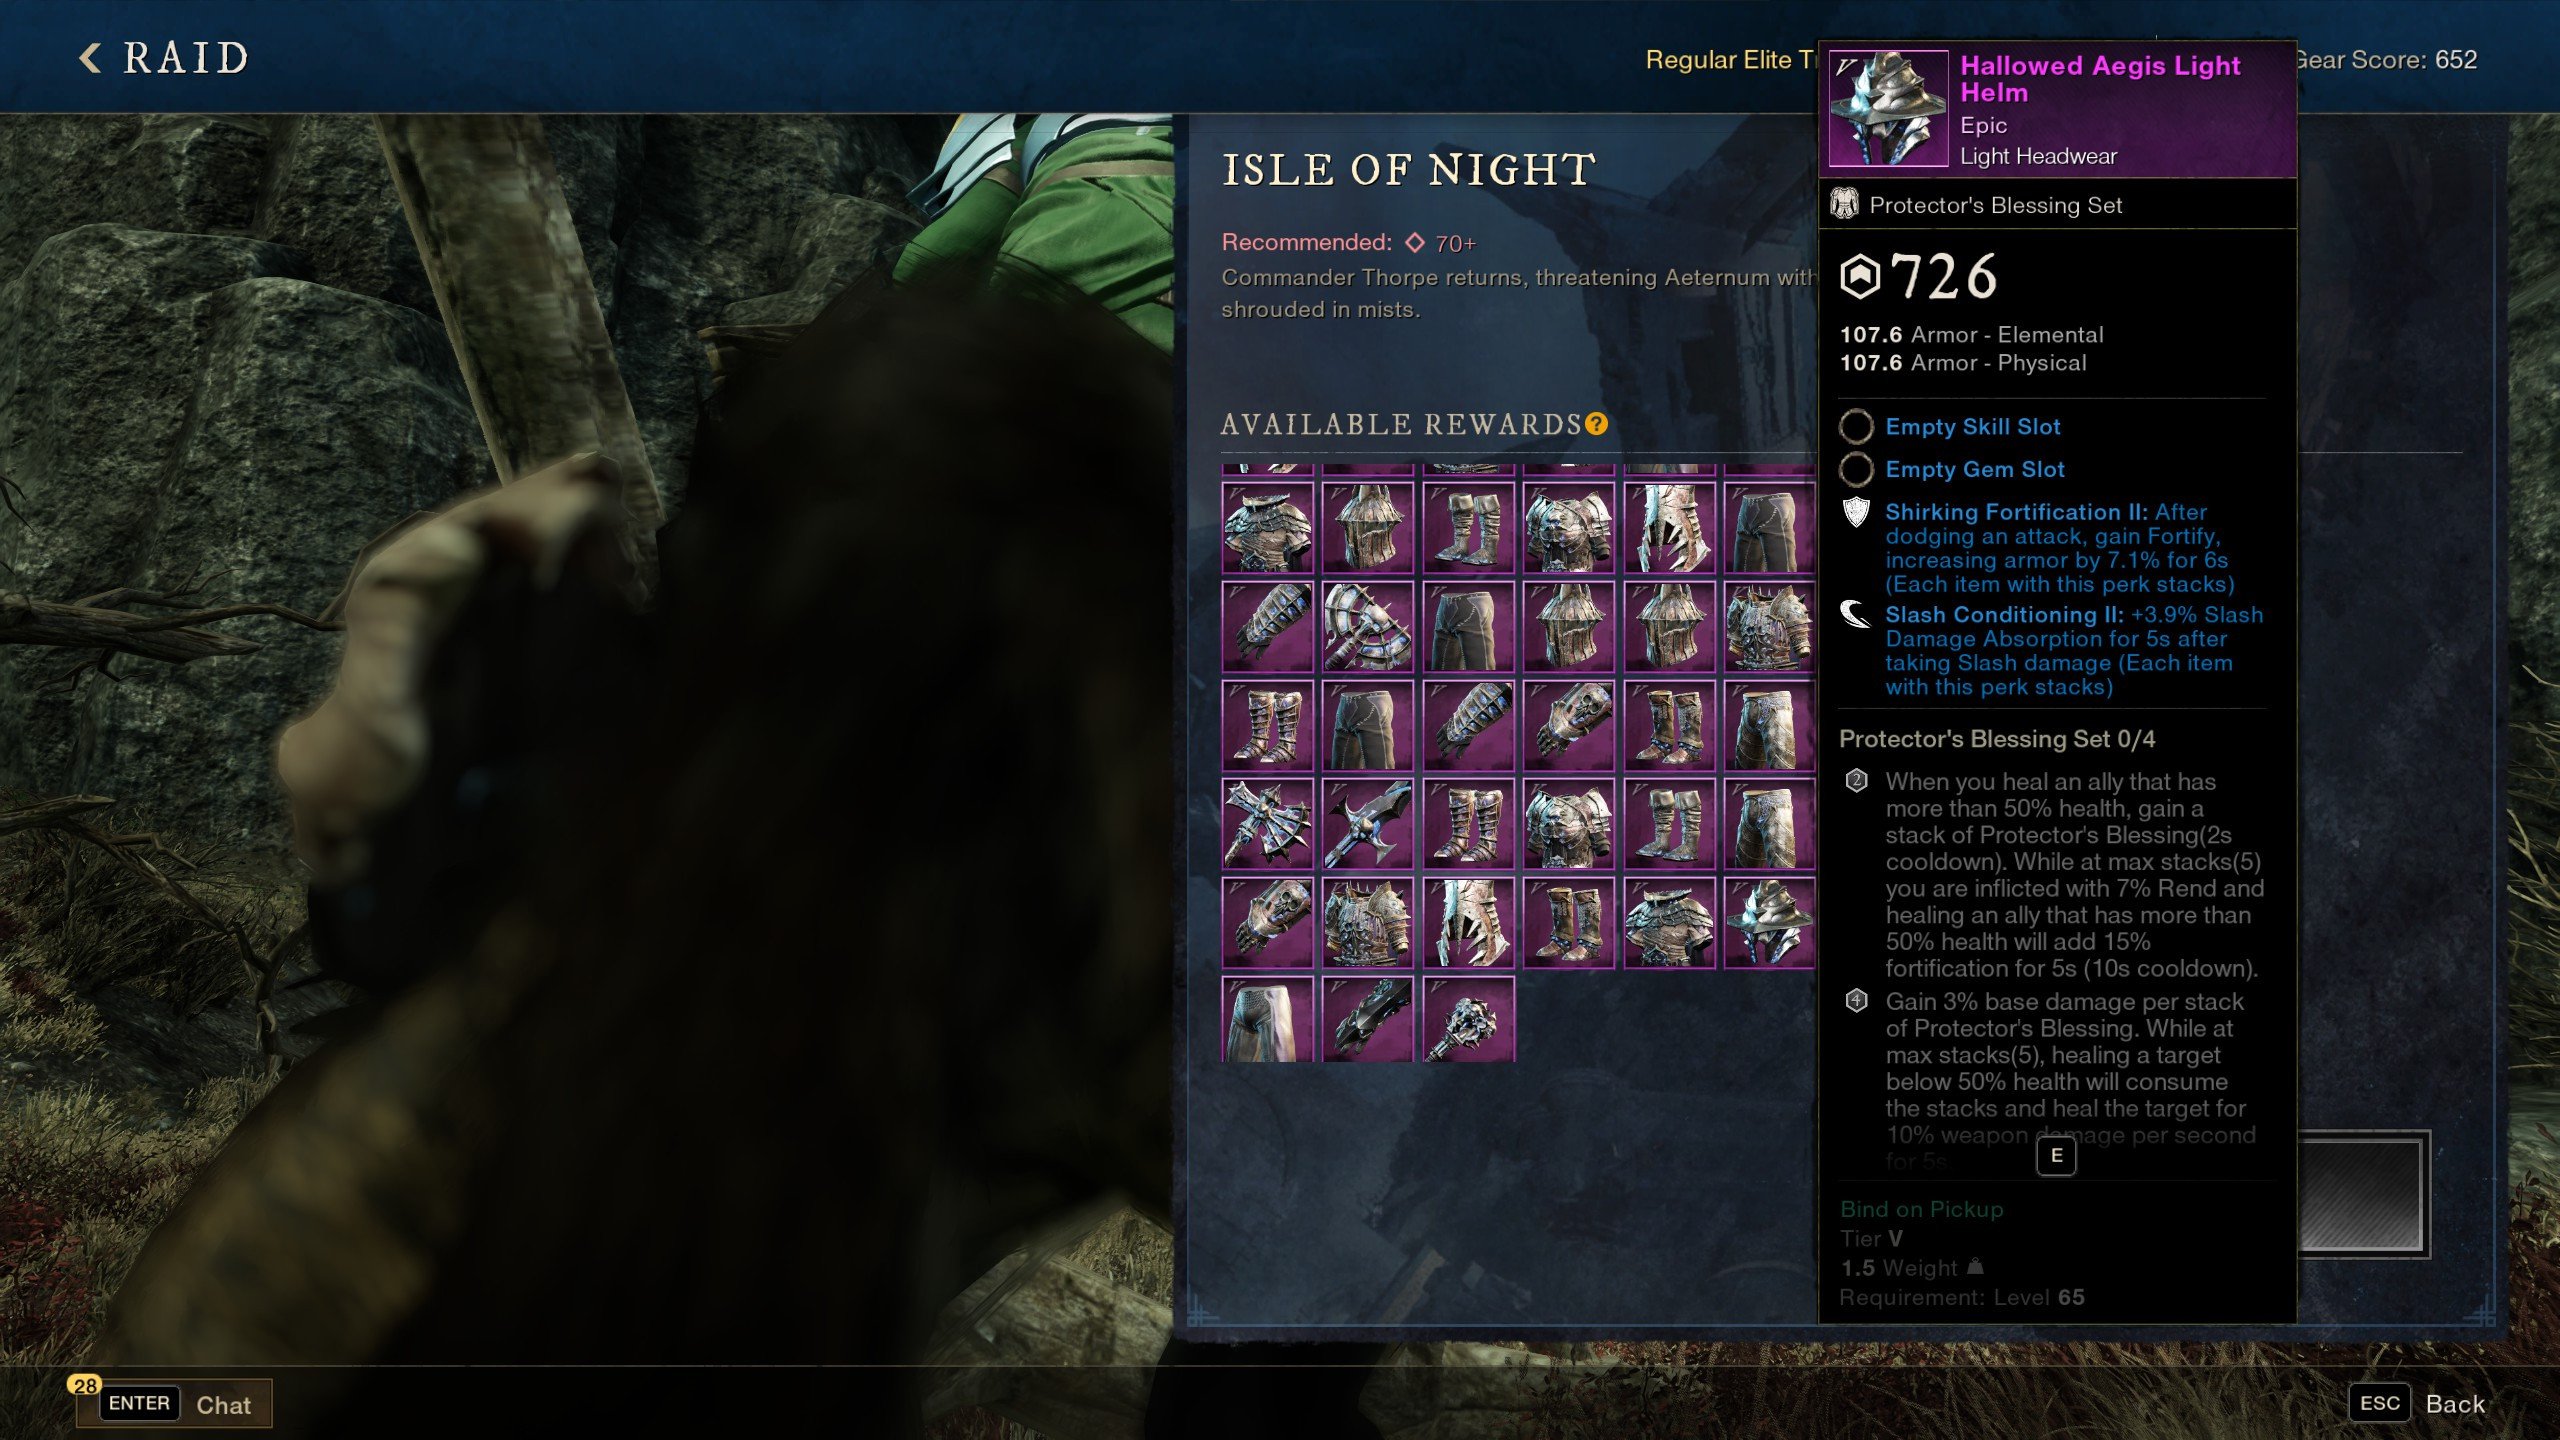
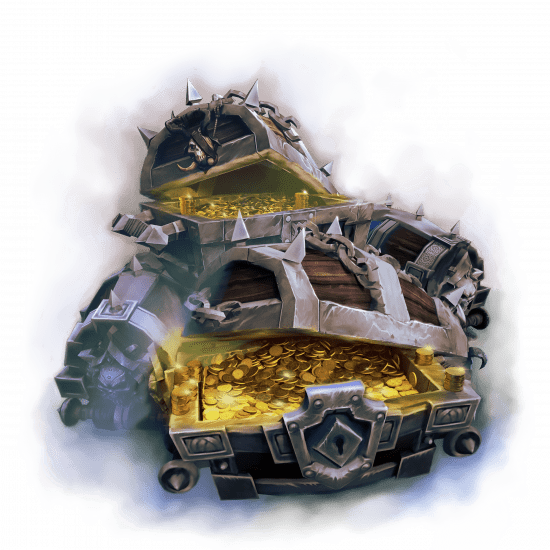
Isle of Night loot table has almost 100 entries, so you know it’s worth your time to try and beat the whole thing. You’ll find gear with up to Gear Score 800, alongside crafting reagents, tokens, and relic shards used for artifact progression. BLOG20
Each boss in the raid drops specific weapons, accessories, or armor pieces tied to one of two major raid sets — Spectral Wrath (Enrage Set), Dreadwarden’s (Second Wind Set), and Hallowed Aegis Set (Protector’s Blessing Set). Repeated clears are encouraged, as each encounter favors distinct loot pools that suit different playstyles. Here is just a taste of Isle of Night drops that you can earn:
| Item Name | Item Type | Drop Source | Special Features |
| Spectral Wrath Light Helm | Light Armor | ??? | Enraged Refresh (reduces cooldowns via Enrage), Sacrificial Empowerment II, Lifestealer’s Draught II |
| Spectral Wrath Rapier | Weapon (Rapier) | ??? | Shredding Backstabs, Rogue Fleche II, End II |
| Spectral Wrath Spear | Weapon (Spear) | ??? | Critical Storm, Compounding Perforate II, Trenchant Crits II |
| Spectral Wrath Flail | Weapon (Flail) | ??? | Empowering Heal, Mending Vortex II, Resurgence II |
| Spectral Wrath Fire Staff | Weapon (Fire Staff) | ??? | Chain Lightning passive, Empowering Burnout II, Sundering Stacks II |
| Spectral Wrath Life Staff | Weapon (Life Staff) | ??? | Chain Lightning, Unstoppable Divine Embrace II, Resurgence II |
| Spectral Wrath Void Gauntlet | Weapon (Void Gauntlet) | ??? | Chain Lightning, Putrefying Scream II, Critical Suppression II |
| Spectral Wrath Amulet | Jewelry (Amulet) | ??? | Keen II, Skilled Enchantment II, Stop, Drop, and Roll II |
| Spectral Wrath Ring | Jewelry (Ring) | ??? | Enraged Leech, Enchanted II, Unscathed Empowerment II |
| Spectral Wrath Earring | Jewelry (Earring) | ??? | Vicious II, Keen II, Refreshing Move II, Nimble II |
| Dreadwarden’s Sword | Weapon (Sword) | ??? | Skilled Enchantment II, Empowering Leaping Strike II, Desperate Empower II |
| Dreadwarden’s Hatchet | Weapon (Hatchet) | ??? | Enchanted II, Compounding Torrent II, Desperate Empower II |
| Dreadwarden’s Great Axe | Weapon (Great Axe) | ??? | Skilled Enchantment II, Intangible Charge II, Desperate Empower II |
| Dreadwarden’s Warhammer | Weapon (Warhammer) | ??? | Skilled Enchantment II, Crippling Mighty Gavel II, Desperate Empower II |
| Dreadwarden’s Musket | Weapon (Musket) | ??? | Enchanted II, Stopping Power II, Desperate Empower II |
| Dreadwarden’s Bow | Weapon (Bow) | ??? | Enchanted II, Shattering Penetrating Shot II, Desperate Empower II |
| Dreadwarden’s Fire Staff | Weapon (Fire Staff) | ??? | Skilled Enchantment II, Empowering Burnout II, Desperate Empower II |
| Dreadwarden’s Amulet | Jewelry (Amulet) | ??? | Well-Being II, Stop, Drop, and Roll II |
| Dreadwarden’s Earring | Jewelry (Earring) | ??? | Refreshing Toast II, Refreshment II |
| Dreadwarden’s Ring | Jewelry (Ring) | ??? | Relentless Second Wind, Enchanted Skills II |
That isn’t even all Isle of Night loot. You can also obtain Isle of Night Tokens, Chromatic Seals, and Relic Shards from raid completions. These materials are used to upgrade artifact-tier equipment or craft set-specific enhancements tied to Season 10’s endgame progression.
Isle of Night Tier Sets List


No raid would be complete without its own signature armor sets, and this one introduces three powerful themed Isle of Night armor set collections. Each set offers unique bonuses suited to different playstyles, from raw offense to dedicated support.
- Spectral Wrath Set (Enrage Set) – Focused on relentless offense, this set builds stacks of Enrage to boost outgoing damage. However, it also increases damage taken, rewarding aggressive and risky playstyles. Includes weapons, jewelry, and armor pieces across all weight categories.
- Dreadwarden’s Set (Second Wind Set) – A hybrid endurance set built around stamina management. It enhances damage, healing, and mobility while exhausted, granting temporary Empower, Haste, and lifesteal bonuses for players who stay active in combat.
- Hallowed Aegis Set (Protector’s Blessing Set) – A defensive and supportive set designed for tanks and healers. Healing allies or dodging attacks grants Fortify and Protector’s Blessing stacks, providing powerful group sustain and extra resilience in long fights.
Each of these armor sets comes in Light, Medium, and Heavy variants, allowing players to tailor their builds while maintaining the visual identity and gameplay bonuses tied to each theme.
Isle of Night Bosses Guide – New World Aeternum
Note: This section is "Work in Progress". We'll update it once we beat the raid ourselves!
Twin Jesters Boss Guide
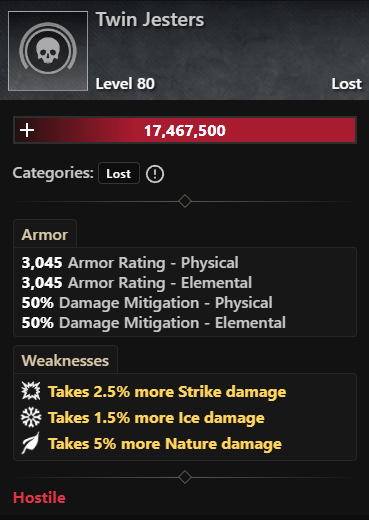 The Twin Jesters are the first boss of the Isle of Night raid. Despite the plural name, they are a single Lost entity — a fused pair of corrupted performers who once entertained Aeternum’s nobility.
Now, they twist their dual voices into a mocking chorus that scorches intruders within their “stage.” This fight unfolds across multiple arenas, blending fast-paced combat, add control, area transitions, and explosive hazards. It’s a long encounter where group coordination is critical at every step.
Phase 1 – Opening Attacks
The fight begins in the lower courtyard arena, where the Jesters perform their opening act with sweeping melee attacks and teleport strikes. The tank must engage quickly to stabilize aggro while ranged DPS spreads out around the arena’s edge.
- Swipe Combo: A double cleave ending with a slam that leaves a short lingering fire pool.
- Teleport Burst: The Jesters vanish and reappear near a random player, releasing a shockwave that must be dodged or blocked.
- Smoke and Mirrors: A haze effect reduces visibility and signals a short reposition or add wave.
- Add Spawns: YS Carcass and YS Woodcutter Lost adds begin appearing early, reinforcing the boss’s attacks with slow but heavy hits.
Players should keep the center of the arena clear to prepare for the first Burning Ring mechanic.
Phase 2 – Clone Phase
Around 80–75% health, the Jesters summon the Hapless Naga. This large serpent-like add marks the end of the first arena.
- Hapless Naga: Performs wide frontal slashes and a spinning tail attack that knocks players down.
- Add Coordination: Kill it immediately, as the next mechanic triggers after its death.
Once the Naga is defeated, the Jesters summon a ring of fire at the arena’s center. Players must move inside it within seconds or burn to death from escalating fire damage outside.
- Burning Ring: Standing outside the red circle causes a stacking Burn DoT that kills quickly. The fire fades after several seconds, ending the phase.
When the fire dissipates, the Jesters retreat, opening a passage to the next arena. Players follow through to continue the encounter.
Phase 3 – Autoguided Surprise
The second arena introduces the Autoguided Surprise mechanic — small floating bombs that drift toward players and explode after a short delay.
- Autoguided Surprise: Homing orbs that can either be destroyed or avoided before detonation. They deal massive AoE fire damage if they reach the group.
- Spawn Timing: The boss releases several at once in a wave pattern. Prioritize destroying them before they reach your party.
- Add Support: The Jesters call in more YS Carcass and YS Woodcutter adds, alongside Banshees from the sides.
The arena itself has narrow walkways and raised edges, making mobility important. Tanks should hold the boss near the middle, while ranged players clear bombs and adds before resuming damage on the Jester.
During this phase, the Twin Jesters Clones also appear — illusions that vanish after taking minimal damage. Only one is real and continues attacking; ranged DPS should identify the correct target quickly to prevent resets.
Phase 4 – Box Mechanic
At around 40% health, the Jesters teleport away, signaling another transition. Players must interact with the nearby mechanism or door to reach the Upper Chamber, where the final acts unfold. This phase combines all prior mechanics with increased frequency and new hazards.
- Bomb and Add Overlap: Bombs now appear during Naga or Brute waves, forcing split attention.
- Boxes: Destructible props appear throughout the arena — some explode if destroyed or stepped on, others may contain cover or line-of-sight opportunities.
- Clone Confusion: Multiple illusions spawn during teleport phases; the real boss often teleports mid-attack.
Strong group communication is key here. DPS should focus targets immediately, while healers maintain mobility to avoid AoEs from both bombs and fire zones.
Phase 5 – Final Burn (Enrage Phase)
At 20–25% health, the Jesters begin their final act. The arena darkens, purple flames rise along the walls, and the boss enters a Final Stand phase.
- Purple Mist: Reduces healing received and applies periodic damage.
- Teleport Chain: The Jesters teleport repeatedly between set positions; each disappearance starts a hidden timer. If they’re not defeated before the sequence ends, the raid wipes.
- No-Heal Segment: Healing is heavily weakened — this is a pure DPS burn.
During this phase, the boss may continue spawning Autoguided Surprise bombs, requiring one or two ranged players to keep clearing them while others maintain pressure.
Key Mechanics Summary
- YS Carcass / YS Woodcutter: Early-phase Lost adds that pressure the tank and melee.
- Hapless Naga: Major add; triggers the Burning Ring phase on death.
- Burning Ring: Fiery safe zone; stay inside or die to burn DoT.
- Autoguided Surprise: Homing bombs; destroy or evade before detonation.
- Twin Jesters Clones: Illusions with minimal HP; only one is real.
- Boxes: Environmental hazard; avoid unnecessary destruction.
- Final Stand: Timed DPS phase with heavy teleporting and healing reduction.
Tips and Strategy
- Damage Types: Prioritize Strike and Nature for maximum efficiency.
- Tanks: Keep the boss centered; maintain clear sightlines for ranged players.
- DPS: Focus Autoguided Surprises first in later phases; they’re lethal if ignored.
- Healers: Save mobility cooldowns for Burning Ring and bomb overlaps.
- Consumables: Use Lost Ward Potions, Lost Coatings, and Fire Absorption Food for survival.
- Cooldowns: Time empowerment buffs for Phase 5 to meet the DPS check before the teleport timer expires.
After the boss is defeated, you will continue exploring the Isle by entering the Stronghold. Inside, you will be tasked with finding and returning the weapon relics to their statues in order to have them protected. Once that is done, you will enter the castle to look for the throne room.
Dahut, YS Heiress and Palatine Guards Boss Guide
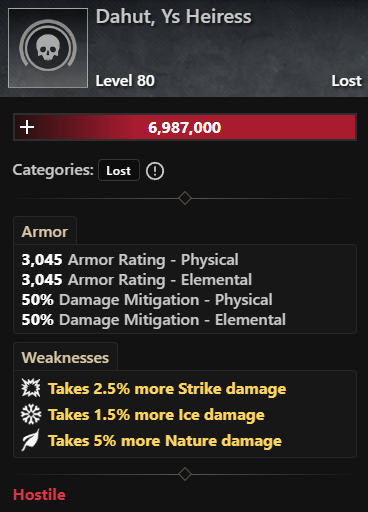
The second encounter in the Isle of Night raid takes place in the throne room of Ys Castle. Here, Dahut, mistress of the court, fights alongside her elite Palatine Guard. The battle unfolds as a single continuous encounter, with guards reviving through the power of the castle rather than Dahut herself. Throughout the fight, players must handle waves of guards, spreading fire marks, and ever-tightening AoE patterns while Dahut weaves her deadly magic in the background.
Opening Engagement
Split the raid into two balanced groups to control the initial guard spawns.
- Palatine Archer marks several players with fiery sigils. Each marked player must immediately spread out, as the mark explodes after a few seconds, leaving a burning circle on detonation.
- Palatine Shieldbearer uses frontal cones and knockbacks. Tanks should face it away from the group.
- Palatine Swordsman appears shortly after one of the first guards falls. Assign one or two players to kite it until the first guard is dead, then collapse to finish it off.
- Palatine Halberdier joins last, sweeping the arena with long-reach cleaves.
When any guard dies, it releases a radial energy burst—bright rays shoot outward across the floor. These can be dodged but often coincide with other AoEs, so call them out early.
Midfight Cycle
As the battle progresses, defeated guards will periodically resurrect, returning to the fight with partial health. Dahut continues attacking during these resurrections with targeted fire bolts, linear slashes, and area flames.
Keep your tank anchored on Dahut while off-tanks or DPS handle the revived guards.
After each resurrection cycle, there is a short window where the arena clears—use this to reposition and refresh buffs.
During this stage, rings of fire begin to appear, alternating between wide and narrow safe zones. Stay alert and rotate as the safe zone shifts.
Dance of Death and Final Push
Dahut uses her Dance of Death buff/debuff somewhere mid-fight, which adds yet another element to keep track of in this fight..
- Players randomly receive the debuff “Marked by Dahut’s Power” — those marked will be targeted by her follow-up attack sequence.
- The dance creates expanding and contracting fire rings, forcing players to step in and out with precise timing.
- Meanwhile, the guards may reanimate again, turning the final moments into organized chaos. Focus on eliminating the guards first while kiting Dahut and maintaining burn uptime when it’s safe.
The encounter ends when Dahut falls; surviving players must avoid one final ring explosion as her flames collapse inward.
Your next boss encounter lies further ahead in the Ruined Chapel. After defeating Dahut, your task becomes defeating the creatures to gain access to it. Once inside the chapel, you'll have to defeat the Ill-Fated Nagas, a sort of a mini-boss encounter. From there on out, you'll continue making your way to the final destination - the Great Tower.
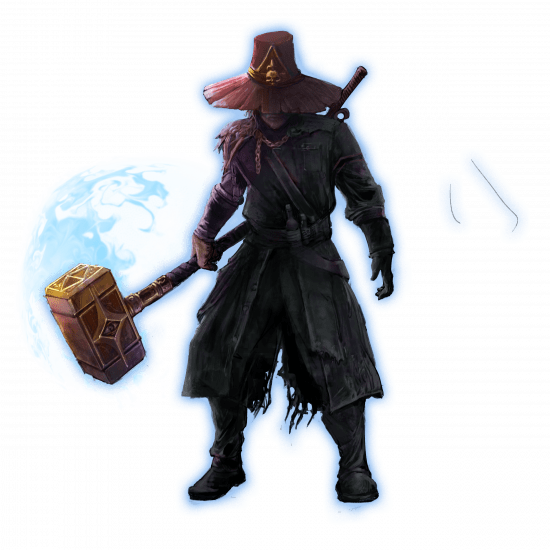
Overlord Thorpe Boss Guide
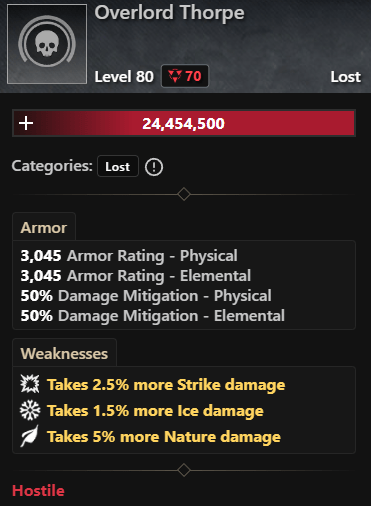 The arena for the final encounter is called Eye of the Storm. Overlord Thorpe claims to be the master of his own destiny, now rendering him powerful enough to enact his revenge on the Ancients.
During the fight, Thorpe attempts to summon the Spear of Longinus, and as he does so, he can be stunned. The adds that he calls are the Enthralled Souls. They appear stationary and can be dispensed rather quickly. Sometimes, Thorpe would plunge his sword, causing multiple fissures on the ground that would burn players. This attack is well-telegraphed; he also announces it by saying, "I will burn it all if I have to".
When Thorpe is at 70% health, he will summon the "Shadow Jesters," who are copies of the Twin Jesters boss that do their signature attacks. He also summons the Shadow versions of Dahut's Guards. It could be either one of them.
Conclusion
With the merging of Rise of the Angry Earth into the base game, every player who owns the game has a chance to try out this new raid, as well as the previous one, and this is a huge deal in the life of New World.
Between the Isle of Night and the Catacombs, the raid is clearly the superior source of the most powerful gear with the highest gearscore. So, we really suggest you try this out as soon as you can. It’s a bloody good time!
F.A.Q.
What level is the Isle of Night?
The Isle of Night is a level 70 endgame raid designed for up to 10 players.
How do you get to the Isle of Night in New World?
You can reach the raid through the Nighthaven map. Look for the southmost point by the sea, near the Church of Grivaros teleport. Or just use the Group Finder feature.
How do I start the Isle of Night raid?
Form a raid group of six or more level 70 players and enter through the raid portal.
Where is the Isle of Night raid?
The raid is located within the Nighthaven region, introduced in Season 10.
How many bosses are in the Isle of Night?
There are three bosses, with Commander Thorpe as the final encounter.