 Dallon Avery
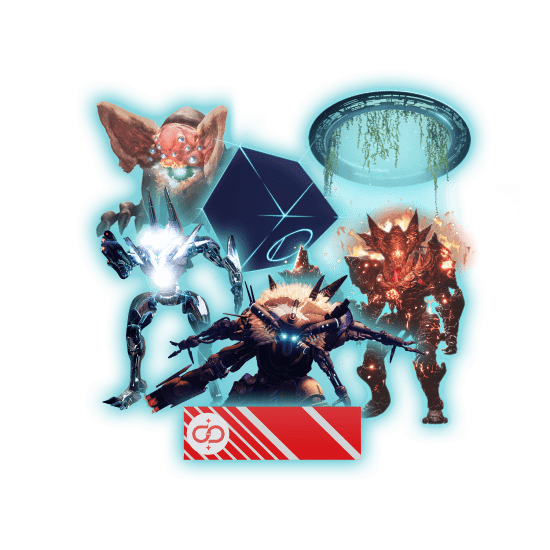
Welcome, Guardians. In this guide, we’re breaking down the best Titan builds for the current Destiny 2 season: Edge of Fate. With the right setup, you’re not just hard to kill—you’re impossible to ignore. Each build here is crafted to help you dominate in PvE, PvP, or wherever the fight takes you.
Each of the listed Destiny 2 Titan builds will include a complete loadout with exotics, abilities, aspects, fragments, and a list of armor mods for each of the armor pieces. We’ll also explain how it all comes together, and how the build works, because some of them have quirky mechanics. But that’s just what you have to deal with if you want to one-shot any enemy in the game.
By the way, if you want to quickly complete your build, you can do so by getting your exotics from SkyCoach. Just go to the Destiny 2 Exotic Items Carry category and select any of weapons or armor pieces that you’re missing. These will be farmed by veteran D2 players and delivered to you in absolutely no time. So save yourself the headache of having to farm some of the rarest items in the game and enjoy your OP builds!
Check out our other Destiny 2 guides:
- Desrt Perpetual Raid Guide
- Best Edge of Fate Exotics
- How to Get Graviton Spike
- How to Get Tier 5 Gear
- Armor 3.0 Guide
- Kell's Fall Exotic Mission Guide
Note: At Skycoach, you can Buy Destiny 2 Boost at the best prices with a fast delivery. Use our special PROMO CODE (in green) hidden in this article for a 20% DISCOUNT.
Browse our hottest Destiny 2 Boosting services


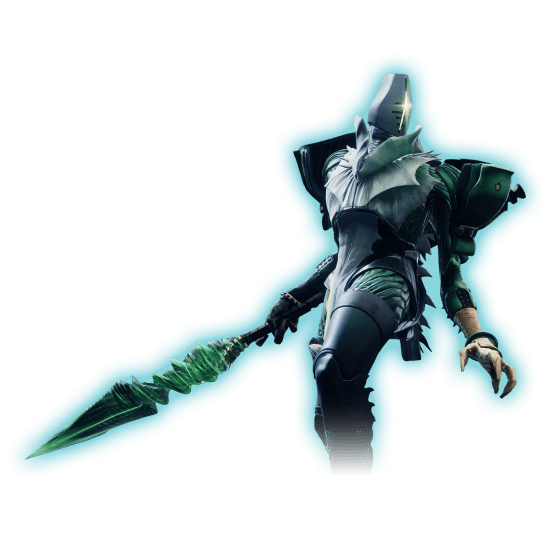
Best Strand Titan Build in Destiny 2
This could very well be the best Titan build in Destiny 2 because it turns your Guardian into a melee juggernaut. With Wishful Ignorance gauntlets, Monte Carlo, and Banner of War, you’ll be ripping through enemies with nearly unlimited melee charges. Every strike ramps up your damage, every kill fuels your next flurry, and you stay alive thanks to constant healing and damage resistance. It’s fast, aggressive, and scales beautifully in team play.
Loadout Overview
Here’s the full loadout for the build. After the table, we’ll break down how each piece contributes to the build’s loop and synergy.
| Slot | Selection |
| Exotic Armor | Wishful Ignorance (Gauntlets) |
| Weapon | Monte Carlo (Kinetic Auto Rifle) |
| Super | Bladefury |
| Grenade | Grapple |
| Melee | Frenzied Blade |
| Class Ability | Rally Barricade |
| Movement | Strafe Lift |
| Aspects | Banner of War, Flechette Storm |
| Fragments | Thread of Warding, Thread of Generation, Thread of Isolation, Thread of Fury |
| Stats Focus | Max Melee (200), then Discipline (Grenade) |
This setup balances pure melee uptime with sustainability and damage scaling. Let’s dive into how it all works.
Core Loop & Strategy
This is a melee-centric PvE build that thrives on aggressive, ability-driven combat. Your gameplay revolves around cycling melee abilities and healing buffs to stay in the fight indefinitely.
- Engage with Flechette Storm to clear mobs or burst tanky enemies.
- Kill with Monte Carlo to quickly refund melee charges.
- Maintain Banner of War by chaining melee kills, finishers, or sword kills.
- Stay alive with Woven Mail, Orb healing, and passive Banner pulses.
- Repeat with nearly full uptime on all abilities. BLOG20
This rhythm of dash in, tear through, recover instantly, and go again makes the build feel fast, fluid, and immensely satisfying.
Exotic Armor: Wishful Ignorance
Normally, Strand Titans get 3 charges of Frenzied Blade. This exotic gives you a fourth, which is huge. Not only does it give you more offensive output, but because Flechette Storm consumes half a melee charge per use, this gives you room for seven total projectiles in a single flurry—more than enough to wipe a wave of enemies or chunk a boss.
- +1 Frenzied Blade charge (4 total)
- Each Frenzied Blade or Flechette Storm hit increases melee damage
- Banner of War pulses restore melee energy based on allies healed — huge for team content
This exotic is the heart of the best Titan DPS build in Destiny 2. The fourth melee charge lets you stay aggressive longer, while the stacking damage buffs turn you into a boss-melting powerhouse. And in group activities, you become even stronger thanks to near-constant melee regen from healing pulses. It’s one of the most synergistic exotics for Titan Strand in Edge of Fate.
Weapon
Monte Carlo is the perfect weapon for this build—it’s not just a gun, it’s part of your ability loop. Every shot and every kill contributes directly to your melee uptime, which means you’re always a few bursts away from another full set of charges. It also benefits from melee kills through its own damage-boosting perk, making it both a tool for sustain and a strong source of damage in its own right.
- Melee energy on hit
- Chance to fully refund melee on kill
- Scales with melee stat (more regen at higher stats)
- Also gains damage from melee kills via Monte Carlo Method
Synergizes perfectly with the melee engine. Also helps deal with ranged targets when you're regrouping or waiting on ability cooldowns.
Abilities
This build relies heavily on your ability uptime, and every slot is chosen to maximize damage, mobility, and survivability. Each piece plays a specific role in maintaining the melee loop, controlling the battlefield, or keeping you and your team alive. Here's how each one contributes:
- Super: Bladefury
Suspend enemies, sever targets, and build melee synergy. - Melee: Frenzied Blade

Quick-dash melee that severs and works with all your regen sources. - Grenade: Grapple

Mobility + grapple melee counts as melee (benefits from all melee buffs). Also recharges when used on a Tangle. - Class Ability: Rally Barricade

Increases reload speed and stability, pulls aggro, and keeps you and your team safe.
Together, these abilities form the core of your loop—mobility, power, survivability, and synergy. They don’t operate in isolation; they feed each other through constant Orb generation, cooldown refunds, and stacking bonuses. Once you get the rhythm, you’ll find yourself chaining abilities almost nonstop.
Aspects
Aspects are the backbone of this build’s identity. They define how your melee abilities behave, how you engage in combat, and how you sustain yourself. Both chosen aspects here—Banner of War and Flechette Storm—are central to this build’s power and loop, enabling constant aggression and team utility.
 |
Banner of War |
- Melee/finisher/sword kill raises a banner
- Pulses heal nearby allies and buff melee/sword damage
- Pulse frequency increases as you get more kills
- Works with Wishful Ignorance to refund melee energy
This is your main damage and sustain engine. Not only does it double your melee output, but it also keeps you and your team alive. The more kills you get, the faster it pulses—and the more energy and healing it provides. It’s one of the most powerful PvE aspects in the game right now.
 |
Flechette Storm |
- Slide, then activate melee to leap and enter “Storm Mode”
- Spam melee to launch tracking Unraveling projectiles
- Uses half a melee charge per throw (can throw up to 7 with full charges)
This is your burst tool and ad-clear nuke. Flechette Storm lets you chain together high-damage melee projectiles, each benefiting from melee damage buffs and applying Unravel. It gives you reach, crowd control, and lethal pressure without ever needing a gun.
Fragments
Fragmens add more attributes to the abilities by way of introducing Keywords, which are essentially effects that can be triggered under certain conditions.
| Icon | Fragment | Effect |
 |
Thread of Warding | Picking up Orbs grants Woven Mail (damage resist) |
 |
Thread of Generation | Dealing damage generates grenade energy (more Grapples) |
 |
Thread of Isolation | Precision hits emit a Sever burst (reduces enemy damage output) |
 |
Thread of Fury | Damaging with Tangles gives melee energy (optional; -10 Melee stat) |
If you're already capping melee energy easily, consider swapping Thread of Fury for something defensive like Thread of Transmutation or Thread of Continuity.
Armor Mods
To make this build function at its highest potential, your armor mods are focused on Orb generation, Armor Charge uptime, and ability cooldown reduction—especially for melee and grenade energy. These mods also help you reach the critical 200 Strength threshold, which amplifies your damage and shortens cooldowns across the board.
| Armor Slot | Mod(s) | Purpose |
| Helmet |
- Kinetic Siphon - Hands-On |
Orbs from Monte Carlo multikills Super energy from melee kills |
| Arms |
- Heavy Handed - Melee Font x2 |
Orbs from melee kills +40 Melee while Armor Charged (stacks) |
| Chest | - Concussive Dampener | Reduces AoE damage from enemies |
| Legs |
- Innervation - Absolution |
Faster grenade cooldown Cooldown reduction for all abilities |
| Class Item |
- Reaper - Time Dilation - Bomber |
Weapon Orbs after class ability Longer Armor Charge Grenade regen from class ability |
Every mod here either fuels your ability loop or helps you maintain key stat bonuses through Armor Charge. The synergy between melee, grenade, and Orb generation ensures you’re rarely waiting on a cooldown—and always ready for your next engagement.
Stat Priorities
Stats are the foundation that this build stands on. By leaning into Strength and Discipline, you maximize both your melee damage output and your grenade-based mobility through Grapple.
- Melee (Strength): Target 200 total for max damage scaling
- Discipline: Get your Grapple back often
- Recovery/Intellect (Optional): More healing or more Supers
You don’t need perfect armor to make this build work, but hitting the 200 Strength breakpoint should be your main priority. Everything else is flexible and can be adjusted based on your available gear or activity type.
Best Void Titan Build in Destiny 2
This is a high-impact, ability-driven Void Titan build centered around airborne Shield Bash one-shots, constant overshields, Devour healing, and explosive ad-clear. With Peregrine Greaves, landing a shoulder charge mid-air turns into a mini-nuke, and when paired with Controlled Demolition, it sets off volatile chain reactions that heal you and your team. Add Devour, Void Overshield uptime, and Vortex Grenades that weaken, and you’ve got a build that’s tanky, explosive, and brutally effective in all PvE content.
Loadout Overview
This best Titan build Destiny 2 PVE relies on tight synergy between your Void abilities, weapon choices, and subclass buffs. Every piece in the loadout is selected to maximize Orb generation, volatile chaining, and survivability through Overshields and Devour. Here’s how your gear and subclass come together:
| Category | Selection |
| Exotic Armor | Peregrine Greaves – Airborne shoulder charges deal massive bonus damage; refunds melee on Champions and mini-bosses |
| Primary Weapon | Mint Retrograde (Void Pulse Rifle) – Consistent ad-clear and synergizes with Orb-generating mods |
| Special Weapon | Vexcalibur (Void Glaive) – Grants Void Overshields while blocking; strong defensive and utility option |
| Heavy Weapon | Aurora Dawn (Sword) – Strong burst damage and mobility; use any DPS heavy depending on the activity |
| Super Ability |
Twilight Arsenal – Summon three Void axes that pull in, weaken, and can be reused for bonus melee damage |
| Grenade | Vortex Grenade – Damaging, grouping, and weakening grenade; perfect for volatile synergy |
| Melee Ability | Shield Bash – Suppresses enemies and grants Overshield on final blows; procs exotic when airborne |
| Class Ability | Rally Barricade – Boosts reload speed and draws enemy aggro; fuels Orb generation through mods |
| Movement Ability | Catapult Lift – Quick aerial launch for easy airborne Shield Bash activations |
| Aspects | Controlled Demolition, Offensive Bulwark – Volatile explosions and Overshield-fueled ability synergy |
| Fragments | Echo of Undermining, Echo of Persistence, Echo of Obscurity, Echo of Starvation |
| Stat Priority | Discipline → Strength → Recovery |
Each element supports another—whether it’s chaining kills to trigger volatile explosions, gaining energy back through Orbs, or staying alive via Overshields and Devour. This loadout is designed to be aggressive, resilient, and highly effective in Void-focused PvE encounters.
Core Loop & Strategy
This Void build is all about burst damage, crowd control, and constant healing. Each piece works together to keep you alive and lethal, even in the middle of a chaotic encounter:
- Engage from the air using Catapult Lift and Shield Bash to slam into high-priority targets. With Peregrine Greaves, this airborne charge does massive bonus damage—enough to instantly delete many majors and heavily damage Champions.
- Trigger Controlled Demolition to spread Volatile through your targets. When Volatile enemies explode, they damage others and heal you. Your abilities and Volatile chaining keep the explosions going.
- Drop a Vortex Grenade to group enemies, weaken them (via Echo of Undermining), and set up an explosive chain reaction.
- Maintain Devour and Overshield by picking up Orbs or Void Breaches, getting melee kills, and finishing enemies. You’re always regenerating health, extending survivability without needing to retreat.
- Loop it again—Void breaches, Orbs, and your weapon synergy all help refill grenades and abilities quickly.
This build is explosive, mobile, and tough to kill. Great for mid-to-close range encounters in activities like Nightfalls, Battlegrounds, or Raids.
Browse our hottest Destiny 2 Boosting services


Exotic Armor: Peregrine Greaves
This exotic defines the build’s identity and playstyle. It transforms your Shield Bash from a utility move into a powerful offensive strike.
- Peregrine Strike boosts shoulder charge damage when used mid-air
- Hitting Champions, Tormentors, or mini-bosses refunds your melee energy
- Provides a small bonus to airborne effectiveness across all weapons
The airborne boost turns your Titan into an actual missile. Against elite enemies, the refund mechanic ensures you can open engagements repeatedly without waiting on Strength cooldowns. Pairing this with Catapult Lift makes your burst initiations smooth and consistent.
Weapons
Your weapon setup supports Void synergy, Orb generation, and consistent damage while weaving in between ability usage. All three weapons serve specific purposes that keep the loop moving:
- Mint Retrograde – A Void pulse rifle that generates Orbs via Harmonic Siphon and rapidly applies damage to support Controlled Demolition procs.
- Vexcalibur – Blocking with this glaive provides Void Overshields to you and nearby allies. It also works well defensively when you're under pressure.
- Aurora Dawn – A versatile Void sword with a strong heavy attack combo. It’s great for burst damage and pairs naturally with close-range gameplay.
Together, these weapons contribute to your Orb generation, provide backup damage when abilities are down, and ensure you can handle everything from waves of ads to isolated elites.
Abilities
Each ability in this build plays a distinct role in sustaining the Void engine, amplifying damage, and giving you ways to control the flow of combat.
 Twilight Arsenal (Super) – Throws three Void axes that weaken and group enemies. After they explode, axes can be picked up and used as temporary melee weapons for added crowd control.
 Vortex Grenade – A powerful area control tool. It pulls enemies in and, with Echo of Undermining, applies Weaken to make them more vulnerable to all incoming damage.
 Shield Bash – The centerpiece of your melee loop. It suppresses targets, grants an Overshield on kill, and is massively buffed by Peregrine Greaves when used mid-air.
 Rally Barricade – Useful for setting up Orbs via Reaper, drawing aggro, and enhancing reload speed for yourself and allies.
- Catapult Lift – Essential for quick vertical movement and consistently activating the Peregrine Greaves damage bonus.

When used together, your abilities keep you on the offensive and rarely off cooldown. By the way, this could also be your personal best pvp Titan build Destiny 2, and here’s why: BLOG20
Shield Bash offers instant suppression and Overshield on kill — both are extremely valuable in duels and control scenarios.
- Controlled Demolition spreads Volatile, enabling multi-kills and area denial.
- Devour via Echo of Starvation gives strong sustain after each kill.
- Vortex Grenade with Echo of Undermining weakens opponents and controls chokepoints.
The build doesn’t rely on slow charge mechanics (like Thunderclap), making it more reactive in fast-paced PvP fights.
While the Arc and Strand builds are monsters in PvE, their reliance on charge-ups, chaining, or prolonged loops makes them less consistent in the PvP sandbox. The Void build offers the best balance of survivability, crowd control, and lethality in Crucible.
| Aspects: |  |
Controlled Demolition |  |
Offensive Bulwark |
Fragments
The selected Fragments boost your survivability, crowd control, and debuff uptime. They work in tandem with Aspects and abilities to sustain your feedback loop.
| Icon | Fragment | Effect |
 |
Echo of Undermining | Your Void grenades apply Weaken, making enemies take increased damage. This makes Vortex Grenades even more lethal. |
 |
Echo of Persistence | Increases the duration of Void buffs like Overshield, Devour, and Invisibility. Great for sustained survivability. |
 |
Echo of Obscurity | Finishers grant Invisibility, giving you a way to disengage or reposition mid-fight. |
 |
Echo of Starvation | Picking up Orbs or Void Breaches grants Devour, giving you healing and grenade energy from kills. |
This Fragment setup ensures your Titan is constantly healing, weakening enemies, and remaining hard to kill—no matter the encounter type.
Armor Mods
To maintain your grenade and Orb loop, your mods focus on Void synergy, Armor Charge uptime, and ability cooldown reduction. Here’s how each armor slot is set up:
| Armor Slot | Mods |
| Helmet | Special Ammo Finder, Harmonic Siphon, Heavy Ammo Finder |
| Arms | Grenade Font, Firepower |
| Legs | Harmonic Scavenger, Innervation, Harmonic Holster |
| Class Item | Reaper, Bomber, Time Dilation |
These mods ensure that each grenade kill generates an Orb, which then reduces grenade cooldown, activates Devour, and grants temporary stat bonuses via Armor Charge. Reaper on the Class Item turns your Barricade into an Orb engine, while Time Dilation gives you more uptime on stat boosts from Grenade Font.
Best Arc Titan Build in Destiny 2
This build is one of the strongest Titan builds in Destiny 2 Edge of Fate. Designed for aggressive, fast-paced PvE combat, it revolves around smashing enemies with charged melee attacks, healing instantly, and keeping ability uptime near 100%. With An Insurmountable Skullfort, every Arc melee kill fully restores your melee energy and health, making you nearly unkillable in red-bar-heavy encounters.
The loop is simple: charge in, punch, recover, repeat. Your abilities feed one another, and thanks to Bolt Charge from Storm’s Keep and Spark of Frequency, you’re constantly empowered. Thunderlord serves as a backup for ranged and boss damage, while your Barricade grants stacks and safety.
Loadout Overview
Every piece of this loadout is selected to reinforce your melee dominance and ensure continuous uptime on health regen, abilities, and damage bonuses.
| Category | Selection |
| Exotic Armor | An Insurmountable Skullfort – Arc melee kills fully heal you and instantly recharge your melee ability |
| Primary Weapon | Multimach CCX – Lightweight Arc SMG for close-range Orb generation and fast movement |
| Special Weapon | Without Remorse – Lightweight Shotgun for backup burst damage or One-Two Punch synergy |
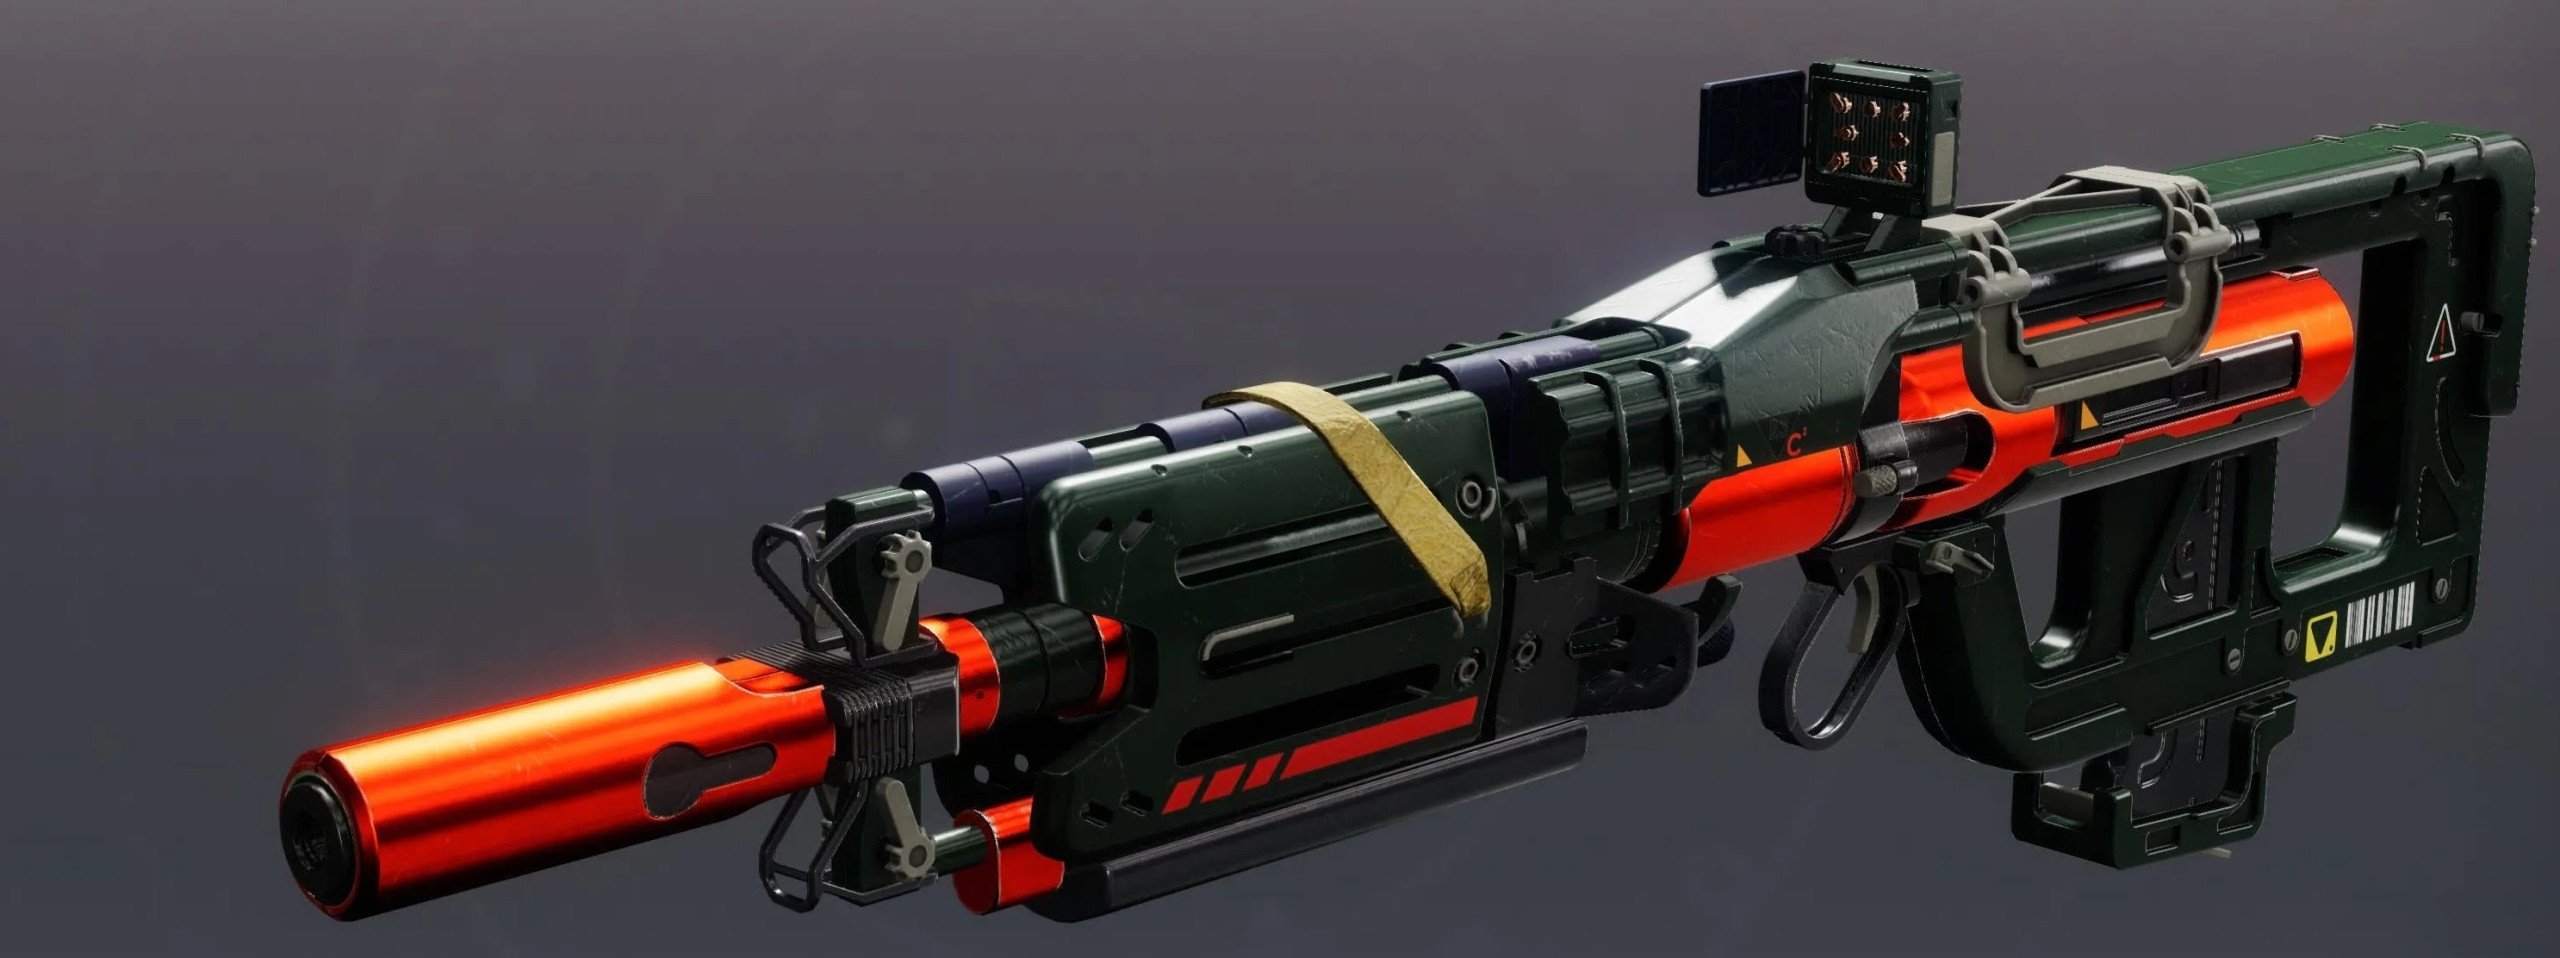
| Heavy Weapon | Thunderlord – Arc Machine Gun with lightning strikes and Bolt Charge generation; excellent boss DPS |
| Super Ability | Thundercrash – Devastating single-target burst with boss melting potential |
| Grenade | Pulse Grenade – Jolts enemies and lasts longer with Fragment synergy |
| Melee Ability | Thunderclap – Chargeable Arc punch with huge burst potential and health return on kill |
| Class Ability | Rally Barricade – Grants Bolt Charge and boosts reload speed; ideal for cover and uptime |
| Movement Ability | Catapult Lift – Fast vertical burst for repositioning and Thundercrash setup |
| Aspects | Knockout, Storm’s Keep |
| Fragments | Spark of Frequency, Spark of Shock, Spark of Resistance, Spark of Magnitude |
| Stat Priority | Strength → Discipline → Recovery |
Together, this loadout turns you into a fast-moving melee missile—able to delete targets in a flash and be fully recovered in seconds.
Core Loop & Strategy
The loop is simple, satisfying, and brutally effective. You’re looking to initiate fights with Thunderclap, then use a mix of regular melee hits, ability kills, and Orbs to keep yourself alive and fully powered.
- Charge up Thunderclap and destroy red bar enemies to activate Knockout and Skullfort’s healing and energy restore.
- Use your uncharged melee if Thunderclap is down—melee hits grant energy and still trigger Knockout’s Amplified buff.
- Once Amplified, you gain bonus speed and handling, and Spark of Frequency gives faster reloads and more Bolt Charge stacks.
- Cast Rally Barricade near enemies to grant Bolt Charge to you and allies via Storm’s Keep, increasing your weapon damage.
- Throw Pulse Grenades to Jolt enemies and trigger chain lightning with Spark of Shock.
This loop ensures you’re always moving, healing, and hitting hard. Even if you miss a Thunderclap, simple punches or finishers keep the loop going without missing a beat.
Exotic Armor: An Insurmountable Skullfort
This exotic helmet is the foundation of the build and your primary sustain tool. It allows for an unrelenting melee playstyle by instantly restoring health and ability energy with each Arc melee kill.
- Final blows with Arc melees fully restore your melee ability and health
- Melee hits (even uncharged) provide Arc melee energy over time
This makes Thunderclap a spammable, high-damage melee that’s almost always ready. If you ever whiff or fail to get a kill, just punch a few red bars and you’ll be back to full charge in seconds.
Weapons
Your weapons play a supporting role in this melee-dominant build. Their job is to generate Orbs, finish off enemies your melee weakens, and contribute to Arc synergy.
- Multimach CCX – Lightweight Arc SMG ideal for run-and-gun play. It complements the build’s high mobility and can quickly mop up weakened enemies.
- Without Remorse – Fast-handling Shotgun that can run One-Two Punch for bonus melee damage. Great for harder targets or mid-combo recovery.
- Thunderlord – The big finisher. Its lightning strikes stun Overload Champions and generate Bolt Charge. It also deals excellent boss damage and fills in when you need range.
These weapons don’t need to do all the work—but they’re crucial when your melee loop is disrupted or in boss phases.
Abilities
Your Arc abilities amplify each other and reinforce your aggressive playstyle. Each one plays a clear role in your uptime and damage output.
 Thundercrash (Super) – High-impact boss-killer or burst option. Can be paired with Falling Star for even higher damage if you loadout swap.
- Pulse Grenade – Applies Jolt with Spark of Shock, chaining lightning to surrounding enemies. Spark of Magnitude boosts its duration.

- Thunderclap – Your core ability. Charge it up for huge burst damage, and thanks to Skullfort, it instantly restores itself and your health.

- Rally Barricade – Your support tool. Use it to stack Bolt Charge with Storm’s Keep, helping fuel weapon damage and uptime.

- Catapult Lift – Quick repositioning and mobility tool, ideal for lining up Thunderclaps or escaping danger.

You’ll rotate through these abilities naturally as they come off cooldown, and Orb generation from melee kills and finishers keeps them online.
| Aspects: |  |
Knockout |  |
Storm's Keep |
Fragments
Each Fragment enhances the reliability and power of your loop, especially your melee, grenade, and Bolt Charge uptime.
| Icon | Fragmet | Effect |
 |
Spark of Frequency | Melee hits boost reload speed and stability; Amplified boosts this effect and grants more Bolt Charge |
 |
Spark of Shock | Arc grenades now Jolt, increasing damage output and enabling chain lightning |
 |
Spark of Resistance | Boosts damage resistance while surrounded, keeping you alive in melee range |
 |
Spark of Magnitude | Increases duration of Pulse Grenades, helping you control space and deal sustained damage |
This combo ensures that your melee and grenade kills both fuel and benefit from your buffs and help control the field.
Armor Mods
Your mods are tuned for Orb generation, Armor Charge uptime, and melee stat boosts. The goal is to stay charged, healthy, and ready to punch at all times. BLOG20
| Armor Slot | Mods |
| Helmet | Powerful Friends, Hands-On, Heavy Ammo Finder |
| Arms | Heavy Handed, Melee Font, Melee Font |
| Chest | Solar Resistance, Void Resistance, Arc Resistance |
| Legs | Arc Scavenger, Weapons Font, Recuperation |
| Class Item | Time Dilation, Time Dilation, Special Finisher |
This setup gives you healing through Recuperation, Orb generation from melee kills (Heavy Handed), and consistent melee stat boosts via Melee Font. Special Finisher is great in high-end content where you're punching elites and want a safety net.
Stat Priorities
The original source notes Strength as the clear stat focus, and it’s essential to this build’s loop. Here’s the priority breakdown:
- Strength – Boosts Thunderclap damage and cooldown. Aim for 100 if possible.
- Discipline – Keeps your Jolt grenades cycling to clear groups and apply debuffs.
- Recovery – Helps you bounce back between Thunderclaps if Devour-style healing isn’t up.
High Strength ensures your melee loop stays tight, while high Discipline gives you area control and support. Recovery helps with passive survival in case you miss a kill or drop the loop temporarily.
Conclusion
Edge of Fate brought major changes to how builds are crafted in Destiny 2—and Titans came out stronger than ever. While some pre-expansion setups were toned down or rebalanced, build-making as a whole didn’t suffer. In fact, it became more focused, more rewarding, and more flexible.
Older builds that relied on now-nerfed synergies or deprecated mods aren’t completely dead—but they’ve been outclassed. The new subclass interactions, reworked Aspects like Storm’s Keep, and expanded artifact system created space for even more powerful builds. Instead of cramming every buff into one loadout, Edge of Fate encourages clean, loop-driven setups with a clear gameplay identity.
As these three top-tier Titan builds show, it’s still very possible to create OP, ability-looping monsters—they just look different now. Whether it’s through Bolt Charge, Devour chains, or Banner of War pulses, Titan mains still have all the tools they need to dominate every activity. The sandbox shifted—but for smart builders, it opened up new lanes of power.
F.A.Q.
What is the best Titan build in Destiny 2 Edge of Fate?
The best overall Titan build right now is the Arc Skullfort Thunderclap build. It offers near-infinite melee uptime, constant healing, and massive burst damage with Thunderclap.
Is it difficult to make a strong Titan build in Destiny 2?
Not at all—Edge of Fate made buildcraft more streamlined. With the right exotic, a clear gameplay loop, and synergistic mods, strong builds are easier than ever to put together.
What are the best exotics for Titans in Destiny 2?
Top-performing Titan exotics include:
- An Insurmountable Skullfort – Arc melee loops with healing
- Peregrine Greaves – One-shot shoulder charge vs majors
- Synthoceps – Melee and Super damage boost in close combat
- Abeyant Leap – Strand crowd control and survivability
How to make a one-shot Titan build in Destiny 2?
Use Thunderclap with An Insurmountable Skullfort, spec into high Strength, and pair it with a shotgun like Without Remorse (One-Two Punch). Fully charged Thunderclaps can one-shot most enemies—even majors.


