 Rick Flair
Cryo Archive Map Guide for Marathon Quick Summary:
- Requirements to access a new map: Runner level 25, all factions unlocked, loadout worth 5000 credits.
- For the first Cryo Archive run, the devs provide a free Cryo Archive Sponsored Kit.
- Cryo Archive is a map with a hub area and six interconnected sections, containing seven locked Vaults with endgame loot.
- Vault rewards include golden weapons and equipment, as well as prestige materials for VIP faction upgrades.
- You can complete CyberAcme contracts to get some of the unique Cryo Archive rewards.
- Compiler is a boss, unique to Cryo Archive. Take your best gear, lots of ammo and consumables, and lots of self-revives to tackle the challenge.
Cryo Archive offers some crazy valuable rewards, but if you’re unprepared for this run, let our Pros do it for you. Check out our Marathon Cryo Archive Raid Boost and get gold loot today.

Read closely 
Browse our hottest Marathon Boosting services


Marathon Cryo Archive
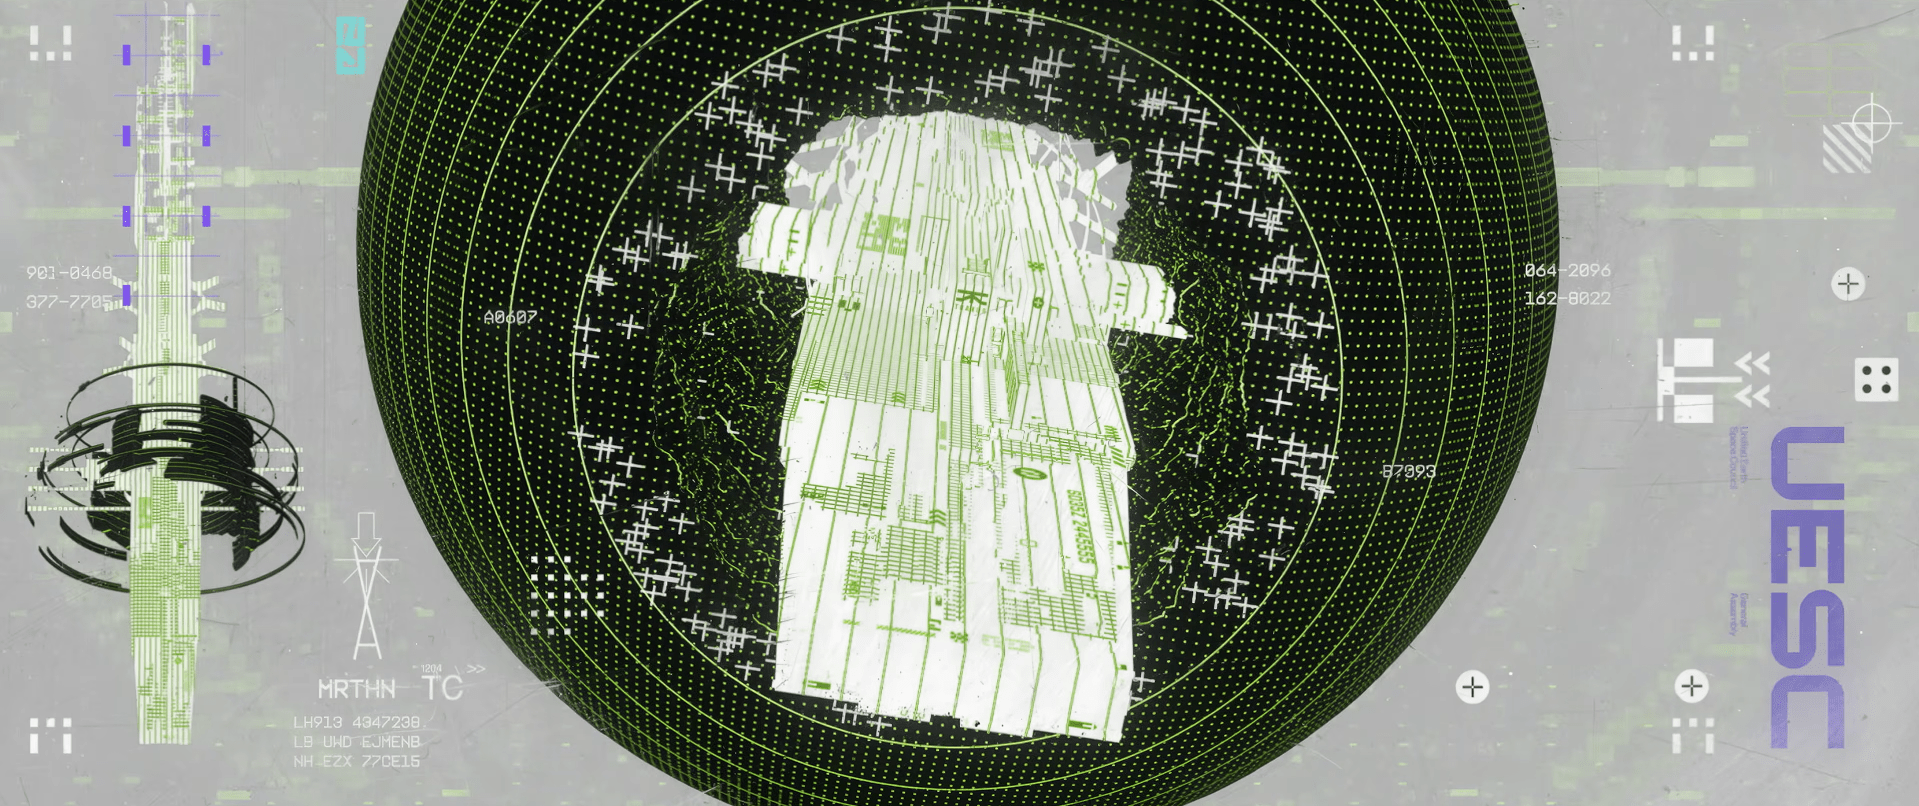
Cryo Archive is the first level of a huge UESC Marathon colony ship that drifts in orbit of Tau Ceti IV. It’s a long-abandoned ship that, in the original game, was taken over by a rampant AI called Durandal. The developers have released a video in which some sort of AI invites Runners to try to solve the mystery of what happened in Marathon. Considering this game takes place around 100 years later, and Durandal has already left Marathon, it’s interesting what AI communicates with us. Might it be Tycho, another AI that’s been tracking Durandal ever since the events of the original game? We’ll see. But don’t be in a hurry. To even enter the ship, you need to meet the Marathon Cryo Archive requirements:
- Runner Level 25: Perhaps to avoid multi-account grifting.
- All Factions Unlocked: You need to complete each contract that introduces all six factions present in the game.
- Minimum Loadout Cost: You can’t launch the raid if your loadout value is below 5k credits.
- A Crew of Three: You cannot play Cryo solo. I'm sorry, solo players, that's a really stupid way of locking you out of content, and we all know that playing with randoms is a sure way to lose your loot. No ROOKs as well.
In an act of generosity, the devs let you get a Cryo Archive Sponsored Kit for free one time. In their words, it’s so that you won’t lose your best gear on first death in Archive, so be sure to play carefully and explore the ship as much as you can on your first run.
One important thing to note is that Cryo Archive is only available from Thursday to Sunday evening! The devs said they’ll try to find a way to implement Cryo Archive more without breaking the balance, since the loot that you get in Cryo Archive is much more valuable and costs a lot. If you're still thinking over whether you need to go to Cryo, the answer is yes. Even if you lose 3 times out of 4, the 4th one will pay for losses. I died 2 times and lost 20k, but made around 70,000 creds. Pretty easy math, I think.
Marathon Cryo Archive Full Map Guide
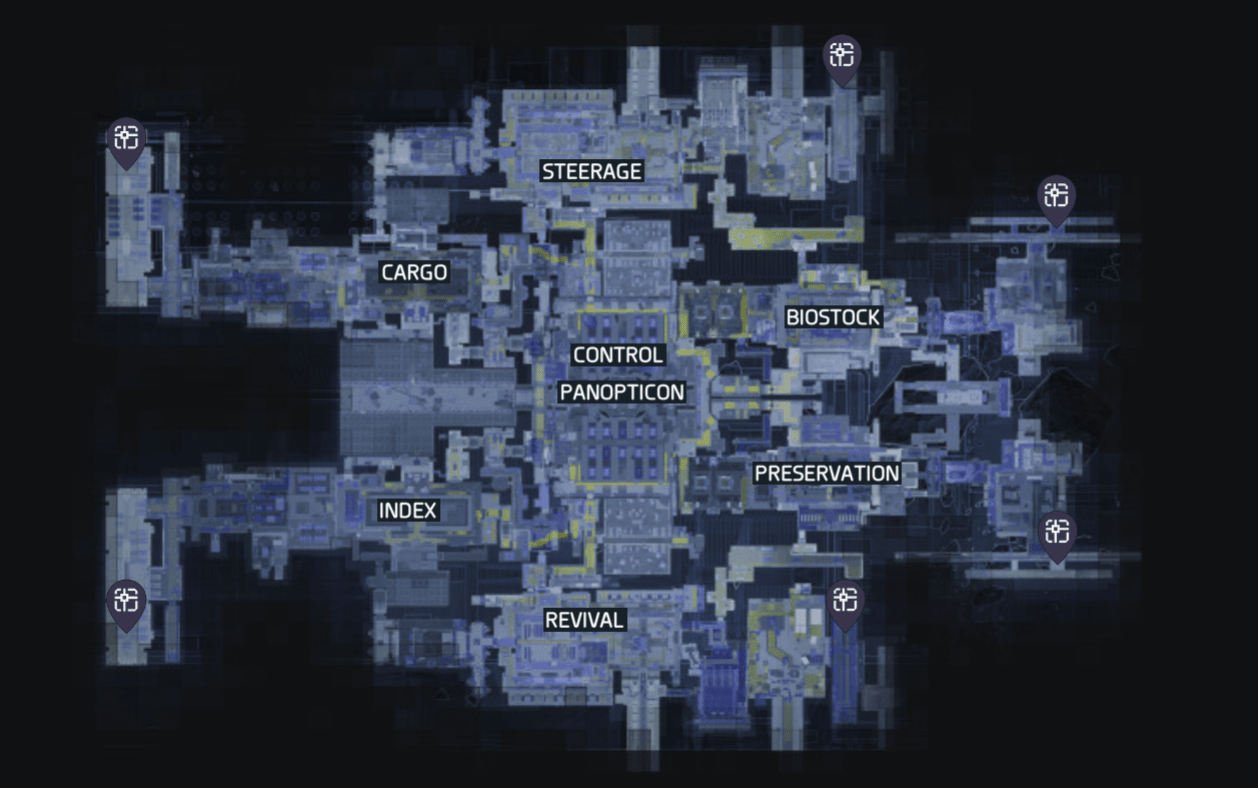
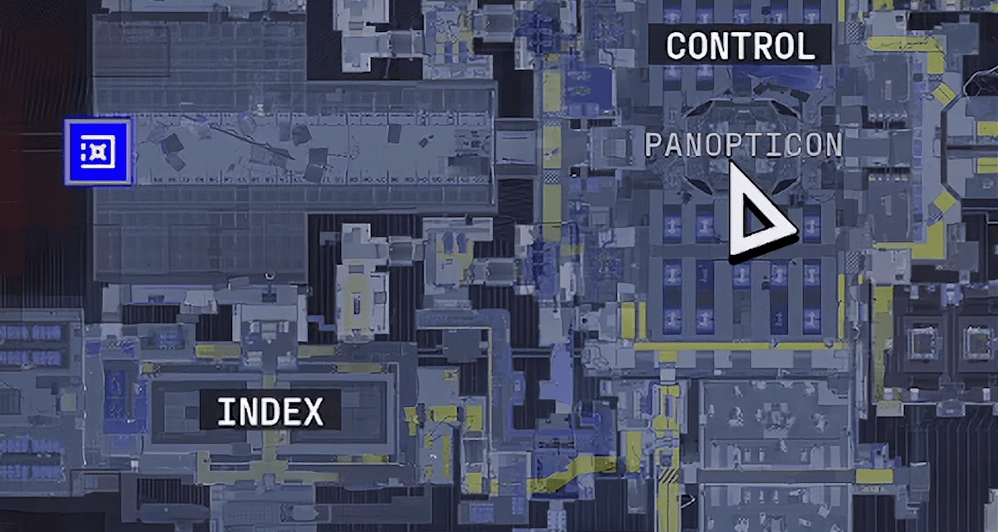
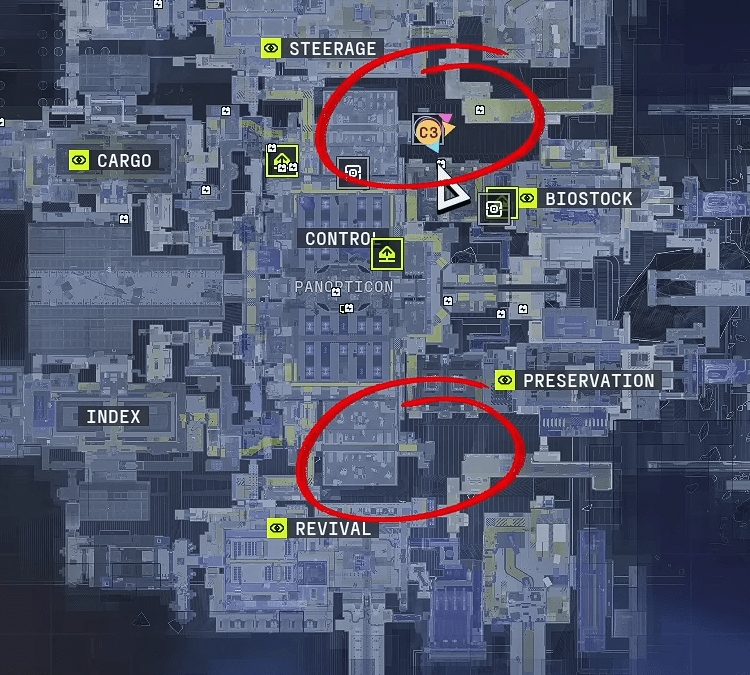
Cryo Archive is a huge map. I don't have the exact numbers, but it feels like 2 other maps combined in size. There are 6 sections with one large hub area. You spawn close to each of these sections, and there are 6 spawns in total, marked on a map with a + marker. The chance to meet other players in the first 5-10 minutes is close to zero. You can encounter people only in the Control room. All Cryo Archive locations are:
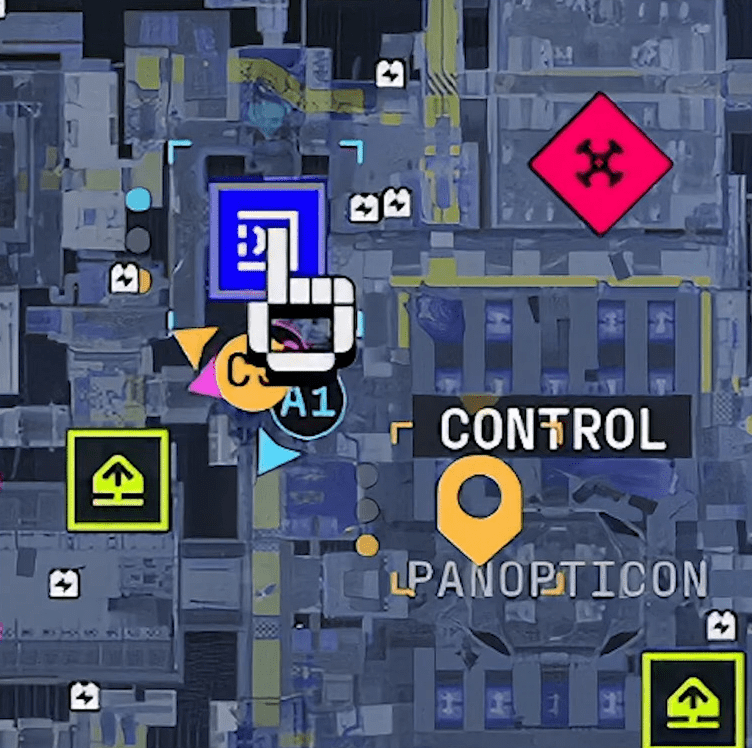
- Control/Panopticon: Central hub area filled with UESC forces.
- Steerage/Revival: Carbon copies of each other. Absolutely symmetrical. Revival is sort of a medical sector, and steerage is technical, but in reality, you can find the same loot everywhere.
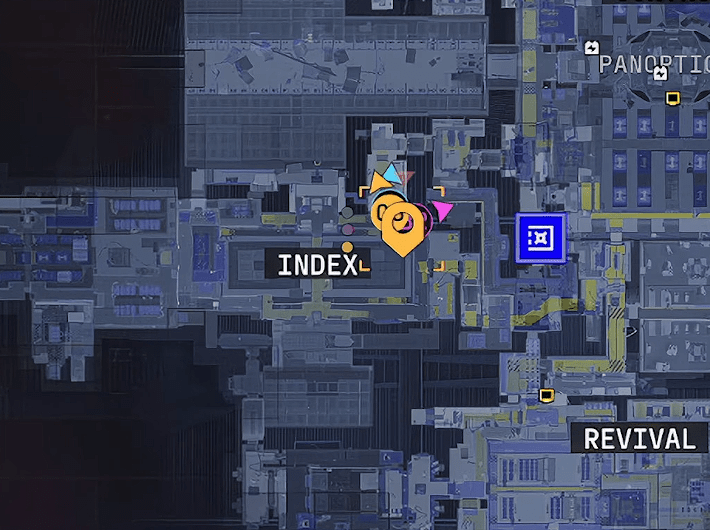
- Cargo/Index: Same ends of the ship, with the only difference being that Cargo is covered in ice and inflicts Frostbite status effect that lowers your healing and movement, and Index is filled with UESC to the brim.
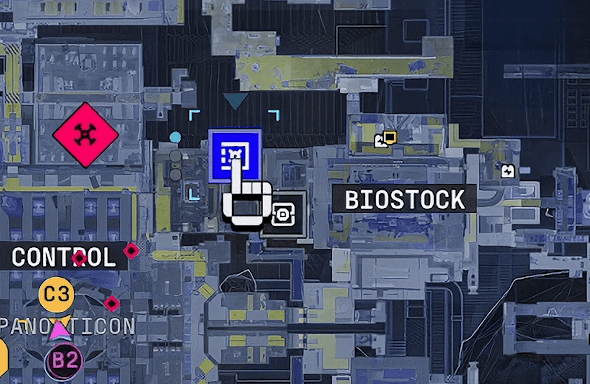
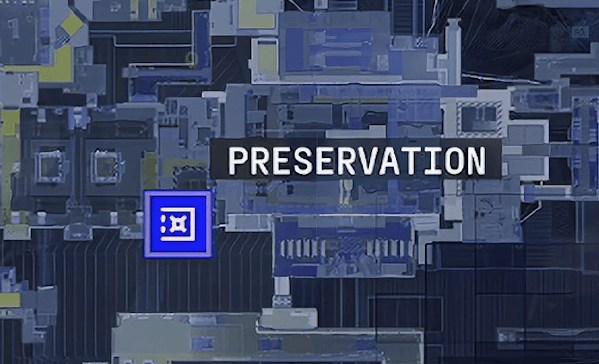
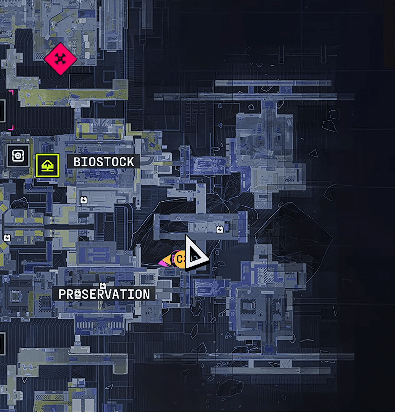
- Biostock/Preservation: Perhaps the most aggressive areas with the biggest potential for early PVP, as they're situated pretty close to each other.
So what do you even do on this ship? Obvious answer - you loot. A lot. Take your biggest backpacks here and don't be afraid to lose everything. You'll mitigate the costs easily. Tons of guns, purple loot, and healing items will help you get through the week of preparation for the next Cryo Archive run. Speaking of loot, there are 3 new universal purple chip mods, as well as 3 new implants, unique to this map. The new loot in Cryo Archive is:
- Covert Recovery: Implant. You heal and use heals faster when in smokes.
- Freeloader: Implant. Destroying an enemy with a knife restores some amount of tactical and prime abilities energy.
- Panic Response: Implant. When low, healing grants a Cardio Kick effect, removing your heat and decreasing the heat gain.
- Punishment: Chip Mod. The weapon deals significantly increased damage against [REDACTED] combatants. The redacted here is Compiler, most likely.
- Testament: Chip Mod. ADSing for a short time increases range and aim assist by a massive amount.
- Hurricane: Chip Mod. While airborne, the weapon has greatly increased stability and reduced accuracy penalty.
This loot can be found anywhere. I, for instance, found all three new chip mods just lying around in some tucked-away corner beneath Cargo.
Now, let's move on to the new mechanic called Security Clearance. Everything you do on the ship, including exploration, destroying UESC units, other players, looting, and using terminals, increases your clearance level. You need the clearance level to open doors and get into more advanced sections of the ship. I won't spoil all the fun, but just know that level 3 is enough to open all doors with safes inside them. Here's what all 5 levels of Security Clearance do:
| Clearance Level | What it Grants |
| 1 | See Wardens on the map |
| 2 | Security Breach terminals are shown on the map (they increase your Clearance level) |
| 3 | See Batteries and Elevators on the map. Batteries are needed to open Vaults. |
| 4 |
Evac terminals are shown on the map, and access to Vault 6 and 7 becomes available. |
| 5 |
Full access. Red valuables can be looted only with this Clearance level. |
Yeah, so, you see, extraction on this map doesn't work as it normally does. To exfil, you need to find a terminal. Don't worry, it's marked as such on the map. Head over to it and then activate it. You don't need a specific Security Clearance level for it. After that, you'll see an exfil that appears on the map. It usually appears far away from you, and you have around 3,5 minutes to get to it. Otherwise, it activates on its own, and you lose the chance to extract. Be mindful: anyone can use this exfil, so don't wait too long. Let's talk more about Security Clearance and what it gives you, as it's basically your progression tracker.
How to Upgrade Cryo Archive Security Clearance Level
Early on, you spawn alone with your team, isolated from other players. Your early goal is to raise your Security Clearance to level 3. Here’s how to upgrade your Security Clearance level:
- Security Tags: By eliminating UESC forces and looting the Security Tags from them. Each Tag fills one section of your Clearance.
- Hacking Terminals: The best way to upgrade Security Clearance is to find terminals that say "Hack Security Clearance". They are filling 3 sections of security clearance level at once. Note that I say "sections", not "levels."
You can make your life easier by using Scanners. Scanners let you know the location of many important things and interactables, marking them on your map, and on higher Clearance levels, marking their location in your HUD. They can be activated when you reach Security Clearance Level 1. On the first level, they mark Batteries and terminals that raise Security Clearance. Your task right now is to look for these terminals and activate them. Use Scanners when you find them to uncover even more terminals. We need to reach level 3 Clearance to open the locked rooms, containing purple and rare loot, as well as backpacks, keys, and guns. Most of the time, looting these can be enough for most players not willing to take further risks.
How to Get Security Clearance Level 5
If you want to risk it all and do or die trying, you can try accessing level 5 of Clearance. This is a very hard task, since you are likely to run out of time before that happens. At this point, your best bet is to either try getting Security Tags from other players or praying on random. You can also use elevators located on the Northeast and Southeast of the Control room to get to the next floor, but be mindful that you’ll need Anti-Virus packs. Find a room in the middle where you need to disarm a security alarm. Doing this will open the door in the middle of this area. This is a path to Vault 6, but you can use it to quickly rack up your Clearance Level as well. Here’s what to do when you get level 5:
- Once you get Security Clearance Lv 5, you should go to the Control area. Specifically, the central part of it with the frozen pit with a walkway above it.
- Drop down, and you’ll see there are 4 arrow-up switches that you need to shoot in order to remove the ice from the ground. This removes it for about a minute.
- After that, look at the center of this pit, and you’ll see an interactable.
Interacting with it will lift a Cryo chamber with a red Valuable inside it. This red Valuable costs 40,000 credits, which will be given to each of the players upon extraction.
Browse our hottest Marathon Boosting services


Marathon Cryo Archive Rewards
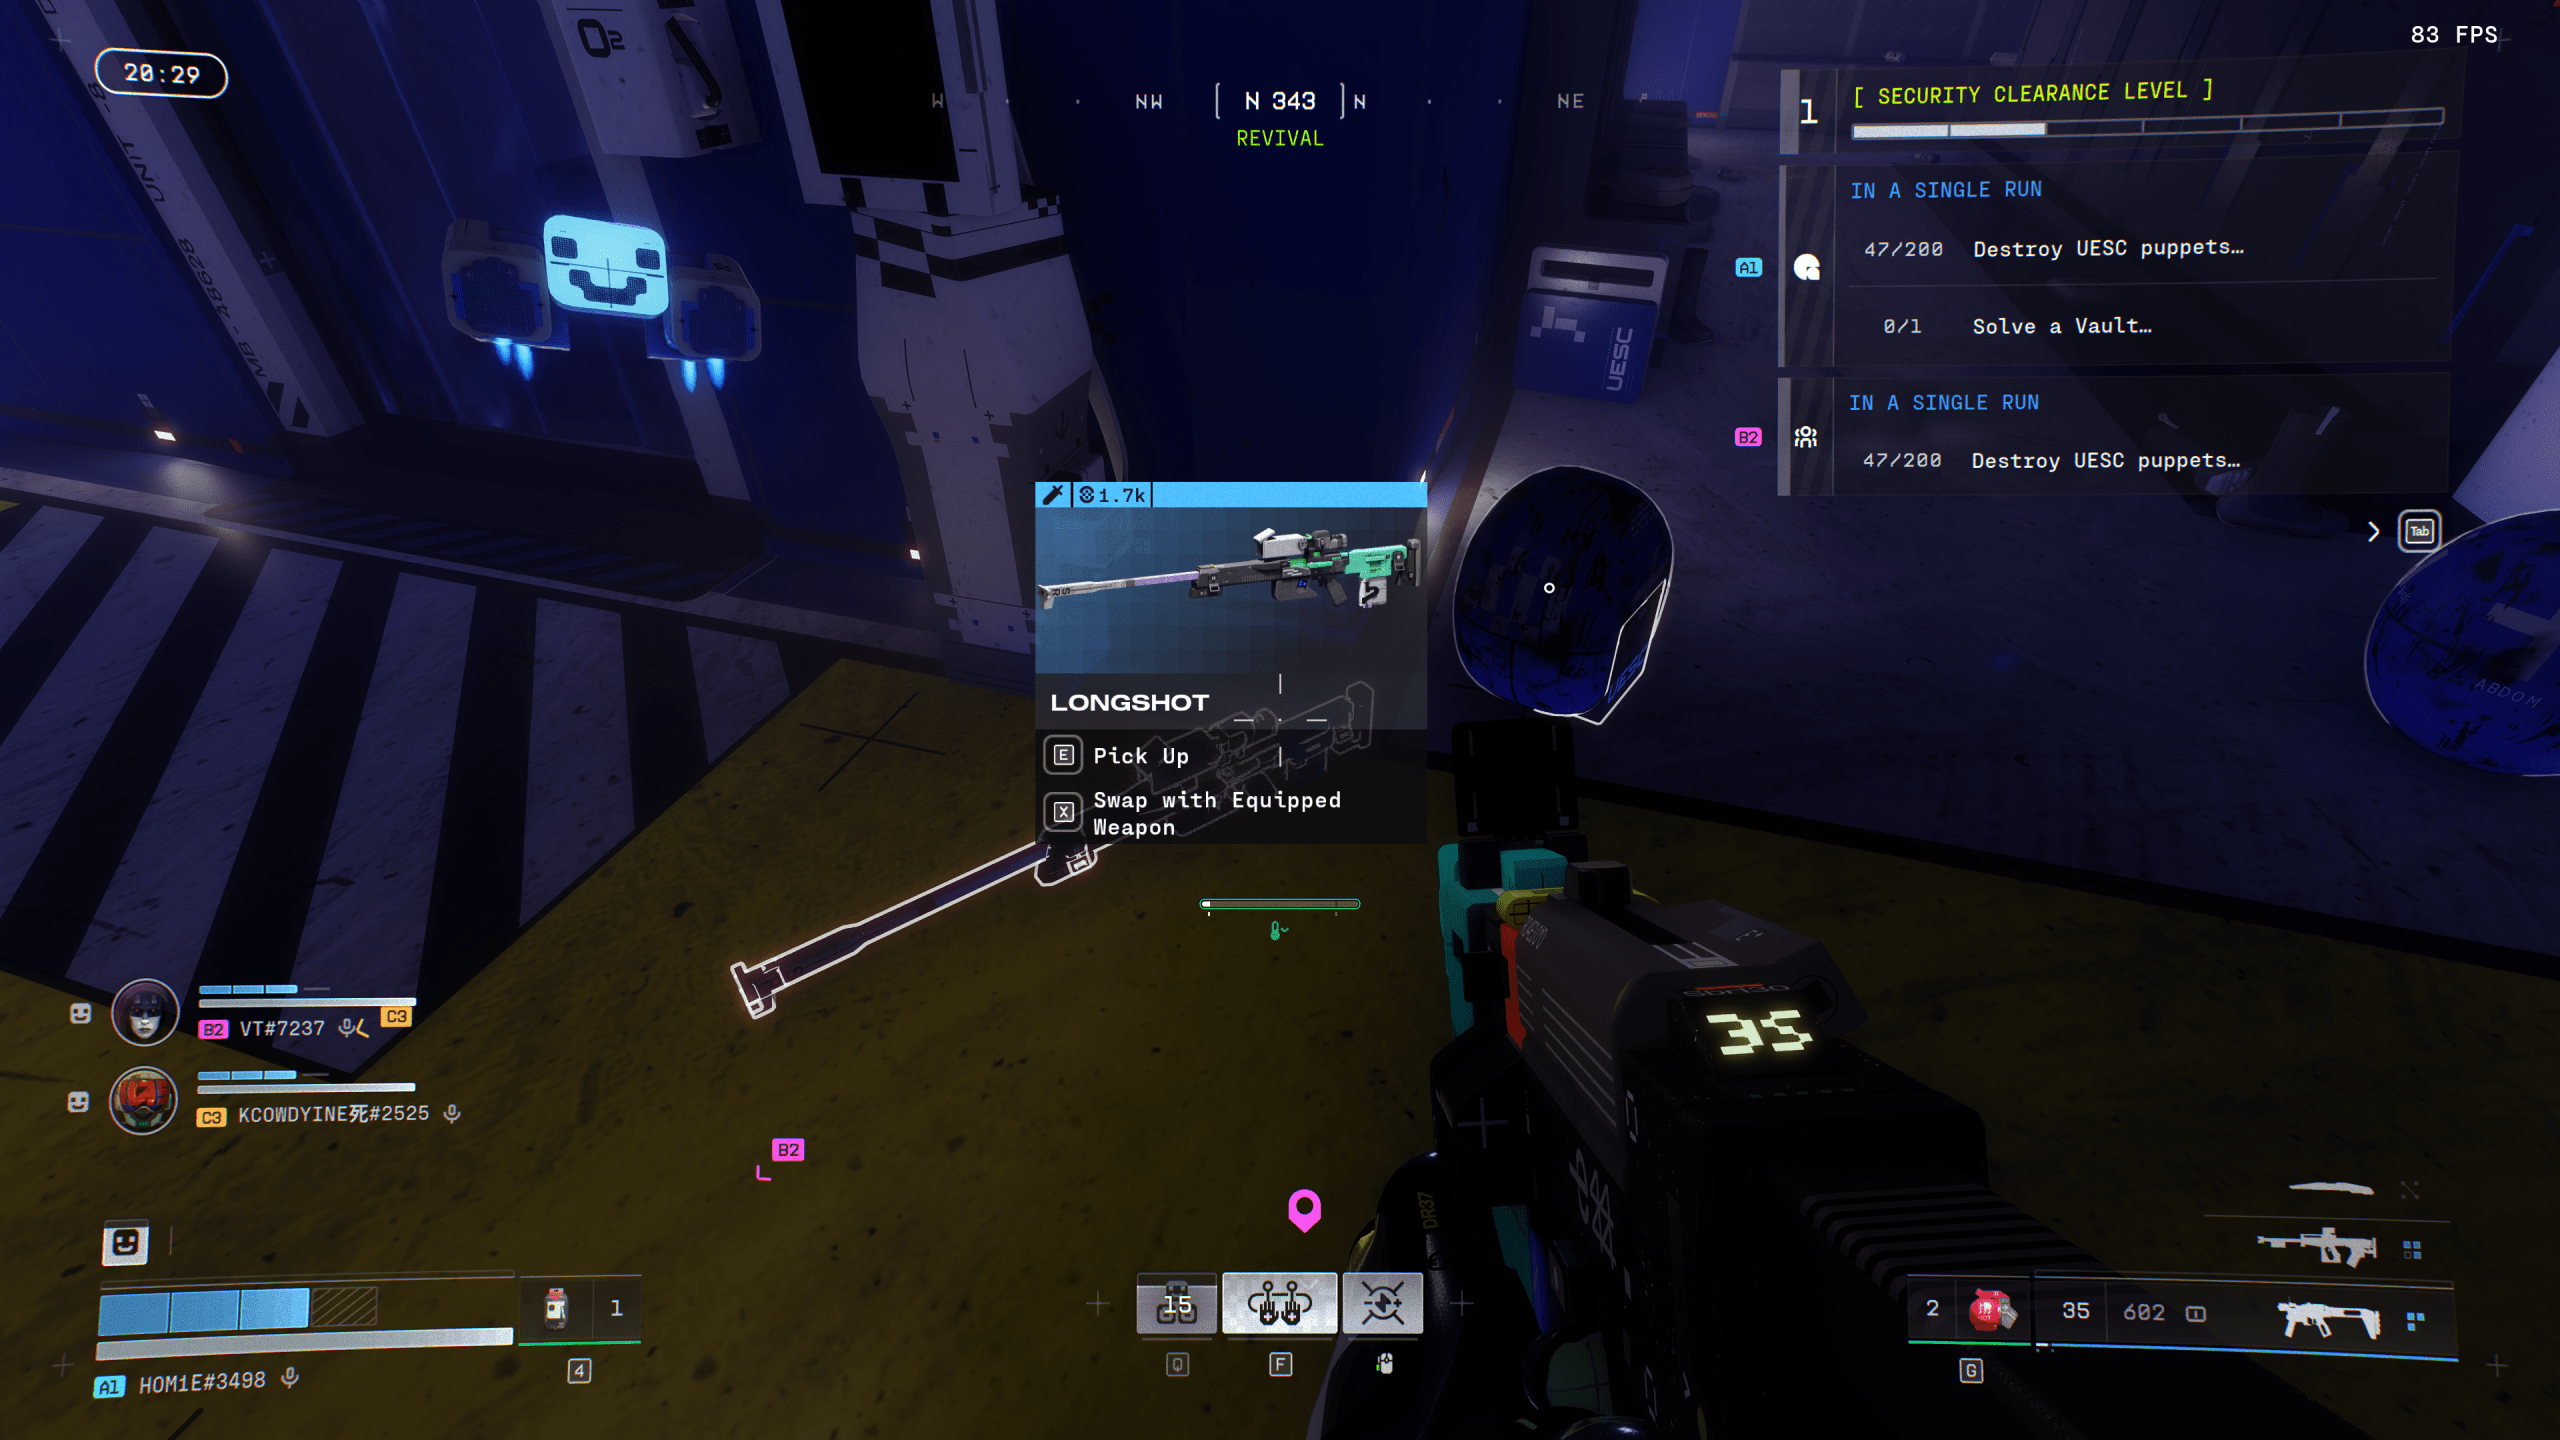
In Cryo Archive, there are seven heavily secured Vaults. You can get in only if you have Marathon Vault keys. The keys can be acquired through looting other maps, on Cryo Archive itself, or via Cryo Archive-unique contracts offered by CyAc, more on that later. Getting the Vault key is only a beginning, as you’ll need to complete a challenge unique to each Vault to get to its contents. The Vaults have very rare loot and items you can’t find anywhere else in the game. Some of the Marathon Cryo Archive rewards are:
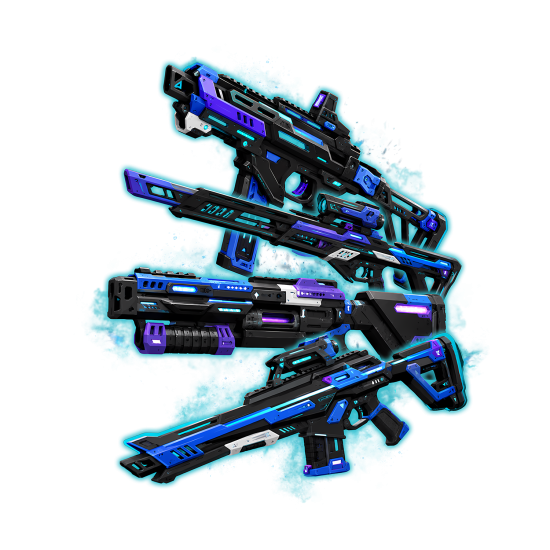
- Unique Prestige Weapons: Expect to find weapons that you can’t get anywhere else, like V00 Zeus RG, V85 Circuit Breaker, Impact HAR, as well as normal weapons with gold mods.
- High-Tier Materials: Some prestige materials, like Alien Alloy and Hazard Capsules, which are needed for high-end faction upgrades. You can also expect to find golden backpacks and shields here.
You don’t always have to exfil to get the high-rarity loot. Another way of getting rare stuff is unique Cryo Archive contracts from CyberAcme that promise high-tier rewards for completing them. Here’s what you need to know about Cryo Archive contracts:
- There are seven types of contracts that you can complete.
- You can reroll contracts to get the same one for yourself and your crew.
- Completing a contract will remove it from your list of contracts for this week.
- Next weekend, the contracts return and the progress resets.
These contracts might be the only way to get extremely valuable items if you’re very unlucky in your runs. Aside from contracts, you also unlock Codex rewards, including skins for all Shells.


You got -20% OFF 
How to Open All Vaults in Cryo Archive
Opening the Vault doors is hard, even if you know what you're doing. Each of the Vaults requires you to have its key, along with other specific items. Not only that, but you'll likely travel around the entire map to get all the needed resources, unless you're lucky with your spawns. To open a Vault in Cryo Archive, you need a few things:
- Batteries: They can easily be found when scanning the surroundings. They become marked on the map. All Vaults require 8 batteries, but the amount you actually need to insert will vary, cause some amount of batteries is already filled.
- Filled Cryo Coolant: Each Vault room requires 1 Filled Cryo Coolant. First, you need to find the Empty Cryo Coolant. They can be lying around in random places, but there are always a few to find in Preservation. Then you need to go to the central area in Control. Find a pit with a walkway above the frozen floor. You need to shoot 4 locks just like in the previous section, where you were getting the red valuable. Drop down, and you'll find pipes that can be used to fill the vessel.
- Credentials: They are only needed for vaults 3-6. There are three types of them - Colonial, Tranquility, and Pump Station. You get each of those by fighting Wardens. Each Warden has specific Credentials to find. More on that later.
Opening Vault doors 1-6 requires you to get these things to get inside them. Note that even if you have the batteries and coolants with credentials, the Vault will not let you in if you don't have the key to it! Each Vault has different requirements needed to be fulfilled to open it. Here's how to open all Vaults in Marathon:
|
Vault # |
Access Requirements |
Description |
Location |
|
Vault 1 |
Cryo Maintenance Key (Cryo Archive 01) |
- |
Located in the Index
|
|
Vault 2 |
Generator Room (Cryo Archive 02) |
- |
Located in the Biostock
|
|
Vault 3 |
Pump Station (Cryo Archive 03), Pump Station Credentials x1 |
To get the Credentials, I recommend using a Scanner in the Control to cover as much ground as possible. Once you scan the area, check your map. It should show blimps where you can find the Warden boss fights. You need to look for blimps on the top right, top left, bottom right, or bottom left. These boss blimps mean that Pump Credentials are there. |
Located in the Preservation
|
|
Vault 4 |
Cryo Monitoring (Cryo Archive 04), Colonist Credentials |
Colonist Credentials can be found next to Vault 5, left of the Control room. Look up and wait for a drone that carries a body. Loot the body, and you’ll find a Colonist DNA Vial. Make your way to the top of Control, to the room where Commanders chill. Inside it, you’ll find battery slots. Use them, and it will spawn more enemies. After you deal with them, the Colonist Credentials will be in the same place where you put your batteries. |
Located in Control
|
|
Vault 5 |
Secret Cargo (Cryo Archive 05), Tranquility Credentials |
Tranquility Rooms are boss rooms located north and south of Control. You get in, you take the Credentials, Warden spawns, you know what to do. |
Left of Control, unnamed space.
|
After the Vault doors open, you'll need to solve a little puzzle. The puzzle is the same for every Vault. Here's how to solve the Vault puzzle:
- When you enter the Vault, you'll see a glowing symbol on a screen.
- Find 3 terminals that have this symbol on them and activate them.
After you activate 3 correct terminals, the final Vault will open, and you'll be able to reap the benefits inside, but most importantly, you'll find AI Subroutines. There are 6 of them, one for each Vault. You need these subroutines to access the boss fight. Also, look for DNA Access cards. They also spawn inside the Vaults, so make sure to take them with you and exfil. You will need to make an imprint of your DNA to access the boss room.
You probably noticed that there’s no Vault 6 in this list. That’s on purpose, since Vault 6 is different. Let’s discuss it in a separate section.
How to Open Vault 6 in Marathon
To even get to Vault 6, you’ll need a clearance level 4 and Anti-Virus packs. Vault 6 can be easy to fumble, so below I have a step-by-step explanation on how to open Vault 6 in Cryo Archive:
- You want to go up to the secret lab, located in the northeast corner of Preservation.
- Inside the room, you’ll find Batteries lock. You’ll need to insert the batteries in it to open a hidden room that has three symbols inside. Memorize these symbols or take a screenshot of them. You’ll need them to open Vault 6. The order is left, top, and right symbols.
- Go to the north Tranquility room, above Control. You need Security Clearance Lv 3 to open the elevator behind Tranquility.
- Once you go up the elevator, you’ll end up in an area where the map doesn’t work. Look around for a room with a security box. Disarm it, and it’ll open the doors right next to this room.
- Kill the enemies that spawn inside this room, including the Golden Shield enemy.
Now that you’ve cleared out the enemies, you get access to the Vault 6 room. As always, you need 8 batteries and a Filled Coolant. You’ll also notice that the room has three screens on the walls. Interact with them in order of the symbols you’ve seen in a lab above Preservation. Once the Vault is open, it’s no different than others. A little puzzle and a ton of loot. And now, the final Vault. Vault 7, which has one of the toughest challenges in this game.
How to Open Vault 7
Vault 7 requires you to complete all previous Vaults in order to get access to it. It also requires you to have a DNA Network Keycard. Remember AI Subroutines? Extracting with them gives you a codex entry. You need to get all the entries to even attempt opening the Vault 7.
After you spawn in, look around and find a DNA Network Machine. There’s one in each section, and you can usually do it before coming in contact with enemy players. The next step is very important. Make sure that the player with all Codex entries uses the DNA code machine. Not all of you have to have the entries. Just one player is enough. Once the DNA Keycard has been processed, it’ll spawn a DNA Sequence in the box next to it. This sequence has four letters in the name. Memorise their order.
Next, you need to go find another DNA Network Machine. Once you do, insert this DNA Sequence that you’ve received. All you have to do is look around the area and find 4 screens with letters on them. Enter them precisely in the order they appear in the DNA Sequence.
After that, repeat the steps we took to get to Vault 6 in the section above. Take as many batteries as you can. This time, don’t go to Vault 6, though. On the other side of the area is another entrance. Use your batteries here, and the door will open. Inside, you’ll need to insert a Command DNA Vial you got from the machine. Once it’s ready, take it, and then the whole room will explode, the color palette changes, and you’ll see a light appear. You need to follow it.
The light will lead you to a platforming section. It’s pretty simple and easy to navigate, so I won’t concentrate on it. At the end of the jump puzzle, you’ll find a room with two terminals. One will spawn an exfil, so don’t worry if it all takes too much time. You’ll have a chance to leave. Another panel releases the Airlock. Go through the Airlock, and you start the boss fight.
Compiler Boss Fight Cryo Archive
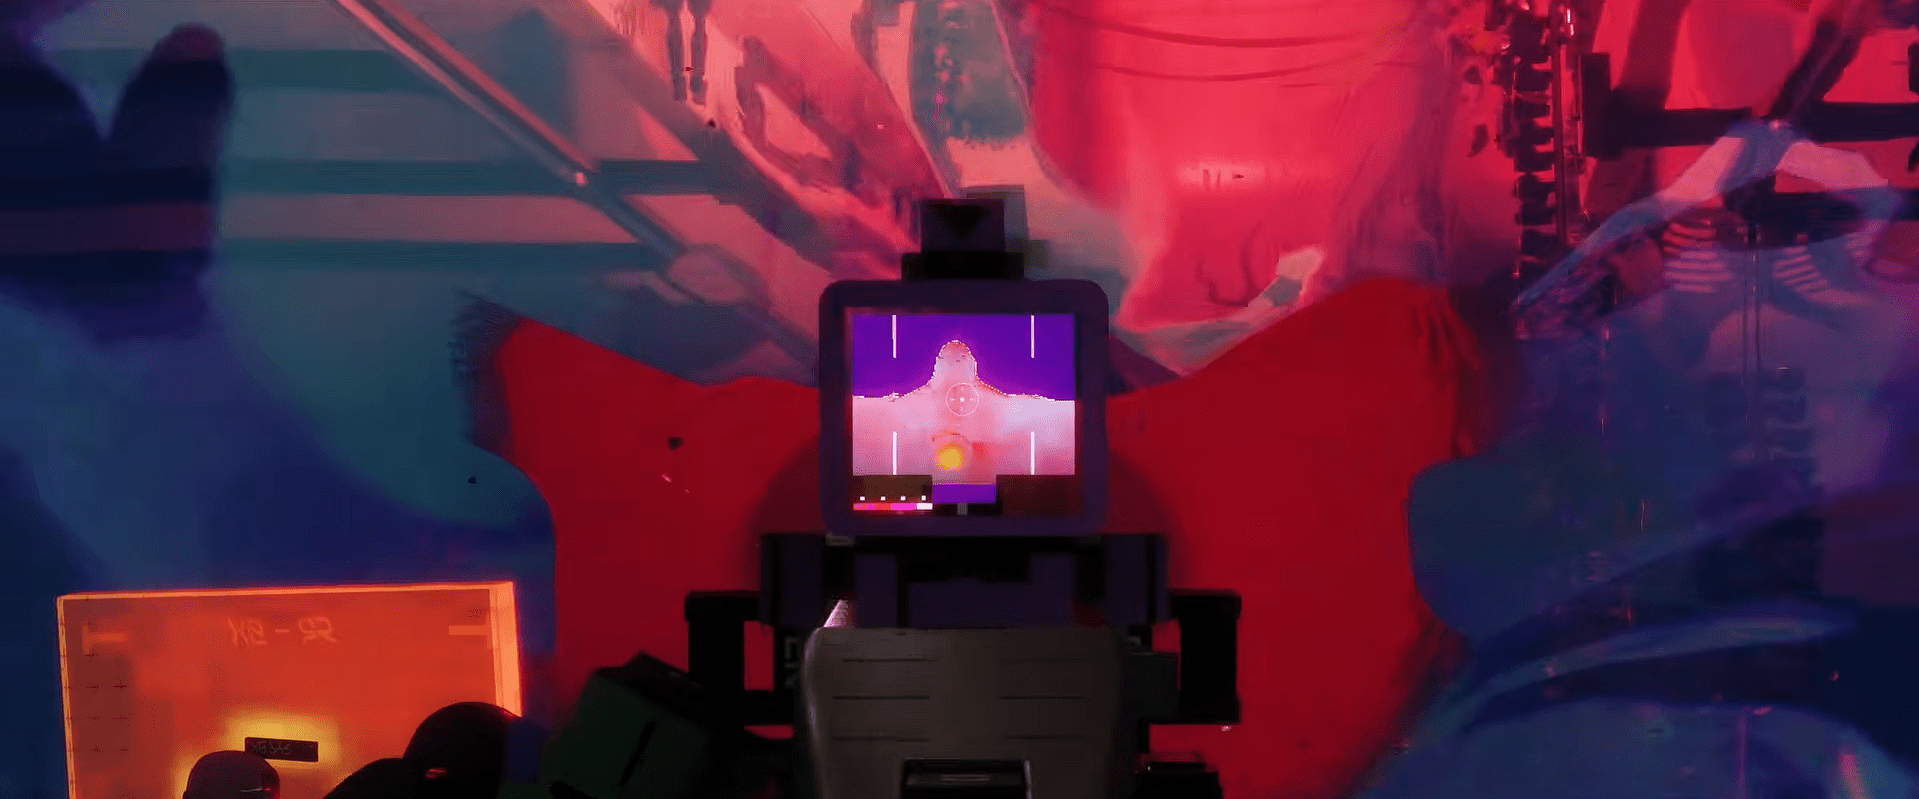
Fighting Compiler is kind of like a very simple Destiny raid boss encounter, but it's still really easy to die from his attacks. If you decide to fight this alien, take your best weapons. Take lots of heals and status removers and pick Triage, as without him, the first encounter will end in party wipe. The only mechanic during this encounter is activating the terminals with symbols scattered around the room and then damaging the boss. Let’s go over how to defeat Compiler in Cryo Archive:
- Activate Terminals: There are 9 terminals and 3 symbols depicted on them. There is no difference in what symbol you start with, but you’ll need to find two other terminals with the same symbol and activate them.
- Damage Phase: Activating Symbols will launch a damage phase. During it, you’ll have a green bubble appear in the middle of the room. Stand inside and start shooting the Compiler’s core.
- Cape Fear: Once you deal enough damage to Compiler’s core, it’ll open its cape and show you its ribcage. Shoot it with all you’ve got.
- Repeat: If you didn’t kill the Compiler, repeat it all over again.
The Compiler has two attacks. One is the laser that’s pretty easy to dodge. Another one is green orbs that it launches at you that slowly follow you around. You can break them. Be mindful that even with prestige shields, 2-3 hits by these will leave you knocked, so take self-revives.
Once you defeat the Compiler, you can loot its corpse to find a Compiler Ganglion, which is an item that lets you trade ammo for a new Contraband rarity weapon: Biotoxic Disinjector. This thing shreds hard. You can get your own weapon in the Vault that opens after you defeat Compiler. Honestly, I’ve felt a little disappointed, cause the fight with Compiler was so simple and the whole road to it was much harder than the boss fight itself. Still, it’s a really nice-looking boss fight that hits even harder in a relatively grounded setting.
Read our other Marathon guides:
Changelog
26 March 2026: Added explanation of how to open the Vaults and defeat a Compiler boss.
F.A.Q
How to defeat Compiler in Cryo Archive?
During the boss fight, you need to look for terminals with symbols on them. There will be 3 symbols in the room and 9 terminals total. Start with any symbol and use the other two terminals that have the same symbol on them. That starts the damage phase. Shoot the Compiler's core, and when it opens its cape, start shooting the ribcage with everything you have. Repeat until the Compiler dies.
How to open Cryo Archive Vaults?
Each Vault is different and poses a unique challenge. First of all, you need a keycard specific to the Vault. Then, you need a minimum of 8 batteries and 1 Filled Cryo Coolant. Vaults 1 & 2 don't require anything else. Vaults 3-6 require specific Credentials, found from boss fights:
- Vault 3: Pump Station Credentials
- Vault 4: Colonist Credentials
- Vault 5: Tranquility Credentials
- Vault 6: None
- Vault 7: Command Credentials
What’s Cryo Archive in Marathon?
Cryo Archive is an endgame map with unique loot not found anywhere else in the game.
When does Cryo Archive become available?
Cryo Archive becomes available on Thursdays at 10:00 A.M. PT/1:00 P.M. ET and ends on Sundays at 10:00 A.M. PT/1:00 P.M. ET.
Is Cryo Archive difficult in Marathon?
Yes, the developers pose it as an ultimate challenge to test your skills and all the gear you’ve farmed during the week.
What do you need to enter the Cryo Archive?
The requirements are pretty simple:
- Runner level 25
- All factions unlocked
- Loadout value of 5000 credits
How to survive Cryo Archive in Marathon?
Take more than you think you’ll need, tread lightly, and never engage in fights until you’ve checked the area you’re in. Try to run it with free kits a couple of times to learn the layout.
What rewards are available in Cryo Archive?
The best and unique loot can be found here, including Prestige weapons and gear, as well as rare materials available only in this location. You can also get a unique Biotoxic Disinjector weapon, and red Valuable loot worth 40,000 credits that will reward each of your teammates.


