 Dallon Avery
Deep Rock Galactic Rogue Core Beginner’s Guide Quick Overview:
- DRG Rogue Core is a very difficult game, especially when played solo
- Your goal on any mission is to get to the lowest level through multiple elevators to reach and defeat the boss
- The health and armor status, as well as ammo carry over from level to level
- Your Reclaimer has a meta-progression and mission-specific skill upgrades
- You start with a pickaxe and always get random weapons
Get access to new biones with Clearance Level Boost from SkyCoach. Explore Hoxxes and its zones with our services!


Read closely 
Browse our hottest DRG Rogue Core Boosting services


DRG Rogue Core Mission Terminal Explained
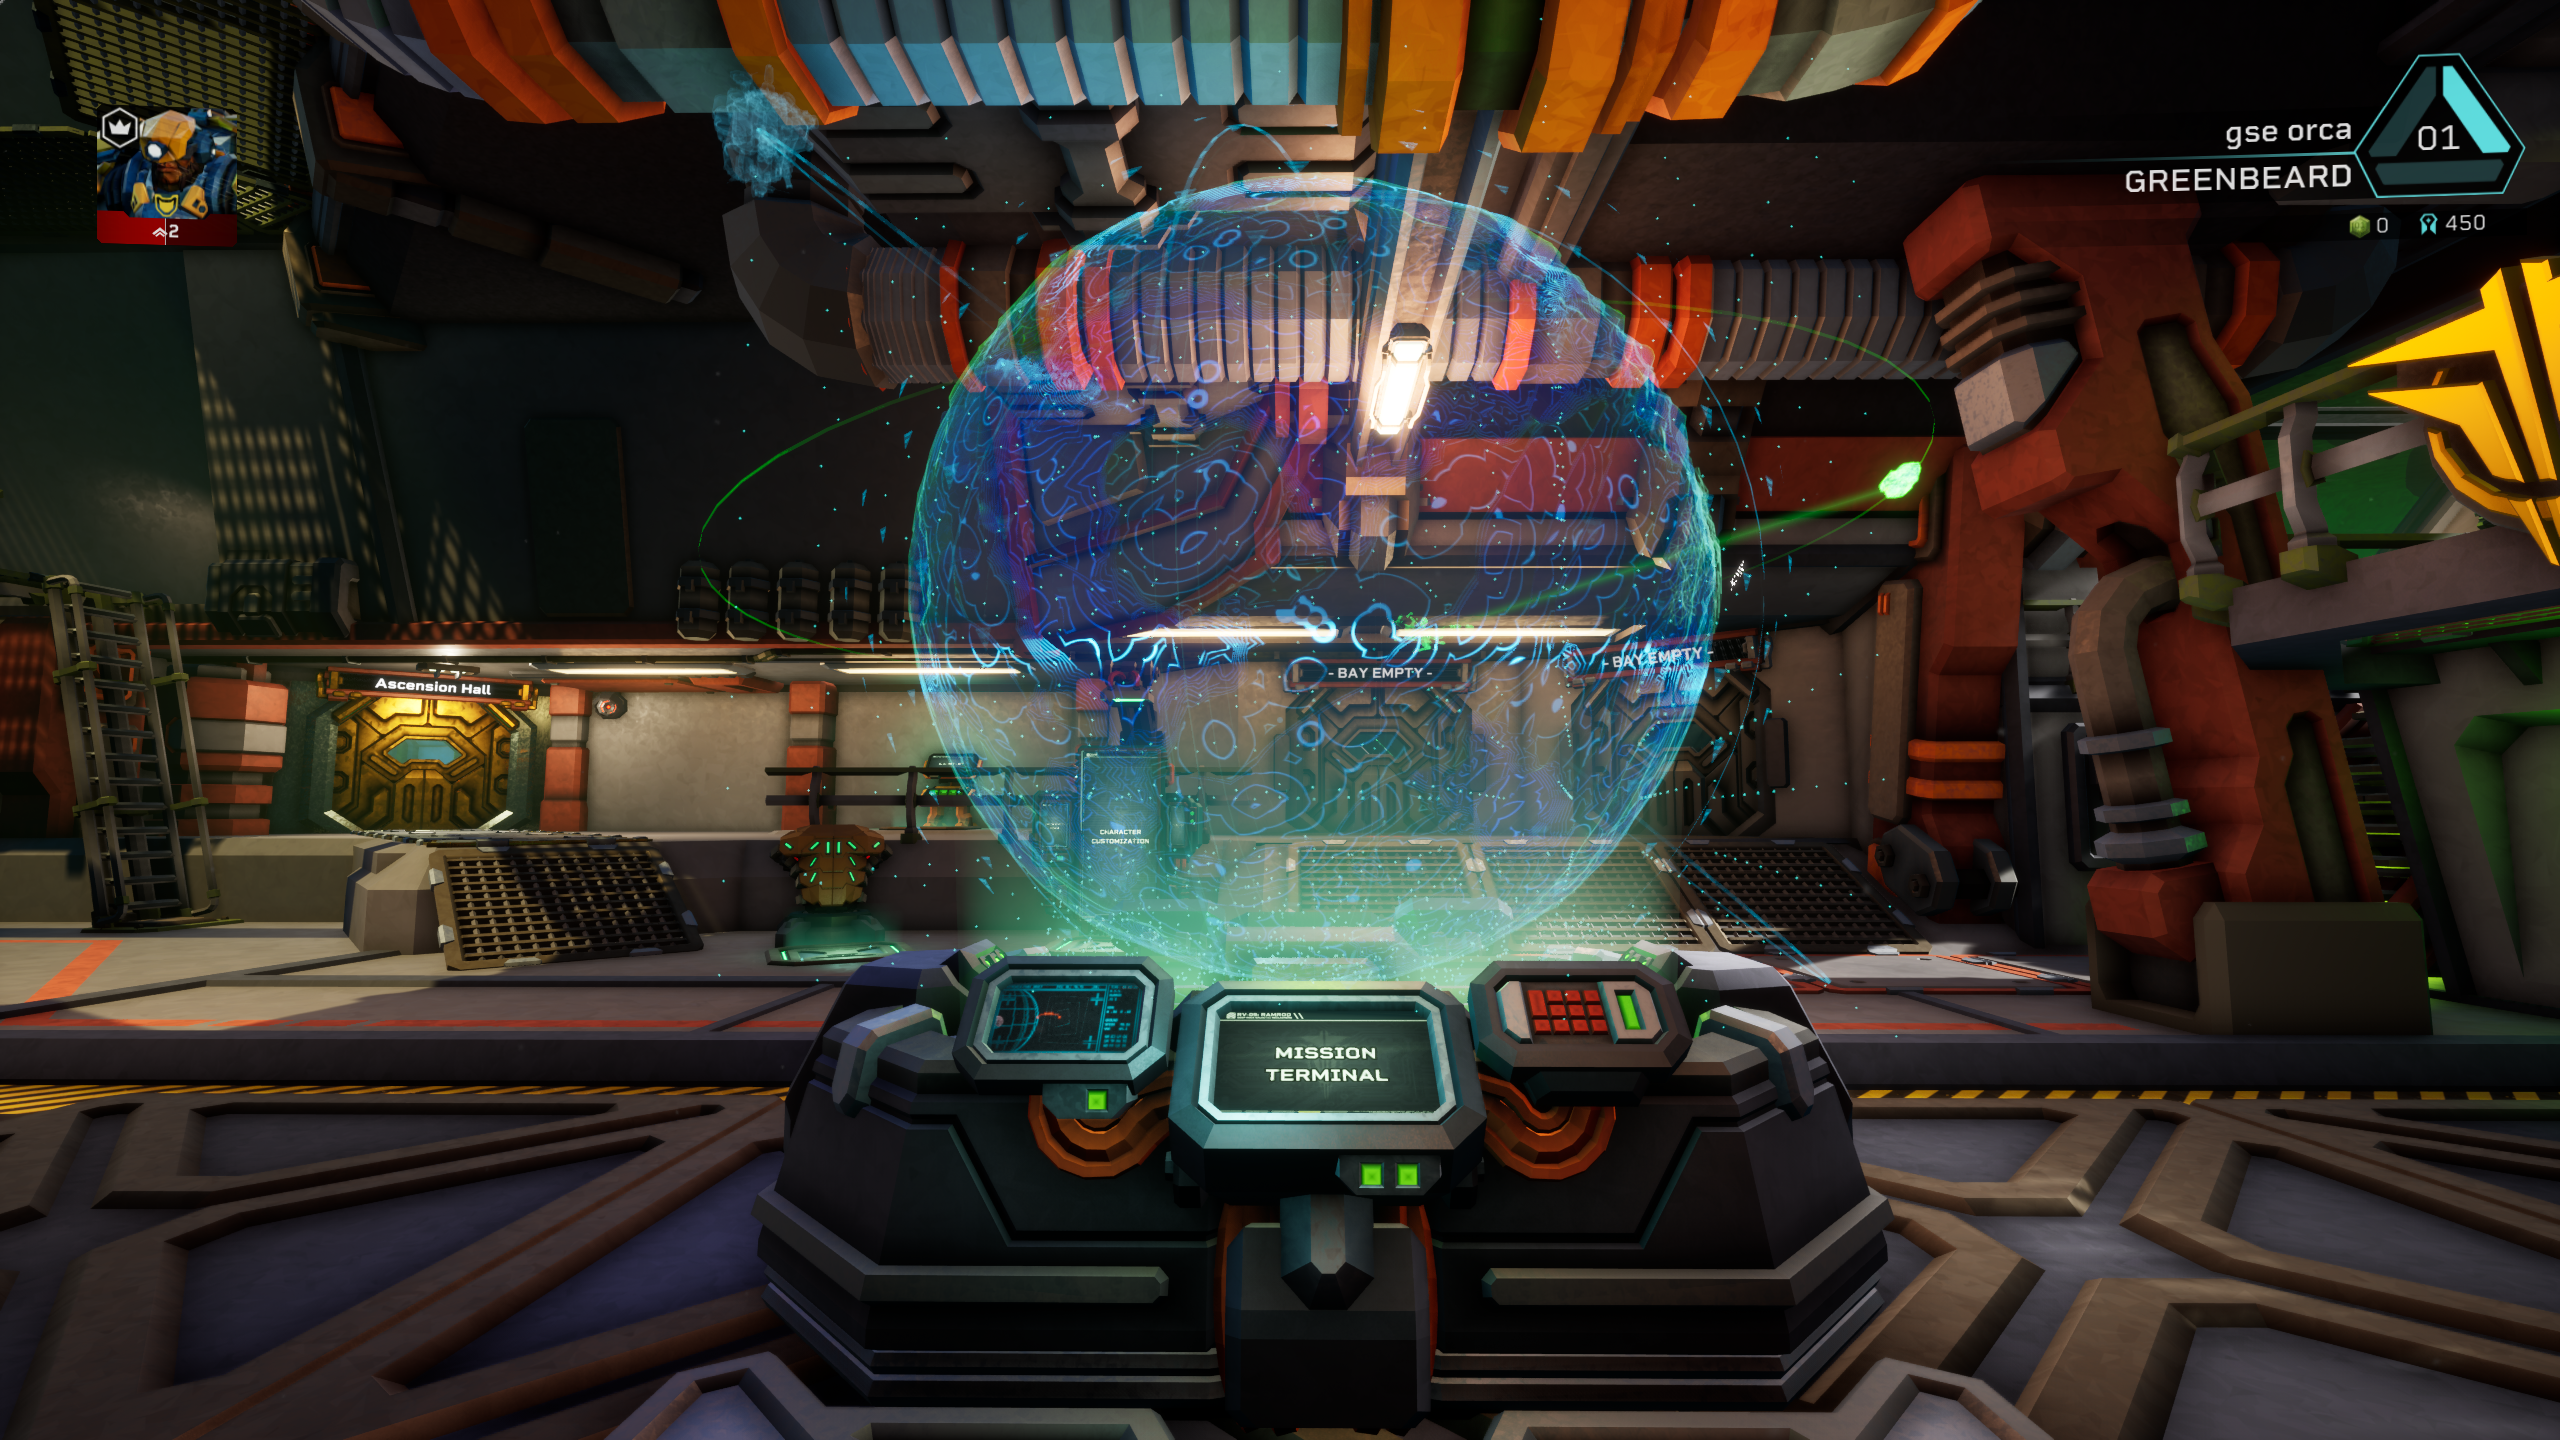
As soon as you launch DRG Rogue Core for the first time, the game will drop you into a mission tutorial, which will show you how the missions typically go. Or at least what each level within the mission will be like.
But I want to start with the Mission Terminal and give you a bigger picture. The entire planet, Hoxxes IV, is divided into zones, and each zone contains some amount of facilities. Each facility has levels, which go deeper into the ground. So your mission is to go from the level that’s closest to the surface, in my case, it’s D-01, to the lowest level, D-04 to defeat the final boss and secure the facility.
On top of that, you can see you have Intel Tasks, which are like challenges grouped into sort of quests. The first one, called “Hoxxes IV,” will have you do the following:
- Reclaim a Facility
- Recover Cameras from the Salt Pits and Crystaline Caverns (0/9)
- Summon a Gatekeeper
- Process Expenite in the R.E.P.D. (0/500)
This first task basically asks you to secure your first facility and collect some cameras on the way. Those, you have to find off the beaten path.
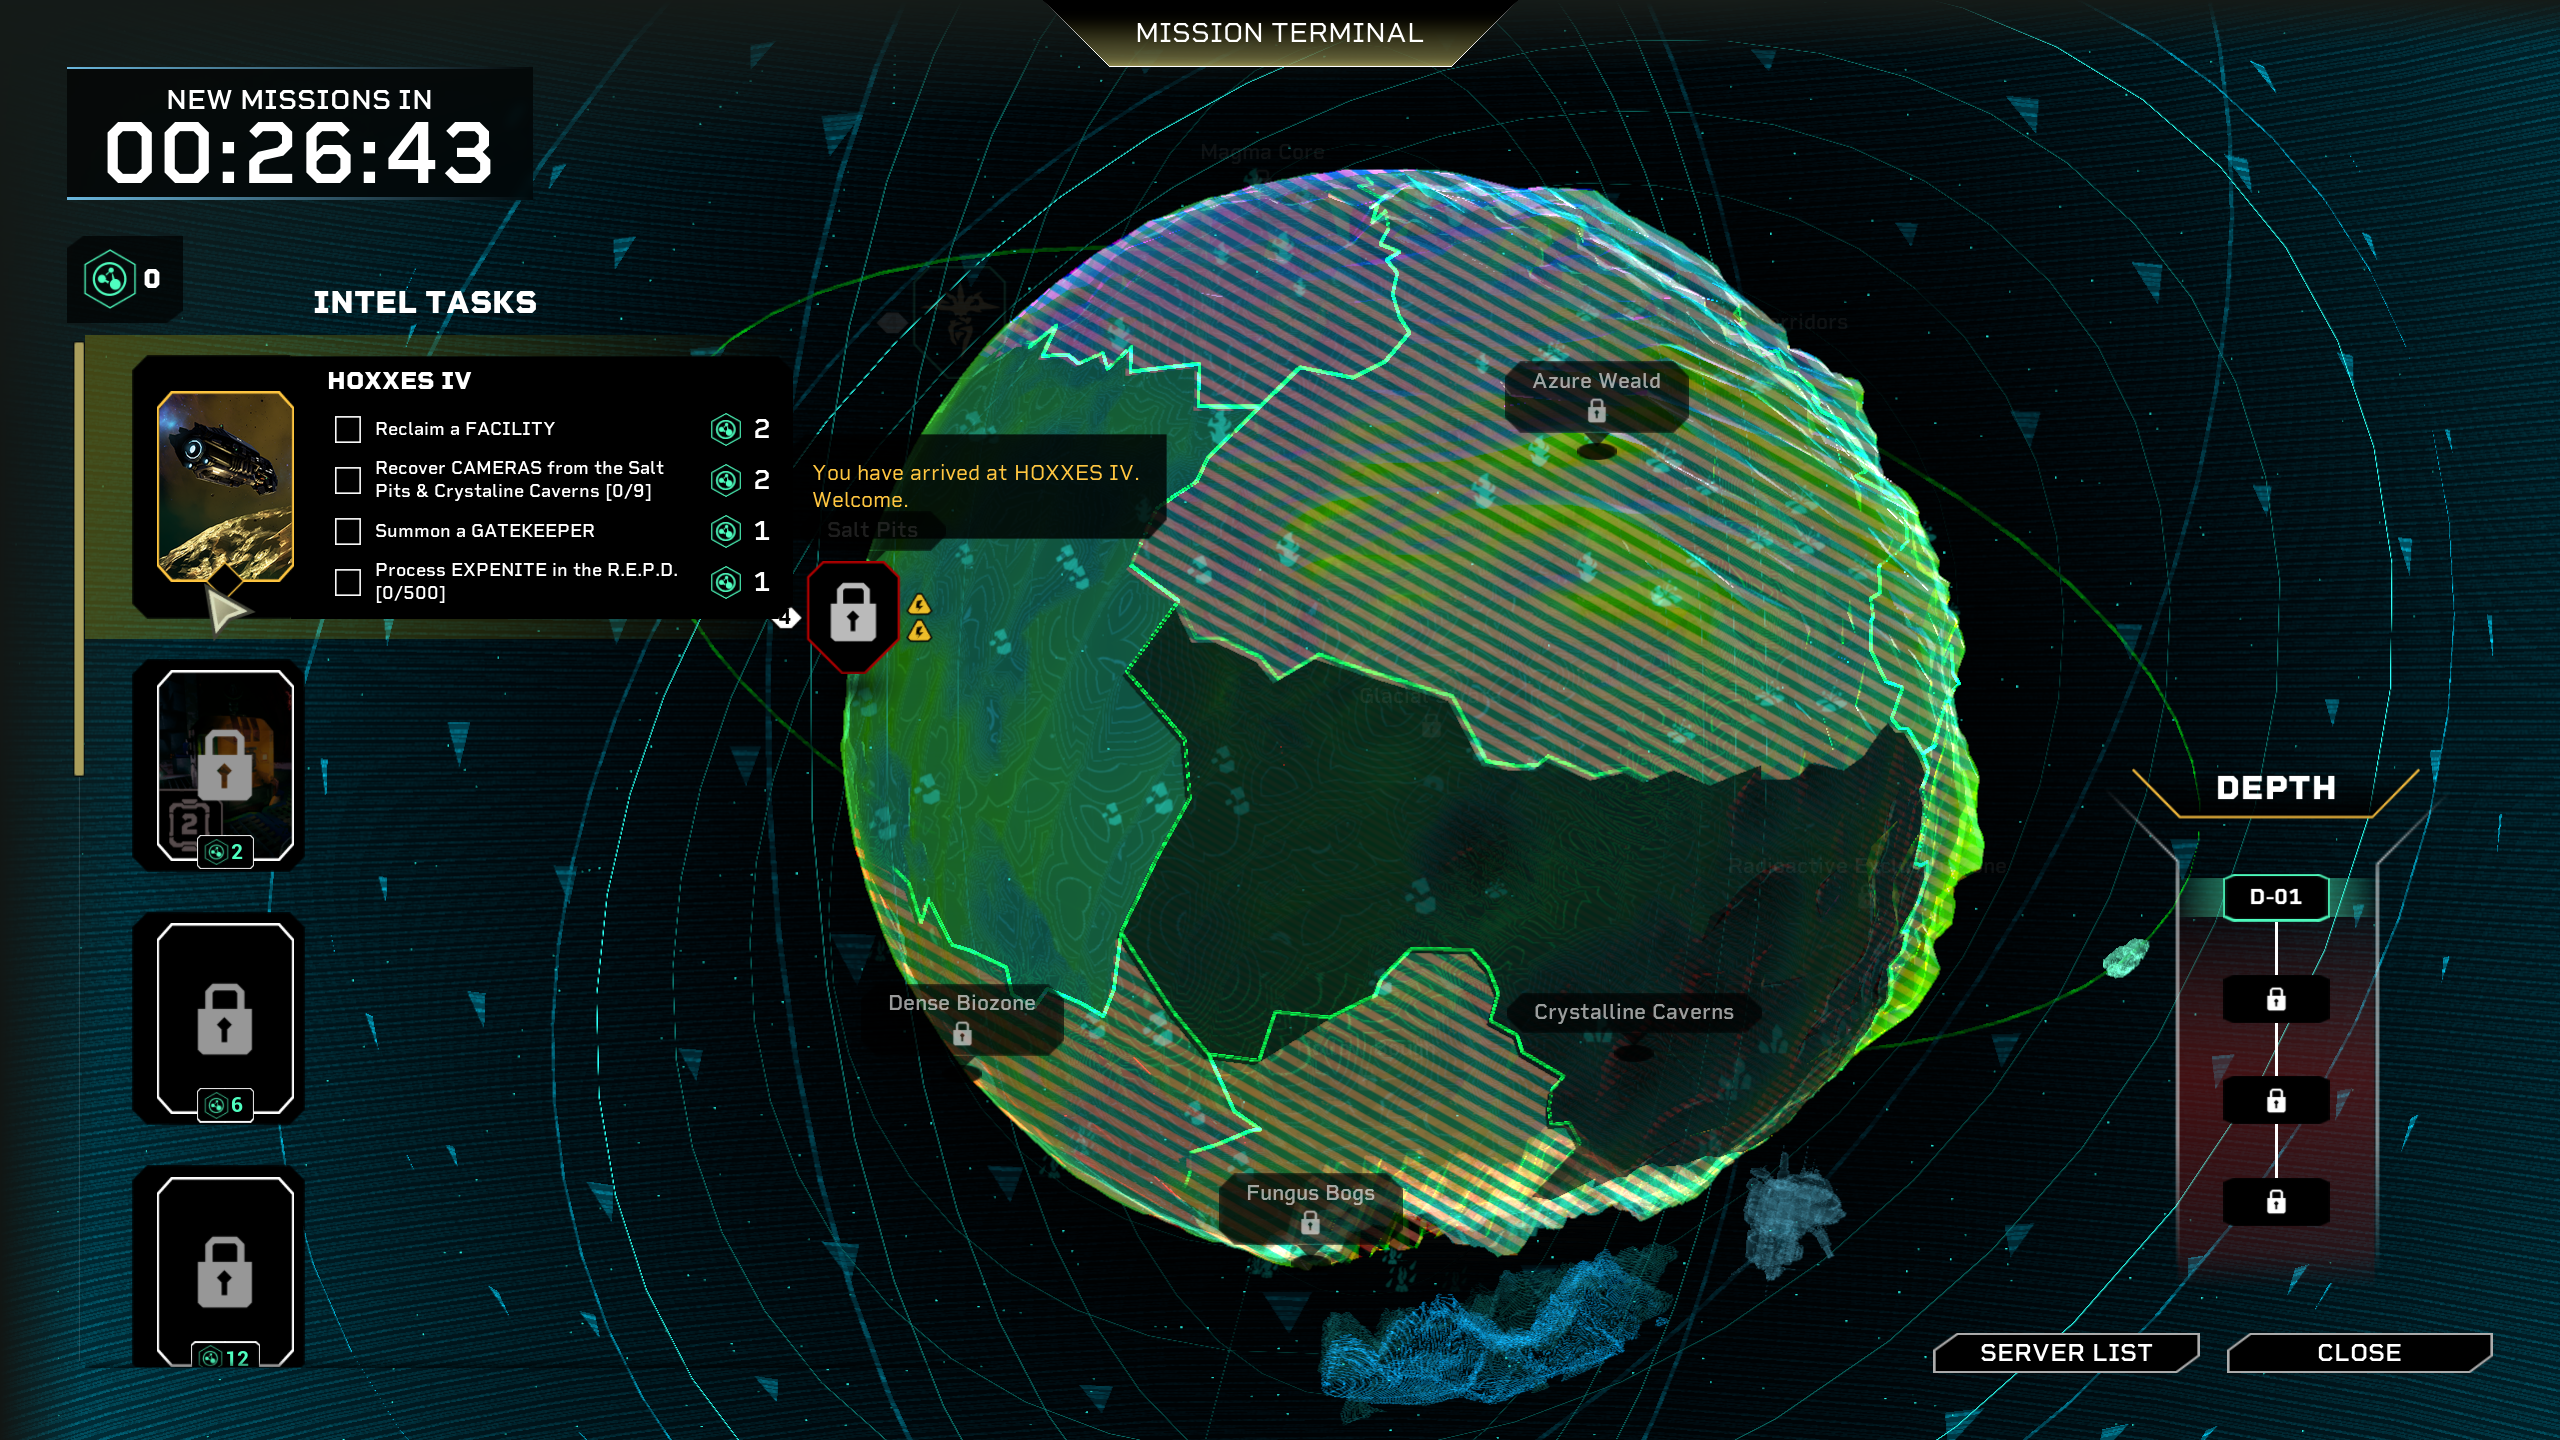
There are several zones on the planet, each of which is essentially a biome with a different underground look. You have:
- Salt Pits - starting area
- Dense Biozone
- Fungus Bogs
- Hollow Bough
- Crystalline Caverns
- Radioactive Exclusion Zone
- Glacial Strata
- Sandblasted Corridors
- Azure Wald
- Magma Core
Each zone contains several facilities with different depths or numbers of levels and complexity. Facility length indicates the physical size of the mining facility in a particular mission. Longer facilities take more time to complete, but also contain more expense, meaning more opportunities to earn upgrades during your mission.
Complexity rates the challenge of navigating and traversing a cave. Low complexity indicates a more linear cave system, where highly complex facilities will require a lot more traversal using all sorts of tools. Basically, imagine always going in a straight line on low complexity or with more verticality on more complex facilities.
Some missions have so-called Alterations, which are modifiers that change the rules of engagement or introduce special enemies.
Clearance Level
I’ve already mentioned the Intel Tasks, which are like quest challenges. As you complete more of these, you gain something called a Clearance Level. Specific Clearance Level is required to access more challenging missions, deploy in other biomes, or to activate certain resources and equipment found during the mission runs. That’s very important.
Rogue Core Main Gameplay Loop
Okay, let’s say you want to jump into your first run straight away. You should already be familiar with how missions go from the tutorial you just finished, but just in case if you haven’t played the game yet, here it is.
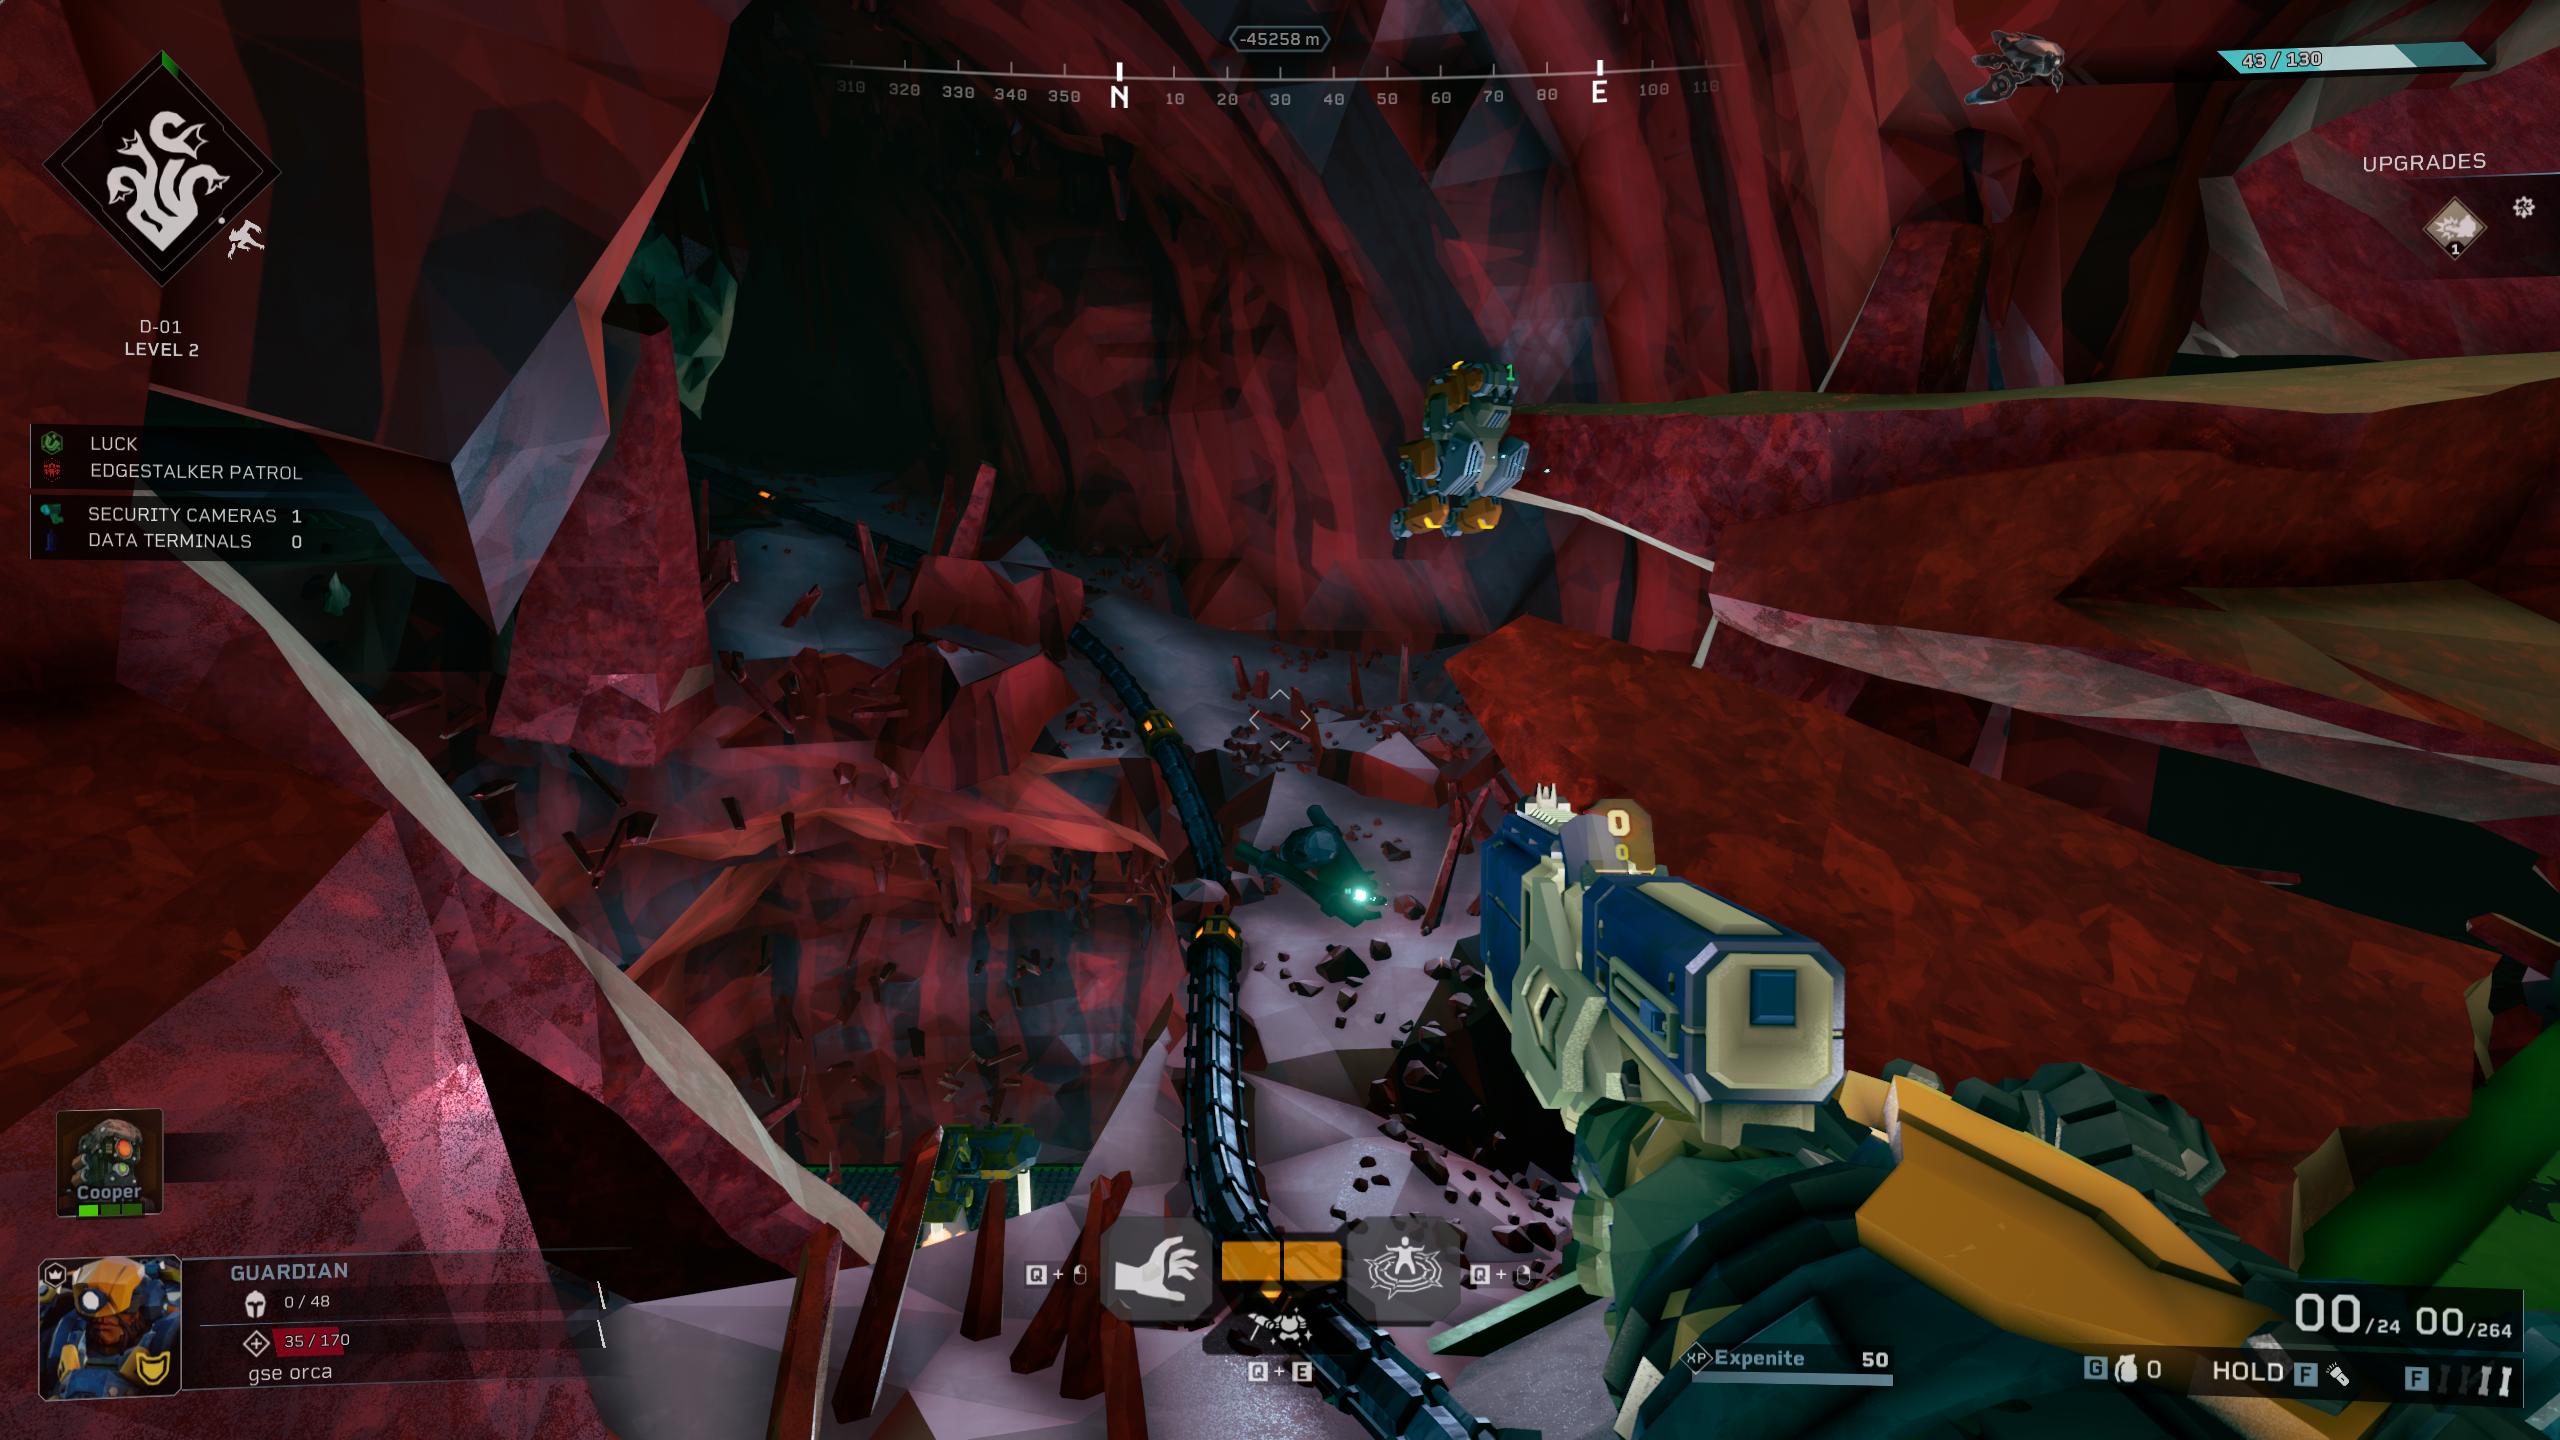
Your main objective is to go from the start of the level to the end, activate the elevator, and descend. Do that for however many levels are in the facility. The lowest level contains a Rift Gate that needs to be destroyed to finish the run successfully. Each level, in its basic form, consists of a series of smaller rooms. There are no hard objectives for rooms, but you may stop at any time to collect Expenite, loot the Equipment Crates, activate Workbenches, etc. At the end of the level, you’ll always find an elevator, which you activate and then defend the area until the elevator arrives to take you to the next level. Your ammo, health, and armor do not restore between levels. Everything carries over.
Threat Timer and Risk Vectors
 You can’t just take your time to loot and explore every nook and cranny. When the mission’s threat timer reaches zero, Corespawn enemies will start pouring out of their rifts endlessly, pushing your team to the elevator for salvation. This is what’s known as the “Unceasing Wave”. You might think you can take out a few waves, but ammo is not endless, so you never want to stay long enough to have to survive this kind of attack.
As you change the level (or floor, if you will), you’ll see a mid-mission status screen, which shows the information on the current, previous, and next floor. Each floor comes with its own unique modifiers that you choose at the start of the new floor.
You get 3 cards with one negative and one positive modifier, and you have to pick which one will be applied to the level you just arrived on.
On-Mission Equipment and Upgrades
Beside the elevator, you’ll come across various objects that will help make your run a bit easier and prepare you for the deeper levels.
First of all, you’ll be able to find Equipment, Weapons, and Munitions Crates randomly scattered across the floor. Usually, they’re found along the Power Cable that points you toward the elevator, but sometimes, you’ll have to find them buried in various corners. The starting weapon you pick up at the start of the run doesn’t have to be the only weapon you use the entire run. Weapon Crates drop more guns that you can put into your free weapon slot as a backup in case the primary runs out of ammo.
Munitions crates can be used more than once. If you’re playing solo, you can use it all as each interaction replenishes 50% of maximum ammo. In a team, usually, it’s one use per player.
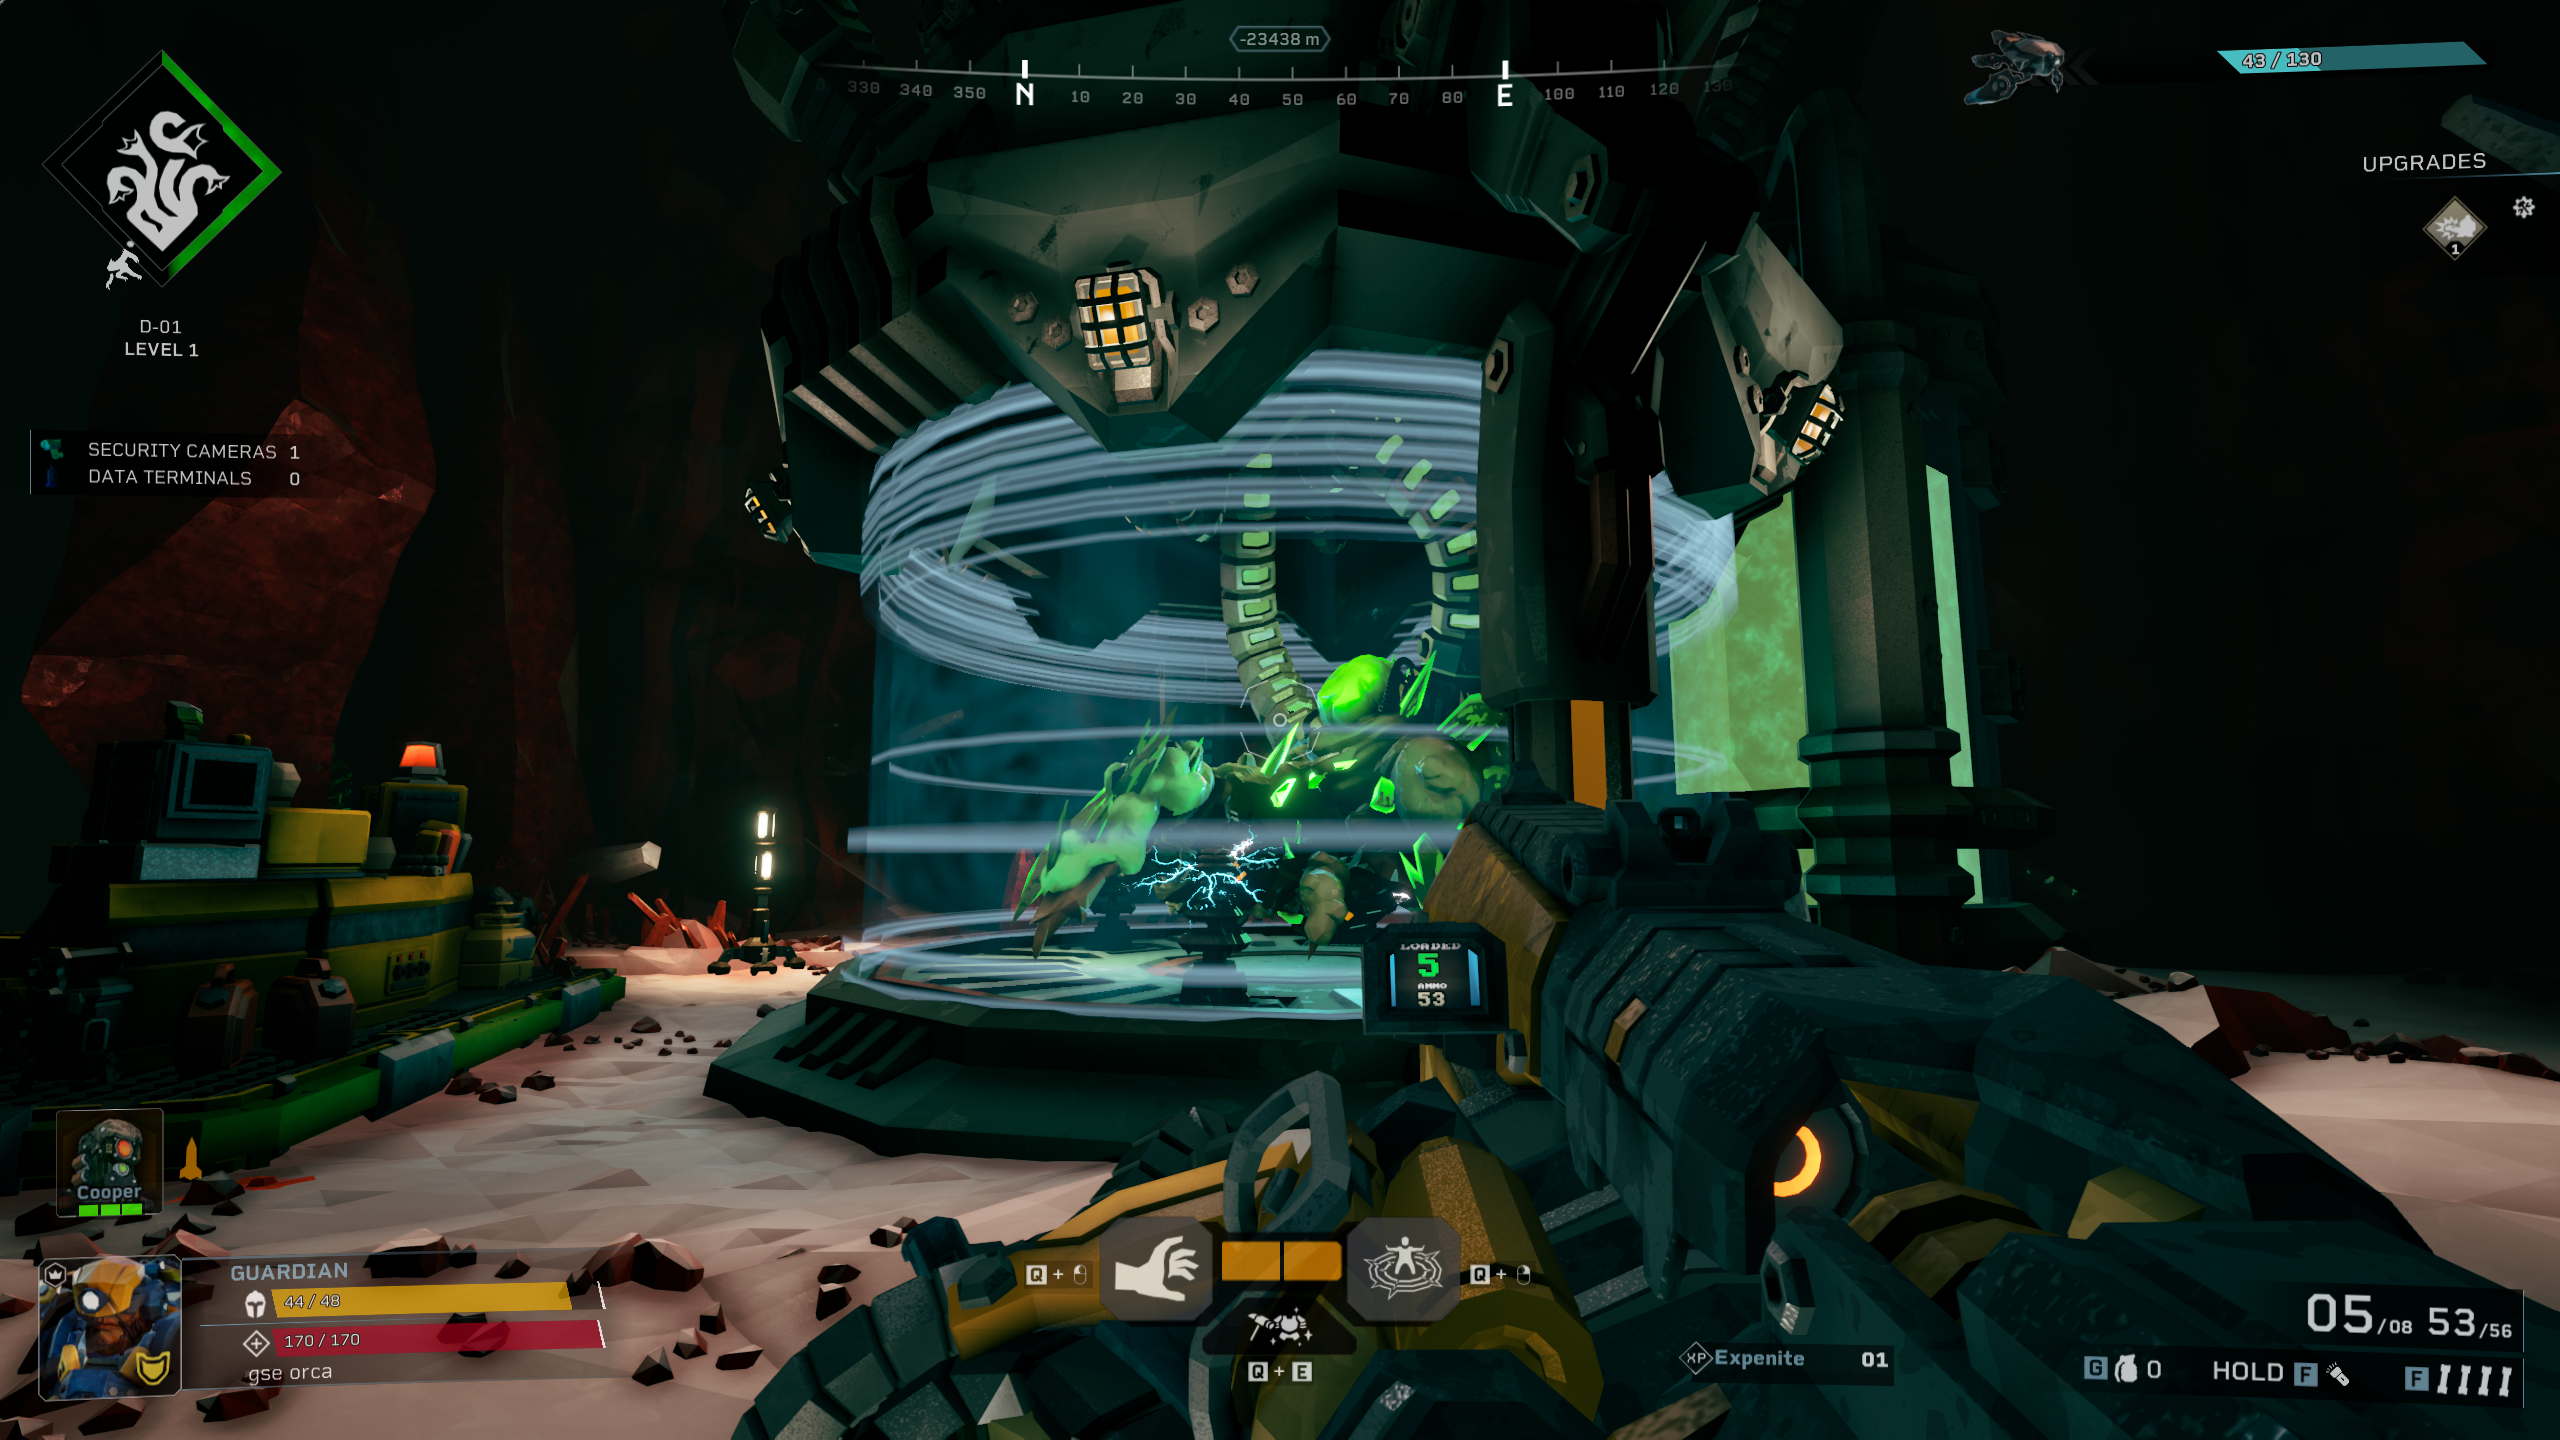
Workbench allows you to upgrade your weapons and skills during the mission. Workbench’s power needs to be restored by finding and bringing the toolbox back to it. The toolbox can be found using the Terrain Scanner. Once the Workbench is active, you get to pick one out of 3 upgrades, 2 of which are usually for weapons and one for the ability.
Bio-Booster offers a selection of upgrades related to your class. It can also be found using the Terrain Scanner. To use it, the Bio-Booster needs to be hacked via a mini-game. Once successful, you’re offered to pick one out of two modifiers that enhance your skills and abilities.
Expenite Upgrades
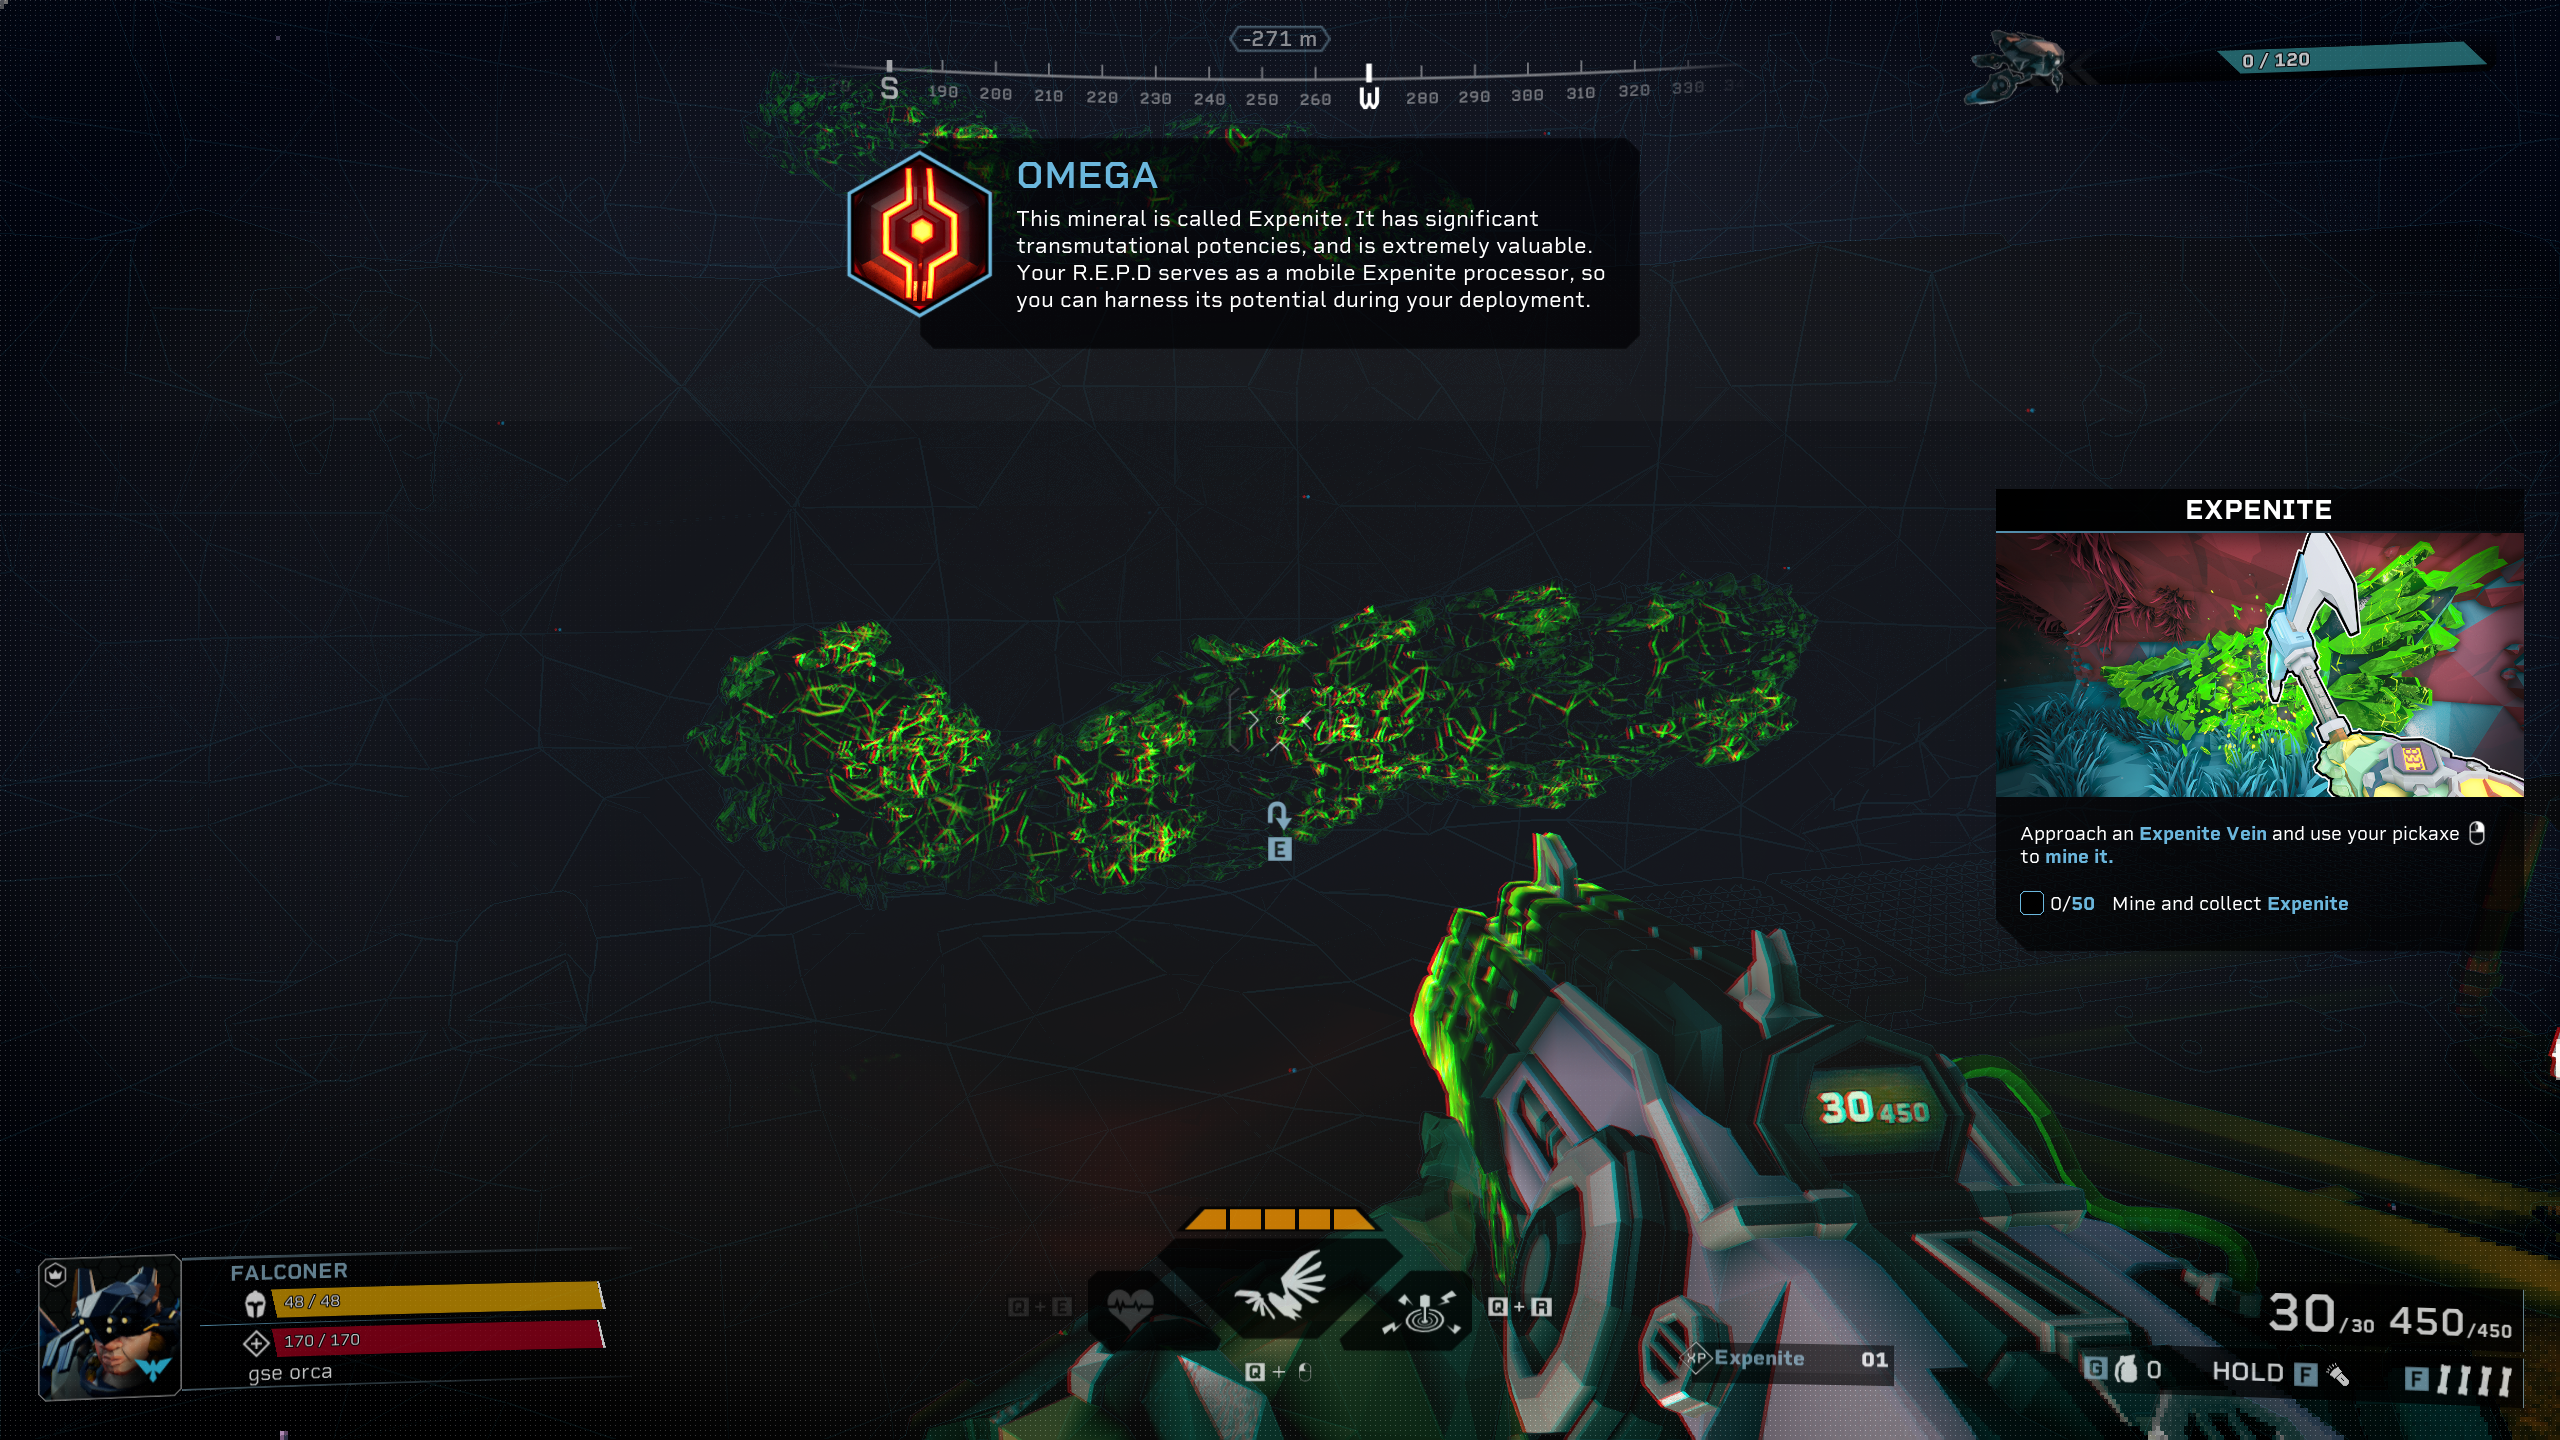
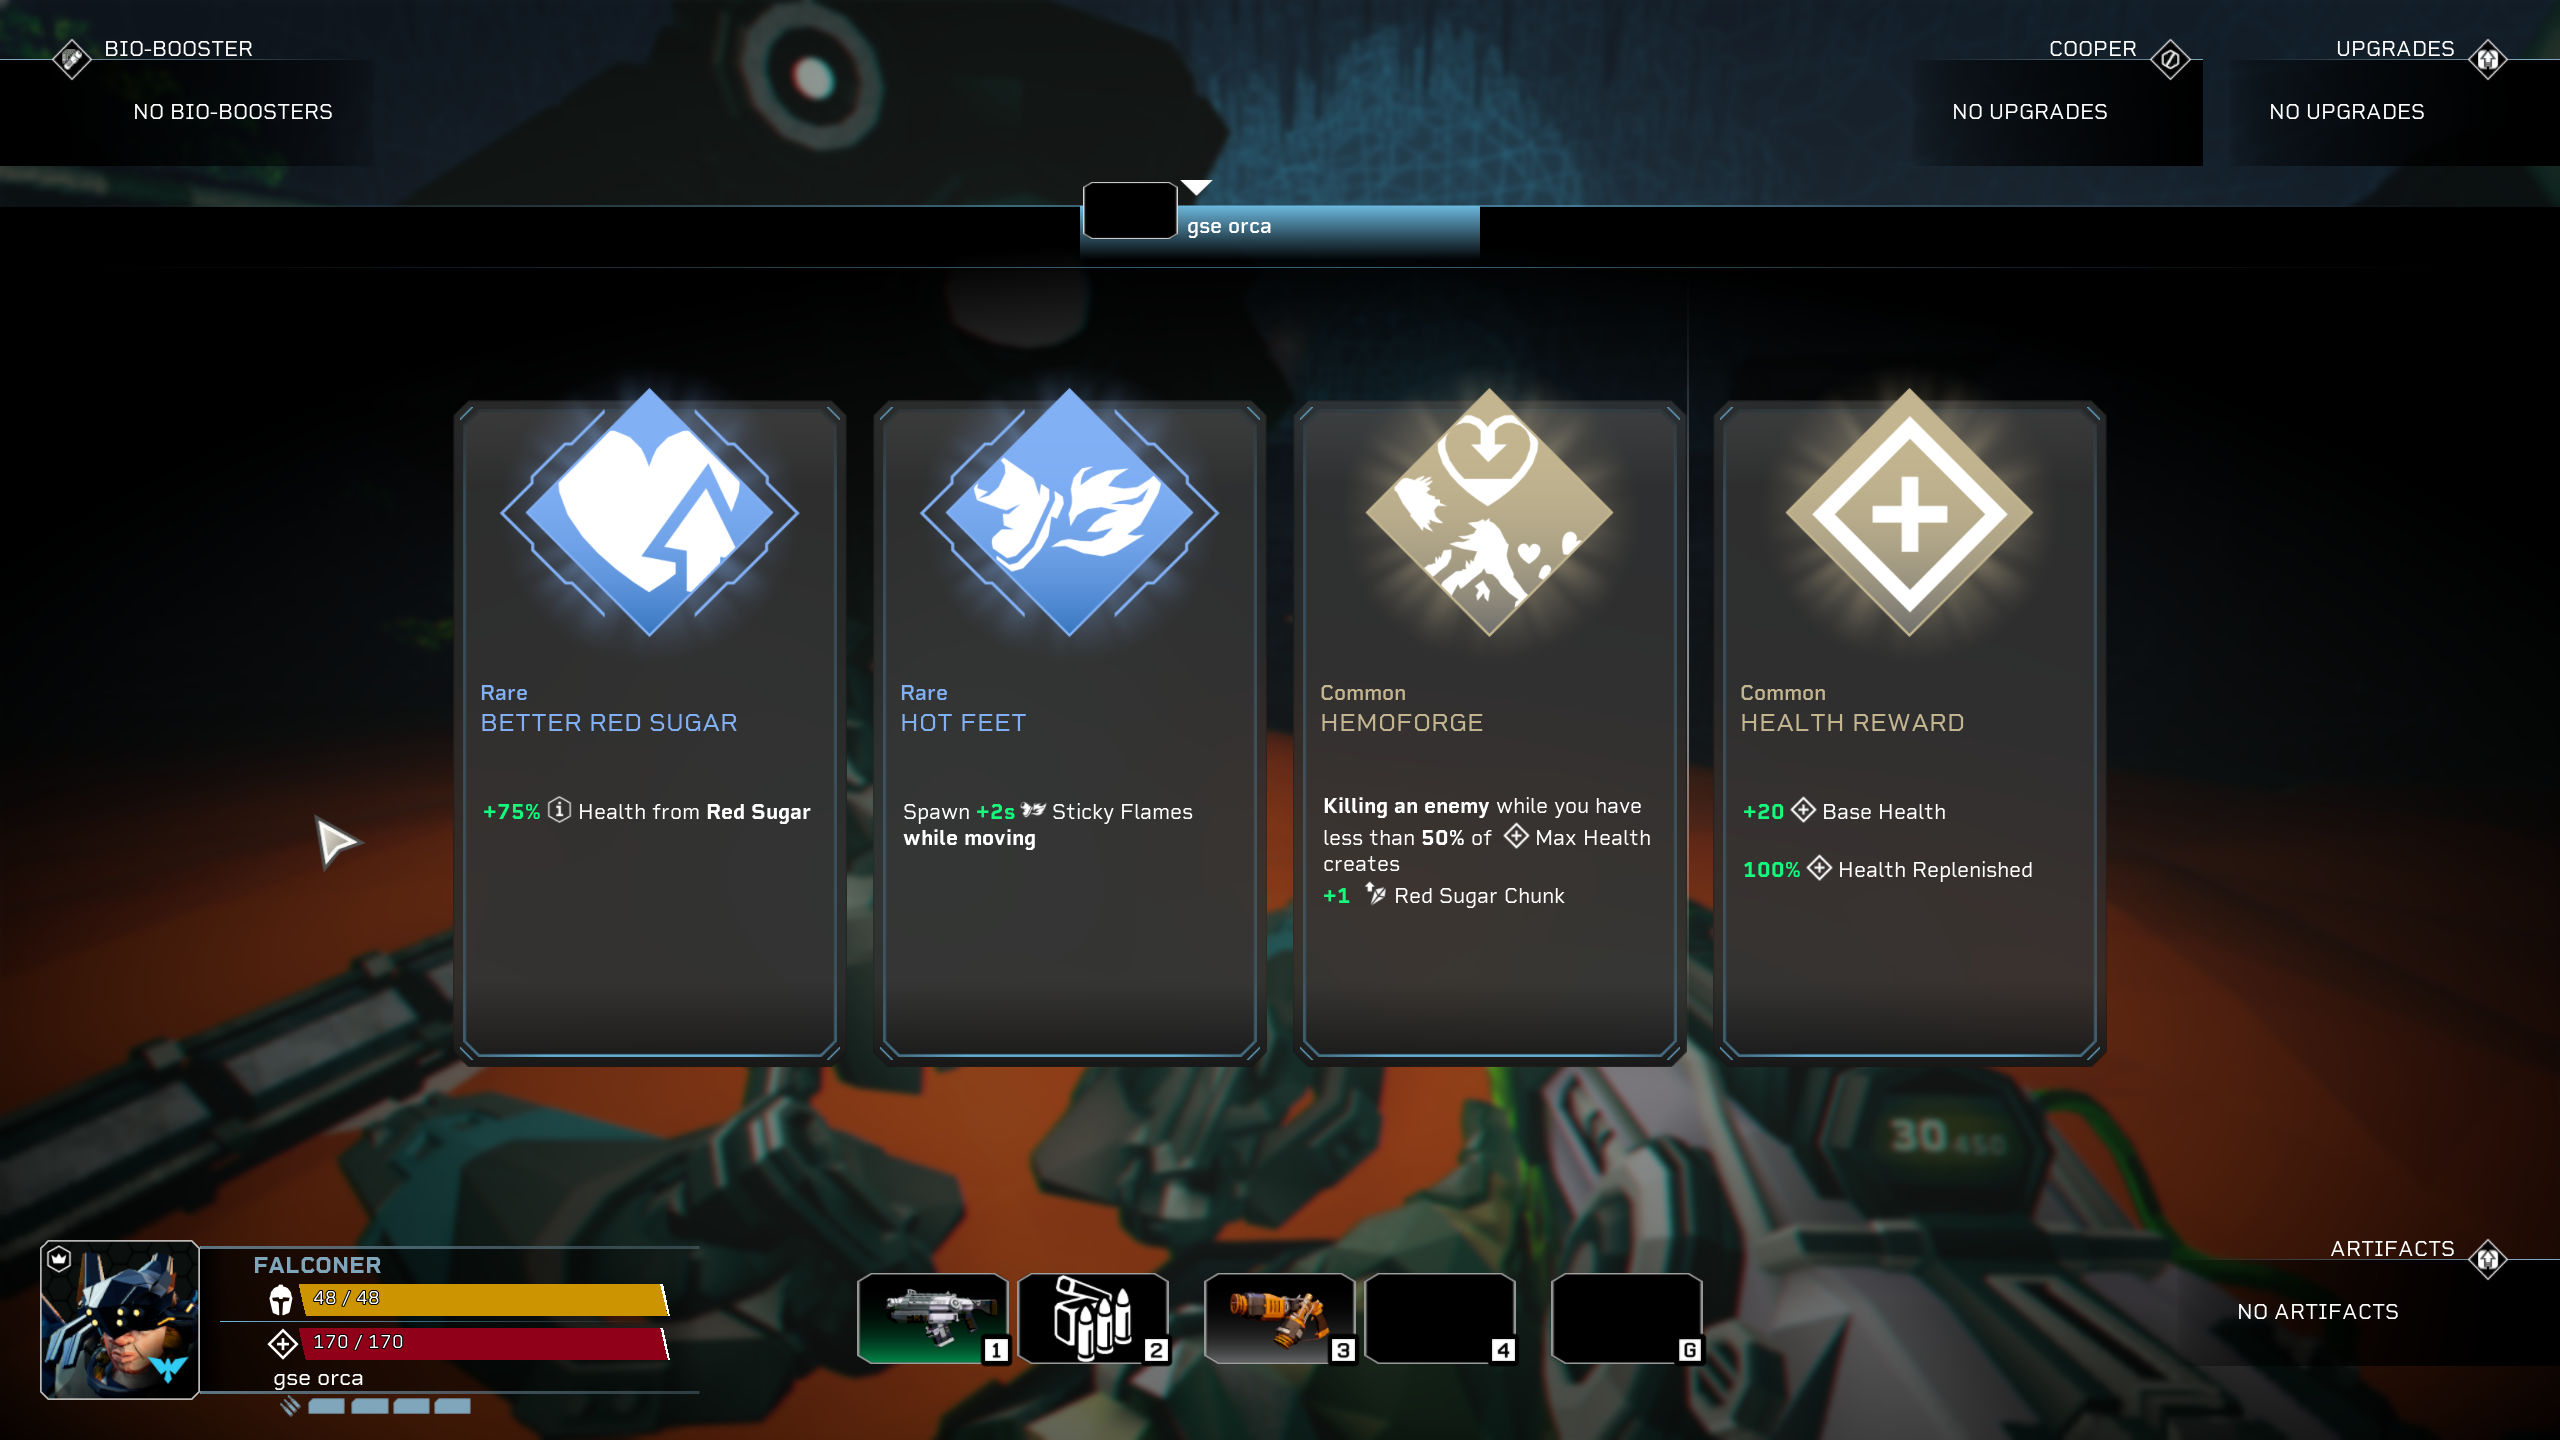
Expenite is a green crystal ore that serves as experience. Mine it, then call your R.E.P.D. drone and store it. Once you gather and store 120 Expenite, you’ll level up and be offered to pick one out of 4 upgrades. Those upgrades can be anything related to your Reclaimer:
- Increased max Health
- Get more health from Red Sugar
- Create Sticky Flames while moving
The list of these is pretty expensive, but each upgrade adds something new to your overall build.
The important part is that you don’t have to mine Expenite, and it is up to you whether you want to risk spending time on this instead of moving to the next elevator. What I’m trying to say is that leveling up is completely optional.
Sometimes, Expenite can be found in the form of a living creature called Expenite Lootbug. Sometimes they can be seen roaming around the caves; they’re hard to miss.
Red Sugar
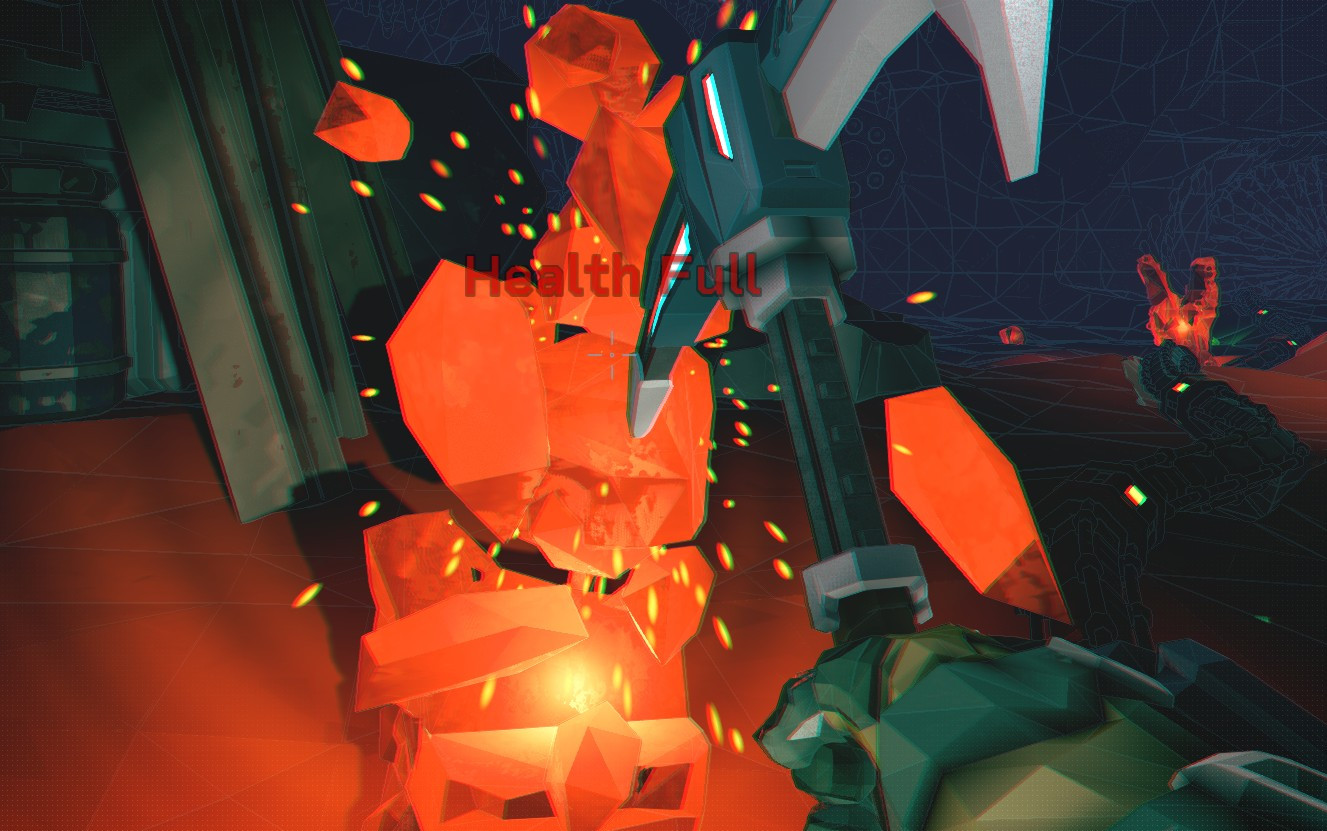
Red Sugar are red crystals found throughout the level. Mining them restores your health. They’re pretty rare, so do make sure you don’t take too much damage.
DRG Rogue Core Classes
There are currently 5 classes, aka Reclaimers, in the game:
- Guardian
- Falconer
- Retcon
- Slicer
- Spotter
Each comes with its own Class Ability, Active, and Passive Skills. I’m not going to go into too much detail describing Reclaimer classes here, because we have a dedicated guide just for that. So, check out “Deep Rock Galactic Rogue Core All Classes Explained” to learn about what each class does. And if you need help picking the right Reclaimer, check out my own “Deep Rock Galactic Rogue Core Best Classes,” where I ranked Reclaimer classes for different team sizes and experience levels.
Rogue Core Meta Progression and Enchancements
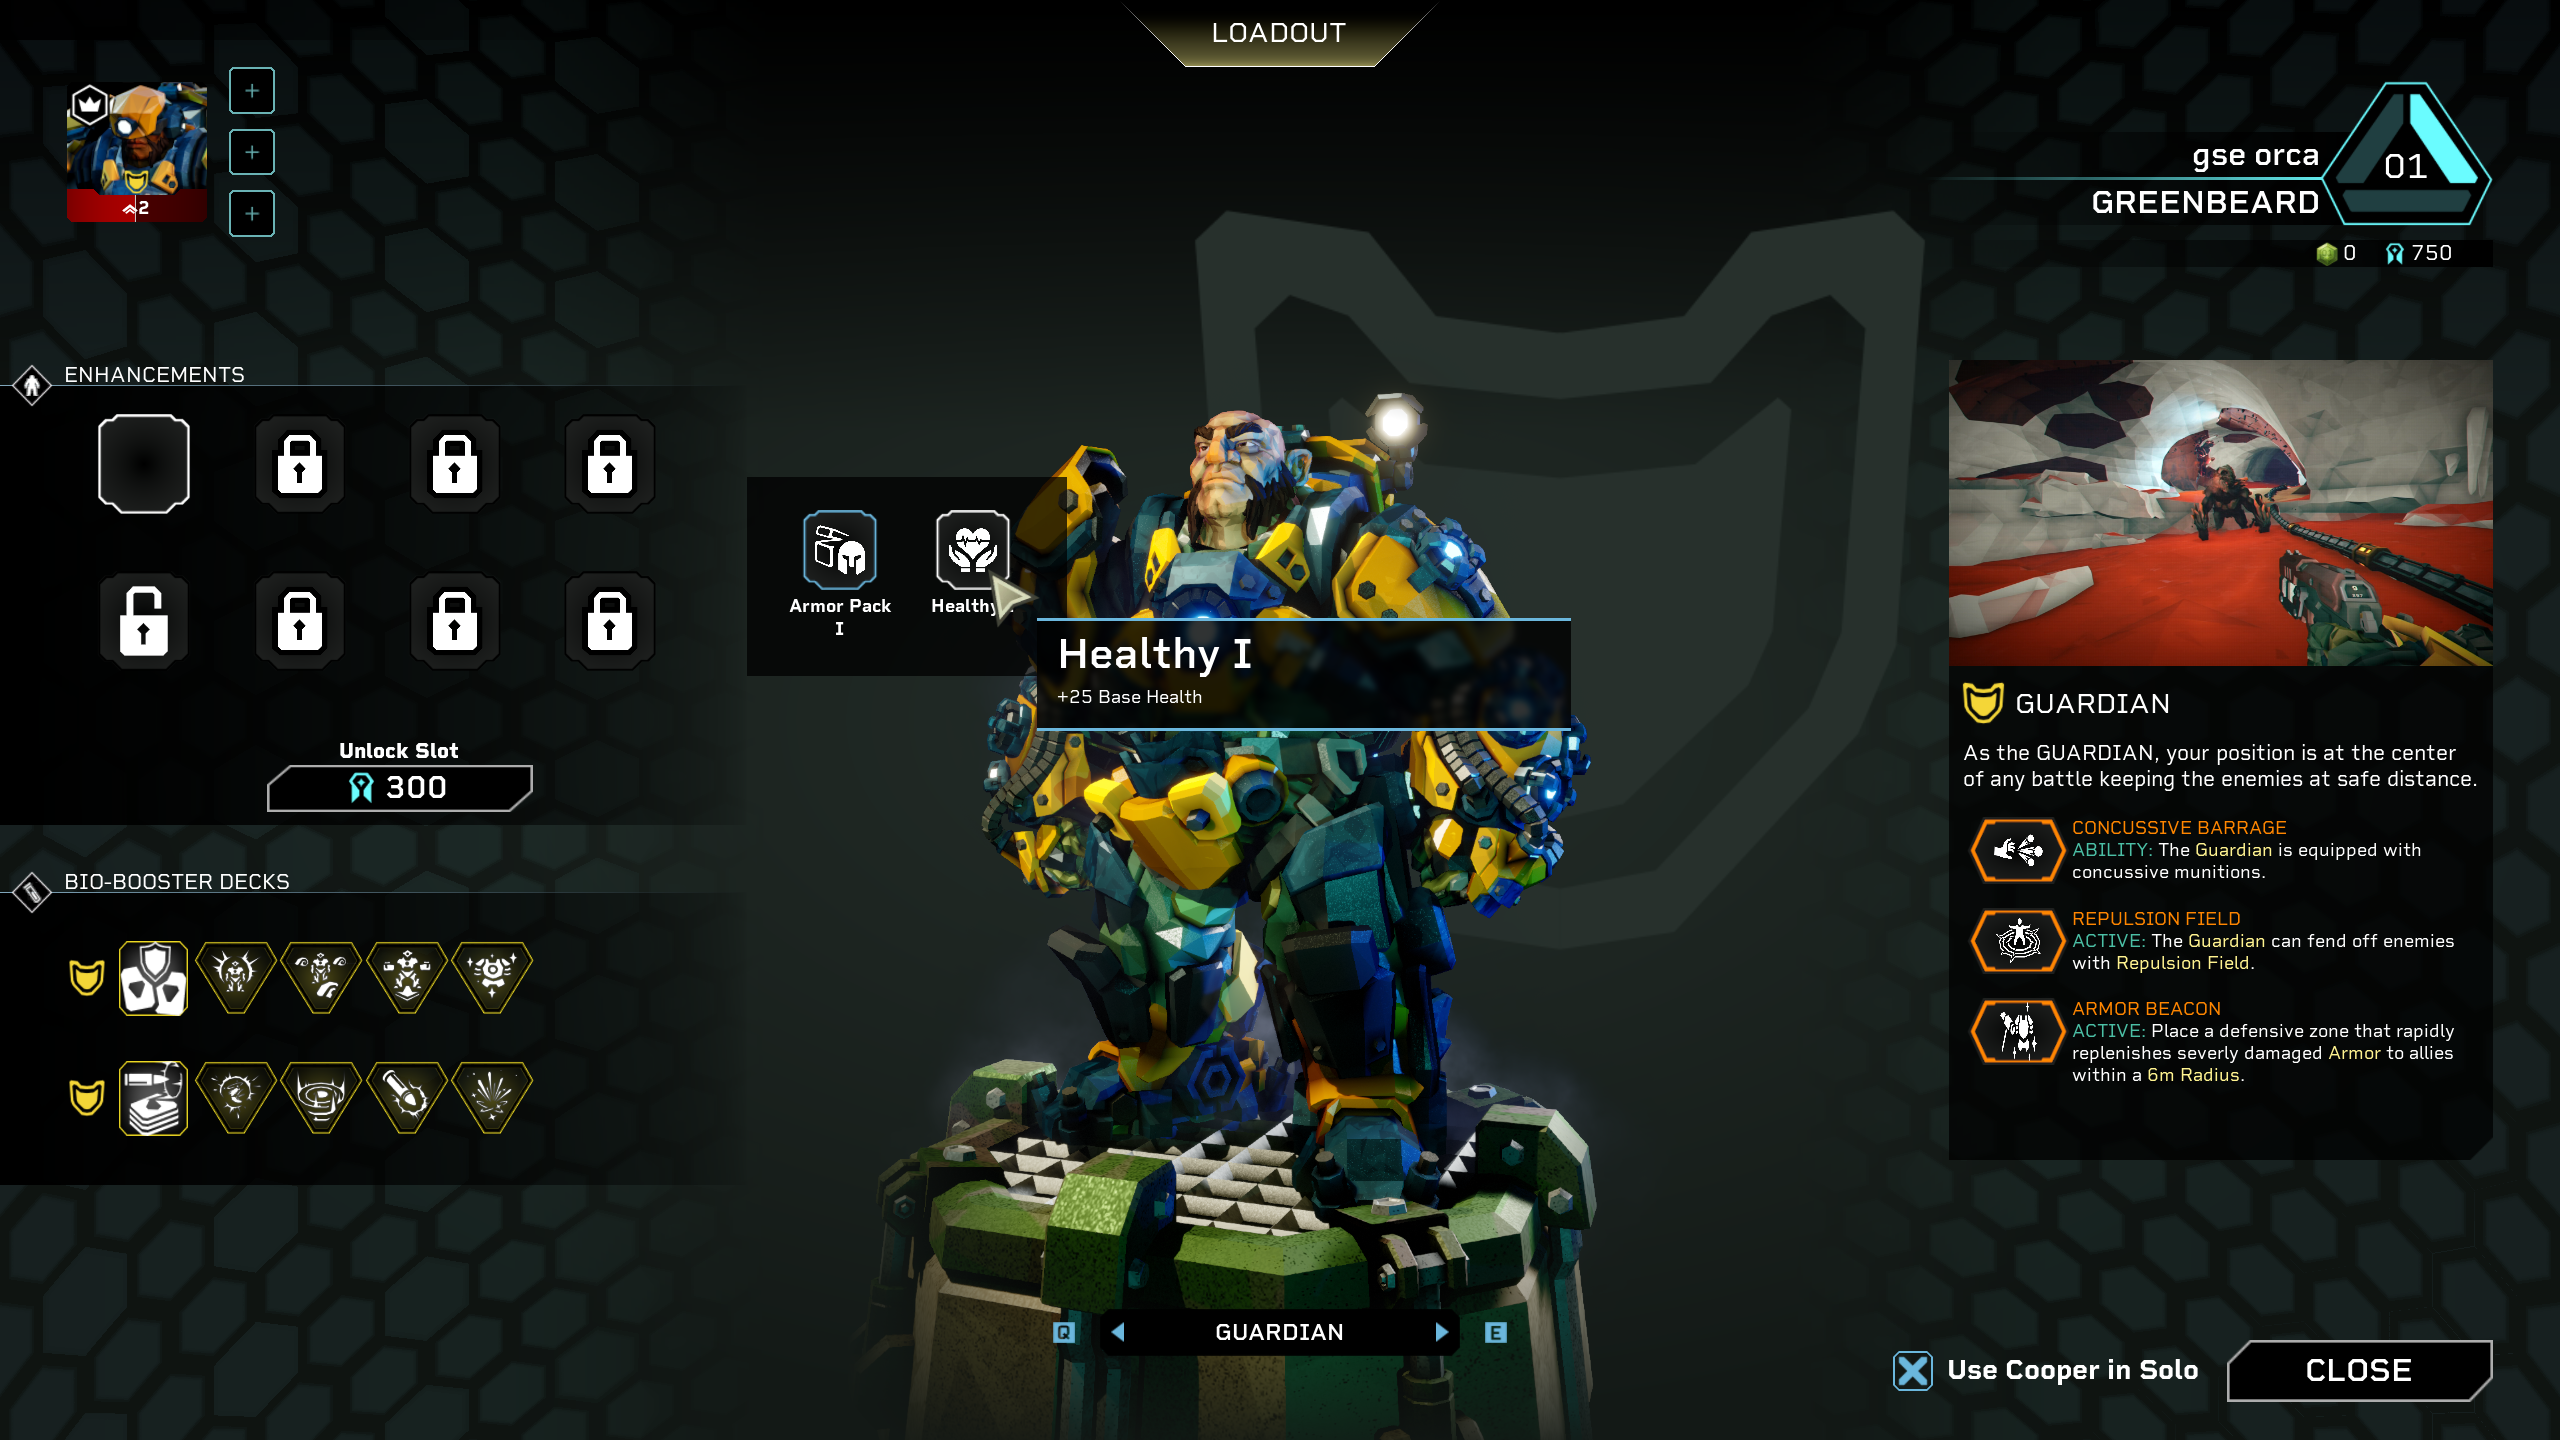
Outside missions, you can unlock Reclaimer Enchancements from the Enhancement Terminal. It looks like a skill tree where you can unlock all sorts of persistent bonuses for your chosen class. Unlocked Enhancements are shared between Reclaimers, but you need to equip them at the Loadouts terminal separately for each Reclaimer.
Each Reclaimer gets 8 Enhancement slots, which need to be unlocked separately for Merits, which is a currency obtained by completing the Tasks from the Operations Command. These tasks are separate from the Intel Tasks that increase your Clearance.
Anyway, Enhancements are unlocked by spending Enhancement Chips. When you complete a mission, you get rewarded with Reclaimer Points, and if you collect Security Cameras, you’ll get a bonus amount of those. Those points convert into Enhancement Chips.
Each Reclaimer’s loadout also contains two Bio-Booster Decks. These are fixed, and they basically decide which upgrades you’ll get when you activate one of those Bio-Boosters during a run.


You got -20% OFF 
DRG Rogue Core Tips and Tricks
Unlike regular Deep Rock Galactic, where it feels like no matter what difficulty you play on, you can just mess around with your friends and still successfully complete missions. Rogue Core is nothing like that. It plays very similarly, but the difficulty spikes and random enemy waves keep you on your toes. Even skilled FPS fans will fail if the team doesn’t try to work together. If you’re new, I have a few DRG Rogue Core tips and tricks, or things that you might not have known about this game:
- Use your glow sticks and flashlight all the time - it’s dark under the ground, and your flares don’t stay lit forever. Hold F to toggle the flashlight. It’s annoying and difficult to aim in the dark!
- Use Terrain Scanner (TAB) more often - it will help you find hidden areas, supplies, weapons, ammo, Expenite, and everything else you need.
- You can command Cooper to attack specific enemies - when playing solo, if you want the drone to target specific enemies, press CTRL to use the laser pointer and then click on the enemy. The laser point is contextual and is used to give commands to the drone.
- Cooper can revive you up to 3 times - basically, you have 3 lives when playing solo.
- The elevator can be broken and needs repairs - when the elevator is called, the enemies will attack the generator that powers it. When enough damage is done, the elevator will stop, and you will need to repair the generator to resume the process.
The two main takeaways I want you to have are these. Don’t spend too much time on each floor/level. You don’t have to farm Expenite, and the longer you take, the harder it’ll be defending the elevator. When that “Unceasing Wave” starts, you’ll die. Sometimes, it’s worth just running straight to the elevator.
Having to use flares is annoying as hell, but there’s no other way. It’s really dark, and you can’t even see the Power Cable or where it goes. You have an unlimited supply of flares, but they’re on a cooldown, so don’t just spam them.
F.A.Q.
Can you play DRG Rogue Core solo?
Yes, and more than that, solo players get an AI-companion drone who will accompany you and revive you when down.
Is DRG Rogue Core difficult?
Rogue Core feels a lot more difficult than regular DRG because of the escalating difficulty of lower floors and the threat timer, which counts down to the endless wave of enemies.
How to restore health in DRG Rogue Core?
Health is restored by mining the red crystals called Red Sugar. They spawn randomly on levels and need to be found first.
How to find more weapons in DRG Rogue Core?
After the start of the mission, you might find Weapon Crates that contain additional guns for you to use.
How to get a higher Clearance Level in DRG Rogue Core?
Higher Clearance Level is granted for completing Intel Tasks found in the Mission Terminal.
How to get Merits in DRG Rogue Core?
Merits are rewarded for completing tasks from the Operations Command terminal, Directives tab. Tasks include:
- Equip x Expenite Upgrades
- Participate in eliminating x corespawn
- Equip x Bio-Boosters
- Gain x levels as the Guardian


