 Dallon Avery
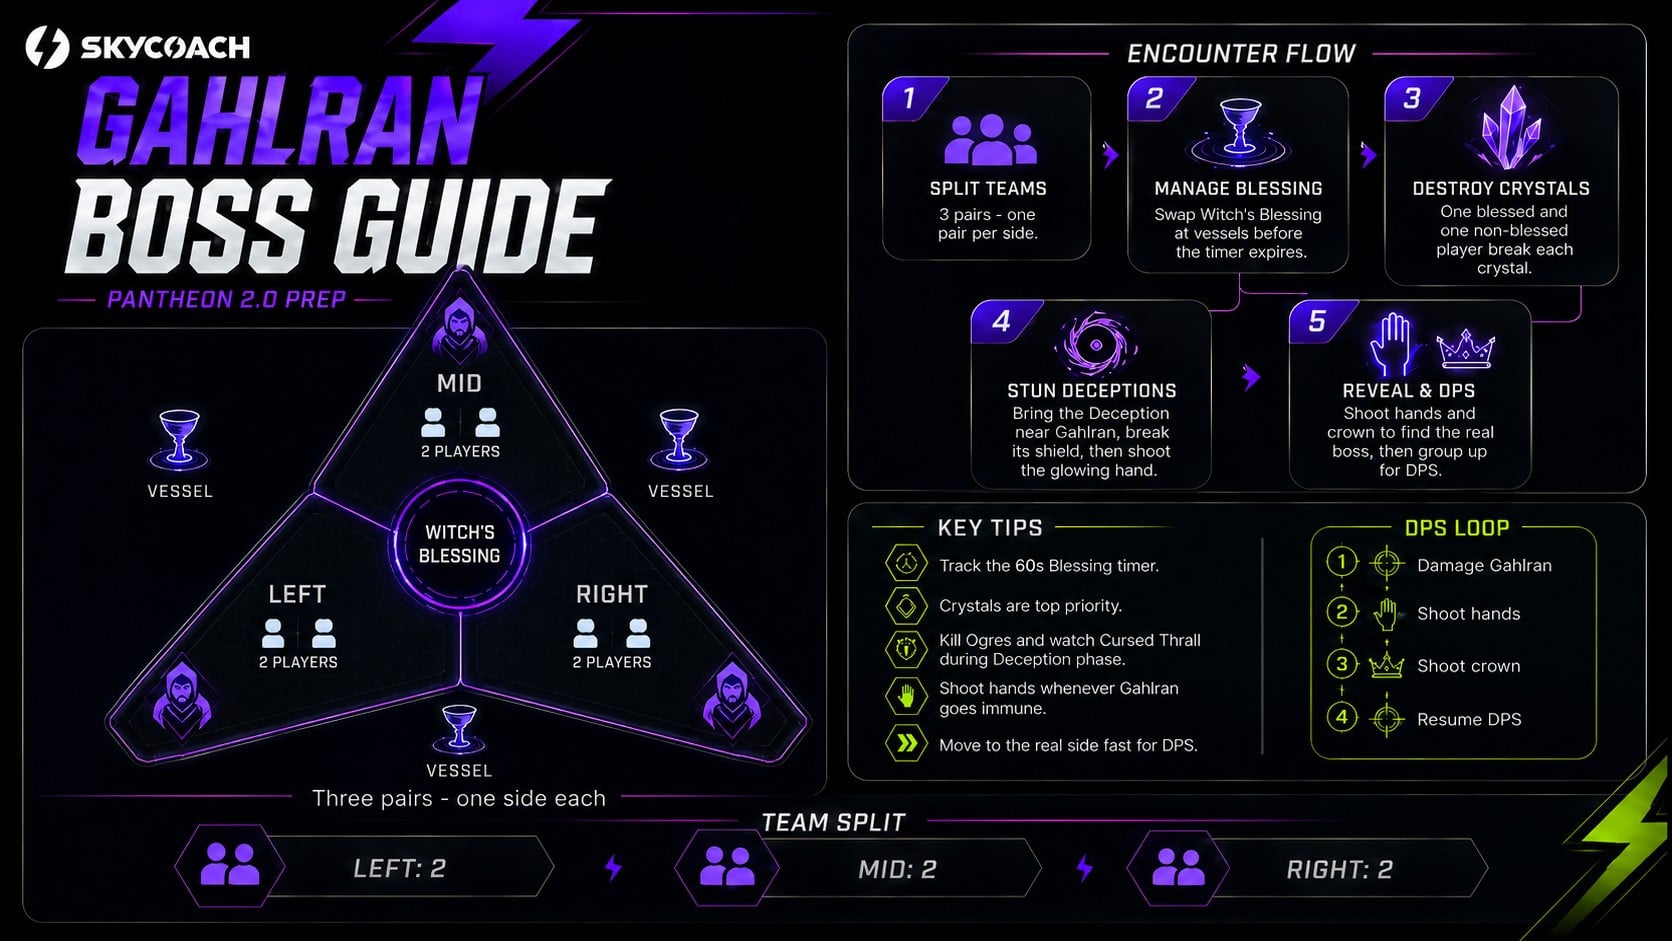
Destiny 2 Pantheon 2.0 Gahlran Guide Quick Overview:
- Split into 3 teams of 2 and assign one team to each Gahlran copy
- Manage Witch’s Blessing and refresh it before the timer expires
- Destroy crystals with one blessed and one non-blessed player
- Break Gahlran’s Deception shield near the boss, then shoot Gahlran’s hands
- Find the real Gahlran, shoot hands and head, then deal DPS until the phase ends
Not yet ready for Pantheon's Gahlran encounter? Buy Pantheon Completion service at Skycoach and let veteran D2 players take care of the runs. Get all the rewards from the encounters and expand your arsenal!


Read closely 
Browse our hottest Destiny 2 Boosting services


D2 Pantheon 2.0 Gahlran Strategy
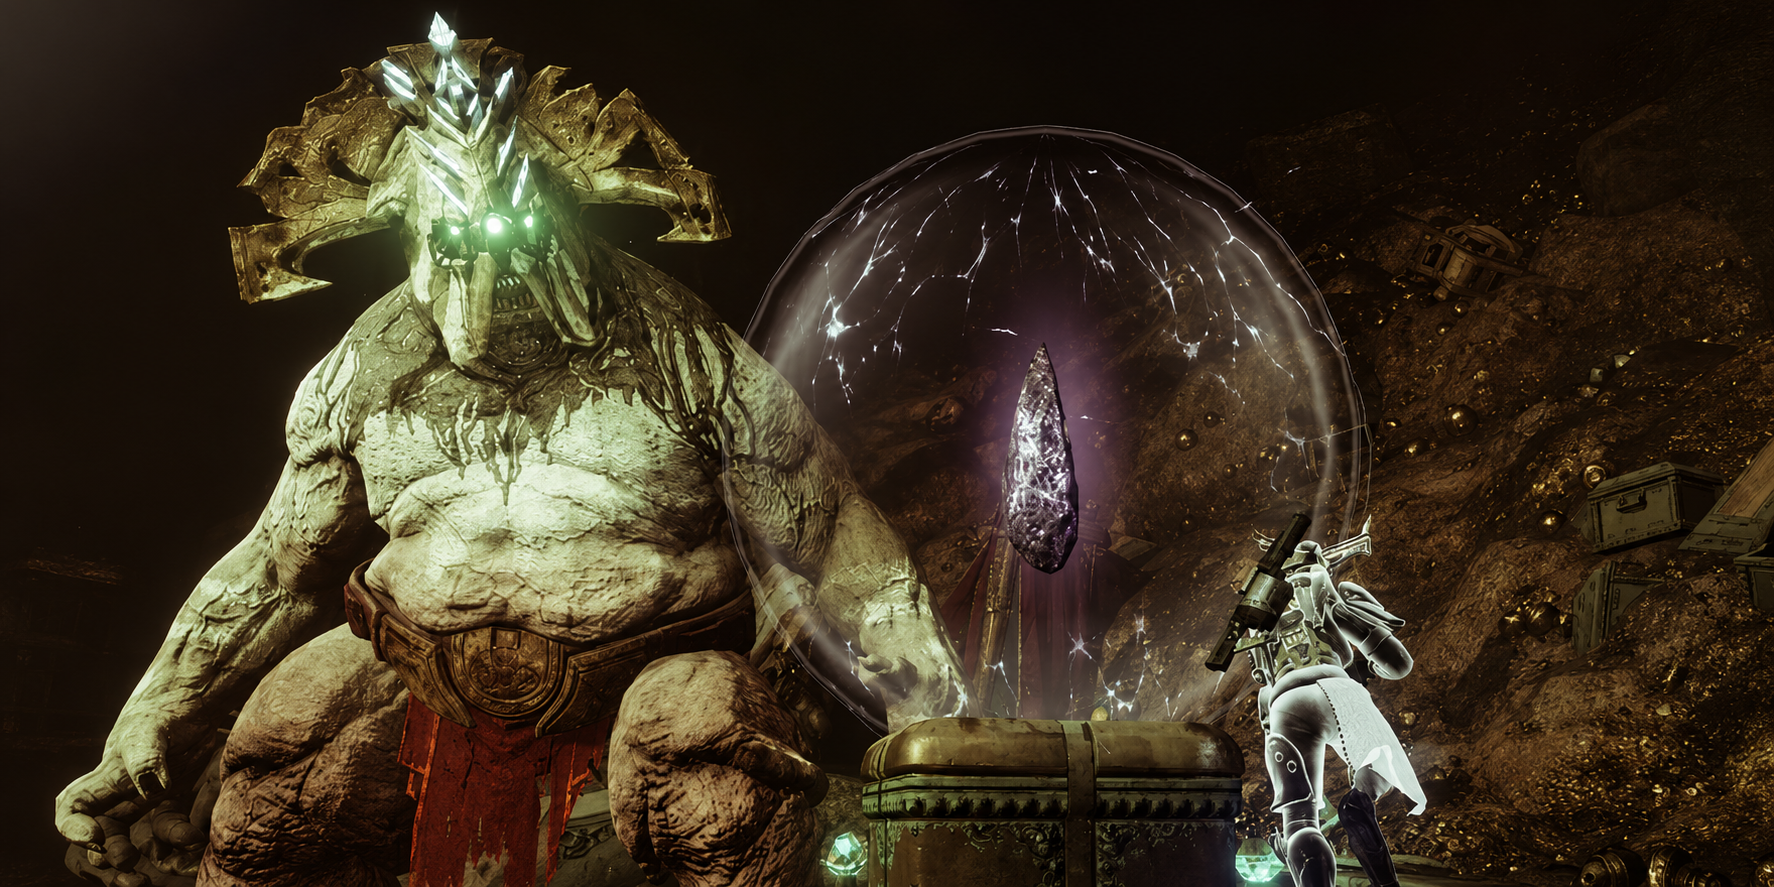
Gahlran the Sorrow-Bearer is the final boss from the Crown of Sorrow raid appearing in Pantheon 2.0. His encounter is built around three separate arena sections, three Gahlran copies, and a rotating buff called Witch’s Blessing. Because of that, you gotta split up into 3 teams of 2 players, so you can pass up the buff between the two. More on the buff later.
The fight starts when someone shoots Gahlran. After that, he creates three copies of himself, and a Witch’s Blessing pool appears near the middle of the arena. One player from each pair should pick up the blessing, then return to their assigned side.
Each team needs to mind their own side, while also keeping track of the adds, crystals, and the buff. At some point, small versions of the boss will spawn called Deceptions. Once they’re dealt with, you then have to find the real Gahlran among the 3 and kill him. That’s the gist.
Witch’s Blessing
So, Witch’s Blessing is the main mechanic of the fight. It lasts 60 seconds, and if the timer reaches zero, the player dies. Because of that, every “blessed” player needs to watch the timer and call for a swap before it gets to 0. I would say the safe time would be about 10-15 seconds so that both of you can get their bearing, locate the vessel, and shoot it.
You swap the buff through Witch’s Vessels, 3 of which can be found around the Flame Pillar in the middle. A blessed player and a non-blessed player shoot the same vessel together, which swaps the blessing and resets the timer. These vessels stay active throughout the encounter, though they disappear for a short time after being used.
My advice is this: let each pair use the Vessel on their right, so there’s no confusion and overlap.
There is also a useful trick here. You do not always need to stand inside the vessel to help with a swap. As long as the other player has the opposite buff state, they can shoot the vessel from anywhere in the arena. This can come in handy if the blessed player is cutting it close.
Team Split
Like I said, you gotta split the team into three pairs. Each pair takes one section of the arena. This is actually similar to how you handle the Argos boss encounter. Check out my Argos guide for more details.
Each pair should know where to stand, which vessel to use, and which Gahlran copy is theirs to deal with.
At the start, one player from each pair takes Witch’s Blessing. The other stays non-blessed. This gives every section one blessed and one non-blessed player, which is required for dealing with crystals and Deceptions later on.
Enemy Waves and Crystals
Each side spawns enemies. Blessed players kill blessed enemies, while non-blessed players kill normal enemies. If an enemy does not take damage from you, your partner likely needs to handle it. In other words, Blessed enemies don’t take damage from non-blessed players and vice versa. I hope that’s clear; otherwise, you’re going to have a hard time.
Then, there are crystals. These spawn shielded and must be destroyed by one blessed and one non-blessed player together. Both players should shoot the crystal at the same time, then destroy it after the shield breaks.
Crystals are a top priority because ignoring them can wipe the fireteam. Drop what you are doing when a crystal appears on your side. They spawn in a clockwise order, so after you’ve dealt with the crystal, warn the team on your right, cause they’re getting it next.
The basic job for each pair is simple:
- Kill enemies in your section
- Swap Witch’s Blessing before the timer expires
- Destroy crystals as soon as they appear
- Survive three enemy waves
After three waves, the fight moves into the Gahlran’s Deception phase.
Browse our hottest Destiny 2 Boosting services


Gahlran’s Deception
After the enemy waves, Gahlran summons Ogres on two sides and a Gahlran’s Deception on the third side. The Deception is a smaller, shielded version of Gahlran. Each side will eventually need to handle one.
If your side gets an Ogre first, kill it and keep managing enemies, crystals, and Witch’s Blessing. If your side gets the Deception, clear nearby Cursed Thrall first so they do not blow up in your face while you handle the mechanic.
To deal with Gahlran’s Deception, bring it close to your Gahlran copy. The big one. Ideally, it should be on the raised platform in front of him. Once it is in position, one blessed player and one non-blessed player melee the Deception together. This removes the shield and stuns it.
After the Deception is stunned, look at your Gahlran copy. Wait for him to finish his fireball attack. His hand will then glow green. Shoot the glowing hand, and Gahlran will slam his cleaver down. If the Deception is positioned correctly, the cleaver kills it.
If the Deception is too far away, Gahlran can miss. In that case, pull the Deception back onto the platform and repeat the whole dance.
The blessed player loses Witch’s Blessing after breaking the Deception’s shield. If that happens, call for a vessel swap and get the buff back before continuing.
All three sections must kill their Deception this way. Once every Deception is dead, the fight moves into the real boss damage phase.
Revealing the Real Gahlran
After all three Deceptions are killed, the music changes, and all three Gahlrans begin channeling energy through their hands and the crown. This is the reveal phase.
Each team shoots the hands on their Gahlran copy, then shoots the crown or head. Two copies will disappear, and one will remain. The one that stays is the real Gahlran.
Once the real Gahlran is found, everyone comes together near him to start dealing damage. A final crystal can spawn around this time, so do not ignore mechanics during the transition.
DPS Phase
Group at the real Gahlran’s section and place a Well or another survivability tool like a bubble shield. Start damaging the boss once everyone is ready. Gahlran can one-shot players who are in his melee range. To avoid that attack, stay off the ground. Hop onto the boxes in front of him to stay safe.
Gahlran’s DPS phase is interrupted by the hands mechanic. When he raises his hands and starts channeling again, he becomes immune. Stop damaging his body and shoot both hands. After the hands are damaged, shoot his head or crown to restart the DPS phase.
The order is pretty simple:
- Damage Gahlran
- Shoot hands when he goes immune
- Shoot head or crown
- Resume DPS
This happens several times during one damage phase. When the damage phase ends, Gahlran leaves, and the encounter resets. Return to your assigned sections, swap Witch’s Blessing with your partner, and repeat the fight from the enemy waves. You’ll likely have to go through several damage phases, more than 2 actually, to kill Gahlran.
Check out more Destiny 2 guides:
- The Way Between quest guide
- Equilibrium dungeon guide
- How to get Heirloom
- How to get Praxic Blade
- D2 Renegades weapons ranked


You got -20% OFF 
F.A.Q.
When is Pantheon 2.0 available in Destiny 2?
Patheon 2.0 will be available with the final update for the game on June 9, 2026, with the first boss encounter. On June 13, there’ll be a boss gauntlet. On June 16, single bosses will start rotating.
What are the bosses in Destiny 2 Pantheon?
Patheon 2.0 will launch with at least 3 classic boss encounters:
- Calus
- Argos
- Gahlran
How to kill Gahlran in Destiny 2 Pantheon?
To kill Gahlran in Destiny 2 Pantheon, split into three pairs and do this:
- Manage Witch’s Blessing.
- Destroy shielded crystals.
- Stun each Gahlran’s Deception near the boss.
- Shoot Gahlran’s hands and crown to reveal the real boss.
- Group up for DPS and break his hands whenever he goes immune.
What are the Destiny 2 Pantheon 2.0 rewards?
Pantheon 2.0 rewards include new armor sets, reprised weapons, holofoil variants, Triumph emblems, exotic cosmetics, and a new Title. Reprised encounters can also drop original raid armor ornaments, such as Leviathan ornaments from Calus.
What are the Destiny 2 Pantheon requirements?
What you will need is a team of 6 players and a loadout good enough to take on raid bosses. During Pantheon, all players will be made underleveled compared to the encountered enemies. Also, Pantheon has no matchmaking — use Fireteam Finder or an LFG tool before launching.
Are there any bonuses for killing bosses faster in Destiny 2 Pantheon?
Yes, a Bonus Timer tracks efficient completion. Finishing fast earns bonus points and unlocks higher-tier rewards.


