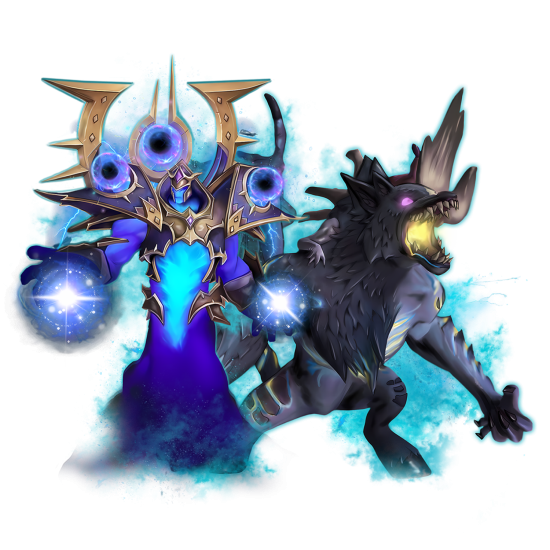
 Dallon Avery
Voidspire Raid Guide Quick Facts:
- There are 6 boss encounters in Voidspire: Imperator Averzian, Vorasius, Fallen-King Salhadaar, Vaelgor & Ezzorak, Lightblinded Vanguard, Crown of the Cosmos.
- Access Dates: March 17 (LFG Wing 1, Normal, Heroic), March 24 (LFG Wing 2, Story Mode, Mythic), March 31 (LFG Wing 3)
- Minimal Requirements: level 90, ilvl 220
- Bosses 2-5 drop tier set tokens for the following slots: hands, shoulders, legs, and helm
- Raid rewards include: housing decor, non-tier gear, plans and patterns for professions, a toy.
This Voidspire raid guide covers everything you need: story context, how to reach the raid, all six boss encounters, tactics, loot details, and rewards. And if you want a faster path through the spire, Skyсoach’s Voidspire Boosting services can help you secure clears and gear without the grind.


Read closely 
Browse our hottest WoW Boosting services


The Voidspire Overview
Let’s begin the Voidspire guide with an overview. This is the first six-boss raid introduced in the Midnight expansion. Built by Xal'atath as a conduit to harness and study Void energy, the structure eventually became corrupted, twisting both its architecture and the surrounding landscape. It now pulses with unstable void magic and is populated by powerful entities known as Voidwraiths, along with several major threats drawn into the spire through the Voidstorm.
Within this raid, players ascend the structure and confront its controlling forces, including Imperator Averzian, Vorasius, Fallen-King Salhadaar, Vaelgor, and Ezzorak, the Lightblinded Vanguard, and the forces gathered under the Crown of the Cosmos. The Voidspire serves as a central battleground in Midnight’s story, culminating in a final confrontation with Alleria Windrunner, consumed by the void, at the summit, where the spire’s void-fueled power becomes fully unleashed.
The Voidspire Location
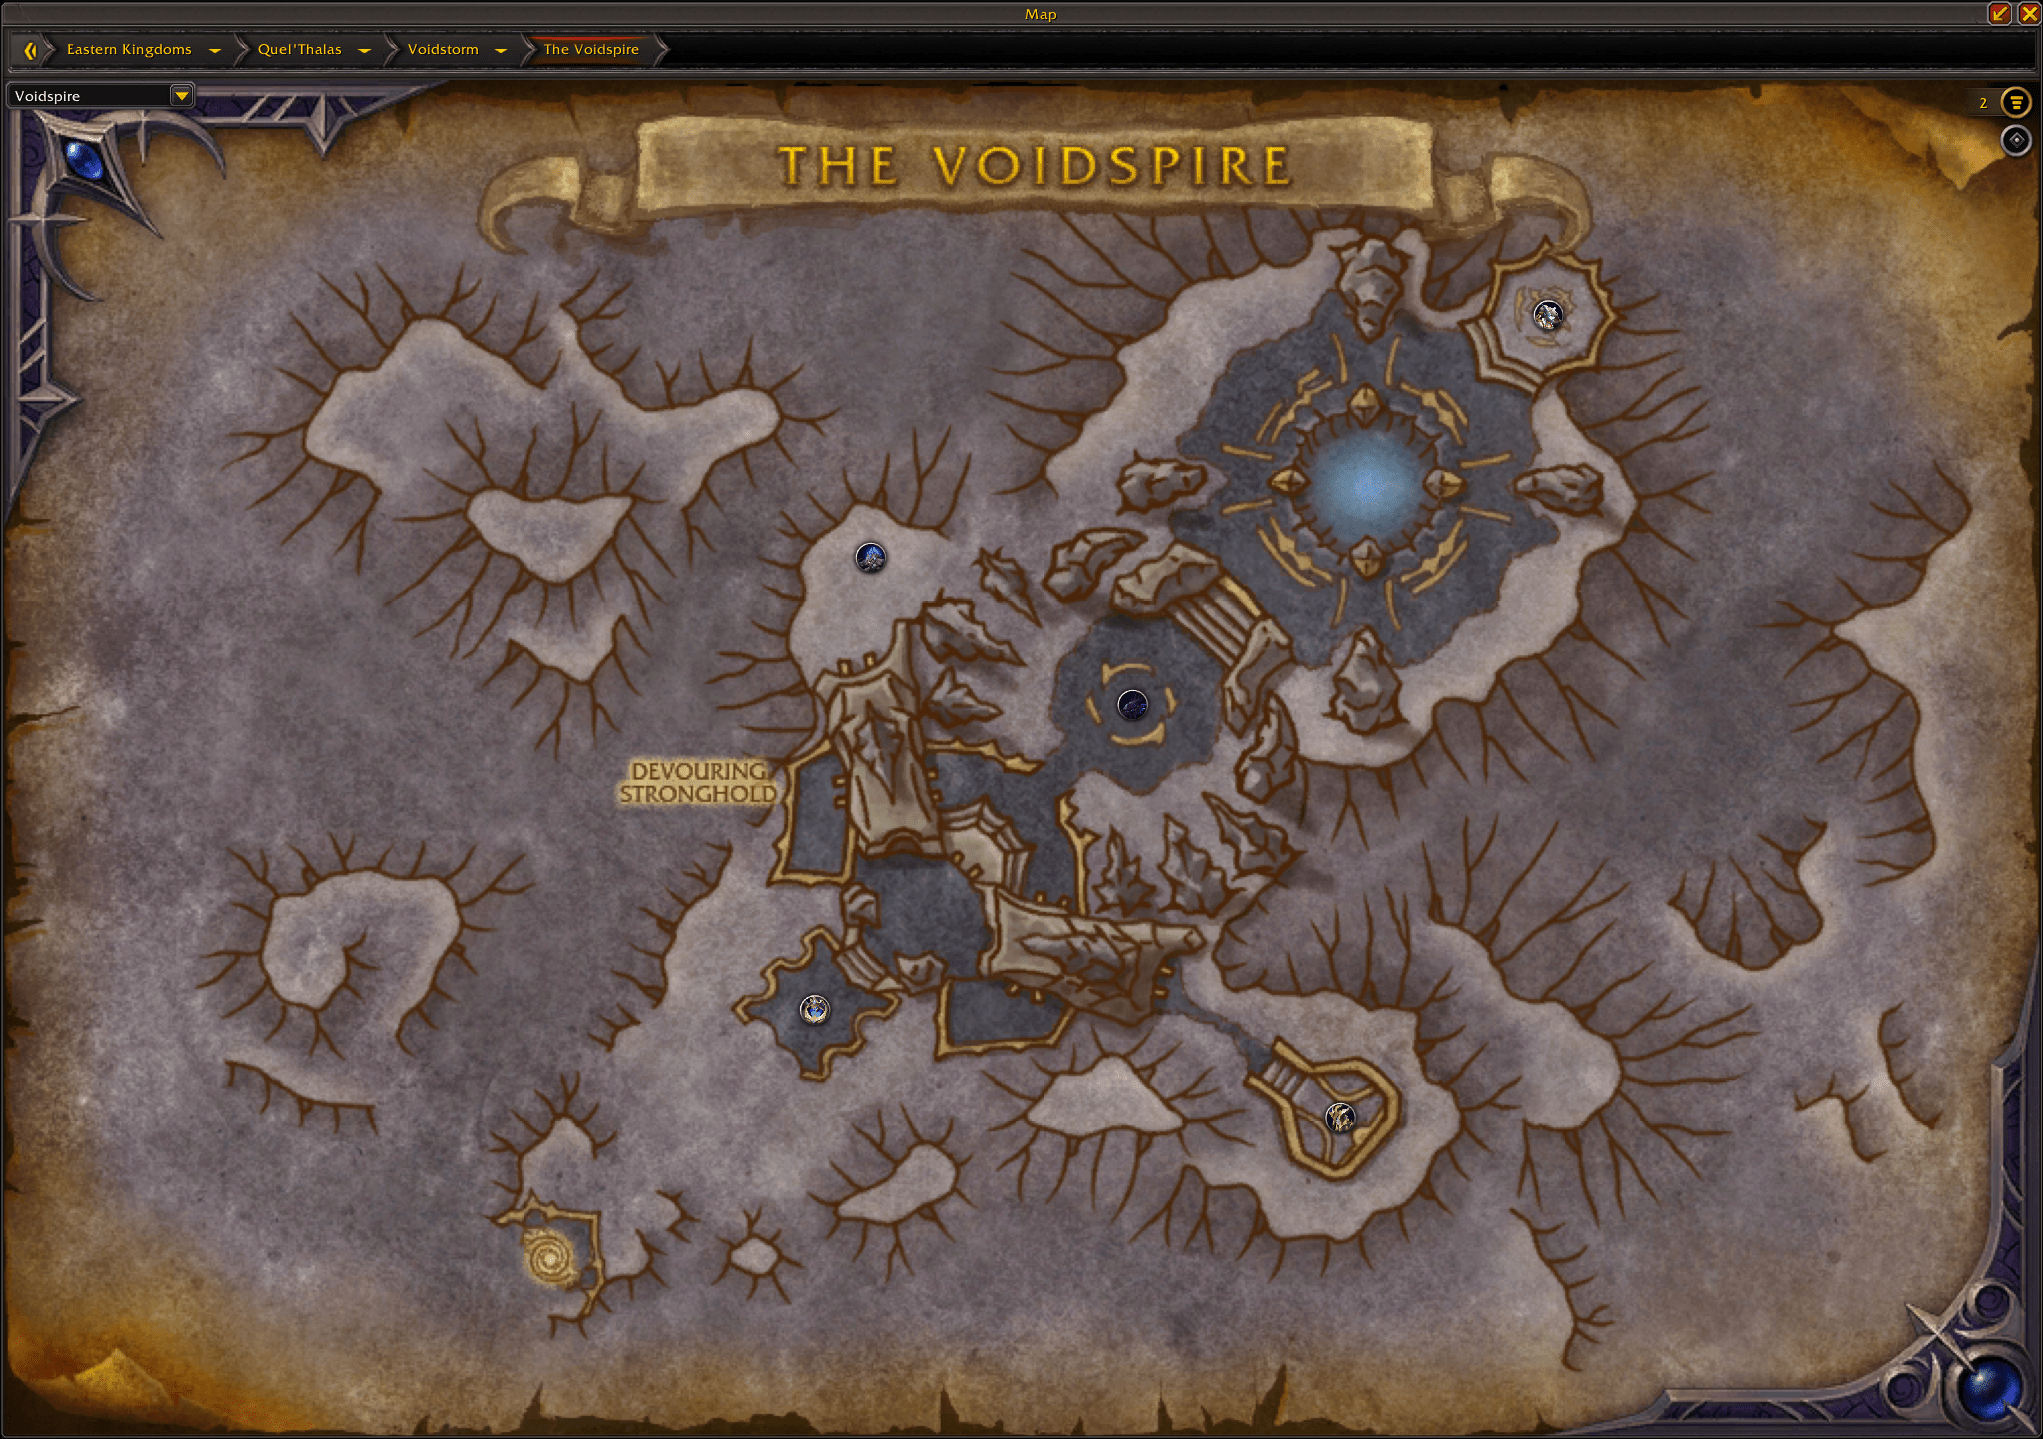
The Voidspire location is within the Midnight expansion’s Voidstorm zone in Quel’Thalas, rising as a towering structure built by Xal'atath and now heavily corrupted by unstable void energies. The raid entrance is positioned at the base of the spire, where the surrounding terrain shows clear signs of Void influence.
You can find the entrance at these coordinates: 45.5 64.4
Players will enter the raid through an exterior platform marked by void-charged architecture, with the interior immediately shifting into shadowed corridors and conduits shaped by the spire’s original void-elf design. You can check out The Voidspire map above to familiarize yourself with the layout.
The Voidspire Bosses
There are a total of six Voidspire bosses, each tied to the corrupted forces occupying the spire and the escalating threat of the Voidstorm. As players climb through the structure, they face powerful leaders, twisted guardians, and cosmic entities drawn into the tower’s influence.
Here is the full Voidspire boss order:
- Imperator Averzian
- Vorasius
- Fallen-King Salhadaar
- Vaelgor & Ezzorak
- Lightblinded Vanguard
- Crown of the Cosmos
The current Voidspire boss order is finalized and hasn't changed since PTR. Together, these encounters create a rising difficulty curve that moves from large-scale physical threats to more complex void-driven mechanics as players approach the summit of the spire.
The Voidspire Tactics
This section is what we call The Voidspire boss guide, where we cover mechanics and encounter flow you’ll face throughout the raid. Each boss will have its own dedicated segment with a breakdown of abilities, role expectations, and tactical recommendations to help your group progress smoothly as you ascend the spire.
If your team wants a faster or more efficient path through the raid, SkyCoach also offers professional Voidspire boosting services that can help secure clears, loot, and achievements without the trial-and-error of early progression.
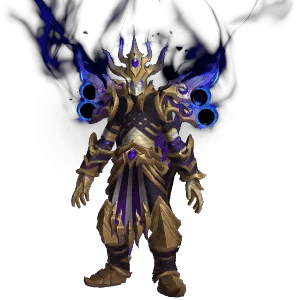
Imperator Averzian Strategy
Imperator Averzian opens The Voidspire with a territory-control fight built around preventing him from completing three adjacent Void Claimed spaces. The arena functions as a nine-section grid, and every mechanic revolves around managing which sections Averzian attempts to claim, which adds spawn, and how your group uses soaks to block his progress.
Notable Abilities
| Ability | Description |
| Shadow’s Advance | Averzian attempts to claim sections of the arena. Once a section is Void Claimed, it cannot be reclaimed. |
| March of the Endless | Triggered if Averzian secures three adjacent spaces. Summons unstoppable waves of adds and wipes the raid. |
| Umbral Collapse | A soak marker drops on a targeted section. Soaking prevents that space from being Void Claimed. |
| Dark Tears | Voids rifts appear over Averzian-controlled spaces, summoning adds. Adjacent tears empower each other and spawn stronger foes. |
| Abyssal Voidshaper – Gathering Darkness | Add that attempts a high-damage cast when fully empowered. |
| Shadowguard Stalwart – Pitch Bulwark | Add that buffs nearby enemies, increasing incoming pressure. |
| Dark Upheaval | Periodic raid-wide damage. |
| Umbral Collapse (impact) | Damage reduced by the number of players soaking. |
| Void Claimed | Averzian gains additional strength while near his own Dark Tears. |
| Blackening Wounds | Heavy tank DoT applied with each melee strike. |
The core objective is preventing Averzian from forming three Void Claimed sections in a straight line. Each time he spawns three adds across the arena grid, the group receives two Umbral Collapse soaks. Assign players to the correct two sections and destroy the add standing in each soaked area. The unsoaked section becomes Void Claimed, marking part of the board as permanently lost.
Your raid must choose which two adds to break based on the current board state. Avoid leaving patterns that give Averzian an easy path to align three in a row. Early pulls should focus on clearing adds in the center or corners to maintain flexibility in later cycles. As more sections fill, movement becomes tighter, and the soft enrage begins to pressure the group.
Abyssal Voidshapers must be prioritized; interrupt or kill them before Gathering Darkness completes. Shadowguard Stalwarts also require attention to avoid excessive buffing on enemy forces. Tanks must drag Averzian away from Dark Tears to limit his Void Claimed empowerment while managing Blackening Wounds with cooldowns or swaps.
Beams and knockbacks from portal pulses should be dodged as they appear, especially as the arena becomes more restricted. If Averzian is allowed to complete three adjacent Void Claimed spaces, the March of the Endless triggers, and the raid is quickly overwhelmed by continuous add waves. Burn him before this alignment occurs, or control the board carefully enough to prevent it.
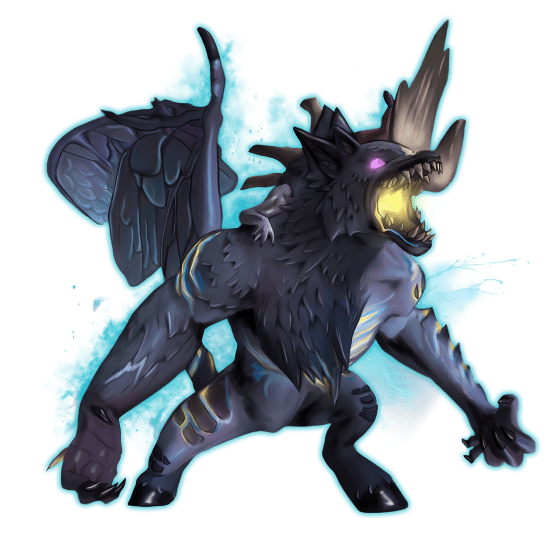
Vorasius Strategy
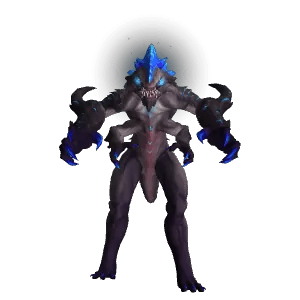
Vorasius serves as the second of the Voidspire raid bosses. He is the early pure-damage benchmark, functioning much like a Midnight-themed Terros encounter. This colossal void-charged predator stands nearly stationary, using overwhelming physical force, raid-wide roars, add explosions, and sweeping void breaths to test your group’s raw throughput and mechanical discipline.
Notable Abilities
| Ability | Description |
| Blistercreeps | Small adds that explode on death. Their explosions damage Void Crystals, helping to break the crystal walls created by tank mechanics. |
| Crystal Fragments | Shards that target the closest available players, requiring careful positioning. |
| Primordial Roar | Raid-wide damage that also knocks players back. Each cast increases Vorasius’s Roar damage for the rest of the fight. |
| Colossal Throw | Heavy tank mechanic that creates crystal walls; affected targets receive Slow Recovery, requiring strong healing to remove. |
| Smashing Frenzy | A frontal smash that creates walls. If the ability fails to hit any target, it deals massive damage to the entire raid. |
| Overpowering Pulse | Triggered if no one is in melee range; deals heavy damage. |
| Parasitic Swarm | Burst of Blistercreep adds that fixate players. |
| Void Breath | A sweeping Godzilla-style frontal breath that travels from one side of the arena to the other. |
This fight revolves around executing clean movement, breaking walls at the correct times, and staying ahead of escalating Primordial Roar stacks. Tanks will regularly receive Colossal Throw and Smashing Frenzy, creating crystal walls on either side of the arena. These walls are essential, as they must be shattered later using Blistercreeps. Tanks should position walls on opposite sides to maintain predictable movement patterns.
When Blistercreeps spawn, they immediately fixate on random players. Those players must kite them into the crystal walls. Killing the Blistercreeps near the walls causes their death explosions to damage and eventually destroy the crystals. Breaking both walls is mandatory before Void Breath begins; otherwise, Vorasius will sweep the entire arena with lethal void fire. The direction of the breath is random every cycle, so players must watch the boss’s facing before committing to a safe side.
Primordial Roar ramps in intensity throughout the encounter. Healers should expect increasingly heavy damage and coordinate cooldowns as stacks accumulate, especially past the second roar. Slow Recovery from Colossal Throw requires focused healing to ensure tanks do not fall behind.
Vorasius is a stationary boss, so melee uptime is strong—but positioning matters. DPS must avoid Crystal Fragment alignment and stay loosely spread during Roar knockbacks to prevent chain hits. Tanks should never let Smashing Frenzy miss; failing to have a target in front of Vorasius causes massive raid-wide punishment.
The fight ends with a soft enrage: after the third Primordial Roar cycle, Vorasius begins casting Focused Aggression, a kill cast that must be beaten with a final burn. With clean wall breaks, correct breath reads, and stable healing through Roar stacks, the encounter becomes a straightforward DPS check.
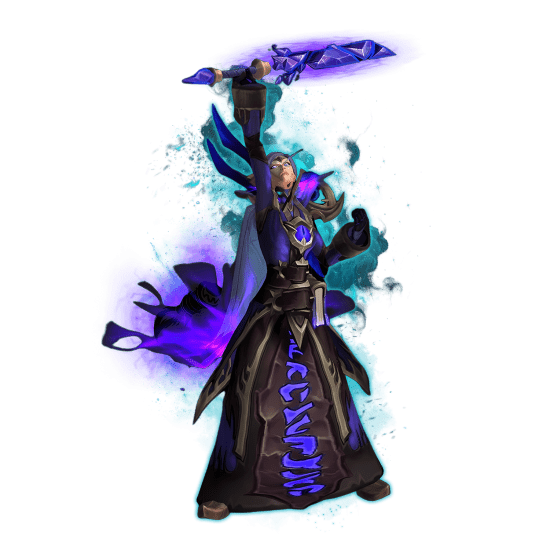
Fallen-King Salhadaar Strategy
Fallen-King Salhadaar returns in The Voidspire as a fast-paced, high-pressure encounter centered on void-charged orbs, add control, frequent movement, and periodic burn windows. Once a ruler of immense power, he now siphons unstable energy from the surrounding machinery, accelerating toward a catastrophic Cosmic Unraveling that players must race to contain.
Notable Abilities
| Ability | Description |
| Cosmic Energy (Passive) | Salhadaar slowly gains energy over time. At 100 energy, he enters Cosmic Unraveling. |
| Concentrated Void | Void orbs drawn toward Salhadaar. If they reach him, he performs Reckless Infusion, empowering himself. |
| Galactic Miasma | Applied to all players when an orb of Concentrated Void is destroyed. |
| Fractured Images — Unstable Nexus | Adds that cast explosive abilities if not interrupted or controlled. |
| Despotic Command | Aura damage; dispelling it leaves Oppressive Darkness on the target. |
| Instability | Tank DoT applied via melee attacks. |
| Shattering Twilight | Creates a spreading pattern of Twilight Spikes around Salhadaar’s current target. |
| Cosmic Unraveling | Raid-wide damage and a brief damage-amplification window on the boss. |
| Cosmic Barrage | Damage from Salhadaar’s unbound soul during Cosmic Unraveling. |
The Voidspire strategy for this boss is built around managing Concentrated Void orbs, controlling add spawns, and handling Salhadaar’s fast mechanic cadence without falling behind on healing. When two Concentrated Void orbs spawn at opposite sides of the room, your group must kill them before they reach the boss. If an orb touches him, Reckless Infusion triggers and heavily ramps incoming damage. However, destroying an orb applies Galactic Miasma to the entire raid, so do not kill both simultaneously unless coordinated. Most groups stagger the orbs—kill one, wait for its DoT to drop, then kill the second.
Fractured Images spawn alongside the orbs. These adds cast Unstable Nexus, which must be interrupted or controlled. Almost all CC works, and once disrupted, they effectively despawn. Kill priority is focused on the orbs first, adds second, and boss damage is maintained in between.
Healers will be under constant stress from Despotic Command, Galactic Miasma, and frequent raid-wide hits. Players targeted by Despotic Command should move toward the room’s edges before calling for dispel to avoid leaving oppressive pools in dangerous positions. Meanwhile, tanks must manage Instability stacks and watch for Shattering Twilight, which places large spike patterns around the tank’s position. Tanks should move away from the raid before the spikes erupt.
When Salhadaar reaches 100 energy, he begins Cosmic Unraveling, a damage-amplifying phase in which he takes increased damage while spinning void beams across the arena. These beams deal moderate damage on Heroic, allowing most groups to stack loosely with raid cooldowns active and burn the boss before returning to the normal cycle. After the unraveling, Salhadaar leaves a lingering void pool on the floor—plan tank movement to avoid cluttering the center of the room.
The encounter repeats its cycle until the boss falls. In the final stretch, overlaps become tighter, orbs spawn more quickly, and healers face severe damage spikes from ramping Miasma and Despotic Command. A clean final Cosmic Unraveling burn is typically needed before unavoidable damage overwhelms the group.
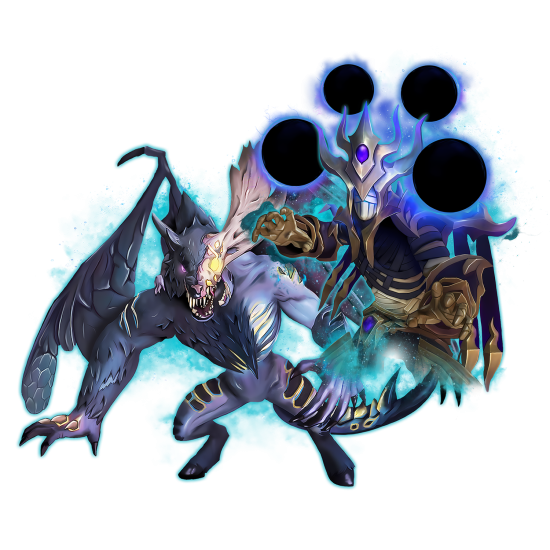
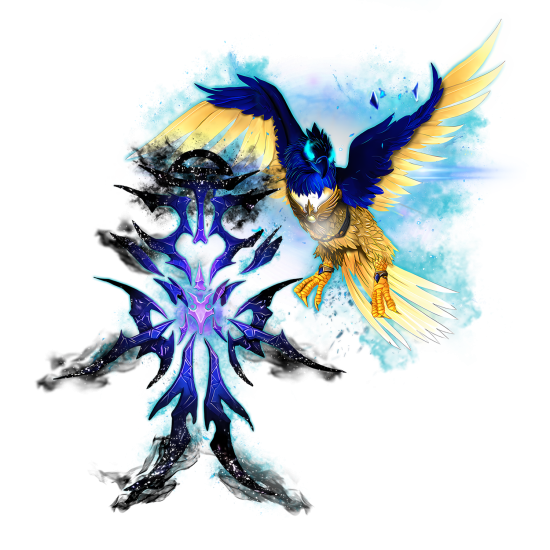
Vaelgor & Ezzorak Strategy

Vaelgor, twin to Ezzorak, is a two-target draconic encounter that mixes aerial barrages, ground cleaves, add waves, and zone-control mechanics. The dragons alternate between grounded and airborne phases, shifting the arena with Gloomfields, Nullzones, and cone attacks before the fight escalates into a combined burn when both siblings land together.
Notable Abilities
| Ability | Description |
| Gloom | Creates a Gloomfield on impact; contact applies Gloomtouched and shrinks the Gloomfield’s size. |
| Gloomtouched | Reduces the total damage of Gloom and shrinks the field further when players soak. |
| Nullbeam | Fires a line at the tank, spawning a Nullzone. Players tethered to the Nullzone trigger Warpsnap, Nullsnap, or Nullzone Implosion if stretched too far. |
| Nullsnap | Raid-wide damage when a tether snaps. |
| Nullzone Implosion | Larger raid-wide hit plus a short-duration high-intensity DoT. |
| Dread Breath | Large frontal cone following a random target; affects everyone caught in front of Vaelgor. |
| Void Howl | Summons Darkmotes that repeatedly cast Voidbolt. |
| Radiant Barrier | Lightbound Vanguard shield that reduces damage from Midnight Flames during transitions. |
| Rakfang / Vaelwing | Tank combo attacks; Rakfang deals Shadow, Vaelwing Physical. Damage increases with tank distance. |
| Midnight Flames | Major raid hit that punctuates phase transitions; reduced by Radiant Barrier. |
This encounter begins with both dragons active, requiring the raid to maintain balanced DPS. If the health difference between Vaelgor and Ezzorak exceeds roughly 10%, the siblings enrage, dramatically increasing incoming damage. Classes with cleave excel here, but groups must watch boss frames constantly to prevent imbalance.
Phase 1: Alternating Dragons
Dread Breath targets a random player, creating a wide cone that continues tracking briefly as the target moves. The safest default movement pattern is to step toward the front or edges of the room while the rest of the raid shifts away. This minimizes unpredictable turns and keeps melee uptime consistent.
Nullbeam is a tank-focused ability that fires directly toward the current tank’s position. When it detonates, it spawns Nullzone adds that quickly spread. Stacking players’ Nullbeam circles results in more concentrated add spawns, helping tanks and DKs grip them into tight kill zones. These adds have low health but clutter nameplates heavily—rapid AoE is essential.
Void Orbs from Void Howl cast Voidbolt repeatedly and should be silenced or gripped into kill zones with the Nullzone adds when possible.
Gloom orbs function like drifting planets that must be soaked by designated players. Each soak applies Gloomtouched, reducing the orb’s remaining damage and shrinking its eventual Gloomfield. Players who soak cannot take the next Gloom, so assign two alternating teams. Allowing a Gloom orb to overlap with an existing Gloomfield triggers room-devouring patterns that rapidly cut off safe space.
Tanks must remain close to Vaelgor to avoid amplified damage from Rakfang/Vaelwing. If a tank receives multiple Nullbeam stacks, the entire raid enjoys reduced pull strength during Nullzone mechanics, so clean tank play smooths multiple overlaps.
Intermission: Radiant Barrier and Midnight Flames
When the dragons cast Midnight Flames, the Lightbound Vanguard creates a Radiant Barrier in the arena’s center. The raid should collapse inside the barrier to reduce heavy incoming ticks. Two players receive debuffs that persist inside the shield—those players should stand at its outer edge to avoid clipping others. A large add spawns and must be killed quickly before the dragons return.
Phase 2: Combined Pressure
Once the intermission ends, both dragons land again, and the Phase 1 loop resumes with higher cadence. Gloom orbs spawn faster, Void Orbs appear more frequently, and Nullzone tethers grow more punishing. Handling Gloom placement becomes critical—steer orbs away from previous fields so they don’t chain-detonate room-wide zones.
The encounter ends in a coordinated race as both dragons must die within seconds of each other. If one dragon reaches a lethal enrage window while the other remains high on HP, the fight collapses quickly. Save cooldowns for the last Radiant Barrier cycle or the final ground phase, depending on healing comfort.
Browse our hottest WoW Boosting services


Lightblinded Vanguard Strategy – War Chaplain Senn, Commander Lightblood, General Bellamy

The Lightblinded Vanguard is a coordinated trio encounter fought simultaneously, with each member bringing a distinct holy combat style and an independent energy bar that culminates in devastating empowerment effects. As their auras surge, the Vanguard unleashes heavy raid-wide bursts, deadly tank combinations, pacification zones, execution mechanics, and silencing volleys. Managing their overlapping abilities—while keeping their positions controlled—is the core challenge of the fight.
Notable Abilities
| Ability | Description |
| Aura of Peace / Wrath / Devotion | Upon reaching full energy, each Vanguard member radiates a powerful aura that buffs allied damage, reduces incoming damage, or pacifies players who strike affected targets. When the aura ends, it consecrates the ground with dangerous Divine Consecration. |
| Divine Consecration (Mythic) | Consecrated ground that pacifies players, increases their damage taken by 100%, and inflicts heavy Holy damage every second. |
| Execution Sentence | Lightblood marks several players with a lethal Holy strike that deals massive damage in a line. Followed by Divine Hammers spiraling outward. |
| Judgment → Final Verdict / Shield of the Righteous | Tank-targeted combo where Judgment greatly increases damage taken, followed by a heavy tank hit. |
| Divine Toll | Bellamy sends out repeating holy projectiles, silencing any player struck. |
| Sacred Shield | Senn shields herself against interrupts, mounts her elekk, charges, and concludes with a Blinding Light disorient. |
| Tyr’s Wrath | Massive healing-absorb stacks applied to the nearest players. |
| Searing Radiance | Pulsing Holy damage with falling pillars of concentrated Light. |
| Light Infused | Increasing raid damage every few seconds while the Vanguard cycles auras. |
| Zealous Spirit (Mythic) | A rotating spirit that empowers one Vanguard member for 45 seconds, enhancing their key ability and spawning new dangerous manifestations. |
This encounter is controlled chaos: three bosses acting at once, each with a deadly empowerment window, and all of them placing dangerous consecrated zones across the room as their auras expire. Your raid’s positioning, interrupt discipline, and cooldown planning determine whether the Vanguard collapses in order—or spirals into an overwhelming wall of Holy damage.
Each Vanguard member reaches 100 energy on their own timer. When this happens:
- Lightblood activates Aura of Wrath (+40% Holy damage for allies).
- Bellamy activates Aura of Devotion (–40% damage taken for allies).
- Senn activates Aura of Peace (pacifies players who strike protected allies).
As soon as the aura ends, the NPC consecrates their location, leaving behind a permanent Divine Consecration zone. These patches are lethal on Mythic and extremely punishing on Heroic if placed poorly.
Positioning the bosses away from each other and moving them before energy peaks keeps the room manageable.
Execution Sentence is the most dangerous raid-wide mechanic in the encounter. Lightblood marks several players, striking them with enormous Holy damage in a line while also making them vulnerable to additional strikes. These hits also release Divine Hammers, swirling outward and threatening nearby players.
To survive:
- Marked players spread and avoid clipping others.
- Healers and tanks focus defensive resources on marked players.
- The raid moves away from Lightblood’s eventual consecration zone.
- Tanks prepare for Judgment → Final Verdict, which is lethal without cooldowns or swaps.
If Lightblood is empowered by a Zealous Spirit (Mythic), Execution Sentence becomes even more dangerous and may overlap with Divine Storm zones.
Bellamy’s Divine Toll is a continuous volley of holy shields that silence anyone hit, forcing ranged players and healers to maintain loose spread patterns.
She also applies:
- Avenger’s Shield splash DoT
- Increasing raid damage through Light Infused
- The tank combo Judgment → Shield of the Righteous, which mirrors Lightblood’s execution on tanks
On Mythic, Divine Toll targets all players, massively increasing silencing risk unless positioning is perfect. Her aura expires into a large Divine Consecration zone, so tanks should relocate Bellamy before she hits full energy.
Senn introduces overwhelming support mechanics that quickly crush uncoordinated groups:
- Tyr’s Wrath repeatedly applies large absorb shields to five nearest players
- Searing Radiance fills the room with pulses and falling pillars
- Sacred Shield → Elekk Charge → Blinding Light creates unavoidable repositioning and a large disorient if the raid is poorly spread
When Aura of Peace activates, players who attack shielded allies become pacified. DPS must immediately swap off these targets.
Her aura also leaves behind Divine Consecration at expiration, compounding positional pressure.
On Mythic, if Senn receives the Spirit of the Vindictive, she begins marking players with Execution Sentence during Tyr’s Wrath windows, creating brutal overlaps.
The Mythic version is defined by the Zealous Spirit cycling between bosses. When empowered:
- Their key damage ability becomes significantly stronger
- A corresponding Spirit add spawns and casts that same ability in sync
- Consecration zones spawn more rapidly
- Execution Sentence, Divine Toll, and Tyr’s Wrath all interweave
Mythic raids must track the Spirit rotation carefully and pre-plan immunities and raid cooldowns around the empowered ability.
As the fight progresses, auras trigger more frequently, consecrated zones cover larger portions of the room, and the Vanguard’s overlapping abilities demand tight assignments:
- Tank swap coordination for each Judgment combo
- Healing cooldowns for Tyr’s Wrath and Divine Toll overlaps
- DPS swaps for Sacred Shield and Execution Sentence
- Careful movement planning around consecration zones
This encounter rewards discipline and punishes any raid that allows empowered abilities to overlap uncontrolled.
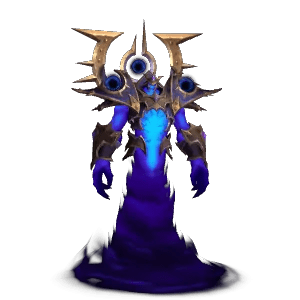
Crown of the Cosmos (Alleria Windrunner) Strategy
Once restrained by Void-forged Sentinels, Alleria Windrunner erupts into a cosmic onslaught as the final encounter of The Voidspire. Her Silverstrike Arrows, Void implosions, and stellar anomalies escalate into a catastrophic intermission before the fight culminates in Stage Two: The End of the End. Managing cleansing arrows, movement-heavy Void hazards, and Sentinel control defines the raid’s success.
| Ability | Description |
| Silverstrike Arrow | Marks a player and fires a piercing Arcane shot that removes all Void effects from players and Voidspawn struck. |
| Silver Residue (Mythic) | When an Undying Sentinel is struck by Silverstrike Arrow, it suffers periodic Arcane damage until death. Also clears its Void effects. |
| Grasp of Emptiness | Obelisks grasp a target, inflicting heavy Shadow DoT and slowing movement; removal triggers Bursting Emptiness, a deadly line blast. |
| Bursting Emptiness | Shadow beams shoot outward from obelisks when the debuff ends, striking any players in their path. |
| Void Expulsion | A celestial body crashes near a player, inflicting raid-wide Shadow damage and leaving hazardous Void Remnants. |
| Void Remnants | Persistent ground patches dealing ticking Shadow damage to anyone inside. |
| Null Corona | Large healing-absorb shield that jumps to another player if dispelled before being healed off. |
| Void Droplet | On death, splashes Corrupting Essence, increasing the victim’s damage taken by 30% for 20 sec (stacks). |
| Echoing Darkness | Sentinel punishment mechanic triggered when no tank is in melee; deals raid-wide damage and stacks Sentinel damage done. |
| Empowering Darkness | Buff that empowers Alleria’s allies within its zone. |
| Gravity Collapse | Tank effect leaving the target vulnerable to Physical damage. |
| Intermission: Silverstrike Barrage | Uncontrolled Silverstrike Arrows fire in all directions. |
| Intermission: Orbiting Matter | Stellar mass orbits Alleria, pulling in and damaging players it touches. |
| Stage Two: The End of the End | Wild cosmic energy floods the arena, escalating all damage and movement mechanics. |
Stage One: The Void’s Spire
You begin by facing Alleria Windrunner while three Undying Sentinels anchor her in place. The early phase is a controlled dance of positioning, cleansing effects, and add management.
Sentinels Control the Phase
- Tanks must remain in melee range of each Sentinel to prevent Echoing Darkness, which rapidly stacks and wipes raids.
- Each Sentinel has a unique punishment mechanic (interrupts, damage reduction debuffs, or slows).
- Sentinels cannot die until their Umbral Tether is removed through encounter progression.
Silverstrike Arrow — Cleansing but Dangerous
This ability removes Void effects from players and Voidspawn, making it both a defensive tool and a line AoE hazard.
Proper execution requires:
- Marked players stepping into safe angles so the line won’t cleave the raid.
- Healers preparing to stabilize the Aspect of the End healing reduction applied to hit targets.
- Optional on Mythic: using Silver Arrow to burn Sentinels through Silver Residue.
Movement Mechanics Layer Rapidly
- Void Expulsion → dodge impact, avoid Void Remnants.
- Grasp of Emptiness → free the targeted player carefully; Burst beams require clear lanes.
- Void Droplets must die away from the raid to avoid stacking Corrupting Essence on the wrong target.
Null Corona — Healing Check
Heal through the absorb rather than dispelling — dispels jump the debuff and causes massive chaos during high movement windows.
Once all three Sentinels fall, Alleria is no longer stabilized — triggering a violent collapse of the arena.
Intermission: Crushing Singularity
Alleria overloads with Void and cosmic energy, creating one of the most movement-heavy intermissions of the expansion.
Mechanics include:
- Stellar Emission stacking Shadow damage and amplifying forced movement.
- Silverstrike Barrage fires chaotic arrows that stack damage taken from subsequent hits.
- Orbiting Matter pulls players out of position and deals massive Shadow damage.
- Singularity Eruptions knock players away if caught in small-radius impacts.
The goal is survival: spread, rotate defensives, and avoid being pulled into Orbiting Matter. When the Simulacrum forms, Stage Two begins.
Stage Two: The End of the End
This is the final stand. The platform destabilizes, movement becomes harsher, and Alleria unleashes unrestricted cosmic force.
Expect:
- Intensified Void zones and movement modifiers from Stellar Emission stacks.
- Faster Silverstrike mechanics with punishing overlaps.
- Persistent pulls from cosmic anomalies.
- Increased tank damage due to rapid Gravity Collapse cycling.
This final burn phase has few mechanics but extreme overlap — cooldown rotations and personal defensives determine success.


You got -20% OFF 
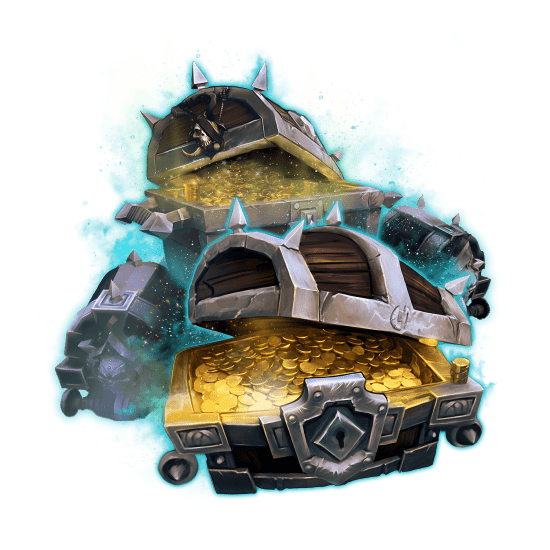
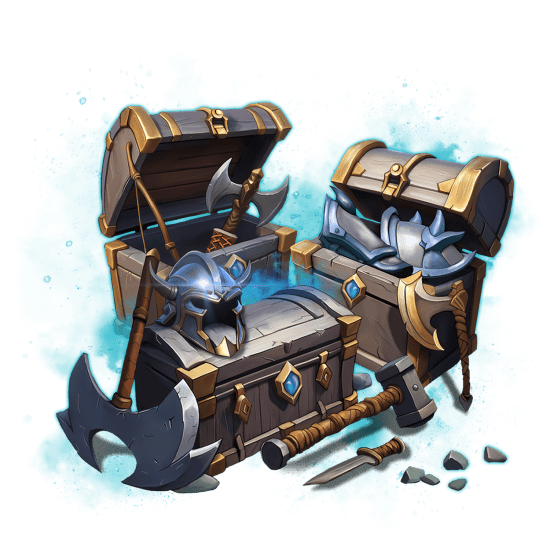
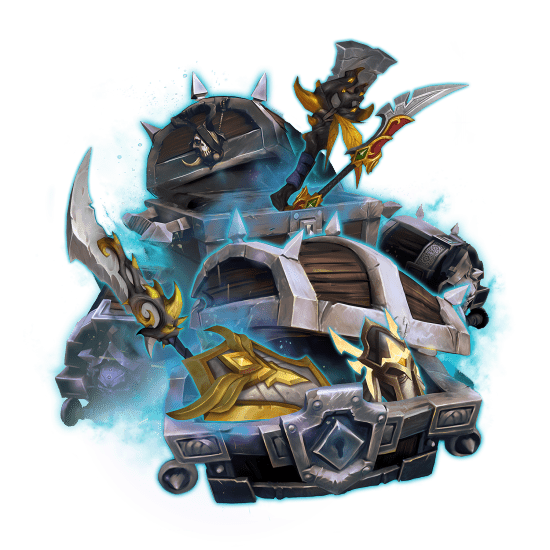
The Voidspire Loot
The Voidspire loot table leans hard into Light, Void, and dragon themes, with a mix of weapons, armor, trinkets, profession recipes, and housing decor from every boss in the raid.
Loot item level scales both by raid difficulty and by boss bracket, with later encounters awarding higher item level gear. The ilvl brackets are as follows:
- LFR: 233-243
- Normal: 246-256
- Heroic: 259-269
- Mythic: 272-282
Below is the complete table with all of the raid gear.
| Item Name | Slot | Source | Type |
| Bulwark of Noble Resolve | Shield | Imperator Averzian | Shield |
| Grimoire of the Eternal Light | Off-hand | Vorasius | Off-hand Frill |
| Bellamy's Final Judgement | Two-Handed | War Chaplain Senn | Two-Handed Mace |
| Sunstrike Rifle | Ranged | Imperator Averzian | Gun |
| Emblazoned Sunglaive | One-Hand | Vaelgor | Warglaive |
| Blade of the Final Twilight | One-Hand | Fallen-King Salhadaar | One-Handed Sword |
| Clutchmates' Caress | One-Hand | Vaelgor | One-Handed Mace |
| Ranger-Captain's Lethal Recurve | Ranged | Alleria Windrunner | Bow |
| Weight of Command | One-Hand | Imperator Averzian | One-Handed Sword |
| Blade of the Blind Verdict | One-Hand | War Chaplain Senn | One-Handed Sword |
| Turalyon's False Echo | One-Hand | Alleria Windrunner | One-Handed Mace |
| Tormentor's Bladed Fists | One-Hand | Fallen-King Salhadaar | Fist Weapon |
| Inescapable Reach | Two-Hand | Vorasius | Polearm |
| Waistcord of the Judged | Waist | War Chaplain Senn | Mail Armor |
| Fallen King's Cuffs | Wrist | Fallen-King Salhadaar | Mail Armor |
| Slippers of the Midnight Flame | Feet | Vaelgor | Cloth Armor |
| Devouring Night's Visage | Head | Imperator Averzian | Leather Armor |
| Despotic Raiment | Chest | Fallen-King Salhadaar | Cloth Armor |
| Sunbound Breastplate | Chest | Alleria Windrunner | Plate Armor |
| Robes of the Voidbound | Chest | Imperator Averzian | Mail Armor |
| Lightblood Greaves | Legs | War Chaplain Senn | Plate Armor |
| Nightblade's Pantaloons | Legs | Alleria Windrunner | Leather Armor |
| Light-Judged Spaulders | Shoulder | Imperator Averzian | Plate Armor |
| Twisted Twilight Sash | Waist | Fallen-King Salhadaar | Leather Armor |
| Voracious Wristwraps | Wrist | Vorasius | Cloth Armor |
| Crown of the Fractured Tyrant | Head | Fallen-King Salhadaar | Plate Armor |
| Frenzy's Rebuke | Head | Vorasius | Mail Armor |
| Nullwalker's Dread Epaulettes | Shoulder | Vaelgor | Mail Armor |
| Endless March Waistwrap | Waist | Imperator Averzian | Cloth Armor |
| Sabatons of Obscurment | Feet | Imperator Averzian | Mail Armor |
| Vaelgor's Fearsome Grasp | Hands | Vaelgor | Leather Armor |
| Leggings of the Devouring Advance | Legs | Imperator Averzian | Cloth Armor |
| Untethered Berserker's Grips | Hands | Alleria Windrunner | Mail Armor |
| Light's March Bracers | Wrist | Imperator Averzian | Plate Armor |
| Void-Skinned Bracers | Wrist | Vorasius | Leather Armor |
| Gaze of the Unrestrained | Head | Alleria Windrunner | Cloth Armor |
| War Chaplain's Grips | Hands | War Chaplain Senn | Cloth Armor |
| Ezzorak's Gloombind | Waist | Vaelgor | Plate Armor |
| Parasite Stompers | Feet | Vorasius | Plate Armor |
| Blooming Barklight Spaulders | Shoulder | War Chaplain Senn | Leather Armor |
| Void-Claimed Shinkickers | Feet | Imperator Averzian | Leather Armor |
| Imperator's Banner | Back | Imperator Averzian | Cloak |
| Signet of the Starved Beast | Finger | Vorasius | Ring |
| Ribbon of Coiled Malice | Neck | Fallen-King Salhadaar | Amulet |
| Gloom-Spattered Dreadscale | Trinket | Vaelgor | Trinket |
| Wraps of Cosmic Madness | Trinket | Fallen-King Salhadaar | Trinket |
| Volatile Void Suffuser | Trinket | Fallen-King Salhadaar | Trinket |
| Heart of Ancient Hunger | Trinket | Vorasius | Trinket |
| Light Company Guidon | Trinket | Imperator Averzian | Trinket |
| Ranger-Captain's Iridescent Insignia | Trinket | Alleria Windrunner | Trinket |
| Vaelgor's Final Stare | Trinket | Vaelgor | Trinket |
| Eternal Voidsong Chain | Neck | Alleria Windrunner | Amulet |
| Bond of Light | Finger | War Chaplain Senn | Ring |
| Draconic Nullcape | Back | Vaelgor | Cloak |
| Hate-Tied Waistchain | Waist | Alleria Windrunner | Plate Armor |
| Canopy Walker's Footwraps | Feet | Alleria Windrunner | Leather Armor |
| Litany of Lightblind Wrath | Trinket | War Chaplain Senn | Trinket |
| Locus-Walker's Ribbon | Trinket | Alleria Windrunner | Trinket |
| Hungering Victory | One-Hand | Vorasius | Dagger |
| Pattern: Devouring Banding | – | Imperator Averzian | Leatherworking Pattern |
| Pattern: Sunfire Silk Spellthread | – | Fallen-King Salhadaar | Tailoring Pattern |
| Plans: Knight-Commander's Palisade | – | Drop, Vendor | Blacksmithing Plans |
| Plans: Blood Knight's Impetus | – | Drop, Vendor | Blacksmithing Plans |
| Plans: Bloomforged Greataxe | – | Drop, Vendor | Blacksmithing Plans |
| Arator's Swift Remembrance | One-Hand | Alleria Windrunner | One-Handed Sword |
| Tattered Vanguard Banner | – | War Chaplain Senn | Housing Decor |
| Voidbound Holding Cell | – | Vaelgor | Housing Decor |
| Banded Domanaar Storage Crate | – | Fallen-King Salhadaar | Housing Decor |
| Imperator's Torment Crystal | – | Imperator Averzian | Housing Decor |
| Voltaic Trigore Egg | – | Vorasius | Housing Decor |
| Devouring Host Ritual Engine | – | Alleria Windrunner | Housing Decor |
| Voidspire Vanquisher's Aureate Trophy | – | Alleria Windrunner | Housing Decor |
Most of these pieces of The Voidspire loot are straightforward boss drops, while the various Nullcores function as junk-style items tied to different armor classes and vendors. The housing décor and profession recipes add long-term progression hooks for crafters and collectors, giving Voidspire kills value beyond pure item level. As more information appears on tier sets, mounts, pets, and achievement rewards for this raid, this section can be expanded with dedicated sub-tables and Renown-like progression details.
The Voidspire Achievements
The Voidspire features a full spread of raid, guild, and Feats of Strength achievements tied to its bosses, optional challenges, and the final encounter, Crown of the Cosmos. These range from standard progression goals to puzzle-style tasks and Mythic-only milestones. Below is the list of all the Voidspire raid achievements associated with the raid based on current Midnight data. BLOG20
| Achievement | Description |
| Ahead of the Curve: Crown of the Cosmos | Defeat Crown of the Cosmos on Heroic difficulty or higher before the next raid tier. |
| Cutting Edge: Crown of the Cosmos | Defeat Crown of the Cosmos on Mythic difficulty before the next raid tier. |
| Hall of Fame: Crown of the Cosmos | Be among the first 200 guilds worldwide to defeat Crown of the Cosmos on Mythic. Grants title: Famed Slayer of the Voidspire. |
| Heroic: The Voidspire | Defeat all bosses in The Voidspire on Heroic difficulty. |
| Heroic: The Voidspire Guild Run | Defeat all bosses in The Voidspire on Heroic difficulty or higher in a guild group. |
| Mythic: The Voidspire | Defeat all bosses on Mythic difficulty. |
| Mythic: Crown of the Cosmos | Defeat Crown of the Cosmos on Mythic difficulty. Grants title: Spirebane <Name>. |
| Mythic: Crown of the Cosmos Guild Run | Defeat Crown of the Cosmos on Mythic difficulty while in a guild group. |
| Mythic: Fallen-King Salhadaar | Defeat Fallen-King Salhadaar on Mythic difficulty. |
| Mythic: Imperator Averzian | Defeat Imperator Averzian on Mythic difficulty. |
| Mythic: Lightblinded Vanguard | Defeat the Lightblinded Vanguard on Mythic difficulty. |
| Mythic: Vaelgor & Ezzorak | Defeat Vaelgor & Ezzorak on Mythic difficulty. |
| Mythic: Vorasius | Defeat Vorasius on Mythic difficulty. |
| Voidspire: Crown of the Cosmos | Defeat Crown of the Cosmos on any difficulty. |
| Voidspire: Fanatics of the Light | Defeat the Lightblinded Vanguard and related bosses. |
| Voidspire: Weapons of the Void | Defeat bosses aligned with Void-warped constructs. |
| The Voidspire | Defeat all bosses on any difficulty. |
| The Voidspire Guild Run | Defeat all bosses on Normal difficulty or higher in a guild group. |
| Aura Farming | Defeat the Lightblinded Vanguard while the entire raid has Maximum Aura. |
| Hungry Hungry Hatchlings | Defeat Vorasius after every player feeds a hatchling enough to put it to sleep. |
| It's Treason Then | Defeat Fallen-King Salhadaar after every raid member kneels to him before the fight. |
| Ready, Set, Snap! | Defeat Vaelgor & Ezzorak after all players break each Nullzone’s tethers within 3 seconds. |
| The Only Winning Move Is Not To Play | Defeat Imperator Averzian after causing him to destroy your banners. |
| We Will, In Fact, See It Again | Defeat Crown of the Cosmos after slaying a Fleshy Monstrosity and returning its meat to The Emptiness. |
These achievements cover the entire raid structure, rewarding everything from perfect execution to entertaining mid-fight gimmicks.
Changelog
March 17, 2026:
- The guide has been updated to reflect the release version of the raid
- Removed outdated info from PTR
- Added raid entrance coordinates
- Added a note about gear ilvl by difficulty
- Replaced the raid map screenshot
March 19, 2026:
- Updated FAQ section
- Updated promos
Read our other WoW guides:
- Midnight Player Housing Neighborhoods
- Brawler's Guild Guide
- How to Level Up Housing
- Best Housing Plots
- Lumber Farming Guide
F.A.Q.
What level should I do The Voidspire?
Level 90 The Voidspire is tuned for max-level characters in the Midnight expansion, with LFR offering the most accessible entry point.
How long does The Voidspire take in WoW?
A full clear generally takes between one and three hours depending on group experience and difficulty.
What level can you enter The Voidspire?
Level 90 characters can queue for or enter the raid across all available difficulties.
Who is the final boss in The Voidspire?
The final encounter is Crown of the Cosmos, fought against Alleria Windrunner after her full descent into Void power.
What is the strategy for The Voidspire bosses?
Each boss features multi-phase mechanics centered on add control, movement discipline, and handling Void-themed hazards. Individual strategy sections above cover every encounter in detail.
What is the boss order of The Voidspire?
The raid follows a mostly linear order: Imperator Averzian, Vorasius, Fallen-King Salhadaar, Vaelgor & Ezzorak, Lightblinded Vanguard, and Crown of the Cosmos.
How many bosses are in The Voidspire?
The raid contains six major encounters, culminating in the final fight against Crown of the Cosmos.
Where is The Voidspire on the map WoW?
The Voidspire is located in the Voidstorm in Quel’Thalas. The entrance coordinates are /way 45.5 64.4.
What item level is The Voidspire raid?
The ilvl of gear dropped by bosses depends on the difficulty of the raid:
- LFR: 233-243
- Normal: 246-256
- Heroic: 259-269
- Mythic: 272-282


