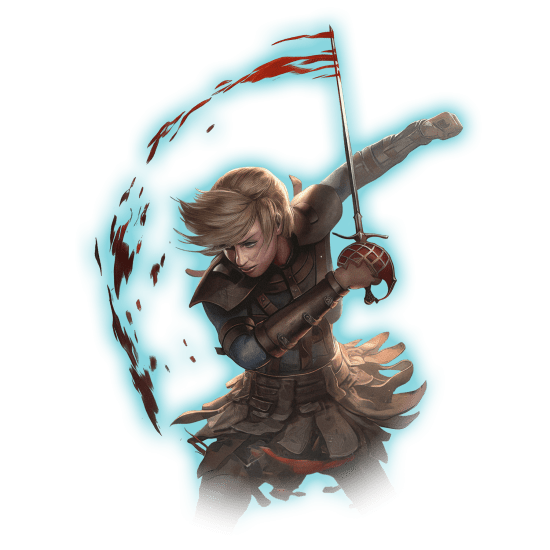
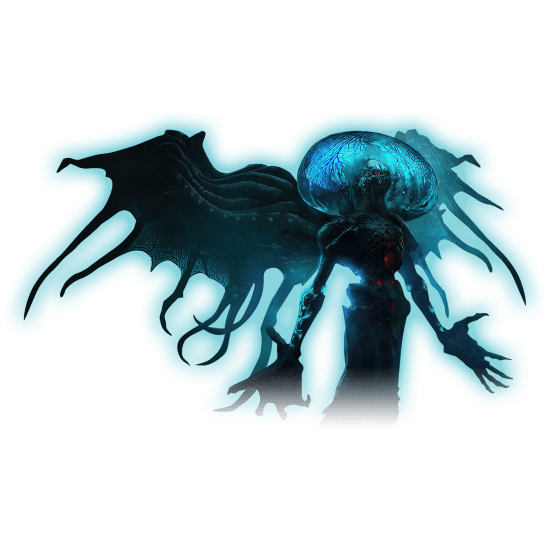
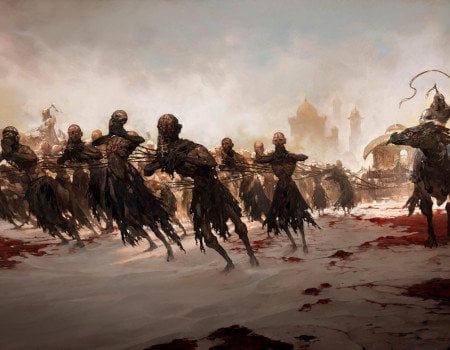
Welcome to Skycoach’s ultimate Path of Exile leveling guide 2026 that will cover everything there’s to know about leveling and how to do it right. This game is structured in such a way that forces players to start from scratch and create a new character. As the new league releases, the characters in the previous league get moved to the standard league. Those who have been playing for a while know how to optimize their runs and get to the endgame fast. Regardless of any of that, everyone has to play through the same 10 acts.
This Path of Exile leveling guide will equip you with the knowledge that will help you finish the story acts and get to the endgame where you can focus more on making your build and playing the maps that you like most. We’ll start with the general progression overview, how it all works, and then go over all 10 acts and provide you with the quickest route through them.
While you are reading this article, Path of Exile 2 is available. Do not waste your time and read our Path of Exile 2 Leveling Guide instead!
IMPORTANT NOTE: Apart from learning everything about the leveling in PoE, you can also Buy Path of Exile Boost from Skycoach. We offer a wide range of products at the lowest market price and with the fastest delivery. You can make your first purchase even CHEAPER if you find a special PROMO CODE (highlighted in green) hidden in this article and get a 20% DISCOUNT.
Check out some of our most popular PoE Boosting services:
Path of Exile Progression Explained
The story serves a tutorial function besides providing the context to the events going on in the game’s universe and how they relate to your character in said universe. The acts are designed to gradually introduce you to more and more mechanics preparing you for the true challenge that is the endgame. Since there’s no option to skip the campaign, everyone is stuck with replaying the same chapters and completing the same quests over and over again. It will be once again up to you to din the best leveling skills PoE, as every build is unique. Anyway, as you progress through the story, you’ll be introduced to various systems and mechanics:
- Gem System: Introduction to skill gems and support gems.
- Passive Skill Tree: Commencement of allocating points in the passive skill tree.
- Currency Items: introduction to currency items like scrolls, orbs, and transmutation orbs.
- Vaal Side Areas (Act 3): Discovery of Vaal side areas containing corrupted zones and bosses.
- Ascendancy Trials (Act 3): Players can start discovering the locations of the first set of Ascendancy Trials.
- Pantheon System (Act 4): Introduction to the Pantheon system, allowing players to capture the powers of defeated gods.
- Jewels (Act 4): Players can find and use jewels, which can be socketed into the passive skill tree.
- Hideouts (Act 4): Introduction to hideouts, providing a personalized space for players to customize.
- Resistances Penalty (Act 5): Players face a resistance penalty after completing Act 5, increasing the importance of gearing for resistances.
- Labyrinth Trials (Act 5): Discovery of the next set of Ascendancy Trials.
- Jewel Crafting (Act 6): Access to a jewel crafting bench for more advanced customization.
- Labyrinth Trials (Act 6): Discovery of the next set of Ascendancy Trials.
- Essences (Act 7): Introduction to essences, powerful crafting materials that modify item properties.
- Labyrinth Trials (Act 7): Discovery of the next set of Ascendancy Trials.
- Labyrinth (Act 8): Players can enter the Cruel Labyrinth.
- Divination Cards (Act 8): Introduction to divination cards, a collectible item that can be exchanged for specific items.
- Labyrinth Trials (Act 8): Discovery of the next set of Ascendancy Trials.
- Labyrinth (Act 9): Players can enter the Merciless Labyrinth.
- Labyrinth Trials (Act 9): Discovery of the next set of Ascendancy Trials.
- Labyrinth (Act 10): Players can enter the Eternal Labyrinth.
- Epilogue (Act 10): Introduction to the epilogue and continuation of endgame content.
- Labyrinth Trials (Act 10): Discovery of the final set of Ascendancy Trials.
As you can see there are lots of mechanics and activities that you will be interacting with at some point in your journey and it’s a good thing that they’re being introduced to players in different parts of the campaign. Nevertheless, if you have reached the endgame at least once, you must know them all and in that case, you would want to get to the max level and the endgame as fast as possible. BLOG20
Fast Leveling Basics
There are a few general things you need to know about the best way to level up in PoE:
- Teleports - most maps will have a teleport also known as the waypoint. They are used for fast travel between the current location and the safe zone, and between zones. You must seek them out whenever you enter a new location. Check the map to see if the node that you’re in has a waypoint, then find it.
- Quests - there are main and sidequests. You don’t need to complete all quests in the town to proceed to the next chapter. You only need to complete the mandatory ones.
- Rewards - mandatory quests will reward you with one of 3 possible things - a key item that unlocks a path forward or the skill points for the endgame. You absolutely must get all Skill Point rewards to complete the campaign. Type in the /passives command into chat to check how many you’re missing.
- Ignore Elites - from time to time you will run into Elite versions of monsters that aren’t your quest objectives. However counterintuitive it may sound, you should ignore them and don’t waste your time killing them. Remember, your goal is to finish 10 Acts as fast as possible. Therefore, if you see one, just keep running towards your objective.
- Ignore League Content - the league mechanic gets introduced as early as the 1 Act of the campaign so that players have a more interesting experience even if they have to go through the same maps again and again. However, each league including the current one offers so much in terms of content, that spending time on it will only slow you down. Just ignore it until you have finished the 10 Acts.
- Loot filter - utilizing a loot filter can significantly enhance your leveling experience. These filters automatically highlight and prioritize valuable items while hiding the clutter, making it easier to identify crucial upgrades and currency items. Many experienced players share their custom loot filters, which you can easily integrate into the game. To activate a loot filter, visit the 'Options' menu in-game, navigate to 'UI,' and select your preferred filter under 'Item Filter.' This simple addition can streamline your gameplay, ensuring you focus on the most important items and accelerate your leveling progress.
Additionally, you could the find fastest leveling build PoE and stick to it if you have experience in making builds. This is mostly everything there’s to know about leveling, what you can skip and what you can’t. You don’t want to be picking up everything enemies drop. Just set your filters to something really rare, otherwise, you’ll be picking up a lot of trash and forcing yourself to waste teleport scrolls to go back to town to sell your loot. This wastes your time.
The next part of the guide is incredibly long because there are a lot of quests within the ten acts. Do you want to know what will take less time to get through all of them? If you buy Path of Exile leveling service from Skycoach, our professional veteran PoE players will handle the leveling for you and do it much faster than you would. Don't waste your time going through this ridiculous process every time there's a new League or you want to try a new character, just order the service today and get your max level character in no time!
Path of Exile Complete Walkthrough
The following part of the game will provide you with a list of mandatory quests and their rewards that you need to complete in each Act the fastest way to level PoE is to run through the acts as quickly as possible.. Just refer to it whenever you struggle or stuck.
Act 1
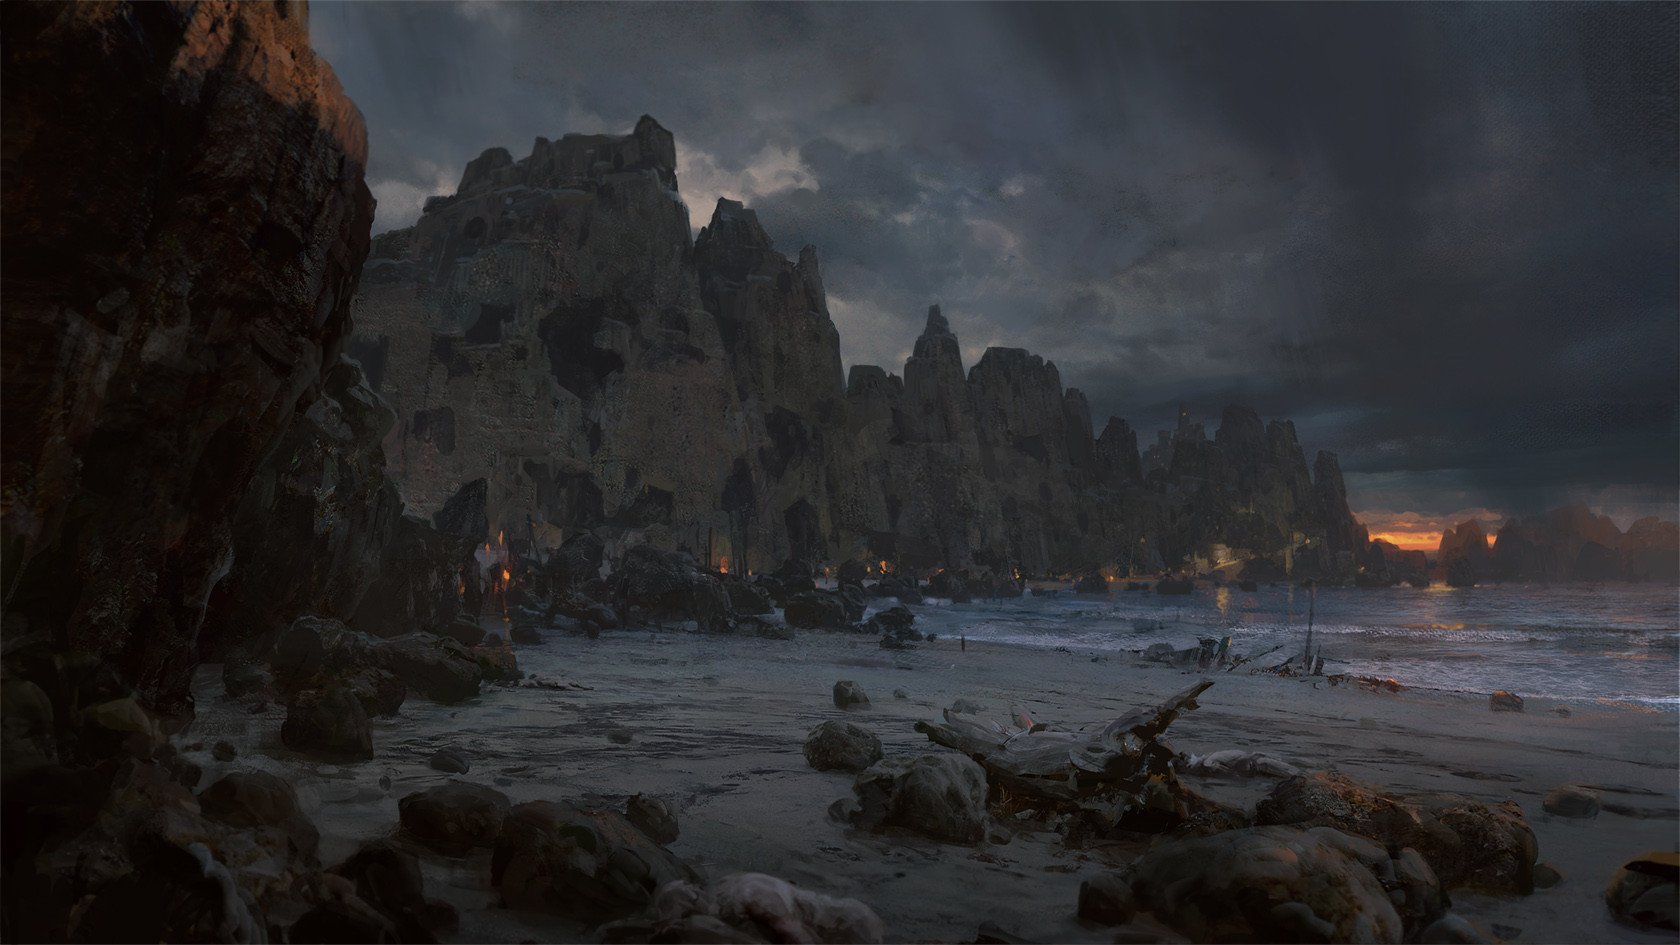
In Act 1 your character washes ashore on the forsaken continent of Wraeclast. Tasked with survival and exploration, you face various challenges in different regions. From the ominous Twilight Strand to the haunted Ship Graveyard, you encounter enemies, assist NPCs, and ultimately confront the powerful Merveil. The act introduces you to fundamental mechanics, lore, and the struggle for survival in a dark and dangerous world.
| Order | NPC | Quest | Quest | Reward |
| - | - | The Twilight Strand | Kill Hillock in Twilight Strand | - |
| 0 | Tarkleigh | Enemy at the Gate | Talk to Tarkleigh in Lioneye's Watch. | - |
| 1 | Nessa | The Marooned Mariner | Find the ship's medicine chest. | Skill gem, Portal Scroll |
| 2 | Nessa | The Tidal Island | Find and defeat Hillock. | Orb of Transmutation |
| 3 | Nessa | Breaking Some Eggs | Find the three eggs in the Fetid Pool. | Skill gem |
| 4 | Tarkleigh | A Dirty Job | Find the Den in the Submerged Passage. | Skill gem |
| 5 | Tarkleigh | The Dweller of the Deep | Find and defeat the Dweller of the Deep. | Skill point |
| 6 | Tarkleigh | The Way Forward | Find the entrance to the Climb. | Skill gem |
| 7 | Siosa (Act 3 | A Fixture of Fate | Find the three Golden Pages in the Prison. | Skill point |
| 8 | Nessa | The Brutal Lord | Find and defeat Brutus. | Skill gem |
| 9 | Tarkleigh | The Siren's Cadence | Find the entrance to the Cavern of Wrath. | Skill gem |
| 10 | Tarkleigh | The Caged Brute | Find and defeat Merveil. | Skill point |
The act concludes with the climactic battle against Merveil, the Siren, in her lair within the Ship Graveyard. You venture into Merveil's Cavern, facing her formidable powers and minions. The fight with Merveil serves as the final encounter of Act 1, and upon defeating her, you return to Lioneye's Watch. The act concludes with a resolution in the town, where you can interact with NPCs, receive rewards, and prepare for the challenges that lie ahead in Act 2.
Check out some of our most popular PoE Boosting services:
Act 2
Act 2 continues your exile's journey into the dense forests and ancient ruins of Wraeclast. Navigating through the Southern Forest and dealing with bandits, you uncover the mysteries behind the Vaal civilization. You confront the Great White Beast, make crucial choices involving bandit leaders, and face the powerful Vaal Oversoul in the Ruins. Act 2 expands the narrative, introduces new characters, and deepens the complexities of the dark tale woven throughout the game.
| Order | NPC | Quest | Objective | Reward |
| 0 | Yeena | The Way Forward | Find the blocked path in the Southern Forest and progress. | - |
| 1 | Silk | The Root of the Problem | Enter the Forest Encampment and talk to Silk. | - |
| 2 | Silk | Deal with the Bandits | Choose to deal with or help one of the three bandit leaders. | Two Passive Skill Points (depending on choice) |
| 3 | Yeena | Intruders in Black | Find the entrance to the Vaal Ruins and explore them. | - |
| 4 | Silk | Through Sacred Ground | Enter the Chamber of Sins and find the Thaumetic Sulphite. | Skill point |
| 5 | Helena | Sharp and Cruel | Retrieve Maligaro's Spike from the Chamber of Sins Level 2. | Skill gem |
| 6 | Silk | The Root of the Problem | Kill the Great White Beast in the Den and return to Silk. | Skill point |
| 7 | Silk | The Bandit Lord Alira | Kill Alira in the Western Forest. | Skill point |
| 8 | Silk | The Bandit Lord Kraityn | Kill Kraityn in the Broken Bridge. | Skill point |
| 9 | Silk | The Bandit Lord Oak | Kill Oak in the Wetlands. | Skill point |
| 10 | Helena | The Root of the Problem | Deliver Maligaro's Spike to Helena. | Skill gem |
| 11 | Silk | Shadow of the Vaal | Enter the Vaal Ruins and defeat the Vaal Oversoul. | Skill point |
Act 2 concludes with the intense battle against the Vaal Oversoul, a powerful entity within the Vaal Ruins. You delve into the ancient ruins, confront the Oversoul, and strive to overcome its formidable abilities. Upon defeating the Vaal Oversoul, you return to the Forest Encampment. The act concludes with interactions with key NPCs, including Silk, Yeena, and Helena. You will receive rewards, make critical choices that impact the narrative, and set the stage for your continued journey into the unforgiving world of Wraeclast in Act 3.
Act 3
Act 3 unfolds within the fallen city of Sarn, a once-great metropolis now overrun by corruption. You will navigate through treacherous districts, uncovering the mysteries behind the city's downfall. Key elements include assisting Clarissa in her investigations, confronting the Undying, and facing the Gemling Queen. The act culminates in a showdown against Dominus within the Sceptre of God.
| Order | NPC | Quest | Objective |
| 1 | Clarissa | Lost in Love | Find the Ribbon Spool in the Battlefront. |
| 2 | Clarissa | Victario's Secrets | Collect the Plague Mask, Black Venom, and Undying Blockade. |
| 3 | Clarissa | Piety's Pets | Kill the three bosses in the Lunaris Temple. |
| 4 | Hargan | A Fixture of Fate | Find the Glyph in the Sceptre of God. |
| 5 | Dialla | A Fixture of Fate (Part 2) | Talk to Dialla in the Sarn Encampment. |
| 6 | Dialla | A Fixture of Fate (Part 3) | Enter the Archives and retrieve Malachai's heart. |
| 7 | Dialla | A Swig of Hope | Kill Piety in the Lunaris Temple and retrieve the Infernal Talc. |
| 8 | Dialla | In Memory of Greust | Find Greust's necklace in the Crematorium. |
| 9 | Grigor | Sever the Right Hand | Kill General Gravicius in the Ebony Barracks. |
| 10 | Clarissa | A Fixture of Fate (Part 4) | Talk to Clarissa in the Sarn Encampment. |
| 11 | Grigor | Breaking the Seal | Find the Thaumetic Sulphite in the Marketplace. |
| 12 | Dialla | A Fixture of Fate (Part 5) | Talk to Dialla in the Sarn Encampment. |
| 13 | Grigor | The Eternal Nightmare | Enter the Imperial Gardens and kill the Nightmare Manifest. |
| 14 | Dialla | A Fixture of Fate (Part 6) | Enter the Library and obtain Malachai's Vise. |
| 15 | Dialla | A Fixture of Fate (Part 7) | Talk to Dialla in the Sarn Encampment. |
| 16 | Dialla | Sceptre of God | Reach the top of the Sceptre of God and kill Dominus. |
Act 3 concludes with the challenging battle against Dominus, a significant antagonist in Path of Exile. You will ascend the Sceptre of God, engaging in a multi-phase encounter with Dominus. Upon defeating Dominus, you will witness crucial narrative events and are transported to the Eternity Shroud. The story progresses, setting the stage for further challenges and revelations in subsequent acts.
Act 4
Act 4 takes place in the Highgate Mines, a location heavily impacted by the cataclysmic events of the previous acts. You will encounterr a series of challenging quests as they navigate through twisted dreamscapes, facing the remnants of Wraeclast's past.
| Order | NPC | Quest | Objective |
| 1 | Tasuni | The Eternal Nightmare | Talk to Tasuni in the Grand Promenade. |
| 2 | Tasuni | The Grand Arena | Enter the Grand Arena and defeat Daresso. |
| 3 | Dialla | The Kaom's Dream | Enter Kaom's Dream and kill Kaom. |
| 4 | Dialla | The Ribbon Spool | Find the Ribbon Spool in the Belly of the Beast. |
| 5 | Dialla | An Indomitable Spirit | Find the Staff in the Belly of the Beast. |
| 6 | Dialla | The King of Desire | Kill Daresso, King of Swords, in the Grand Arena. |
| 7 | Dialla | The Queen of Despair | Kill Shavronne, the Branded in the Harvest. |
| 8 | Tasuni | The Dreamer's Dream | Enter the Black Core and kill Malachai, The Nightmare. |
The act concludes with you venturing into the Black Core, a nightmarish dimension created by the twisted mind of Malachai, The Nightmare. The ultimate goal is to confront and defeat Malachai, the antagonist responsible for much of the chaos and corruption in Wraeclast. The final battle takes place in a challenging encounter within the Black Core, leading to the resolution of Act 4 and setting the stage for the next chapter in your journey.
Act 5
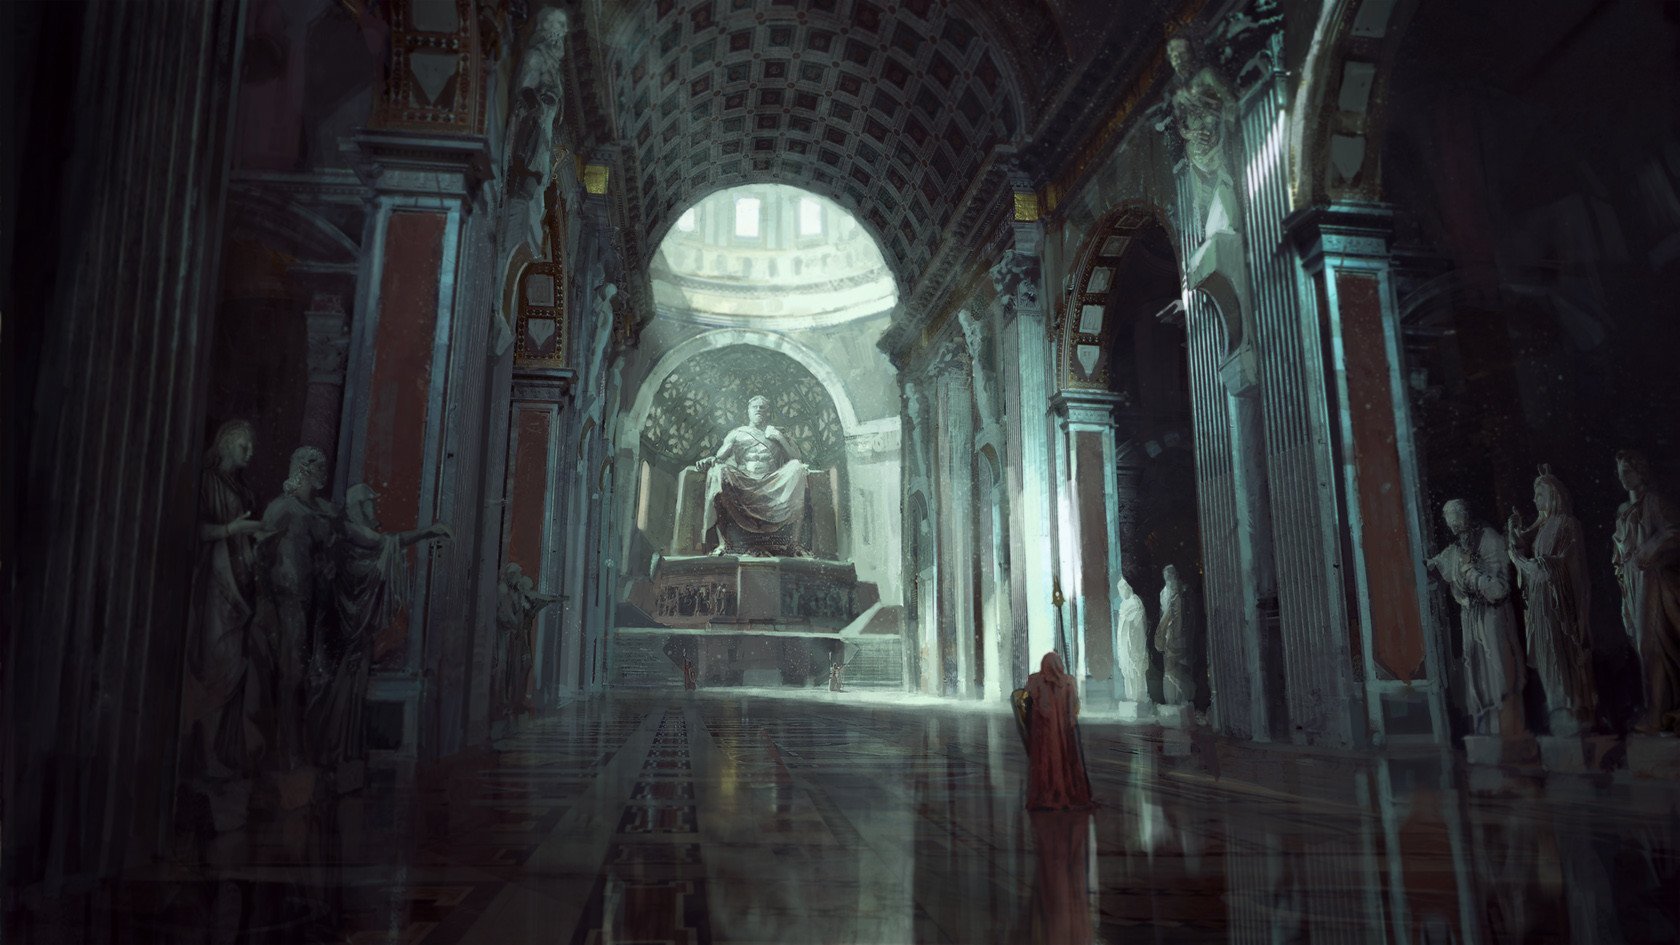
Act 5 continues the story as you return to Oriath, only to find it in disarray. The oppressive rule of the templars and the presence of Kitava, the Insatiable, contribute to the chaos.
| Order | NPC | Quest | Objective |
| 1 | Lilly Roth | Return to Oriath | Talk to Lilly Roth on the Prisoner's Gate. |
| 2 | Lilly Roth | Depraved Trinity | Find the Sign of Purity in the Control Blocks. |
| 3 | Lilly Roth | The King's Feast | Find the Thaumetic Emblem in the Ossuary. |
| 4 | Lilly Roth | The Queen's Vaults | Enter the Cathedral Rooftop and retrieve Kitava's Torments. |
| 5 | Innocence | In Service to Science | Talk to Innocence in the Control Blocks. |
| 6 | Innocence | Kitava's Torments | Slay Kitava's Herald in the Control Blocks. |
| 7 | Lilly Roth | Safe Passage | Find a way to the Ruined Square from the Control Blocks. |
| 8 | Lilly Roth | The Key to Freedom | Enter the Templar Courts and find the Sign of Purity. |
| 9 | Lilly Roth | Love is Dead | Find Oyun in the Ruined Square. |
| 10 | Lilly Roth | The Puppet Mistress | Find Vilenta in the Control Blocks. |
| 11 | Innocence | Death to Purity | Slay Justicar Casticus in the Templar Courts. |
| 12 | Lilly Roth | In the Grasp of Corruption | Enter the Reliquary and retrieve the Teardrop. |
| 13 | Lilly Roth | A Matter of Time | Open the Templar Courts using the Sign of Purity. |
| 14 | Lilly Roth | The Wings of Vastiri | Find the Teardrop in the Torched Courts. |
| 15 | Innocence | Queen of Despair | Slay Vilenta in the Torched Courts. |
| 16 | Innocence | Vilenta's Vengeance | Slay Vilenta in the Cathedral Rooftop. |
| 17 | Lilly Roth | The Last of the Masters | Find Bannon in the Control Blocks. |
| 18 | Lilly Roth | The Shattered Crown | Enter the Ruined Square and find the Shattered Crown. |
| 19 | Lilly Roth | An End to Hunger | Slay Gruhast in the Ruined Square. |
| 20 | Lilly Roth | Greetings, Survivor | Talk to Lilly Roth in Oriath Square. |
The act concludes with the defeat of Vilenta, the Puppet Mistress, and the player's confrontation with Kitava's Herald. The story takes a dark turn as Kitava's influence intensifies, setting the stage for further struggles against the malevolent forces that threaten Wraeclast. The act sets the narrative tone for the continuing battle against the insatiable hunger and corruption that pervades the world of Path of Exile.
Act 6
Act 6 picks up the story with you returning to the shores of Wraeclast after defeating Kitava's Herald in Act 5. However, Oriath remains a city in turmoil. You will navigate through the ruins and face new challenges as they seek to uncover the mysteries behind the ongoing corruption and restore some semblance of order.
| Order | NPC | Quest | Objective |
| 1 | Lilly Roth | The Brine King's Reef | Find the Brine King's Reef on the Tidal Island. |
| 2 | Lilly Roth | The Tidal Island | Find the Karui Waypoint in the Tidal Island. |
| 3 | Lilly Roth | The Karui Fortress | Enter the Karui Fortress and kill Tukohama. |
| 4 | Weylam Roth | Prisoners of Fate | Find the Engineering Camp in the Prison. |
| 5 | Lilly Roth | Shattered Past | Find the Allflame in the Prison. |
| 6 | Lilly Roth | Queen of Despair | Enter the Control Blocks and kill Abberath. |
| 7 | Lilly Roth | The Mother of Spiders | Find the Black Venom in the Control Blocks. |
| 8 | Lilly Roth | The Father of War | Find the Black Flag in the Prison. |
| 9 | Lilly Roth | Love is Dead | Find Oyun in the Cavern of Anger. |
| 10 | Lilly Roth | The Cloven One | Enter the Northern Forest and kill Gruthkul. |
| 11 | Lani | The Puppet Mistress | Find Vilenta in the Ruined Square. |
| 12 | Lani | Essence of Umbra | Find the Essence of Umbra in the Control Blocks. |
| 13 | Lani | Fall of an Empire | Enter the Control Blocks and kill Yugul. |
| 14 | Helena | The Masters of a Forgotten Despair | Find Bannon in Highgate. |
| 15 | Lilly Roth | An Indomitable Spirit | Find the Staff in the Belly of the Beast. |
| 16 | Lilly Roth | The King's Feast | Find the Thaumetic Emblem in the Ossuary. |
| 17 | Lilly Roth | The Queen's Vaults | Enter the Cathedral Rooftop and retrieve Kitava's Torments. |
| 18 | Weylam Roth | The Caged Brute | Find the Slave Pens in the Control Blocks. |
| 19 | Lani | The Cloven One | Enter the Northern Forest and kill Gruthkul. |
| 20 | Lilly Roth | The Puppet Mistress | Find Vilenta in the Ruined Square. |
| 21 | Lilly Roth | Essence of Umbra | Find the Essence of Umbra in the Control Blocks. |
| 22 | Lilly Roth | Fall of an Empire | Enter the Control Blocks and kill Yugul. |
| 23 | Helena | The Masters of a Forgotten Despair | Find Bannon in Highgate. |
| 24 | Lilly Roth | The Storm Blade | Find the Storm Blade in the Chamber of Innocence. |
| 25 | Lilly Roth | Death to Purity | Enter the Templar Courts and kill Innocence. |
| 26 | Lilly Roth | Return to Oriath | Talk to Lilly Roth in the Templar Courts. |
The act concludes with players delving deeper into the lore of Wraeclast, confronting significant adversaries, and gaining crucial insights into the source of the corruption plaguing the land. The story reaches a pivotal point, setting the stage for the continuing saga. The player's journey in Act 6 culminates in revelations about the dark forces at play, paving the way for further challenges and confrontations in the subsequent acts.
Act 7
Act 7 in Path of Exile involves exploring various locations, facing challenging bosses, and uncovering the mysteries of Wraeclast. You will encounter Weylam Roth, Helena, Clarissa, and Lani, each providing quests and guidance throughout the act. The narrative unfolds as you complete quests, defeats powerful enemies, and makes crucial choices.
| Order | NPC | Quest | Objective |
| 1 | Weylam Roth | The Silver Locket | Find the Silver Locket in the Broken Bridge. |
| 2 | Weylam Roth | Kishara's Star | Find Kishara's Star in the Ashen Fields. |
| 3 | Weylam Roth | A Swig of Hope | Find the Sulphur Flasks in the Sulphur Vents. |
| 4 | Weylam Roth | The Key to Freedom | Find the Keystones in the Northern Forest. |
| 5 | Weylam Roth | The Master of a Million Faces | Find Gravicius in the Chamber of Sins Level 2. |
| 6 | Helena | Lord of the Ashen Arrow | Find Greust in the Ashen Fields. |
| 7 | Weylam Roth | The Dread Thicket | Find the Black Flag in the Dread Thicket. |
| 8 | Clarissa | Queen of Despair | Find Maligaro's Map in the Temple Map. |
| 9 | Weylam Roth | Gruthkul, Mother of Despair | Find Gruthkul in the Gruthkul's Den. |
| 10 | Helena | The Puzzle of Faith | Find Bannon in the Causeway. |
| 11 | Weylam Roth | The Silver Locket | Return to Weylam Roth in the Bridge Encampment. |
| 12 | Helena | The Master of a Million Faces | Return to Greust in the Ashen Fields. |
| 13 | Helena | Lord of the Ashen Arrow | Return to Helena in the Causeway. |
| 14 | Weylam Roth | The Master of a Million Faces | Return to Weylam Roth in the Broken Bridge. |
| 15 | Clarissa | Queen of Despair | Return to Clarissa in the Bath House. |
| 16 | Weylam Roth | The Dread Thicket | Return to Weylam Roth in the Dread Thicket. |
| 17 | Weylam Roth | The Key to Freedom | Return to Weylam Roth in the Northern Forest. |
| 18 | Weylam Roth | Gruthkul, Mother of Despair | Return to Weylam Roth in the Gruthkul's Den. |
| 19 | Helena | The Puzzle of Faith | Return to Helena in the Causeway. |
| 20 | Lani | Trial of the Lingering Pain | Find the Trial of Lingering Pain in the Chamber of Sins Level 2. |
| 21 | Weylam Roth | The Master of a Million Faces | Return to Weylam Roth in the Bridge Encampment. |
| 22 | Helena | The Master of a Million Faces | Return to Helena in the Bridge Encampment. |
| 23 | Lani | The Master of a Million Faces | Find the Map in the Chamber of Sins Level 2. |
| 24 | Weylam Roth | The Master of a Million Faces | Return to Weylam Roth in the Bridge Encampment. |
Act 7 concludes with the player returning to key NPCs, including Weylam Roth, Helena, Clarissa, and Lani, to report their findings and progress. The quests lead the player through diverse environments, from the Broken Bridge to the Ashen Fields and beyond.
Act 8
Act 8 in Path of Exile delves into the decaying city of Sarn, exploring its haunted streets and battling corrupt entities. You will encounter a new set of challenges and allies, including important NPCs like Clarissa, Weylam Roth, and others. As the narrative unfolds, you must face powerful foes and navigate through the twisted streets of Sarn to unravel the mysteries within.
| Order | NPC | Quest | Objective |
| 1 | Clarissa | The Sarn Encampment | Find the entrance to the Sarn Encampment. |
| 2 | Clarissa | The Sarn Encampment | Talk to Clarissa in the Sarn Encampment. |
| 3 | Clarissa | The Sarn Encampment | Find and speak to Maramoa in the Sarn Encampment. |
| 4 | Clarissa | The Sarn Encampment | Find and speak to Oyun in the Sarn Encampment. |
| 5 | Clarissa | The Sarn Encampment | Find and speak to Irasha in the Sarn Encampment. |
| 6 | Clarissa | The Gemling Legion | Find the Decanter Spiritus in the Control Blocks. |
| 7 | Clarissa | Breaking the Seal | Find and activate the first Darkshrine. |
| 8 | Clarissa | Breaking the Seal | Find and activate the second Darkshrine. |
| 9 | Clarissa | Breaking the Seal | Find and activate the third Darkshrine. |
| 10 | Clarissa | The Wings of Vastiri | Find the Wings of Vastiri in the Bath House. |
| 11 | Clarissa | The Wings of Vastiri | Return to Clarissa in the Bath House. |
| 12 | Clarissa | Reflection of Terror | Find the Rapture Device in the Lunaris Concourse. |
| 13 | Clarissa | Reflection of Terror | Return to Clarissa in the Bath House. |
| 14 | Lani | The Gemling Legion | Return to Lani in the Control Blocks. |
| 15 | Clarissa | An End to Hunger | Find the Sign of Purity in the Reliquary. |
| 16 | Clarissa | An End to Hunger | Return to Clarissa in the Reliquary. |
| 17 | Clarissa | Map to Tsoatha | Find the Map to Tsoatha in the Toxic Conduits. |
| 18 | Clarissa | Map to Tsoatha | Return to Clarissa in the Bath House. |
| 19 | Clarissa | Lani's End | Find the Black Venom in the Toxic Conduits. |
| 20 | Clarissa | Lani's End | Return to Clarissa in the Bath House. |
| 21 | Lani | Reflection of Terror | Return to Lani in the Bath House. |
| 22 | Weylam Roth | Map to Tsoatha | Return to Weylam Roth in the Control Blocks. |
| 23 | Weylam Roth | The Gemling Legion | Return to Weylam Roth in the Control Blocks. |
| 24 | Clarissa | The Gemling Legion | Return to Clarissa in the Control Blocks. |
Act 8 concludes with players returning to key NPCs like Clarissa, Weylam Roth, and Lani to report their progress and discoveries. The quests in Act 8 lead players through the corrupted city of Sarn, unveiling its dark secrets and preparing them for the challenges that lie ahead. As players complete the mandatory quests and make pivotal choices, the stage is set for the continuation of their journey in the unforgiving world of Path of Exile.
Act 9
Act 9 in Path of Exile sees you will be venturing into the desolate and corrupted city of Highgate, confronting new challenges, and uncovering the truth behind the ongoing chaos. NPCs such as Petarus and Vanja, as well as others, guide you through this dark chapter. The act requires you to navigate through hostile environments, face powerful adversaries, and make critical decisions that shape the unfolding narrative.
| Order | NPC | Quest | Objective |
| 1 | Oyun | The Blood Aqueduct | Enter the Blood Aqueduct and find the Sign of Purity. |
| 2 | Oyun | A Town in Need | Find the Sewer Key in the Control Blocks. |
| 3 | Vilenta | A Valuable Combination | Find the Venomous Brood in the Descent and retrieve the Allflame. |
| 4 | Irasha | The Ruler of Highgate | Find High Templar Avarius in the Control Blocks and defeat him. |
| 5 | Oyun | The Storm Blade | Find the Storm Blade in the Vastiri Desert. |
| 6 | Vilenta | Queen of Despair | Find Vilenta in the Vastiri Desert and kill her. |
| 7 | Oyun | Fastis Fortuna | Find the Cathedral Apex and defeat the Depraved Trinity. |
| 8 | Lani | The Gemling Legion | Find the Control Blocks and retrieve the Decanter Spiritus. |
| 9 | Oyun | Toxic Delivery | Find the Sulphur Wastes and defeat Plaguewing. |
| 10 | Irasha | The Vastiri Desert | Enter the Vastiri Desert and locate the Oasis. |
| 11 | Jun Ortoi | The Immortal Syndicate | Interact with the Immortal Syndicate Encounters in the Vastiri Desert. |
| 12 | Irasha | The Three Faces of God | Find the Temple of Decay and defeat the Depraved Trinity. |
Act 9 concludes with players reporting back to key NPCs, possibly making significant choices, and setting the stage for the next part of their journey.
Act 10
Act 10 in Path of Exile serves as the conclusion to the storyline set in the city of Oriath. After the defeat of Kitava, you must navigate the aftermath of the catastrophic events unleashed by the Beast.
| Order | NPC | Quest | Objective |
| 1 | Lani | Return to Oriath | Talk to Lani in Act 10 town. |
| 2 | - | The Ossuary | Enter the Ossuary and find the Sign of Purity. |
| 3 | - | The Templar Courts | Enter the Templar Courts and kill Avarius. |
| 4 | - | The Canals | Find the entrance to the Canals. |
| 5 | - | Breaking the Seal | Find the Sign of Purity in the Canals. |
| 6 | - | Map to Tsoatha | Find the Map to Tsoatha in the Reliquary. |
| 7 | Lani | Lani's Watch | Return to Lani in Act 10 town. |
| 8 | - | The Cathedral Rooftop | Enter the Cathedral Rooftop and defeat Kitava. |
| 9 | Lani | Return to Oriath | Talk to Lani in the Templar Courts. |
Upon Kitava's defeat, players witness the consequences of their actions and the impact on the surviving inhabitants of Oriath. The story takes a poignant turn, exploring themes of sacrifice, redemption, and the aftermath of a city in ruins. Characters from previous acts, as well as new allies, play a role in shaping the narrative.
The act concludes with a transition to the endgame content, marking the beginning of the player's journey into the Atlas of Worlds and the pursuit of even greater challenges.
What Happens Next?

After completing the last quest of Act 10 and defeating Kitava, you will enter the endgame content in Path of Exile. The endgame primarily revolves around the Atlas of Worlds, which is a map system where you can explore high-level areas, encounter challenging bosses, and acquire powerful items. Want to know how to power level in Path of Exile? Here’s how.
The following is an overview of the endgame content and tips on reaching the max level quickly:
- Atlas of Worlds:
Players progress through the Atlas by running Maps, which are items that open portals to various zones. Each map has its own modifiers and challenges, providing a diverse and challenging endgame experience.
- Elder and Shaper Influence:
As you complete maps, you may encounter the Elder and Shaper influences. These are powerful entities that can alter the properties of maps and introduce new challenges. Defeating the Elder and Shaper can yield valuable rewards.
- Guardians and Shaper:
High-level maps can contain Guardian maps, each guarded by a powerful boss. Defeating all four Guardians allows access to the Shaper's Realm, where players can face the ultimate boss, the Shaper.
- Elder and Uber Elder:
By manipulating Elder influence on the Atlas, players can spawn the Elder on specific maps. Defeating the Elder and his guardians can lead to the Uber Elder encounter, one of the most challenging fights in the game.
- Delve:
Delve is an infinite dungeon that offers a unique challenge. Players explore the Azurite Mine, battling monsters and collecting valuable resources. The deeper you go, the tougher the challenges and rewards.
- Blight and Metamorph:
Other league mechanics like Blight and Metamorph bring additional encounters and challenges to the endgame.
This part of the Path of Exile speed leveling guide will tell you what you should be doing when reaching the max level in the endgame:
- Run Efficient Maps: Choose maps that are well-suited to your character's strengths and can be cleared quickly. Focus on layouts that are easy to navigate.
- Experience Boosts: Use experience boosts such as Zana's map mods, high-quality maps, and sextants to increase experience gains.
- Party Play: Playing in a group can increase the efficiency of clearing maps and provide additional support. Shared experience in a party can speed up leveling.
- Focus on Damage and Survivability: Prioritize passive skill points and gear that enhance your damage output and survivability. Efficiently clearing content allows for faster leveling.
- Complete Encounters: Engage with league mechanics and encounters, as they often provide valuable rewards and experience.
Remember that the endgame in Path of Exile is highly customizable, and there are many different ways to approach it based on your preferred playstyle and goals. Try finding the PoE fastest leveling build and play with it.Experiment with different content and enjoy the diverse challenges the endgame has to offer.
Conclusion
Path of Exile is a massive game that has a really long campaign that consists of 10 acts, tons of replayable content sprinkled throughout the acts, and highly customizable endgame content that each player can shape to their preference. It includes the most challenging boss encounters and an endless void of loot.
This guide has equipped you with the necessary tips and tricks for the leveling stages that will help you run through the 10 Acts with relative ease. Remember, your goal is to get to the endgame as fast as possible, there’s no time to stop and sniff the flowers! We’ve provided you with the complete walkthrough of a story and a list of mandatory quests that you must do to finish it. We’ve also provided some handful insights on how to hit the last level when playing the endgame activities but we didn’t provide any PoE leveling builds which there are so many. We hope that this guide has been helpful and we’ll see you in the next one.
F.A.Q.
How Do You Level Up Fast in PoE?
To level up quickly in Path of Exile, focus on completing quests efficiently, prioritize high-density areas, and use gear that enhances your damage output.
How to Level Up After 90 PoE?
After reaching level 90 in Path of Exile, continue running high-tier maps, invest in quality gear, and consider specializing your character further with advanced passive tree options.
How Does Path of Exile Work?
Path of Exile is an action RPG with a deep and complex skill system, a vast passive skill tree, and an ever-evolving endgame known as the Atlas of Worlds, offering diverse challenges and rewards.
Where to Start with PoE?
Start your Path of Exile journey by following the main questline, familiarize yourself with the game's mechanics, and seek guidance from in-game tutorials and the PoE community for a smoother initiation.
Can You Get Power Leveled in PoE?
Yes, it is possible to get power leveled in Path of Exile. Experienced players can assist you in quickly progressing through content, helping you reach higher levels faster.


