Wrath of the Machine Raid Carry – Buy Destiny 2 PvE Boost & Carry Service
We all know that Bungie absolutely loves to reuse content. This year, we already got a bunch of guns and armor sets from the original game, as well as a huge and shiny rework of the King’s Fall raid. And you know what? It is great to see good stuff from the original being revived and enjoyed once again by a completely new demographic. Not only because of nostalgia (which is still a major factor), but because the content is actually good.
So, with the King’s Fall release, it is safe to assume one more legacy raid will be released in the two-month window before the Lightfall Chapter introduction, and we bet on Wrath of the Machine – another insanely popular raid from Destiny. Why? Because when Season of Plunder arrived, and we were guessing which legacy raid would make its return – King’s fall and Wrath of the Machine were two major contenders. With one already in the rotation, the second gets moved a bit further down the line.
Considering that legacy raids rarely differ from their original counterparts, it is safe to assume that major mechanics will be the same with a number of barely noticeable variations. We will, of course, update this guide when WotM releases, but for now – this is your best way to prepare yourself for the coming content. Worry not about googling “destiny 2 wrath of the machine raid carry”, “destiny 2 wrath of the machine raid boost”, “destiny 2 wrath of the machine raid gear” and such.
Before You Enter the Raid
Recommendations for different raids are always somewhat similar. Still, let’s go through them real quick just to make sure.
Weapons:
- Divinity/Sleeper Stimulant/Arbalest/Gjalahorn – These are your go-to damage dealers during tough encounters with bosses and mini-bosses. Make sure to have at least several of these in your team’s arsenal before entering the raid. It will, in fact, make your life much easier.
- Sweet Business/Meta Auto Rifles or SMGs – These are important for add clearing and yellow bar enemies. Basically, you will need something fast shooting and with medium damage output. If you have some other exotics in your slot and Sweet Business is not an option, grab some AR or SMG with nice stats. Godroll of Gnawing Hunger or Funell Web should do the trick.
Classes:
Anything will do, really. But keep in mind that support roles are crucial for any raid, so Titans with Ward of Dawn, Warlock with Well of Radiance and Hunters with Shadowshot will make things a bit smoother. Damage output is also important, though, so grabbing some arc missiles for Titans, golden guns for Hunters and Novas for Warlocks will help you to deal with those tanky bosses.
Stages and What to Expect. Step-by-step Instructions
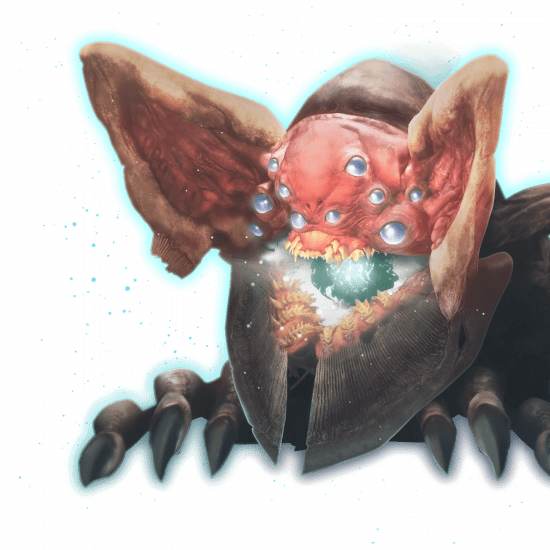
Vosik Encounter
The very first little mechanic you should deal with upon entering a raid is charging stuff. Grab some lighting orbs flying around the area to get the Voltage Rising buff. When getting it four times, you can deposit it into an improvised charger. Watch yourself, though. Grabbing those fast is essential, due to the buff being on a timer. Take too long and boom – you are dead. Once two full stacks (4x is a full stack) are deposited into charging stations – SIVA charges appear.
These are crucial for defeating the raid’s first boss. Grab these charges and throw them right at the boss until he starts panicking and promptly retreats.
To draw Vosik out of hiding and enter the next stage of this boss fight, you will need to complete a jumping puzzle. Yay, we at SkyCoach love these. When you finish jumping across falling platforms, you will appear in Splicer’s Den - Vosik’s lair.
Here Vosik is invincible and surrounded by his trusty Splicers. Kill enough of them and SIVA charges will spawn once again. You must again throw them at the boss, but at the same time or with small windows between throws. Once it is done correctly, one of the monitors behind Vosik will start glowing – destroy it to damage the boss.
Repeat the process until the boss is no more and remember, if you fail to destroy the required monitor in time - Vosik’s shields will regenerate, and you will have to start all over again.
Dead Zamboni Encounter
After you are done with collecting Vosik’s loot, proceed through the door and another jumping section. At the end of it, you will find the raid’s second boss.
Here, you start with destroying Zamboni’s turrets, which will expose a weak spot on his head. Attack it until a platform drops to the left or right of the boss. Use this platform to climb Zamboni and stay on him until he smashes himself into the wall. This will trigger a pack of enemies to spawn.
Kill them and collect Zamboni’s Parts. Your end goal is to place these parts into their color-coded places on Zamboni’s body. The best way to do this, is to split your team into three pairs, with one guardian constantly carrying a part and the others protecting them.
Deliver all the details until the boss smashes through the wall once again, killing himself. The path to Wrath of the Machine’s last boss is now open to you.
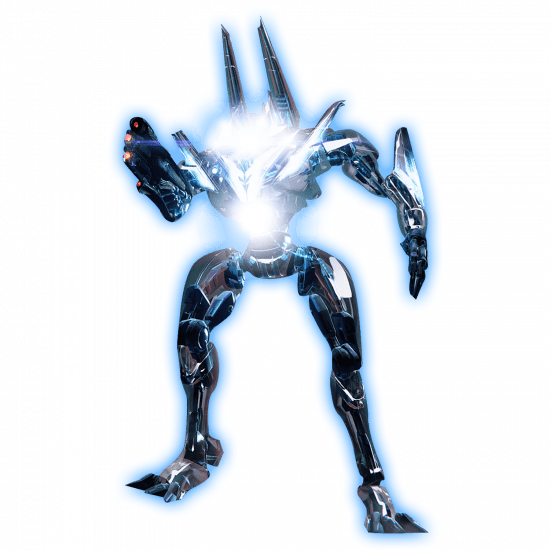
The Last Boss, Aksis
Firstly, you will want to split your team into three pairs. Each pair will cover one of the rooms in this section. In each room, kill adds until the Captain spawns. Killing him will make a cannon of some specific element appear on his body. Once it happens, a Servitor charged with one of the elements also spawns, so connect the dots and use the specific Elemental Cannon for its respectable Servitor. Killing the right Servitor makes SIVA charges appear (just like in the beginning), which you should throw at the weak spots on Aksis’ body. Keep repeating the process until the second phase of the boss fight.
The second phase is slightly trickier. Repeat the entire “killing Servitors and throwing charges” thing, but this time throw them directly at the boss. Sooner or later, one of your fireteam’s members will randomly become Voltage buffed, and Aksis will start teleporting through the section’s rooms. It is the Voltage buffed player’s job to catch Aksis in one of the rooms and stun him with the discharge. While Aksis is stunned – attack him with everything you got.
At the end of the fight, there is a special attack that can potentially wipe your entire team. Just jump on one of the pillars in the room to dodge it and proceed with damaging it. You will need to quickly drain Aksis’ last portion of health, or he will kill your entire team.
Wrath of the Machine Loot Pool
Following the King’s Fall release, we can deduce that WotM’s loot pool will be the same as in the original game. Unfortunately, it is impossible to know for certain what boss drops what weapon exactly. All we can do is present you with a few lists of Wrath of the Machine raid drops.
Weapons:
| Chaos Dogma |
A Legendary Scout Rifle |
| Quantiplasm |
A Legendary Shotgun |
| Zeal Vector |
A Legendary Sidearm |
| Ex Machina |
A Legendary Sniper Rifle |
| Fever and Remedy |
A Legendary Hand Cannon |
| Sound and Fury |
A Legendary Rocket Launcher |
| Genesis Chain |
A Legendary Auto Rifle |
| Steel Medulla |
A Legendary Pulse Rifle |
| If Materia |
A Legendary Machine Gun |
| Ether Nova |
A Legendary Fusion Rifle |
There are also a couple of nice armor sets you can get out of WotM:
- Cosmoclast Set for Titans;
- Nanomania Set for Hunters;
- Red Miasma Set for Warlocks.
And even a couple of fancy ghost shells:
- Infection Shell;
- Amalgam Shell.


![[object Object]](/images/payment_systems/white/pay-pal.svg)
![[object Object]](/images/payment_systems/white/visa-and-mastercard.svg)
![[object Object]](/images/payment_systems/white/apple-pay.svg)
![[object Object]](/images/payment_systems/white/google-pay.svg)
![[object Object]](/images/payment_systems/white/eps.svg)
![[object Object]](/images/payment_systems/white/giropay.svg)
![[object Object]](/images/payment_systems/white/ideal.svg)
![[object Object]](/images/payment_systems/white/skrill.svg)
![[object Object]](/images/payment_systems/white/bitcoin.svg)
![[object Object]](/images/payment_systems/white/inxy_payment.svg)
![[object Object]](/images/payment_systems/white/sezzle.svg)
![[object Object]](/images/payment_systems/white/epoch.svg)