 Dallon Avery
Welcome, Hunters! The first thing we think about when we see so many weapons and armor to craft is: which ones are the best? Which combination of armor pieces, charms, decorations, and weapons will allow me to deal the most damage while keeping me well-protected from monster attacks? In this list, we’ll name the Monster Hunter Wilds best builds for each weapon to help you find the answers you’re looking for.
While there may be some universally strong builds, if you’ve found your weapon of choice, you’re likely going to stick with it no matter what. So, you might as well use the best options available to maximize your potential.
Monster Hunter Wilds is obviously a very grind-heavy game, and it becomes even more time-consuming the closer you get to the endgame. If you want to create a build—whether from our list or your own—you should consider Weapons or Decorations Farming Services at Skycoach. There’s no point in wasting hours farming resources when you could let professional gamers at Skycoach handle it for you. That way, you can focus on the hunt while getting the gear you need!
Read our other articles:
- Zenny Farming Guide
- Dual Blades Guide
- Beginner's Guide
- Best Weapons Tier List
- Best Armor Sets
- Leveling Guide
- Cooking Guide
Note: At Skycoach, you can Buy Monster Hunter Wilds Boost at the best prices with fast delivery. Use our special PROMO CODE (in green) hidden in this article for a 20% DISCOUNT.
Browse our hottest Monster Hunter Wilds Boosting services


Long Sword Best Build in Monster Hunter Wilds
This Monster Hunter Wilds best Long Sword build focuses on Poison damage, fast counters, and critical hits, making it highly effective against most monsters. Rompo Mytoxin’s poison buildup combined with Weakness Exploit and Critical Boost ensures consistent high damage, while Quick Sheathe allows for seamless counterattacks. The Ajara Reverberator (Hunting Horn) serves as a supportive secondary weapon, boosting mobility and evasion.
| Category | Item | Skills/Effects | Effect Description |
| Primary Weapon | Rompo Mytoxin (Long Sword) | Power Prolonger Lv. 3 | Extends Crimson Gauge uptime |
| Secondary Weapon | Ajara Reverberator (Hunting Horn) | Echo Bubble, Attack Up, Earplugs | Boosts movement speed, attack, and prevents roars from interrupting |
| Alternative Weapon | Hope Blade II (Long Sword) | Speed Sharpening Lv. 1 | Speeds up weapon sharpening to maintain damage output |
| Armor - Head | Artian Helm A | Flayer Lv. 1, Earplugs Lv. 1 | Makes wounding easier, prevents roar interruption |
| Armor - Chest | Kranodath Mail | Partbreaker Lv. 1 | Increases part break efficiency |
| Armor - Arms | Artian Vambraces | Blight Resistance Lv. 1 | Reduces elemental blight duration |
| Armor - Waist | Dahaad Shardcoil A | Weakness Exploit Lv. 1, Tremor Resistance Lv. 1 | Increases Affinity when hitting weak spots, prevents tremor effects |
| Armor - Legs | Alloy Greaves A | Quick Sheathe Lv. 1 | Speeds up weapon sheathing |
| Charm | Chainblade Charm | Flayer Lv. 1 | Same as above (wounding bonus) |
| Decorations - Weapon | Critical Jewel (1), Expert Jewel (1), Venom Jewel (1) | Critical Boost Lv. 1, Critical Eye Lv. 1, Poison Attack Lv. 1 | Increases crit damage, affinity, and poison buildup |
| Decorations - Armor | Defense Jewel (1), Protection Jewel (1), Destroyer Jewel (1) | Defense Boost, Divine Blessing, Partbreaker | Increased defense, reduced incoming damage, improved part-breaking |
This build maximizes poison buildup through Rompo Mytoxin’s natural status effect, making it ideal for sustained fights against high-health monsters. Power Prolonger extends the Crimson Gauge, reducing downtime between Spirit Slashes, while Weakness Exploit and Critical Boost ensure high Affinity on weak points.
Remember that the best armor & skills for each weapon must complement each other. For example, you only need a sheathing skill if you’re using a Long Sword; ranged weapons are probably not going to benefit from this type of skill.
The Ajara Reverberator Hunting Horn adds mobility and attack buffs, further improving damage uptime and counterplay. Quick Sheathe enhances Foresight Slash and counter combos, making it smoother to reposition and re-engage. BLOG20
With Flayer increasing wound efficiency, Partbreaker for additional stagger damage, and Poison Attack amplifying damage over time, this build offers a deadly mix of raw DPS and status damage, making it one of the strongest Long Sword setups in Monster Hunter Wilds.
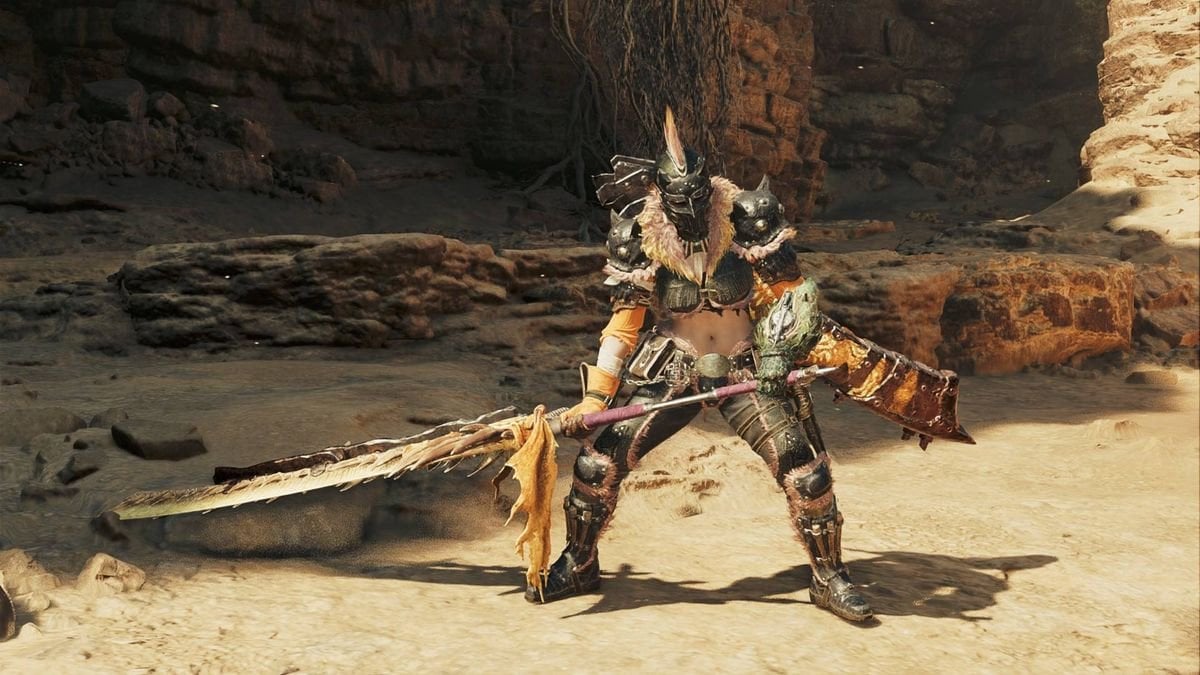
Greatsword Best Build in Monster Hunter Wilds - Wound Cleaver

The Monster Hunter Wilds best Great Sword build focuses on maximizing wound creation, Affinity stacking, and charge speed, making it ideal for high-damage, precision strikes. Weakness Exploit and Flayer enhance damage by targeting wounded weak spots, while Focus accelerates True Charged Slash for devastating blows. Decimator ensures HP recovery when breaking wounds, keeping you in the fight longer. With Maximum Might countering negative Affinity and Stamina-based skills improving mobility, this build offers a perfect balance of power, speed, and survivability for an aggressive, high-impact playstyle.
| Category | Item | Skills/Effects | Effect Description |
| Primary Weapon | G. Veldian Gladius I | Focus Lv. 2 | Reduces charge time for Charged Attacks |
| Secondary Weapon | Bone Shooter III (Heavy Bowgun) | Guard Lv. 2, Attack Boost Lv. 1 | Reduces knockback from guarding, increases raw attack |
| Alternative Weapon 1 | Albirath Wing I | Critical Element Lv. 1, Master's Touch Lv. 1 | Elemental attacks can critically hit, prevents sharpness loss on crits |
| Alternative Weapon 2 | Nihil Great Sword I | Critical Draw Lv. 2 | Grants guaranteed crits on first unsheathed attack |
| Armor - Head | G. Arkveld Helm | Flayer Lv. 1 | Increases damage to wounds and makes it easier to create wounds |
| Armor - Chest | G. Arkveld Mail | Flayer Lv. 1, Blight Resistance Lv. 1 | Same as above, reduces elemental blight duration |
| Armor - Arms | G. Rathalos Vambraces | Weakness Exploit Lv. 1 | Increases Affinity when attacking monster weak spots |
| Armor - Waist | Xu Wu Coil | Stamina Surge Lv. 1, Maximum Might Lv. 1 | Increases stamina regen speed, boosts Affinity when stamina is full |
| Armor - Legs | G. Rathalos Greaves | Weakness Exploit Lv. 1 | Same as above (increases Affinity on weak spots) |
| Charm | Chainblade Charm I | Maximum Might Lv. 1 | Same as above (Affinity boost when stamina is full) |
| Decorations - Weapon | Focus Jewel (1), Handicraft Jewel (1) | Focus Lv. 1, Handicraft Lv. 1 | Faster charge time, increases sharpness bar |
| Decorations - Armor | Physique Jewel (1) x3 | Constitution Lv. 3 | Reduces stamina consumption from dodging and blocking |
| Set Bonus Skills | – | Decimator (G. Arkveld Armor), Scorcher (G. Rathalos Armor) | Decimator heals you when breaking wounds, Scorcher |
To make the best loadouts in Monster Hunter Wilds you have to take into account alternative options. This setup ensures that every attack lands harder and faster, keeping damage output high while maintaining sharpness and stamina efficiency. If you prefer an elemental crit playstyle, Albirath Wing I offers higher elemental damage at the cost of Focus, which can be mitigated by a Focus Jewel. For hit-and-run tactics, Nihil Great Sword I guarantees critical hits on unsheathed attacks, but struggles to create wounds, which are essential to this build’s strategy.
The best secondary weapons complement this build’s strengths. Bone Shooter III (Heavy Bowgun) offers Spread and Cluster Ammo for ranged damage, while also providing defensive options with Guard 2. Alternatively, G. Veldian Harpes I (Dual Blades) benefits from Flayer to create wounds rapidly, while Stamina Surge ensures Demon Mode uptime. This combination makes it a highly efficient and deadly build for extended hunts.
Sword & Shield Best Build in Monster Hunter Wilds
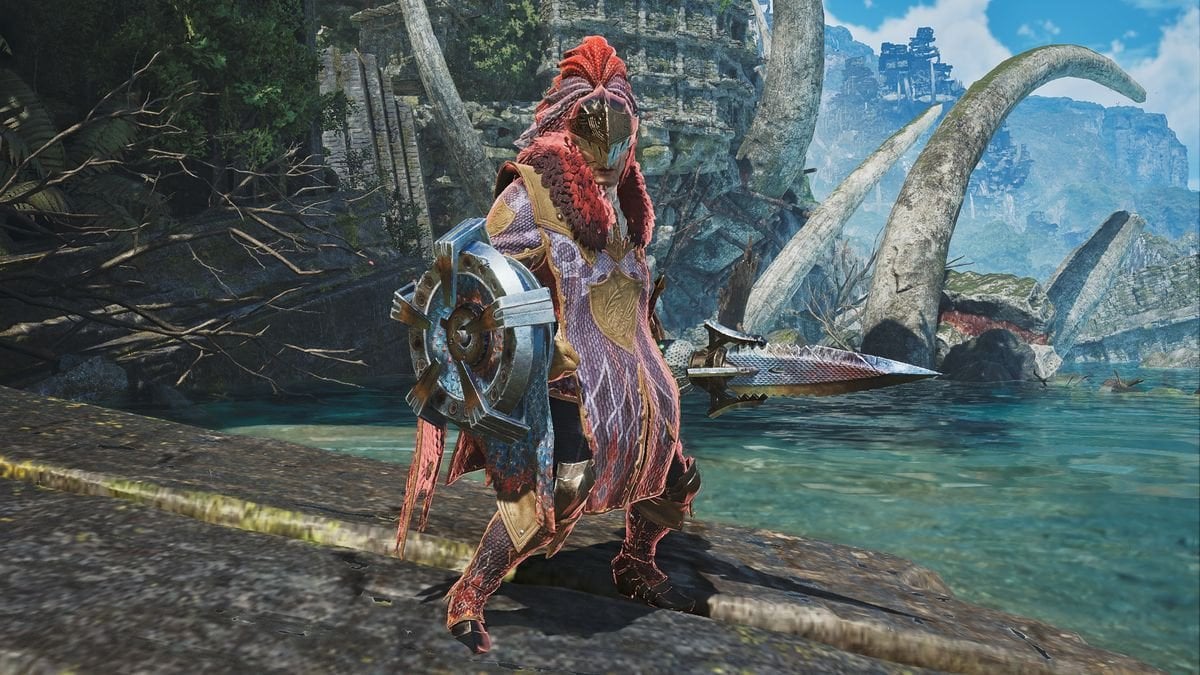
The Monster Hunter Wilds best Sword & Shield build prioritizes Fire elemental damage, Critical Hits, and mobility for a fast-paced combat style. Weakness Exploit and Burst maximize Affinity when targeting wounded or weak points, while Critical Element boosts elemental crits. Evasion tools like Constitution and Evade Window help maintain offensive pressure while avoiding enemy attacks. This build is ideal for players who enjoy rapid, high-damage strikes with enhanced elemental amplification.
| Category | Item | Skills/Effects | Effect Description |
| Primary Weapon | Albirath Edge I | Critical Element Lv. 1, Master's Touch Lv. 1, Fire Attack Lv. 1 | Elemental attacks can crit, prevents sharpness loss on crits, boosts Fire damage |
| Secondary Weapon | Albirath Bow I | – | Shares same Fire element and Affinity, benefits from Constitution for stamina management |
| Alternative Weapon | Twin Albiraths I | – | Benefits from Constitution, similar strengths to Albirath Edge |
| Armor - Head | G. Rathalos Helm | Weakness Exploit Lv. 1, Intimidator Lv. 1 | Increases Affinity when striking weak spots, reduces chances of being targeted |
| Armor - Chest | G. Ebony Mail | Bleeding Resistance Lv. 1 | Reduces duration of bleeding effects |
| Armor - Arms | G. Rathalos Vambraces | Weakness Exploit Lv. 1 | Same as above (Increases Affinity on weak spots) |
| Armor - Waist | G. Ebony Coil | Burst Lv. 1, Bleeding Resistance Lv. 1 | Increases elemental damage and raw damage over time when attacking |
| Armor - Legs | G. Rathalos Greaves | Weakness Exploit Lv. 1 | Same as above (Increases Affinity on weak spots) |
| Charm | Evasion Charm I | Evade Window Lv. 1 | Extends invulnerability window during dodges |
| Decorations - Weapon | Blaze Jewel (1) | Fire Attack Lv. 1 | Boosts Fire elemental damage |
| Decorations - Armor | Physique Jewel (1) x4 | Constitution Lv. 4 | Reduces stamina depletion when evading, guarding, or performing actions |
| Set Bonus Skills | – | Scorcher (G. Rathalos Armor), Burst Boost (G. Ebony Coil) | Chance to deal extra Fire damage, boosts Burst effectiveness |
This build fully utilizes elemental Sword & Shield combat, enhancing Fire damage through the best decorations & charms for weapons that give you extra Scorcher and Burst, while Critical Element ensures that elemental damage scales with Affinity. Weakness Exploit synergizes with this by granting consistent critical hits on monster weak points, making it highly effective for cutting and striking in fast-paced battles.
To keep up with aggressive playstyles, Constitution and Evade Window improve stamina efficiency and dodging reliability. Master’s Touch prevents sharpness loss when landing crits, reducing the need for frequent sharpening.
For players who prefer ranged options, the Albirath Bow is a solid choice as it shares the same Fire affinity and benefits from Constitution. Meanwhile, Twin Albiraths offer rapid hit capabilities, capitalizing on Burst and Weakness Exploit for high sustained DPS.
This build is best used against monsters weak to Fire and thrives in aggressive, precise combat. It’s excellent for both solo and co-op play, ensuring continuous elemental and raw damage pressure while maintaining stamina control and mobility.
Dual Blades Best Build in Monster Hunter Wilds

The Monster Hunter Wilds best Dual Blades build is designed for maximum elemental damage output, stamina efficiency, and critical hits. Burst enhances both elemental and raw attack power, while Critical Element boosts elemental crits for relentless assault. Constitution and Stamina Surge extend Demon Mode uptime, allowing for continuous high-speed attacks. This setup is perfect for hunters who thrive in fast-paced combat with sustained, aggressive damage.
| Category | Item | Skills/Effects | Effect Description |
| Primary Weapon | Twin Albiraths I | Critical Element Lv. 1, Master's Touch Lv. 1, Razor Sharp Lv. 1 | Elemental attacks can crit, prevents sharpness loss on crits, reduces sharpness consumption |
| Secondary Weapon | G. Veldian Harpes I | Focus Lv. 2 | Increases Demon Gauge fill speed |
| Alternative Weapon | Uth Ngarpatu I | Power Prolonger Lv. 2 | Extends duration of Demon Mode |
| Armor - Head | G. Ebony Helm | Burst Lv. 1 | Increases attack power after repeated attacks |
| Armor - Chest | Rey Sandmail | Constitution Lv. 1 | Reduces stamina consumption when dodging and guarding |
| Armor - Arms | G. Ebony Braces | Burst Lv. 1 | Same as above (Increases attack power after repeated attacks) |
| Armor - Waist | Xu Wu Coil | Stamina Surge Lv. 1, Maximum Might Lv. 1 | Increases stamina recovery speed, boosts Affinity when stamina is full |
| Armor - Legs | Xu Wu Greaves | Stamina Surge Lv. 1 | Same as above (Increases stamina recovery speed) |
| Charm | Surge Charm I | Stamina Surge Lv. 1 | Same as above (Increases stamina recovery speed) |
| Decorations - Weapon | Crit Element Jewel (1) | Critical Element Lv. 1 | Elemental damage can critically hit |
| Decorations - Armor | Physique Jewel (1) x3 | Constitution Lv. 3 | Reduces stamina depletion when evading, guarding, or performing actions |
| Set Bonus Skills | – | Burst Boost (G. Ebony Armor) | Extends the duration of Burst’s attack boost |
This build fully embraces elemental Dual Blades play, leveraging Burst and Critical Element to enhance Fire elemental damage. Stamina Surge and Constitution work together to extend Demon Mode uptime, allowing for longer, relentless attacks without running out of stamina too quickly.
The Twin Albiraths I are the ideal Fire-based Dual Blades, but the G. Veldian Harpes I serves as an excellent Dragon element alternative, with Focus Lv. 2 helping to charge Demon Mode faster. Meanwhile, Uth Ngarpatu I is a strong Water element alternative, thanks to its Power Prolonger Lv. 2, which helps maintain Archdemon Mode longer despite its negative Affinity.
This build is best suited for monsters weak to Fire and works exceptionally well in fast-paced fights where elemental damage is highly effective. The high stamina sustain and Affinity-based damage scaling make it perfect for experienced Dual Blades users who want continuous, high-speed DPS.
Hammer Best Build in Monster Hunter Wilds

The Monster Hunter Wilds best Hammer build is designed to maximize stun potential, sustained damage, and mobility. Weakness Exploit and Flayer enhance head strikes, making it easier to stagger and KO monsters quickly. Marathon Runner and Constitution improve stamina efficiency, allowing for extended charge attacks and better movement. This setup is perfect for aggressive hunters who enjoy constant pressure and repeated knockdowns.
| Category | Item | Skills/Effects | Effect Description |
| Primary Weapon | Twin Albiraths I | Critical Element Lv. 1, Master's Touch Lv. 1, Razor Sharp Lv. 1 | Elemental attacks can crit, prevents sharpness loss on crits, reduces sharpness consumption |
| Secondary Weapon | G. Veldian Harpes I | Focus Lv. 2 | Increases Demon Gauge fill speed |
| Alternative Weapon | Uth Ngarpatu I | Power Prolonger Lv. 2 | Extends duration of Demon Mode |
| Armor - Head | G. Ebony Helm | Burst Lv. 1 | Increases attack power after repeated attacks |
| Armor - Chest | Rey Sandmail | Constitution Lv. 1 | Reduces stamina consumption when dodging and guarding |
| Armor - Arms | G. Ebony Braces | Burst Lv. 1 | Same as above (Increases attack power after repeated attacks) |
| Armor - Waist | Xu Wu Coil | Stamina Surge Lv. 1, Maximum Might Lv. 1 | Increases stamina recovery speed, boosts Affinity when stamina is full |
| Armor - Legs | Xu Wu Greaves | Stamina Surge Lv. 1 | Same as above (Increases stamina recovery speed) |
| Charm | Surge Charm I | Stamina Surge Lv. 1 | Same as above (Increases stamina recovery speed) |
| Decorations - Weapon | Crit Element Jewel (1) | Critical Element Lv. 1 | Elemental damage can critically hit |
| Decorations - Armor | Physique Jewel (1) x3 | Constitution Lv. 3 | Reduces stamina depletion when evading, guarding, or performing actions |
| Set Bonus Skills | – | Burst Boost (G. Ebony Armor) | Extends the duration of Burst’s attack boost |
This build revolves around stunning and staggering monsters by focusing on head hits and wound creation. Weakness Exploit provides Affinity bonuses for consistent high-damage output, while Flayer makes it easier to inflict wounds for additional damage.
For alternative weapon choices, Albirath Bludgeon I is a great Fire element option, using Critical Element to boost elemental crits, while Nihil Hammer I provides Water coverage and Focus 2 for charge speed.
This setup is best suited for KO-heavy playstyles, excelling against monsters that can be easily stunned. The combination of high raw damage, increased wound creation, and efficient stamina management makes this a powerful and consistent build for hammer users.
Browse our hottest Monster Hunter Wilds Boosting services


Hunting Horn Best Build in Monster Hunter Wilds
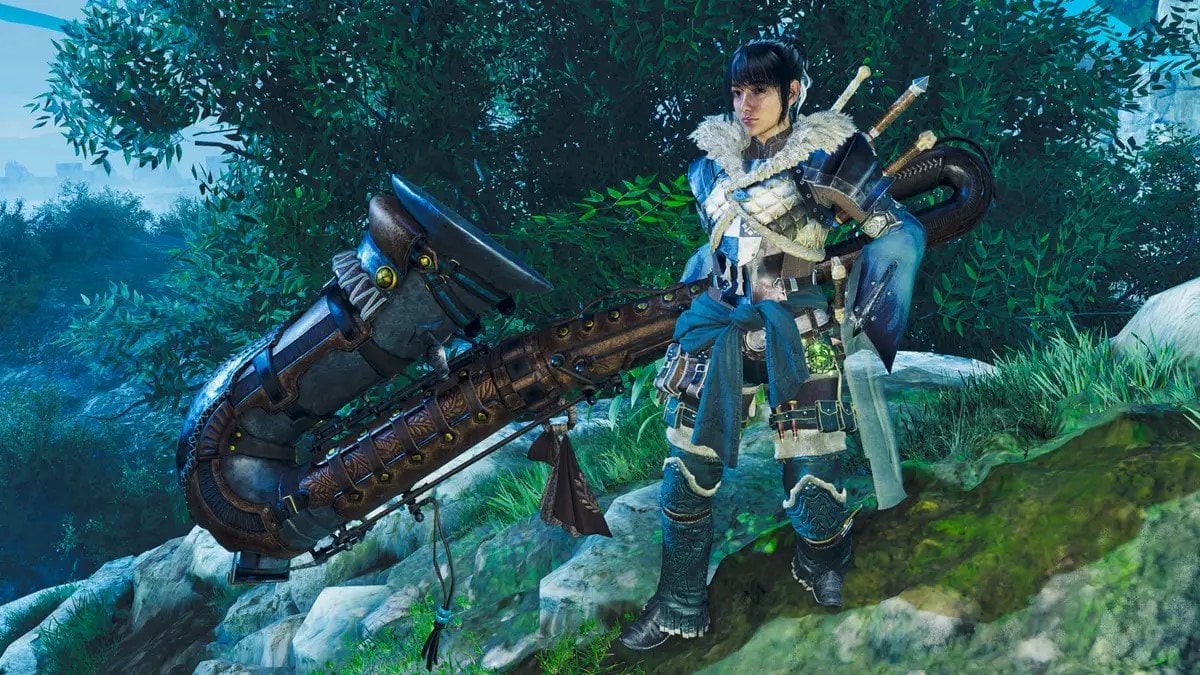
The Monster Hunter Wilds best Hunting Horn build balances strong elemental and raw damage while providing powerful buffs. It utilizes Critical Element and Burst to amplify the Hunting Horn’s rapid multi-hits, boosting both elemental and raw attack power. Master’s Touch minimizes sharpness loss, ensuring sustained performance throughout hunts. The Echo Bubble effect also regenerates stamina, making this build highly effective when paired with stamina-heavy weapons like Dual Blades or Bow.
| Category | Item | Skills/Effects | Effect Description |
| Primary Weapon | G. Veldian Malleus I | Focus Lv. 2 | Reduces charge time for Charged Attacks |
| Secondary Weapon | Chthonian Gunfire I | Partbreaker, Thunder Ammo Coverage | Breaks monster parts faster, Thunder Ammo for ranged coverage |
| Alternative Weapon | Albirath Bludgeon I | Critical Element Lv. 1, Master’s Touch Lv. 1 | Elemental attacks can crit, prevents sharpness loss on crits |
| Alternative Weapon | Nihil Hammer I | Focus Lv. 2 | Same as above (Reduces charge time for Charged Attacks) |
| Armor - Head | G. Arkveld Helm | Flayer Lv. 1 | Increases damage to wounds and makes it easier to create wounds |
| Armor - Chest | Ajarakan Mail | Partbreaker Lv. 1 | Increases damage and speed in breaking monster parts |
| Armor - Arms | G. Rathalos Vambraces | Weakness Exploit Lv. 1 | Reduces stamina depletion, boosts Attack when HP is low |
| Armor - Waist | G. Doshaguma Coil | Marathon Runner Lv. 1, Heroics Lv. 1 | Increases Affinity when attacking monster weak spots |
| Armor - Legs | G. Rathalos Greaves | Weakness Exploit Lv. 1 | Same as above (Increases Affinity on weak spots) |
| Charm | Marathon Charm I | Marathon Runner Lv. 1 | Same as above (Reduces stamina depletion) |
| Decorations - Weapon | Focus Jewel (1), Handicraft Jewel (1) | Focus Lv. 1, Handicraft Lv. 1 | Faster charge time, increases sharpness bar |
| Decorations - Armor | Physique Jewel (1) x3 | Constitution Lv. 3 | Reduces stamina consumption when dodging and blocking |
| Set Bonus Skills | – | Decimator (G. Arkveld Armor) | Heals you when breaking wounds |
This is one of the Monster Hunter Wilds best weapon builds because it thrives on sustained offensive pressure while providing teamwide support. Flayer increases wound creation, synergizing perfectly with Weakness Exploit to maximize Affinity for more critical hits. The Decimator set bonus ensures passive healing, allowing you to stay aggressive without constantly using potions.
The Echo Bubble’s stamina regeneration is especially valuable for Dual Blades, Bows, and Insect Glaives, making this build a fantastic pick for multiplayer hunts. The Burst skill significantly increases elemental damage output, ensuring rapid and consistent damage with repeated Hunting Horn swings.
With Critical Element and Master’s Touch, this build allows powerful elemental crits without worrying about sharpness depletion, making it one of the strongest Hunting Horn builds in Low Rank Monster Hunter Wilds.
Lance Best Build in Monster Hunter Wilds
The Monster Hunter Wilds best Lance build focuses on maximizing defense and counterattacks, allowing hunters to stay aggressive while maintaining impenetrable guard capabilities. Guard and Offensive Guard minimize knockback and stamina drain when blocking, while Flayer and Weakness Exploit enhance damage on wounded parts. With Evade Extender improving mobility, this build ensures easy repositioning after blocking or countering, making it perfect for a defensive yet aggressive playstyle.
| Category | Item | Skills/Effects | Effect Description |
| Primary Weapon | G. Veldian Lancea I | Guard Lv. 2 | Reduces knockback and stamina drain while guarding |
| Secondary Weapon | Assault Conga (Light Bowgun) | Special Ammo Boost, Opening Shot | Enhances special ammo effectiveness, increases opening attack damage |
| Alternative Weapon 1 | Chthonian Firewheel I | Offensive Guard Lv. 2 | Boosts attack after performing a perfect guard |
| Alternative Weapon 2 | Purifying Beaumains | Guard Lv. 3, Flayer Lv. 1 | Further reduces knockback and stamina drain, improves wound creation |
| Armor - Head | G. Arkveld Helm | Flayer Lv. 1 | Increases damage to wounds and improves wound creation |
| Armor - Chest | G. Arkveld Mail | Flayer Lv. 1, Blight Resistance Lv. 1 | Same as above (boosts wound creation), reduces elemental blight duration |
| Armor - Arms | G. Rathalos Vambraces | Weakness Exploit Lv. 1 | Increases Affinity when attacking weak spots |
| Armor - Waist | Balahara Coil | Evade Extender Lv. 1 | Increases dodge distance for better repositioning |
| Armor - Legs | G. Rathalos Greaves | Weakness Exploit Lv. 1 | Same as above (boosts critical hit chance on weak spots) |
| Charm | Leaping Charm I | – | Enhances evasion and mobility |
| Decorations - Weapon | Guardian Jewel (1) x2 | Offensive Guard, Guard | Boosts attack after a perfect guard, reduces stamina consumption when blocking |
| Decorations - Armor | Shockproof Jewel (1), Physique Jewel (1) x2 | Shock Absorber, Constitution | Prevents teammates from knocking you back, reduces stamina consumption |
This build offers high survivability and counterplay, making it ideal for hunters who prefer a defensive yet aggressive approach. Offensive Guard rewards perfect guarding with bonus attack power, increasing the Lance’s damage potential. Weakness Exploit and Flayer synergize perfectly, ensuring higher Affinity and extra damage on wounded parts.
With Evade Extender and Constitution, the build allows better mobility and stamina efficiency, keeping the hunter ready to reposition or counterattack at any moment, which makes it one of the best early game builds in Monster Hunter Wilds. BLOG20
Guard Lv. 3 from Purifying Beaumains or G. Veldian Lancea I provides exceptional defensive stability, letting the hunter withstand even the strongest monster attacks with minimal knockback.
For team hunts, this setup includes Shock Absorber, preventing teammates from interrupting your counters and block chains. The Rocksteady Mantle or Blessing Charm can further reinforce survivability, making this one of the most versatile and resilient Lance builds in Low Rank Monster Hunter Wilds.
Gunlance Best Build in Monster Hunter Wilds
The Monster Hunter Wilds best gunlance build excels in both explosive firepower and sustained melee attacks, maximizing shelling damage while maintaining sharpness. Flayer enhances wound creation, Decimator provides passive healing, and Artillery boosts shelling effectiveness. With Master’s Touch and Critical Element ensuring consistent melee damage, this build delivers powerful burst damage while keeping normal attacks sharp and effective.
| Category | Item | Skills/Effects | Effect Description |
| Primary Weapon | Albirath Rook I | Artillery, Critical Element, Master’s Touch | Boosts shelling damage, allows elemental crits, prevents sharpness loss on crits |
| Secondary Weapon | Lawful Bors (Gunlance) | Guard, Focus | Reduces knockback and stamina drain, decreases Wyvern Fire charge time |
| Alternative Weapon 1 | G. Veldian Hasta I | Guard Lv. 2 | Provides additional defense for better blocking capability |
| Alternative Weapon 2 | Bone Gunlance III | Attack Boost, Guard Lv. 2 | Increases raw damage, improves defense |
| Armor - Head | G. Arkveld Helm | Flayer Lv. 1 | Increases wound creation and damage to wounded parts |
| Armor - Chest | G. Arkveld Mail | Flayer Lv. 1, Blight Resistance Lv. 1 | Same as above (boosts wound creation), reduces elemental blight duration |
| Armor - Arms | G. Arkveld Vambraces | Flayer Lv. 1 | Same as above (boosts wound creation) |
| Armor - Waist | Xu Wu Coil | Stamina Surge, Maximum Might | Speeds up stamina recovery, boosts Affinity at max stamina |
| Armor - Legs | G. Arkveld Greaves | Blight Resistance Lv. 1 | Reduces elemental blight duration |
| Charm | Chainblade Charm I | – | Provides additional utility |
| Decorations - Weapon | Artillery Jewel (1) | Artillery | Boosts shelling damage and Wyvern Fire explosion power |
| Decorations - Armor | Physique Jewel (1) x3 | Constitution | Reduces stamina consumption |
This build capitalizes on the synergy between Flayer and the Gunlance’s shelling potential, making it easy to create and destroy wounds for higher damage output. Decimator ensures passive healing, keeping the hunter in the fight for longer without stopping to heal. Maximum Might grants bonus Affinity, ensuring critical hits land more frequently for increased overall damage.
With Artillery boosting explosive attacks and Master’s Touch preserving sharpness, this Gunlance build sustains damage over long hunts without constant sharpening. The combination of Flayer and Decimator rewards aggressive play, making it one of the most effective and self-sustaining Gunlance setups in Low Rank Monster Hunter Wilds.
Switch Axe Best Build in Monster Hunter Wilds
The Monster Hunter Wilds best switch axe build combines high burst damage with excellent mobility, utilizing Weakness Exploit and Flayer to maximize Affinity and wound damage. Rapid Morph ensures faster transformations, while Focus speeds up gauge filling. With Evade Extender, this build provides exceptional mobility, allowing hunters to dodge effectively while maintaining offensive pressure.
| Category | Item | Skills/Effects | Effect Description |
| Primary Weapon | G. Veldian Securis I | Focus, Power Phial | Charges gauge faster, boosts damage output |
| Secondary Weapon | Valkyrie Flame (Light Bowgun) | Poison Duration Up | Extends poison effect for additional passive damage |
| Alternative Weapon 1 | Nu Zhangyu I | Rapid Morph Lv. 2 | Speeds up transformations, increases morph attack damage |
| Alternative Weapon 2 | Iron Accelerator II | Rapid Morph Lv. 2, Poison Phial | Provides poison buildup, enhances morph attacks |
| Armor - Head | G. Arkveld Helm | Flayer Lv. 1 | Increases wound creation and damage to wounded parts |
| Armor - Chest | G. Arkveld Mail | Flayer Lv. 1, Blight Resistance Lv. 1 | Enhances wound-based attacks, reduces elemental blight duration |
| Armor - Arms | G. Rathalos Vambraces | Weakness Exploit Lv. 1 | Boosts Affinity on weak spots |
| Armor - Waist | Balahara Coil | Evade Extender Lv. 1 | Increases dodge range for better repositioning |
| Armor - Legs | G. Rathalos Greaves | Weakness Exploit Lv. 1 | Same as above (boosts Affinity on weak spots) |
| Charm | Leaping Charm I | – | Provides additional evasion utility |
| Decorations - Weapon | Quickswitch Jewel (1) x2 | Rapid Morph | Improves speed and damage of transformations |
| Decorations - Armor | Shockproof Jewel (1), Physique Jewel (1) x2 | – | Reduces knockback, enhances stamina efficiency |
This build capitalizes on Flayer and Weakness Exploit, maximizing Affinity for critical hits on wounded monsters. Rapid Morph and Focus ensure smooth transitions between Axe and Sword mode, allowing for fluid, aggressive combos. Evade Extender boosts survivability, making it easier to reposition against fast-moving monsters.
With Poison Duration Up in the secondary weapon, this build offers consistent poison buildup, increasing overall damage output over time. Scorcher and Decimator provide additional set bonuses, boosting both damage and survivability, which is essential for to have in the best endgame builds in Monster Hunter Wilds. The combination of offense, defense, and mobility makes this Switch Axe build one of the strongest choices for Low Rank Monster Hunter Wilds.
Charge Blade Best Build in Monster Hunter Wilds
The Monster Hunter Wilds best charge blade build maximizes offensive power and survivability, using Flayer and Burst to increase damage on wounded parts while Weakness Exploit boosts Affinity for more critical hits. Master’s Touch minimizes sharpness loss, and Stun Resistance ensures uninterrupted attacks. Impact Phials deliver massive KO damage, making this build ideal for aggressive Charge Blade users.
| Category | Item | Skills/Effects | Effect Description |
| Primary Weapon | Albirath Blade I | Critical Element, Master’s Touch, Impact Phial | Increases critical elemental damage, prevents sharpness loss on crits, high KO potential |
| Secondary Weapon | Fearbringer Callistox (Bow) | – | Provides a ranged option against flying monsters |
| Alternative Weapon 1 | Chthonian Flame I | Offensive Guard Lv. 2, Element Phial | Buffs attack after a Perfect Guard, enhances elemental phial explosions |
| Alternative Weapon 2 | Bone Strongarm III | Load Shells Lv. 2, Impact Phial | Charges phials faster for more explosive damage |
| Armor - Head | G. Ebony Helm | Burst Lv. 1 | Increases damage output with repeated attacks |
| Armor - Chest | G. Arkveld Mail | Flayer Lv. 1, Blight Resistance Lv. 1 | Boosts wound damage, reduces elemental blight duration |
| Armor - Arms | G. Ebony Braces | Burst Lv. 1 | Same as above (boosts damage after multiple hits) |
| Armor - Waist | G. Arkveld Coil | Blight Resistance Lv. 1 | Reduces elemental blight duration |
| Armor - Legs | G. Rathalos Greaves | Weakness Exploit Lv. 1 | Increases Affinity on weak spots |
| Charm | Blessing Charm I | – | Provides additional survivability with Divine Blessing |
| Decorations - Weapon | Guardian Jewel (1) | Offensive Guard | Increases attack when guarding perfectly |
| Decorations - Armor | Protection Jewel (1), Adapt Jewel (1), Steadfast Jewel (1) x3 | Boosts defense, reduces stamina depletion, prevents stuns | – |
This Charge Blade build focuses on high burst damage and consistent phial explosions, making use of Flayer and Weakness Exploit to ensure maximum Affinity on wounded targets. Burst further enhances overall attack, synergizing perfectly with Impact Phial KO damage.
With Master’s Touch and Stun Resistance, hunters can maintain sharpness and avoid getting interrupted during combos. The Decimator set bonus provides passive healing, allowing hunters to stay aggressive without needing frequent potions.
For players who prefer a more defensive approach, Offensive Guard increases attack power after a successful block, making it an excellent choice for hunters who frequently use Guard Points. The combination of raw power, KO potential, and survivability makes this Charge Blade build one of the strongest options in Low Rank Monster Hunter Wilds.
Insect Glaive Best Build in Monster Hunter Wilds
This Insect Glaive build prioritizes high mobility, stamina efficiency, and sustained damage through Flayer and Constitution. Power Prolonger extends Kinsect buffs, while Decimator provides passive healing when attacking wounds. Latent Power enhances Affinity during prolonged fights, making this build effective for both aerial combat and grounded strikes.
| Category | Item | Skills/Effects | Effect Description |
| Primary Weapon | G. Veldian Trudis I | Power Prolonger Lv. 2, Focus Lv. 1 | Extends Kinsect Extract duration, speeds up gauge charge |
| Secondary Weapon | Hope Cannon III (Heavy Bowgun) | – | Provides ranged support, can block attacks |
| Alternative Weapon 1 | Guardian Rathmaul I | Critical Element, Master’s Touch | Boosts elemental damage on crits, prevents sharpness loss |
| Armor - Head | G. Arkveld Helm | Flayer Lv. 1 | Increases wound creation, enhances Weakness Exploit |
| Armor - Chest | G. Arkveld Mail | Flayer Lv. 1, Blight Resistance Lv. 1 | Further boosts wound creation, reduces elemental blight duration |
| Armor - Arms | G. Arkveld Vambraces | Flayer Lv. 1 | Same as above (enhances wound-based damage) |
| Armor - Waist | G. Arkveld Coil | Blight Resistance Lv. 1 | Reduces elemental blight duration |
| Armor - Legs | Rey Sandgreaves | Latent Power Lv. 1, Constitution Lv. 1 | Boosts Affinity and reduces stamina depletion |
| Charm | Fitness Charm I | – | Enhances stamina management |
| Decorations - Weapon | Enhancer Jewel (1), Focus Jewel (1) | Power Prolonger, Faster gauge charge | Improves Kinsect Extract duration, reduces recharge time |
| Decorations - Armor | Physique Jewel (1) x3 | Constitution | Reduces stamina consumption |
This build excels in maintaining aerial dominance and delivering rapid multi-hits. Flayer allows for quicker wound application, making Weakness Exploit highly effective for consistent critical hits. Power Prolonger ensures Kinsect buffs last longer, reducing the need for frequent recasting. Constitution 5 provides near-unlimited stamina management, ensuring longer aerial combos and sustained pressure on monsters.
With Decimator granting passive healing when breaking wounds, this build allows for aggressive gameplay without frequent healing interruptions. The Echo Bubble effect from Kinsect buffs further enhances survivability, making this build ideal for both solo and multiplayer hunts. The combination of high maneuverability, sustained damage, and passive healing makes this one of the most effective Insect Glaive builds in Low Rank Monster Hunter Wilds.
Light Bowgun Best Build in Monster Hunter Wilds
The Monster Hunter Wilds best light bowgun build focuses on high Affinity, rapid-fire damage, and sustained stamina management. Opening Shot boosts initial burst damage, while Flayer enhances wound-based damage output. Weakness Exploit ensures frequent critical hits, making this build highly effective for both solo and multiplayer hunts.
| Category | Item | Skills/Effects | Effect Description |
| Primary Weapon | G. Veldian Impetum I | Opening Shot Lv. 2, Critical Eye Lv. 2 | Boosts first-shot damage, increases Affinity |
| Secondary Weapon | Hope Cannon III (Heavy Bowgun) | – | Provides support with Demon and Armor ammo |
| Alternative Weapon 1 | Chthonian Gunfire I | Tetrad Shot Lv. 2 | Enhances rapid-fire Pierce ammo for alternative playstyle |
| Armor - Head | Xu Wu Helm | Maximum Might Lv. 1 | Increases Affinity when stamina is full |
| Armor - Chest | G. Arkveld Mail | Flayer Lv. 1, Blight Resistance Lv. 1 | Enhances wound-based damage, reduces elemental blight duration |
| Armor - Arms | G. Rathalos Vambraces | Weakness Exploit Lv. 1 | Increases Affinity when hitting wounded areas |
| Armor - Waist | Xu Wu Coil | Stamina Surge Lv. 1, Maximum Might Lv. 1 | Improves stamina recovery, increases Affinity when stamina is full |
| Armor - Legs | G. Rathalos Greaves | Weakness Exploit Lv. 1 | Further boosts critical hits on weak spots |
| Charm | Surge Charm I | – | Enhances stamina recovery for sustained dodging |
| Decorations - Weapon | Expert Jewel (1) x2 | Critical Eye | Further increases Affinity for higher crit chance |
| Decorations - Armor | Physique Jewel (1) x3 | Constitution | Reduces stamina consumption for better mobility |
This build maximizes damage potential with rapid-fire Spread Lv. 2 and critical hit synergy. Flayer allows for quicker wound application, making Weakness Exploit highly effective for consistent critical hits. Maximum Might ensures high Affinity when stamina is full, while Stamina Surge and Constitution reduce stamina depletion, keeping movement fluid and allowing for sustained DPS.
With Wylk Burst granting additional recovery near Wylkrystals, and Scorcher adding consistent fire damage to rapid-fire shots, this build thrives in high-pressure hunts. The G. Arkveld Mail unlocks the Decimator set bonus, providing passive healing when breaking wounds, allowing for aggressive gameplay without frequent healing interruptions.
This Light Bowgun build is one of the strongest for Low Rank Monster Hunter Wilds, offering high DPS, excellent stamina management, and sustained critical damage for both solo and multiplayer hunts.
Heavy Bowgun Best Build in Monster Hunter Wilds

The Monster Hunter Wilds best heavy bowgun build prioritizes burst damage, sustained firepower, and survivability. It maximizes ammo efficiency with Tetrad Shot while enhancing damage on wounded parts using Flayer and Burst. This build is ideal for long-range suppression, delivering continuous high damage and providing crowd control in both solo and multiplayer hunts.
| Category | Item | Skills/Effects | Effect Description |
| Primary Weapon | G. Veldian Impetum I | Opening Shot Lv. 2, Critical Eye Lv. 2 | Boosts first-shot damage, increases Affinity |
| Secondary Weapon | Hope Cannon III (Heavy Bowgun) | – | Provides support with Demon and Armor ammo |
| Alternative Weapon 1 | Chthonian Gunfire I | Tetrad Shot Lv. 2 | Enhances rapid-fire Pierce ammo for alternative playstyle |
| Armor - Head | Xu Wu Helm | Maximum Might Lv. 1 | Increases Affinity when stamina is full |
| Armor - Chest | G. Arkveld Mail | Flayer Lv. 1, Blight Resistance Lv. 1 | Enhances wound-based damage, reduces elemental blight duration |
| Armor - Arms | G. Rathalos Vambraces | Weakness Exploit Lv. 1 | Increases Affinity when hitting wounded areas |
| Armor - Waist | Xu Wu Coil | Stamina Surge Lv. 1, Maximum Might Lv. 1 | Improves stamina recovery, increases Affinity when stamina is full |
| Armor - Legs | G. Rathalos Greaves | Weakness Exploit Lv. 1 | Further boosts critical hits on weak spots |
| Charm | Surge Charm I | – |
Enhances stamina recovery for sustained dodging |
| Decorations - Weapon | Expert Jewel (1) x2 | Critical Eye | Further increases Affinity for higher crit chance |
| Decorations - Armor | Physique Jewel (1) x3 | Constitution | Reduces stamina consumption for better mobility |
This build thrives on sustained rapid-fire damage while benefiting from passive healing and strong defensive capabilities. Burst increases attack power with continued shots, and Flayer ensures faster wound creation for increased Weakness Exploit effectiveness. BLOG20
Tetrad Shot allows for increased ammo efficiency and fire rate, ensuring consistent DPS without frequent reloading. The Decimator set bonus provides passive healing when breaking wounds, reducing reliance on consumables and keeping you in the action longer.
With Mending Mantle restoring health over time and Guard Up increasing protection against unblockable attacks, this Heavy Bowgun setup is a formidable choice for both solo and multiplayer encounters, excelling in both offense and survivability.
Bow Best Build in Monster Hunter Wilds
The Monster Hunter Wilds best bow build focuses on high elemental damage, stamina management, and sustained burst damage. It capitalizes on Critical Element, Constitution, and Burst to enhance both elemental and raw attack power, making it a balanced build for rapid shot output and consistent DPS.
| Category | Item | Skills/Effects | Effect Description |
| Primary Weapon | Albirath Bow I | Critical Element Lv. 1, Ballistics Lv. 1, Fire Attack Lv. 1 | Increases elemental damage, optimizes shot range, and boosts fire element |
| Secondary Weapon | Twin Albiraths I (Dual Blades) | – | Works well with Burst and stamina skills for melee options |
| Alternative Weapon 1 | Nihil Bow I | Focus Lv. 2 | Water-element alternative with fast charge time |
| Armor - Head | G. Ebony Helm | Burst Lv. 1 | Increases attack power after consecutive hits |
| Armor - Chest | G. Ebony Mail | Bleeding Resistance Lv. 1 | Reduces stamina drain and provides minor defensive utility |
| Armor - Arms | G. Ebony Braces | Burst Lv. 1 | Further enhances sustained damage |
| Armor - Waist | G. Ebony Coil | Burst Lv. 1 | Prolongs Burst damage buff uptime |
| Armor - Legs | Xu Wu Greaves | Stamina Surge Lv. 1 | Improves stamina regeneration for better bow charge sustain |
| Charm | Surge Charm I | – | Boosts stamina recovery further |
| Decorations - Weapon | Blaze Jewel (1) | Fire Attack | Enhances fire damage for Albirath Bow I |
| Decorations - Armor | Physique Jewel (1) x4 | Constitution | Reduces stamina depletion, essential for sustained bow shots |
This element-focused Bow build is centered on stamina management and consistent elemental burst damage.
- Burst and Burst Boost stack with high fire rate, rewarding aggressive play.
- Flayer ensures wounds are easily created, increasing Weakness Exploit effectiveness.
- Constitution and Stamina Surge minimize stamina depletion, allowing for longer charged shots and frequent dodging.
- Ballistics optimizes effective range, preventing damage drop-off when shooting at varying distances.
Mending Mantle or Evasion Mantle is recommended to improve survivability and maintain DPS uptime, as Bow users rely heavily on mobility and dodging enemy attacks.
This build is ideal for players looking for high elemental damage output, sustained firepower, and strong survivability via stamina efficiency.
Conclusion
Choosing the right build for your weapon in Monster Hunter Wilds is key to maximizing your damage, survivability, and overall hunting experience. The right mix of armor, weapons, and skills can make your hunts smoother, more efficient, and way more fun.
That said, there’s no single “perfect” build—every player has their own playstyle! Maybe you prefer a more aggressive, up-close approach, or maybe you like to stay mobile and take precise shots from a distance. Don’t be afraid to experiment with different weapons, armor combinations, and decorations to find what works best for you.
Also, keep in mind that Monster Hunter Wilds will receive updates and balance patches over time. That means what works best today might change in the future. So, stay flexible, adapt, and keep testing new builds—half the fun of Monster Hunter is discovering new ways to take down those massive beasts!
Most importantly, have fun and enjoy the hunt! Whether you're a seasoned hunter or just getting started, there’s always something new to learn and master.
F.A.Q
What is the best build in Monster Hunter Wilds?
There’s no single “best” build—it depends on your weapon, playstyle, and the monster you’re hunting. However, strong builds focus on damage output, stamina management, and survivability while taking advantage of weapon-specific skills. Experimenting with different setups will help you find the best build for your playstyle.
How to make the best build for my weapon in MH: Wilds?
- Choose a weapon that fits your preferred combat style (melee, ranged, fast, heavy, etc.).
- Pick armor pieces that complement your weapon’s strengths, focusing on skills like Attack Boost, Critical Eye, or Elemental Enhancements.
- Use decorations and charms to fine-tune your build with additional skills that improve damage, mobility, or defense.
- Test your build against different monsters and adjust based on your experience.
How to know which skills are best for my build in Monster Hunter Wilds?
Look for skills that boost your weapon’s effectiveness—for example, Weakness Exploit and Critical Boost for high-crit weapons or Artillery and Load Shells for Gunlance users. Prioritize damage, stamina management, and defensive skills based on your playstyle. Checking in-game skill descriptions and community-recommended builds can help guide your choices.
Which charms should I use with my build in Monster Hunter Wilds?
- Damage-focused builds: Attack Charm, Critical Charm, Exploiter Charm.
- Defense-focused builds: Earplugs Charm, Guard Charm, Divine Blessing Charm.
- Stamina-based builds: Fitness Charm, Surge Charm.
- Weapon-specific charms: Choose based on skills that enhance your weapon’s core mechanics, like Focus Charm for charge-based weapons.
How to get decorations in Monster Hunter Wilds?
Decorations are obtained by completing hunts, quests, and gathering materials from monsters. Higher-rank hunts and investigations offer better chances of obtaining rare decorations. You can also craft or meld decorations at the Smithy once you unlock the feature.


