 Crispy Jackie

Welcome to our complete Rancorwood dungeon guide for Throne and Liberty. With the release of Wilds of Talandre, you’ve got more challenges to test your skills. Think you’re ready for Rancorwood? This Tier 3 dungeon is tougher than it looks. Deadly fire mechanics, punishing attacks, and platform destruction will test your skill.
Two bosses stand in your way – Gugbarg and King Khanzaizin, with the final fight pushing your group to the limit. Mess up the mechanics, and you’ll burn. This quick Rancorwood guide explains how to beat both bosses, explains King Khanzaizin mechanics, and more. Get ready for an epic walkthrough to claim the sweetest rewards at the end.
Don’t want to spend your time grinding this instance? Skycoach is here to help you Complete Rancorwood or any other dungeon you’re stuck on. We work with all platforms and guarantee the best price for the services provided. Trust this job to our PROs while enjoying the game in a way you like.
Read our other Throne and Liberty guides:
Note: At Skycoach, you can Buy Throne and Liberty Boost for the best prices with fast delivery. Use our special PROMO CODE (in green) hidden in this article for a 20% DISCOUNT.


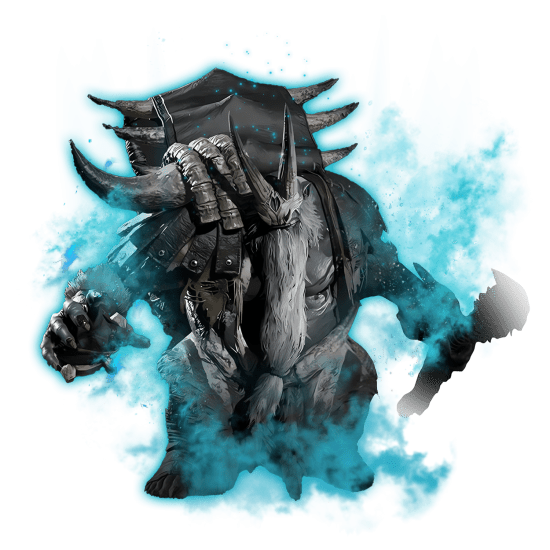

Rancorwood Bosses
Rancorwood has two bosses that stand between you and victory: Gugbarg and King Khanzaizin. Each boss has unique mechanics that will challenge your team in different ways.
Gugbarg is the first boss, acting as a warm-up before the real challenge. His attacks are simple but relentless, including ground AoEs, fire zones, and summoned totems. The fight is more about endurance than difficulty, but ignoring the mechanics can still cause trouble. Destroy the totems fast, move out of the fire, and keep steady damage on him to win.
King Khanzaizin is the final boss and the real test of Rancorwood. His fight is all about fire control, platform destruction, and punishing attacks. The arena is divided into slices, which will catch fire and spread if you fail mechanics. He also locks players in place for meteor strikes, forcing the team to react fast. If your group loses control, the entire battlefield burns, leaving nowhere to stand. Mastering the mechanics is the only way to survive.
How to Defeat Gugbarg
Gugbarg is a straightforward fight with minimal painful mechanics to adapt to. He uses fire-based attacks and summons totems that must be destroyed quickly. Stay aware of his AoEs and burn zones to avoid unnecessary damage. Here’s how to defeat Gugbarg in Rancorwood:
- Dodge Ground AoEs – The boss spawns fiery zones that deal damage over time. Move out fast.
- Destroy Totems ASAP – Totems buff the boss and make the fight harder. Kill them quickly.
- Block the Fury Attack – This attack is unavoidable, but blocking reduces damage.
- Keep Healing Up – Fire damage ticks over time, so healers must stay active.
- Stay Close to the Boss – Ranged players should position carefully to avoid constant movement.
Once this boss is down, you’re ready to keep going forward. King Khanzaizin is the final challenge waiting for you at the end of the dungeon.
How to Defeat King Khanzaizin
Now, we’ve made it to the toughest encounter of this instance. This Rancorwood boss guide is your instruction on how to defeat King Khanzaizin to complete the dungeon.
The fight is all about fire control, survival, and teamwork. If your group fails mechanics, the platform burns away, leaving nowhere to stand. Good coordination and fast reactions are the keys to victory.
All the action happens on a circular platform divided into slices. Khanzaizin’s attacks light these slices on fire, and the fire spreads over time. If your team doesn’t extinguish the flames, you’ll eventually run out of safe ground and wipe. Players must use the geysers below the platform to put out fires and reset the battlefield.
Follow these tips to beat King Khanzaizin:
- Tank turns the boss away – His frontal attacks can wipe the group if not positioned correctly.
- Dodge fire waves and AoEs – Taking unnecessary damage wastes healing and stamina.
- Meteor marks a player – Another teammate must step in to share the impact.
- Fire spreads over time – Use geyser buffs to extinguish flames before the arena burns.
- Red Orb destroys platforms – Marked players must break a platform to avoid losing one randomly.
- At 50% HP, mechanics double – More meteors, more fire, and faster platform destruction make the fight harder.
The biggest danger is losing too many platforms too quickly. A single mistake can ruin the whole run, so everyone must stay focused until the very end. This is a true test of endurance and execution. Manage fire, share meteors, dodge attacks, and use the geysers correctly. BLOG20
King Khanzaizin Mechanics
In this part of the guide, we’ll take a closer look at Rancorwood boss mechanics, specifically King Khanzaizin. Getting a bit ahead of things – fire, platform destruction, and knockback attacks are the biggest threats. Now, let’s see what the developers have prepared for us in this instance:
| Mechanic | Description |
| Wrath Attack | A wide cone-shaped fire blast aimed at the tank. The tank must face the boss away from the group to avoid hitting teammates. Players caught in it can dodge roll to escape. |
| Fire Ground AoEs | Random players will spawn fire zones beneath them. These deal damage over time, so move out of the fire quickly to avoid unnecessary damage. |
| Meteor Strike | The farthest player is marked and rooted in place. A meteor will land on them, dealing massive damage. Another player must step into the red circle to split the impact and avoid a one-shot. The meteor will set the platform slice on fire after landing. |
| Fire Spreading | Burning platform slices will slowly spread fire to adjacent slices. Players must jump to geysers, gain a buff, and use it to extinguish the flames when returning to the platform. |
| Triple Wrath into Fury Attack | The boss does three Wrath Attacks in a row. The first must be dodged, while the second and third have safe spots. After this, he does a powerful Fury Attack that players must block to avoid getting knocked off the platform. |
| Red Orb | A player (later two) gets a Red Orb above their head. If they do nothing, the boss destroys a random platform slice. To control the destruction, the marked player must run into a burning platform so the explosion removes a specific slice instead. |
| Geyser Jump and Fire Control | After the Fury Attack, players must jump down to geysers. This gives them a buff that prevents fire damage and lets them extinguish burning platforms when they return. At least three players should do this to keep the arena safe |
One of the most dangerous Rancorwood mechanics to be prepared for during this fight is when the boss is below 50% HP. Meteor Strikes happen twice, two players get Red Orbs instead of one, and fire spreads even faster. Wrath Attacks become more frequent, and mistakes can quickly lead to a wipe. That’s the reason why you should stay focused until the very end, or you can get wiped easily.


Rancorwood Walkthrough
Rancorwood is a Tier 3 dungeon that requires smart enemy management and quick movement through fire-filled areas. The path to the final boss includes a few key fights and some unique mechanics. Here’s a complete Rancorwood walkthrough to complete the dungeon:
- Defeat the Rampaging Orcs: At the start, you’ll face Rampaging Orcs, marked with a special symbol. These enemies must be defeated to open the way forward. Most other enemies can be skipped, so focus on taking down only the required targets.
- Take Down Broktu: Once the marked enemies are down, Broktu appears. He is a named enemy with no special mechanics, so this fight is quick and simple. Once Broktu is dead, a geyser activates nearby.
- Use the Geyser and Reach the Burning Bridge: Step onto the geyser and wait for it to launch you into the air. While airborne, morph and glide to the platform, then grapple to the top. The bridge ahead is on fire, and you’ll need to put out the flames to move forward. The geyser grants a buff that allows players to extinguish fire, so make sure your team is ready before crossing.
- Defeat Gugbarg: After crossing the bridge, you’ll fight Gugbarg, the dungeon’s first boss. His mechanics are simple but dangerous if ignored. He spawns fire zones, summons totems, and deals damage over time. The key to victory is destroying totems quickly, avoiding fire patches, and blocking his Fury Attack when needed. When Gugbarg is defeated, another geyser activates, allowing your team to move forward.
- Slay Grok: Before facing the final boss, you’ll need to defeat Grok. Like Broktu, he has no special mechanics and goes down quickly. Killing him unlocks access to King Khanzaizin’s arena.
- Face King Khanzaizin: With the path clear, you’ll now face King Khanzaizin, the dungeon’s final and most difficult boss. His fight revolves around fire spreading, platform destruction, and meteor mechanics. Survival depends on managing fire properly, dodging deadly attacks, and using the geysers efficiently.
If your team executes the mechanics correctly, you’ll take him down and clear Rancorwood successfully.
Best Team Setup for Rancorwood
Rancorwood is a mechanics-heavy dungeon that requires a balanced team to survive. Fire control, platform management, and boss positioning are key to victory. Here’s the best team setup for Rancorwood:
- Tank: Greatsword / Sword and Shield
- DPS: Dagger / Crossbow
- Healer: Wand / Staff
Below, we'll go over each role's main task in this raid. This will provide you with a deeper understanding of what you should be focused on.
- Tank Role:
The tank’s job is to position bosses correctly and absorb damage. Against King Khanzaizin, they must turn him away from the group to avoid deadly frontal attacks. They should also save stamina to block Fury Attacks and avoid getting knocked off the platform.
- DPS Role:
DPS should focus on bursting down priority targets like totems in the Gugbarg fight and handling meteor mechanics in the final battle. At least one ranged DPS is helpful to bait meteors and position them safely.
- Healer Role:
Healers must constantly top up health due to fire damage over time. They should prepare for meteor impact damage and help with revives if needed. Support players can provide shields, stamina restoration, or debuffs to help with survival.
At least three players should be assigned to jump down to geysers and put out fires during the King Khanzaizin fight. This should include one DPS and at least one support/healer to make sure the arena remains safe. BLOG20
Rancorwood Rewards
Rancorwood offers valuable loot, including armor, accessories, items, and currency rewards. While the dungeon does not drop weapons, you can obtain powerful gear to enhance your builds. Here’s a complete list of Rancorwood rewards you can get:
| Category | Items |
| Armor | Ogre King’s Horned Helm (Head Armor) |
| Accessory |
Moon and Star Ring (Ring), Cunning Ogre Belt, Earth Goddess’ Fence |
| Items | Lizard Scale, Fermented Rotein |
| Miscellaneous | Spirit Urs (Morphstone), Abyssal Contract Token Points (x500), Training Dew: 10,000 Points |
You can also obtain a ton of Armor parts. They are quite weak yet can be used for particular setups:
Admiral’s Victorious Pants, Forgotten Assassin’s Shadowless Gaiters, Ogre King’s Horned Helm, Ogre Lord Bone Gaiters, Oracle Priest’s Soul Pants, Skilled Veteran’s Fated Gaiters, Vanguard’s Limitless Gaiters, Ascended Guardian Shoes, Gilded Raven Boots, Phantom Wolf Boots, Sabatons of the Field General, Shadow Harvester Boots, Shock Commander Sabatons, Swirling Essence Shoes
These rewards help improve both DPS and defensive stats. Keep farming the Rancorwood dungeon to get the best rewards and test your skills as never before.
How Difficult is Rancorwood?
Rancorwood is a challenging Tier 3 dungeon that requires good teamwork, fire control, and precise execution. The first boss, Gugbarg, is simple, but King Khanzaizin is a serious test. His fire mechanics, platform destruction, and meteor strikes can quickly overwhelm unprepared groups.
Mistakes add up fast, and losing too many platforms leads to a wipe. Tanks must position correctly, DPS must handle meteors, and some players must jump to geysers to control fire. The difficulty comes from mechanical execution, not raw damage. Well-coordinated teams will clear it smoothly, but poor fire management leads to disaster.
Conclusion
This wraps up our Rancorwood guide for Throne and Liberty. You’re now prepared for this epic battle to defeat King Khanzaizin and overcome all the mechanics awaiting you. This article also has a list of rewards you want to hunt for and all other details. Now, get into this dungeon and see how your walkthrough goes. We’re sure you’ll be victorious. Good luck, and we will see you in the game.
F.A.Q.
How to do Rancorwood in Throne and Liberty?
Defeat marked enemies to progress, use geysers to cross fire zones, and beat Gugbarg and King Khanzaizin to complete Rancorwood.
How to defeat King Khanzaizin in Rancorwood?
Dodge fire attacks, share meteor damage, use geysers to put out fire, and manage platform destruction to survive the fight.
How to enter Rancorwood?
You need to be Level 55 with a minimum Combat Power of 3500 to access Rancorwood.
Is Rancorwood difficult?
Yes, King Khanzaizin’s fire mechanics and platform destruction make it one of the toughest dungeons in Throne and Liberty.


