
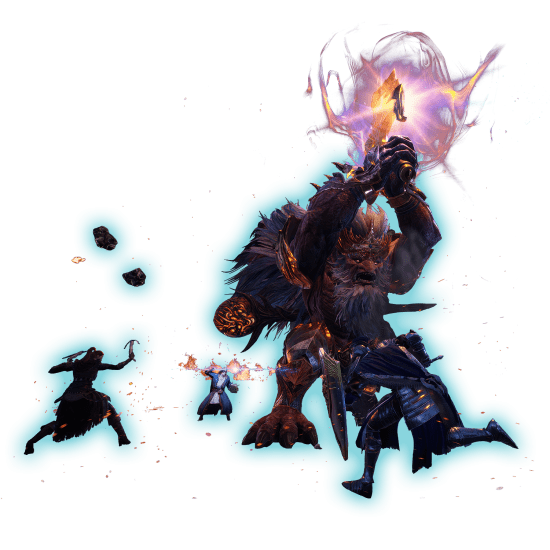
This Throne and Liberty Taedal’s Tower guide explains how to complete all 20 floors within a challenging solo dungeon. You will encounter a unique boss during each stage, featuring specific mechanics and skills. Get ready to test your skills and earn exclusive rewards.
If you are already stuck at a specific stage, you can rest assured knowing Skycoach is here to help you with Taedal’s Tower Completion. Our PROs are ready to assist you with any floor all the way up to 20. Finish the challenge with no sweat and enjoy your well-deserved rewards!
- Throne and Liberty Gearing Guide
- Throne and Liberty Contracts Guide
- Throne and Liberty Beginner's Guide
- Throne and Liberty Best Builds
- Throne and Liberty Best Weapons Tier List
Note: At Skycoach, you can Buy Throne and Liberty Boost at the best prices with fast delivery. Use our special PROMO CODE (in green) hidden in this article for a 20% DISCOUNT.


What is Taedal’s Tower?
Taedal’s Tower in Throne and Liberty is one of the two Secret Dungeons available in the game. You have 20 levels to go through, each becoming more difficult as you progress. Be prepared to face off against powerful bosses waiting for you on each floor. They will require you to play carefully around their mechanics to defeat them.
Using a range of potions is also a must-have as you get to higher levels. Taedal’s Tower difficulty system is similar to any other tower-type challenge. If you cannot take down a particular boss, you can always try again when you have better gear or a higher level. You will be rewarded with unique rewards, including Precious Weapon Growthstone, Quality Recovery Crystal, and others, every time you finish a floor.

How to Unlock Taedal’s Tower
You can unlock Taedal’s Tower once you reach level 15. At this point, you will have access to only one floor – Charging Gatekeeper. Defeat Chief Orc Gatekeeper and reach level 19 to progress further and open the second floor. It goes like this until you reach the level cap of 50 and complete the 10th floor. After that, you need to complete one stage after another until you get to finish all 20 Taedal’s Tower floors.
Taedal’s Tower Location
You will discover Taedal’s Tower location by progressing through the main story line and visiting the Starlight Observatory Ruins within the Codex Chapter 3: Veterans Never Die. By interacting with Ashien’s Strange Painting, you will be teleported inside the dungeon. After that, you will permanently have two ways of accessing Taedal’s Tower:
- Visiting the Starlight Observatory Ruins location
- Accessing the dungeon via the Secret Dungeons tab in the Main Menu
The second alternative is preferable, as it saves your time and can get you teleported to Taedal’s Tower bosses from anywhere in Solisium. Use this feature later every time you want to see how you are doing on higher-level floors and whether you are ready to progress further.

Floor 1 – Charging Gatekeeper
Here are the basic details on Floor 1:
- Floor: Charging Gatekeeper
- Boss: Chief Orc Gatekeeper
- Unlock Requirements: Level 15
- Weaknesses: Vulnerable to kiting and ranged builds
Floor 1 of Taedal’s Tower is called Charging Gatekeeper, and it puts you against Chief Orc Gatekeeper. This is the first and the easiest boss you will encounter within TL Taedal’s Tower. He can barely move around the arena, is simple to kite, and does not deal that much damage. You are lucky if you are playing as a ranged DPS, as you can deal with this boss without letting him close.
These tips will assist you in conquering Chief Orc Gatekeeper and learning his mechanics:
- Charge: The Gatekeeper will try to rush onto you with a charge, which is easy to avoid. Strafe to either left or right and be ready for the boss to cast this ability again. If he misses it three times in a row, he will return to a normal battle state.
- Hook: Getting out of the boss’s melee range will make him cast his hook to pull you closer. You can either block this ability if you press the button timely or simply evade it by dashing to one of the sides.
- Ground Slam: The boss starts hitting the ground and sends several AoE waves that deal damage. You can avoid this by jumping timely or dashing to a different side of the coming wave.
Floor 2 – Rushing Queen Spider
Let’s dive into the main facts regarding Floor 2:
- Floor: Rushing Queen Spider
- Boss: Venomous Queen Spider
- Unlock Requirements: Level 17
- Weaknesses: Vulnerable to kiting and ranged builds
Making timed out dashes is the key to defeating Venomous Queen Spider. This is especially important if you are playing as a ranged DPS. Be aware of her Rush ability, which she will use to level the distance between you two. You should also be prepared for frequent poison attacks that apply DoTs.
You can take down Venomous Queen Spider and learn about her abilities with these instructions:
- Rush: The spider boss will rush onto you every time you get too far away from her. Counter this ability by dashing to either right or left.
- Venom Jump: She will jump on you and deal heavy poison damage. Be ready to do a perfect block when you see a purple circle appearing. This can help you time out your block and avoid taking any damage.
- Web: The boss will weave a large web around the location you are standing at. It deals damage and slows you as long as you stay on it. Change your fighting spot until the web disappears. It takes 10 seconds before it does.
- Back Spray: She will send out an AoE spell from her back that deals mediocre damage and slows your character. You can avoid this by dashing to the opposite side of the incoming projectile.

Floor 3 – Screams and a Healing Song
A quick look at the main details on Floor 3:
- Floor: Screams and a Healing Song
- Boss: Starving Giant Zombie
- Unlock Requirements: Level 19
- Weaknesses: Vulnerable to kiting and ranged builds
Reaching Floor 3 in your Taedal’s Tower walkthrough is where you get a chance to interact with another friendly NPC. Lost Adventurer will stay by your side throughout the fight (unless killed by the boss) and protect you from the poisonous abilities. Your goal is not only defeating the boss but saving her life as well. If the NPCs die too early, you will not be able to take down Starving Giant Zombie due to the specifics of his mechanics.
Let’s see what you should expect from Starving Giant Zombie regarding his abilities:
- Ground Smash: This is by far the most dangerous ability the boss will use to try and kill your ally. It is a straightforward AoE that deals a lot of damage. Every time it is cast, you want to make sure you are as far away from Lost Adventurer as possible.
- Projectile Throw: The boss sends a projectile that hits you and applies DoT.
- Take Cover: Every time you hear Lost Adventurer asking you to come behind her, you should do this immediately before being hit by poison spits emitted by the boss. This ability cannot be blocked or avoided by any means other than with NPC’s help.
- Starving Zombie: The boss will summon another zombie as you are about to take him down. You should deal with this creature first and then return to the main boss to finish him off. BLOG20
Floor 4 – Whirling Goblins
You will find the basic points about Floor 4 here first:
- Floor: Whirling Goblins
- Boss: Incomplete Giant Goblin
- Unlock Requirements: Level 20
- Weaknesses: Vulnerable to kiting and ranged builds
This boss is another enemy you can win by moving around the arena and dashing whenever needed. Unlike the previous encounter, you keep doing Taedal’s Tower solo again this time. Most of his abilities can also be blocked if you time it out well, thanks to the purple circle appearing on the ground.
Want to defeat Incomplete Giant Goblin? Check out his mechanics:
- Stunning Jump: The goblin will try to jump on you and stun you. You can evade this by doing a perfect block.
- Pull: The boss will grab you and get closer to himself while dealing damage with the sword.
- Push: It works in a similar way to the previous ability but vice versa. He pushes you off and tries to jump on you to deal damage further.
- Spinning Attack: The goblin starts spinning around the room, trying to chase you and deal damage. Keep using your movement abilities and kite the boss until the ability ceases. Do not try to fight him in this stance, as you will suffer a ton of damage and will not be able to continue the battle.


Floor 5 – Warrior's Cry
Take a quick glance at Floor 5 and things that expect you:
- Floor: Warrior’s Cry
- Boss: Rusted Armor Warrior
- Unlock Requirements: Level 31
- Weaknesses: Ranged builds
Unlike most of the previous bosses, Rusted Armor Warrior is an agile and mobile enemy. You always want to keep the maximum distance possible away from him. He only attacks in melee and will always try to gap-close the range to a minimum. Just make sure you do not go farther than 8 meters, as the boss will then jump on you and deal several Fury Attacks you cannot evade.
Here is how you deal with Rusted Armor Warrior and his mechanics:
- Do Not Interfere: Launches several projectiles to deal damage to you and stars charging onto your location. Avoid these projectiles by dashing to either right or left.
- No One Can Pass: The warrior starts whirling and dealing damage if you get close to him. Stay away from the boss until the ability ends.
- Kill. Kill. Kill: The boss charges at you and deals a severe attack after he gets to your position. Getting hit by this blow stuns you and allows the warrior to perform another powerful attack. This ability cannot be blocked, the only way to get away from it is to dodge it.
- Die. Die. Die: This skill works in a similar manner to the previous one. You need to get away from both attacks, as they deal a ton of damage, and the first one can also stun you.
Floor 6 – Finding the Piton in the Flames
Let’s outline the necessary information on Floor 6:
- Floor: Finding the Piton in the Flames
- Boss: Mad Red Pyromancer
- Unlock Requirements: Level 35
- Weaknesses: Both melee and ranged builds work
This is the stage when the dungeon’s mechanics start getting more interesting. Mad Red Pyromancer uses his power to set the entire arena on fire. Standing on it will wipe you almost immediately. Instead, you want to jump on one of the four pillars when the boss is about to cast this spell.
Follow this guide to slay Mad Red Pyromancer and learn more about his casts:
- Charged Attack: Pay attention to the purple circle appearing. This will help you perfectly block this powerful attack from the boss.
- Teleport: The pyromancer teleports to another place.
- Fire Bombs: The boss sends several AoEs that will chase you for a couple of seconds. You can dodge these, or they will cause damage and explode.
- Burning Ground: The pyromancer sets the entire floor on fire by casting the spell and sitting still. Use your grapple hook to get on a chosen pillar and wait for the cast to end. You can use a Bow or any other range weapon to keep dealing damage when standing far away from the boss. The ability becomes stronger when the boss is about to die, as you will only have one pillar to get onto.
Floor 7 – The Bound
Here is a concise explanation of Floor 7:
- Floor: The Bound
- Boss: Bound Shadowmancer and Despair Dark Enforcer
- Unlock Requirements: Level 31
- Weaknesses: Ranged builds
Bound Shadowmancer is a ranged enemy who does not move much around the arena and keeps casting spells to damage you. Despair Dark Enforcer will be after you throughout the fight, trying to damage you in melee. To complete Floor 7, you need to slay only one boss of the two. They are different in terms of mechanics yet are quite predictable. We highly recommend that you keep focusing on Bound Shadowmancer while kiting the second boss around the room.
Do this to take down Bound Shadowmancer and Despair Dark Enforcer.
Bound Shadowmancer:
- Beam: The boss casts a laser that deals significant damage if you touch it.
- Area Strike: A default AoE spell you can avoid by getting out of the blue area.
- Lightning Strike: The boss emits several lightning bolts. You can avoid taking damage by dashing away.
Despair Dark Enforcer:
- Spin Attack: The boss starts spinning around, dealing a ton of damage upon hitting you.
- Lightning Line: The Enforcer swings his scythe, unleashing bolts of lightning in your direction. These bolts create dark blue patches on the ground that you need to steer clear of.
Floor 8 – Poisons, Explosions, and Detox Herbs
Let’s start with a quick rundown of Floor 8:
- Floor: Poisons, Explosions, and Detox Herbs
- Boss: Giant Ant Commander
- Unlock Requirements: Level 43
- Weaknesses: You can use both melee and ranged builds
This fight is all about adds and avoiding poison damage. This mechanic is quite similar to what you have already seen on Floor 7. The only difference is that the arena is now covered with poison instead of fire.
These are the steps to beat Giant Ant Commander and his attacks to be aware of:
- Explosive Ants: The boss will often summon these ants to keep chasing you around the area. They do not deal much damage themselves, yet they can explode. The only way to avoid taking damage from these little creatures is to wait for them to start casting a self-explosive spell and move away from them.
- Poison Wave: The entire area will be full of poison you can neutralize by picking up Detox Herbs. They will be scattered around the room as well after the spell is cast. Collect all three herbs to get rid of three stacks of the DoT damage debuff.
Floor 9 – Dance of the Flashing Sword
These are the core details about Floor 9:
- Floor: Dance of the Flashing Sword
- Boss: Dancing Giant Butcher
- Unlock Requirements: Level 47
- Weaknesses: It is advisable to use a melee build
Timed blocks and quick dodges are the key to surviving this fight. This boss is fast and uses a combination of melee and ranged attacks throughout the encounter. Unlike early-stage enemies, kiting him becomes a problem since he can change his attack type.
Here is the method for overcoming Dancing Giant Butcher, as well as the description of his abilities:
- Ranged Attacks: Throws bolts at you, each dealing significant damage. You can catch the perfect time to block them.
- Backstab: The butcher appears at your back and tries to execute a strike. This can be either dodged or blocked if you catch the right timing again. BLOG20


Floor 10 – Commander's Shadow Strike
Starting with the essential facts on Floor 10:
- Floor: Commander’s Shadow Strike
- Boss: Oblivion Skeleton Commander
- Unlock Requirements: Level 50
- Weaknesses: Melee build is preferable for this fight
This boss is a sort of pinnacle point of the first half of Taedal’s Tower. Be ready for a ton of AoE casts, hard-hitting attacks and frequent stuns. Being caught in one of those often means you can be wiped or stay at low HP. This means you need to use potions to restore health and play more carefully.
Follow this guide to take down Oblivion Skeleton Commander and learn about his attacks:
- Dark Pull: You will see a cloud appearing in the selected area. Stepping into it will pull you to the boss and make you vulnerable to his strong attack.
- Stunning Rush: The commander rushes onto you and tries to stun you. This can be either dodged or blocked if you catch the right timing.
- Ground Slam: The boss will fall down to the arena from the very top. This will cause a massive AoE wave, which will deal damage to you no matter where you are standing. The only way to avoid this is to jump right before the commander lands.
- Pull Jump: When the boss drops below 50% health, he will leap and pull you in. You have got to act quickly and get out of the way, or you’ll get hit with some serious AoE damage.
Floor 11 – Maze of Death
Let’s explore the main highlights of Floor 11:
- Floor: Maze of Death
- Boss: Roaring Avolos Umbramancer
- Unlock Requirements: The previous stage finished
- Weaknesses: You can choose between melee and ranged builds
The main challenge of this encounter is the need to solve a maze fast. Failing to do this will make you suffer from AoE damage that can easily wipe you in a few hits like that. There is no way you can avoid taking this damage other than getting out of a maze. Make sure you have your camera settings adjusted accordingly to view the entire arena from above.
Here is the approach to taking down Avolos Umbramancer and a set of his abilities:
- Maze of Death: You will find yourself moved to the center of the area without a way of avoiding this. The boss starts casting an AoE spell you can dodge by getting out of this maze by running. No wall climbing or hook grappling – only running and thinking logically about how you can get out of this.
- Beam: A laser starts moving towards you, but you can avoid it by stepping in the opposite direction.
- Lightning Bolts: Once you get out of the maze, do not step on the blue circles you see on the floor. They deal damage, and there are too many of them to soak them all.
- Seeking Lightning: Three small circles will pop up around your character. You have got to move out of them fast because they will get hit by lightning shortly after. Later in the fight, six circles will show up instead of three, so you will have even more to dodge.
Floor 12 – Answers in the Sand
A snapshot of the core information on Floor 12:
- Floor: Answers in the Sand
- Boss: Scorpos
- Unlock Requirements: The previous stage finished
- Weaknesses: Ranged build is preferable for the fight
You will need to draw the main boss out by leading the smaller scorpions into the quicksand. You will repeat this tactic throughout the fight, and if timed right, you can even stun the boss when it shows up again.
The key to defeating Scorpos lies in knowing his abilities and being prepared for them:
- Burrow: The boss gets underground and starts moving towards your location. He will then try to hit you from beneath. Stay in motion to avoid this strike. Dashing and jumping are recommended.
- Spin Attack: The scorpion begins spinning around, making you suffer a ton of damage if hit by this ability.
- Hide: The enemy will vanish, and three smaller scorpions will take its place, just like at the beginning of the fight. You’ll also see three light patterns, but the one you need to focus on is the purple one. Once the lights stop moving, they turn into whirlwinds. You need to lead the small scorpions into the correct whirlwind – the one that came from the purple light – to make the boss reappear.
Floor 13 – Fall, Shock, Destroy
Take a quick glance at Floor 13:
- Floor: Fall, Shock, Destroy
- Boss: Lighting Jump Attacker
- Unlock Requirements: The previous stage finished
- Weaknesses: Melee build would suit this encounter more
This boss can easily wipe you if you get hit by his lightning strike. This ability will be cast way more often if you are playing as a ranged DPS. Therefore, we highly recommend sticking to a melee build instead. You will also need to solve a puzzle to summon the boss to the arena. You will come across three rock formations: one red, one neutral, and one blue. To transfer energy from the red rock to the blue, you need to activate them in the right order: red first, then blue, and finally, the neutral one in the middle.
Here is the plan for beating Lightning Jump Attacker and what abilities to expect:
- Hide: It works in a similar manner to what you have already encountered on Floor 12. The only difference is that you need to dodge lighting pillars, or you will suffer damage while solving a puzzle.
- Lightning Punch: The boss emits a massive AoE strike across the arena. Getting hit by it paralyzes you and makes you vulnerable to his next attack.
- Jump Attack: The attacker rushes onto you while casting an AoE ability along the way. Get out of your current location to avoid getting hit by it. Trying to block the attack is possible, but catching the right timing can be problematic.
- Lightning Stomp: The boss creates a big lightning AoE that you want to dodge at all costs. If you get hit by it, your character will be immobilized, leaving you vulnerable to his other attacks.
Floor 14 – Out of Sight
Let’s outline the necessary information on Floor 14:
- Floor: Out of Sight
- Boss: Old Wizard’s Eye
- Unlock Requirements: The previous stage finished
- Weaknesses: Both melee and ranged builds are suitable
This boss is known for its AoE ability, which can instantly kill you, making you start the fight from scratch. His other attacks are also deadly, which means you either need to learn to dodge them correctly or catch the right time to block them.
Follow these steps to conquer Old Wizard’s Eye and read about his abilities:
- Wide Beam: The eye will cast a laser that deals damage to anyone standing in one half of the arena. Get to the second half of the room to avoid it.
- Tentacle Beam: A default projectile you cannot dodge.
- Ground Smash: The boss hits the ground thrice and emits AoE damage. You cannot dodge this by dashes or jumps. The only way to level the incoming damage is to block it timely.
- Ground AoE: The eye will cast AoE directed at a specific part of the arena. Get out of the location you are standing in. Once the cast is over, the boss will stay helpless for a few seconds. Use this time to heal up or restore MP if needed.
- Spinning Beam: The boss starts whirling around. If hit by one of those lasers, you will suffer a ton of damage and be stunned.
Floor 15 – Thieves and Retrievers
We’ll cover the fundamentals of Floor 15 first:
- Floor: Takers and Retrievers
- Boss: Stealer of Light Dren
- Unlock Requirements: The previous stage finished
- Weaknesses: Both melee and ranged builds are suitable
Staying mobile is how you survive this fight. Be prepared for frequent ability casts and a ton of damage when battling the boss in melee. We highly recommend sticking to kiting as often as possible to avoid taking unnecessary damage. This encounter will take a lot of time, yet you do not want to rush through it.
Take down Stealer of Light Dren by learning his mechanics:
- Stun: A simple projectile that aims and stuns you upon hitting. Do a perfect parry to avoid the effect.
- Knife Slash: Dren will try to strike you with his short knife when being close to you. Always kite the boss to avoid taking damage from this spell.
- Blood Charge: The boss rushes onto you and leaves a trail of AoE you do not want to step into.
- Blood Rain: A line of blood pillars will pop up, and if you touch them, you will take serious damage. This attack comes on fast, so you’ll need to be quick to dodge it. Staying mobile and moving around during the fight can help you avoid them more easily.
- Light Steal: The boss gets to the center of the area, and you are being moved to its very edge. The room will be plunged into darkness, making the boss invisible. During this phase, the boss’s shadow will be after you. Try to stick to the edges of the room and keep an eye out for the light orb. Once you spot it, activate it to bring back the light and reveal the boss’s location. After that, he will stay defenseless for 10 seconds, allowing you to deal a ton of DPS or restore HP and MP.
Floor 16 – Precise Moment
The must-know points for Floor 16 include the ones such as:
- Floor: Precise Moment
- Boss: Immortal Guardian
- Unlock Requirements: The previous stage finished
- Weaknesses: Melee build is rated higher for this fight
The entire battle revolves around the platform mechanic. You will fight the boss when standing on one of them, and you cannot deal any damage if you are on another one. This is why you want to go for the melee build. BLOG20
Below is how you can defeat Immortal Guardian and a description of his attacks:
- Hammer Slam: The boss slams his hammer, causing AOE damage. Block it, or you will get stunned.
- Radiant Hammer: He charges his glowing hammer and slams it down for AOE damage. Parry to avoid heavy hits.
- Scorching Floor: The boss jumps to a pillar, igniting the ground. Jump to a pillar to escape.
- Hammer Barrage: The boss unleashes quick strikes from different angles. Stay behind him to dodge.
- Power Up: At low health, the boss becomes invulnerable for a few seconds. Use this time to heal, but be wary – his damage will increase afterward.
Floor 17 – Unbreakable Shield of Cooperation
A fundamental breakdown of Floor 17 includes these points:
- Floor: Unbreakable Shield of Cooperation
- Boss: Chaos Archwizard
- Unlock Requirements: The previous stage finished
- Weaknesses: Go for a ranged build for this battle
This is another encounter where you do not fight the boss solo but with an NPC assisting you. Your task is to save this character’s life and get under his cover during specific mechanics occurring throughout the fight.
These tips will help you defeat Chaos Archwizard and learn about his spells:
- Blue Fire: The boss starts casting fire in the front line. You can easily dodge this by dashing to either left or right.
- Magical Sphere: A basic AoE spell you can avoid by getting to another part of the arena.
- Ground Detonation: Get away from a blue zone you see on the floor, or you will suffer a ton of damage.
- Deadly Haze: Almost the entire room is covered with haze you want to avoid, or you will take damage. Get to Adventurer NPC to be protected from this cast.
Floor 18 – Swirling Firestorm
Starting with an overview of Floor 18, here is what you need to know:
- Floor: Swirling Firestorm
- Boss: Exploding Flame Desert Wizard
- Unlock Requirements: The previous stage finished
- Weaknesses: Choose a melee build for this encounter
Dodging a deadly Fire Tornado is the key to avoiding a wipe mechanic. You will also need to do a ton of timed blocks to complete the fight.
Here is the winning strategy against Exploding Flame Desert Wizard and all her abilities:
- Fire Tornado: A small tornado moves around the room, letting you jump higher if you touch it. Keep track of its position to survive the boss’s attacks.
- Fireball: The wizard launches a fireball at you. Block or parry it to avoid damage.
- Charged Fireball: Similar to the first, this fireball knocks you back on hit. A well-timed block or parry can negate it.
- Fire Wave: The enemy retreats and slams the ground, creating fire lines. She then causes a wave of fire to travel between them. Stay back to avoid the flames.
- Immolation: The wizard teleports to the center and charges a massive fireball, smashing it down for AoE damage and making the ground molten. Get to the fire tornado to jump to a safe spot behind her.
Floor 19 – Reaching Higher
Starting with an introduction to Floor 19, check these details:
- Floor: Reaching Higher
- Boss: Nightmare Conductor
- Unlock Requirements: The previous stage finished
- Weaknesses: Opt for a ranged build for this fight
You will need to move around on some floating platforms while dealing damage and dodging or blocking attacks. Using ranged weapons will make this fight a lot easier since the platforms can keep you from getting too close for melee hits.
To defeat Nightmare Conductor, learn his abilities first:
- Spell Beam: The boss fires a spell at you. Parry or use a shield to avoid the hit.
- Charged Spell: He charges up a spell aimed at you. If it connects, it stuns and damages you. Watch for the purple circle to time your parry.
- Triple Orbs: The boss creates three orbs: two red and one blue. The red ones deal AoE damage and damage over time, while the blue one targets you directly and can be parried. Keep an eye on them to dodge surprise hits.
- Magical Wave: The boss sends out a wave of magic that covers the whole arena. You cannot dodge it, but a shield skill can block the damage.
- Giant Orb: The boss floats and charges a huge blue orb. After a bit, he throws it down for massive damage. Jump up platforms to escape it – if you reach the top in time, you will not take any damage.
Floor 20 – Revenge and Resurrection
Let’s begin with a general outline of the details for Floor 20:
- Floor: Revenge and Resurrection
- Boss: Revenger Skeleton Commander
- Unlock Requirements: The previous stage finished
- Weaknesses: Both melee and ranged build can be used
Prepare to face off the boss’s adds, parry a ton of hard-hitting attacks, and survive a more improved version of the enemy you have already encountered in this challenging dungeon.
These are the steps to beat Revenger Skeleton Commander and a way to learn about his casts:
- Tower Skeletons: The enemy calls in smaller skeletons to attack. Focus on taking them down fast before they become a problem.
- Charge: The commander rushes at you and slashes with his sword, hitting you hard. You can dodge, but he will keep coming at you with this move.
- Fire Wave: You will see the boss charge up with fiery energy before unleashing an AoE fire attack. It stuns if it hits, but a shield skill can block it.
- Flaming Circle: He creates a small fire AoE on the ground. You can avoid heavy damage by quickly stepping away from it.
- Fiery Charge: The commander jumps at you, knocking you back and creating a wave of fire when he lands. You cannot dodge it, but using a shield skill can help.
- Second Wind: If you bring the boss’s health to zero, he will heal back to full, and you will have to fight him again. He only does this once, so it’s like you have to take him down twice.
Taedal’s Tower Rewards
You will be awarded a set of predefined items after you complete each level of this dungeon. We have compiled a full list of Taedal’s Tower rewards to share with you:
- Growthstones for equipment upgrades
- Sollant
- Amitoi
- Rare Consumables
With each floor completed, you will receive more rewards, and their rarity will grow accordingly.
Taedal’s Tower Tips
The following Taedal’s Towers tips will help you complete all 20 stages of the dungeon and earn the rarest prizes:
| Know Your Bosses | Each floor introduces a stronger boss with unique abilities. Take a moment to learn their attack patterns and weaknesses before jumping in. This knowledge will help you dodge their attacks and exploit any vulnerabilities, making each fight easier. |
| Manage Your Resources | Keep an eye on your health and mana as you progress through the floors. Use potions wisely and consider taking a break between floors to create a plan and replenish your resources. Planning ahead can save you from being caught off guard in tougher battles. |
| Experiment with Builds | As you progress, try out different builds to find what suits your playstyle. Mix and match skills and equipment to create a build that counters specific boss mechanics, allowing you to adapt as you climb higher in the tower. |
How Hard Is Taedal’s Tower?
Taedal’s Tower can be quite challenging, especially as you progress to higher floors. Each boss is stronger and has unique mechanics that require quick reflexes and strategy. You will face a mix of enemies and environmental hazards, making it crucial to adapt your tactics. While it may take several attempts to master the fights, with practice and the right build, you can definitely conquer the dungeon.
Conclusion
This brings us to the end of our Taedal’s Tower guide for Throne and Liberty. We hope you have learned all the details you wanted to know about a specific floor and are now ready to jump into a fight. With 20 bosses to conquer, this dungeon is a true challenge for both new and veteran players. Though, the rewards waiting for you are more than worth it. Good luck, and we will see you in Solisium.
F.A.Q.
How difficult is Taedal’s Tower in Throne and Liberty?
This is by far the most challenging solo activity you can access in the game.
How do I access Taedal’s Tower?
Progress through the main campaign and enter Starlight Observatory Ruins to access the tower for the first time.
What are the rewards for completing Taedal’s Tower?
Here is what you get for finishing floors in this dungeon:
- Growthstones for equipment upgrades
- Sollant
- Amitoi
- Rare consumables
How many floors are in Taedal’s Tower?
You have a total of 20 floors to complete within Taedal’s Tower.
What is Taedal’s Tower location?
You can find the entrance to Taedal’s Tower in Starlight Observatory Ruins.


