
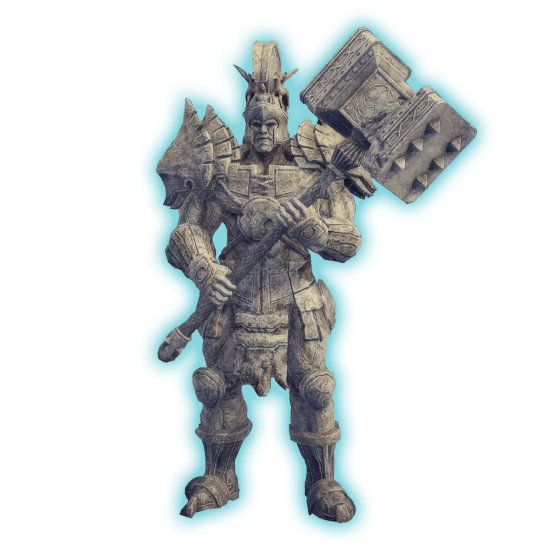
Welcome to the Throne & Liberty SNS and Wand build guide. This is a tank build that uses a combination of two weapons:
- Sword and Shield
- Wand and Tome
If you want to be able to survive boss fights in the group or solo dungeons, all while maintaining the aggro on yourself, this build is exactly what you need. Your secondary weapon lets you use healing abilities, which only adds to your survivability and even lets you do without a dedicated healer in the group content!
If you want to learn more about the game, check out our other guides:
- Throne and Liberty Gearing Guide
- Throne and Liberty Contracts Guide
- Throne and Liberty Beginner's Guide
- Throne and Liberty Best Builds
- Throne and Liberty Best Weapons Tier List
- Wand and Staff PvE Build Guide
Note: At Skycoach, you can Buy Throne and Liberty Boost for the best prices with fast delivery. Use our special PROMO CODE (in green) hidden in this article for a 20% DISCOUNT.


The core concept is to provide stability for your group, making sure that enemies are focused on you while keeping yourself healthy enough to withstand prolonged fights. The Sword allows you to taunt and shield yourself effectively, while the Wand acts as your safety net, letting you heal up after heavy damage or even recover an ally who may have been knocked down. This build trades off offensive power in exchange for survival and support, ensuring that even if a healer is lost, you can still keep the party going. BLOG20
If your goal is to tank efficiently, especially in tough encounters where healers may be at risk, this build would be perfect. However, due to its low damage output, it’s not ideal for soloing or speed-running content, as it will struggle to bring enemies down quickly. Instead, it thrives when paired with strong DPS teammates who can capitalize on the control and stability you bring to each fight.

Pros and Cons
We’ll start the Sword and Wand Tank guide by reiterating this build’s strengths and weaknesses so that you have a good idea of what you’re working with.
Pros:
- High Defense: This build is exceptionally durable, allowing it to withstand heavy damage from multiple enemies. With the Sword and Shield combination, it can block and reduce incoming attacks, ensuring you remain the last one standing even in high-pressure situations. This makes it perfect for holding aggro against large groups or powerful bosses.
- Strong Utility and Support: The inclusion of the Wand enables this build to provide healing for itself and potentially its teammates, offering valuable utility in group settings. In the absence of a healer or during emergency situations, the Wand allows you to keep the team alive longer and even stabilize the group when things get chaotic.
- Adaptability in Dungeons: The self-healing and defensive capabilities make the build versatile in dungeons. If the group healer goes down, you can step in temporarily, sustaining yourself and managing aggro until the fight stabilizes, which can be the difference between a wipe and a successful run.
Cons:
- Poor Damage Output: This build sacrifices offensive power to maximize defense and utility. As a result, it takes significantly longer to deal with enemies compared to pure DPS builds. This can slow down dungeon runs and make solo play tedious, as you lack the raw damage to quickly dispatch enemies.
- Limited Solo Potential: Due to its focus on tanking and support, this build is heavily reliant on teammates to contribute damage. While it can survive nearly any encounter, it won’t be able to efficiently clear content on its own, making it less suitable for players looking to farm or progress quickly solo.
- High Dependency on Weapon Swapping: Effectively utilizing this build requires constant weapon switching between Sword and Wand to balance tanking and support. This can be challenging to manage, especially in high-stress encounters, and might require more mechanical skill and awareness than builds focused on a single weapon setup.
Next up, we’ll explain SNS and Wand how to play by introducing your core skills, passive, defense skills, and gear.
Sword and Wand Stat Priorities (Attributes)
When it comes to Sword and Wand stat priority, you’re going to want to focus on stats that increase your HP and defense. Therefore, you want to increase strength and dexterity first, followed by everything else.
| Attribute | Points | Benefits |
| Strength | 60 | HP Regeneration, Maximum Health, Resistances |
| Dexterity | 40 | Critical Hit Chance, Evasion Rate, Movement Speed |
| Wisdom | 15 | Main Max Damage, Max Mana, Mana Regen, Cooldown Speed |
| Perception | 20 | Increased chance of landing hits (Hit Rate), Increased chance to land Crowd Control Effects |
The Wisdom and Perception pair aren’t very important SNS and Wand stats unless you want to focus on healing rather than tanking, which is surprisingly a viable option.

Sword and Shield / Wand and Tome Active Skills
The Throne & Liberty SNS and Wand abilities are your bread and butter of the core gameplay. They define what you do in combat and what role
| Weapon Type | Skill | Cooldown |
| Sword and Shield | Shield Strike | 6 |
| Shield Throw | 33 | |
| Counter Barrier | 21 | |
| A Shot at Victory | 24 | |
| Provoking Roar | 30 | |
| Stalwart Bastion | 90 | |
| Wand and Tome | Swift Healing | 12 |
| Invincile Wall | 30 | |
| Touch of Despair | 6 | |
| Fountain of Life | 36 | |
| Clay’s Salvation | 45 | |
| Blessed Barrier | 30 |
The chosen abilities are carefully curated to balance the build’s need for both survivability and utility. On the Sword and Shield side, the combination of Shield Strike, Shield Throw, and Counter Barrier allows for consistent aggro management and damage output, while Stalwart Bastion and Provoking Roar keep enemies locked onto the user. For the Wand and Tome, the inclusion of Swift Healing and Fountain of Life gives strong self-healing options, while Clay’s Salvation and Blessed Barrier provide group support. Invincible Wall offers a temporary shield for high-damage situations, and Touch of Despair enhances damage on targets, making the build not just a defensive wall but also a potent debuffer.
These abilities synergize well because they complement each other’s strengths—defense, healing, and debuffing—allowing the build to excel in multiple roles within a party setting. The variety of defensive tools ensures the build can withstand heavy damage, while the healing abilities allow it to sustain itself and support the group without a dedicated healer.

SNS and Wand Passive Skills
The best PvE SNS and Wand would not be complete unless you select the correct passive abilities from both weapons.
| Weapon | Passive | Type |
| Sword and Shield | Aegis Shield | Survival |
| Sword and Shield | Impenetrable | Survival |
| Wand and Tome | Noble Revival | Survival |
| Sword and Shield | Resilient Mind | Tactics |
| Wand and Tome | Devotion and Emptiness | Tactics |
| Wand and Tome | Selfless Soul | Tactics |
| Sword and Shield | Spectrum of Agony | Control |
| Wand and Tome | Wraith’s Beckon | Tactics |
The primary synergy comes from mixing high defense and healing, using the Sword and Shield’s Provoking Roar to gather enemies and Counter Barrier or Stalwart Bastion to mitigate damage, while the Wand and Tome focus on keeping the user and allies alive with Swift Healing and Fountain of Life. Blessed Barrier offers a unique synergy by further boosting the party’s survivability, while passives like Noble Revival and Selfless Soul strengthen their healing output.
Touch of Despair and Wraith’s Beckon work in tandem, making Curses more effective and extending their duration. The build can then capitalize on these effects with Curse Explosion, which scales based on Curse stacks, making it a powerful burst tool against cursed targets.
On the Sword and Shield side, Aegis Shield and Impenetrable maximize the build’s defensive potential when surrounded by enemies, turning the character into a nearly immovable bulwark. Meanwhile, Resilient Mind and Spectrum of Agony ensure that the build remains sustainable over long encounters, reinforcing the build’s dual role as a durable tank and hybrid healer.


Defense Skill
The Sword and Shield’s Shield Survival Technique fits this build better because it maximizes tanking efficiency by providing a consistent way to absorb and mitigate incoming damage, while simultaneously supporting the build’s focus on sustain and retaliation. The skill’s ability to regenerate Health and generate a shield equal to 14% of Max Health when blocking a Fury Attack provides immediate protection and survivability. Additionally, when the skill changes to Retaliatory Strike, it enables a powerful counterattack that not only deals significant burst damage but can also be further enhanced by repeated defenses against Fury Attacks. This makes the Shield Survival Technique a strong tool for maintaining aggro and punishing enemies during boss fights or large-scale encounters, where being able to withstand and retaliate against powerful attacks is crucial. BLOG20
On the other hand, the Wand and Tome’s Chaotic Shield is more suited for managing cooldowns and supporting allies, which is less critical for a frontline tank. Its defensive mechanics focus more on empowering Curse skills and offering healing through Healing Spell. While these abilities can be beneficial in some situations, they do not provide the same level of self-sustain, damage mitigation, or direct counterplay that the Shield Survival Technique does. As a result, the Shield Survival Technique is more effective in maintaining the user’s durability, helping the build absorb damage while still contributing to overall DPS.
Sword and Shield / Wand’ Best Guardian

Lady Knight Kamarshea is highly recommended for a SnS and Wand build due to her unique skill, Blazing Panic, which synergizes well with the build's focus on elemental damage and rapid attacks. This ability boosts Fire and Lightning attributes with every skill hit, making it ideal for builds that leverage high attack speed and multi-target hits. The attribute boost stacks up to 10 times, significantly increasing the damage output. At M12, she also enhances Wind attributes, adding even more versatility and potency to the build.
To unlock Lady Knight Kamarshea, players must complete the Elemental Tree Harvest quest found at Daybreak Shore. This quest requires communing with a Small Elemental Tree, following an Elemental Spirit, and checking on the health of several Old Elemental Trees in the region. The process is relatively straightforward but requires navigating through timed projections of old Elemental Trees and missing a step resets your progress.
Once acquired, Kamarshea can also be found in the Guardian Support Chest and through Codex entries like Demon's Test.
Sword and Wand Build Rotation
For the Throne & Liberty Sword and Wand rotation we’ll break down the case of you fighting a dungeon boss, because that’s where this build shines the most.
- Initiate with Basic Melee Hits: Begin the encounter by using melee hits to establish initial aggro on the boss. This prevents any accidental targeting of party members and helps position yourself for the subsequent abilities.
- Touch of Despair: Apply Touch of Despair early in the fight to start building up damage-over-time (DoT) effects. This skill lays a foundation for sustained damage, making it ideal to use before more direct engagement.
- Provoking Roar and Shield Throw: Use Provoking Roar immediately after Touch of Despair to grab the boss’s attention and any nearby adds. Follow up with Shield Throw to solidify aggro and increase your control over the situation.
- Shield Strike: Keep Shield Strike on cooldown. This skill maintains your position as the primary target, while its direct damage contributes to overall threat generation.
- A Shot at Victory: Weave in A Shot at Victory whenever available for an extra burst of damage. Although primarily a DPS ability, it helps compensate for lower-damage defensive skills.
- Swift Healing or Clay’s Salvation: If your health dips unexpectedly or if your group takes AoE damage, use Swift Healing for targeted healing or Clay’s Salvation if multiple party members need assistance.
- Stalwart Bastion: Activate Stalwart Bastion during moments of intense damage or when the boss prepares to cast a high-damage ability. This skill acts as a panic button, greatly boosting your survivability and allowing you to mitigate lethal hits.
- Blessed Barrier: When you anticipate heavy incoming damage or want to protect yourself and others, use Blessed Barrier. This ability not only provides a shield but also amplifies the effectiveness of any subsequent healing, making it a strategic choice for dangerous phases.
- Fountain of Life: Keep Fountain of Life on cooldown, placing it under your own position to ensure consistent healing. Its AoE nature makes it perfect for encounters where the healer might struggle to keep you topped off.
- Invincible Wall: Use Invincible Wall as a final resort when facing high-damage boss mechanics or when you need to shield yourself and nearby allies from a potential wipe.
This best SNS and Wand rotation balances damage output, threat management, and survivability, making it highly effective for tanking and protecting your team in both single-target and AoE scenarios.
- Touch of Despair comes first to ensure early damage over time, which maximizes output and helps draw more aggro in the long run.
- Provoking Roar and Shield Throw are used immediately afterward to solidify aggro and prevent any misalignment in threat control.
- Shield Strike and A Shot at Victory alternate to maintain pressure and contribute to consistent damage while prioritizing cooldown management.
- Defensive abilities like Stalwart Bastion, Blessed Barrier, and Invincible Wall are reserved for critical moments, reducing the chance of overusing them during the fight’s less intense phases.
- Healing abilities are woven in only when necessary to preserve mana and ensure sustainability throughout the encounter.
Sword and Wand BiS Gear
For the Sword and Wand best in slot, you’re going to want to focus on items that give you the most defense and extra HP.
- Sword and Shield: Nirma's Sword of Echoes (Heavy Attack Chance, Critical Hit, Hit)
- Wand and Tome: Excavator's Mysterious Scepter (Heavy Attack Chance, Critical Hit, Hit)
- Helmet: Winged Wind Storm Hood (Magic Endurance, Ranged Endurance, Cooldown Speed)
- Shoulders: Ancient Tapestry Mantle (Max Health, Silence Resistance, Skill Damage Resistance)
- Chest: Winged Wind Storm Armor (Magic Evasion, Magic Endurance, Ranged Endurance)
- Gloves: World Tree's Origin Gloves (Melee Endurance, Range, Magic Endurance)
- Legs: Winged Wind Tsunami Pants (Max Health, Magic Endurance, Ranged Endurance)
- Boots: Winged Wind Gale Boots (Max Health, Magic Endurance, Move Speed)
- Necklace: Slayer's Quicksilver Pendant (Skill Damage Boost, Max Health, Silence Chance)
- Bracers: Bracers of the Primal King (Max Health, Skill Damage Resistance, Silence Resistance)
- Ring 1: Sapphire Dimensional Band (Skill Damage Boost, Max Health, Buff Duration)
- Ring 2: Band of Universal Power (Skill Damage Boost, Max Health, Buff Duration)
- Belt: Belt of Bloodlust (Max Health, Silence Resistance, Skill Damage Resistance)
This setup emphasizes a combination of offensive power and essential survivability. With a strong focus on boosting Heavy Attack Chance and Critical Hit stats, it aims to maximize damage output while providing ample defenses to mitigate incoming damage. The build also highlights resistances against key debuffs like Silence, and increases in endurance make it ideal for maintaining uptime in challenging encounters. The inclusion of Max Health and Damage Resistance ensures that the character remains resilient in sustained fights.
Conclusion
At the end of the day, Throne & Liberty SNS and Wand PvE build is what every dungeon party needs to have. If this is the type of gameplay you’re looking for – keeping boss’s aggro on yourself, making sure the rest of the teammates have a window of opportunity to deal damage.
During leveling, it may seem that a tanking build will take longer because it doesn’t have the same DPS potential, but it’s actually not that bad. You’ll be mawing down mobs left and right when questing, so don’t worry about it. Just keep an eye out on the gear that has your kind of skills and bonus stats and don’t forget to upgrade it when you have enough materials. Always remember that you can transfer the upgrades to a higher tier of gear as this will save you the resources. Finally, practice keeping the aggro on the monsters and you’ll be begged to join dungeon runs!
F.A.Q.
Is SNS and Wand build good in Throne & Liberty?
A tank build with extra healing skills is an invaluable type of character in any group content. Rest assured that you’ll be practically begged to join dungeons runs all the time!
Is SNS and Wand hard to play in TL?
As long as you master the art of keeping aggro and staying alive while being attacked by one or more enemies, you’ll be good. Every role, whether a tank, DPS, or healer must learn to maximize their effectiveness at what they do. A tank build such as this one needs to learn how to survive for the team.
What is the best weapon for a SNS and Wand?
The best weapons for Sword and Shield and Wand and Tome build are these:
- Nirma's Sword of Echoes
- Excavator's Mysterious Scepter
These are the best in slot weapons for the build as of level 50. When the global version catches up with the Korean version in terms of content, there’ll be other BiS weapons.
Is SNS and Wand good in PvE Throne & Liberty?
This build is superb in PvE, especially in endgame group content. But even during questing, you won’t feel any trouble leveling up, because you’ll be able to pull and defeat multiple mobs at once.
How do I maximize DPS as SNS and Wand?
DPS is not the main goal on a build that uses Sword and Shield plus Wand and Tome. Your main priority should be keeping aggro and staying alive. This build is perfect for that with its multiple stuns, aggro-focused skills and heals.
What is the best rotation for a SNS and Wand?
The main rotation looks something like this:
- Initiate with Basic Melee Hits
- Touch of Despair
- Provoking Roar and Shield Throw
- Shield Strike
- A Shot at Victory
The rest of your hotbar skills and situtational and can be included into the rotation based on the enemy you’re dealing with.