Welcome back, adventurers! Damn, it feels good to be back in the Mists of Pandaria expansion. The Pandaria remix is a new spin on the ways WoW fans get to relive the greatest content of the past. In this Heart of Fear guide, we’ll go over the entire raid and navigate through this spooky maze of Mantid madness. From facing off against the operatic Imperial Vizier Zor'lok to dodging the razor-sharp blades of Blade Lord Ta'yak, we've got your back every step of the way.
This updated Heart of Fear raid guide is written specifically for the Pandaria remix event in retail WoW. As you know, during this event, you can create a new character and replay it through the entirety of the Pandarian expansion with faster progression and easier access to transmog sets. The raid stays more or less the same as the original. The only thing that changes is how fast you can access it from the start of your journey.
So, grab your fellow heroes, gear up, and let's dive headfirst into the Heart of Fear. It's gonna be a wild ride, full of epic battles and maybe a few screams (of victory, hopefully)! Let's show these Mantids who's boss!
Before we proceed with the rest of our guide, should you not feel like replaying through old content with little to no changes at all for the mere chance to get some long-forgotten and rare rewards in the form of transmog sets or mounts, you can simply buy MoP Remix Heart of Fear Raid boost from Skycoach. This boosting service lets you claim the raid rewards without having to farm the instance personally. Skycoach's team of expert gamers will get any amount of loot and complete any other objective you need. The service is completely safe, and it will save you a lot of time.
IMPORTANT NOTE: Apart from learning everything about Heart of Fear, you can also Buy WoW Pandaria Boost from Skycoach. We offer a wide range of products at the lowest market price and with the fastest delivery. You can make your first purchase even CHEAPER if you find a special PROMO CODE (highlighted in green) hidden in this article and get a 20% DISCOUNT.
Browse our hottest WoW Boosting services
What is Heart of Fear in Mists of Pandaria Remix?
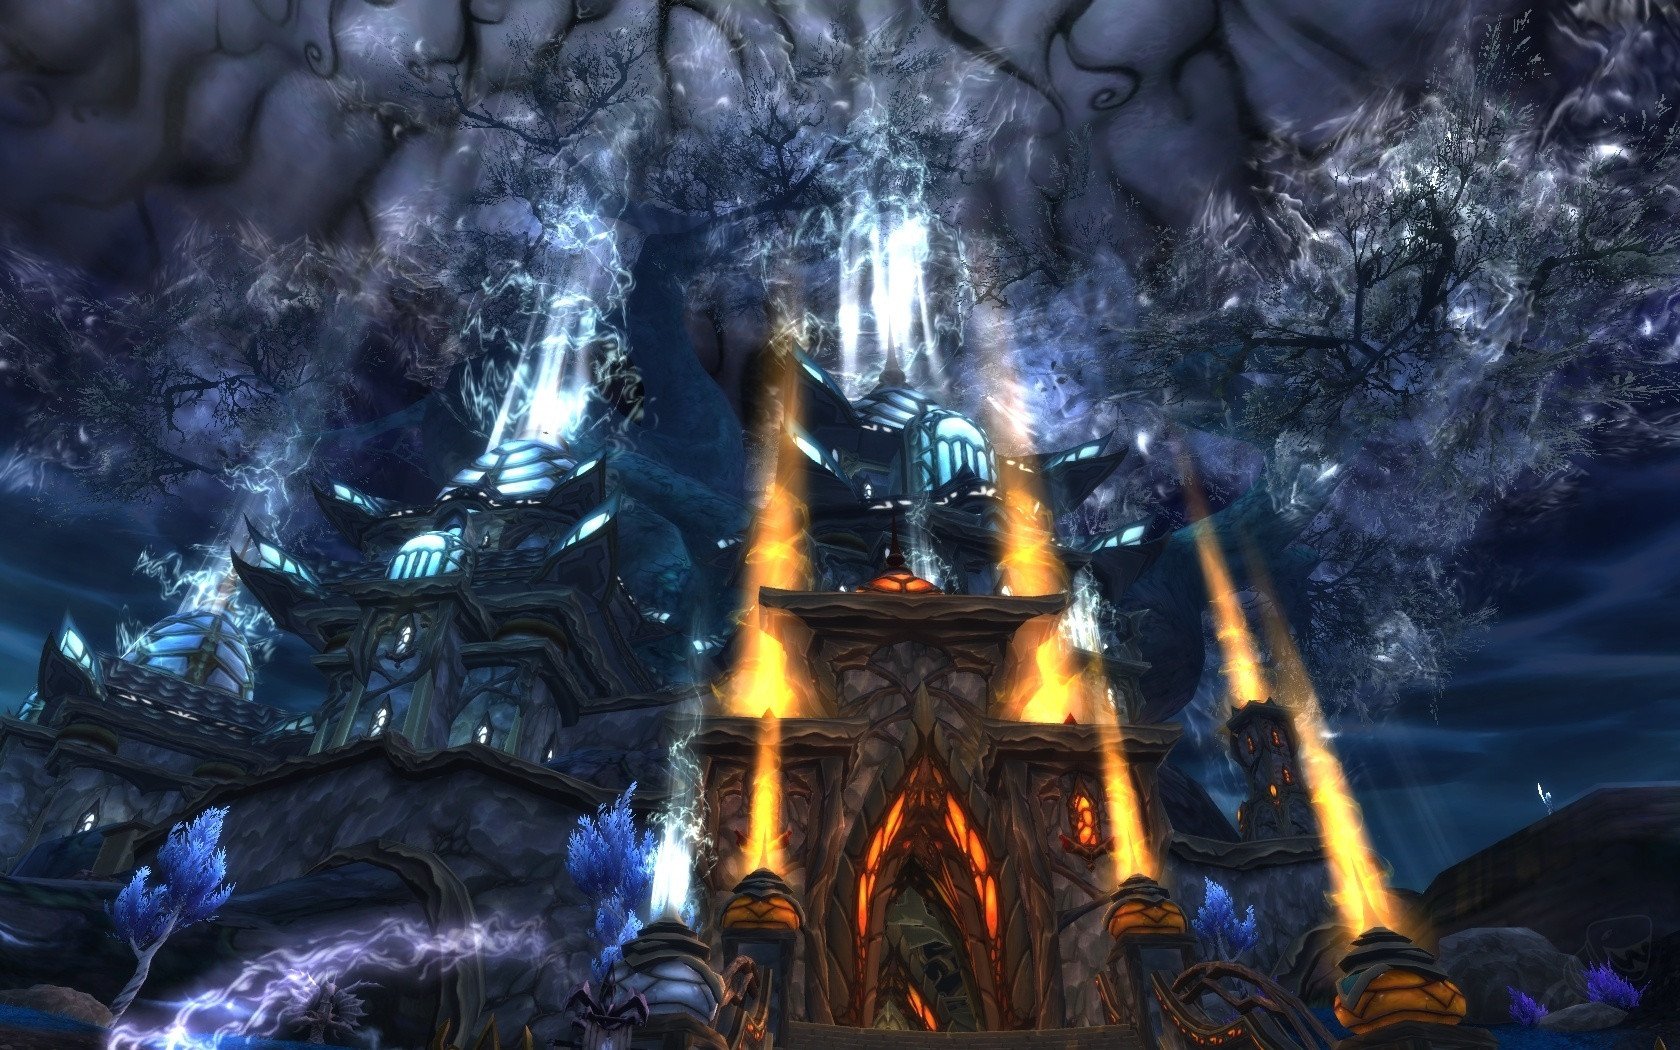
Heart of Fear used to be this pivotal raid in the conflict between the forces of Azeroth and the Mantid, a race of insect-like creatures who served and prayed to Old God Y'Shaarj.
As you explore Pandaria, you’d come across Mantid who are led by the Empress Shek’zeer. She is launching relentless Heart of Fear quest, assaulting the Pandaren and other inhabitants of the continent. It becomes clear that the Mantid are being corrupted by the Sha, manifestations of negative emotions, which are in turn influenced by the Old God's malevolent presence.
As you progress through the story of the expansion, you confront some of the Mantids in various zones. Several queslines will eventually lead you into the raid’s instance. There you will must fight Shek’zeer to put an end to her madness.
The original Heart of Fear release date was October 30, 2012, as part of patch 5.0.5. It included six boss encounters and was designed for groups of 10 or 25 players, depending on the difficulty. In the next section, we’ll tell you (or remind you) how to get to Heart of Fear and how to prepare for it.
Heart of Fear Location

As for the Heart of Fear location, to find the entrance, you must go to the Dread Wastes. Adventurers must navigate to the western side of the zone. The raid entrance is situated at coordinates 39.1, 35. Look for a large rotting tree structure in this area, as the entrance to the raid is built into the base of this tree.
Still not sure where is the Heart of Fear? Simply approach the rotting tree structure carefully, as it may be guarded by hostile creatures. Defeat any enemies in your path, then locate the entrance at the base of the tree. This entrance leads directly into the Heart of Fear raid instance.
Now that you know where is entrance Heart of Fear, head inside and embark on a perilous journey through the depths of the Dread Wastes, confronting the corrupted forces of the Mantid and ultimately facing off against Empress Shek'zeer and her minions. Prepare yourself for epic battles and treacherous challenges as you delve into the heart of the Dread Wastes and confront the darkness that lurks within the raid. If you’re still not sure about where to look for the entrance, check out the Heart of Fear location map that we attached above.
Heart of Fear Bosses
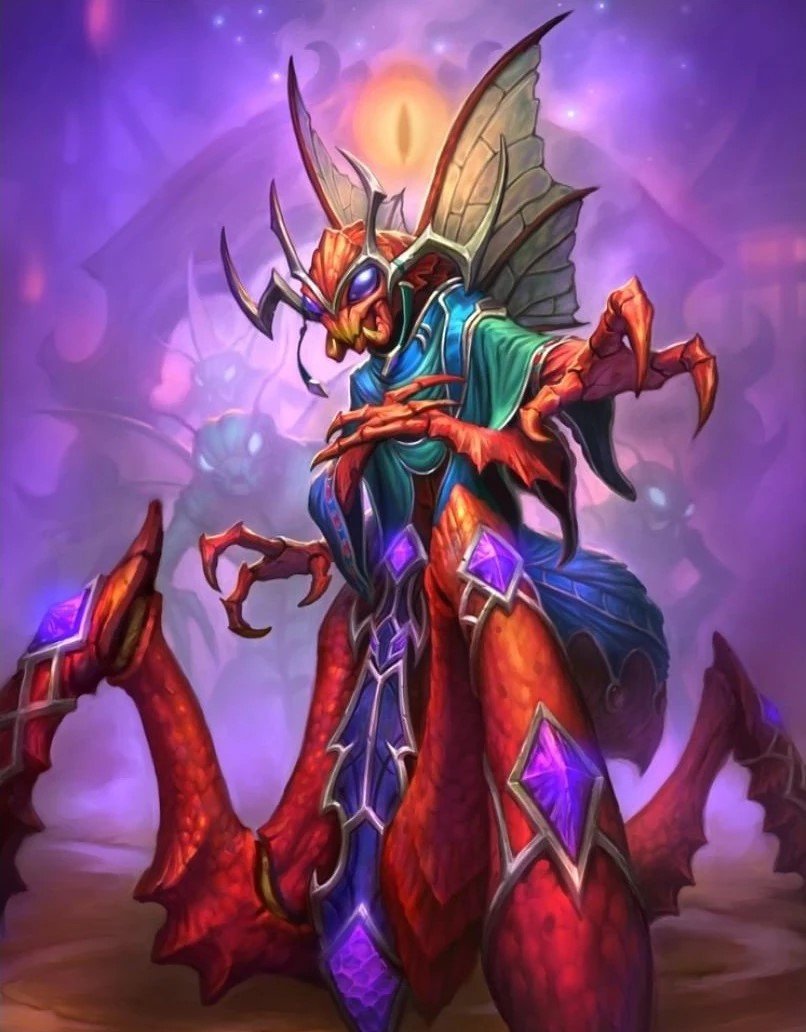
In case you’ve forgotten or never played it, throughout this raid, you’ll face 6 boss encounters. Just because there’ll be faster leveling process doesn’t mean that you shouldn’t take these encounters seriously. The boss mechanics in this raid are actually crazy and your raid party needs to be very careful or else the wipe will be imminent.
Anyway, let’s introduce the Heart of Fear bosses:
- Imperial Vizier Zor'lok
- Blade Lord Ta'yak
- Garalon
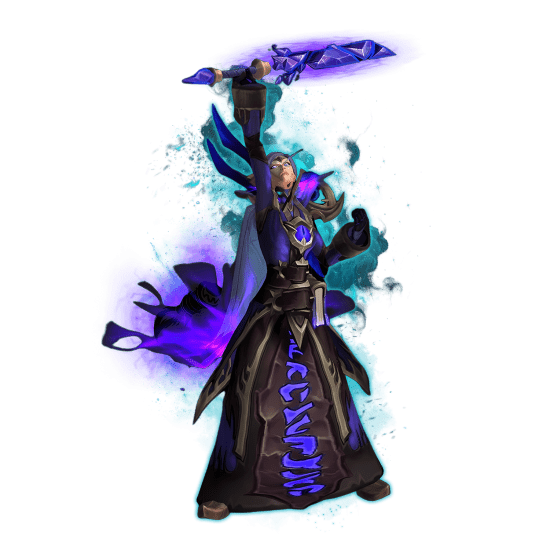
- Wind Lord Mel'jarak
- Amber-Shaper Un'sok
- Grand Empress Shek'zeer
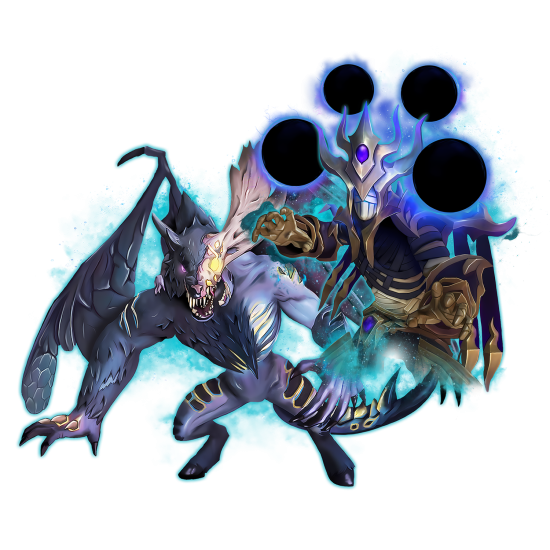
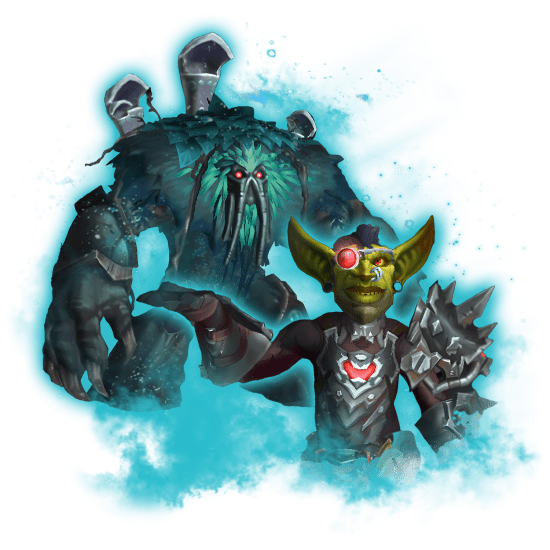
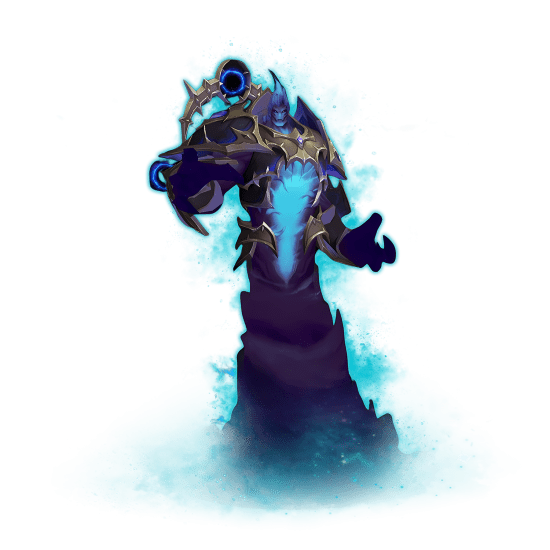
If these names don’t sound familiar, here’s a little teaser of what you can expect from them. One boss commands the mantid with powerful proclamations, while another is a patient and intelligent blade master. A colossal behemoth challenges adventurers and a wind lord leads the mantid's aerial forces with arrogance. A once-brilliant alchemist's mind has been corrupted by fear, and the grand empress of the mantid must be deposed before her corruption consumes Pandaria. BLOG20
Heart of Fear Loot Table
Now that we reminded ourselves who we’re fighting, it’s time to remember why. The Heart of Fear loot includes various pieces of transmog sets, all of which you can take with you into the next expansion. If you’re looking for specific set parts, then check out our neat table:
| Gear Slot | Item Name | Source |
| Weapon | Claws of Shek'zeer | Grand Empress Shek'zeer |
| Boots | Boots of the Blowing Wind | Blade Lord Ta'yak |
| Sandals of the Unbidden | Garalon | |
| Bracers | Attenuating Bracers | Imperial Vizier Zor'lok |
| Twisting Wind Bracers | Blade Lord Ta'yak | |
| Chest | Robes of Eighty Lights | Garalon |
| Gloves | Gloves of Grasping Claws | Imperial Vizier Zor'lok |
| Clutches of Dying Hope | Wind Lord Mel'jarak | |
| Helm | Xaril's Hood of Intoxicating Vapors | Garalon |
| Leggings | Leggings of Shadow Infestation | Amber-Shaper Un'sok |
| Cloak | Hisek's Chrysanthemum Cape | Imperial Vizier Zor'lok |
| Drape of Gathering Clouds | Blade Lord Ta'yak | |
| Legbreaker Greatcloak | Garalon | |
| Stormwake Mistcloak | Garalon | |
| Neck | Korven's Amber-Sealed Beetle | Wind Lord Mel'jarak |
| Pheromone-Coated Choker | Imperial Vizier Zor'lok | |
| Choker of the Unleashed Storm | Blade Lord Ta'yak | |
| Necklace of Congealed Weaknesses | Garalon | |
| Off-hand | Tornado-Summoning Censer | Blade Lord Ta'yak |
| One-handed Mace | Kri'tak, Imperial Scepter of the Swarm | Grand Empress Shek'zeer |
| Belt | Warbelt of Sealed Pods | Imperial Vizier Zor'lok |
| Boots | Impaling Treads | Wind Lord Mel'jarak |
| Chest | Chestplate of the Forbidden Tower | Imperial Vizier Zor'lok |
| Garalon's Graven Carapace | Garalon | |
| Gloves | Grasps of Panic | Garalon |
| Windblade Talons | Blade Lord Ta'yak | |
| Helm | Garalon's Hollow Skull | Garalon |
| Leggings | Articulated Legplates | Imperial Vizier Zor'lok |
| Shoulders | Pauldrons of the Broken Blade | Blade Lord Ta'yak |
| Shoulderpads of Misshapen Life | Amber-Shaper Un'sok | |
| Ring | Fragment of Fear Made Flesh | Imperial Vizier Zor'lok |
| Ring of the Bladed Tempest | Blade Lord Ta'yak | |
| Painful Thorned Ring | Wind Lord Mel'jarak | |
| Seal of the Profane | Amber-Shaper Un'sok | |
| Vizier's Ruby Signet | Imperial Vizier Zor'lok |
On top of that, each boss has a chance to drop two exclusive items - Sigil of Wisdom and Sigil of Power. Both of these are part of the quest called the Strength of One's Foes, which you might want to do during the Remix event. However, there was no specific Heart of Fear mount tied to the raid.
Heart of Fear Tier Sets List
The Tier 14 sets were being obtainable from raids, including Heart of Fear. In order to get the full set, you had to play and farm both Heart of Fear drops and Terrace of the Endless Spring. You’d find tokens that you would turn in for specific parts of those sets. Here’s what you could have gotten from Heart of Fear specifically:
| Slot | Token | Source |
| Chest | Chest of the Shadowy Conqueror | Grand Empress Shek'zeer, Heart of Fear |
| Chest of the Shadowy Protector | ||
| Chest of the Shadowy Vanquisher | ||
| Hands | Gauntlets of the Shadowy Conqueror | Wind Lord Mel'jarak, Heart of Fear |
| Gauntlets of the Shadowy Protector | ||
| Gauntlets of the Shadowy Vanquisher | ||
| Legs | Leggings of the Shadowy Conqueror | Amber-Shaper Un'sok, Heart of Fear |
| Leggings of the Shadowy Protector | ||
| Leggings of the Shadowy Vanquisher |
Obviously, these items from the Heart of Fear loot table are outdated, but you should still hunt them down to add to your transmog collection.
Heart of Fear tier set for your class might actually be relevant for the duration of the event, so definitely do not ignore it.
Heart of Fear Bosses Guide - Mists of Pandaria Remix
In this section of our guide, we will take a look at each boss encounter and describe the specific details of how you can defeat them. We’ll include stuff such as team compositions, tactics, boss abilities, etc. Keep in mind that the final details regarding the boss's health and damage values might be changed throughout the event. We’ll provide the original numbers first and then update them as they change.
Imperial Vizier Zor'lok
The first boss fight consists of two phases. The biggest challenge of this battle is your group’s ability to stay on their toes and regularly move around the arena. Let’s take a look at the boss’s health pool.
- 10-man raiding party boss HP - 174M (normal) / 218M (heroic)
- 25-man raiding party boss HP - 436M (normal) / 654M (heroic)
There’s going to be an enrage timer, which will be the same for all difficulties and party sizes. It’s 11 minutes. If you take longer than this, it will mean a team wipe, so don’t wait around.
Don’t go looking for the Heart of Fear solo guide. We suggest the following raid composition for this boss. Make sure to relay this to your raid leader:
- 10-man raiding party - 2 tanks, 2-3 healers, 5-6 DPS (classic roster)
- 25-man raiding party - 2 tanks, 5/6 healers, 17/18 DPS (for both difficulties)
Remember that this is a two-phase battle that will test your ability to move around the arena to avoid certain doom. In the first phase, you’ll be dodging dangerous clouds of poisonous gas. In the second phase, the boss pulls everyone closer to himself, so you must reset your positions soon after.
Imperial Vizier Zor'lok Abilities
| Ability Name | Description |
| Inhale | Zor'lok's self-buff ability. He casts Inhale between Exhale casts, stacking a damage increase buff on himself. Each stack boosts the damage of Exhale by 50%. Stacks are removed after Exhale is cast with three or more stacks. |
| Exhale | Zor'lok's damaging ability. It's a channeled spell targeting a random raid member, dealing damage and stunning them. If intercepted by another player, Exhale deals reduced damage to the intercepting player. |
| Song of the Empress | Zor'lok's ability to damage the raid if no melee attacks are performed against him. Forces engagement on his platform. |
| Force and Verve | Zor'lok channels Force and Verve every 45 seconds, dealing significant raid-wide Physical damage for 10 seconds. Prior to casting, Zor'lok creates 3 shields nearby that reduce damage taken by 40%. The shields are placed in specific locations: one next to Zor'lok, another further away, and the third approximately 20 yards from him. Each shield can protect a limited number of players. Failure to seek shelter under the shields results in high damage. |
| Attenuation | Zor'lok channels Attenuation approximately every 45 seconds, releasing disks that move across the floor, dealing substantial Physical damage upon contact. The disks bounce off room edges and sometimes split into two, complicating avoidance. Players must move to evade the disks. Running in a circular pattern around Zor'lok can aid in avoiding them due to their spawning pattern. |
| Convert | Zor'lok mind controls a random number of raid members approximately every 60 seconds. To break free, mind-controlled players must be damaged to 50% of their maximum health, with attacks having a chance to instantly break the control. Healers should dispel any debuffs applied by mind-controlled players. |
Imperial Vizier Zor'lok - Tactics & Strategy
For the Heart of Fear tactics for Zor'lok, let’s first analyze both phases:
- The boss will be jumping between 3 platforms and use a special ability tied to the platform. The ground level will be filled with gas, which you need to avoid.
- At 40% of health, the boss will come down in the center of the room and pull your team to his location. He’ll keep using all of the abilities from all three platforms.
During Phase One of the Zor'lok boss fight, which lasts until he reaches 40% health, Zor'lok rotates between three platforms in the room, each presenting different challenges. On the Force and Verve platform, he channels a damaging ability called Force and Verve, which can be mitigated by standing under protective shields. The Attenuation platform sees Zor'lok unleash disks that bounce around the room, dealing significant damage upon contact. Players must dodge these disks to survive. On the Convert platform, Zor'lok mind controls random raid members, requiring the raid to quickly break them out. In Heroic mode, additional complexities arise, such as fewer players being able to benefit from protective shields and the introduction of Echoes that mimic Zor'lok's abilities. BLOG20
Phase Two begins when Zor'lok reaches 40% health, and he flies above the center of the room, pulling the raid to his location. In this phase, Zor'lok utilizes all abilities from Phase One. However, the raid doesn't face Attenuation and Force and Verve simultaneously, making it more manageable. The raid must spread out to avoid the disks from Attenuation, ensuring they can reach protective shields in time. Heroism/Bloodlust/Time Warp is recommended for Phase Two due to its intensity.
Learning the fight involves practicing each platform separately to understand and mitigate its unique challenges. In Heroic mode, Zor'lok gains additional health and damage, while new mechanics like Echoes are introduced. These copies mirror Zor'lok's abilities, presenting new threats and requiring precise coordination to overcome them.
Browse our hottest WoW Boosting services
Blade Lord Ta'yak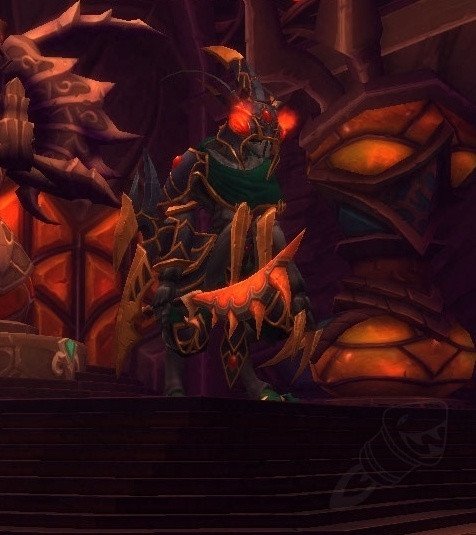
This boss fight will check your group coordination further, as there will be moments when all players need to group up tightly in one spot and then quickly spread out. Plus, it has a total of two soft-enrage timers, which means that if you don’t deal enough damage on time, the boss will get much more powerful.
- 10-man raiding party boss HP - 130M (normal) / 196M (heroic)
- 25-man raiding party boss HP - 451M (normal) / 586M (heroic)
The two soft-enrage timers are 8 minutes and 15 seconds each. If you don’t deal enough damage by the time this timer runs out, you’ll significantly reduce your chances of winning
We suggest the following raid composition for this boss. Make sure to relay this to your raid leader:
- 10-man raiding party - 2 tanks, 2-3 healers, 5-6 DPS (classic roster)
- 25-man raiding party - 2 tanks, 5/6 healers, 17/18 DPS (for both difficulties)
There are also only two phases to this fight and no adds (additional trash mobs). Your only target throughout the fight will be Ta’yak. But that doesn’t mean he’ll be easy to defeat.
Blade Lord Ta'yak Abilities
| Ability | Description |
| Tempest Slash | Every 20-30 seconds, Ta'yak creates tornadoes at the location of random ranged raid members. These tornadoes move slowly, damaging and knocking back players they touch. They persist throughout the phase, continually increasing in number. |
| Unseen Strike | Every 60 seconds, Ta'yak targets a raid member with Unseen Strike. He disappears and reappears at the player's location, dealing massive Physical damage in a cone in front of him. The damage is split among all targets hit. This attack is unavoidable and can be fatal if not divided among enough players. |
| Wind Step | Every 30 seconds, Ta'yak blinks to a random raid member's location, applying a 30-second bleed to them and nearby allies. The bleed inflicts significant Physical damage. |
| Overwhelming Assault | Ta'yak regularly targets his main aggro target with Overwhelming Assault, dealing high damage and applying a debuff, causing the target to take 100% more damage from Overwhelming Strike for 45 seconds. Requires two tanks to manage. |
| Intensify | Every 60 seconds, Ta'yak gains a stack of Intensify, increasing his damage and haste by 5% per stack. |
At the start of phase 2, Ta'yak teleports everyone to a long corridor and envelops each raid member in a tornado, transporting them to one end while he moves to the other. He summons tornadoes at his end, which slowly move toward the raid. The raid must traverse the corridor, avoiding tornadoes that push them back. Ta'yak shifts to the opposite end at 10% health, continuing the tornado onslaught. The boss deals moderate Nature damage throughout the phase, with damage increasing based on his Intensify stacks. Intensify stacks increase every 10 seconds in this phase.
Blade Lord Ta'yak - Tactics & Strategy
Let’s review the Ta’yak Heart of Fear strategy first by looking at each phase and then proceed to actual tactics.
- This phase lasts until you deplete 80% of the boss's health. He’ll throw various abilities at your party, most of which will make your team group up or spread out in an orderly fashion.
- During this phase, which starts at 20% of health, you will have to keep doing multiple tornados and deal damage only when it is safe to do so.
Phase One strategy revolves around effective positioning and coordination. To mitigate damage from Wind Step, the raid should spread out, ensuring only one player is hit by the ability. However, when Unseen Strike occurs, the raid must swiftly stack together to share the damage, which is crucial for survival.
Designating a consistent stacking point and promptly reacting to Unseen Strike's targeted player is key. Tanks must maintain a taunt rotation to manage the debuff from Overwhelming Assault, while the entire raid must actively avoid tornadoes spawned by Tempest Slash. Strategic positioning of ranged DPS and healers can influence tornado spawning locations, optimizing movement and minimizing interference with the encounter's tempo. Additionally, managing Ta'yak's Intensify stacks is imperative as the damage output escalates over time.
Phase Two introduces a unique corridor navigation mechanic amidst Ta'yak's relentless assault. As the raid progresses towards Ta'yak, they must deftly maneuver through the corridor, dodging incoming tornadoes. Healing becomes exceptionally challenging during this phase due to the continuous damage and movement constraints. Everyone must contribute to healing, utilizing personal defensive cooldowns and health-restorative abilities.
Upon reaching Ta'yak's platform, players can focus on DPS or healing until he transitions. Timing the transition efficiently, possibly before Ta'yak reaches 10% health, can optimize the encounter progression and mitigate unnecessary risks. Players caught by tornadoes are forcibly returned to the corridor's entrance, facing continued damage and potential isolation from healers, emphasizing the importance of avoiding tornadoes.
Optimizing raid-wide cooldown usage, such as Heroism/Bloodlust/Time Warp, during Phase One immediately after Unseen Strike can expedite the phase progression while minimizing Intensify stacks. This strategic use maximizes efficiency and aids in overcoming Phase One's complexities, setting the stage for a smoother transition into Phase Two.
Garalon
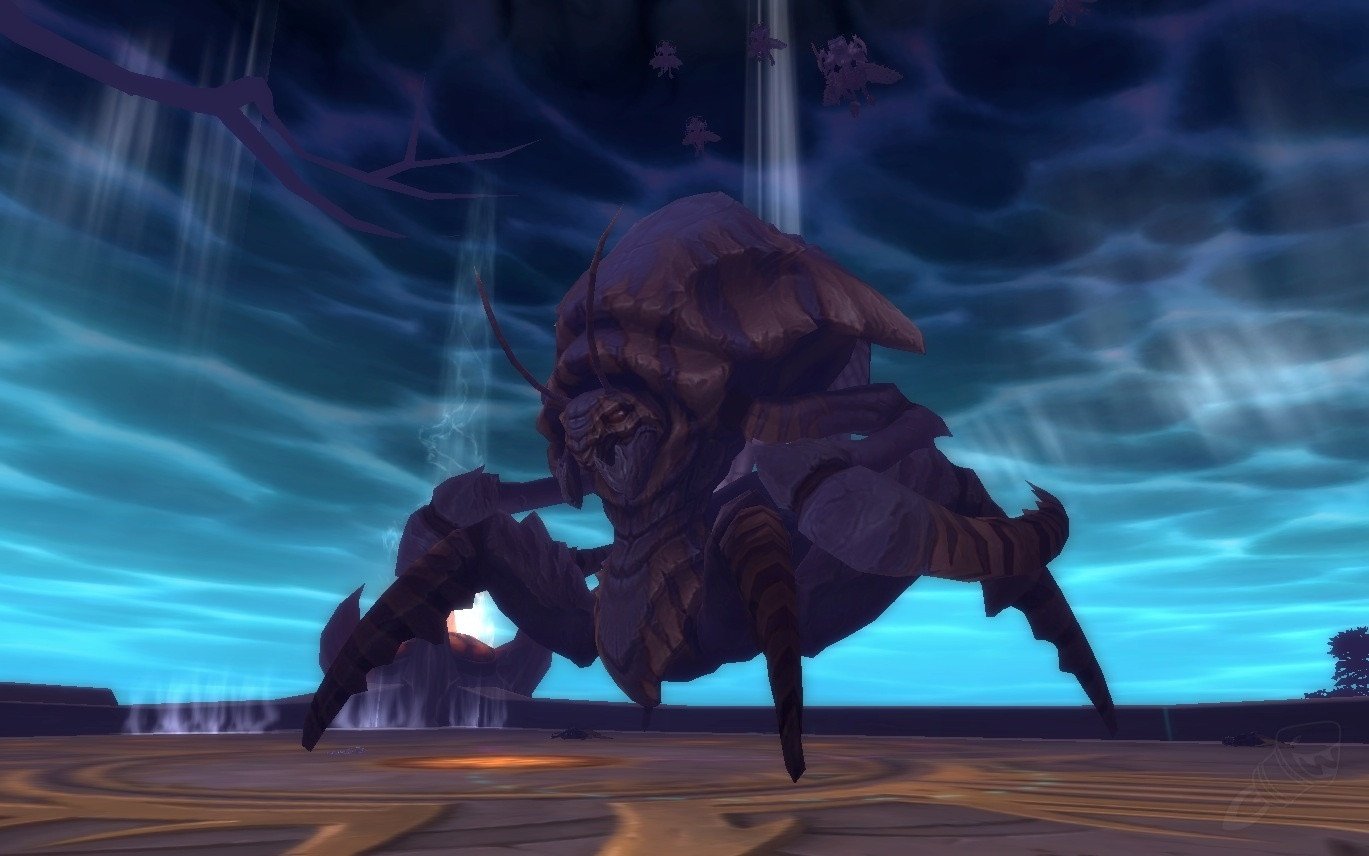
This is a unique fight because you will be dealing damage to the boss himself and his limbs separately. Your DPS and healers must stay focused at all times so as not to miss the window of opportunity to deal damage or heal the party.
- 10-man raiding party boss HP - 218M (normal) / 96.9M (heroic)
- 25-man raiding party boss HP - 69.4M (normal) / 96.9M (heroic)
There’s an enrage timer that you need to be mindful of. It’s 12 minutes on normal difficulty and 7 minutes on Heroic.
We suggest the following raid composition for this boss. Make sure to relay this to your raid leader:
- 10-man raiding party - 2 tanks, 2-3 healers, 5-6 DPS (classic roster)
- 25-man raiding party - 2 tanks, 5/6 healers, 17/18 DPS (for both difficulties)
The boss does not deal melee damage; instead, it chooses a random target that he chases down, which must be used to kite him in various directions. Each of the 4 of his legs can be destroyed, which will slow down the boss, making it much easier to kite him. He has the ability to revive his legs, which means that you’ll be doing this throughout the whole fight.
Garalon Abilities
| Ability | Description |
| Pheromones Debuff | Garalon applies Pheromones on the player who initiates the encounter, persisting throughout the fight. It deals increasing Nature damage to the raid every 2 seconds. Garalon fixates on the Pheromones carrier, moving towards them. |
| Crush | Garalon's raid-wide damaging attack deals high damage to all raid members and significantly more to those under Garalon or when Pheromones passes to a new target. |
| Furious Swipe | This frontal cone attack inflicts high Physical damage. If it misses at least two players, Garalon gains a stack of Fury, boosting damage and movement speed by 10% per stack. |
| Pungency | The Pheromones carrier suffers from this stacking debuff, increasing Pheromones damage to the raid by 10% of its base damage per stack. Lasts for 2 minutes in 10-man, 4 minutes in 25-man, and 20 seconds in LFR. |
| Pheromone Trail | The Pheromones carrier leaves damaging void zones behind, known as Pheromone Trail. |
| Fury | Garalon gains a stack of Fury when Furious Swipe misses at least two players, boosting damage and movement speed by 10% per stack. |
The "under Garalon" condition applies within a 12-yard radius of his hitbox, visually marked by a circle.
Garalon - Tactics & Strategy
You can break down the whole fight into several stages that share the same principles:
- Pass the debuff between the players, making sure that no one is the target for too long. But don’t pass it too often to avoid as many casts of Crush as possible.
- The person who is targeted by the boss must kite him efficiently.
- Only the tanks must absorb Furious Swipe
- No one must stand directly under the boss, which causes him to cast Crush
- Try to break all of his legs and keep him slowed at all times.
In the encounter with Garalon, the fight revolves around understanding the mechanics of his legs and managing the Pheromones debuff effectively.
Garalon has separate legs that can be targeted and attacked, located on the outer edges of his massive model. Killing these legs not only deals damage to Garalon but also slows him down due to a stacking debuff.
Each leg killed deals 3% damage to Garalon and applies a 15% slow debuff, stacking up to 4 times.
To facilitate killing the legs, players receive the Weak Points buff when within 12 yards of a leg, doubling the damage they deal to it. However, players within this range must be cautious not to move under Garalon, as this triggers his powerful Crush ability.
Additionally, Garalon periodically revives his legs using Mend Leg, requiring consistent attention to leg management throughout the fight.
Tank duties primarily involve maintaining positioning in front of Garalon to absorb Furious Swipe damage. Rogues can alternatively tank Garalon by utilizing Feint and other abilities to mitigate damage, increasing raid DPS.
Managing the Pheromones debuff is crucial, with the carrier needing to pass it on strategically to minimize raid damage. Passing it around 20 stacks is advisable, with specific players assigned to handle the debuff. Passing the debuff triggers Garalon's Crush ability, dealing raid-wide damage and stunning players. BLOG20
The carrier of Pheromones must kite Garalon, staying outside the range of his frontal cone attack and minimizing the void zones left behind to preserve raid mobility.
Healing concerns arise from tank damage, constant Nature damage from Pheromones, raid-wide damage from Crush, and damage from standing in void zones.
Throughout the fight, DPS must focus on killing Garalon's legs, maximizing damage using the Weak Points buff while avoiding triggering Crush.
Using Heroism/Bloodlust/Time Warp at the start of the fight is recommended to capitalize on cooldown availability and ensure the raid's survival.
Wind Lord Mel'jarak
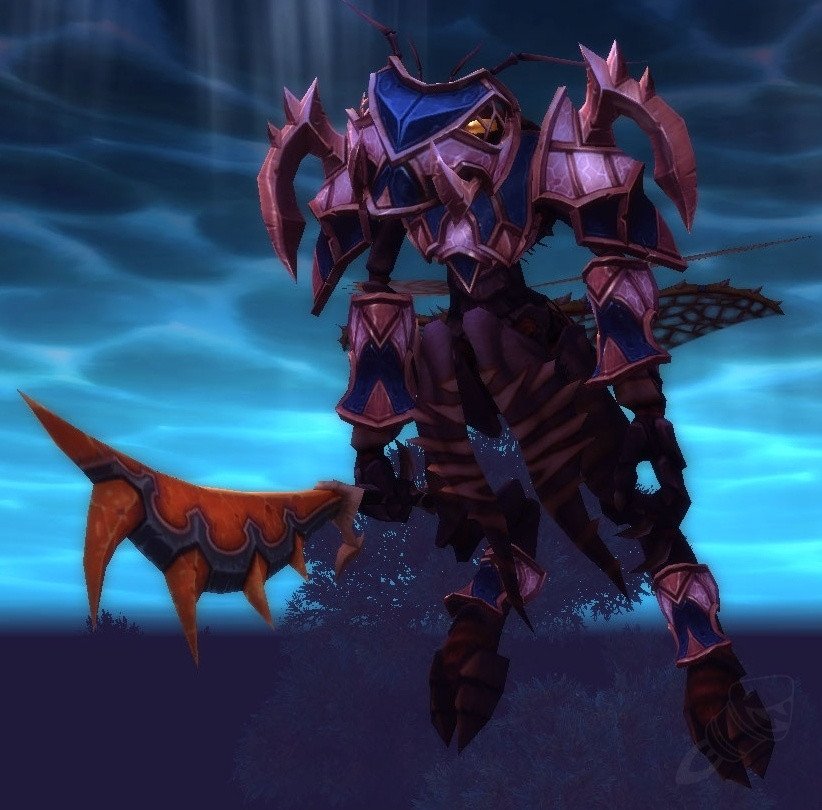
The fourth raid boss will throw powerful adds at you that you must deal with while fighting the boss himself. Everyone in your group must be at the top of their game to succeed in this encounter.
- 10-man raiding party boss HP - 281M (normal) / 588M (heroic)
- 25-man raiding party boss HP - 854M (normal) / 1.76B (heroic)
There’s an enrage timer set to 8 minutes, after which the boss will increase his damage to the point at which he’ll wipe your entire group in a matter of seconds.
We suggest the following raid composition for this boss. Make sure to relay this to your raid leader:
- 10-man raiding party - 2 tanks, 2-3 healers, 5-6 DPS (classic roster)
- 25-man raiding party - 2 tanks, 5/6 healers, 17/18 DPS (for both difficulties)
There’s only one phase to this fight, but at the center of it lies the importance of dealing with 9 adds. Each of the 3 types of adds share the health pool and abilities. Killing 3 adds at the same time will give the boss a buff. More importantly, the fight can be won in a number of ways, which we will explain down below in the tactics section.
Wind Lord Mel'jarak Abilities
| Ability | Description |
| Mel'jarak | |
| Whirling Blade | Mel'jarak throws his weapon at a random raid member's location, dealing damage to all players in its path on the way to the target and back. Casts every 60 seconds. |
| Rain of Blades | A raid-wide damaging ability that deals Physical damage to all raid members every 0.50 seconds for 6 seconds. Casts every 60 seconds. |
| Wind Bomb | Mel'jarak throws a bomb at a raid member's location, dealing high Nature damage to nearby players upon landing. After 3 seconds, it arms itself and explodes, dealing very high raid-wide Nature damage if players are within 6 yards. Bombs persist throughout the fight. |
| Sra-thik Amber-Trappers | |
| Amber Prison | Amber-Trappers trap targeted players and nearby allies in amber, stunning them. Players can be freed by interacting with the amber. Casts roughly every 35 seconds. |
| Corrosive Resin | Amber-Trappers apply a debuff to a random raid member, dealing moderate Nature damage per second per stack. Moving consumes stacks and leaves behind void zones. Casts every 35 seconds. |
| Zar'thik Battle-Menders | |
| Mending | Zar'thik Battle-Menders cast an interruptible heal on adds, restoring 25% of their maximum health. |
| Quickening | Battle-Menders place a dispellable buff on adds, increasing their damage and melee attack speed by 25% for 15 seconds. Buff stacks. |
| Kor'thik Elite Blademasters | |
| Kor'thik Strike | Elite Blademasters deal high Physical damage to a random raid member simultaneously. Casts every 40 seconds. |
One more thing - Mel'jarak gains a stack upon each same-kind add's death, increasing his damage by 50% and his damage taken by 33%.
Wind Lord Mel'jarak - Tactics & Strategy
Let’s look at the summary of the fight:
- Assign one tank to the boss, and a few adds, with the others focusing on the remaining adds.
- Form a circular spread around the boss to mitigate Whirling Blade damage and avoid multiple players getting caught in Amber Prison.
- Stay alert to Wind Bomb landing zones and avoid triggering them once armed.
- Utilize crowd-control abilities on adds as much as possible, depending on your raid's strategy.
- Handle adds' abilities: interrupt Mending, dispel Quickening, and coordinate movement for Corrosive Resin affected players.
- Quickly free any players trapped in Amber Prison to maintain raid efficiency.
In this encounter, deciding which adds to crowd control is crucial. While any combination can work, your choice should suit your raid's strengths. Let's look at each add type:
- Amber-Trappers: These add inconvenience with Amber Prison, cast every 35 seconds. Leaving them unchecked fills the room with Residue, limiting movement.
- Battle-Menders: They heal other adds and buff their damage. While heals can be interrupted and buffs dispelled, it requires constant raid focus.
- Elite Blademasters: Left free, they deal extreme damage, potentially one-shotting players. Managing their strikes is vital to survival.
It's essential to utilize raid strengths. If you have reliable interrupters, consider not controlling all Battle-Menders. Here's a viable 10-man strategy:
- Crowd-control 1 Amber-Trapper, 2 Battle-Menders, and 1 Blademaster.
- Focus on Battle-Menders first for easier raid management.
- Once Battle-Menders are down, control 1 Amber-Trapper and 1 Blademaster.
- Take out Blademasters first, then Amber-Trappers.
Remember, DPSing Mel'jarak isn't a priority until adds are dealt with. Spread out in a wide circle to minimize damage, stack cautiously during Rain of Blades, and be vigilant for Wind Bombs. Tank all adds together for cleave damage. With smart positioning and add-control, victory is within reach.
Amber-Shaper Un'sok

The fifth boss encounter is by far the most difficult one in terms of how many things you’ll have to deal with. There are adds to kill, mechanics to handle, and much more. Brace yourselves!
- 10-man raiding party boss HP - 218M (normal) / 340M (heroic)
- 25-man raiding party boss HP - 654M (normal) / 1B (heroic)
There’s no enrage timer for this boss, but one is not needed anyway. This fight is going to be difficult enough without it.
We suggest the following raid composition for this boss. Make sure to relay this to your raid leader:
- 10-man raiding party - 2 tanks, 2-3 healers, 5-6 DPS (classic roster)
- 25-man raiding party - 2 tanks, 5/6 healers, 17/18 DPS (for both difficulties)
The battle with Amber-Shaper Un'sok unfolds in three distinct phases. Throughout the encounter, Un'sok sporadically transforms raid members into Mutated Constructs, imbuing them with unique abilities and pivotal roles. Understanding the mechanics of the Mutated Construct role is paramount, as these players play a pivotal role in the encounter's success.
Due to the tank's frequent transformation into a Mutated Construct and Un'sok's incapacitating ability in Phase Two, employing two tanks is essential for raid stability.
Amber-Shaper Un'sok Abilities
| Mutated Construct | |
| Ability | Description |
| Consume Amber | The Mutated Construct absorbs a pool of Burning Amber, generating 20 Willpower. However, this also increases the Construct's maximum health by around 5% and heals it for the same amount. While detrimental to the raid due to the increased damage required to free the player, it may be necessary if the Construct's health is not low enough for the player to leave before Willpower runs out. |
| Struggle for Control | Costs 8 Willpower and is a self-interrupt. This ability interrupts the Construct's Amber Explosion ability, dealing high raid-wide damage, and increases the Construct's damage taken by 100% for 5 seconds. Essential for mitigating the harmful effects of Amber Explosion during Phase Two. |
| Amber Strike | A single-target attack on a 6-second cooldown, dealing substantial damage and applying the Destabilize debuff, increasing the target's damage taken by 10% per stack for 12 seconds, interrupts spellcasting and is crucial for disrupting the dangerous raid-wide spell cast by the add in Phase Two, similar to the Construct's Amber Explosion. |
| Break Free | Allows the transformed raid member to break free of the Mutated Construct, provided the Construct's health is below 20% of its maximum. Essential for freeing the player from the Construct's control, enabling them to resume their original role in the encounter. |
Be mindful that 2 of these abilities use a resource called WIllpower. One of them accumulates it, while the other spends it. The boss, naturally, has a different set of abilities:
| Phase | Ability | Description |
| Phase One | Amber Scalpel | Targets a random raid member with a beam of amber, dealing large damage over time at the point of contact and leaving damaging void zones behind. Some of these void zones transform into Living Amber adds, fixating on random players and dealing melee damage. When killed, Living Amber explodes, damaging nearby players and healing other Living Ambers. Leaves behind Burning Amber void zones. |
| Parasitic Growth | Debuff placed on a random raid member, dealing moderate Nature damage every 2 seconds for 30 seconds. Healing received increases the damage from Parasitic Growth. | |
| Reshape Life | Transforms a random raid member (typically a tank) into a Mutated Construct. | |
| Phase Two | Amber Explosion | Cast by the Amber Monstrosity, dealing high raid damage. Interruptible by Amber Strike. |
| Massive Stomp | Cast by the Amber Monstrosity, dealing large Physical damage to enemies within 15 yards and knocking them back. | |
| Fling | Cast by the Amber Monstrosity, throwing its target (usually the tank) to a random location, dealing large Physical damage upon landing and stunning nearby players. | |
| Phase Three | Concentrated Mutation | Buffs Un'sok's damage done and attack speed by 50%. |
| Volatile Amber | Causes an amber pool around the room's edges to explode, firing amber shards at the raid. Shards deal moderate Nature damage upon contact with players. |
You will adapt your tactic to the abilities in each phase accordingly.
Amber-Shaper Un'sok - Tactics & Strategy
Prepare for the hardest 3 phases of boss battling you’ve had in a long time:
- Phase One: Initiated upon engagement until Un'sok reaches 70% health. During this phase, the focus lies on eliminating small adds while evading hazardous ground effects.
- Phase Two: Triggered at 70% health when Un'sok summons an add, persisting until the add's demise. Un'sok is highly resistant to damage during this phase, rendering him virtually impervious.
- Phase Three: Commences upon the add's defeat in Phase Two and endures until Un'sok's demise. This phase intensifies the battle, amplifying both damage dealt by Un'sok and the demand on healers and DPS players.
Throughout the fight, one of the players will be turned into a Construct by the boss. The player will retain full control over their changed character who will have gained new abilities and a resource called Willpower. This resource is crucial to the Construct's survival and is used to defeat the boss. One of the abilities allows the player to return to the normal form by spending Willpower, which diminishes every second. This can only be done when the Construct has less than 20% health. This can be achieved by other players attacking the construct.
If the conditions are met, the player can turn back and stop being the construct. However, if there’s not enough Willpower or the Construct health reaches 0, the player dies. Besides that, the Construct has other abilities that they must use to deal damage to the boss. This is what makes the fight so difficult.
To defeat the boss in this encounter, your raid needs to understand and execute the mechanics of each phase effectively.
Phase One:
- Focus on DPSing Mutated Constructs as soon as they appear, bringing them below 20% health but not killing them.
- Avoid getting hit by the Amber Scalpel beam and kite it away from the raid.
- Kill Living Amber adds while managing the void zones they leave behind.
- Keep players affected by Parasitic Growth healed without overhealing to avoid increasing damage.
- Interrupt Mutated Constructs when they cast Amber Explosion.
- Tanks turned into Mutated Constructs should maintain the damage-increasing debuff on the boss and interrupt Amber Explosion.
Phase Two:
- DPS the Amber Monstrosity while dealing with Un'sok's abilities from Phase One.
- Ranged players and healers should stay at least 15 yards away from the Amber Monstrosity to avoid Massive Stomp.
- Tanks should be prepared to be thrown by the Amber Monstrosity and stunned upon landing.
- Mutated Constructs should interrupt Amber Explosion and stack the damage debuff on the Amber Monstrosity.
- Healing concerns include increased tank damage and damage from Massive Stomp.
Phase Three:
- Focus on burning down Un'sok while ignoring damage on Mutated Constructs.
- Mutated Constructs should stack Amber Strike on Un'sok and consume Burning Amber void zones as needed to replenish Willpower.
- Interrupt Amber Explosion casts from Mutated Constructs.
- Un'sok's Concentrated Mutation increases damage and attack speed, so be prepared for increased damage output.
- Avoid getting hit by Volatile Amber explosions.
Alternative strategies involve manipulating debuffs and phases to shorten the encounter, but the primary focus remains on executing mechanics effectively and managing resources. Learning the fight requires understanding the role of the Mutated Construct and practicing mechanics such as kiting Amber Scalpel and healing Parasitic Growth properly.
Grand Empress Shek'zeer
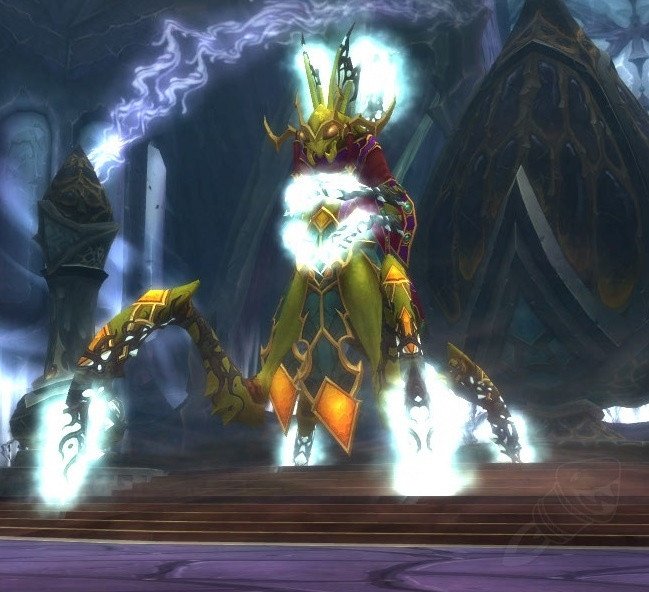
The last and final boss fight is going to be even harder than the last one. Get ready for the final showdown!
- 10-man raiding party boss HP - 196M (normal) / 307M (heroic)
- 25-man raiding party boss HP - 620M (normal) / 940M (heroic)
Make sure that your healers know their jobs. There’ll be several intense situations for your healers to deal with.
We suggest the following raid composition for this boss. Make sure to relay this to your raid leader:
- 10-man raiding party - 2 tanks, 2-4 healers, 4-6 DPS
- 25-man raiding party - 2 tanks, 5/6 healers, 17/18 DPS (for both difficulties)
Once again, this is going to be a 3-part battle. The unique feature of this fight is that the first two phases actually rotate until the start of phase 3, which starts when the boss has 30% health left.
Grand Empress Shek'zeer Abilities
Phase One Abilities
There are several boss abilities in this phase.
| Ability | Enemy | Description |
| Dissonance Fields | Boss | Shek'zeer places two Dissonance Fields on the ground, which are yellowish swirly zones. These fields have health pools and are damaged each time a raid member casts a spell. When a field dies, it deals a large amount of raid-wide Physical damage through Sonic Discharge. The goal is to avoid having both fields die simultaneously. Players standing inside a field affected by Cry of Terror take increased damage, cannot be healed, and continue to suffer damage from Cry of Terror and the field itself. |
| Cry of Terror | Shek'zeer debuffs a random caster or healer with Cry of Terror, causing moderate Shadow damage every 2 seconds to all raid members. When the debuffed player enters a Dissonance Field, the field takes increased damage, but the player cannot be healed while inside and continues to take damage from Cry of Terror and the field itself. | |
| Eyes of the Empress | Shek'zeer stacks Eyes of the Empress on her target, turning them into a powerful hostile mob if the debuff reaches 5 stacks. | |
| Dread Screech | Shek'zeer targets random raid members (excluding tanks and melee DPS) with Dread Screech, dealing high Physical damage to them and allies within 5 yards. | |
| Kor'thik Reavers | Adds | Large adds that cast Poison Bomb, applying a debuff that deals Nature damage over time, and use Toxic Slime, a frontal cone attack dealing high Nature damage. They also apply Poison-Drenched Armor, which damages the affected player but enhances the damage of nearby raid members. |
| Set'thik Windblades | Small adds that fixate on random targets, cast Dispatch for high Physical damage, use Sonic Blade for high single-target damage and interrupting spell casting, and place Sticky Resin void zones that slow and damage players. Void zones merge when stepped on, eventually forming Amber Traps that stun and damage trapped targets. |
Phase Two Abilities
Adds will start helping the boss.
| Ability | Description |
| Eyes of the Empress | Shek'zeer retains her Eyes of the Empress ability from Phase One. |
| Sha Energy | Shek'zeer deals moderate Shadow damage to random raid members. |
| Consuming Terror | A frontal cone attack dealing high Shadow damage and fearing affected players. |
| Visions of Demise | Shek'zeer applies a two-part debuff to random raid members, initially causing no harm but triggering fear and moderate Shadow damage after 4 seconds. The second debuff can be dispelled. |
| Calamity | Shek'zeer deals Shadow damage to all raid members equal to 50% of their current health. |
| Amassing Darkness | Deals increasing Shadow damage to random targets, eventually causing large raid-wide damage. |
Phase Three Abilities
At this stage, the boss gains a few new abilities.
| Ability | Description |
| Eyes of the Empress | Shek'zeer retains her Eyes of the Empress ability from Phase One. |
| Sha Energy | Shek'zeer deals moderate Shadow damage to random raid members. |
| Consuming Terror | A frontal cone attack dealing high Shadow damage and fearing affected players. |
| Visions of Demise | Shek'zeer applies a two-part debuff to random raid members, initially causing no harm but triggering fear and moderate Shadow damage after 4 seconds. The second debuff can be dispelled. |
| Calamity | Shek'zeer deals Shadow damage to all raid members equal to 50% of their current health. |
| Amassing Darkness | Deals increasing Shadow damage to random targets, eventually causing large raid-wide damage. |
Grand Empress Shek'zeer - Tactics & Strategy
Let’s start with a summary:
Phase One
- Maintain a 5-yard spread between players and execute precise tank switches.
- Manage Dissonance Fields to prevent simultaneous destruction.
- Designate one field for priority destruction and have the player afflicted by Cry of Terror relocate inside it.
- Caution: Healing within the field is absorbed.
Phase Two
- Swiftly eliminate all adds, prioritizing Windblades then Reavers.
- Trap Reavers in Amber Traps while allowing Windblades to cast Sticky Resin for successful trapping.
Phase Three
- Transition to a burn phase when Shek'zeer reaches 30% health.
- Mitigate Visions of Demise effects by minimizing player impact.
- Maintain tank rotation, positioning Shek'zeer away from the raid to minimize frontal cone attacks.
- Promptly dispel fears and prepare to heal through significant raid-wide damage inflicted by Sha Energy and Amassing Darkness.
- Consider stacking in 10-man formations to streamline healing, but be mindful of Visions of Demise mechanics.
- Strategically employ raid-wide cooldowns to bolster survivability and maximize DPS output on the boss.
Phase One demands your raid to adhere to two fundamental strategies: maintaining a minimum spread of 5 yards between players and executing precise tank switches. These tactics provide the groundwork for success.
Managing the Dissonance Fields emerges as the primary challenge. The objective is to prevent the simultaneous destruction of these fields. To achieve this, designate one field for priority destruction and have the player afflicted by Cry of Terror relocate inside it. However, healers must exercise caution as healing within the field is absorbed.
In Phase Two, the primary goal is to swiftly eliminate all adds. Start by targeting the Windblades before turning your attention to the Reavers. The key is to trap the Reavers in Amber Traps while allowing the Windblades to cast Sticky Resin enough times for successful trapping.
Phase Three initiates when Grand Empress Shek'zeer reaches 30% health, signaling a transition to a burn phase. Maintain spatial awareness to mitigate the effects of Visions of Demise, ensuring it impacts as few players as possible. Tanks must adhere to a strict rotation, positioning Shek'zeer away from the raid to minimize frontal cone attacks. Promptly dispel fears and prepare to heal through significant raid-wide damage inflicted by Sha Energy and Amassing Darkness.
Consider stacking in 10-man formations to streamline healing processes, but be mindful of Visions of Demise mechanics. Employ raid-wide cooldowns strategically to bolster survivability and maximize DPS output on the boss.
Conclusion
Heart of Fear raid is one of the most exciting activities in the whole expansion. It feels so great to be able to experience it once again as if it were the retail content. The raid has 6 bosses, whom you will fight in the same order. In other words, you can’t choose who you fight and when. The encounters themselves will put you through the wringer. We’ve come to expect that each boss represents a unique challenge, but nothing can prepare you for the kind of mechanics you will deal with in this raid. The Dragonflight raids are great, too, but lots of players forgot how cool it was to clear those MoP-era raids.
Either way, now you’re brought back up to speed on the Heart of Fear raid. With the Remix event, you’ll be able to jump into it much sooner than you would in the original expansions all those years ago and maybe even run the Heart of Fear solo, so you better start getting ready soon!
F.A.Q.
What level is Heart of Fear?
The raid is located in the Dread Wastes zone, which is suited for levels 35-70.
How do you get to Heart of Fear in Pandaria Remix?
The raid entrance is situated at coordinates 39.1, 35, which is in the Dread Wastes.
How do I start Heart of Fear?
Just head over to the entrance with your party and you will be taken into the raid instance. No prior attunement or quests are needed.
Where is Heart of Fear raid?
The raid is located in Dread Wastes, the exact spot can be found by these coordinates – 39.1, 35.
How many bosses are in Heart of Fear?
There are 6 bosses in this raid:
- Imperial Vizier Zor'lok
- Blade Lord Ta'yak
- Garalon
- Wind Lord Mel'jarak
- Amber-Shaper Un'sok
- Grand Empress Shek'zeer
Who is the first boss in Heart of Fear?
The first boss is Imperial Vizier Zor'lok. This is going to be a difficult fight, even though this is only the first encounter.
What mounts drop in Heart of Fear?
No mounts drop in this raid.


