Welcome, Adventurer. Albion Online is one of the biggest and most unique MMORPGs available today. Behind the looks of a casual online game hides a mammoth of sandbox experience. If you ever wanted to play an online game where you set your own goals instead of NPC telling you what to do next, you’ve come to the right place. This Albion Online beginner guide will introduce you to the game, explain how it works, and provide you with a plan for the starting hours of your progression. A lot of players get stuck at the very beginning, not knowing what to do after finishing the tutorial. There are no questlines to follow and no quest marks on the map. So, unless you have a group of friends or a guild who can give you directions, you’re pretty much left to make your own destiny.
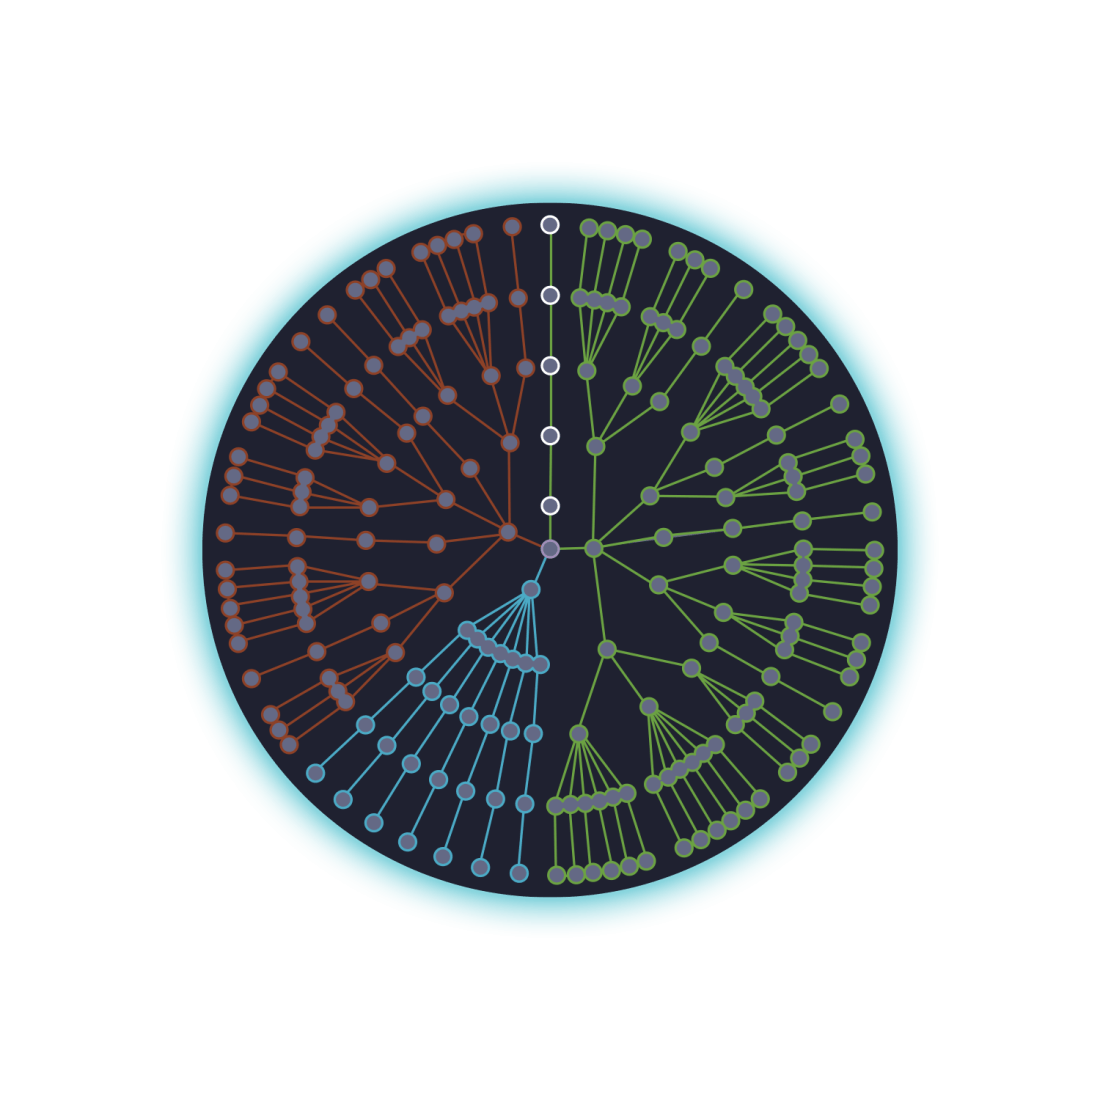
The sandbox style is both liberating and dangerous. Unsuspecting players who don’t know any of our Albion Online tips might venture too deep into the wildlands and end up killed by other players and lose all possessions. You could easily get lost by looking at the Destiny Board, the game’s unique progression system that includes hundreds of skills that are turned into a maze-like radial star chart. Don’t worry; we will make everything clear to you.
Let’s start with one very useful advice – you don’t have to do everything on your own. The game’s main currency is Silver. Players do just about anything to make as much of it as possible. You should know that you can easily buy Albion Online Silver at Skycoach. The game’s open economy allows you players to make money by selling Silver for real money. Skycoach is the perfect place to buy it because it offers the best price. You could spend it on buying higher-tier gear for your character or pay for the Premium account, which would be even cheaper than actually buying Premium directly. Skycoach employs the most experienced Albion players who will give you as much Silver as you need. Check out the offer by clicking on the link and give yourself a leg up when starting your adventures in Albion!
IMPORTANT NOTE: Apart from reading our beginner's guide, you can also Buy Albion Online Boost from Skycoach. We offer a wide range of products at the lowest market price and with the fastest delivery. You can make your first purchase even CHEAPER if you find a special PROMO CODE (highlighted in green) hidden in this article and get a 20% DISCOUNT.
Albion Online World Structure
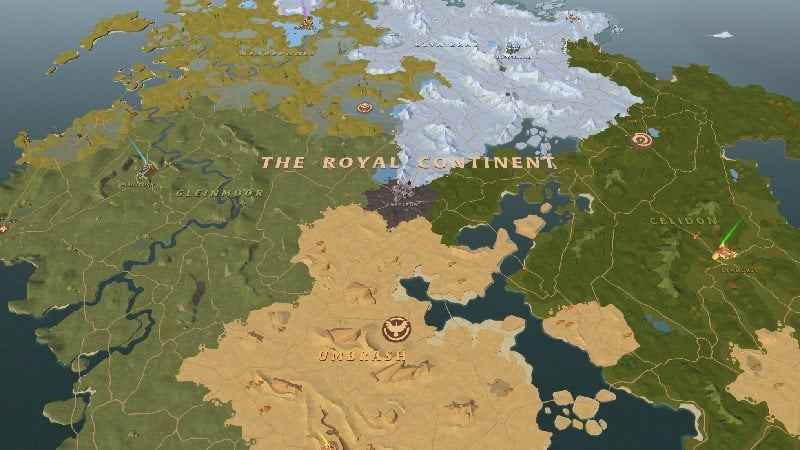
We’d like to start our Albion Online complete guide by explaining how the game works. Unlike most other modern MMORPGs with classic world structure, Albion offers something completely different. Let’s start with the World Tiers.
The world of Albion is divided into five biomes, two continents, and two massive endgame locations on top of that. The biomes make what is called the Royal Continent. Each biome consists of:
- Zones – open-world locations you can travel through
- Starter Towns – social hubs where players endup after completing a tutorial, they feature some of the basic crafting stations and are located near major cities.
- Royal Cities – major hubs where players gather to trade, craft, etc.
Each biome contains gatherable resources unique to its landscape. Knowing which biome is best for what kind of resource is important to keep in mind if you intend to focus on crafting.
| Biome | Resource | Royal City |
| Steppe | hide > fiber > ore > fish | Bridgewatch |
| Forest | wood > hide > stone > fish | Lymhurst |
| Swamp | fiber > wood > hide > fish | Thetford |
| Mountain | ore > stone > fiber > fish | Fort Sterling |
| Highlands | wood > stone > ore > fish | Martlock |
As you can see, you can catch fish in every biome. There’s also the sixth city called Caerleon located in the very center of the Royal Continent.
If you’re wondering how to start Albion Online, you start by creating a character. Then you go through a tutorial, after which you endup in one of the Starter Towns, from there you can make your way to one of the Royal Cities. At that point, you can do pretty much anything you want, as there’s no more guidance from the game. This is where you should notices that zones of the map have colored icons. But what do they mean?
You see, Albion Online has full-on PvP. It means that any player can kill any other player as long as they’re outside city limits. If a player is killed, they lose everything they had in their bag. However, the severity of these rules changes with different zone types. There are four types of zones:
| Blue (safe) | you can’t be killed or looted in these zones. | |
| Yellow | can be attacked by other players but not killed or looted. Instead, you get knocked down and then automatically get back on your feet. If anything, only your currently equipped armor will take some damage. | |
| Red | in these zones, you can be killed and lose the items you were carrying. | |
| Black | the same rules apply here as in Red zones. The only difference is that players don’t need to turn on the PvP flag to attack other players here. |
No matter where you die, you’ll never lose the Silver or Gold that you had on you. If you want to attack other players in yellow or red zones, you need to flag yourself. But this Albion Online gaming guide is not about PvP. Once you become hostile, any player will be able to attack you. This system has a few more mechanics that we won’t get too much into the details. There’s a reputation system that punishes players for attacking non-flagged players. There are rules when you’re able to attack players without flagging yourself who belong to the enemy guild. There are also instances where PvP is allowed, such as Treasure Sites. But, for now, just pay attention to what zone you’re entering and remember what happens if you die in them.
To the north of the Royal Continent, there’s a landmass called the Outlands. All zones there are black, which means it’s free PvP and no reputation loss. This is where guilds take their armies to fight for resources, outposts, and loot. If you want to know how to play Albion Online in these zones, there’s a separate guide for that. Outlands can be accessed from the Realmgates in each of the 5 Royal Cities. Outlands have their own towns where you can sell stuff, craft items, repair, and have a safe space to log off.
The so-called alternate realms are locations that are not part of the main map of the game. These locations feature their own set of rules, including different conditions for entering and exiting them. Those are:
- Roads of Avalon – a realm that features black-only zones. To get there, you must find a random portal in the open world. Exiting the Roads is also done through a portal, which may lead back into a random Albion zone or to another Roads of Avalon map. You can never know where the next portal will take you.
- The Mists – these zones are accessed by temporary portals that pop up randomly. Inside, you may find any amount of resources and rare, valuable loot. Sometimes you might also come across a portal that leads to the Mists’ own city called Brecilien.
Here are some more Albion Online tips for beginners for you. These two locations are best suited for high-level adventurers who have good equipment and are more familiar with the game. You would do much better if you stick to the Royal Continent as long as you’re getting used to the game. BLOG20
Albion Online Core Mechanics
All you need to understand about the game to know how to start playing Albion Online as a beginner, is the concept of Tiers. Learning how to start playing Albion Online as a beginner sets the stage for an unforgettable gaming experience. There’s key concept that explains pretty much all about how the game works.
Tiers serve as a fundamental aspect of Albion Online, acting as the primary metric of character strength and progression within the game. All equipment, crafting materials, and buildings are categorized into tiers, each representing a different level of power and capability. Players must unlock access to higher tiers through the Destiny Board, primarily by increasing their masteries.
| Roman Numeral | Tier | Name |
| I | 1 | Beginner |
| II | 2 | Novice |
| III | 3 | Journeyman |
| IV | 4 | Adept |
| V | 5 | Expert |
| VI | 6 | Master |
| VII | 7 | Grandmaster |
| VIII | 8 | Elder |
Even in material gathering, the initial node level of each resource gathering node constitutes mastery, while subsequent levels are considered specialization levels. Entities of a specific tier are typically denoted with a tier-specific prefix, accompanied by a Roman numeral indicating the tier in-game.
Consumables also adhere to tier classifications, although potions and food merely require mastery nodes for crafting rather than specialization levels. For this Albion Online beginners guide 2024, we’re not going to talk about crafting. This allows players to utilize any potion or food without necessarily unlocking a node on the Destiny Board.
Repair costs are influenced by tier and enchantment level, with higher-tier and enchanted items incurring greater expenses. However, repair costs remain consistent across items of the same quality, meaning that players can possess masterfully crafted equipment with enhanced power without incurring additional repair fees.
Albion Online Destiny Board and Leveling
Finally, we’ve arrived to the part of our Albion Online starting guide where we get to talk about character progression and the scary skill tree.
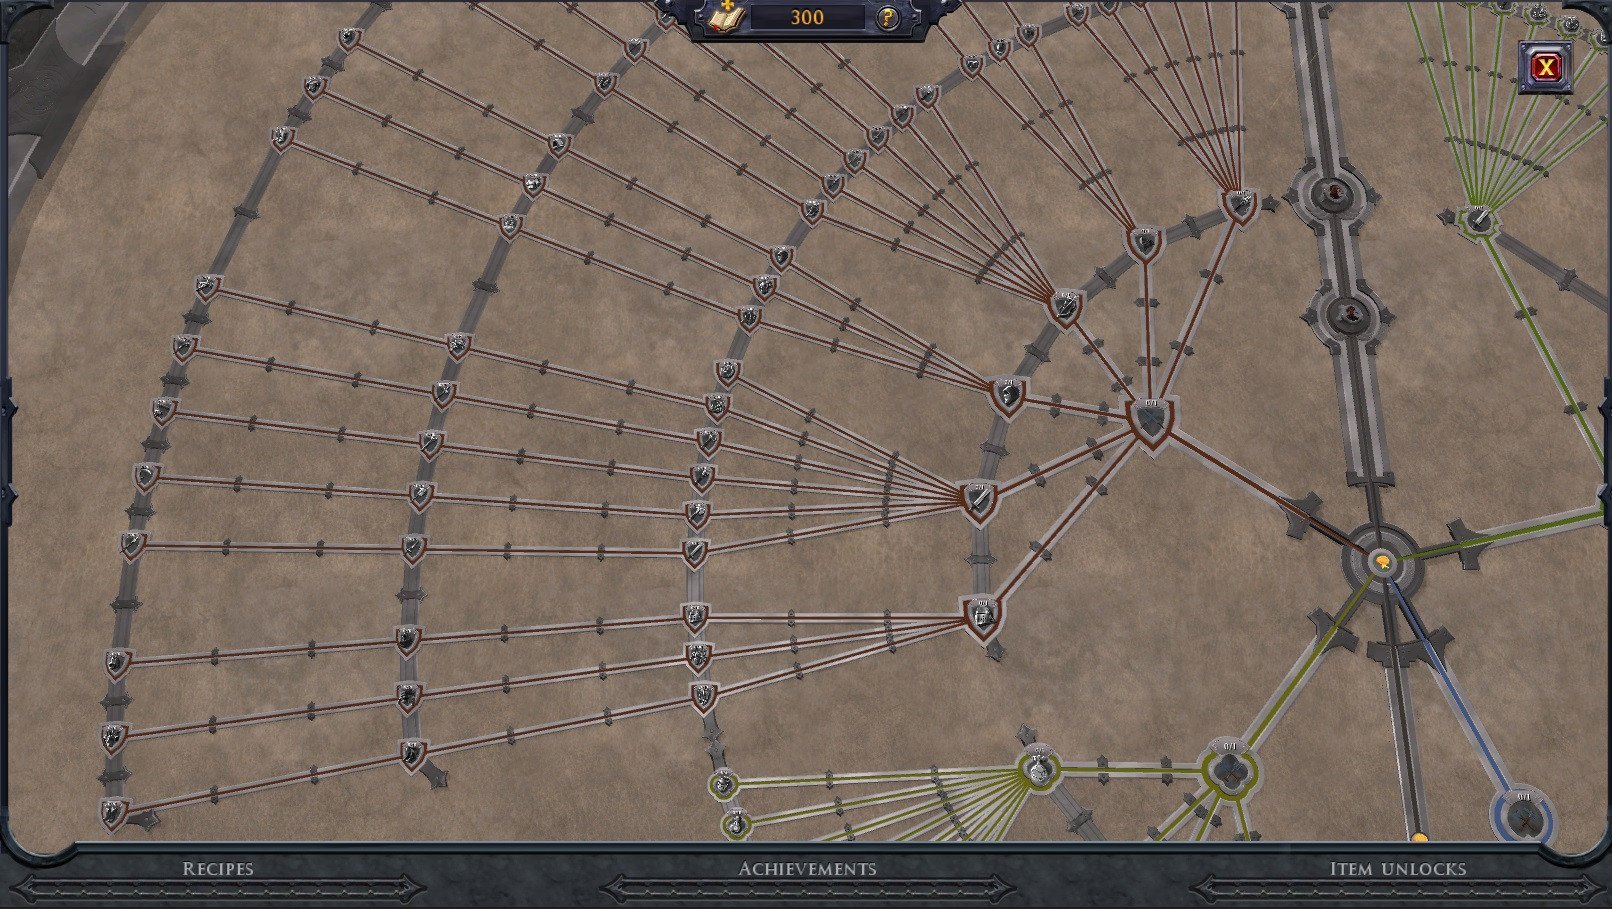
Much like in other MMORPG games your character gains experience for doing various actions. Experience in this game is called Fame. Therefore, Fame farming refers to the powerleveling method that focuses on obtaining as much Fame as possible as quickly as possible. You spend Fame by increasing Mastery and Specializations on the Destiny Board. If you look at the Destiny Board, you’ll see that it consists of various nodes connected to each other.
These nodes show your progress in various aspects of the game. It may be fighting using various weapons, wearing specific armor, or crafting tools. It also shows you what activities you must do to unlock a higher tier of gear. At the very center, you’ll see the Adventurer node.
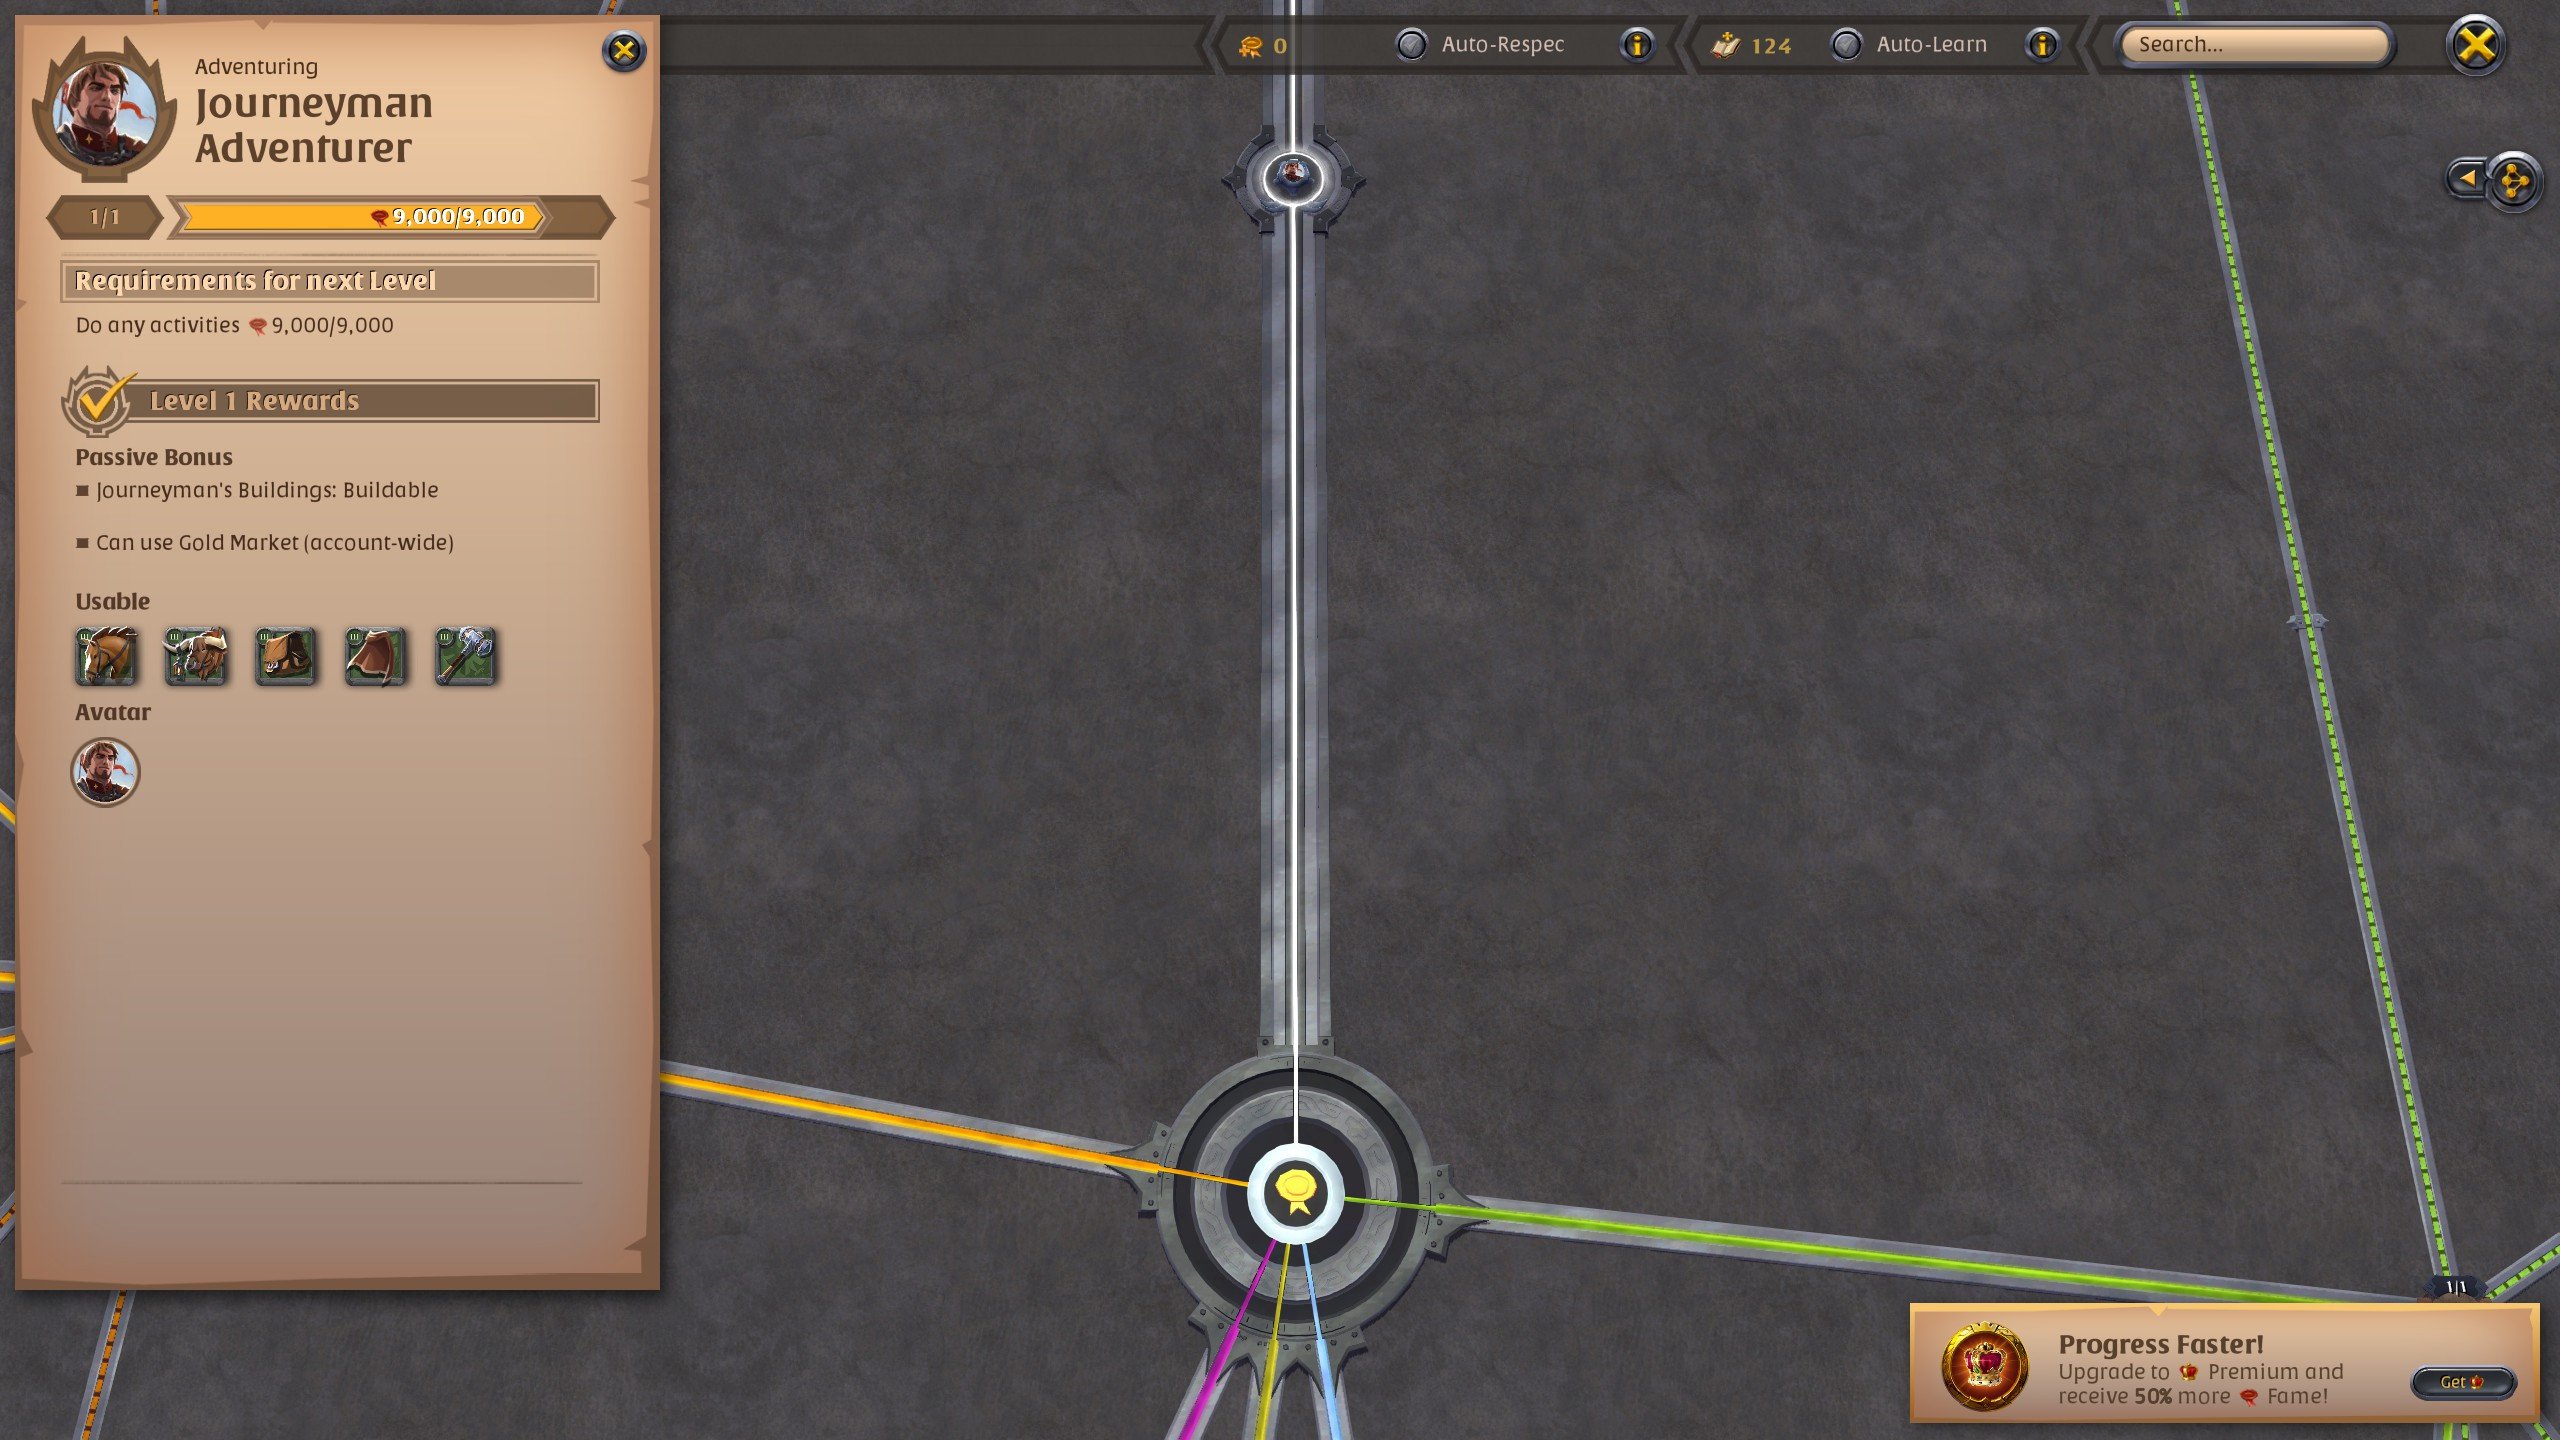
The line that goes up from it is called the Adventurer Path. It represents your general progression. Whatever you do in the game that gives you Fame passively upgrades this path. Your rewards for progressing through this path are a higher tier of mounts, capes, bags, and siege hammers, plus some miscellaneous rewards like avatars, etc.
To the left from the center, you’ll see Mastery Nodes dedicated to combat skills. Those nodes split into different weapon and armor nodes. The Reaver Path that is leveled up by killing creatures unlocks access to a higher tier of Expeditions and increases damage against monsters and wildlife. At the bottom, you’ll see three different gathering masteries, and on the right, there’s the crafting mastery section. Now, you can easily navigate around the Destiny boards by remembering the following:
- The upper part of the board represents your general progression through the Adventurer Path.
- To the left is the Reaver Path and combat Masteries.
- At the bottom, there are the gathering nodes
- To the right are the nodes for Crafting.
Also, you can use the search bar at the top right corner to find specific nodes!
Mastery
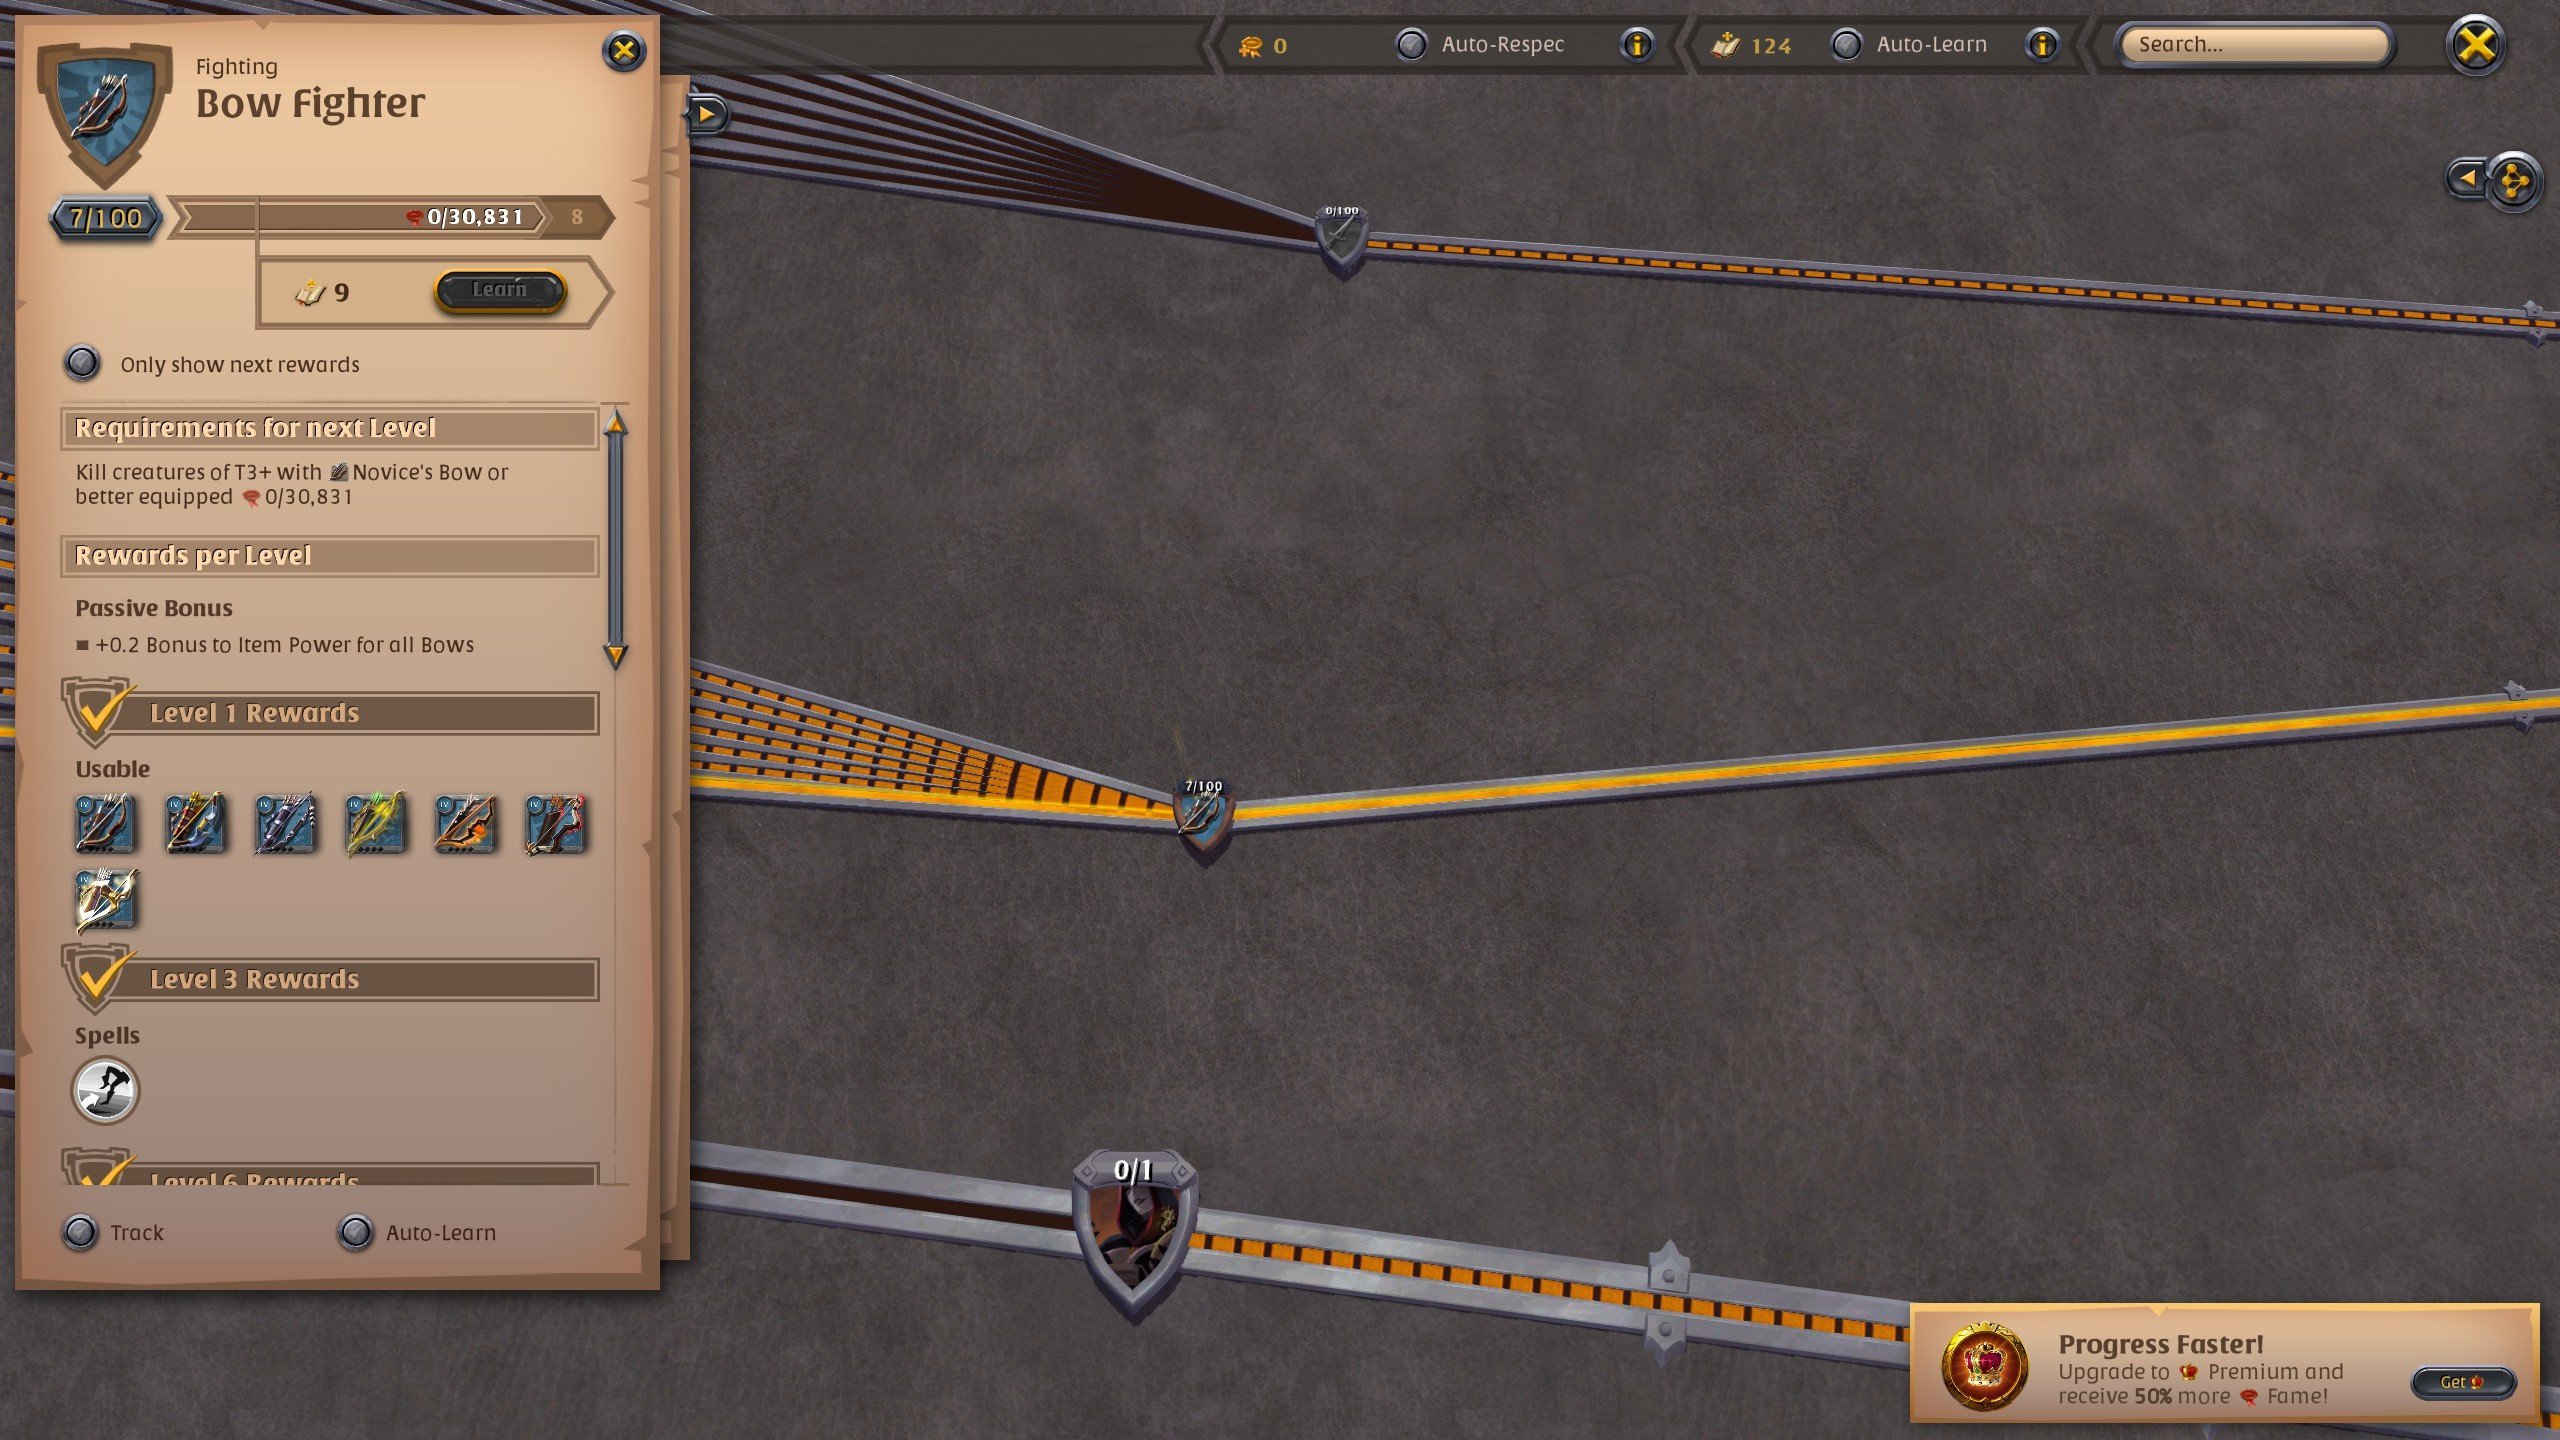
In our Albion Online's new player guide, we’re going to define Mastery as one of the types of nodes on the Destiny Board that represent a category of skills. In short, each Mastery has several levels that unlock a new tier of gear. Masteries can be described as categories of skills, while Specializations are sub-categories of skills. Here's a detailed breakdown of how Mastery operates:
- Definition: Mastery nodes are integral components of the Destiny Board, categorized by their role in skill development and progression. These nodes encompass all except Trainee, Journeyman, Reaver, and Specialization nodes.
- Differentiation from Specializations: It's crucial to distinguish between Mastery and Specialization. While Mastery represents overall proficiency and progression, Specialization denotes focused expertise within a specific subset.
- Node Structure: Each Mastery node may lead to several Specialization nodes. Notably, all Mastery nodes, except for Adventurer nodes, eventually branch into Specialization nodes.
- Main Lines and Tutorial Nodes: Adventurer and Reaver nodes form the primary lines of the Destiny Board, whereas Trainee and Journeyman nodes primarily function as tutorial nodes, excluding resources.
- Resource Mastery: Mastery in basic material gathering nodes follows a unique structure where only the initial level constitutes Mastery. Subsequent levels are considered Specialization, reflecting the unlocking of new tiers of equipment and resources.
- Progression Mechanics: Advancement in Mastery nodes is critical for overall progress. Players accumulate fame to level up nodes, with various methods available for fame collection.
- Equipment Tier Unlocks: Mastery nodes facilitate the unlocking of new tiers of equipment, granting players access to higher-quality gear. Additionally, item power bonuses are bestowed by most Mastery nodes, indirectly affecting crafted item quality.
- Main Tree Mastery Nodes: Each main tree in the Destiny Board corresponds to specific Mastery nodes, each with its associated color. For instance, the Gathering tree encompasses various Mastery nodes for resource types, while the Fighting tree includes Masteries for weapon and armor types.
- Unlocking Abilities: Mastery nodes are instrumental in unlocking new abilities and enhancing equipment. Higher Mastery levels grant access to additional skills and passive abilities, enabling players to utilize more advanced gear effectively.
Basically, to unlock a Master Node and level it up, you need to do whatever thing gives you progress for it. To find out what it is that you need to do, just open any node, and it will contain information about the requirements for the next level. It will also tell you what you will unlock at each level. BLOG20
Specializations
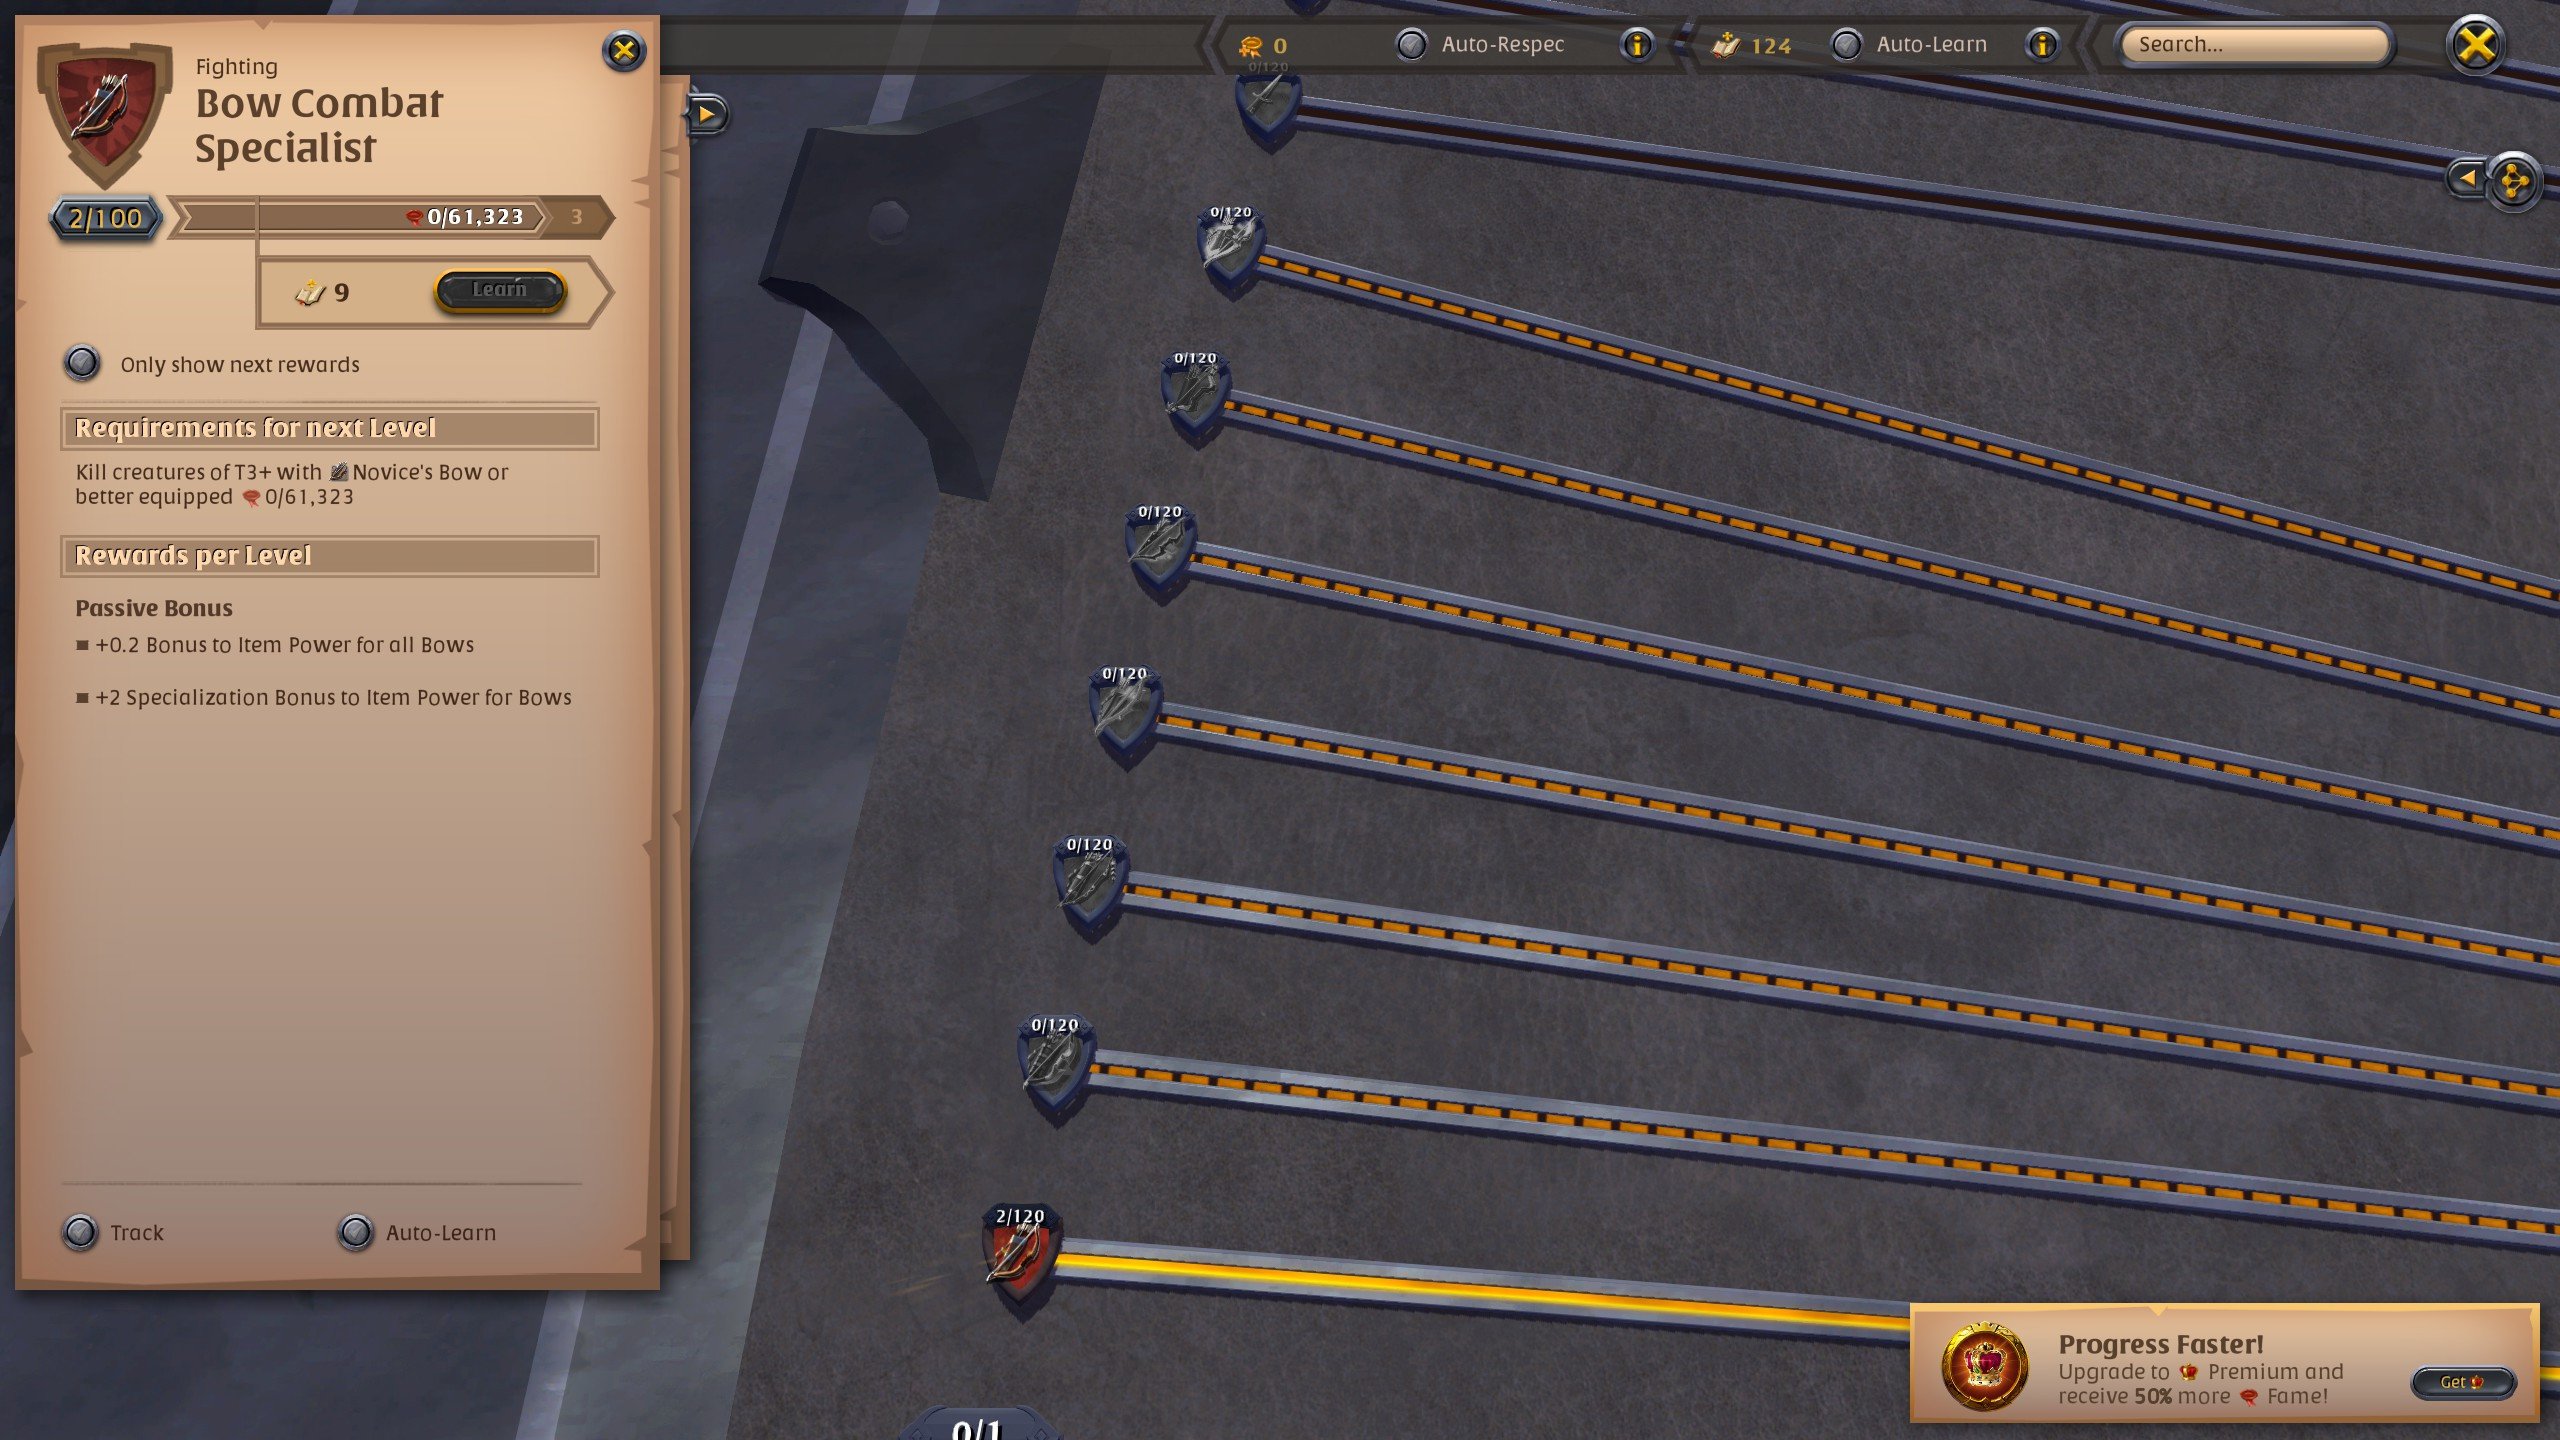
Specializations are the evolution of mastery Nodes. For instance, the Bow Fighter Mastery Nodes lead to seven specialization nodes:
- Bow Combat Specialist
- Warbow Combat Specialist
- Longbow Combat Specialist
- Whispering Bow Combat Specialist
- Wailing Bow Combat Specialist
- Bow of Badon Combat Specialist
- Mistpiercer Combat Specialist
Here's an in-depth exploration of the Specialization system:
- Definition: Specializations represent specialized nodes within the Destiny Board, focusing on specific skills or activities. Unlike Mastery nodes, Specialization nodes are distinct and cater to individual aspects of gameplay.
- Node Structure: All nodes, except for Adventurer and Reaver nodes, eventually lead to Specialization nodes as players progress through the game. Adventurer and Reaver nodes function differently as they form the main lines of the Destiny Board.
- Fame and Progression: Progressing in Specialization nodes is crucial for overall advancement. Players earn Fame by engaging in various activities, such as combat, gathering, crafting, or refining, to level up Specialization nodes. Alternatively, players can utilize Tomes of Insight or Gathering Tomes to accelerate progress without directly participating in these activities.
- Fame Acquisition Mechanisms: Fame acquisition for Specialization nodes is independent of other nodes and depends on player activity. Tomes, particularly Combat Tomes and Gathering Tomes, play a significant role in Fame acquisition, with Premium accounts earning additional Fame due to rounding mechanics.
- Premium Benefits: Premium accounts enjoy certain advantages in Fame acquisition, especially with low Fame values, as Premium status influences Fame values earned. Some Specialization nodes, such as Farming and Crafting, offer focus bonuses exclusively for Premium members.
- Unlocking Specializations: Certain Specialization nodes, particularly in Farming, require specific conditions for initial progression, such as owning a personal island and spending at least one week of Premium before purchasing the island.
- Specialization Points: Specialization nodes provide Specialization points, which are utilized to enhance node level effects in specific contexts. These points are directly proportional to the node's level and are obtained by creating items, gathering resources, or using specific gear.
In essence, Specializations in Albion Online offer players a tailored approach to skill development and progression, allowing them to specialize in specific activities and reap rewards accordingly. Through Fame acquisition and strategic investment in Specialization nodes, players can customize their gameplay experience and excel in their chosen endeavors.
Albion Online Quick Start Guide
Now you know how the game is structured and how not to get lost looking at the Destiny Board. But you’re still absolutely clueless about what to do in the game. That’s totally normal; some gamers come to the game already knowing what to do. They usually join guilds and take it from there. However, solo players and those who want to experience the game on their own might struggle. But don’t worry; in this section of Albion Online tips for new players, we’ll give you a to-do list that will take you to Tier 8 of gear right from the beginning.
You may choose the follow it, or decide to go a different route. In any case, here we go.
Step 1. Create Your Character and Play Tutorial
When starting Albion Online, customize your character to your liking before entering the world. Before proceeding, opt to play the tutorial, which grants three days of Premium membership. Follow the tutorial prompts, paying attention to basic movement and combat mechanics introduced throughout.
Step 2. Complete Initial Quests
Progress through the initial quests provided during the tutorial phase. These quests, such as "Get to Know Your Enemy" and "From Beginner to Novice," offer rewards including silver and gear. You’re going to need to have 256 silver. Utilize the marketplace to purchase recommended gear items:
- Scholar cowl (T2)
- Soldier boots (T2)
- Mercenary jacket (T2)
- Novice bow (T2)
Equip the new armor and don’t forget to select one of the abilities on each piece of gear. When you get to Travel Planner, you’ll be able to move to one of 5 locations. If you’re a solo player, we recommend the Swamp Cross.
Step 3. Getting Tier 3 Armor
Explore the starter island to gather rough stone and wood. The stone will go for 120-180 silver each. These resources can be sold at the marketplace to buy T3. You’re going to need around 7-8k silver to buy all the pieces. Check your inventory to see the estimated value of your gathered resources to know if you have enough. This whole thing will take you about 5 minutes tops. When you’re ready, go to the Marketplace and buy the following:
- Journeyman’s Spear (T3)
- Torch (T3)
- Soldier Boots (T3)
- Mercenary jacket (T3)
- Scholar cowl (T3)
- Bag (T2 or T3)
Step 4. Redeem 100,000 Fame on Mobile
Download Albion Online on your mobile device and log in with your account details. Claim the 100,000 Fame reward available exclusively for mobile users. Utilize this Fame to unlock Tier 3 on your Destiny Board, enabling further progression.
The Pile of Tomes has 10 Tomes of Insights, each giving you 10k Fame. Use one tome to get to Journeyman Adventurer to be able to equip all the items you bought. Then, click on each item that is equipped and go to the Destiny Board to see the Mastery nodes for them. Use up to 3 Tomes to unlock tier 4.
Step 5. Progress to Tier 4 and Tier 5 Armor
Continue gathering resources to earn about 20k silver and more fame. Just run around the first location in circles until you’ve gathered enough resources. You’re going to want to move to the big city (Thetford in Swamps) to buy T4 cheaper.
Purchase tier 4 and tier 4.1 armor from the marketplace. Equip the new armor and select abilities for each item to bolster your character's capabilities.
Step 6. Reaching T4-T6
Once you’re in the big city, buy the following items and select these skills:
- Spear (T4.1) – Launching Strike skill
- Torch (T4.1)
- Soldier Boots (T4.1) – Wanderlust skill and Toughness passive
- Mercenary Jacket (T4.1) – Bloodlust skill and Balanced Mind passive
- Mage Cowl (T4.1) – Poison skill and Aggression passive.
Spend the rest of the Tomes to upgrade to Tier 5. You’re going to need to reach Expert Reaver by accumulating 78.765 Fame. This will make you a lot stronger against T5 mobs. Go back to the market and buy one solo dungeon T5 map that will cost you around 5.5r silver.
Next, you’re going to want to reach Reaver Tier 6, so that you can clear T6 solo dungeons. Also, you need to level up your armor and weapon masteries to unlock higher tiers of gear. You can do that simply by killing monsters, which you do as you clear the dungeons. Make your way to T6 just farming dungeons.
Step 7. Choose PvE Path
Decide whether to focus on PvE activities, such as resource gathering and dungeon farming or embrace a PvP-centric playstyle with engagements in corrupted dungeons and open-world PvP zones. Tailor your activities based on your preferences and objectives.
PvE players should avoid PvP and make their way to Tiers 7 and 6 by doing one of three things:
- Gathering – gather resources and level up gathering masteries to make silver and upgrade to higher tiers. Upgrading the gathering tools is done the same way as with weapons and armor.
- Farming Dungeons – basically keep doing the same thing as you were doing. Roam around the world, entering dungeons and killing and looting everything inside.
- Mix farming dungeons and gathering – if you want, you can do both things, which will mean a slower progression but more engaging gameplay.
Step 8. Choose PvP Path
As soon as you reach Tier 5 of Reaver and your gear, you can start doing Corrupted dungeons where you’ll be facing monsters and other players. If you want to start making money and progressing through PvP content, this is the way to do it.
These Dungeons appear randomly, and you don’t need to buy a map to find one. When you get to Tier 6 armor, you’ll be able to do the higher difficulty of these dungeons, which includes full-loot PvP. That’s why you still need to do solo dungeons to prepare yourself. BLOG20
Step 9. Getting to Endgame (Tier 8)
You can reach Tier 8 the same way you got to Tier 5 and 6. Decide which activity you want to do and grind it. PvP is obviously more risky but also yields better rewards. PvE, on the other hand, takes a bit more time but is also less risky. You can follow this general direction:
- T4-T5 – do solo dungeons
- T5-T6 – do the Corrupted dungeons on the Hunter level
- T6-T8 – only do Stalker level Corrupted dungeons or T6 solo or group dungeons.
For gatherers: decide on one material you want to gather starting from Tier 4. If you want to level up your weapon at the same time, stick to Skinning.
- T4-T6 – gather in T5 yellow zones.
- T6-T7 – gather in T6 red zones.
- T7-T8 – gather in black zones.
Save up your learning points, which let you skip chunks of leveling a Mastery node until you are absolutely sure what you want to do. And that’s pretty much it!
Conclusion
Albion Online doesn’t hold your hand; it’s a full-on sandbox game where you are the only one who can decide what to do and how to progress. The game is made in such a way that it lets you level up based on what you’re doing. Each occupation in the game has its own progression track. If you want to be a fighter, you’ll end up leveling your weapons and armor. Want to gather or craft stuff? Then, by doing those things, you will level them up.
We also didn’t mention the fact that there are no classes in the game. Instead, you are what you wear. It means that the active skills are tied to the items that you equip. Helmet, armor, boots and weapons each have several skills to choose from. This also mean that you can switch your playstyle and role by simply requipping different set of gear. It’s that simple.
In this Albion Online guide, we’ve explained everything you need to know to start playing Albion Online. So, now, all that’s left to do is wish you luck. Good luck, adventurer!
F.A.Q.
What should I do as a beginner in Albion Online?
Complete the tutorial and claim your free Tomes of Insight that grants free Fame. Start gathering resources outside of the city to sell them and buy T2 and T3 gear.
What is the best start weapon in Albion Online?
All weapons are good, but we suggest trying a combination of a Spear and Torch.
What is the best starting point in Albion Online?
The best starting biome for solo players is the Swamps and Thetford, which is the biome’s capital.
Where do I start first in Albion Online?
First, you complete the tutorial to get free claimable Fame. Then, proceed to the mainland and do a simple quest. Then, you’ll have to pick one of 5 starting locations, one per biome. We suggest the Swamps for best resource farming spots.
What is the easiest weapon for beginners in Albion Online?
Try the Spear or the Bow with leather armor. Both weapons have good range, which gives you enough space to dodge enemy attacks.
Is Albion Online easy for beginners?
Yes, it has a very simplistic combat system. The only way it can be confusing is if you don’t know what to do after a tutorial, which happens to a lot of players. We recommend reading this guide to find out how to get to the endgame fast and easy.
Is it easy to start Albion Online?
Yes, the game is free, and when you create a character, it takes you to the tutorial location, where it explains the basic mechanics.


