 Dallon Avery
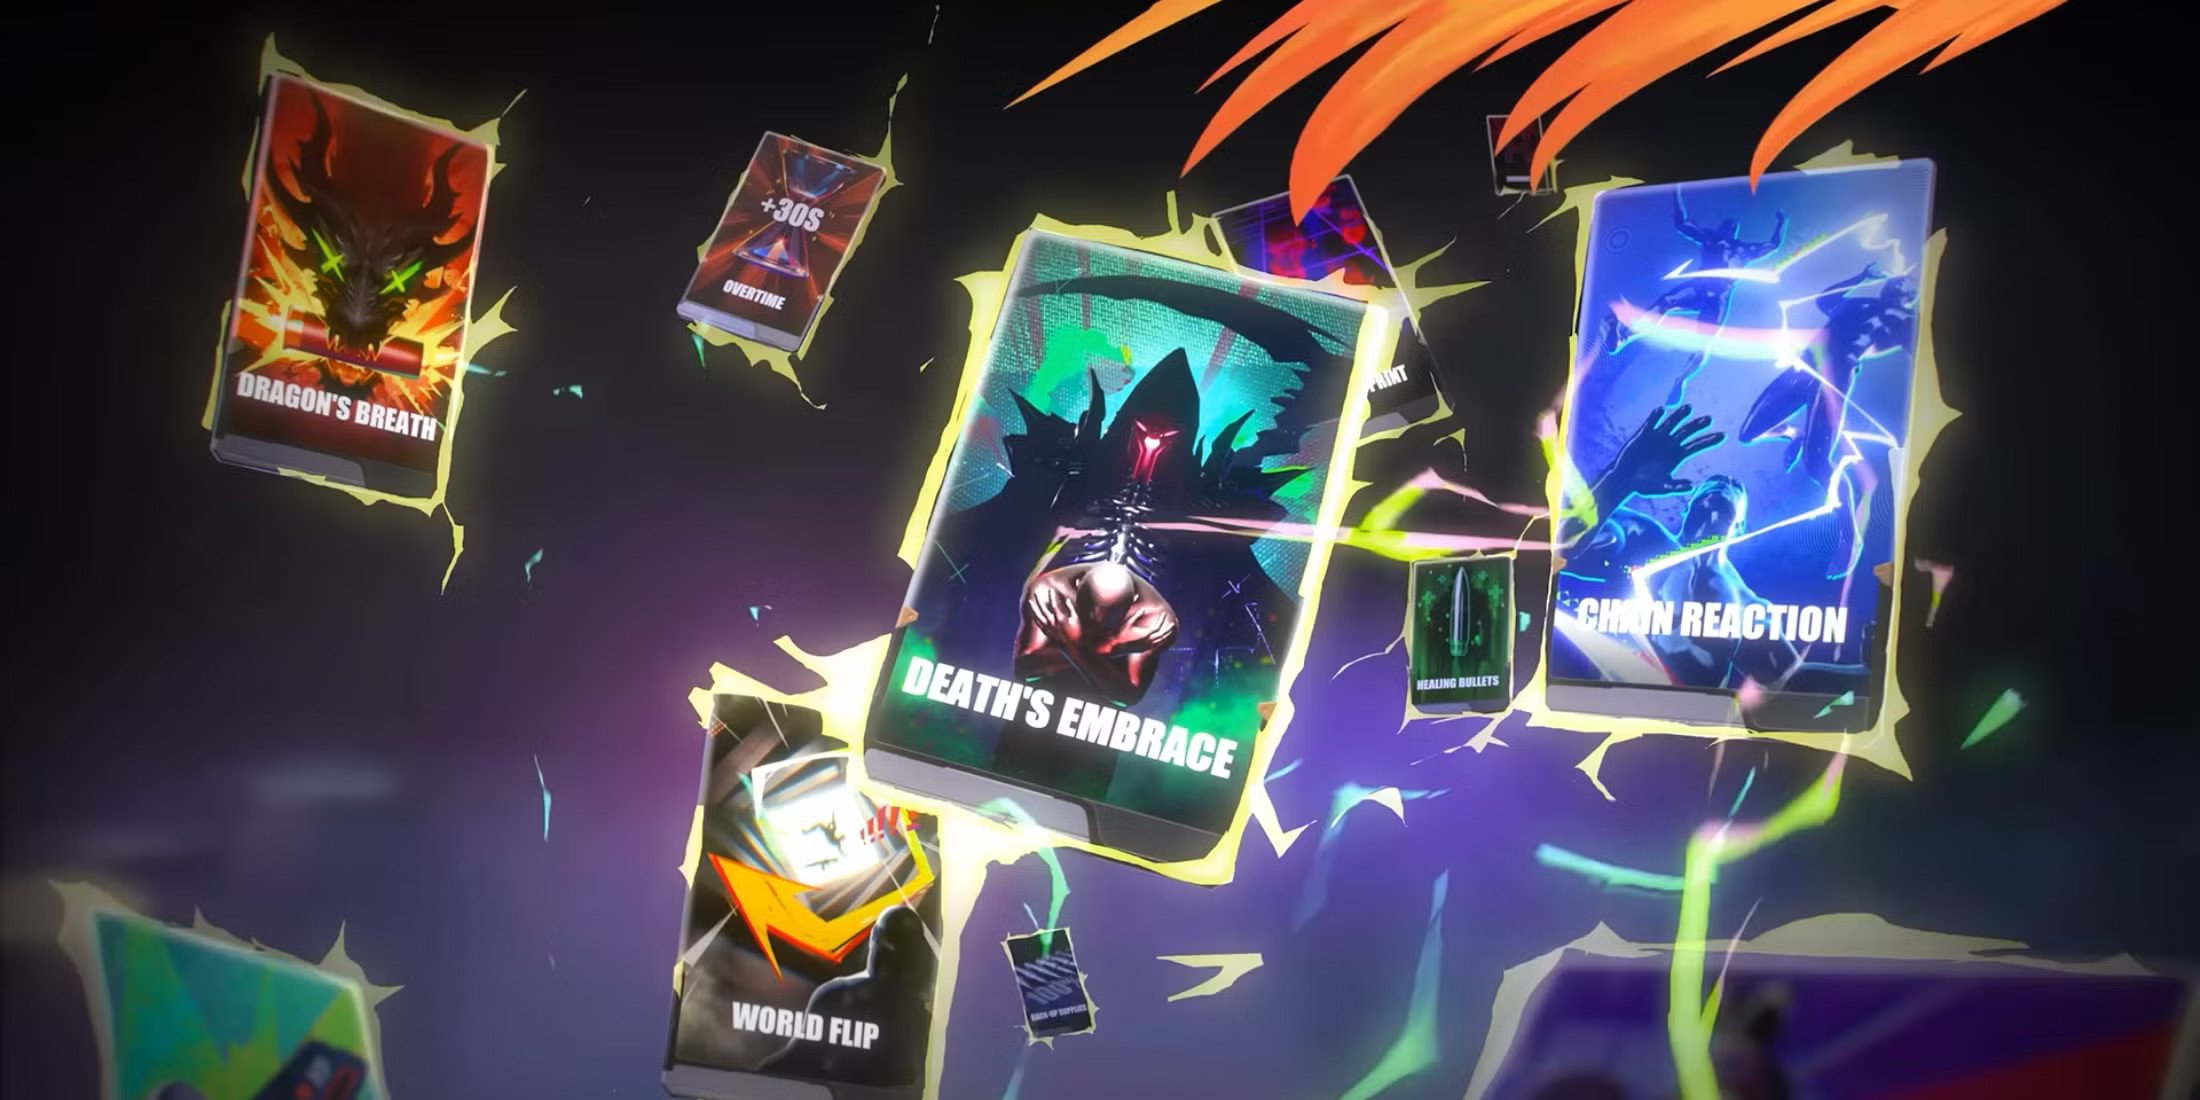
What’s the first thing that comes to mind when thinking about FragPunk? The cards, of course! The defining feature that makes every match in this game unique in terms of rules and conditions. What cards do is they modify the gameplay in a number of ways. With them, you can remove a plantsite, make the heads of enemies bigger, or spawn bots to help you out. There are a little over 70 cards in the game, and in this FragPunk cards tier list, we’ll rank them all from best to worst.
If playing against or with different cards that change every round still feels weird and you struggle to get to the desired rank in ranked mode, try Fragpunk Rank Boost at Skycoach. Competitive shooters are difficult enough as it is, having these cards can mess up a well-prepared game plan. Let Skycoach pro gamers take your account to the desired rank so that you can enjoy the benefits of fair matchmaking and equally-skilled opponents.
Read our other FragPunk guides:
Note: At Skycoach, you can Buy FragPunk Boost for the best prices with fast delivery. Use our special PROMO CODE (in green) hidden in this article for a 20% DISCOUNT.


How Our FragPunk Cards Tier List Works
How do you get 169 FragPunk Shard cards ranked fairly? We’ve come up with a perfect ranking criteria that we believe is good enough to evaluate each and every card in the game. Check it out:
- S-Tier: Must-pick cards. These are game-changers that consistently provide a strong and tangible advantage. If a team has the chance to vote for these, they should prioritize them unanimously.
- A-Tier: Very strong and reliable cards. These cards offer major advantages but may require specific playstyles, team coordination, or conditions to maximize their value. They are highly desirable but not always essential.
- B-Tier: Good but situational picks. These cards have clear benefits, but their effectiveness depends on specific match conditions or the user's skill level. They're strong picks in certain scenarios, but not always the best choice.
- C-Tier: Inconsistent or niche cards. These cards have some utility, but they are either too situational, require too much setup, or are heavily outclassed by better options. Rarely worth picking unless in highly specific situations.
- D-Tier: Bottom-tier, borderline useless cards. These cards are either meme picks, provide almost no advantage, or can actively hinder your team. They should never be picked unless trolling or experimenting.
Of course, every FragPunk tier list is subjective, regardless of what’s being ranked. So, try not to take this tier list as the absolute truth. The meta will form over time, and various updates will bring balancing changes. When this happen we’ll update this tier list accordingly. BLOG20
Best FragPunk Cards Tier List
Here are all 169 Shard Cards ranked from the most impactful ones to the most useless. Let us say this right away – most cards are pretty good. There are only two of them are nothing more than a funny meme, but the rest have their uses.
| Tier | Shard Card |
| S-Tier | Vampire Bullet, Short Exposure, Skill Vampire, Security Check, Alert, Superhuman, Quick Reload, Foot Dragging, Mass Cheetah, Health Club, Skill Replenish, Plenty of Ammo, Barrier Destruction, Prosthetic Enhancements, Morale Booster, Maximum Overhealth, Super Jump, Sustained Crab Walk, Swift Support, Bullet Trade, Offense Defense, Site Deletion, Medical Error, Explosive Shot, Freeze Bullet, Bullet Upgrade, Eagle Eyes, Clone Tech, Blade Master, Bio-Warrior, Squat Master, Misfire, Dullahans, Death’s Embrace, Freestyle Placement, Full Moon, Big Heads, Ricochet, Vampire Night |
| A-Tier | Band-Aid Solution, Weapon Enhancement, Melon Rinds, Clear Path, Swift Resolution, Black Hole Traps, Toy Traps, Mini Traps, Stealthy Start, Dr. Converter, Headshot Master, Take Your Time, Long-term Investment, Scan Reductions, Efficient Conversion, Blast Suits, Skill Treasures, Nerfed Site A, Nerfed Site B, Informant, Close Havoc, Time to Snipe, Squat Defence, Parting Flash, Extra Converter, Portable Detector, Regenerative Therapy, Extra Site, Small Heads, Flashy Projectiles, Homing Projectiles, Toxic Traps, Psychic Defusing, Smoke Shields, A Main Ban, B Main Ban, A Short Ban, B Short Ban, Inherit the Wind, Origin Detection, Deadly Rewind |
| B-Tier | Full Fire Power, Cure Shot, Turtleback, Bigger and Badder, Emergency Evacuation, Throw to Plant, Life Saver, Relocation, Weapon Morph, Piercing Bullet, Superfly, Eye of the Reaper, Backup Weapon, Airborne Justice, Healing Site A, Healing Site B, Shotgun Charge, Rapid Marksman Rifle, Peace Treaty, Tick Tock, Return to Sender, Mini Mags, Chain Reaction, Free For All, Killstreak Bonus, Dibs, Quick Charge, Holistic Deadicine, Bigger Bombs, Hold the Pass, Drought, High Ground, Lucky Bullets |
| C-Tier | Acrophobia, Portal Malfunction, Broken Bridge, Weapon Ban, Spreading Smoke, Lingering Smoke, Weak Jumps, Endless Battle, Quick Defuse, Explosion Specialist, Long Dash, Large Bounty, Dragon’s Breath, Muscle Weakness, Safety Glasses, Misty Site A, Misty Site B, Stand Up Straight, 0 Compassion, Hidden Cameras, Rift Expansion, Time-saving Skill, Mission Bound, Headache Vision, Two-Way Portals, Sustained Exposure, Weapon or Life, Prosthetic Eye, Roger, Roger, Frozen Wasteland, Birdman, Iron Head, Invest in Future, King of Eggs, HUD Remix, Whetstone, Feinting Flash, Fragile Converter, Leader of the Dead, Heavy Armor, IP Theft, Bad Knees, Painful Motivation, Dimensional Travel, Close Quarters Combat, Beauty Sleep, Cloaking Plant, Sprint Fire, Guess Who?, Reaper’s Scythe, Equipment Supply, Hard Rain, Infernal Hounds, Stealth Novice |
| D-Tier | Let Them Hear You, Pull the Plug |
Following this table, we’ll name all the best FragPunk cards and explain what they do. As you know, when starting out in FragPunk, you can’t see the full list of cards, instead, they get added to your library as you complete matches.
S-Tier Cards
Must-pick FragPunk meta cards. These are game-changers that consistently provide a strong and tangible advantage. If a team has the chance to vote for these, they should prioritize them unanimously. These cards enhance core mechanics like movement, healing, damage output, and enemy control, making them the best in FragPunk.
Vampire Bullet
- Cost: N
Adds +Nx5% lifesteal to bullet damage. This provides free sustain while dealing damage, making it one of the best passive effects in the game.
Short Exposure
- Cost: 2
Expose effects don’t last as long, reducing enemy tracking abilities. This counteracts recon-heavy teams by preventing extended wall hacks and spotting.
Skill Vampire
- Cost: 2
This is one of the top FragPunk cards. It grants +100% lifesteal to Skill damage, making it a top-tier pick for aggressive ability-based Lancers who can keep healing while dealing high ability damage.
Security Check
- Cost: 2
Doors expose enemies and emit alarm sounds, making it perfect for revealing enemy movement and preventing sneaky plays.
Alert
- Cost: 4
Allows players to sense nearby enemies after not taking damage for a while, providing strong defensive awareness.
Superhuman
- Cost: N
Increases healing, movement speed, and damage reduction from Skills by +Nx20%. This buffs all supportive and tanky playstyles, making it an easy top-tier pick.
Quick Reload
- Cost: 3
Reduces reload time significantly, allowing for faster weapon engagements. Essential for high-fire-rate weapons and clutch fights.
Foot Dragging
- Cost: N
Reduces enemy movement speed by -Nx3%, making it an amazing control tool that slows enemies in fights, making them easier to hit.
Mass Cheetah
- Cost: 4
Increases movement speed by 15%, making it one of the best mobility buffs for any playstyle.
Health Club
- Cost: 5
Increases Max HP by 25, making it a core survival tool for tanky builds.
Skill Replenish
- Cost: 4
Allows skills that normally don’t replenish to recharge, and already replenishing skills recharge even faster, making it amazing for ability-based Lancers.
Plenty of Ammo
- Cost: N
Increases magazine size and total ammo by Nx25%, making weapons last longer in firefights.
Barrier Destruction
- Cost: 4
Allows destruction of prep-phase barriers, giving early control over the map and speeding up rounds.
Prosthetic Enhancements
- Cost: 5
Makes allied limbs bulletproof, reducing the effectiveness of body shots and forcing headshots.
Morale Booster
- Cost: 4
After planting, restores all allies’ HP and Skill uses to max, making it a must-pick for post-plant strategies.
Maximum Overhealth
- Cost: 4
Allows healing to go beyond normal max HP by up to 25 extra HP, making healing abilities much stronger.
Super Jump
- Cost: 4
Grants huge jumps that knock down nearby enemies when landing, making it a mobility and CC powerhouse.
Sustained Crab Walk
- Cost: 3
Forces enemies to crouch when taking continuous damage, heavily disrupting movement-focused Lancers.
Swift Support
- Cost: 5
Allows players to teleport to a teammate’s side, making it excellent for repositioning, escapes, or fast reinforcements.
Bullet Trade
- Cost: 2
Allows Projectile Skills to be replenished using Primary Weapon ammo, making ability-based Lancers even deadlier.
Offense Defense
- Cost: 4
Swaps Defenders and Attackers, completely changing strategies for each round.
Site Deletion
- Cost: 5
Removes one Target Site randomly, forcing enemies into unexpected rotations and strategy shifts.
Medical Error
- Cost: 5
Prevents enemies from receiving heals, completely shutting down support Lancers.
Explosive Shot
- Cost: 4
Bullets explode on impact, adding AoE damage and making shots more effective.
Freeze Bullet
- Cost: 3
Slows enemies by -55% on hit, making it a perfect crowd-control tool.
Bullet Upgrade
- Cost: 3
Improves the Blaster, Flasher, Smoker, and Burner, enhancing utility weapons significantly.
Eagle Eyes
- Cost: 2
Exposes all enemies in line of sight, making it a powerful recon tool.
Clone Tech
- Cost: 4
Allows teammates to choose the same Lancer, enabling double strategies or stacked abilities.
Blade Master
- Cost: 5
Grants the Blaze sword, which blocks bullets and melee attacks, making melee fighters far more dangerous.
Bio-Warrior
- Cost: 5
Allows players to respawn as a zombie once, ensuring extra fighting power even after death.
Squat Master
- Cost: 5
Increases max HP every time you crouch, stacking infinitely if spammed.
Misfire
- Cost: 4
Forces a random enemy to fire their gun every 5 seconds, disrupting stealth play and positioning.
Dullahans
- Cost: 5
Makes allied heads invulnerable, hard-countering headshot-based Lancers.
Death’s Embrace
- Cost: 3
Spawns a Reaper behind damaged enemies, which slashes all enemies in range and changes the skybox for extra chaos.
Freestyle Placement
- Cost: 5
Allows attackers to plant the Converter anywhere, but detonates after 40 seconds, adding extreme flexibility to attack rounds.
Full Moon
- Cost: 3
Grants Werewolf power, causing injured enemies to leave tracks. After dealing 200 damage, further attacks inflict DoT, making it a strong aggressive tool.
Big Heads
- Cost: 5
Makes enemy heads bigger, increasing headshot accuracy and making it easier to land critical hits.
Ricochet
- Cost: 5
Allows bullets to bounce up to 3 times, making hallway fights deadly.
Vampire Night
- Cost: 5
Grants Vampire powers, increasing max HP and bullet lifesteal. After 200 damage, you slowly regenerate HP, providing sustained healing in fights.
A-Tier Cards
A-Tier cards are some of the best cards in FragPunk. They’re highly effective and provide significant advantages, though they may require more specific situations or team coordination to maximize their value. These cards are still excellent choices and can be game-changers in the right hands.
 Band-Aid Solution
- Cost: 4
Regain a small amount of HP when injured, offering survivability in extended fights.
Weapon Enhancement
- Cost: 5
Enhances a random weapon of each type, providing unexpected boosts.
Melon Rinds
- Cost: 3
Gain a throwable melon that makes enemies slip, disrupting movement.
Clear Path
- Cost: 2
Removes doors from the level, allowing for easier rotations.
Swift Resolution
- Cost: 2
Reduces match time by 30 seconds, forcing faster engagements.
Black Hole Traps
- Cost: 3
Traps generate black holes when triggered, displacing enemies.
Toy Traps
- Cost: 2
Reduces enemy trap damage by 50%, limiting defensive setups.
Mini Traps
- Cost: 2
Decreases enemy trap range by 30%, further weakening defensive utility.
Stealthy Start
- Cost: 3
Prevents exposure for 30 seconds after combat begins, enabling safer engagements.
Dr. Converter
- Cost: 3
Heals nearby allies when carrying the Converter, adding team sustain.
Headshot Master
- Cost: N
Increases headshot damage by Nx10%, making accurate players more lethal.
Take Your Time
- Cost: N
Increases the time the Converter takes to explode by Nx10s, extending round duration.
Long-term Investment
- Cost: 2
For every 7 seconds alive, gain 0.1 Shard points, rewarding survival.
Scan Reductions
- Cost: 3
Reduces the range of enemy scanning skills by 50%, countering recon abilities.
Efficient Conversion
- Cost: 4
Once planted, reduces the Converter timer by 20 seconds, speeding up objective play.
Blast Suits
- Cost: N
Reduces damage taken from explosions by Nx20%, minimizing AoE threats.
Skill Treasures
- Cost: 2
Treasures can now drop items that replenish Skill uses, extending ability uptime.
Nerfed Site A
- Cost: 3
Reduces cover around A Site, making it harder to hold.
Nerfed Site B
- Cost: 3
Reduces cover around B Site, altering defensive positioning.
Informant
- Cost: 4
Pings remaining enemies when scoring a kill, revealing enemy positions.
Close Havoc
- Cost: N
Increases bullet damage by Nx10% at close range, favoring aggressive plays.
Time to Snipe
- Cost: N
Increases bullet damage by Nx10% at long range, boosting sniping effectiveness.
Squat Defence
- Cost: 3
Crouching reduces recoil by 10% and increases damage reduction by 20%.
Parting Flash
- Cost: 2
Releases a blinding flashbang when dying, disrupting enemies.
Extra Converter
- Cost: N
Adds N extra Converters for attackers to pick up, offering strategic variety.
Portable Detector
- Cost: 2
Detects enemy gadgets nearby, countering traps and setups.
Regenerative Therapy
- Cost: 5
Slowly regains HP after not taking damage for a while, enhancing survivability.
Extra Site
- Cost: 3
Adds an extra Target Site, increasing tactical options.
Small Heads
- Cost: 4
Reduces the size of allied heads, making them harder to hit.
Flashy Projectiles
- Cost: 4
Projectiles release a flash when making contact, adding a disorienting effect.
Homing Projectiles
- Cost: 3
Projectiles track enemies, making them harder to dodge.
Toxic Traps
- Cost: 3
Each ally gets one Toxic Trap they can set, controlling space. BLOG20
Psychic Defusing
- Cost: 3
Converter automatically starts defusing when a defender is nearby.
Smoke Shields
- Cost: 4
Increases max HP by 15 when staying inside smoke, encouraging tactical cover use.
A Main Ban
- Cost: 3
Blocks A Main with a destructible barricade, slowing enemy pushes.
B Main Ban
- Cost: 3
Blocks B Main with a destructible barricade, providing additional defense.
A Short Ban
- Cost: 3
Blocks A Short with a destructible barricade, restricting access.
B Short Ban
- Cost: 3
Blocks B Short with a destructible barricade, funneling opponents.
Inherit the Wind
- Cost: 3
Grants +1 skill use to allies when a teammate dies, rewarding trades.
Origin Detection
- Cost: 3
Exposes the gadget owner for 2 seconds when the gadget is destroyed.
Deadly Rewind
- Cost: 2
Your last few bullets zip back into your gun when reloading, dealing damage if they hit.


B-Tier Cards
B-Tier cards are just short of being in the current FragPunk meta. They’re situationally useful and can provide decent advantages, but they either require specific conditions to be effective or are outclassed by higher-tier options. These cards are not bad but should be picked carefully depending on the match and strategy.
 Full Fire Power
- Cost: 3
Loads all of your ammo into one mag, removing the need to reload but limiting flexibility.
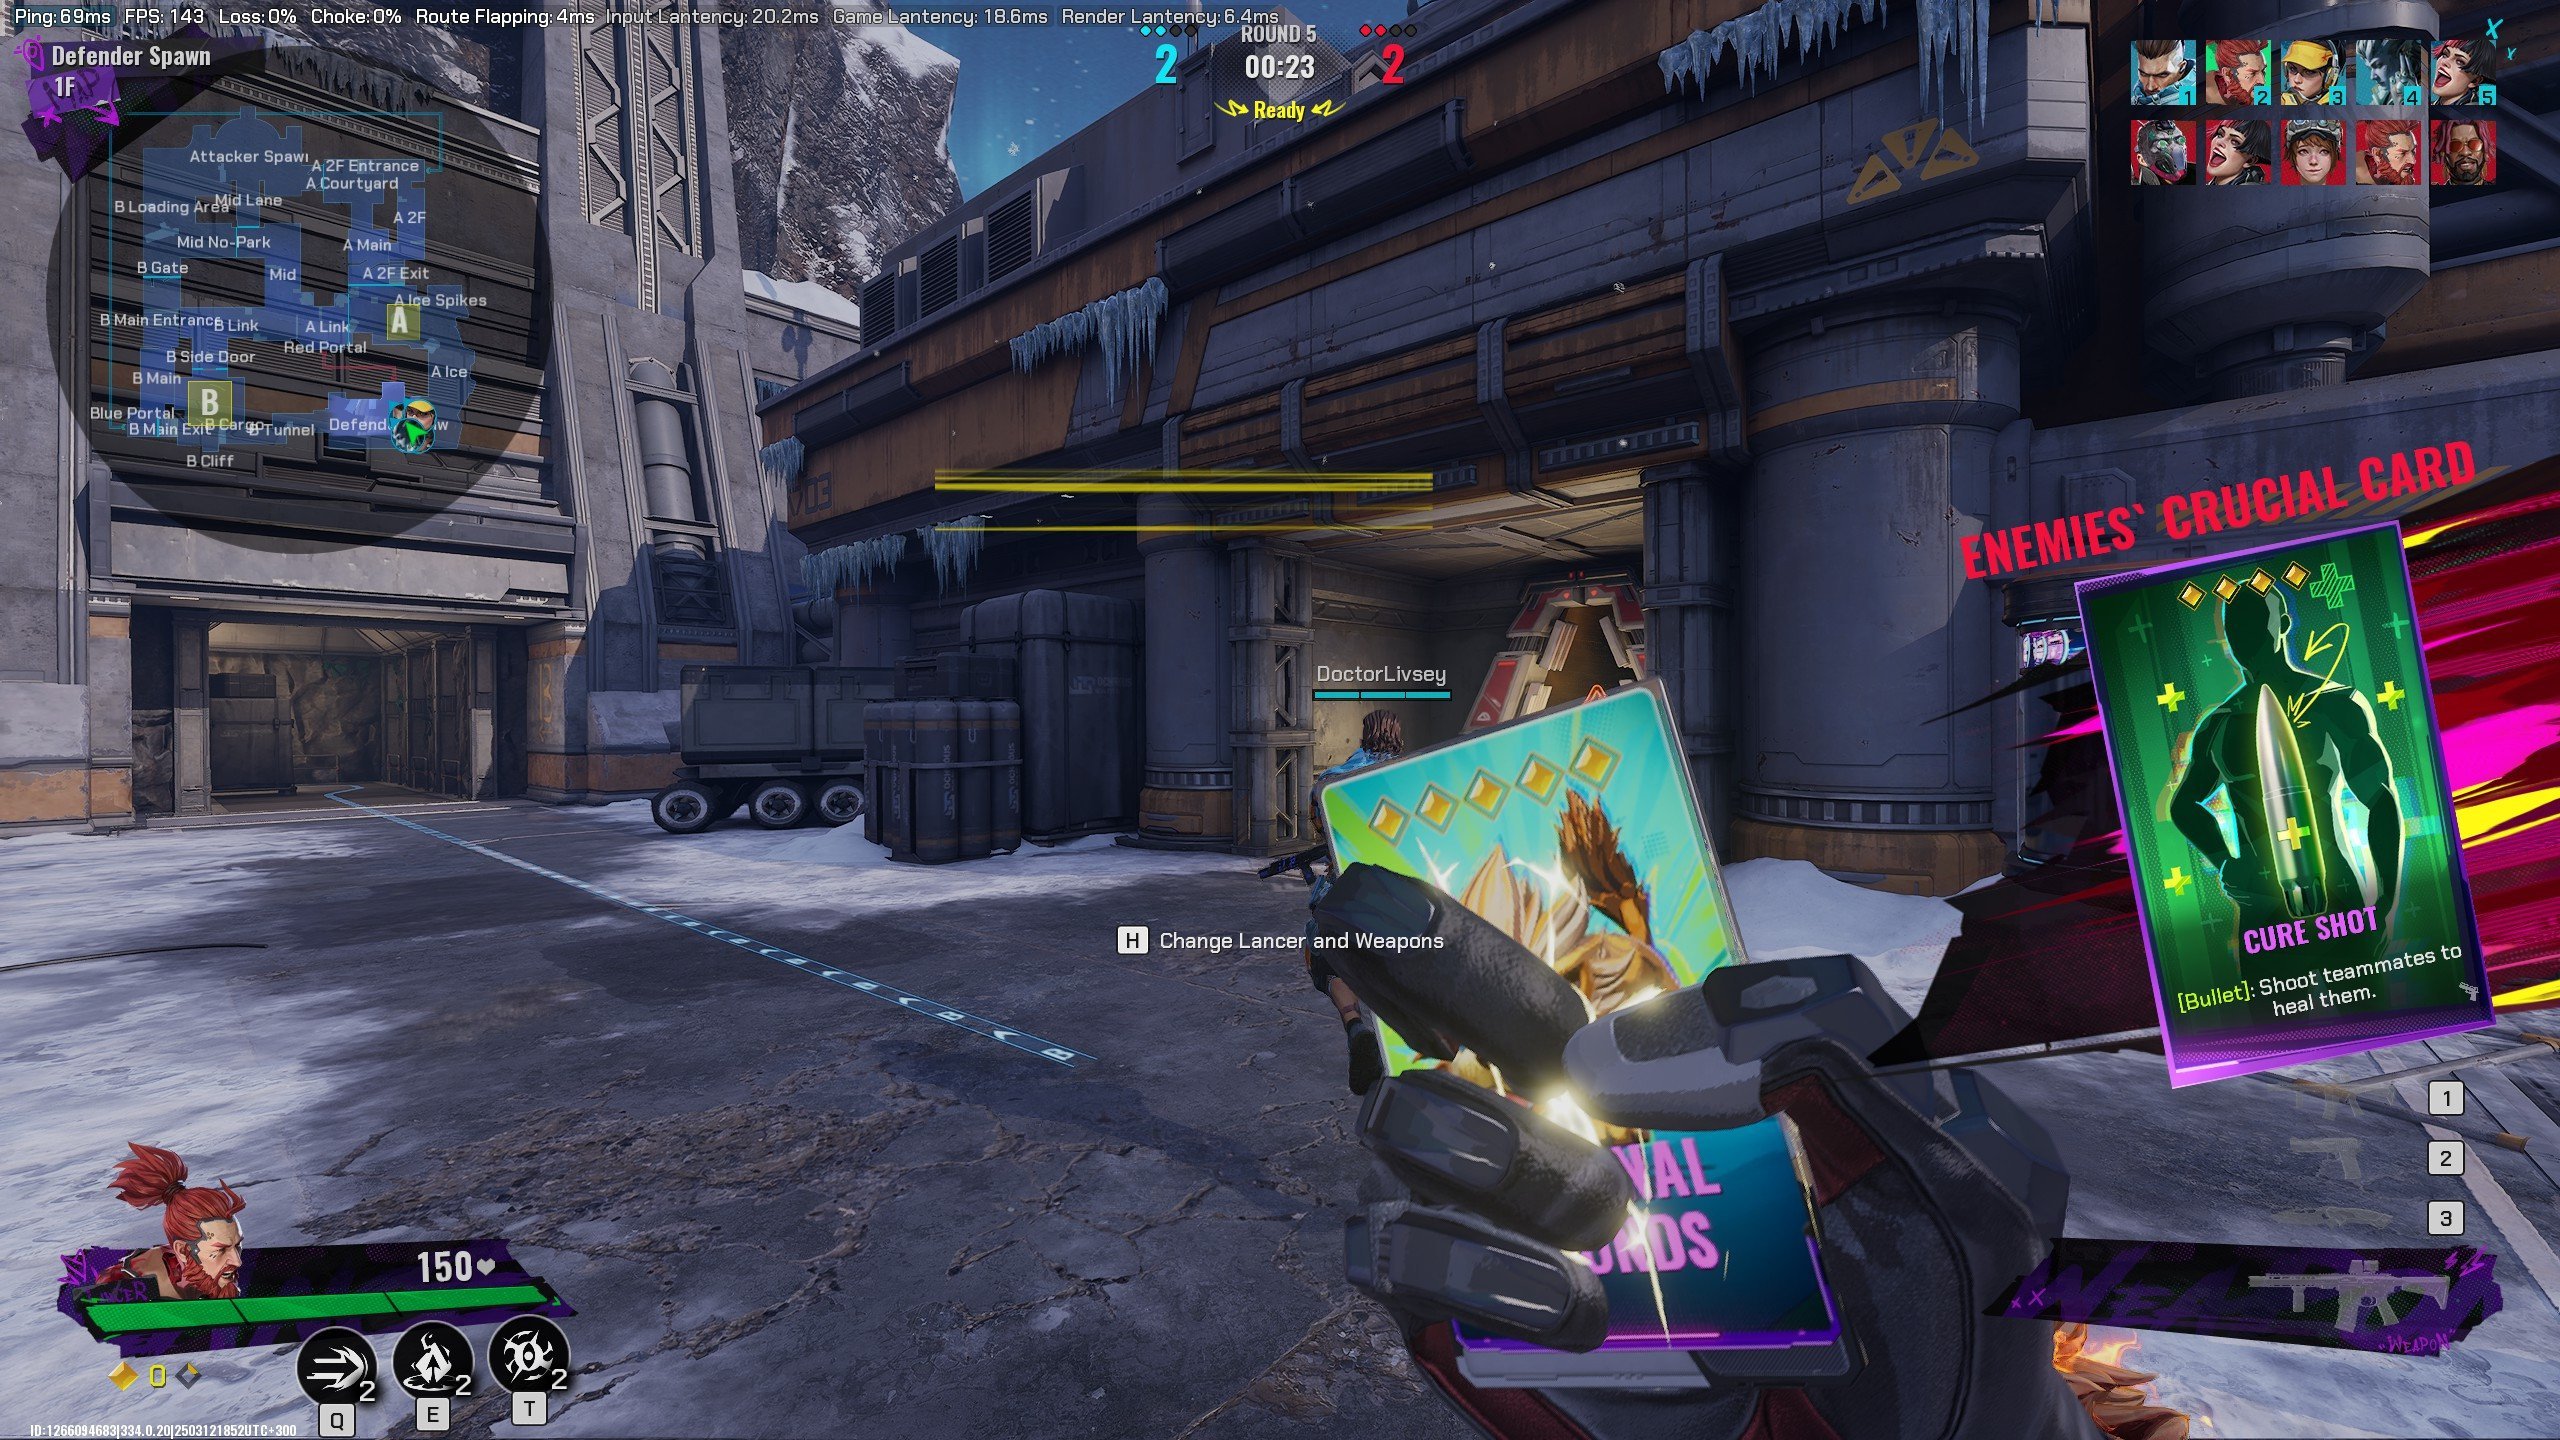
Cure Shot
- Cost: 4
Shoot teammates to heal them, trading offensive power for support utility.
Turtleback
- Cost: 3
Equip a turtle on your back that blocks bullets, offering rear protection.
Bigger and Badder
- Cost: 2
Projectiles get bigger and do more damage as they fly, rewarding long-range engagements.
Emergency Evacuation
- Cost: 4
Increases movement speed by 20% when under attack, aiding quick escapes.
Throw to Plant
- Cost: 3
The Converter plants itself when thrown into the target site, speeding up planting.
Life Saver
- Cost: 4
Teammates can be revived once via Soul Cores, but enemies can destroy them.
Relocation
- Cost: 5
Defenders can relocate the Target Sites until the Converter is planted, making the round dynamic.
Weapon Morph
- Cost: 5
Dropped weapons become turrets, providing automatic fire support.
Piercing Bullet
- Cost: 4
Bullets can go through walls once, enabling surprise eliminations.
Superfly
- Cost: 4
Gain a double jump ability, increasing mobility and movement options.
Eye of the Reaper
- Cost: 4
A planted Converter sends out a pulse that exposes nearby enemies.
Backup Weapon
- Cost: 5
Equip another primary weapon in your secondary slot, allowing for versatile loadouts.
Airborne Justice
- Cost: 4
Higher fire rate and reload speed while airborne, favoring aggressive vertical plays.
Healing Site A
- Cost: N
Creates a healing zone at A Site, regenerating Nx2 HP per second for allies.
Healing Site B
- Cost: N
Creates a healing zone at B Site, offering the same benefits as Healing Site A.
Shotgun Charge
- Cost: 3
Aims-down-sights to charge shotgun shells for massive damage, making shotguns deadlier.
Rapid Marksman Rifle
- Cost: 4
Reduces recoil and removes the rate of fire limit for Marksman rifles, improving accuracy.
Peace Treaty
- Cost: 3
Dropping your primary weapon grants you 70% damage reduction, rewarding strategic disarmament.
Tick Tock
- Cost: 5
After 1 minute, target sites are disabled, forcing attackers to eliminate defenders.
Return to Sender
- Cost: 5
When damaged for the first time, enemies are teleported to their spawn, resetting engagements.
Mini Mags
- Cost: N
Reduces enemy magazine size by -Nx5%, limiting sustained fire.
Chain Reaction
- Cost: 3
Creates a lightning chain that damages enemies within 4 meters, useful in clustered fights.
Free For All
- Cost: 4
All weapons can be chosen for free once, removing the economy restriction for one round.
Killstreak Bonus
- Cost: 3
Grants a +10% damage buff with each kill, rewarding aggressive players.
Dibs
- Cost: 3
Treasures are only destructible by your team, ensuring secure Shard Points.
Quick Charge
- Cost: 2
Melee attack charge time is reduced by 50%, allowing for faster melee follow-ups.
Holistic Deadicine
- Cost: N
Regains Nx10% health on every kill, improving sustain in prolonged fights.
Bigger Bombs
- Cost: 3
Explosion range increases by +50%, affecting a larger area.
Hold the Pass
- Cost: 2
Rapidly regenerates HP while standing on the bridge, useful for holding positions.
Drought
- Cost: 2
Drains on the map dry up, altering movement routes and engagements.
High Ground
- Cost: N
Bullet damage increases by Nx10% when shooting from a higher position.
Lucky Bullets
- Cost: 4
Fires an extra bullet in a random direction with every shot, offering unpredictable bonus damage.
C-Tier Cards
C-Tier cards offer little strategic advantage or require specific scenarios to be useful. They are not completely worthless, but they are often inconsistent, making them weaker than higher-tier options.
 Acrophobia
- Cost: 3
When the enemy is mid-air, their bullet damage is reduced by 50% for 2 seconds, limiting aerial threats.
Portal Malfunction
- Cost: 2
Disables all portals on the map, removing a key movement mechanic.
Broken Bridge
- Cost: 2
Disables the bridge on the map, cutting off a major route.
Weapon Ban
- Cost: 4
Bans a random primary weapon of each type, limiting enemy weapon choices.
Spreading Smoke
- Cost: 3
Increases the size of smoke clouds by 50%, making them harder to bypass.
Lingering Smoke
- Cost: 3
Doubles the duration of smoke grenades, keeping areas obscured for longer.
Weak Jumps
- Cost: N
Reduces enemy jump height by -Nx10%, making movement more restrictive.
Endless Battle
- Cost: 2
Increases the match time by 30 seconds, extending rounds artificially.
Quick Defuse
- Cost: 3
Reduces defusing time by 50%, allowing for much faster retakes.
Explosion Specialist
- Cost: N
Explosive damage increases by Nx20%, amplifying grenade and explosive effectiveness.
Long Dash
- Cost: N
Charged melee attack reach increases by Nx50%, extending melee attack range.
Large Bounty
- Cost: 2
Treasures drop double rewards, increasing available Shard Points.
Dragon’s Breath
- Cost: 3
Shotguns deal extra fire damage over time, making them deadlier in close quarters.
Muscle Weakness
- Cost: 3
Enemy projectiles fall faster, affecting long-range engagements.
Safety Glasses
- Cost: 3
Reduces the blinding effect of enemy flashbangs, improving visibility.
Misty Site A
- Cost: 2
A Site becomes misty, reducing visibility on that part of the map.
Misty Site B
- Cost: 2
B Site becomes misty, similarly reducing visibility.
Stand Up Straight
- Cost: 3
Enemies can’t crouch or slide, removing key movement options.
0 Compassion
- Cost: 3
Players with a kill/death ratio below 1 gain 10% increased rate of fire and 25% damage reduction, favoring struggling players.
Hidden Cameras
- Cost: 3
Treasures transform into cameras you can look through, allowing for additional surveillance.
Rift Expansion
- Cost: 3
Enlarges the target site, making plant and defuse areas bigger.
Time-saving Skill
- Cost: 3
Using skills reduces round time by 1 second per usage, which may have niche applications.
Mission Bound
- Cost: 2
You cannot die while planting the Converter, ensuring the plant goes through.
Headache Vision
- Cost: 3
Getting hit by a headshot exposes all your enemies, making it a high-risk information tool.
Two-Way Portals
- Cost: 2
Map portals work in both directions, offering increased movement flexibility.
Sustained Exposure
- Cost: 2
Enemies are exposed when taking sustained damage, making extended fights riskier.
Weapon or Life
- Cost: 5
Sacrifice your primary weapon to survive lethal damage once, offering a one-time second chance.
Prosthetic Eye
- Cost: 3
Throw one of your eyes as a camera, but lose part of your vision in return.
Roger, Roger
- Cost: 4
Spawns two combat bots on your team, offering additional AI support.
Frozen Wasteland
- Cost: 3
Turns the map into a snowy landscape, allowing players to slide everywhere.
Birdman
- Cost: 2
Fall slower while aiming down sights, reducing fall damage but affecting movement speed.
Iron Head
- Cost: 4
Become immune to extra headshot damage, negating headshot multipliers.
Invest in Future
- Cost: 3
Double Shard Point gain this round, giving you more resources for future rounds.
King of Eggs
- Cost: 5
Crouch for 10 seconds to lay an egg that heals for 50 HP, a gimmicky self-healing mechanic.
HUD Remix
- Cost: 3
Tear off your health bar and swap it with your target Lancer, introducing unpredictable outcomes.
Whetstone
- Cost: 4
Melee hits on enemies and allies regain HP, rewarding close-quarters combat.
Feinting Flash
- Cost: 3
Dropping your primary weapon generates a flashbang, disorienting enemies.
Fragile Converter
- Cost: 4
The Converter has 1500 HP, but it can be destroyed, introducing a new way to counter plants.
Leader of the Dead
- Cost: 5
Spend your own HP to generate a zombie, sacrificing health for an additional entity.
Heavy Armor
- Cost: 5
A random ally gains a massive HP buff but suffers greatly reduced damage output.
IP Theft
- Cost: 3
Destroying an enemy trap generates an identical allied trap, turning their tools against them.
Bad Knees
- Cost: 4
Enemies take full fall damage, punishing aerial movement.
Painful Motivation
- Cost: 4
Bullets can damage allies but increase their movement speed and fire rate, adding a high-risk buff.
Dimensional Travel
- Cost: 4
All players can travel between two worlds, where players in different dimensions are invisible to each other.
Close Quarters Combat
- Cost: 5
Both teams can only use melee weapons, drastically changing engagements.
Beauty Sleep
- Cost: 3
You can sleep to heal yourself, making it an impractical but amusing self-healing mechanic.
Cloaking Plant
- Cost: 2
Spawns invisibility-granting stealth grass on defensive routes.
Sprint Fire
- Cost: 3
Hipfire doesn’t interrupt sprinting, allowing full mobility while shooting.
Guess Who?
- Cost: 3
Enemies can’t see bullet damage indicators, making it harder for them to react to attacks.
Reaper’s Scythe
- Cost: 4
Generates a Reaper’s Scythe in your spawn, which can be used for powerful melee attacks.
Equipment Supply
- Cost: 5
All weapons gain one more use, providing extended weapon availability.
Hard Rain
- Cost: 5
Spawns heavy rain on the map, granting a water shield while standing in it.
Infernal Hounds
- Cost: 5
Each ally gets a fiery hound that follows them and attacks enemies, exploding into an AoE fire pit.
Stealth Novice
- Cost: 2
Enemies expose themselves when they enter and exit invisibility, countering stealth-based playstyles.
D-Tier Cards
 D-Tier cards are usually the least effective and are typically situational or gimmicky. These cards can disrupt your strategy or provide limited value in most scenarios, and they generally require specific setups or conditions to work.
Let Them Hear You
- Cost: 4
Increased movement speed when using voice chat, making it a fun but largely impractical card for competitive play.
Pull the Plug
- Cost: 4
Disables all Shard Cards for the round, which can be beneficial to disrupt the opponent's plans but also limits your own strategy significantly.
Best Cards for Attack
These S-tier are the best cards for attack in FragPunk. They’re incredibly strong and should be prioritized in your attacking strategy to maximize pressure on defenders and secure the plant with minimal risk.
- Offense Defense – This card swaps attackers and defenders for the round, giving attackers a huge tactical advantage. This sudden role reversal can completely disrupt the defensive strategy, creating confusion and making it easier to take control of the objective.
- Plenty of Ammo – Increasing mag size and ammo by 25% is perfect for sustained firefights and aggressive pushes. It ensures that attackers don’t run out of ammo during critical moments while advancing towards the plant. This card enhances your offensive capability and allows you to sustain pressure on the defenders without worrying about reloading too often. BLOG20
- Skill Replenish – Attackers can benefit greatly from accelerated skill replenishment. With this card, skills that typically don’t replenish (such as grenades, flashes, and other tactical abilities) will regenerate faster, allowing for more utility usage during the round. This card gives attackers more tools to break through defensive lines, control sightlines, and set up successful plants.
Best Cards for Defense
To hold off attackers and secure the Converter site you need the best cards for defense in FragPunk. The following S-tier cards are perfect for maximizing your defensive capabilities.
- Security Check – Exposing enemies near doors and triggering alarm sounds is an invaluable piece of intel for defenders. It lets your team know when to expect attackers, giving you the opportunity to prepare defensive positions and take preemptive action to prevent an easy plant. This card is perfect for holding chokepoints or narrow entrances.
- Freeze Bullet – This card slows down attackers by 55% on hit, which makes it extremely difficult for them to advance or escape while pushing the site. This crowd control effect is a major disruptor in defense and works particularly well in slowing attackers down as they try to reach the plant location, giving you more time to respond and defend.
- Prosthetic Enhancements – Having bulletproof limbs means you’re much harder to kill, especially in situations where enemies target arms and legs. It’s a strong defensive asset that helps you survive longer in firefights and makes you less vulnerable to sustained damage, giving you the edge when holding defensive positions or contesting the plant site.
Conclusion
In FragPunk, Shard Cards are a game-changing mechanic that can completely alter the flow of each round. Choosing the right cards based on whether you are attacking or defending is crucial for success. The S-tier cards in this guide offer the most strategic advantages, whether it's by disrupting your opponents, increasing your survivability, or enhancing your offensive capabilities. By incorporating these top-tier cards into your gameplay, you’ll have a significant advantage in FragPunk's dynamic and fast-paced matches.
F.A.Q.
What are the best cards in FragPunk?
- Vampire Bullet: Adds lifesteal to bullet damage, enhancing sustainability in fights.
- Superhuman: Increases healing, speed, and damage reduction from skills, improving overall survivability.
- Quick Reload: Greatly reduces reload time, keeping your offensive pressure high.
What is the strongest card in FragPunk?
Plenty of Ammo card is extremely strong because it increases your mag size and ammo by 25%, allowing for continuous fire during key moments of the round.
What are the best cards for attack in FragPunk?
- Freestyle Placement: Lets attackers plant the Converter anywhere, removing plant location restrictions.
- Explosive Shot: Bullets explode on impact, adding explosive damage to your shots, useful for clearing enemies and disrupting defenses.
- Vampire Night: Increases your max HP and provides lifesteal, letting attackers stay alive longer while dealing damage.
What are the best cards for defense in FragPunk?
- Freeze Bullet: Reduces enemy movement speed by 55% on hit, making it harder for attackers to push.
- Barrier Destruction: Makes preparation-phase barriers destructible, helping defenders to set up defenses more quickly.
- Dullahans: Makes allied heads invulnerable, greatly reducing the chance of being killed by headshots.
What is the most used FragPunk card?
Mass Cheetah is widely used for its +15% movement speed, allowing players to get into position faster and escape tight situations.


