We bet you have been waiting for this, heroes! The time-limited Pandaria Remix event is finally here. It brings many long-forgotten activities back to the game. Specifically for this, we have crafted this Siege of Orgrimmar guide for Mists of Pandaria Remix. This is the fifth and final raid you will have to complete within this expansion’s content.
Within these pages, we share the Siege of Orgrimmar strategy, its location, boss list, and other details. This is arguably the most complex raid you can tackle in this expansion. It houses as many as 14 bosses in total. The first of them is Immerseus, and the final one is Garrosh Hellscream himself!
Be prepared to witness their powerful abilities and make sure your party adapts to their deadly mechanics. Thanks to our Siege of Orgrimmar raid guide, you will succeed in all this and beyond. This activity is also a great way to get geared up for the upcoming The War Within expansion launching soon. Do not miss an opportunity to grab the items you have been missing all these years. After the event is over, nothing disappears, and it is transferred to the retail version of the game.
Before jumping straight to the point, spare us a moment here. At Skycoach, you can Buy Siege of Orgrimmar Raid Boost at the best market price. Our PROs will help you complete the instance on any difficulty. Forget about the grind, and let us take care of this job for you. The only thing you are left to do is to enjoy the loot and keep exploring Azeroth further!
IMPORTANT NOTE: Apart from learning everything about Siege of Orgrimmar, you can also Buy WoW Pandaria Boost from Skycoach. We offer a wide range of products at the lowest market price and with the fastest delivery. You can make your first purchase even CHEAPER if you find a special PROMO CODE (highlighted in green) hidden in this article and get a 20% DISCOUNT.
What is Siege of Orgrimmar in Mists of Pandaria Remix
Siege of Orgrimmar in MoP Remix is one of the five returning raids from the original expansion released in 2012. Similarly to other instances, you can tackle it in two distinct versions – 10-man and 25-man. Just like before, the activity comes in both Normal and Heroic difficulties. As we have mentioned, you will have to go through 14 encounters within this raid instance.
The original Siege of Orgrimmar release date was on September 10, 2013. The activity has become available again within the time-limited Mists of Pandaria Remix event. Once again, players have a chance to get their hands on unique loot. Among them is the Kor'kron Juggernaut mount we will talk about later in the article.
Siege of Orgrimmar is accessible upon reaching level 60. However, players will also be able to redo its Heroic version after achieving the level cap of 70.
Siege of Orgrimmar Location
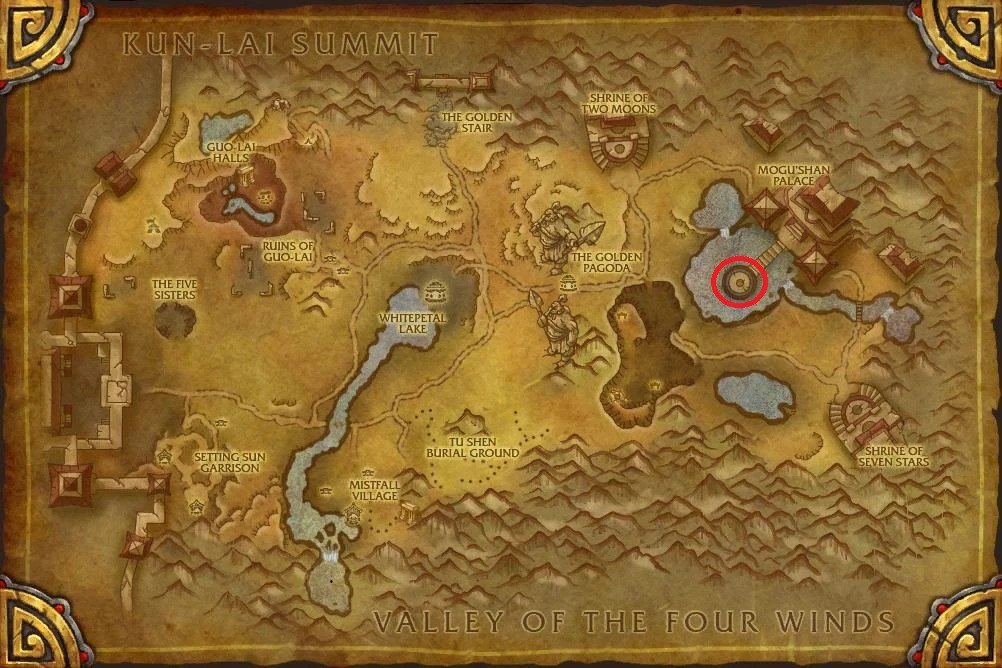
To find the Siege of Orgrimmar location, make your way to the Vale of Eternal Blossoms. This zone is placed between Valley of the Four Winds and Kun-Lai Summit. The easiest way to get there is through Dalaran portals. Once you are there, head to Mogu'shan Palace and look for a pile of white stones scattered near its entrance.
If you still wonder how to get to Siege of Orgrimmar, follow these coordinates – 72.5, 44.1. Though the entrance is easy to spot, you will not miss it for sure if you do this.
In case you have a question of where is entrance Siege of Orgrimmar after all the attempts, we have you covered. We have attached a screenshot with the exact location marked on it. Keep reading the article further to find it and have a visual hint of what you need to look for.
Here is the Siege of Orgrimmar location map marked in the screenshot below:
Now that you know where is the Siege of Orgrimmar, let’s get prepared for the challenge. First of all, you need to hit the maximum level, as this is the fifth and most complex raid within this expansion’s content. For this, you can Buy WoW Pandaria Remix Leveling at Skycoach. Save plenty of time, skip the grind, and enjoy playing the game at level 70 ASAP. We offer the best price for the service provided and guarantee the fastest results!
Siege of Orgrimmar Bosses
With 14 Siege of Orgrimmar bosses waiting to be vanquished, this raid is arguably one of the most complex instances in the game. As usual, each of them features deadly abilities, unseen before mechanics, and compositions you need to be prepared for. Things get more difficult if your party decides to clear the raid in Heroic mode.
We have compiled a Siege of Orgrimmar boss list in WoW Mists of Pandaria Remix:
- Immerseus
- The Fallen Protectors
- Norushen
- Sha of Pride
- Galakras
- Iron Juggernaut
- Kor'kron Dark Shaman
- General Nazgrim
- Malkorok
- Spoils of Pandaria
- Thok the Bloodthirsty
- Paragons of the Klaxxi
- Siegecrafter Blackfuse
- Garrosh Hellscream
Keep reading our guide to find detailed Siege of Orgrimmar tactics for each boss we have mentioned. This will save plenty of time for your raid group and help you rush through the most difficult encounters easily. BLOG20
Siege of Orgrimmar Loot Table
The following part of the article focuses on Siege of Orgrimmar loot table to demonstrate what rewards you can hope to get. Depending on a particular item’s quality, it will feature different stats.
NOTE: The Siege of Orgrimmar loot provided below is NOT FINAL and is intended for illustrative purposes only. This text focuses primarily on guiding through defeating the raid's most powerful bosses, rather than exhaustively detailing every available reward within the instance. However, getting acquainted with this table offers insight into the potential rewards awaiting you.
| Boss | Item Name | Gear Slot |
|---|---|---|
| Immerseus | Cloak of Misguided Power | Back |
| Immerseus' Crystalline Eye | Neck | |
| Trident of Corrupted Waters | Staff | |
| The Fallen Protectors | Death Lotus Crossbow | Crossbow |
| Poisonbinder Girth | Waist | |
| Sha-Seared Sandals | Feet | |
| Norushen | Fusion-Fire Core | Trinket |
| Norushen's Enigmatic Barrier | Shield | |
| Xifeng, Longblade of the Titanic Guardian | 1H Sword | |
| Sha of Pride | Assurance of Consequence | Trinket |
| Gaze of Arrogance | Staff | |
| Shield of Mockery | Shield | |
| Galakras | Dragonmaw Emergency Strap | Waist |
| Dagryn's Discarded Longbow | Bow | |
| Galakrond Control Band | Finger | |
| Iron Juggernaut | Belt of Ominous Trembles | Waist |
| Minelayer's Padded Boots | Feet | |
| Seismic Bore | 1H Mace | |
| Kor'kron Dark Shaman | Iron Wolf Hood | Head |
| Ashen Wall Girdle | Waist | |
| Ashflare Pendant | Neck | |
| General Nazgrim | Gauntlets of the Cursed Conqueror | Hands |
| Arcweaver Spell Sword | 1H Sword | |
| Bulwark of the Fallen General | Shield | |
| Malkorok | Kor'kron Hand Cannon | Gun |
| Robes of Riven Dreams | Chest | |
| Seal of Sullen Fury | Finger | |
| Spoils of Pandaria | Ancient Mogu Tower Shield | Shield |
| Immaculately Preserved Wand | Wand | |
| Chitin-Link Chain Belt | Waist | |
| Thok the Bloodthirsty | Devilfang Band | Finger |
| Gleaming Eye of the Devilsaur | Neck | |
| Thok's Acid-Grooved Tooth | Trinket | |
| Siegecrafter Blackfuse | Blackfuse's Blasting Cord | Neck |
| Calixian Bladebreakers | Hands | |
| Lever of the Megantholithic Apparatus | Staff | |
| Paragons of the Klaxxi | Bracers of Sonic Projection | Wrist |
| Hisek's Reserve Longbow | Bow | |
| Iyyokuk's Hereditary Seal | Finger | |
| Garrosh Hellscream | Belt of the Broken Pact | Waist |
| Curse of Hubris | Trinket | |
| Kor'kron Spire of Supremacy | Staff |
With an overwhelming number of Siege of Orgrimmar drops available, we wish you big luck in getting the ones you really need. If you do not have this much time, let our PROs take care of this job for you. Do not miss the opportunity to get the items you have always wanted. Skycoach is here to help!
After defeating Garrosh Hellscream, the final raid boss, you have a chance to get a unique Siege of Orgrimmar mount. It is called Kor'kron Juggernaut, which drops with around a 3% chance from this boss only.
Siege of Orgrimmar Tier Sets
Speaking of other rewards every player is after, Siege of Orgrimmar tier sets cannot be missed out on here. They are tailored to different classes and roles you are intended to execute. These sets also come in several qualities, providing better or worse stats and effects.
| Class | Set Name | Role |
|---|---|---|
| Death Knight | Battleplate of Cyclopean Dread | DPS |
| Plate of Cyclopean Dread | Tank | |
| Druid | Vestments of the Shattered Vale | Healer |
| Battlegear of the Shattered Vale | DPS | |
| Armor of the Shattered Vale | Tank | |
| Regalia of the Shattered Vale | Caster | |
| Hunter | Battlegear of the Unblinking Vigil | Ranged |
| Mage | Chronomancer Regalia | Caster |
| Monk | Vestments of Seven Sacred Seals | Healer |
| Armor of Seven Sacred Seals | Tank | |
| Battlegear of Seven Sacred Seals | DPS | |
| Paladin | Vestments of Winged Triumph | Healer |
| Plate of Winged Triumph | Tank | |
| Battlegear of Winged Triumph | DPS | |
| Priest | Regalia of Ternion Glory | Caster |
| Vestments of Ternion Glory | Healer | |
| Rogue | Barbed Assassin Battlegear | Melee |
| Shaman | Celestial Harmony Vestment | Healer |
| Celestial Harmony Battlegear | Melee | |
| Celestial Harmony Regalia | Caster | |
| Warlock | Regalia of the Horned Nightmare | Caster |
| Warrior | Battleplate of the Prehistoric Marauder | DPS |
| Plate of the Prehistoric Marauder | Tank |
Judging by the list you see above, everyone can obtain a tier set suiting their playstyle and preferences. Just keep in mind how hard they are to get. In the long run, if you manage to get the one you need, all your time and effort investments are justified.
Siege of Orgrimmar Bosses Guide – WoW Pandaria Remix
The biggest part of our article is dedicated to Siege of Orgrimmar bosses guide. Here, you can find everything about each boss’s mechanics, abilities, and recommended strategies. Before delving into any details, we would like to draw your attention to one thing. Teamwork and an experienced raid leader are essential components for any encounter.
While you can solo Siege of Orgrimmar, the chances of it are not that high. This will require a completely different approach. Instead, focus on working in a group of people who are, in most cases, going to be your friends. Let’s start with Immerseus and go all the way to Garrosh Hellscream. One of the most exciting raids in the history of WoW awaits, heroes!
Immerseus
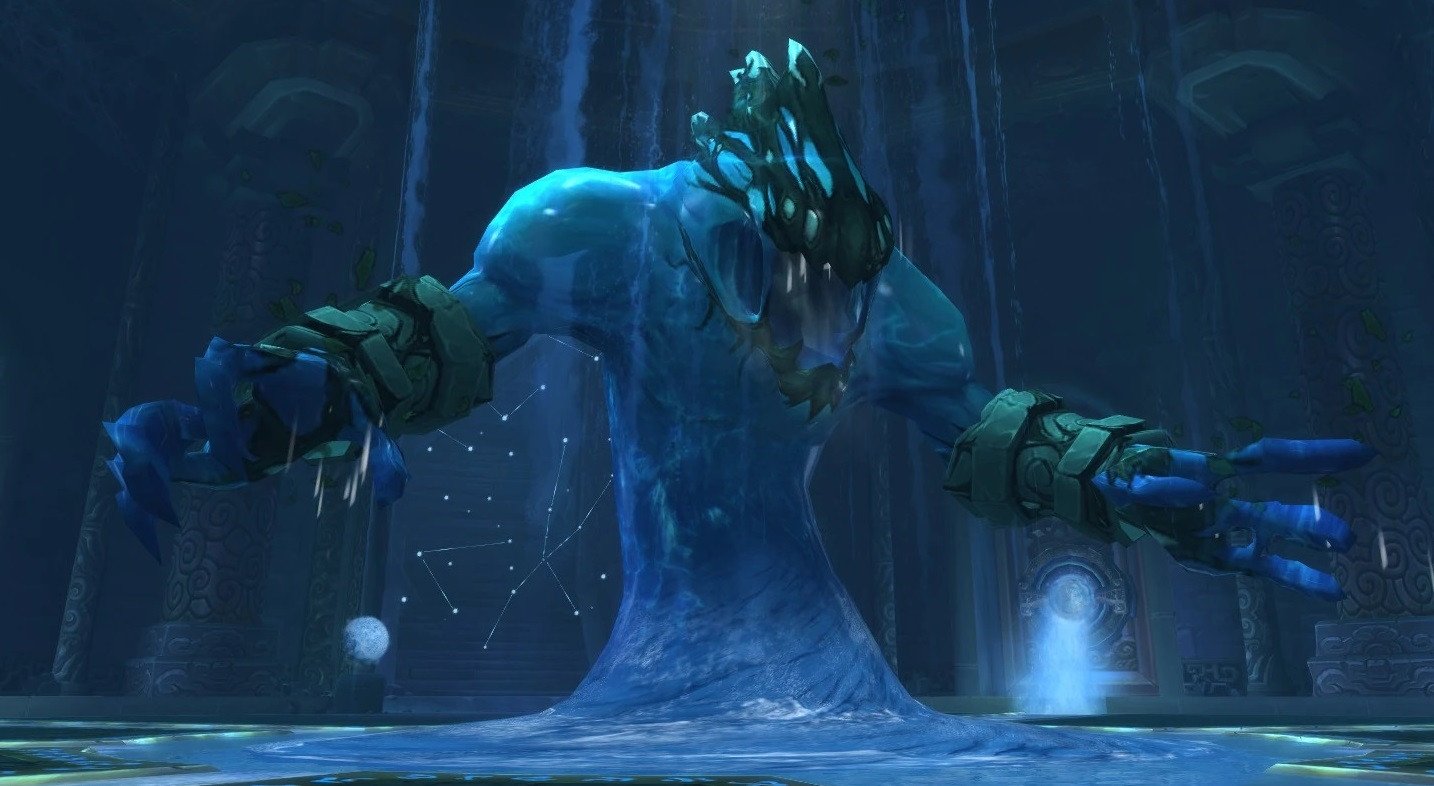 Starting with the basics, Immerseus stands as the 1st boss you will encounter within the Siege of Orgrimmar raid. While the encounter itself is fair, it will test your group’s gear level. Below, you can find important pre-fight details before we get further into our Immerseus guide Pandaria Remix:
- 10-Man Normal Health Pool – 62M;
- 10-Man Heroic Health Pool – 87.2M;
- 25-Man Normal Health Pool – 212M;
- 25-Man Heroic Health Pool – 267.8M.
The boss also features a 10-minute Enrage timer to be aware of.
Speaking of the Immerseus boss raid composition, stick to this option:
- 10-Man Normal: 2 Tanks, 2-3 Healers, 5-6 DPS;
- 10-Man Heroic: 2 Tanks, 3 Healers, 5 DPS;
- 25-Man Normal: 2 Tanks, 5-7 Healers, 16-18 DPS;
- 25-Man Heroic: 2 Tanks, 5-7 Healers, 16-18 DPS.
Other alternatives can be used as well, but this one is our top priority.
Immerseus Abilities
Now, let’s have a detailed look at Immerseus abilities and describe them briefly:
| Sha Bolt | Deals Shadow damage to anyone affected by the ability and targets standing within 5 yards of them. The skill also forms a Sha Pool around the area it was used on. |
| Swirl | Summons several small void zones, which move around the area. They deal damage to any player who is hit by them. Those who take damage from these zones are also knocked in the air. |
| Seeping Sha | Acts as a protective barrier the boss uses to protect himself. If you get too close and touch this shield, you will take damage. However, it does not work for melee range classes. |
| Corrosive Blast | Deals Shadow damage and grants a debuff, which increases Shadow damage taken by 300%. This effect lasts for 45 second and stacks. Do make sure you make a tank switch when the spell is cast. |
As you can see, you do not have to play around too many mechanics at once. However, Corrosive Blast can be especially dangerous if you do not play carefully enough.
Immerseus Guide – Tactics & Strategy
Continuing our Immerseus guide, it is important to clarify how many Phases you will have to go through. You will face two alternating Phases until the boss is defeated.
Immerseus comes into the battle with a Corruption resource bar starting at 100. This bar gradually decreases throughout the fight based on your raid's actions. Immerseus meets his end when his Corruption level hits 0.
The Immerseus Phase initiates the fight. Here, you will fight Immerseus himself, stationed in the center of a circular arena. As his health rapidly diminishes (due to his small health pool), he will split into numerous adds, signaling the onset of the second phase.
The Split Phase commences when Immerseus hits 0% health. The boss fragments into various small adds, some friendly and some hostile, which slowly converge toward the arena's center. Friendly adds can be healed, while hostile ones can be damaged and eliminated. Once all adds are dealt with (either healed, killed, or reaching Immerseus), the Split Phase concludes, and the Immerseus Phase resumes.
Each add dispatched or healed during the Split Phase reduces the boss's Corruption by 1 point. When the Immerseus Phase restarts, the boss's health percentage matches his Corruption level.
This is what your Immerseus tactics will look like in most cases:
- Tank the boss with your back to the raid, switching tanks after each Corrosive Blast;
- Keep the entire raid spread out around the boss, maintaining a distance of at least 5 yards between players. Move out of void zones created by Sha Bolt immediately;
- When Immerseus uses Swirl, steer clear of the moving void zones and avoid the water jets he shoots. Depending on your position, you may need to move a lot to dodge them effectively;
- Avoid the center of the arena, as it inflicts damage and knocks you back.
Positioning is crucial, and several key considerations should be kept in mind. Firstly, only the tank currently engaged with Immerseus should be positioned in front of him, while the off-tank stays nearby, ready to taunt when necessary (remember, you cannot move through Immerseus).
The raid should spread out evenly around Immerseus for multiple reasons. First, the area will become crowded with Sha Bolt void zones as the phase progresses, necessitating the use of the entire space. Second, maintaining a 5-yard distance between raid members helps mitigate additional damage from Sha Bolt. Third, during the Split Phase, adds will spawn from various points around the room, requiring raid members to be strategically placed to handle them effectively.
Additionally, it is crucial to position healers throughout the room to ensure that each group of players remains within range of sufficient healing support.
Moving on, let’s talk about Heroic mode of the Immerseus encounter. In each Phase, the boss gets a buff called Swelling Corruption. Attacks chip away at its stacks, causing the attacker to suffer a dispellable Shadow DoT and summoning a melee add. The buff dissipates when all stacks are depleted. During the Split Phase, Immerseus creates a damaging void zone at the center of the room. It expands slowly, dealing increasing Shadow damage and shrinking whenever it hits a player. It disappears at the end of the phase. BLOG20
The Fallen Protectors
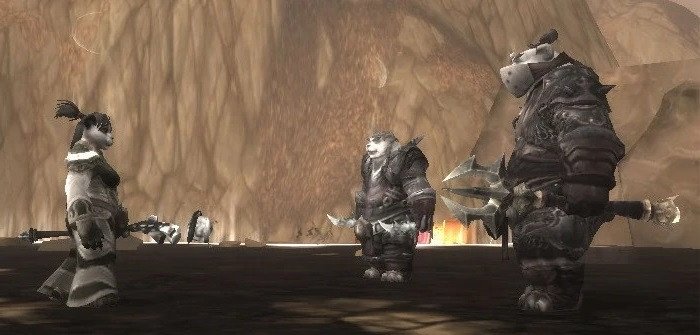 Up next, you will face off against The Fallen Protectors – 2nd encounter of the Siege of Orgrimmar raid. Be prepared for a council-type fight, which tests your group’s ability to play together. The most important aspects here are moving around the area and repositioning. Before we jump into further details with The Fallen Protectors guide, here is what you need to know:
| Difficulty | Rook Stonetoe | He Softfoot | Sun Tenderheart |
| 10-Man Normal | 114M | 112M | 112M |
| 10-Man Heroic | 248M | 247M | 245M |
| 25-Man Normal | 320M | 317M | 314M |
| 25-Nan Heroic | 701M | 695M | 688M |
The fight also features a 10-minute Enrage timer to be aware of.
Speaking of The Fallen Protectors boss raid composition, stick to this option:
- 10-Man Normal: 2 Tanks, 2-3 Healers, 5-6 DPS;
- 10-Man Heroic: 2 Tanks, 2-3 Healers, 5-6 DPS;
- 25-Man Normal: 2 Tanks, 5-7 Healers, 16-18 DPS;
- 25-Man Heroic: 2 Tanks, 5-7 Healers, 16-18 DPS.
Other alternatives can be used as well, but this one is our top priority.
The Fallen Protectors Abilities
Since you will be fighting three bosses at once, The Fallen Protectors abilities will look different depending on the enemy. This type of battle is not unique to Siege of Orgrimmar, but it is always painful for less coordinated raid groups.
Rook Stonetoe:
He Softfoot:
Sun Tenderheart:
Each boss also features a so-called Desperate Measures phase. During it, different mechanics occur, which happen at 66% and 33% HP. Usually, one or more adds are summoned after during this phase. Once they are defeated, the boss returns to the fight with the same amount of health.
The Fallen Protectors Guide – Tactics & Strategy
Now, let’s jump into a more detailed The Fallen Protectors guide we have crafted for you. First and foremost, your raid needs to develop a comprehensive strategy to tackle the regular phases of all three bosses simultaneously. Once this general approach is understood, you will then need to delve into mastering the Desperate Measures phases, all while dealing with the standard abilities of the other two bosses concurrently. It is critical to ensure that only one boss enters a Desperate Measures phase at a time, as facing multiple bosses in this state will significantly complicate matters.
It is crucial to tank He Softfoot and Rook Stonetoe all the time. Sun Tenderheart will mainly use Sha Sear at your party. Here is what your strategy will look like in most cases.
Tanks:
- Ensure Rook is facing away from the rest of the raid to shield them from Vengeful Strikes' damage.
- Keep He positioned away from the raid and relocate him as needed when he creates poison void zones. Employ a minor defensive cooldown to withstand Instant Poison.
- When He casts Gouge, the tank must face away to prevent incapacitation.
Healers:
- Swiftly dispel Shadow Word: Bane to prevent its harmful effects whenever feasible.
- Stand ready to heal the significant and unavoidable damage caused by Garrote and Calamity.
Everyone:
- Steer clear of Corrupted Brew to avoid its harmful effects.
- If targeted by Sun's Sha Sear, move away from fellow raid members to minimize damage. There is no need to interrupt Sun.
- When Rook initiates Corruption Kick, move away to avoid the damage it deals.
- Stay vigilant of He's poison void zones and avoid them accordingly.
It is crucial to slay all three bosses at once. The maximum gap between killing them cannot be more than 10 seconds. That is why your DPS should have the following priority to ease the task:
- Take Rook to 66%
- Take He to 66%
- Take Sun to 66%
- Take Rook to 33%
- Take He to 33%
- Take Sun to 33%
- Kill all three bosses
As a rule, you will keep damaging all three bosses with your DoTs and cleave damage.
Now, let’s add a few words concerning Heroic mode and what makes it different. Alongside the general increase in health and damage output for all mobs, several mechanics have been adjusted to ensure that your raid consistently triggers each boss's Desperate Measures phase. These modifications act as soft enrage mechanics, designed to prevent raids from prolonging any specific boss's encounter. Similarly to He's soft enrage in Normal mode, where Garrote becomes undispellable and indefinite in duration but resets during his Desperate Measures phase, these changes reset when a boss enters their respective Desperate Measures phase.
Norushen
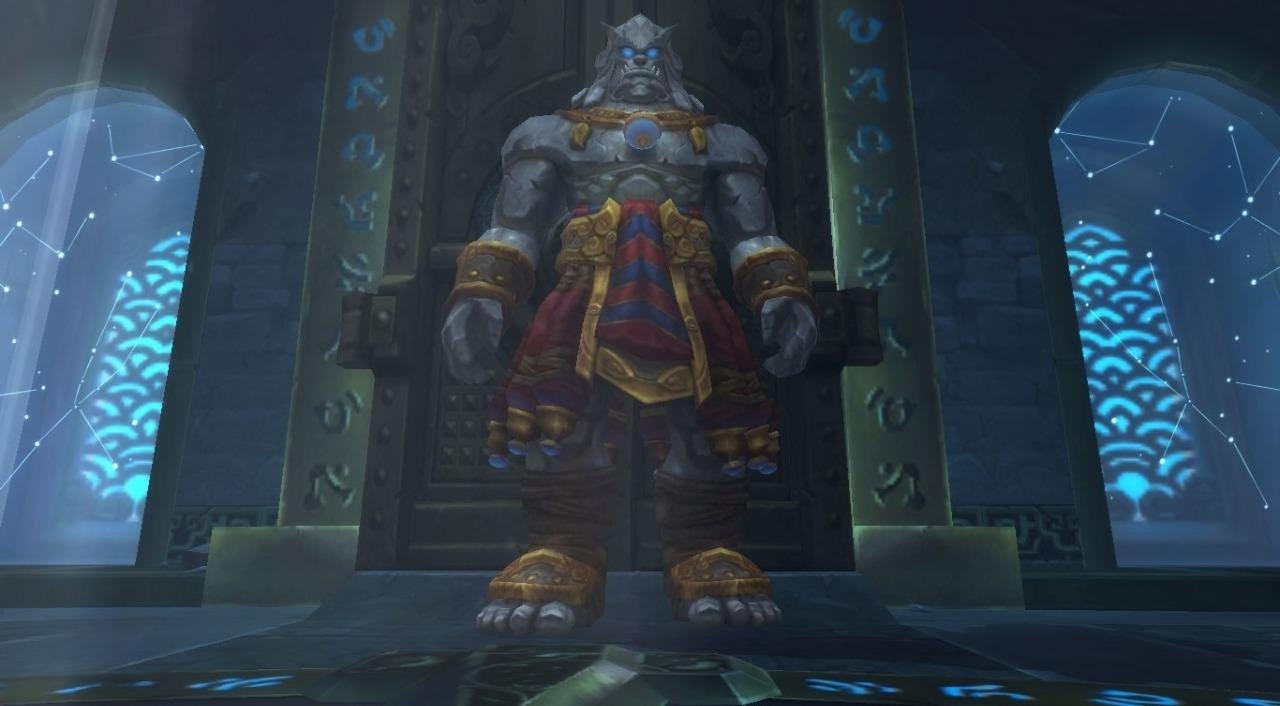 Norushen acts as the 3rd boss you will encounter in the Siege of Orgrimmar raid. During it, you will help Norushen to defeat Amalgam of Corruption. The entire battle can be split into two realms, each of them featuring specific mechanics we will cover below.
Starting with the basics of our Norushen guide, let’s take a look at the boss’s health pool:
- 10-Man Normal Health Pool – 261M;
- 10-Man Heroic Health Pool – 702M;
- 25-Man Normal Health Pool – 1.1B;
- 25-Man Heroic Health Pool – 1.95B.
The boss also features a 7-minute Enrage timer to be aware of.
Speaking of the Norushen boss raid composition, stick to this alternative:
- 10-Man Normal: 2 Tanks, 2-3 Healers, 5-6 DPS;
- 10-Man Heroic: 2 Tanks, 2-3 Healers, 5-6 DPS;
- 25-Man Normal: 2 Tanks, 5-7 Healers, 16-18 DPS;
- 25-Man Heroic: 2 Tanks, 5-7 Healers, 16-18 DPS.
Other options can be used as well, but this one is our top priority.
Norushen Abilities
First of all, let’s have a closer look at Norushen abilities you can expect within this encounter:
| Unleashed Anger | Deals high Physical damage to the chosen target. As a rule, it is your group’s tank. |
| Self Doubt | Acts as a stacking debuff, which increases the target’s damage taken from Unleashed Anger by 40% per stack. Switching your tanks is a must when the debuff is applied. |
| Icy Fear | Presents a continuous threat throughout the encounter with the Amalgam, striking the entire raid with Frost damage every 3 seconds. As the Amalgam's health dwindles, the intensity of this Frost damage escalates. It is important to note that Icy Fear only affects players within the Normal Realm. |
| Blind Hatred | Deals tons of AoE Shadow damage to all the players hit by this spell. |
The number of mechanics you need to keep in mind is not that overwhelming. However, they can seem tricky due to the fact you are fighting the boss in two different realms.
Norushen Guide – Tactics & Strategy
Moving on with our Norushen guide, let us clarify the realm mechanics you will have to go through. In this encounter, your focus is not on battling Norushen himself but rather on confronting the Amalgam of Corruption. Norushen is an ally to your raid and remains uninvolved in the fight.
The encounter unfolds across two distinct realms:
- The Normal Realm, where the bulk of the confrontation against the Amalgam of Corruption occurs.
- The Test Realm, a brief visit required for each raid member during the fight.
At the outset, raid members possess a level of Corruption, which diminishes their damage output against the Amalgam. Throughout the encounter, certain mechanics may increase their Corruption. Success hinges on most, if not all, DPS players purging their Corruption, transitioning to a Purified state, and thereby maximizing their damage against the Amalgam. Healers and Tanks who purge their Corruption benefit from heightened healing and reduced damage intake, respectively.
Players can cleanse their Corruption by venturing into the Test Realm, where they face specific challenges – defeating designated mobs. Upon completion, they return to the Normal Realm, ready to resume the battle against the Amalgam.
Once the encounter starts, your entire raid will be situated in the Normal Realm, where the majority of the battle unfolds. However, a crucial aspect of the fight involves brief excursions for most raid members into their respective Test Realms to cleanse their Corruption. While these Test Realms are largely distinct from the Normal Realm, they still influence the overall encounter, warranting early acknowledgment.
The primary link between the two realms lies in the transfer of mobs slain by DPS players in their Test Realms. These mobs, restored to full health, are subsequently dispatched into the Normal Realm, where your raid must contend with them.
To ease the fight, purify as many players as possible. But purifying everyone is not the best idea due to time constraints. Prioritize by:
- Purifying enough DPS for the raid to defeat the boss in time.
- Ensure enough tanks and healers are purified to soak Residual Corruption void zones.
At the start, send a tank and DPS to the Test Realms. The tank in the Normal Realm tanks the first Unleashed Manifestation of Corruption, while the other tank gets purified. Repeat this cycle to facilitate tank switching.
The Heroic mode of the Norushen encounter closely mirrors the Normal mode, with minimal deviations. Initially, Heroic mode introduced several new abilities, but these were swiftly altered by the developers. As a result, the fight is notably simplified compared to its original iteration. The only difference you will see is that mobs have increased HP and do higher damager.
Sha of Pride
 As your group continues to move forward, you will encounter Sha of Pride, the 4th boss in the Siege of Orgrimmar raid. The fight can seem quite tricky compared to others since you will have to manage a specific resource called Pride. The battle will also test your party’s ability to race together as a team to finish the boss at the end.
As always, let’s begin our Sha of Pride guide Pandaria Remix by sharing the boss’s health pool:
- 10-Man Normal Health Pool – 425M;
- 10-Man Heroic Health Pool – 660M;
- 25-Man Normal Health Pool – 1.2B;
- 25-Man Heroic Health Pool – 1.85B.
As the Sha of Pride's health decreases to 30%, the raid will steadily accumulate 5 Pride every 10 seconds. This accumulation persists, granting approximately 200 seconds for the raid to defeat the boss from that juncture.
Speaking of the Sha of Pride boss raid composition, stick to this alternative:
- 10-Man Normal: 2 Tanks, 2-3 Healers, 5-6 DPS;
- 10-Man Heroic: 2 Tanks, 2-3 Healers, 5-6 DPS;
- 25-Man Normal: 2 Tanks, 5-7 Healers, 16-18 DPS;
- 25-Man Heroic: 2 Tanks, 5-7 Healers, 16-18 DPS.
Other options can be used as well, but this one is our top priority.
Sha of Pride Abilities
Compared to other bosses, you will have a bigger number of Sha of Pride abilities to deal with:
- Reaching Attack
- Wounded Pride
- Corrupted Prison
- Mark of Arrogance
- Swelling Pride
- Bursting Pride
- Projection
- Aura of Pride
- Overcome
- Self-Reflection
- Mocking Blast
- Last Word
- Unleashed
Despite a greater number, they are not that too difficult to handle.
Sha of Pride Guide – Tactics & Strategy
Moving on with our Sha of Pride guide, let’s get into a more detailed strategy for this Siege of Orgrimmar encounter. Tanks should swap the boss whenever one of them is afflicted by Wounded Pride. The off-tank should pick up Manifestations of Pride while the raid focuses on quickly eliminating them. It is crucial to interrupt any casts of Mocking Blast.
Be prepared to move away from areas where Reflections will spawn during Self-Reflection casts. Tanks should pick up the resulting Reflections for AoE damage. Ensure no one stands atop titan prisons, but be ready to swiftly free imprisoned players by moving to their location.
Healers under the effects of the Gift of the Titans buff should dispel Mark of Arrogance from afflicted players whenever possible. Handle Swelling Pride effects as necessary. Avoid taking damage from Bursting Pride void zones.
Players affected by Projection should promptly move to their projections within 6 seconds. Those with Aura of Pride must maintain a distance of at least 5 yards from other raid members until their debuff expires.
Maintain awareness to prevent any raid member from reaching 100 Pride. As the Sha of Pride's health diminishes to 30%, use offensive and defensive cooldowns. Finish off the boss swiftly before the raid accumulates 100 Pride.
Heroic mode strategy builds upon Normal mode with added mechanics: Banishment and Unstable Corruption.
- For Banishment, stack the raid near the boss to quickly kill Corrupted Fragments, minimizing time in the Sha Realm.
- Handle Unstable Corruption by loosely spreading out and closing Rifts of Corruption whenever possible, avoiding hostile adds and maze walls.
Players should avoid Orbs of Light in the Sha Realm to prolong survival. Rifts spawn constantly, requiring assigned groups to close them while avoiding Weakened Resolve and Mark of Arrogance debuffs.
Stack for Self-Reflection to manage resulting adds, but move away when Reflections spawn. Aim to reduce boss health to 30% before any member reaches 50 Pride, simplifying the strategy. Healers can dispel Mark of Arrogance if it does not exceed 50 Pride before the boss hits 30% health. BLOG20
Galakras
 Galakras stands as the 5th boss encounter within the Siege of Orgrimmar. Drawing parallels to the Razorscale encounter from Wrath of the Lich King, players must navigate through waves of mobs and use Anti-Air turrets to force the proto-drake boss to land, allowing for direct engagement and eventual defeat.
Starting our Galakras Guide Pandaria Remix, it is worth mentioning the boss’s health pool first:
- 10-Man Normal Health Pool – 218M;
- 25-Man Normal Health Pool – 417B;
The boss also features a 7-minute Enrage timer to be aware of.
Speaking of the Galakras boss raid composition, stick to this alternative:
- 10-Man Normal: 2 Tanks, 2-3 Healers, 5-6 DPS;
- 25-Man Normal: 2 Tanks, 5-7 Healers, 16-18 DPS;
Other options can be used as well, but this one is our top priority.
Galakras Abilities
As for Galakras abilities, the boss only has two of them. However, your raid group will face off against plenty of adds, each featuring their own specific abilities. Learning them is essential to complete this encounter of the Siege of Orgrimmar raid.
Korgra the Snake:
Lieutenant Krugruk:
High Enforcer Thranok:
Master Cannoneer Dagryn:
Each of these mini-bosses spawns one after another and has fixed timers when they enter the fight.
As for Galakras abilities, he only has the following ones:
- Flames of Galakrond – Deals ticking Fire damage in the form of a large ball of fire targeted at a random player;
- Pulsing Flames – Inflicts Fire damage to all players. Each pulse increases Fire damage dealt by the boss by 5%.
However, you should be prepared to face off against the boss himself only as the second phase starts. Until then, be ready to play around the constantly spawning adds with their own abilities.
Galakras Guide – Tactics & Strategy
The Galakras encounter unfolds across two distinct phases:
In Phase 1, your raid's objective is to overcome multiple waves of mobs, including four formidable mini-bosses. Victory over these adversaries grants access to two Anti-Air Turrets. Coordinated activation of these turrets compels Galakras to descend, marking the onset of Phase 2.
Phase 2 sees your raid confronting Galakras, a formidable proto-drake. With only two abilities at its disposal, this phase revolves around a DPS race, as a soft enrage mechanic intensifies the pressure on the raid.
- Phase 1:
Despite its apparent complexity, the strategy for Phase 2 is refreshingly straightforward. Given the overwhelming number of adds and their varied abilities, meticulous planning is often impractical. Instead, the key lies in reacting swiftly to the mechanics while adhering to a few essential guidelines:
- Prioritize the immediate elimination of Healing Tide Totems and banners spawned by Dragonmaw Flagbearers.
- Dispatch Kor'kron Demolishers promptly upon their appearance.
- Exercise caution around Dragonmaw Ebon Stalkers, swiftly relocating as they teleport behind you.
- Quickly dispose of Dragonmaw Bonecrushers to mitigate heavy damage inflicted on friendly NPCs.
Now, let’s see what you should expect within the following phase.
- Phase 2:
This strategy revolves around simplicity and coordination. Tanks must execute a smooth tank switch to manage Galakras' stacking tank DoT.
To counter Flames of Galakrond, optimal positioning is crucial. Melee players should stack behind the boss, forming a cohesive unit, while ranged raid members position themselves approximately 30 yards behind the melee group.
This formation ensures that the damage from Flames of Galakrond is mitigated by both groups, minimizing its impact on the raid. However, players soaking the fireballs will incur stacks of the Fire damage DoT. Depending on the encounter's duration, players with high stacks may need to step out of the group until their stacks dissipate temporarily.
Healers must anticipate and prepare for Galakras' stacking buff and the damage from Pulsing Flames, utilizing healing cooldowns effectively to sustain the raid.
Speaking of the Heroic mode when fighting Galakras. In the encounter, all mobs boast enhanced health and inflict amplified damage.
A noteworthy alteration to the mechanics involves the unlocking of towers. Rather than the towers becoming accessible automatically, each one requires unlocking by a friendly NPC. This NPC undergoes a 90-second process to unlock a tower, during which Dragonmaw Grunts attempt to thwart it. If the NPC succumbs to the assault, a replacement spawns shortly afterward, resetting the tower-opening process.
Iron Juggernaut
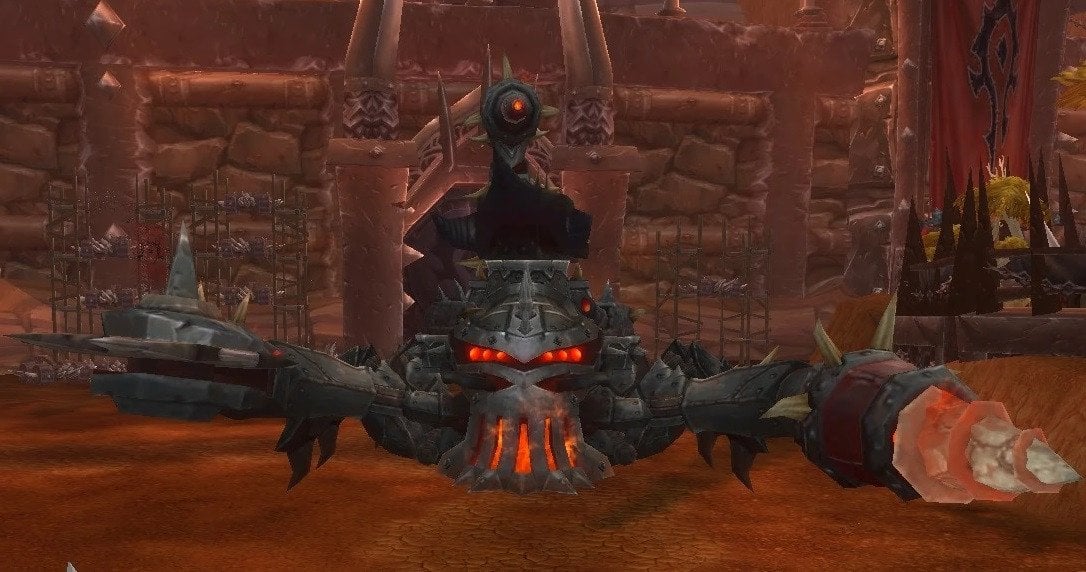 Standing before the gates of Orgrimmar, your raid confronts the Iron Juggernaut, the 6th boss of the Siege of Orgrimmar raid. He cycles between two distinct phases: one mobile and the other stationary. Triumph over this mechanical behemoth grants your raid passage into Orgrimmar at last.
As always, let’s begin our Iron Juggernaut guide Pandaria Remix by sharing the boss’s health pool:
- 10-Man Normal Health Pool – 450M;
- 10-Man Heroic Health Pool – 592M;
- 25-Man Normal Health Pool – 1.4B;
- 25-Man Heroic Health Pool – 1.8B.
The boss also features a 10-minute enrage timer to be aware of.
Speaking of the Iron Juggernaut boss raid composition, stick to this alternative:
- 10-Man Normal: 2 Tanks, 2-3 Healers, 5-6 DPS;
- 10-Man Heroic: 2 Tanks, 2-3 Healers, 5-6 DPS;
- 25-Man Normal: 2 Tanks, 5-7 Healers, 16-18 DPS;
- 25-Man Heroic: 2 Tanks, 5-7 Healers, 16-18 DPS.
Other options can be used as well, but this one is our top priority.
Iron Juggernaut Abilities
Depending on the phase, Iron Juggernaut abilities will look different.
Assault Phase:
- Flame Vents – Deals damage in a frontal cone attack. The spell makes the hit target take 10% more Fire damage. Make sure to switch your tank after this ability is cast;
- Borer Drill – Inflicts Physical damage with earth spikes traveling across the area;
- Laser Burn – Deals Fire damage and makes a target take DoT damage.
Siege Phase:
- Seismic Activity – Constantly deals Physical damage every second to the entire raid;
- Shock Pulse – When used, all party members are knocked back;
- Demolisher Cannons – Deals Fire damage to a chosen target and to others who are in a 6-yard radius;
- Cutter Laser – Chases a random player for 10 seconds with a laser beam, dealing overwhelming Fire damage upon hitting a target;
- Explosive Tar – When used, slowing void zones are created. When getting in contact with Cutter Laster, they explode and deal great Fire damage to the entire raid.
As you can see, the second phase turns out to be much more challenging compared to the first one in terms of what abilities are used.
Iron Juggernaut Guide – Tactics & Strategy
The battle against the Iron Juggernaut is strictly a single-target engagement, featuring two distinct and unchanging phases that alternate independently of the raid's actions. The Assault Phase initiates the encounter, lasting for 2 minutes. During this phase, the Iron Juggernaut executes melee attacks while remaining mobile. Following the Assault Phase, the Siege Phase ensues for 60 seconds. In this phase, the Iron Juggernaut remains stationary and refrains from melee attacks.
Notably, the encounter's difficulty remains constant throughout, with the phases continuing to alternate until the raid either succumbs or emerges victorious.
- Phase 1:
Facing away from the raid is crucial for Iron Juggernaut, as his frontal attack, Flame Vents, poses a threat. Swapping tanks during this phase is essential when the current tank accumulates 3-4 stacks of Flame Vents.
Positioning the raid in an arc behind the boss, spaced 8 yards apart, minimizes the need for movement to avoid Mortar Cannon damage. When Mortar Cannon is cast, players within the affected area should swiftly relocate.
Players must exercise caution to evade the erratic earth spikes from Borer Drill, reacting promptly to their movements.
Healers should prepare to address unavoidable damage from Laser Burn, whose DoT cannot be dispelled. However, provided Mortar Cannon and Borer Drill are evaded, this damage should be manageable.
Assigning a player to detonate Crawler Mines upon their spawn is essential. Ideally, the off-tank assumes this role due to their high health and damage reduction capabilities. Alternatively, players with immunities may be suitable, although the frequency of Crawler Mine casts may pose challenges.
- Phase 2:
During the Siege Phase, Iron Juggernaut remains stationary at the location where it ended the Assault Phase. However, this does not mean you are already done with this Siege of Orgrimmar boss. Despite not moving, he can still get your raid wiped easily.
Tanking duties are unnecessary during this phase, so tanks should focus on dealing damage to the boss and managing Crawler Mines. Ranged raid members should spread out around the boss to mitigate damage from Demolisher Cannons.
All players must position themselves to ensure a clear path if targeted by Cutter Laser, avoiding dragging the laser through Explosive Tar void zones. Ideally, the laser should be kited without disrupting other players' positioning, while ensuring the targeted player avoids unfavorable knockbacks.
The primary challenge is preventing players from being knocked back too far by Shock Pulse. To address this, the raid should position themselves near obstacles, such as the edges of the fighting area, to prevent excessive knockbacks.
Healers must contend with the constant raid-wide damage from Seismic Activity, compounded by frequent knockbacks. Defensive raid cooldowns are invaluable during this phase to mitigate the strain on healing resources.
In Heroic mode, alongside increased health and damage output, Iron Juggernaut introduces two new mechanics:
- During the Assault Phase, the boss employs Ricochet every 15 seconds. This unleashes a sawblade that swiftly traverses the battlefield, primarily targeting the area around ranged raid members, inflicting damage upon contact.
- In the Siege Phase, Iron Juggernaut unleashes Mortar Barrage, continuously bombarding random areas near him with high-damage explosions. These zones are marked by red circles, similar to those affected by Mortar Cannon during the Assault Phase, but they do not target raid members' locations.
As for everything else, this version of the fight copies its Normal part.
Kor'kron Dark Shaman
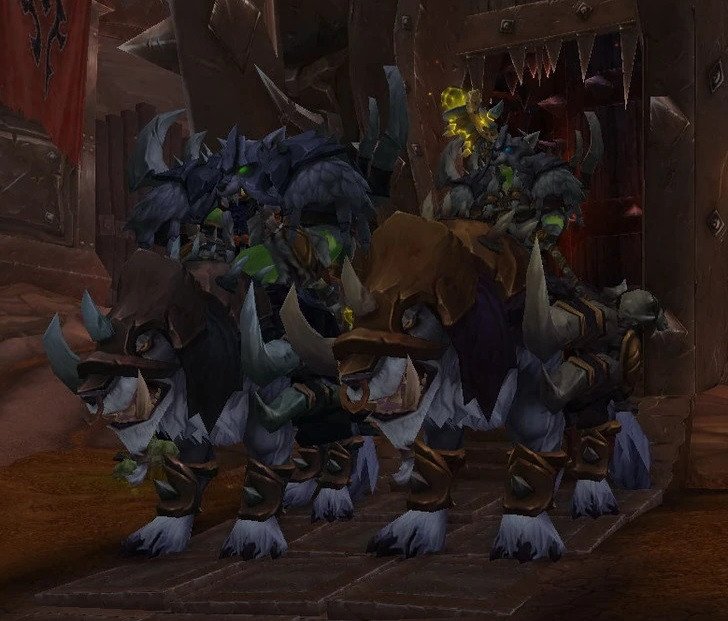 Kor'kron Dark Shaman stands as the 7th challenge within Siege of Orgrimmar. This encounter pits your raid against two Shamans in a twins-style battle. The bosses share a health pool, and the encounter’s difficulty increases as their health diminishes.
As always, let’s start out Kor'kron Dark Shaman guide Pandaria Remix with the information concerning the boss’s HP:
- 10-Man Normal Health Pool – 435M;
- 10-Man Heroic Health Pool – 654M;
- 25-Man Normal Health Pool – 1B;
- 25-Man Heroic Health Pool – 1.9B.
The bosses gain increased haste and deal higher damage when their health level is lower than 25%.
Speaking of the Kor'kron Dark Shaman boss raid composition, stick to this alternative:
- 10-Man Normal: 2 Tanks, 2-3 Healers, 5-6 DPS;
- 10-Man Heroic: 3 Tanks, 2-3 Healers, 4-5 DPS;
- 25-Man Normal: 2 Tanks, 5-7 Healers, 16-18 DPS;
- 25-Man Heroic: 3 Tanks, 5-7 Healers, 15-17 DPS.
Other options can also be used, but this one is our top priority.
Kor'kron Dark Shaman Abilities
As for Kor'kron Dark Shaman abilities, both bosses use the same skills, such as:
- Swipe – Acts as a frontal cone attack, dealing Physical damage;
- Rend – Deals Physical damage and stacks a bleeding effect;
- Bloodlust – Activated only when the bosses reach 25% HP. It increases their haste and the damage done.
Apart from the shared abilities, each boss has a set of specific abilities.
Earthbreaker Haromm:
Wavebinder Kardris:
All the spells listed are not used right after the fight starts. The first ones are available at the beginning. The second ones only appear when the bosses have 85% HP. The third ones become available when they have 65% HP left. Finally, the fourth ones are active when they have 50% HP or less.
Kor'kron Dark Shaman Guide – Tactics & Strategy
The Kor'kron Dark Shaman encounter features two twin-style bosses, Earthbreaker Haromm and Wavebinder Kardris, who share a health pool and engage your raid simultaneously. At the onset of the fight, your raid also contends with their mounts, Darkfang and Bloodclaw, although these mounts quickly perish, leaving your raid to confront the two bosses.
As the battle progresses, its complexity increases. Initially, each boss possesses only one ability. However, as their health diminishes, they unlock additional abilities. At 85%, 65%, and 50% health, each boss gains a new ability. Additionally, when their health dwindles to 25%, the bosses receive a buff augmenting their damage and haste by 25%.
Defeating the Kor'kron Dark Shaman entails a straightforward strategy. As most boss abilities are reactive, raid members must effectively respond while maintaining consistent damage on the bosses. Let's delve into the specifics of each stage of the fight:
Initially, the bosses should be tanked together near the outer edge of the fighting area, allowing ranged raid members to position themselves in the center. This positioning facilitates cleave damage, enhancing overall raid DPS. As Ashen Wall is introduced, the bosses must be promptly relocated to avoid being caught within the wall's path.
Tanks must regularly swap to manage the stacking debuff applied by Earthbreaker Haromm.
Speaking of Heroic mode, it is quite similar to the Normal version. However, here are a few differences you need to know about:
In Heroic mode, alongside increased damage and health pools, each of the two bosses in the Kor'kron Dark Shaman encounter gains a new ability upon reaching 95% health:
- Earthbreaker Haromm gets Iron Tomb. This ability creates a solid, stationary tomb at the location of a random raid member. Upon creation, all players within a 3-yard radius suffer substantial Physical damage and are slightly knocked up. The tomb persists until the end of the fight, serving as an obstacle;
- Wavebinder Kardris gets Iron Prison. This debuff is randomly applied to a raid member, lasting for 60 seconds without any immediate effects. However, upon expiration, the affected player sustains damage equivalent to 100% of their maximum health as Physical damage, unaffected by armor.
Both abilities are used by the bosses every 30 seconds throughout the encounter. BLOG20
General Nazgrim
 Moving on, you will face off against General Nazgrim, the 8th boss within the Siege of Orgrimmar raid instance. The encounter itself mainly resembles a random fight with a Warrior character. However, you will also have to deal with a ton of adds along the way.
Let’s begin our General Nazgrim guide Pandaria Remix with the information concerning the boss’s HP:
- 10-Man Normal Health Pool – 349M;
- 10-Man Heroic Health Pool – 523M;
- 25-Man Normal Health Pool – 976M;
- 25-Man Heroic Health Pool – 1.5B.
Speaking of the General Nazgrim boss raid composition, stick to this alternative:
- 10-Man Normal: 2 Tanks, 2-3 Healers, 5-6 DPS;
- 10-Man Heroic: 2 Tanks, 2-3 Healers, 5-6 DPS;
- 25-Man Normal: 2 Tanks, 5-7 Healers, 16-18 DPS;
- 25-Man Heroic: 2 Tanks, 5-7 Healers, 16-18 DPS.
Other options can be used as well, but this one is our top priority.
General Nazgrim Abilities
All the General Nazgrim abilities can be split into two distinct types – the ones that consume Rage and those that don’t. Starting with the ones that do not cost Rage, there are only two of them:
- Sundering Blow – Deals a tremendous amount of Physical damage and reduces the target’s armor by 10% per stack. When the boss uses this ability, he gains 5 Rage. Make sure to swap a tank after he soaks this skill;
- Bonecracker – Inflicts Physical damage and adds a bleed effect to the hit target. It also reduces their maximum HP by 10%.
Moving on, we have four abilities that consume Rage to be cast:
- Heroic Shockwave (30 Rage) – The boss leaps at the location where a party member stands. The skill also deals Physical damage to the target and the ones who are standing within 10 yards;
- Kor'kron Banner (50 Rage) – Summons a Kor'kron Banner that grants all the present adds to grant Nazgrim 3 Rage when they attack. This is an attackable NPC, and it has a really low HP level;
- War Song (70 Rage) – All players take 50% of their maximum health as Physical damage;
- Ravager (100 Rage) – Nazgrim introduces a new mechanic by hurling a weapon at a random raid member's location. This weapon remains untargetable and impervious to attack, persistently spinning in place until the end of the encounter. Any players within a 6-yard radius of the weapon suffer significant Physical damage, granting Nazgrim 5 Rage for each player affected.
Also, remember that the boss uses their most expensive ability every 15 seconds.
General Nazgrim Guide – Tactics & Strategy
While the following Siege of Orgrimmar encounter boasts numerous abilities and adds, the strategy remains remarkably straightforward. Begin by swiftly dispatching all Orgrimmar Faithful before directing your attention to Nazgrim.
We have segmented the remaining tasks your raid must undertake into sub-sections for clarity and ease of execution. Your tanks must execute a precise tank switch throughout the encounter to ensure Nazgrim never targets a player afflicted by Sundering Blow.
Healers must be vigilant in responding to Bonecracker, as it inflicts unavoidable damage on affected players. Additionally, they must anticipate and mitigate the heightened damage from Nazgrim during Berserker Stance.
To mitigate Nazgrim's Rage, only the tank afflicted by Sundering Blow should engage him during Defensive Stance. Other raid members should refrain from attacking him and avoid his abilities altogether.
When adds are present, they take precedence as the primary targets. However, if only a Kor'kron Ironblade remains, raid members can cleave and apply damage over time effects to Nazgrim simultaneously, as Ironblades pose the least threat.
Ranged DPS players should promptly eliminate Kor'kron Ironblades during their Ironstorm cast, with awareness that these adds self-heal upon reaching 50% health and require tanking.
Kor'kron Assassins must be swiftly stunned and dispatched to prevent lethal Backstab attacks. Hunters should maintain Flares to reveal Assassins in stealth, and players fixated on Assassins must face them. When not fixated, Assassins require tanking.
Interrupts are crucial for Kor'kron Arcweavers, particularly to prevent Magistrike casts. While they constantly attempt spellcasting, they do not necessitate tanking.
Similarly, Kor'kron Warshamans require diligent interrupts, especially to prevent Empowered Chain Heal casts. Dispelling Earth Shield swiftly and promptly destroying Healing Tide Totems is essential. Enemies should be kept away from Healing Tide Totems. These adds do not require tanking.
The preferred kill priority is as follows:
- Kor'kron Warshamans
- Kor'kron Arcweavers
- Kor'kron Assassins
- Kor'kron Ironblades
Ironblades can be delayed in favor of focusing on Nazgrim during Defensive Stance, but this strategy should only be employed if Defensive Stance is imminent. Overpopulating Ironblades can lead to complications.
Speaking of Heroic mode of the fight, here are a few changes you need to be aware of:
In Heroic mode, alongside increased health and damage output, General Nazgrim introduces two major changes to the encounter:
- Execute: Every 15 seconds, Nazgrim casts Execute on his current tank, inflicting massive Physical damage. The ability has a 2.3-second cast time, posing a significant threat to the tank's survivability.
- Kor'kron Sniper: A new type of add, the Kor'kron Sniper, joins the fray with other adds. In Heroic mode, three adds spawn in each wave instead of two, with the Sniper integrated into this rotation.
As for everything else, the fight resembles its Normal version.
Malkorok
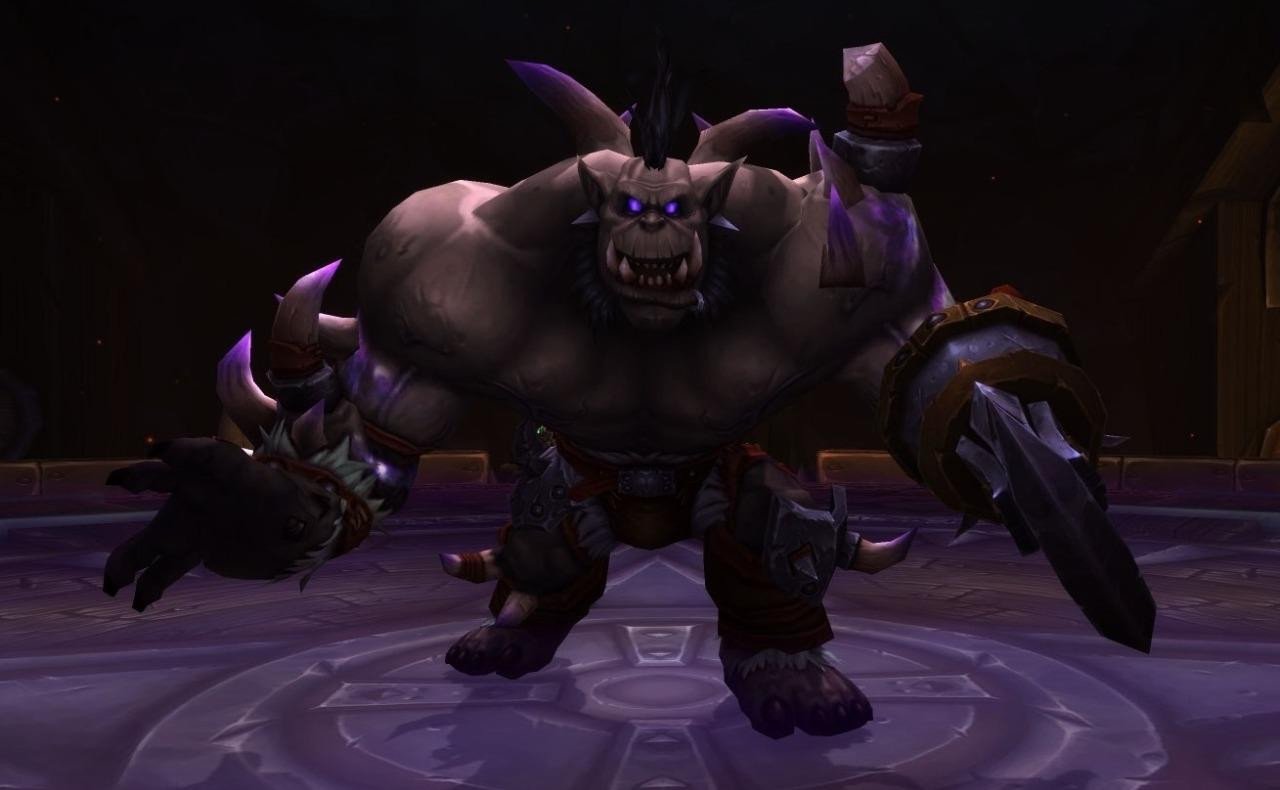 Malkorok is the 9th boss you will encounter as you move through the Siege of Orgrimmar raid. Unlike other enemies, he has a super short Enrage timer. This means your entire raid group should focus on dealing as much damage to him before he wipes your party. Since we are getting closer to the end of the raid, this battle becomes noticeably harder.
Let’s begin our Malkorok guide Pandaria Remix with the information concerning the boss’s HP:
- 10-Man Normal Health Pool – 376M;
- 10-Man Heroic Health Pool – 629M;
- 25-Man Normal Health Pool – 1B;
- 25-Man Heroic Health Pool – 1.8B.
The boss features a 6-minute Enrage timer. With his Eradicate, he wipes your entire raid once the time strikes.
Speaking of the Malkorok boss raid composition, stick to this alternative:
- 10-Man Normal: 2 Tanks, 2-3 Healers, 5-6 DPS;
- 10-Man Heroic: 2 Tanks, 2-3 Healers, 5-6 DPS;
- 25-Man Normal: 2 Tanks, 5-7 Healers, 16-18 DPS;
- 25-Man Heroic: 2 Tanks, 5-7 Healers, 16-18 DPS.
Other options can be used as well, but this one is our top priority.
Malkorok Abilities
During the Might of the Kor'kron Phase, all raid members are afflicted by the Ancient Miasma debuff, which manifests two effects:
- Ancient Miasma alters the effect of healing spells, converting them into damage absorption shields for raid members. These shields have a maximum capacity equivalent to 100% of the player's maximum health and provide protection against various sources of damage, including fall damage;
- Additionally, Ancient Miasma inflicts moderate Shadow damage on all players every 2 seconds, necessitating proactive healing and mitigation strategies to counter its effects.
Malkorok abilities include the following:
With the start of Phase 2 called Blood Rage, Malkorok uses these two abilities:
Following the conclusion of the Blood Rage phase, Malkorok acquires a stack of Relentless Assault. This buff augments his damage output by 25% for the duration of the encounter.
Malkorok Guide – Tactics & Strategy
Since the entire fight consists of two distinct phases, we would like to continue our Malkorok guide, describing them individually.
- Phase 1:
Your tanks must swap on Malkorok to manage the Fatal Strike debuff effectively. To mitigate damage from Seismic Slam, your raid should adopt a spread-out positioning across the platform.
Raid members must diligently evade Arcing Smash and steer clear of its affected areas during Breath of Y'Shaarj's cast. Every Imploding Energy void zone must be promptly soaked to mitigate its effects.
Furthermore, players must exercise caution to minimize unnecessary damage intake due to Ancient Miasma. While damage absorption shields can accumulate to 100% of a player's maximum health, those who briefly lose their shield and sustain damage cannot be healed. Nonetheless, they can be promptly re-shielded.
- Phase 2:
During this phase, when Malkorok's Rage reaches 100, your raid should promptly stack in front of him, taking care to anticipate the final Breath of Y'Shaarj before the transition. This initiates a challenging 20-second period of intense raid-wide damage, necessitating prepared defensive cooldowns from healers.
Furthermore, some players will be afflicted by Displaced Energy. These players must relocate away from the raid, either awaiting dispel or allowing their debuff to expire. Upon its conclusion, they should rejoin the raid promptly.
The accumulation of Malkorok's Relentless Assault buff with each Blood Rage Phase will progressively heighten the difficulty of the encounter. However, it does not necessitate any immediate action from your raid.
Apart from having Malkorok’s health and damage increased, you need to be prepared for the following mechanics within Heroic mode:
Throughout this phase, orbs of corruption will sporadically spawn on the platform, with 2 appearing in 10-man raids and 5 in 25-man raids, every 3 seconds. These orbs linger indefinitely until players make contact with them. Upon contact, the orb detonates, stripping the player of their damage-absorption shield from Ancient Miasma and inflicting moderate Shadow damage.
Living Corruption adds manifest regularly during this phase, sometimes coinciding with Seismic Slam casts but not exclusively tied to them. These melee attackers adhere to standard threat mechanics but possess a passive aura that drastically reduces the movement and spell-casting speed of nearby players within an 8-yard radius by 75%.
Spoils of Pandaria
 Spoils of Pandaria represents the 10th encounter you have in the Siege of Orgrimmar raid. In this unique encounter, your raid will not fight any bosses directly. Instead, you will divide into two teams, each tasked with opening numerous crates that release waves of adds to be defeated. Success hinges on efficiently clearing the room within a designated timeframe.
The encounter features two hard enrage timers. The initial stage must be completed within 270 seconds, followed by a subsequent stage with a 300-second limit. There does not seem to be a soft enrage timer in this fight.
Speaking of the Spoils of Pandaria boss raid composition, stick to this alternative:
- 10-Man Normal: 2 Tanks, 2-3 Healers, 5-6 DPS;
- 10-Man Heroic: 2 Tanks, 2-3 Healers, 5-6 DPS;
- 25-Man Normal: 2 Tanks, 5-7 Healers, 16-18 DPS;
- 25-Man Heroic: 2 Tanks, 5-7 Healers, 16-18 DPS.
Other options can be used as well, but this one is our top priority.
Spoils of Pandaria Abilities
Each crate has several mobs you can face off. They also feature different abilities. However, we are not going to delve into a detailed description of every skill. They are relatively straightforward to understand and can be countered easily.
Spoils of Pandaria Guide – Tactics & Strategy
The Spoils of Pandaria fight is unique, swapping a boss for a horde of adds spread across four quadrants. Initially, only two quadrants are accessible, requiring your team to split up. After clearing enough enemies, gates open to the other two quadrants. Each group faces challenges in both Mogu and Mantid-themed areas. To access the final quadrants, each team must power up a lever by defeating mobs. Doors open only when both levers are activated. The fight is timed, with set intervals for lever activation.
Despite the overwhelming number of adds and abilities, the strategy for this encounter is surprisingly simple.
Before diving in, divide your raid into two balanced groups. Each group, with an even mix of Tanks, Healers, and DPS, should head to their designated quadrant and start opening crates.
There is no fixed order for crate opening, but a few guidelines can help:
- Prioritize Pandaren Crates for their powerful buffs, keeping them active as long as possible.
- Avoid unnecessary crate openings. For instance, if only a small amount of energy is needed, opt for Lightweight Crates instead of Massive Crates.
- Use raid members' cleave and multi-DoT abilities. Keep Lightweight Crates open while handling more powerful mobs from Massive or Stout Crates.
In Heroic mode of the Spoils of Pandaria encounter, the strategy shifts slightly from Normal mode, but the overall feel remains similar.
Aside from increased health and damage for all mobs, two key changes alter the fight:
- Crimson Reconstitution void zones now inflict Fire damage to those inside them.
- Upon killing all mobs in a crate, an Unstable Spark add spawns in the other active quadrant. These sparks cast Supernova, a devastating spell that deals massive damage, posing a significant threat to the raid.
These changes require careful positioning and timing to manage effectively. BLOG20
Thok the Bloodthirsty
 Thok the Bloodthirsty is the 11th boss you will face off against within the Siege of Orgrimmar raid. The colossal devilsaur holds three friendly NPCs captive, each of whom your raid must liberate during the encounter. However, upon their release, Thok swiftly devours them, acquiring their abilities and unleashing them against your raid.
Let’s start our Thok the Bloodthirsty guide Pandaria Remix with the information concerning the boss’s HP:
- 10-Man Normal Health Pool – 349M;
- 10-Man Heroic Health Pool – 654M;
- 25-Man Normal Health Pool – 1.3B;
- 25-Man Heroic Health Pool – 1.9B.
The boss features a 10-minute Enrage timer to be aware of.
Speaking of the Thok the Bloodthirsty boss raid composition, stick to this alternative:
- 10-Man Normal: 2 Tanks, 2-3 Healers, 5-6 DPS;
- 10-Man Heroic: 2 Tanks, 3-4 Healers, 4-5 DPS;
- 25-Man Normal: 2 Tanks, 5-7 Healers, 16-18 DPS;
- 25-Man Heroic: 2 Tanks, 5-7 Healers, 16-18 DPS.
Other options can be used as well, but this one is our top priority.
Thok the Bloodthirsty Abilities
Before delving into a detailed strategy, let’s take a look at Thok the Bloodthirsty abilities first:
- Fearsome Roar (can be replaced with Acid Breath/Freezing Breath/Scorching Breath)
- Tail Lash
- Shock Blast (can be replaced with Corrosive Blood/Icy Blood/Burning Blood)
- Deafening Screech
- Bloodied
- Fixate
- Blood Frenzy
As you can see, certain abilities can be replaced with others. This happens depending on what NPC you decide to free first. Let us remind you that there are three of them in total, and the order can vary.
Thok the Bloodthirsty Guide – Tactics & Strategy
The encounter with Thok the Bloodthirsty unfolds in two alternating phases, each presenting unique challenges. That is something you should be already used to when clearing the Siege of Orgrimmar raid:
- Phase 1 initiates the fight, during which your raid engages Thok directly. He employs a variety of abilities against your raid, and this phase persists until specific actions by your raid or prolonged failure culminates in a wipe.
- Phase 2 emerges as a transitional phase where Thok's aggression shifts from being tankable to fixating on random raid members. Here, your raid must liberate one of three captive NPCs (Akolik, Gorai, and Montak). Upon release, Thok swiftly devours them, concluding the phase. The subsequent Phase 1 is then influenced by the NPC consumed in Phase 2.
This alternating pattern repeats until all three NPCs are freed, leading to a total of eight potential phases. Following the liberation of all NPCs, the raid becomes indefinitely trapped in Phase 2, resulting in eventual failure.
- Phase 1:
In Phase 1 of the Thok encounter, your raid should adhere to several key tactics:
- Ensure Thok's face and tail are not directed towards the raid to avoid his frontal and rear cone attacks.
- Stack the entire raid together, positioned alongside Thok.
- Do a tank switch to manage the boss's abilities effectively.
- Be prepared to heal the escalating raid-wide damage inflicted by Deafening Screech and Shock Blast.
As the raid is gathered closely together per the recommended strategy, Thok transitions to Phase 2 once the collective damage reaches a critical threshold. To extend Phase 1's duration, deploy defensive cooldowns when the interval between Deafening Screech casts falls below 7 seconds.
- Phase 2:
In Phase 2 of the Thok encounter, simplicity defines the strategy. Once the phase initiates, all raid members should distance themselves from Thok, anticipating his selection of the first Fixate target. The chosen player must then lead Thok away in a predetermined direction while the rest of the raid ensures they are clear of Thok's path.
A strategic approach to Thok's Fixate involves marking two locations within the room, roughly 50 yards apart. When Thok fixates on a player, they lead him towards one location, and subsequent fixated players guide him towards the other. This pattern allows raid-free movement throughout the room.
Upon the Kor'kron Jailer's appearance, tanks should immediately engage, and DPS players should prioritize eliminating him. Afterward, a designated player can loot the Jailer to release a captive NPC from the cage. While it is feasible to damage Thok during this phase, doing so prolongs it. Generally, ending the phase swiftly is preferable, though specific circumstances may warrant extended damage to the boss.
As for Heroic mode, a few notable changes appear:
During the second Phase 1, after the second Deafening Screech, Captive Cave Bats will enter the fray. These adds adhere to a typical threat table and possess a single ability: Vampiric Frenzy. Some bats will gain this self-buff, granting them the ability to deal damage in their vicinity and subsequently heal themselves for a portion of the damage dealt.
As the third Phase 1 commences, following the second Deafening Screech, Starved Yeti will make their appearance. These adds fixate on random locations across the room, charging towards them upon selection. Any players in their path suffer lethal damage.
It is essential to adapt to these new mechanics and adjust the raid's strategy accordingly. Additionally, remember that each time Thok kills an NPC during Phase 2, he significantly heals himself. This healing can be mitigated by abilities similar to Mortal Strike. Moreover, players fixated upon by Thok during Phase 2 will sustain damage, necessitating prompt healing.
Paragons of the Klaxxi
 Paragons of the Klaxxi are the 12th encounter you will have to complete within the Siege of Orgrimmar. They have remained loyal to the Old Gods, honoring their allegiance without wavering. To progress through the instance, you must now confront and defeat them. Your raid will face all 9 Paragons, although you'll only contend with groups of 3 at once.
Let’s start our Paragons of the Klaxxi guide Pandaria Remix with the information concerning the boss’s HP:
- 10-Man Normal Health Pool – 43.6M;
- 10-Man Heroic Health Pool – Unknown;
- 25-Man Normal Health Pool – Unknown;
- 25-Man Heroic Health Pool – Unknown.
The boss features a 12-minute Enrage timer to be aware of.
Speaking of the Paragons of the Klaxxi boss raid composition, stick to this alternative:
- 10-Man Normal: 2 Tanks, 2-3 Healers, 5-6 DPS;
- 10-Man Heroic: 2 Tanks, 2-3 Healers, 5-6 DPS;
- 25-Man Normal: 2 Tanks, 5-7 Healers, 16-18 DPS;
- 25-Man Heroic: 2 Tanks, 5-7 Healers, 16-18 DPS.
Other options can be used as well, but this one is our top priority.
Paragons of the Klaxxi Abilities
Depending on what enemy you are fighting, Paragons of the Klaxxi abilities will look different. Below, we have listed all 9 of them for you to get acquainted:
Skeer the Bloodseeker:
Rik'kal the Dissector:
Hisek the Swarmkeeper:
Ka'roz the Locust:
- Whirling
- Hurl Amber
- Flash
- Strong Legs
Korven the Prime:
Iyyokuk the Lucid:
Xaril the Poisoned Mind:
Kaz'tik the Manipulator:
Kil'ruk the Wind-Reaver:
Paragons of the Klaxxi Guide – Tactics & Strategy
Just like with the bosses’ abilities, we are going to provide you with a detailed Paragons of the Klaxxi guide for each enemy you will face within this battle. This encounter of Siege of Orgrimmar is by far the most diverse one regarding how many mechanics you will have to deal with:
- Skeer the Bloodseeker:
Hewn becomes a priority only when Rik'kal the Dissector is active simultaneously. In such cases, Skeer's tank cannot engage Rik'kal. Your team must swiftly DPS and eliminate any Bloods upon their appearance. Even if Blood reaches its target, its healing will be reduced due to its lower health. Reserve the Bloodthirsty ability for moments of intense damage to aid in maintaining the raid's health.
- Rik'kal the Dissector:
Genetic Alteration is only a concern when Skeer the Bloodseeker is active simultaneously. In such cases, Rik'kal's tank cannot engage Skeer.
To handle Injection, the tank should time their active mitigation cooldowns to prevent the stacks from being applied to them. If the debuff does occur and Amber Parasites spawn, prioritize their quick elimination.
Players mutated into Amber Scorpions, either by the boss or after acquiring the Mad Scientist buff following Rik'kal's demise, require increased healing due to continuous damage. While in this form, maximize damage output on the boss or any remaining adds, with the Prey ability being particularly effective against Amber Parasites.
- Hisek the Swarmkeeper:
Hisek's Multi-Shot inflicts unavoidable damage on random raid members, requiring healers to respond promptly. During Aim, a line of several ranged raid members should position themselves between the targeted player and Hisek, ensuring each member is at least 5 yards apart. This formation mitigates the damage the target receives. Due to the damage radius, stacking the entire raid together is not feasible. Use Compound Eye on cooldown, targeting the current enemy from a distance to maximize its damage output.
- Ka'roz the Locust:
Given Ka'roz's speed, Flash is nearly unavoidable. Thus, players should spread out beforehand to minimize the impact of Whirling, ensuring affected players are not near others.
Avoid void zones from Hurl Amber. Use Strong Legs to damage bosses or adds, potentially breaking Encase in Amber blocks if Korven is present.
- Korven the Prime:
Whenever Korven casts Encase in Amber on a Klaxxi Paragon, prioritize breaking the amber block swiftly with all DPS. Expect Korven's tank to sustain high damage from Shield Bash/Vicious Assault, so ensure tanks and healers are ready. Face Korven away from raid members due to Vicious Assault's frontal cone damage. Use the Master of Amber to save low-health raid members by providing them with a targetable Ice Block, granting healers time to restore their health.
- Iyyokuk the Lucid:
Diminish's damage to random raid members requires healers to respond promptly. Keep all players above 25% health during Iyyokuk's presence to prevent instant kills.
The main challenge arises from Iyyokuk's Insane Calculation: Fiery Edge. When this ability is cast, linked players should move apart to minimize damage from the fiery lines. Other raid members must avoid contact with these lines. Adjust movement considering the presence of other bosses during this phase.
For the Ingenious ability, prioritize casting it on players who share both class and race with others in the raid to maximize its healing effect. Avoid casting it on a unique combination, like a Worgen Druid, if there are no other Worgens or Druids present.
- Xaril the Poisoned Mind:
When Kil'ruk the Wind-Reaver is active alongside Xaril, watch out for Tenderizing Strikes, indicating Xaril's tank cannot handle Kil'ruk. Manage Caustic Blood by timing tank cooldowns to prevent stack application. Healers should strategically use the Vast Apothecarial Knowledge buff on players anticipating high damage, like tanks facing Mutilate.
- Kaz'tik the Manipulator:
During Kaz'tik's presence, avoid standing between him and others to reduce damage from Sonic Projection. The main threat is Kaz'tik's Mesmerize ability with Hungry Kunchongs. Ranged DPS players must quickly damage the active Kunchong to break Mesmerize. If a Kunchong becomes Mature, kill it swiftly and avoid its Swipe attack. There is no point in killing or damaging Kunchongs, as they are immediately replaced and immune. Focus on breaking Mesmerize and damaging other targets. Use Master of Puppets ability on cooldown to boost damage from the Immature Kunchong companion.
- Kil'ruk the Wind-Reaver:
Exposed Veins is only an issue when Xaril the Poisoned Mind is active simultaneously, requiring Kil'ruk's tank to focus on Xaril instead. Survive Gouge and Mutilate by using tank cooldowns and healing accordingly to manage the high damage. Avoid Death from Above by staying spread out to minimize damage, despite the brief warning animation before Kil'ruk lands. Players with Reave should use it to deal damage to enemies whenever possible.
Siegecrafter Blackfuse
 Siegecrafter Blackfuse acts as the 13th encounter within the Siege of Orgrimmar raid. In this complex fight, your raid confronts Blackfuse and a multitude of his gadgets and devices.
Let’s start our Siegecrafter Blackfuse guide Pandaria Remix with the information concerning the boss’s HP:
- 10-Man Normal Health Pool – 43.6M;
- 10-Man Heroic Health Pool – Unknown;
- 25-Man Normal Health Pool – Unknown;
- 25-Man Heroic Health Pool – Unknown.
The boss features a 10-minute Enrage timer to be aware of.
Speaking of the Siegecrafter Blackfuse boss raid composition, stick to this alternative:
- 10-Man Normal: 2 Tanks, 2-3 Healers, 5-6 DPS;
- 10-Man Heroic: 2 Tanks, 2 Healers, 6 DPS;
- 25-Man Normal: 2 Tanks, 5-7 Healers, 16-18 DPS;
- 25-Man Heroic: 2 Tanks, 4-5 Healers, 18-19 DPS.
Other options can be used as well, but this one is our top priority.
Siegecrafter Blackfuse Abilities
Moving on, let’s take a closer look at Siegecrafter Blackfuse abilities:
- Electrostatic Charge
- Reactive Armor
- Protective Frenzy
- Launch Sawblade
- Automatic Repair Beam
- Energized Defensive Matrix
Apart from the boss himself, you will also have to deal with his adds’ abilities.
Automated Shredders:
Activated Missile Turrets:
Activated Laser Turrets:
Activated Electromagnets:
Crawler Mines:
As you can see, adds do not have too many mechanics to deal with. The boss himself still remains the main threat in the fight. BLOG20
Siegecrafter Blackfuse Guide – Tactics & Strategy
For optimal positioning, tank Blakfuse at the edge of his platform near the northwestern conveyor belt. This minimizes the risk of Shockwave Missile waves and keeps distance from Crawler Mines spawning near the northeastern conveyor belt.
The tank handling Blakfuse cannot also manage Automated Shredders due to their Automatic Repair Beam aura. They must be tanked separately, maintaining a minimum distance of 35 yards apart.
A tank switch is necessary on Blakfuse due to the Electrostatic Charge debuff. The tank debuffed should damage the Automated Shredder, ensuring it's destroyed before the next spawn, allowing for safe tank switching. Be prepared with defensive cooldowns as Blakfuse buffs himself with Protective Frenzy when adds die. The Automated Shredder tank should avoid Death From Above and can benefit from taking damage from add abilities, though not essential.
A new wave of adds spawns on the north-western conveyor belt every 40 seconds, but due to the Pattern Recognition debuff, players can only travel there every 60 seconds. Thus, two teams must alternate handling the belt. Players on the belt do not take damage (unless hit by Matter Purification Beams,) so only assign DPS players, no healers or tanks are needed. In 10-man, 2 DPS players suffice to kill adds before they reach the end. In 25-man, 4 players are optimal.
Focus on killing Disassembled Crawler Mines as they're most disruptive. Occasionally, allow Deactivated Electromagnets through to the northeastern belt, which is needed for Magnetic Crush to remove sawblades. On the main platform, DPS Siegecrafter Blackfuse while dodging his abilities and those of the adds. Avoid sawblades created by Blackfuse's Launch Sawblade and position away from them during Magnetic Crush by Activated Electromagnets.
Watch out for Automated Shredders' Death From Above and manage their increasing damage from Overload with healers reacting accordingly. Handle Activated Laser Turrets intelligently, ensuring Superheated void zones don't interfere with raid positioning, especially regarding sawblades.
Deal with Crawler Mines by kiting them away and killing them before they reach targets, using Break-in Period debuff to stun, snare, and root them. Avoid kiting near Siegecrafter Blackfuse to prevent healing from Automatic Repair Beam. Dodge damage from Activated Missile Turrets' Shockwave Missile by standing about 15-30 yards away from Blackfuse. Hunters can use Deterrence to prevent damage.
Speaking of what differences you can expect in Heroic mode, they are as follows:
All mobs in the fight have increased health and deal higher damage. The significant change comes from the Overcharged state of weapons surviving each wave on the north-western conveyor belt, altering their mechanics when they reappear on the north-eastern belt:
- Overcharged Electromagnets alternate pulling and pushing players and sawblades, removing all sawblades before despawning.
- Overcharged Crawler Mines spawn two larger Crawler Mines in addition to regular small ones, which split into two small Crawler Mines each upon death.
- Overcharged Missile Turrets summon three Missile Turret NPCs on the platform, continuously casting Shockwave Missile until killed. They spawn successively to the right of the previous one.
- Overcharged Laser Turrets create three concentric rings of fire on the platform instead of following a player with a laser beam. Safe areas exist at the center, outer edge, and halfway between.
The Overcharging of weapons follows two rules:
- Electromagnet
- Crawler Mines
- Missile Turret
- Laser Turret
Weapons cannot be Overcharged twice in a row.
Additionally, on the north-western conveyor belt, the walls formed by Matter Purification Beams no longer have a fixed gap. The gap shifts regularly as one beam deactivates and another activates every few seconds.
Garrosh Hellscream
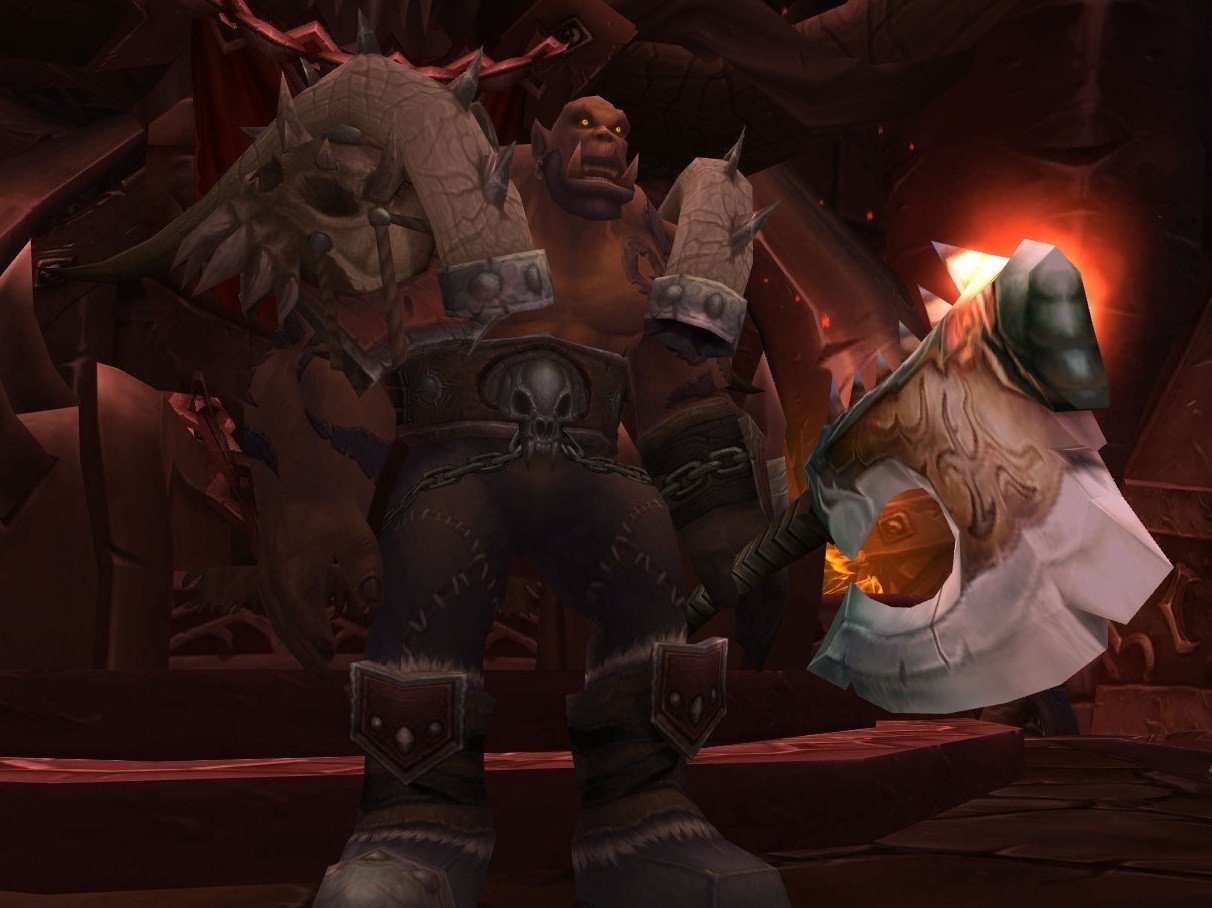 Congratulations, heroes! You have finally made it to Garrosh Hellscream himself. He is the 14th and final boss you will face off against within the Siege of Orgrimmar raid.
Let’s start our Garrosh Hellscream guide Pandaria Remix with the information concerning the boss’s HP. The numbers will vary depending on what phase of the fight you are going through – One, Two, or Three:
- 10-Man Normal Health Pool – 161M/419M;
- 10-Man Heroic Health Pool – 161M/419;
- 25-Man Normal Health Pool – 451M/1.16B;
- 25-Man Heroic Health Pool – 451M/1.16B.
The boss features a 16-minute Enrage timer to be aware of.
Speaking of the Garrosh Hellscream boss raid composition, stick to this alternative:
- 10-Man Normal: 2 Tanks, 2-3 Healers, 5-6 DPS;
- 10-Man Heroic: 2 Tanks, 3-4 Healers, 4-5 DPS;
- 25-Man Normal: 2 Tanks, 5-7 Healers, 16-18 DPS;
- 25-Man Heroic: 2-3 Tanks, 3-5 Healers, 17-20 DPS.
Other options can be used as well, but this one is our top priority.
Garrosh Hellscream Abilities
Depending on the phase, Garrosh Hellscream abilities will look different.
Phase 1:
- Desecrate – Deals Shadow damage to all enemies within 15 yards, creating a Desecrated Weapon at the hit location;
- Hellscream’s Warsong – The buff cast on all adds alive every 30 seconds. It boosts the targets’ damage done and HP by 150%.
Apart from the boss himself, you will also face a few adds with the following abilities:
- Kor'kron Warbringers use Hamstring;
- Farseer Wolf Riders use Ancestral Fury, Ancestral Chain Heal, and Chain Lightning.
Phase 2:
Phase 3:
During this phase, the boss uses the same abilities as in Phase 2, but they are empowered this time:
- Empowered Whirling Corruption
- Empowered Touch of Y'Shaarj
- Empowered Desecrate
- Empowered Gripping Despair
Garrosh Hellscream Guide – Tactics & Strategy
The battle against Garrosh Hellscream unfolds across four distinct phases, each presenting unique challenges and mechanics. This is something you have not encountered in the Siege of Orgrimmar raid until the final boss:
- Phase 1 persists until Garrosh's health diminishes to 10%, triggering a full heal for him and a transition phase for your raid. Here, Garrosh wields only two abilities while aided by additional adds.
- The Transition Phase spans 1 minute, requiring your raid to dispatch straightforward adds and halt Garrosh's power increase by interrupting a channeling cast.
- Phase 2 endures until Garrosh's health dips to 10% again, where he replenishes to 25% health and transitions to Phase 3. Throughout this phase, Garrosh periodically banishes your raid to the realm of the Transition Phase, necessitating a repeat of the phase's mechanics.
- Phase 3 persists until Garrosh's defeat. Here, he employs primarily the same abilities as in Phase 2.
Now, let’s take a closer look at the strategy for each phase. Starting with Phase 1, here is what you need to know:
- Position one tank to handle Garrosh while the other picks up Kor'kron Warbringers and Farseer Wolf Riders as they appear.
- Focus on AoE damage for Warbringers and single-target damage for Wolf Riders, prioritizing interrupting Ancestral Chain Heals.
- Keep ranged raid members at a distance to prevent Desecrated Weapons from spawning in melee range, and promptly eliminate these weapons.
- Assign one ranged DPS to eliminate one Siege Engineer, allowing the other to activate the Iron Star.
- Evade the Iron Star's path, utilizing any available knockbacks to push adds into its trajectory.
During the Transition Phase, you should take the following steps:
Quickly eliminate any adds present upon arrival in Y'Shaarj's realm, dividing into groups if necessary in the Temples. Stay close to adds to benefit from their damage-reduction buffs upon death. Stack up inside Garrosh's hitbox, positioning slightly behind his facing direction to avoid Annihilate attacks while benefiting from group healing effects.
- Phase 2:
Employ tank switches to handle Gripping Despair. Have ranged raid members stack together, moving slightly with each new Desecrated Weapon to conserve space. Ignore the weapons during Empowered Desecrate. Avoid standing near Garrosh during Whirling Corruption and kill Minions of Y'Shaarj separately during Empowered Whirling Corruption.
Ensure players affected by Touch of Y'Shaarj are interrupted and brought to 20% health promptly to break mind control. Quickly move to Garrosh during Transitions to minimize his energy gain.
- Phase 3:
Here, the strategy mirrors Phase 2, but with stronger versions of all abilities. It's a high-pressure burn phase where speed is crucial. While Desecrated Weapons may clutter the space, the main challenge is handling the increasingly problematic Minions of Y'Shaarj with limited room to maneuver.
In Heroic mode, several differences alter the dynamics of each phase and introduce a new phase exclusive to Heroic difficulty. Kor'kron Warbringers no longer follow standard tanking mechanics but fixate on raid members, preferring the nearest player and changing targets unpredictably. In the Temple of the Jade Serpent transition, adds an attempt to cast Embodied Doubt, dealing raid-wide damage and stacking a debuff, increasing damage taken from subsequent casts.
In the Terrace of Endless Spring transition, Crushing Fear void zones appear, triggering damaging projectiles and fearing players. In the Temple of the Red Crane transition, adds channel a raid-wide damaging spell if engaged for too long, indicating a failed transition due to slow progress. Minions of Y'Shaarj gain 10 energy with each melee attack, casting Empowering Corruption upon reaching 100 energy, similar to their effect upon death.
In Heroic mode, you will also have to go through an additional Phase.
When Garrosh reaches 0% health, he initiates a 20-second role-playing speech before your raid is transported to a phased Stormwind City location. Here, Garrosh is rejuvenated to 60% health, and your raid must deplete it to 0% again to defeat him.
During this phase, Garrosh possesses an energy bar that plays a crucial role. Starting at 0 energy, he gradually accumulates energy over time. Upon reaching 100 energy, Garrosh executes a significant ability, with additional energy gained through another mechanism.
Garrosh employs several abilities:
Before Phase 4, your raid strategy closely resembles that of Normal mode, with a few tweaks. Alongside the strategy, your raid needs exceptional DPS and healing throughput, coupled with near-flawless execution from all members.
Conclusion
This marks the end of our Siege of Orgrimmar Guide Mists of Pandaria Remix, heroes. We hope you have found everything you wanted to know about this raid. With this number of encounters and mechanics to play around, you need a reliable party to get through it.
However, the rewards you get for completing this iconic raid are more than worth it. From slaying Immerseus to defeating Garrosh Hellscream himself, we have covered all the bosses waiting for you inside the instance. Good luck, heroes, and we will see you in Azeroth!
F.A.Q.
What level is Siege of Orgrimmar WoW Pandaria Remix?
Players can access Siege of Orgrimmar upon reaching level 60.
How do you get to Siege of Orgrimmar in Pandaria Remix?
You can find the entrance to Siege of Orgrimmar in the Vale of Eternal Blossoms.
How do I start Siege of Orgrimmar?
You can start the raid by finding its entrance at the following coordinates – 72.5, 44.1.
Where is Siege of Orgrimmar raid?
Look for Vale of Eternal Blossoms on your map to enter the raid. This zone is placed between Valley of the Four Winds and Kun-Lai Summit.
How many bosses are in Siege of Orgrimmar?
The Siege of Orgrimmar raid houses 14 bosses in total:
- Immerseus
- The Fallen Protectors
- Norushen
- Sha of Pride
- Galakras
- Iron Juggernaut
- Kor'kron Dark Shaman
- General Nazgrim
- Malkorok
- Spoils of Pandaria
- Thok the Bloodthirsty
- Paragons of the Klaxxi
- Siegecrafter Blackfuse
- Garrosh Hellscream
Who is the first boss in Siege of Orgrimmar?
Immerseus is the first encounter you will face off against in Siege of Orgrimmar.
What mounts drop in Siege of Orgrimmar?
Players can loot Kor'kron Juggernaut by slaying Garrosh Hellscream, the final boss of the raid.


