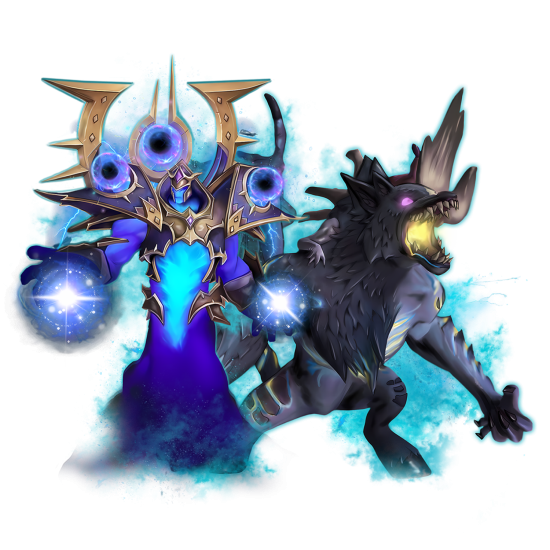
 Dallon Avery
Welcome to the Throne of Thunder, brave adventurer! As you step foot onto the ancient Isle of Thunder, you are thrust into the heart of a realm steeped in history and danger. Here, amidst the swirling storms and crumbling ruins, lies the seat of power of the fearsome Thunder King, Lei Shen.
This Throne of Thunder guide is created specifically for the Mists of Pandaria Remix event. As one of two final raids of the expansion, this is going to be the toughest challenge where your party will have to go through a whopping twelve boss encounters, each of which is its own epic battle.
The Throne of Thunder stands as a testament to the might and ambition of this ancient tyrant, its halls echoing with the whispers of forgotten secrets and untold power. But it is not just the Thunder King's presence that looms over these lands; a myriad of creatures, both ancient and malevolent, call this place home, each seeking to claim dominion over the island's treasures.
Yet, despite the perils that await within, there is hope, for you and your allies stand ready to brave the depths of the Throne of Thunder, to confront its guardians and uncover its mysteries. Together, you will face formidable foes, from the twisted experiments of the mogu to the primal fury of the elemental lords.
But remember, adventurer, the challenges that lie ahead are not to be underestimated. Only through cunning strategy, unwavering determination, and steadfast cooperation will you emerge victorious against the horrors that dwell within the Throne of Thunder.
So steel yourself, gather your allies, and prepare to embark on a journey unlike any other. For within the shadowed halls of this ancient stronghold, destiny awaits those brave enough to seize it. Welcome to the Throne of Thunder, where legends are forged, and heroes rise to claim their rightful place among the champions of Azeroth.
Before we get to the Throne of Thunder raid guide itself, we’d like to point something out. At Skycoach, you can Buy Throne of Thunder Raid Boost, which is a service that grants a raid completion in the way that you want. It means that you can set your own goals and conditions. You can pick the difficulty, completion method, and completion speed. The Skycoach veteran WoW players called PROs will complete the raid for you or with you. This is the best and fastest way to get all of the new rewards during the Pandaria remix event.
IMPORTANT NOTE: Apart from learning everything about Throne of Thunder, you can also Buy WoW Pandaria Boost from Skycoach. We offer a wide range of products at the lowest market price and with the fastest delivery. You can make your first purchase even CHEAPER if you find a special PROMO CODE (highlighted in green) hidden in this article and get a 20% DISCOUNT.
Browse our hottest WoW Boosting services


What is Throne of Thunder in Mists of Pandaria Remix
The Throne of Thunder raid in World of Warcraft is a sprawling, multi-winged instance located on the Isle of Thunder, off the coast of Pandaria. It stands as a testament to the might and ambition of Lei Shen, the Thunder King, who once ruled over the land with an iron fist. The raid's structure reflects the Thunder King's power, with its vast halls and chambers housing a variety of formidable adversaries.
Patch 5.2 of the Mists of Pandaria expansion on March 5, 2013, was the original Throne of Thunder release date. The patch introduced players to a new chapter in the ongoing conflict between the Horde, the Alliance, and the various factions vying for control of Pandaria. The raid was accessible in multiple difficulty modes, including LFR (Looking For Raid), Normal, Heroic, and Mythic, catering to players of varying skill levels and group sizes.
The lore surrounding the Throne of Thunder delves into the history of Lei Shen and his reign over Pandaria. The Thunder King, once a mortal tyrant, rose to power by harnessing the power of the storms and subjugating the various tribes and creatures of the isle. He constructed the Throne of Thunder as his seat of power, using it as a base from which to exert his control over the land.
As you venture deeper into the raid following the Throne of Thunder quest, you encounter a variety of adversaries aligned with Lei Shen's forces, including mogu, saurok, and Zandalari trolls. Each boss encounter presents its own unique challenges and mechanics, testing players' skills, coordination, and teamwork.
The raid culminates in an epic showdown against Lei Shen himself, as players confront the Thunder King in his throne room atop the fortress. With lightning crackling around him and the echoes of thunder reverberating through the halls, players must rally their strength and courage to defeat this ancient tyrant and bring an end to his reign of terror.
Throne of Thunder Location
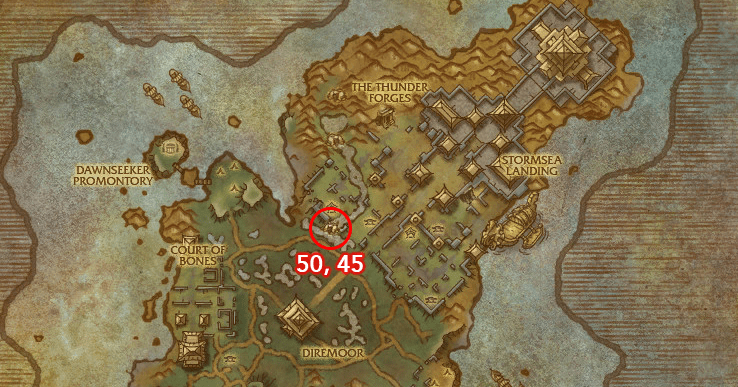
The Throne of Thunder location is called the Isle of Thunder, an island off the coast of Pandaria. To access the raid, players must first unlock the Isle of Thunder zone by completing a short questline that begins with an invitation from either Lorewalker Cho (for Alliance players) or Sunwalker Dezco (for Horde players) in their faction's respective capital city.
If you haven’t completed these questlines, then you wouldn’t know where is the Throne of Thunder anyway. But once players have unlocked the Isle of Thunder, they can travel there via portals located in their faction's capital city or by using their faction's portal hub in the Vale of Eternal Blossoms. Upon arriving on the Isle of Thunder, players will find themselves in a sprawling outdoor zone filled with dangerous creatures and ancient ruins. This is how to get to Throne of Thunder and there are no shortcuts.
To enter the Throne of Thunder raid, players must first assemble a group of adventurers and travel to the entrance of the raid instance, which is located at the southeastern edge of the island. The entrance is marked by a massive doorway flanked by stone statues and guarded by elite mogu warriors. So, when wondering where is entrance Throne of Thunder is, look for those statues.
Before entering the raid, players should ensure that they are properly geared and prepared for the challenges that await them. This includes having appropriate consumables, such as potions and flasks, as well as understanding the mechanics of each boss encounter and coordinating their strategy with their group.
Look up the Throne of Thunder location map we attached to help you navigate the island. Once inside the raid instance, players will find themselves in the antechamber of the Throne of Thunder, where they can speak with an NPC to queue for the raid or form a group with other players manually. From there, players can progress through the various wings and boss encounters of the raid, facing off against powerful foes and collecting valuable loot along the way.
Throne of Thunder Bosses
The Throne of Thunder raid is a massive instance located on the Isle of Thunder in Pandaria. It's one of the major raid instances introduced in the Mists of Pandaria expansion.
The raid consists of several boss encounters, each with its own unique mechanics and challenges. There’s no way Throne of Thunder solo would be possible in its renewed version. Here's a breakdown of the main bosses:
- Jin'rokh the Breaker: Players face off against this powerful troll warlord who utilizes lightning-based attacks. He has abilities like Lightning Storm and Electrified Waters that require players to carefully manage their positioning and movement.
- Horridon: This encounter pits players against a massive armored dinosaur accompanied by waves of Zandalari trolls. Players must deal with different types of adds while controlling Horridon himself, utilizing crowd control and proper positioning to survive.
- Council of Elders: Players face a council composed of different Zandalari tribe leaders. Each elder has unique abilities and must be dealt with strategically to progress through the encounter.
- Tortos: This boss encounter features a giant turtle who uses abilities like Rockfall and Whirlwind. Players must dodge falling rocks, and handle adds while managing Tortos's energy and mechanics.
- Megaera: Players encounter a hydra with multiple heads, each representing a different elemental type. Coordination and prioritization are key to defeating this multi-headed beast.
- Ji-Kun: Players battle against a massive bird nesting atop the Throne of Thunder. The encounter involves dealing with Ji-Kun's offspring while managing nests and eggs, all while avoiding deadly environmental hazards.
- Durumu the Forgotten: This boss fight takes place in a maze-like room filled with various visual effects and illusions. Players must navigate through the maze while dealing with Durumu's abilities, including the infamous maze phase, where players must dodge beams of light.
- Primordius: Players confront an experiment gone wrong, a creature infused with various types of Primordial Essence. Players must adapt to changing buffs and debuffs while dealing with adds and avoiding harmful effects.
- Dark Animus: This encounter features a swarm of smaller constructs that players must manage and defeat while avoiding their destructive abilities.
- Iron Qon: Players face off against a skilled mogu warrior and his three elemental companions. Each elemental has its own set of abilities, requiring players to adapt their tactics throughout the fight.
- Twin Consorts: Players fight against the twin consorts of Lei Shen, the Thunder King. This encounter requires coordination between the two bosses and features various celestial mechanics.
- Lei Shen: The final boss of the Throne of Thunder raid, Lei Shen is the Thunder King himself. This epic encounter features multiple phases and mechanics, culminating in an intense battle against one of the most powerful foes in Pandaria.
- Ra-den: Additional boss available in the heroic version of the raid only.
Needless to say, even though there are 13 encounters, there are more Throne of Thunder bosses. But we’ll get to these details in one of our next sections. BLOG20
Throne of Thunder Loot Table
The Throne of Thunder loot table will show you the kind of rewards you can get from the raid. Remember that the chances of a specific item dropping are always random.
Also, please beware that the Remix version of the Throne of Thunder loot will most likely be different from the original loot. This guide’s main goal is to provide a strategy for defeating every boss encounter in this raid. Therefore, the following table is nothing more than a list of potential rewards aimed to give you an idea of what you might be able to earn.
Every boss has a chance to drop one of the dozens of unique items for different gear slots and classes. It is said that the remix version will make the loot viable for the current version of the game, and it may also be good enough even in the next expansion. On top of that, you’ll have a chance to get a Throne of Thunder mount from one of two bosses:
- Clutch of Ji-Kun that drops from Ji-Kun
- Spawn of Horridon that drops from Horridon
The Remix is a perfect chance to add them to your collection if you still don’t have them.
Throne of Thunder Tier Sets
Speaking of the raid’s rewards, we can’t avoid mentioning the Throne of Thunder tier set, which is the type of loot that players used to hunt down by farming these raid bosses. Each set is tailored for a specific class and role. This next table lists all known tier 15 sets from the raid.
| Class | Tier Set |
|---|---|
| Death Knight | All-Consuming Maw |
| Druid | Haunted Forest |
| Hunter | Saurok Stalker |
| Mage | Chromatic Hydra |
| Monk | Fire-Charm |
| Paladin | Lightning Emperor |
| Priest | Exorcist |
| Rogue | Nine-Tail |
| Shaman | Witch Doctor |
| Warlock | Thousandfold Hells |
| Warrior | Last Mogu |
The pieces of these sets are actually tuned for different roles. For example, the Vestments of the Witch Doctor are for the healer Shamans, whereas the Regalia of the Witch Doctor is for the caster Shamans. These sets have a good chance of becoming as viable as the sets from the current Dragonflight sets, so you should definitely try to get them all.
Browse our hottest WoW Boosting services


Throne of Thunder Bosses Guide – WoW Pandaria Remix
We’ve finally come to the most important part of our guide. In the following sections, you’ll find complete descriptions of the bosses, along with the tactics and strategies for defeating them. For each boss encounter, we’ll provide a short description of the encounter, the health pools for all sizes of the raid, and the difficulty. Furthermore, you’ll find complete information about the abilities. Please beware that this is not a Throne of Thunder solo guide because the renewed raid won’t be as easily completed as its older version.
Finally, we’ll describe each boss’ battle strategy, explaining the mechanics of the fight and ways to defeat the boss as fast as possible.
Jin'rokh the Breaker
Starting our Throne of Thunder strategy with the first encounter. The order in which you will face the bosses is always the same. While this is the first boss in the raid and he has fewer mechanics to work around compared to the next encounters, don’t think that you can beat it without any effort. Every member of the party must stay alert at all times.
- 10-man raiding party boss HP - 207M (normal) / 317M (heroic)
- 25-man raiding party boss HP - 622M (normal) / 952M (heroic)
There’s a soft enrage timer of 7 minutes when the entire arena becomes covered in damaging void zones, which means death to your entire party.
- 10-man raiding party - 2 tanks, 2-3 healers, 5-6 DPS (classic roster)
- 25-man raiding party - 2 tanks, 5/7 healers, 16/18 DPS (for both difficulties)
The damage phase is a race where DPS classes must do their best to deal enough damage and kill the boss in less than 7 minutes. BLOG20
Jin'rokh the Breaker Abilities
The Breaker has a few abilities that you will have to deal with:
| Ability | Description |
| Thundering Throw | Jin'rokh hurls a player at a mogu statue, breaking it and causing moderate Physical damage. The player then inflicts moderate Nature damage and a 6-second stun to nearby allies upon landing. A Conductive Water void zone is created at the impact site, gradually expanding and enhancing damage dealt and received by those within. |
| Conductive Water | Void zones spawned by Thundering Throw that grow over time, covering a quarter of the room. Standing in them grants a damage and healing buff but increases Nature damage taken. They also trigger damage if affected by certain abilities. |
| Focused Lightning | Jin'rokh summons a lightning orb fixated on a raid member, dealing periodic Nature damage to nearby players. Upon reaching its target, it detonates, inflicting high Nature damage to nearby players. If detonated within Conductive Water, it deals increased damage. Leaves behind a Lightning Fissure, persistently damaging nearby players. Interaction with Fissures leads to Implosion, dealing significant raid-wide damage and increasing subsequent Implosions' damage. Exploding in Electrified Waters causes fatal damage to nearby players. |
| Lightning Fissure | Persistent ground effect left behind by Focused Lightning, dealing Nature damage to nearby players. Removed upon contact with Conductive Water, triggering damage to those inside. |
| Static Burst | Jin'rokh inflicts moderate Nature damage to the raid and applies Static Wound stacks to the tank, causing them to take additional Nature damage from boss melee attacks. A portion of this damage is also shared with raid members. Requires tank switching. |
| Lightning Storm | Periodic spell cast by Jin'rokh, inflicting moderate Nature damage to the entire raid over a duration. Marks the end of Conductive Water's usefulness as it transforms into Electrified Waters, causing continuous damage to players within. |
The breaker has the ability to target one person from the raid, the arena’s floor, or the entire party. All abilities are clearly telegraphed, so it’s all about remembering them.
Jin'rokh the Breaker – Tactics & Strategy
To defeat Jin'rokh the Breaker, follow these key strategies:
- Tank Rotation: Alternate tanking Jin'rokh to manage Static Wound stacks effectively. Taunt off each other to reset the threat after Thundering Throw.
- Positioning in Conductive Water: DPS and healers should stand in the newest Conductive Water void zone until Lightning Storm. Ranged players must be ready to move out if targeted by Focused Lightning.
- Dealing with Focused Lightning: Designate safe areas to detonate Focused Lightning orbs, away from Conductive Water. Avoid letting orbs hit players inside the water or Lightning Fissures.
- Handling Thundering Throw: Tanks should position themselves to be thrown at the designated mogu statue, where Conductive Water spawns. Taunt Jin'rokh immediately after being thrown.
- Adapting to Lightning Storm: Stack in the center of the room during Lightning Storm, using raid cooldowns for survival. Leave Conductive Water to avoid increased Nature damage.
- Optimizing DPS: Save DPS cooldowns for when standing in Conductive Water to maximize damage output.
- Timing Heroism/Bloodlust: Use Heroism/Bloodlust about 20 seconds after the first Conductive Water spawns to coincide with DPS cooldown availability.
- Learning the Encounter: Focus on mastering handling Focused Lightning and maximizing DPS during the Conductive Water phases.
For Heroic mode, address two additional mechanics:
- Ionization: Spread out before Ionization expires and dispel affected players safely. Use immunities or self-dispels to minimize damage.
- Lightning Strike: During Lightning Storm, avoid sparks from Lightning Strike by moving around the room.
Following these strategies will increase your chances of success against Jin'rokh the Breaker.
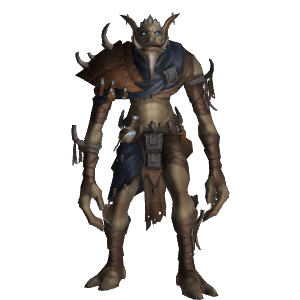
Horridon
The second boss encounter is not that difficult overall. However, it does have quite a number of mechanics to keep in mind. Plus, you’re going to have to deal with lots of adds during the fight.
- 10-man raiding party boss HP - 654M(normal) / 218M (heroic)
- 25-man raiding party boss HP - 1,177M(normal) / 1,962M(heroic)
There’s an enrage timer of 12 minutes, after which your party will wipe.
- 10-man raiding party - 2 tanks, 2-3 healers, 5-6 DPS (classic roster)
- 25-man raiding party - 2 tanks, 5/7 healers, 16/18 DPS (for both difficulties)
You must deal sustained damage to the boss and take care of the adds at the same time, utilizing different AoE abilities.
Horridon Abilities
The boss has a few abilities, and this raid encounter also features adds with their own abilities. BLOG20
| Ability | Description |
| Triple Puncture | Deals significant damage to the tank and applies a debuff, increasing subsequent Triple Puncture damage by 10%. Requires tank rotation to manage efficiently. |
| Double Swipe | Inflicts heavy damage to all players within a 35-yard cone in front of and behind Horridon. |
| Charge | Horridon charges at a player, unleashing a Double Swipe upon reaching them. |
| Cracked Shell | Horridon gains stacks of Cracked Shell at the end of each phase, boosting damage taken by 50% per stack until the end of the encounter. |
On top of that, each add has its own ability:
- Zandalari Dinomancer – Dino-Mending casted on the boss that needs to be interrupted.
- Farraki Trolls – Blazing Sunlight and Sand Trap
- Gurubashi Trolls – Venom Bolt Volley and Venomous Effusions
- Drakkari Trolls – Mortal Strike and Frozen Orbs
- Amani Trolls – Chain Lighting, Hex of Confusion
Each type of adds has a few additional variants that have their own abilities. The adds change each phase, making your party readjust based on the type of add you’re fighting against.
Horridon – Tactics & Strategy
The battle against Horridon is structured into five distinct phases, each presenting unique challenges as different tribes of Trolls join the fray.
Phases One through Four see Horridon accompanied by a specific tribe of Trolls pouring from one of the four arena doors. After a minute, a Zandalari Dinomancer enters, whose defeat allows the raid to close the door, preventing further reinforcements. Each phase demands swift elimination of the tribe's main threats: Sand Traps in Phase One, Living Poison in Phase Two, Frozen Bolts in Phase Three, and Lightning Nova in Phase Four. Transitioning between phases requires strategic positioning and coordination, ensuring efficient door closures while managing Horridon's relentless assault.
Phase Five culminates in a showdown with both Horridon and War-God Jalak. Prioritizing Jalak's demise is paramount, as his Bestial Cry inflicts escalating damage. Surviving this intense phase necessitates meticulous cooldown management and precise execution of mechanics. Premature activation of Phase Five by weakening Horridon risks overwhelming the raid, emphasizing the need for strategic pacing and readiness for the final confrontation.
Phase 1: The Farraki
Horridon is joined by the Farraki Trolls, bringing their own set of challenges. As the northwestern door opens, Sul'lithuz Stonegazers and Farraki Skirmishers enter the arena. Sul'lithuz Stonegazers pose an immediate threat with their Stone Gaze ability, which makes them capable of stunning players for a significant duration. Quick elimination of these adds is crucial to prevent raid members from being incapacitated. Additionally, Farraki Wastewalkers will join the fray, unleashing Blazing Sunlight on random targets, leaving damaging fire DoTs in their wake. Players must be vigilant to avoid the expanding Sand Traps created by the Wastewalkers. Coordination is key to interrupting Stone Gaze, dispelling Blazing Sunlight's DoT, and dodging Sand Traps while managing Horridon's attacks.
Phase 2: The Gurubashi
With the northeastern door opening, Gurubashi Trolls flood into the arena, led by Gurubashi Bloodlords and Gurubashi Venom Priests. Gurubashi Bloodlords relentlessly target players with Rending Charge, inflicting grievous bleeding wounds that demand immediate attention. Meanwhile, Gurubashi Venom Priests rain down Venom Bolt Volley, leaving debilitating poison DoTs on their victims. Interrupting Venom Bolt Volley becomes paramount to survival. Amidst the chaos, players must be wary of Venomous Effusions summoned by the priests, as these creatures spew venomous pools that can quickly overwhelm the raid. Precision in interrupting abilities, dispelling poisons, and avoiding poison pools is essential, all while managing Horridon's relentless assaults.
Phase 3: The Drakkari
As the southeastern door opens, Drakkari Trolls surge forth, accompanied by Risen Drakkari Champions and Drakkari Frozen Warlords. Risen Drakkari Champions and Warriors relentlessly assail players with the Deadly Plague, a debilitating disease that must be promptly dispelled to prevent its spread. Meanwhile, Drakkari Frozen Warlords unleash Mortal Strike on their primary target, reducing incoming healing and demanding careful attention from healers. Beware the Frozen Orbs summoned by the Warlords, which release freezing bolts capable of immobilizing and damaging nearby players. As the raid navigates through these threats, managing dispels, avoiding Frozen Orbs, and mitigating damage from Horridon's onslaught remain top priorities.
Phase 4: The Amani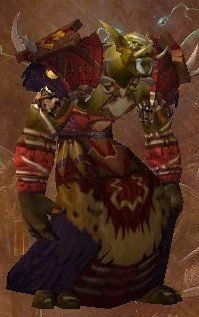
With the southwestern door opening, Amani Trolls charge into battle alongside Amani'shi Protectors and Flame Casters. Amani'shi Protectors deliver devastating melee strikes, while Flame Casters bombard the raid with fiery projectiles. Interrupting Flame Casters' Fireball ability becomes crucial to mitigate incoming damage. However, the true challenge lies in managing Amani Warbears and their subsequent transformation into Amani'shi Beast Shamans upon death. These shamans unleash Chain Lightning and Hex of Confusion, threatening to overwhelm players with devastating spells and curses. To survive this phase, players must maintain optimal positioning, prioritize interrupting key abilities, dispel harmful curses, and evade Chain Lightning strikes, all while contending with Horridon's unrelenting assault.
Phase 5: War-God Jalak
As the final phase commences, the focus shifts to War-God Jalak's entry into the arena. Swiftly dispatching Jalak becomes paramount, as his Bestial Cry inflicts substantial damage to the raid while increasing in potency with each cast. Coordinated cooldown usage and strategic positioning are essential to weathering this onslaught. Moreover, considering Jalak's vulnerability to disarming offers an opportunity to mitigate incoming damage and expedite his defeat. Amidst the chaos, players must maintain vigilance against Horridon's continued assaults, ensuring effective tank swaps and positioning to maximize survivability. BLOG20
Throughout each phase, adaptability, communication, and precise execution of mechanics are paramount. By coordinating interrupts, dispels, and positioning while effectively managing cooldowns and damage output, the raid can overcome the challenges posed by Horridon and emerge victorious.
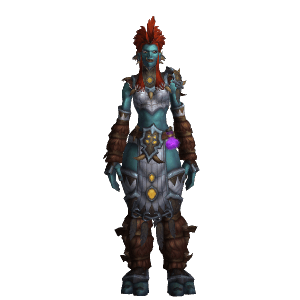
Council of Elders
This is a fight with four Trolls at the same time, which is where the difficulty of the encounter comes from.
- 10-man raiding party boss HP - 89.8M (normal) / 117M (heroic)
- 25-man raiding party boss HP - 225M(normal) / 352.7M(heroic)
There’s no enrage timer whatsoever.
- 10-man raiding party - 2 tanks, 2-3 healers, 5-6 DPS (classic roster)
- 25-man raiding party - 2 tanks, 5/7 healers, 16/18 DPS (for both difficulties)
The fight has a tendency of restricting the battle arena, limiting the mobility of your party. You must be aware of your surroundings at all times.
Council of Elders Abilities
Each of the 4 bosses has their own abilities.
| Image | Boss | Abilities |
 |
Frost King Malakk |
|
 |
Kazra'jin |
|
 |
Sul the Sandcrawler |
|
 |
High Priestess Mar'li |
|
Not only that but, each troll has a fighting style that needs to be kept in mind during the fight.
Council of Elders – Tactics & Strategy
There’s only one phase but you must kill all 4 trolls to complete the encounter. Each troll has its own health pool. During the fight one of the trolls will become empowered which leads them to cast a raid-wide damaging spell. The empowerment can be disabled when the troll loses 25% of health.
The encounter revolves around managing the abilities of each elder while balancing raid positioning and resource allocation.
Tanks must effectively manage boss positioning and debuffs, while healers contend with sustained raid damage and periodic spikes. DPS players must prioritize targets and coordinate burst damage phases.
The fight's mechanics emphasize positioning, interrupt management, and add control. Raid members must spread out to minimize damage from certain abilities, interrupt key spells to prevent dangerous effects, and efficiently handle additional enemies summoned throughout the encounter.
Strategic planning and effective communication are essential to success. Raid leaders should assign roles, designate interrupt rotations, and establish clear positioning guidelines to optimize performance. Flexibility is key, as adaptability to changing circumstances ensures the raid can overcome unexpected challenges.
By understanding the mechanics of each boss, coordinating their efforts, and executing their roles with precision, raid groups can overcome the Council of Elders and claim victory in the Throne of Thunder.
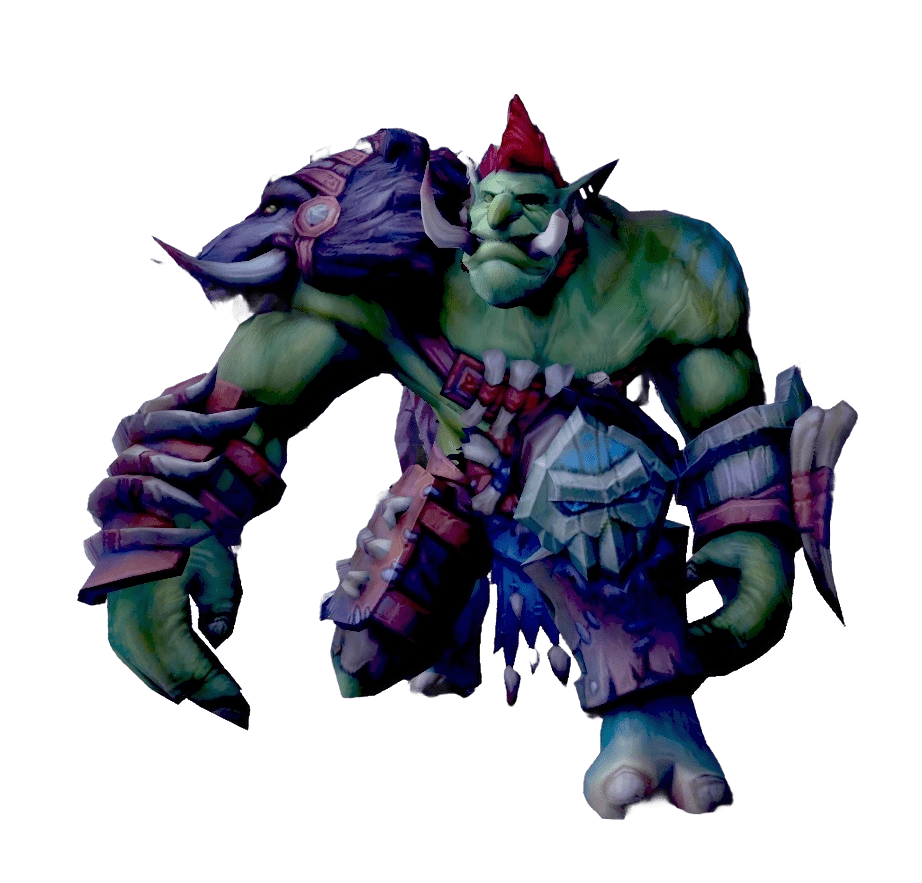
Tortos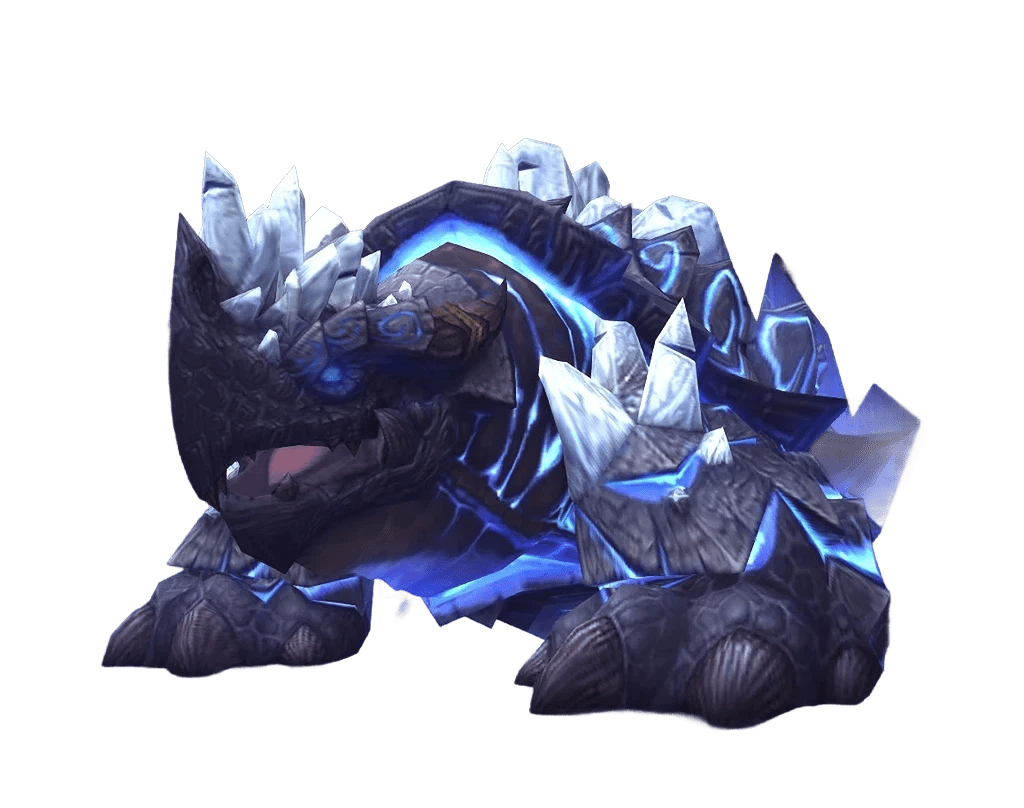
The tables are turned for this next encounter. You won’t find any particularly complex mechanics in this fight, but the difficulty of the encounter is still pretty high.
- 10-man raiding party boss HP - 179M (normal) / 319M(heroic)
- 25-man raiding party boss HP - 599M (normal) / 1,000M (heroic)
The soft enrage timer is 8 minutes at which time the arena will be flooded with the elite mobs called Whirl Turtle. They will quickly put an end to your efforts.
- 10-man raiding party - 2 tanks, 2-3 healers, 5-6 DPS (classic roster)
- 25-man raiding party - 2 tanks, 5/7 healers, 16/18 DPS (for both difficulties)
This encounter will have some raid members to do specific actions while the rest of the group will have to avoid various projectiles and deal damage.
Tortos Abilities
Let’s start with the Tortos abilities:
| Ability | Description |
| Furious Stone Breath | Tortos casts this ability every 45 seconds, dealing massive raid-wide damage. It must be interrupted by kicking a Whirl Turtle add at the boss. The time until the next cast is indicated by Tortos' Fury bar. If no one is within melee range, he gains Fury faster. |
| Rockfall | Throughout the fight, stalactites fall from the cave roof, dealing high damage to anyone within 5 yards of impact and lower damage to those within 20 yards. Impact locations are marked in advance by blue circles. |
| Quake Stomp | Regularly cast, this ability stuns all players for 1 second and deals 65% of their maximum health as Physical damage. Increases the frequency of Rockfall impacts for 8 seconds. |
| Snapping Bite | Tortos uses this highly damaging ability against his current target every 8-10 seconds, dealing a large amount of Physical damage. |
Besides these, the encounter features two adds:
- Whirl Turtles: Summoned every 60 seconds by Tortos. Cannot be tanked; move randomly and deal damage with Spinning Shell. When near death, they become immune and stationary, but can be kicked to interrupt spells and debuff targets.
- Vampiric Cave Bats: Enter every 30 seconds. Have normal aggro tables and use Drain the Weak, which deals damage and heals them if the target's health is low.
Tortos – Tactics & Strategy
The boss doesn’t move around at all, and there’s only one phase, but he summons to types of adds pretty often. The essential mechanic of this fight is when you damage the add until they have 25% health left, they can be “kicked” into the boss to deal damage.
In the fight against Tortos, it's crucial to keep him engaged in melee range at all times to prevent him from casting Furious Stone Breath more frequently. Additionally, one tank should handle Tortos while another manages the Vampiric Cave Bats, positioning them near Tortos for easier DPS from melee players.
For interrupting Tortos' Furious Stone Breath, designate a player to consistently kick a Whirl Turtle towards him. This player should be prepared to move into position before the cast and use the Kick Shell ability to interrupt the spell. Having a backup interrupter adds an extra layer of reliability to this strategy.
In terms of damage priority, ranged DPS should focus on Whirl Turtles, while melee DPS split their attention between Tortos and the Vampiric Cave Bats. It's crucial to ensure there's always a Whirl Turtle available for kicking before each Furious Stone Breath cast, so timely elimination of these adds is essential.
Megaera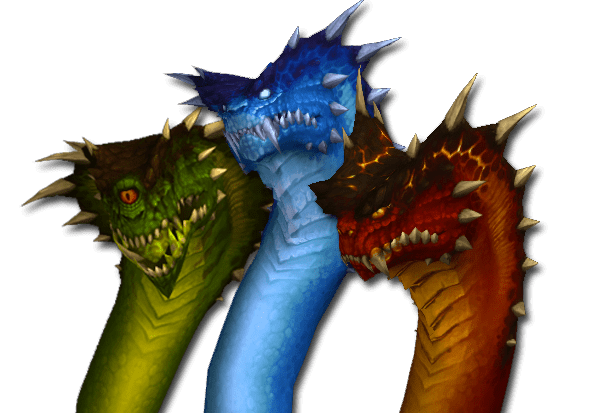
The fifth encounter represents a battle against the hydra with several heads.
- 10-man raiding party boss HP - 315M (normal) / 413M (heroic)
- 25-man raiding party boss HP - 789M (normal) / 1,026M (heroic)
The heads and the body have different amounts of health.
- 10-man raiding party - 2 tanks, 2-3 healers, 5-6 DPS (classic roster)
- 25-man raiding party - 2 tanks, 5/7 healers, 16/18 DPS (for both difficulties)
The main hurdle of this fight is dealing enough DPS while keeping damage-dealers safe. There are some movement-related bits, but they shouldn’t be too difficult at this point.
Megaera Abilities
The boss has 3 heads and their abilities differ based on their location. There can be two locations – one is near the arena, the second is at the back. The abilities near the arena are as follows:
| Head Type | Ability | Description |
| Flaming Head | Cinders | Applied to a random raid member, dealing instant damage and damage over time for 30 seconds. Dispelling creates a fiery void zone at the player's location. |
| Frozen Head | Torrent of Ice | Chases a random raid member for 8 seconds, dealing Frost damage at impact and leaving behind icy void zones. The more Frozen Heads, the more players are targeted. |
| Venomous Head | Acid Rain | Shoots a ball of acid at a random raid member's location, dealing Nature damage upon impact. More heads mean more players targeted. |
Interaction: Cinders dispelled by running over Icy Ground; Torrent of Ice dispels fiery void zones. Abilities of the heads when they are away from the arena are:
| Head Type | Ability | Description |
| Flaming Head | Ignite Flesh | Melee attack that deals Fire damage and stacks a Fire damage over time on affected players. |
| Frozen Head | Arctic Freeze | Melee attack that deals Frost damage and stacks a debuff freezing affected players at 5 stacks. |
| Venomous Head | Rot Armor | Melee attack that deals Nature damage and stacks a debuff causing affected players to take 10% increased damage from all sources per stack. |
Mechanic: Rampage causes Magic damage; additional heads increase damage taken. If no one is in melee range, heads spam Megaera's Rage.
Megaera – Tactics & Strategy
The objective is to kill 7 heads, as each head killed deals damage to the boss herself. When 2 heads are near the arena, they can be damaged and killed. When the heads are away from it, they cannot be attacked, but these heads will use some of their abilities.
The approach to defeating Megaera is surprisingly straightforward despite the apparent complexity of the encounter. Here's a simplified breakdown:
- Start by focusing your raid's damage on one of the two heads near the platform, preferably targeting the Frozen Head first. When one head is defeated, endure the raid-wide damage from Rampage while staying stacked together. After Rampage ends, spread out again and have each tank pick up one of the remaining heads, ensuring they face away from the raid.
- During this phase, your raid will need to handle the abilities cast by the heads at the back of the cave. Players affected by Cinders must quickly run over any icy void zones created by the Frozen Head's ability and then be dispelled in safe locations away from the raid. Those targeted by Torrent of Ice should kite the beam away from the raid, avoiding stacking points, and any raid-wide damage from Acid Rain should be minimized by promptly moving away from its impact locations.
- Tanks have a relatively simple task during this fight. While Rampage is active, continue to stack with the rest of the raid and attack the head that is the current focus. Shortly before Rampage ends, prepare to switch to tanking the other head to prevent the stacking of debuffs applied by their breath attacks.
Maintain a balance in killing heads to avoid excessive stacks of Hydra Frenzy, and ensure that no head accumulates more than 2 stacks. Lastly, be prepared for a healing-intensive encounter, particularly during Rampage phases, and utilize healing and defensive cooldowns accordingly.
Ji-Kun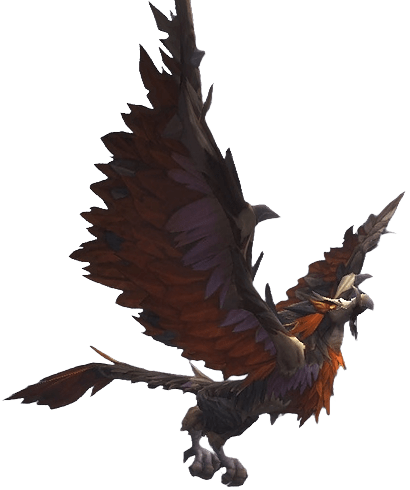
The Ji-Kun encounter involves defeating a giant bird boss atop its nest. Players must manage nests, eggs, and flying birds while dealing with various abilities like Quills and Talon Rake. The fight revolves around controlling adds, avoiding environmental hazards, and maintaining proper positioning to handle mechanics effectively.
- 10-man raiding party boss HP - 244M (normal) / 366M (heroic)
- 25-man raiding party boss HP - 732M (normal) / 1,099M (heroic)
There’s no enrage timer of any sort, but the boss has some adds that will make your life difficult.
- 10-man raiding party - 2 tanks, 2-3 healers, 5-6 DPS (classic roster)
- 25-man raiding party - 2 tanks, 5/7 healers, 16/18 DPS (for both difficulties)
The fight features constant DPS checks, so your damage-dealers better be ready to give it their best shot!
Ji-Kun Abilities
Ji-Kun has five distinct abilities:
| Ability | Description |
| Infected Talons | A Nature damage DoT on the tank that stacks over time. |
| Talon Rake | An attack on the tank that applies a debuff, increasing damage taken from Talon Rake for 1 minute. |
| Down Draft | Cast every 2 minutes, pushes players away from Ji-Kun for 8 seconds. Players must move towards Ji-Kun to avoid being pushed. |
| Caw | Ji-Kun targets random raid members (2 in 10-man, 5 in 25-man/LFR) with sound waves, dealing damage in an 8-yard radius upon impact. |
| Quills | Channels an 8-second raid-wide AoE attack every minute, damaging players on Ji-Kun's platform and those on nests below. |
She also has the ability to spawn adds:
Feed Young – Regularly casts to feed Hatchlings below. If no Hatchlings, spawns green slime balls on the platform. Players hit by slime become Slimed. Intercepting the slime grants a damage/healing buff.
Ji-Kun – Tactics & Strategy
The Ji-Kun fight is a single-phase encounter where players face the boss herself along with various adds. Ji-Kun remains on a circular platform throughout the fight, requiring tank swaps. Below her platform are nests with eggs that spawn Hatchlings, which must be killed quickly to prevent further adds. If left unchecked, Hatchlings evolve into more dangerous Fledgelings and eventually Juveniles. Raid members rotate to the nests to manage these adds while others remain on the platform to focus on Ji-Kun. Additionally, nests above Ji-Kun's platform contain Mature Eggs that activate periodically, posing a threat if not dealt with swiftly. Coordination and timely add management are key to success in this encounter.
The strategy for the Ji-Kun fight involves coordinated actions between different groups of raid members to manage nests, while those on Ji-Kun's platform handle her abilities.
- Tank Rotation: Ensure tanks alternate tanking Ji-Kun to manage Infected Talons and Talon Rake debuffs.
- Nest Management: Assign groups to handle nests. Rotate groups to clear nests as they activate, using Flight abilities to return to the platform.
- Platform Spread: Spread out to minimize Caw damage and run towards Ji-Kun during Down Draft to avoid being pushed away.
- Feed Pools: Intercept slime balls to prevent Feed Pools from spawning on the platform. Despawn existing Feed Pools by standing in them for 3 seconds.
- Healing Focus: Be prepared for high raid damage during Quills casts.
- DPS Boost: In 25-man, assign a dedicated group to clear nests and intercept slime balls to stack the Primal Nutriment buff for increased raid DPS. In 10-man, utilize spare Flight charges for occasional interception.
Durumu the Forgotten
The seventh encounter demands precise execution. The encounter with Durumu the Forgotten revolves around managing his various visual mechanics while dealing with periodic adds
- 10-man raiding party boss HP - 261M (normal) / 392.5M (heroic)
- 25-man raiding party boss HP - 785M (normal) / 1,17M (heroic)
After 10 minutes, Durumu will cast Obliterate, which will wipe the party.
- 10-man raiding party - 2 tanks, 2-3 healers, 5-6 DPS (classic roster)
- 25-man raiding party - 2 tanks, 5/7 healers, 16/18 DPS (for both difficulties)
Players must avoid his gaze attacks by moving out of line of sight, navigate through his maze-like maze, and handle adds appropriately. Coordination and awareness are crucial to avoid deadly effects and defeat Durumu. BLOG20
Durumu the Forgotten Abilities
The boss uses different abilities in two phases. Adapt your strategy depending on the phase, you must!
| Abilities | Description |
| Normal Phase | |
| Hard Stare | Damaging attack that applies Serious Wound (reduces healing received) and Arterial Cut (bleed effect) debuffs. |
| Force of Will | Spams a cone effect targeting a random raid member, knocking back anyone caught in it. |
| Lingering Gaze | Fires Shadow bolts at random raid members, leaving behind damaging void zones. |
| Life Drain | Summons a Hungry Eye that channels Life Drain on a raid member, healing Durumu. Can be intercepted by players, transferring the drain to them. |
| Colorblind Phase | |
| Red, Blue, Yellow Beams and Cones | Beams target players with corresponding colors, creating cones on the ground. |
| Red Cone (Infrared Light) | Damages the raid if no players are inside the cone. |
| Blue Cone (Blue Rays) | Damages the raid if no players are inside the cone. |
| Yellow Cone (Bright Light) | Damages the raid if no players are inside the cone. |
The normal phase abilities can also be used during the colorblind phase, so be aware of that as well.
Durumu the Forgotten – Tactics & Strategy
Technically, there’s only one phase in this fight, but it would be easier for you and your party if you split it into 3 sections.
- Normal section – occurs at the start of the fight when the boss uses his less damaging attacks.
- The colorblind section – occurs when the boss uses his signature mechanic shining two lights at two random party members. They’ll be able to reveal hidden adds. Once 3 adds are killed after being revealed, the fight progresses to the third section.
- The third section – happens when the boss starts to circle around the arena and use the beam of light as the main ability. This is a survival phase.
These phases repeat themselves until the boss is dead.
Normal Phase Strategy:
During this phase, your raid will face Durumu's basic abilities. Tanks should swap to manage debuffs, while raid members avoid void zones and knockbacks. Intercept Life Drain to minimize healing on Durumu.
- Tank Swaps: Alternate tanking to manage debuffs.
- Void Zones: Avoid Lingering Gaze void zones.
- Knockbacks: Move out of Force of Will cones to avoid being knocked back.
- Life Drain Intercept: Have players intercept Life Drain to minimize Durumu's healing.
Note: Paladins can remove Hard Stare stacks with Divine Shield.
Colorblind Phase Strategy:
In this phase, beams target players, revealing adds when the cones intersect their locations. Distribute raid members evenly between cones to minimize raid-wide damage. Focus on revealing and killing Crimson Fogs.
- Beam Distribution: Assign players to cones based on their role.
- Revealing Adds: Detect and kill Crimson Fogs quickly.
- Avoid Revealing Azure Fog: Prevent the blue cone from revealing the Azure Fog.
- Healing Concerns: Use healing cooldowns to manage raid damage.
Disintegration Beam Phase Strategy:
As the Disintegration Beam covers the room, players must stand in safe zones to avoid being killed. Move with the safe zones to stay protected.
- Safe Zones: Follow safe zones to avoid the lethal Disintegration Beam.
- Avoid Eye Sores: Stepping on Eye Sores should be avoided.
- Continuous Movement: Keep moving with the safe zones as they expand.
By executing these strategies, your raid should be able to overcome each phase of the Durumu encounter effectively.
Primordius
The eighth boss has many abilities but, ultimately, it is not a very challenging battle.
- 10-man raiding party boss HP - 218M(normal) / 305M (heroic)
- 25-man raiding party boss HP - 654M (normal) / 916M (heroic)
After 8 minutes, the boss goes Berserk, increasing his damage by a lot which will make him able to kill the entire party in the next 10 seconds.
- 10-man raiding party - 2 tanks, 2-3 healers, 5-6 DPS (classic roster)
- 25-man raiding party - 2 tanks, 5/7 healers, 16/18 DPS (for both difficulties)
This battle will be most difficult for DPS role specifically, as they will need to manage various effects, while dealing damage.
Primordius Abilities
The boss has several regular abilities. During the fight, the boss evolves, gaining new abilities.
| Ability | Description |
| Primordial Strike | Frontal cone attack dealing high Physical damage, cast every 20 seconds. Tanks must survive this. |
| Malformed Blood | Stacking debuffs causing Nature damage every 3 seconds. Also increases damage dealt to Living Fluids, requiring a tank switch. |
| Mutated Abomination | Buff making Primordius take reduced damage from players not Fully Mutated. |
| Evolution | Buff gained when Primordius reaches maximum mutation capacity. Increases damage done by 10% and grants one of the following abilities: |
| Ventral Sacs | Raid-wide AoE Nature damage every second. (Evolution Ability) |
| Caustic Gas | Deals high Nature damage, split between players within 25 yards of Primordius. (Evolution Ability) |
| Acidic Spines | Targets random raid members with nukes, damaging all players within 5 yards of the target. (Evolution Ability) |
| Volatile Pathogen | Applies Pathogen Glands debuff, dealing large Nature damage every second for 10 seconds. (Evolution Ability) |
| Metabolic Boost | Buff increases Primordius' attack speed by 50% and reduces ability cooldowns by 50%. (Evolution Ability) |
| Erupting Pustules | Throws projectiles dealing Nature damage in random areas of the room. (Evolution Ability) |
The boss gradually increases his special resource, which, when reached the maximum amount of, grants him one of the “evolutionary” abilities.
Primordius – Tactics & Strategy
The encounter with Primordius is a single-phase battle with several key mechanics. By default, players deal minimal damage to Primordius, but there are ways to increase damage output. Adds spawn throughout the fight, leaving behind buffs when killed. Accumulating these buffs grants players the ability to deal full damage for a limited time as Fully Mutated. However, if adds reach Primordius, he gains damaging abilities, escalating the challenge. Additionally, taking too many buffs after becoming Fully Mutated can have adverse effects.
The strategy for the Primordius encounter revolves around effective DPS management, buff acquisition, and response to boss abilities.
- Allocate DPS roles based on mutation status: non-mutated DPS focuses on killing Living Fluids to gain beneficial buffs, while fully mutated DPS targets Primordius directly to maximize damage output.
Manage player buffs by actively collecting Mutagenic Pools to gain beneficial buffs. Assign high DPS players to collect buffs first to maximize their time on the boss. Once fully mutated, avoid touching Mutagenic Pools to prevent harmful debuffs.
- React to boss abilities accordingly: heal through Ventral Sacs, split damage for Caustic Gas, spread out for Acidic Spines, intensively heal targets affected by Pathogen Glands, and dodge Erupting Pustules.
Adapt to conflicting abilities by stacking tightly to mitigate damage and using healing and defensive cooldowns to survive. It may be beneficial to allow Living Fluids to reach Primordius during conflicting ability phases to hasten the removal of conflicting abilities through Evolution stacks.
Dark Animus
This fight is a weird one. The only thing that is normal is the fact that you’ll face the boss and his adds at the same time.
- 10-man raiding party boss HP - 174M (normal) / 218M (heroic)
- 25-man raiding party boss HP - 436M (normal) / 654M (heroic)
At the start of the fight, the boss is inactive. It is dormant until its minions activate it.
- 10-man raiding party - 2 tanks, 2-3 healers, 5-6 DPS (classic roster)
- 25-man raiding party - 2 tanks, 5/7 healers, 16/18 DPS (for both difficulties)
Dark Animus Abilities
You must know that the boss uses a special resource called Anima. The boss will activate and use his abilities based on the amount of Anima he consumes.
| Ability | Description |
| Siphon Anima | Drains 1 Anima from any golems every 6 seconds, killing them when drained completely. |
| Touch of the Animus | Places a debuff on a random raid member, dealing moderate Fire damage every 4 seconds. |
| Anima Ring | Creates a ring of spheres around the target, closing in on them. Touching a sphere applies a debuff, increasing melee damage taken by 50% for 15s. |
| Anima Font | Causes a player debuffed by Touch of the Animus to damage nearby allies when cast. |
| Interrupting Jolt | Deals large raid-wide Nature damage, interrupts spellcasting, and silences players for 8.5 seconds. |
| Full Power | Channels extremely high damage to random raid members every second, wiping the raid quickly. |
Besides the Dark Animus, there will be hordes of of 3 types of adds:
- Animal Golems casting Acceleration Link
- Large Anima Golems casting Crimson Wake
- Massive Anima Golems casting Matter Swap & Explosive Slam
Dark Animus – Tactics & Strategy
In the battle against the Dark Animus, you'll encounter various golems alongside the boss: Anima Golems, Large Anima Golems, and Massive Anima Golems. Initially, only the Anima Golems are active. When you kill an Anima Golem near larger adds or the Dark Animus, it activates them by transferring its Anima to them. Anima is the life force animating these creatures.
Large Anima Golems activate when they receive enough Anima (two Anima Golems' worth), while Massive Anima Golems and the Dark Animus activate with any amount of Anima. Each add has its own abilities upon activation, while the Dark Animus gains abilities as its Anima level increases. If it reaches maximum Anima by absorbing all golems' Anima, it wipes the raid.
Your goal is to find a balance: kill enough golems to manage their numbers without overloading the Dark Animus. Watch our video preview for a visual guide, but refer to this text for specific tactics.
Anima Management:
Begin by assigning tanks and plate DPS players to handle Anima Golems, ensuring they remain spread apart to prevent Acceleration Link. Strategically kill Anima Golems to transfer their Anima to Massive Anima Golems, which should be tanked in the center of the room.
Activate the Dark Animus when there are few Anima Golems left in the room to slow his Anima drain. Aim for the Dark Animus to reach 36 Anima initially, delaying his progression to 100 Anima.
Avoid activating Large Anima Golems due to their disruptive abilities like Crimson Wake.
Handling Abilities:
Handle Dark Animus abilities by promptly dispelling Matter Swap after a few seconds and avoiding Explosive Slam by watching ground indicators. Tank Massive Anima Golems in the middle to minimize disruption from Matter Swap.
During the encounter, promptly exit the Anima Ring to prevent increased melee damage and ensure players affected by Anima Font stay away from others to prevent damage spread. Beware of Interrupting Jolt, ensuring no one is casting spells during this ability.
Final Push:
Lastly, defeat the Dark Animus before he reaches 100 Anima to avoid a wipe. Through effective Anima management and ability handling, your raid can emerge victorious against the Dark Animus.
Iron Qon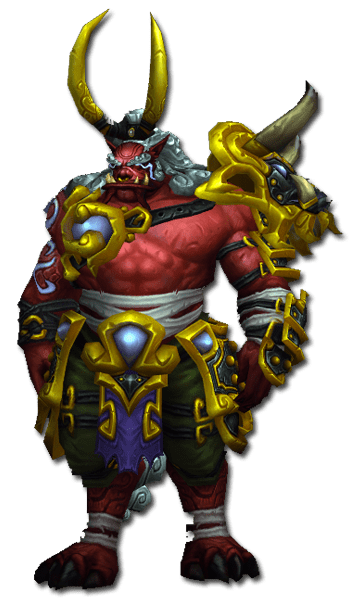
This boss has lots of phases, but they’re relatively easy to track and follow.
- 10-man raiding party boss HP - 152M (normal) / 155M (heroic)
- 25-man raiding party boss HP - 359M (normal) / 457M (heroic)
After 12 minutes, the boss starts to deal considerably more damage which will lead to your party wiping.
- 10-man raiding party - 2 tanks, 2-3 healers, 5-6 DPS (classic roster)
- 25-man raiding party - 2 tanks, 5/7 healers, 16/18 DPS (for both difficulties)
This fight requires immaculate communicational skills.
Iron Qon Abilities
Iron Qon uses different mounts that grant him different abilities.
| Phase | Abilities | Description |
| Phase One | Burning Cinders | Iron Qon throws his spear, igniting the ground with lines of magma. Standing on these lines applies a DoT. |
| Molten Overload | When Ro'shak's Molten Energy is full, he gains increased damage and casts Molten Inferno at the raid. | |
| Molten Inferno | Ro'shak's raid-wide damaging attack that costs Molten Energy. | |
| Unleashed Flame | Ro'shak targets a stacked group with a damaging ability, applying a debuff that increases Fire damage taken. | |
| Phase Two | Storm Cloud Strike | Iron Qon throws his spear, causing lines of lightning to appear on the ground. Standing on them deals damage. |
| Arcing Lightning | Quet'zal stuns a raid member, absorbing healing and dealing damage to nearby allies. | |
| Windstorm | Quet'zal summons tornadoes, reducing damage and pulling players towards the center of the room. | |
| Phase Three | Freeze Spear | Iron Qon throws his spear, freezing the ground. Standing on the ice deals Frost damage and slows movement. |
| Dead Zone | Dam'ren creates shields, nullifying damage from specific sides. | |
| Frozen Resilience | Dam'ren reflects a portion of damage back to attackers. | |
| Freeze | Dam'ren debuffs a raid member, causing moderate Frost damage upon expiration. | |
| Phase Four | Rising Anger | Iron Qon gains stacking damage buff over time. |
| Fist Smash | Iron Qon deals raid-wide Physical damage at intervals. | |
| Ignite Cyclone | A random tornado from Phase Two becomes ignited, dealing Fire damage until the end of the fight. | |
| Freeze Cyclone | A random tornado from Phase Two becomes frozen, stunning players and causing health loss. |
During the last phase, Iron Qon fights solo.
Iron Qon – Tactics & Strategy
- In Phase One, the key is meticulous coordination to counter Ro'shak's onslaught. Divide the raid into rotating groups, each taking turns to stack up and absorb Unleashed Flame while managing Scorched debuffs. Tanks should position themselves strategically within these groups to minimize damage. It's imperative to avoid standing on the lingering magma lines spawned by Burning Cinders Icon Ignite Spear. Focus DPS on Ro'shak, ensuring his Molten Energy doesn't reach maximum to prevent the catastrophic Molten Overload Icon Molten Overload.
- Phase Two demands awareness and swift action. Watch for Storm Cloud's lightning lines and immediately free players trapped by Arcing Lightning Icon Arcing Lightning. During Windstorm, quickly vacate the central circle to evade tornadoes while maintaining damage on Quet'zal. Optimal positioning can reduce damage reduction during Windstorm, maximizing overall output.
- In Phase Three, continuous DPS on Dam'ren is essential while evading the hazardous frost lines and lingering tornadoes. Strategize to attack Dam'ren from unshielded sides during Dead Zone Icon Dead Zone phases, maximizing damage output. Healers should brace for passive raid damage from Frozen Resilience Icon Frozen Resilience and promptly mitigate the Frost damage from Freeze debuffs.
- The final Phase Four demands focused aggression. Stack the raid in a tornado-free zone and unleash all available cooldowns and buffs to expedite Iron Qon's demise. Prioritize DPS to prevent excessive stacking of Rising Anger Icon Rising Anger, which escalates Iron Qon's damage output. Effective management of raid damage ensures a swift victory over Iron Qon.
Twin Consorts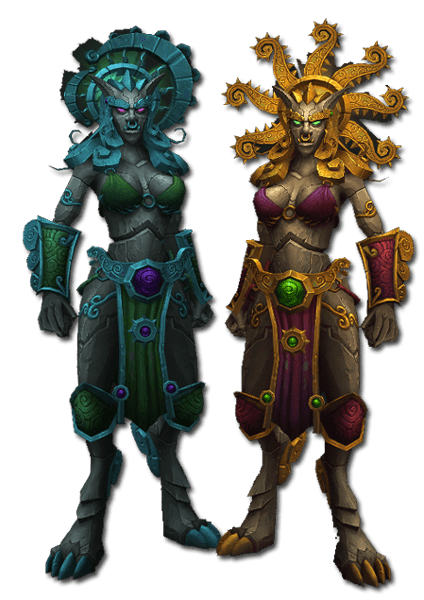
In this boss encounter, you’ll be fighting two enemies with separate healthpools.
- 10-man raiding party boss HP - 174M (normal) / 218M (heroic)
- 25-man raiding party boss HP - 436M (normal) / 654M (heroic)
After 13 minutes and 36 seconds your raid party will be wiped. Both bosses have equal amounts of HP. There’s also a hard enrage timer equal to 10 minutes.
- 10-man raiding party - 2 tanks, 2-3 healers, 5-6 DPS (classic roster)
- 25-man raiding party - 2 tanks, 5/7 healers, 16/18 DPS (for both difficulties)
Twin Consorts Abilities
There are four phases and two bosses in each. Both bosses will use specific abilities based on the active phase.
| Phase | Boss | Ability | Description |
| Darkness Phase | Lu'lin | Bloom Moon Lotus | Lu'lin places lotus flowers emitting clouds that induce sleep upon contact. |
| Lu'lin | Cosmic Barrage | Channels stars targeting raid members, dealing damage and knocking them back. | |
| Lu'lin | Beast of Nightmares | Summons a hostile Beast fixating on a tank, while healers receive Corrupted Healing debuffs. | |
| Suen | Tears of the Sun | Channeled Fire damage to the raid. | |
| Suen | Light of Day | Nuke on random raid members, dealing damage in an 8-yard radius. | |
| Daylight Phase | Suen | Fan of Flames | Stacking debuff on the tank, increasing Fire damage taken. |
| Suen | Flames of Passion | Charges a raid member, leaving damaging fire in her path. | |
| Suen | Blazing Radiance | Self-buff increasing Fire damage done, reduced by proximity to Ice Comet. | |
| Lu'lin | Ice Comet | Lu'lin summons Ice Comet projectiles, which, when near Suen, reduce her Blazing Radiance stacks. | |
| Lu'lin | Icy Shadows | Buff for players near the Ice Comet, reducing Fire damage taken. | |
| Break of Dusk | Lu'lin | Ice Comet | Lu'lin summons Ice Comet projectiles. |
| Lu'lin | Tidal Force | Lu'lin channels waves of water, dealing high damage and making herself immune. | |
| Suen | Fan of Flames | No longer used. | |
| Suen | Flames of Passion | No longer used. | |
| Suen | Blazing Radiance | Continues stacking, reduced by proximity to Ice Comet. | |
| Suen | Light of Day | Nuke on random raid members, dealing damage in an 8-yard radius. | |
|
Final Phase (Daylight) |
Darkness | Bloom Moon Lotus | No longer used. |
| Darkness | Cosmic Barrage | No longer used. | |
| Darkness | Beast of Nightmares | No longer used. | |
| Darkness | Tears of the Sun | No longer used. | |
| Darkness | Light of Day | No longer used. | |
| Daylight | Fan of Flames | No longer used. | |
| Daylight | Flames of Passion | No longer used. | |
| Daylight | Blazing Radiance | Continues stacking. | |
| Daylight | Ice Comet | Summons Ice Comet projectiles. | |
| Daylight | Icy Shadows | Buff for players near the Ice Comet. |
The final phase and the boss will depend on whom you defeated during the previous phase.
Twin Consorts – Tactics & Strategy
In this fight, there are four phases:
- Darkness – lasts 3 minutes and you fight Lu’lin with Suen supporting her.
- Daylight – lasts 3 minutes and you fight Suen with Lu’lin supporting her.
- Break of Dusk – you will fight both bosses until one of them is killed
- Final phase – reflects the phase of the last remaining boss.
The unique feature of this fight is the presence of Celestials:
- Niuzao - Fortitude of the Ox
- Chi-Ji - A Rush of Cranes
- Yu'lon - The Serpent's Vitality
- Xuen - The Tiger's Celerity
They can aid you by providing one of their buffs, if the party completes specific tasks to earn their assistance.
In the Darkness Phase, maintaining distance between raid members is crucial to minimize damage from Cosmic Barrage and Light of Day. Keep an eye out for the sleep-inducing clouds released by Bloom Moon Lotus and move away promptly to avoid being incapacitated. Assign tanks to handle Lu'lin and the Beast of Nightmares, with one tank focusing on Lu'lin and the other on the Beast. Healers should be mindful of their healing on the tank facing the Beast to reduce damage from Corrupted Healing. Take advantage of Suen's appearance to apply Damage over Time effects during Tears of the Sun.
During the Daylight Phase, managing Suen's Blazing Radiance stacks is paramount. Position her near Ice Comets whenever possible to keep the stacks low. Tanks must be vigilant in alternating tanking Suen to manage the Fan of Flames debuff. It's advisable for players targeted by Ice Comet to move away to avoid being hit by the projectiles.
In the Break of Dusk Phase, focus all efforts on defeating one boss quickly, preferably Suen, as Lu'lin becomes immune to damage periodically. Spread out to minimize damage from Light of Day and continue to position Suen near Ice Comets. Be prepared for Lu'lin's Tidal Force, which can be challenging to avoid. Use defensive cooldowns effectively to mitigate its damage.
In the final phase, if Suen is defeated first, the Darkness Phase becomes more manageable without Tears of the Sun and Light of Day. However, if Lu'lin is defeated first, the Daylight Phase becomes challenging without Ice Comets to reduce Suen's Blazing Radiance stacks. Utilize defensive and healing cooldowns efficiently to overcome these challenges and defeat the remaining boss before the enrage timer expires.
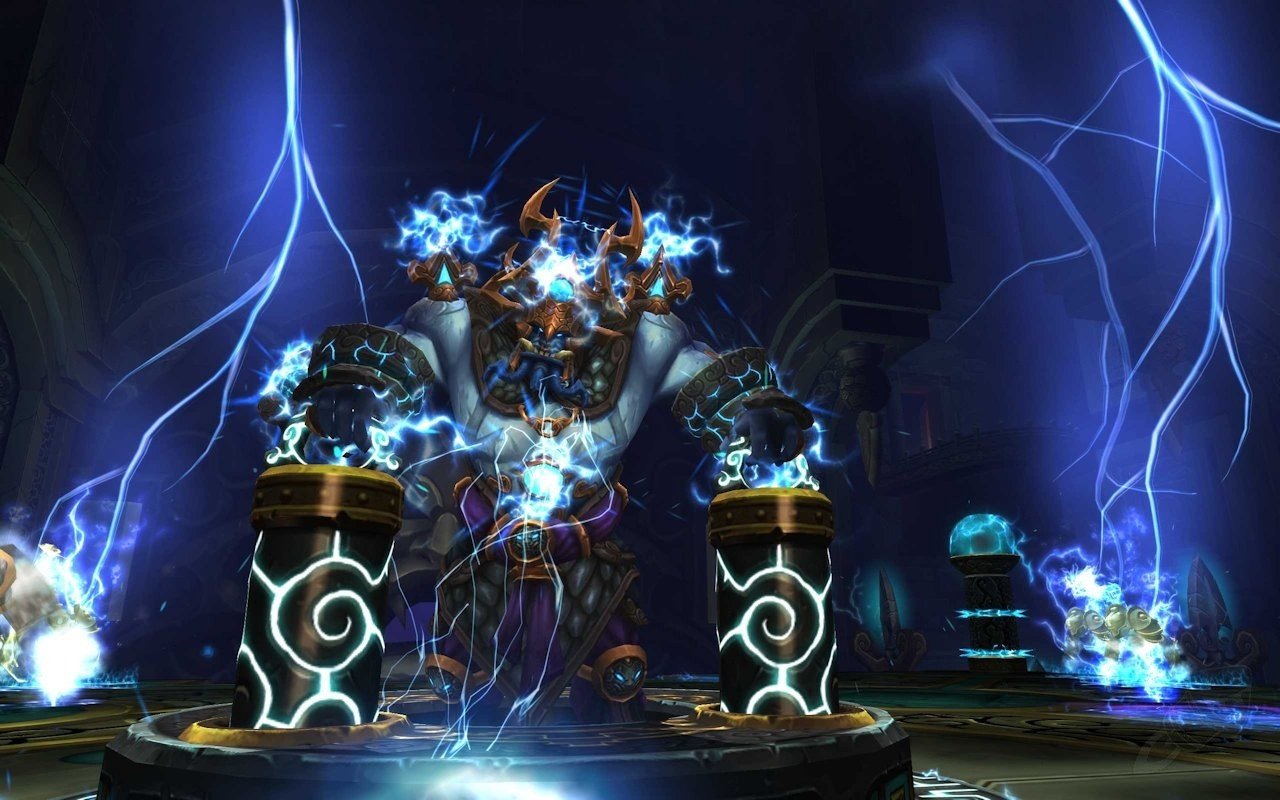
Lei Shen
This is the final and, by all accounts, the ultimate boss encounter. It is the longest and most complex one yet. Get ready!
- 10-man raiding party boss HP - 329M (normal) / 580M (heroic)
- 25-man raiding party boss HP - 990M (normal) / 1,746M (heroic)
The enrage timer for this boss is 10 minutes. Don’t take that long or you’ll fail.
- 10-man raiding party - 2 tanks, 2-3 healers, 5-6 DPS (classic roster)
- 25-man raiding party - 2 tanks, 5/7 healers, 16/18 DPS (for both difficulties)
The fight features main and transition phases.
Lei Shen Abilities
Lei Shen gets abilities when he stands next to one of four conduits. When he is not near one of the conduits, he will cast another ability.
| Ability | Description | Source |
| Static Shock | Lei Shen marks a random player, who later emits Nature damage split among nearby allies. More players are affected as the conduit levels up. | North Conduit |
| Diffusion Chain | Lei Shen targets a player with chain lightning, jumping to nearby allies. This spawns adds that also cast Chain Lightning, becoming stronger with conduit levels. | East Conduit |
| Overcharge | Lei Shen roots a player, creating a damaging ring after a delay. The number of affected players increases with the conduit's level. | South Conduit |
| Bouncing Bolt | Lei Shen launches lightning bolts at random spots, damaging nearby players. Missed bolts spawn adds that only melee. | West Conduit |
| Discharged Energy | When not near any conduit, Lei Shen spams a raid-wide damaging ability. | N/A |
Each ability can be upgraded if the conduit receives 100 energy.
Lei Shen – Tactics & Strategy
The battle against Lei Shen in the Throne of Thunder raid is a challenging and multi-phase encounter. Here's a breakdown of the key elements:
- Conduits:
- There are 4 conduits located in the corners of the platform.
- When Lei Shen is near a conduit, he gains an additional ability specific to that conduit.
- Each conduit gains Energy over time, leveling up when it reaches 100 Energy, making Lei Shen's abilities more powerful.
- Phases:
- Phase One: Lasts until Lei Shen reaches 65% health. Players must handle Lei Shen's core abilities and those granted by the conduits.
- First Transition Phase: Starts at 65% health and lasts 45 seconds. Lei Shen is unattackable, and players must deal with all 4 conduit abilities simultaneously.
- Phase Two: From the end of the First Transition Phase until Lei Shen reaches 30% health. Lei Shen uses different abilities, including those from the conduits.
- Second Transition Phase: Begins at 30% health and lasts 45 seconds. Players deal with 3 conduit abilities as one conduit becomes destroyed.
- Phase Three: Lasts from the end of the Second Transition Phase until Lei Shen's defeat. Conduits are inactive, and players only face Lei Shen's abilities.
- Other details:
- Lei Shen's abilities change based on the phase of the fight.
- If Lei Shen is not near any conduit, he casts a raid-wide damaging ability.
- The fight requires coordination and strategy to manage the conduits and survive Lei Shen's attacks.
Now, let’s learn how to win in each phase.
Throughout the Fight:
Coordinate with your raid team to stack on players affected by Static Shock, spreading out for Diffusion Chain to avoid chain lightning. Stack on Overcharged players before the debuff expires to prevent being stunned, and stand in locations where Bouncing Bolt lands to soak them and prevent adds.
Phase One:
Execute a tank switch for Decapitate to mitigate damage and move away from Thunderstruck impact locations to minimize damage. Avoid standing in Crashing Thunder void zones and keep Lei Shen near conduits, moving him to prevent any conduit from reaching 100 Energy.
First Transition Phase:
Split the raid into four groups, each handling one quarter of the platform. Quickly move away from Bouncing Bolt impact locations and position healers between groups for efficient healing coverage.
Phase Two:
With one conduit destroyed, focus on managing the remaining three conduits' abilities. Perform a tank switch for Fusion Slash to manage increased damage and spread out to minimize damage from Summon Ball Lightning. Avoid Lightning Whip AoE damage and subsequent lightning lines.
Second Transition Phase:
Similar to the first transition phase but with only three active conduits. Adjust group assignments as needed due to damage from the inactive conduit's quarter.
Phase Three:
Perform a tank switch for the Overwhelming Power debuff and avoid being blown off the platform by Violent Gale Winds. Handle Thunderstruck, Summon Ball Lightning, and Lightning Whip as in previous phases.
By coordinating effectively, adapting to each phase's challenges, and executing these key tactics, you can defeat Lei Shen and emerge victorious in the Throne of Thunder raid.
Ra-den
You thought you won? Ha-ha-ha. If you’re playing on Heroic difficulty, this encounter is the true final boss battle.
- 10-man raiding party boss HP - 1.423M (heroic)
- 25-man raiding party boss HP - 4.269M (heroic)
The enrage timer for this boss is 10 minutes. Don’t take that long or you’ll fail.
- 10-man raiding party - 2 tanks, 2-3 healers, 5-6 DPS (classic roster)
- 25-man raiding party - 2 tanks, 5/7 healers, 16/18 DPS (for both difficulties)
The fight features main and transition phases.
Ra-den Abilities
Ra-den has a multitude of abilities, each of which deal insane amounts of damage.
| Ability | Description |
| Touch of Karma | A precise strike that disrupts the target's essence, fatal if not defended against. Defensive abilities like shields or dodges can reduce the damage. Every 10 seconds. |
| Touch of Death | A precise strike that saps the target's life force, causing Shadow damage over time. The damage is based on the target's current health and bypasses many defenses. Only in 25-player Heroic mode. |
| Materials of Creation | Conjures the forces of creation to empower the caster. |
| Imbued with Anima | Empowers the target with Anima energy. |
| Blood Nova | Releases a burst of pure Anima energy, increasing enemies' maximum health but damaging them over time until removed. |
| Unstable Anima | Corrupts the target's life essence, causing it to explode periodically and damage nearby allies. If no allies are present, a catastrophic explosion occurs. |
| Summon Sanguine Horror | Summons an Anima construct to the battlefield. |
| Sanguine Volley | Inflicts Shadow damage on all enemies within range. |
| Imbued with Vita | Empowers the target with Vita energy. |
| Blue Fire Nova | Unleashes a burst of Nature damage on all enemies. |
| Unstable Vita | Charges the target with storm energy, causing periodic lightning strikes that jump to nearby targets. Inflicts Vita Sensitivity. |
| Vita Sensitivity | Exposure to Unstable Vita makes a player vulnerable, leading to instant death upon further exposure. |
| Summon Crackling Stalker | Summons a Vita construct to aid in battle. |
| Cauterizing Flare | Deals Nature damage to nearby enemies and may neutralize Anima. |
| Crackle | Deals Nature damage to a target, with the potential to chain to nearby enemies, increasing in power with each jump. |
| Lingering Energies | Increases the caster's damage each time Unleashed Anima or Unleashed Vita triggers. This effect extends to any summoned minions and lasts indefinitely. |
| Ruin | Inflicts Plague damage on all nearby enemies over time. |
Don’t be frightened, we’ll explain how to defeat the boss and make this encounter trivial.
Ra-den – Tactics & Strategy
The strategy for defeating Ra-den on Heroic difficulty in the Throne of Thunder raid can be summarized as follows:
Phase 1 (100% - 40%):
- Manage Unstable Vita: Assign players to run to designated markers when they are targeted with Unstable Vita. Ensure the tank is never farther away than the two players exchanging Vita, as anyone hit by the exchange will take significant damage.
- Deal with Crackling add: DPS down the Crackling add when it spawns, stun it when it reaches around 20%, knock it away from the group, and finish it off. Be prepared for its AoE explosion upon death.
- Handle Materials of Creation: Ra-den summons red and blue balls that travel towards him. Ranged DPS must immediately attack the red ball (Essence of Anima) to prevent raid-wide damage. Kill the 1st, 2nd, and 3rd red balls, allow the 4th to hit, then kill the 5th and 6th before letting the 7th hit to bring Ra-den to around 40% health.
Phase 2 (40% - 5%):
- Ra-den starts using the raid-wide ability called Ruin, which deals damage augmented by the number of balls he consumed in Phase 1 and Phase 2. Utilize rotating raid cooldowns to mitigate the damage. Ignore all balls in Phase 2 and focus on burning the boss. Be prepared for burst damage when Ra-den hits 40% health and uses Ruin in conjunction with the last Materials of Creation hit.
Overall, the fight becomes trivial with a Protection Paladin or Brewmaster Monk tank due to their high DPS and healing output. Ensure proper execution of mechanics and cooldown management to secure victory.
Conclusion
This brings us to the end of our guide for Pandaria Remix Throne of Thunder raid. Fighting 13 bosses is no joke, it takes hours just to beat them all. It’s going to take much more if you’ve never done it before. Hopefully, this guide will help you navigate through each encounter with ease. Yes, the raid is quite old at this point, and so are all of the bosses in it. Still, there are a lot of players who have never played through the raid before. Honestly, a lot of us, WoW fans, have already forgotten it. It’s been over 10 years since we’ve visited Pandaria.
Now, you are armed with knowledge to take down each boss. Watch each other’s backs, take a little breather before each encounter and discuss your steps before entering the next arena. Do all of that, and victory will be yours. Good luck, and may fortune favors heroes of Azeroth!
F.A.Q.
What level is Throne of Thunder WoW Pandaria Remix?
Players can access Throne of Thunder upon reaching level 60.
How do you get to Throne of Thunder in Pandaria Remix?
You need to complete a short questline that begins with an invitation from either Lorewalker Cho (for Alliance players) or Sunwalker Dezco (for Horde players).
How do I start Throne of Thunder?
To start the raid, you need to enter it by using a portal near to the Shado-Pan Garrison in Townlong Steppes. It’ll take you to the right place. Enter through the side entrance to start the raid.
Where is Throne of Thunder raid?
The entrance is located in the north-western part of the Isle of the Thunder King.
How many bosses are in Throne of Thunder?
The Throne of Thunder raid houses 13 bosses in total:
- Jin'rokh the Breaker
- Horridon
- Council of Elders
- Tortos
- Megaera
- Ji-Kun
- Durumu the Forgotten
- Primordius
- Dark Animus
- Iron Qon
- Twin Consorts
- Lei Shen
- Ra-den (heroic difficulty only)
Who is the first boss in Throne of Thunder?
Jin'rokh the Breaker is the first encounter you will face off against in Throne of Thunder.
What mounts drop in Throne of Thunder?
You can get two mounts in this raid:
- Clutch of Ji-Kun that drops from Ji-Kun
- Spawn of Horridon that drops from Horridon


