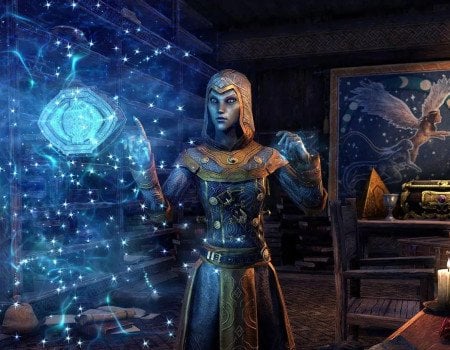
In a world where knowledge is power, a once noble order has fallen into darkness. The Scribes of Mora, devoted followers of Hermaeus Mora, now serve a new, sinister master. Led by the ruthless Valinna, they have become violent zealots. Prepare to journey between realms, face unimaginable dangers, and reclaim the legendary Itinerant Staff. The fate of the Scribes of Mora rests in your hands.
Welcome to the Scrivener's Hall guide that will lead you through this dungeon with 3 of its bosses, explaining how to succeed in each encounter.
In ESO, everything is driven by gold. Every dungeon in the Rift is a challenge best approached with a good build and powerful equipment, which always costs a lot of gold. If you need more currency, you can buy ESO Gold at Skycoach. This is the fastest currency deliverer out there. Just enter the amount (in millions) and pay for the order; gold will be delivered to you shortly. Stop wasting time trying to replicate complex farming methods; just buy gold at Skycoach and play the game your way!
IMPORTANT NOTE: Apart from learning about the Scrivener's Hall dungeon, you can also Buy ESO Boost from Skycoach. We offer a wide range of products at the lowest market price and with the fastest delivery. You can make your first purchase even CHEAPER if you find a special PROMO CODE (highlighted in green) hidden in this article and get a 20% DISCOUNT.


Where is Scrivener’s Hall
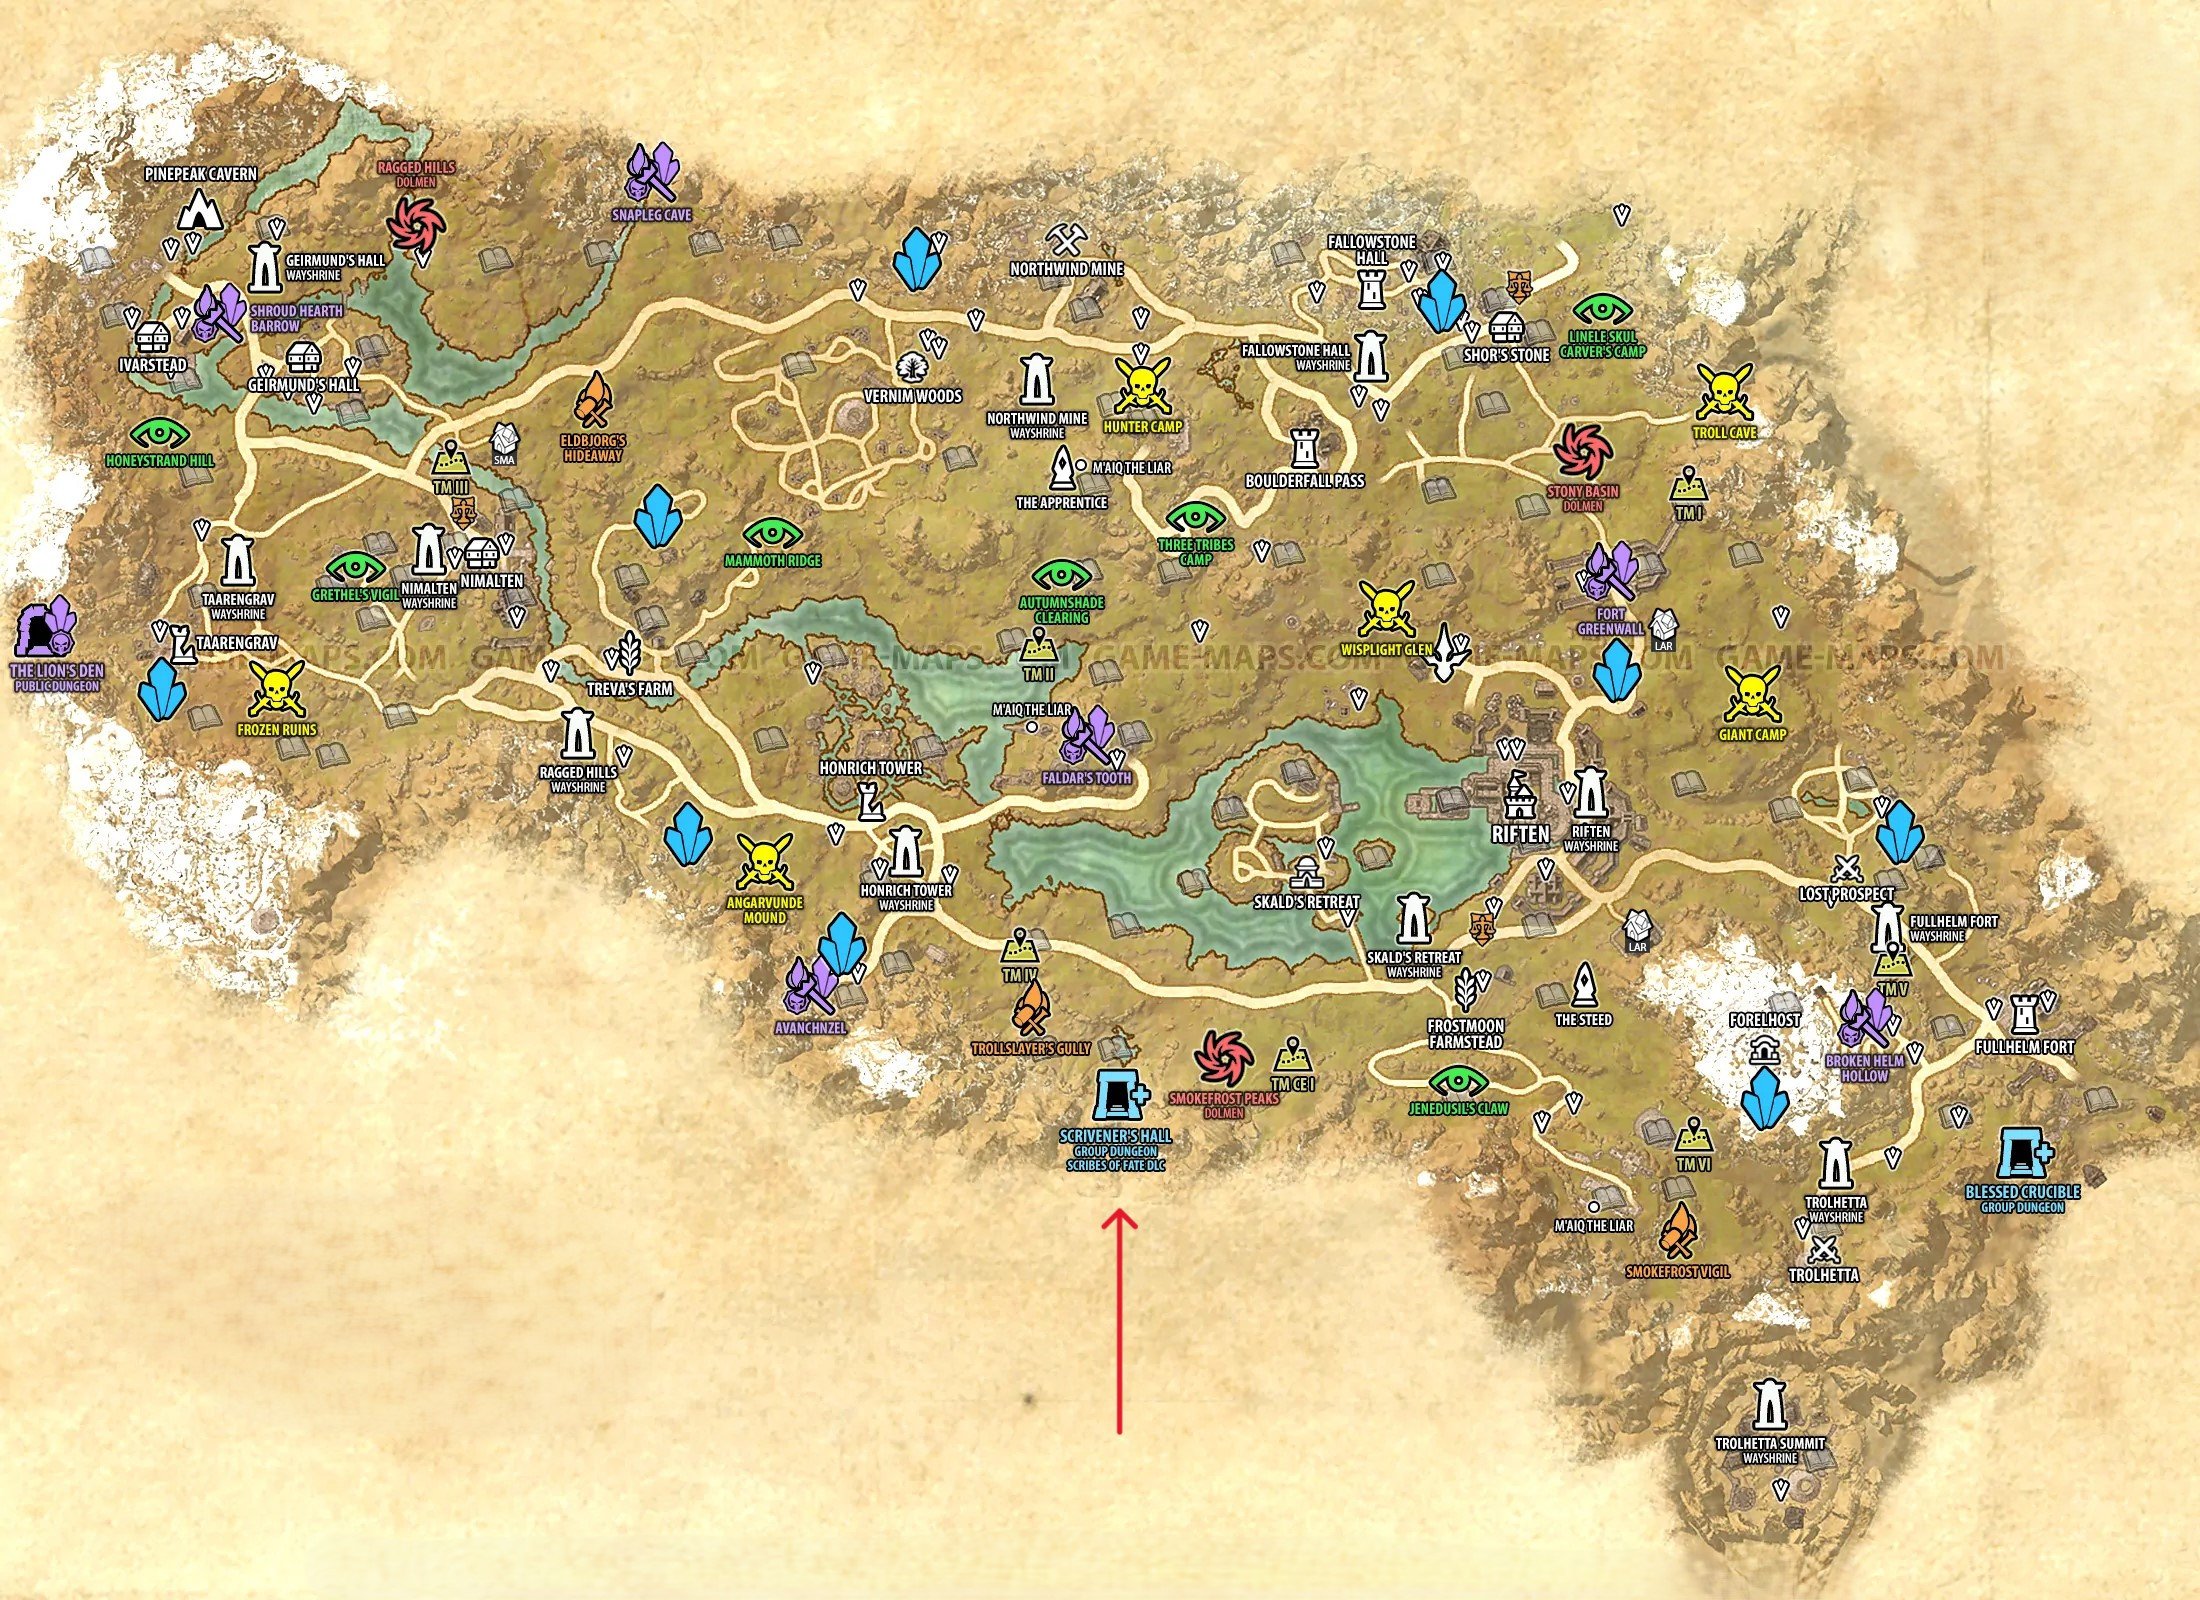
The plot of this dungeon will see you helping Keshargo, ex-leader of the Scribes of Mora. His order turned into violent fanatics under new leadership in the face of the Wood Elf Valinna, who used to be Keshargo’s best pupil.
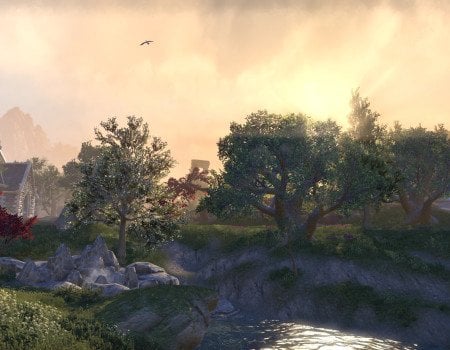
ESO Scrivener's Hall location is easily accessible from the Rift, which is a southeastern location in Skyrim. The entrance into the dungeon can be found in the southernmost part of the Rift’s map, between the Trollslayer’s Gully and Smokefrost Peaks Dolmen Dark Anchor. You do need to own the Scribes of Fate DLC to be able to access this dungeon.

Scrivener’s Hall Boss List
In Scrivener’s Hall, you will face multiple enemy types:
- Normal, also known as trash mobs
- Elites that are likely to be too powerful to deal with solo
- Minibosses and their pack of minions
- Bosses, some of which are optional
In order to beat the dungeon, you need to defeat all boss encounters, of which there are 4, with one being a hidden encounter:
- Riftmaster Maqri
- Ozezan the Inferno
- Valinna & Lamikhai
- Cartoqueen (secret boss)
Technically, there are 5 bosses, but the final encounter will see your group fight two bosses at the same time. Furthermore, there is ESO Scrivener's Hall secret boss that needs to be unlocked. This secret boss fight will take place inside The Vault, which contains 20 small and 20 large chests that can be opened with their respective keys. In order to reveal the boss, you must open all 40 chests in one dungeon run. The keys can be obtained by defeating enemies called Cartoklepts, who are optional minibosses. Beware that these minibosses need to be killed quickly; otherwise, they will disappear like the Crystal Lizards from Dark Souls. BLOG20
There are only 2 Cartoklepts in a dungeon, so each player can only get 2 keys per dungeon run. You’re going to have to complete the same dungeon at least three times to collect 24 ESO Scrivener's Hall keys. Also, keep in mind that small keys only drop on Normal Difficulty, whereas the large keys only drop on Veteran Difficulty.
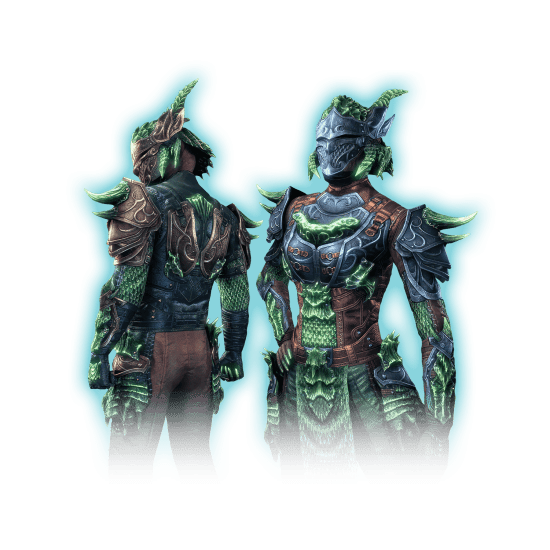
Scrivener’s Hall Gear Sets
One of the biggest reasons to do this dungeon in the first place is the chance to complete one of 4 unique gear sets.
| Armor Type | Set | Set Bonuses |
| Light Armor | Runecarver's Blaze |
|
| Medium Armor | Apocryphal Inspiration |
|
| Heavy Armor | Abyssal Brace |
|
| Monster Helm Sets |
Ozezan the Inferno |
|
As with other sets in ESO, equipping all of the pieces unlocks a unique bonus such as increased DoT damage, additional group buffs, damage reduction, granting Armor for overhealing, etc. Other Scrivener's Hall rewards include achievements that unlock titles such as the Weaver’s Bane or the Scribe Savior, emotes, trophies, etc.

Scrivener’s Hall Bosses Guide
Now that you know what kind of loot awaits you, let’s learn how to survive each boss encounter. A fair warning – the Veteran difficulty and hard mode will change some of these bosses’ attacks. Therefore, if you’ve never completed this dungeon before, it’s best to start at Normal difficulty. In any case, let’s get started.
Riftmaster Maqri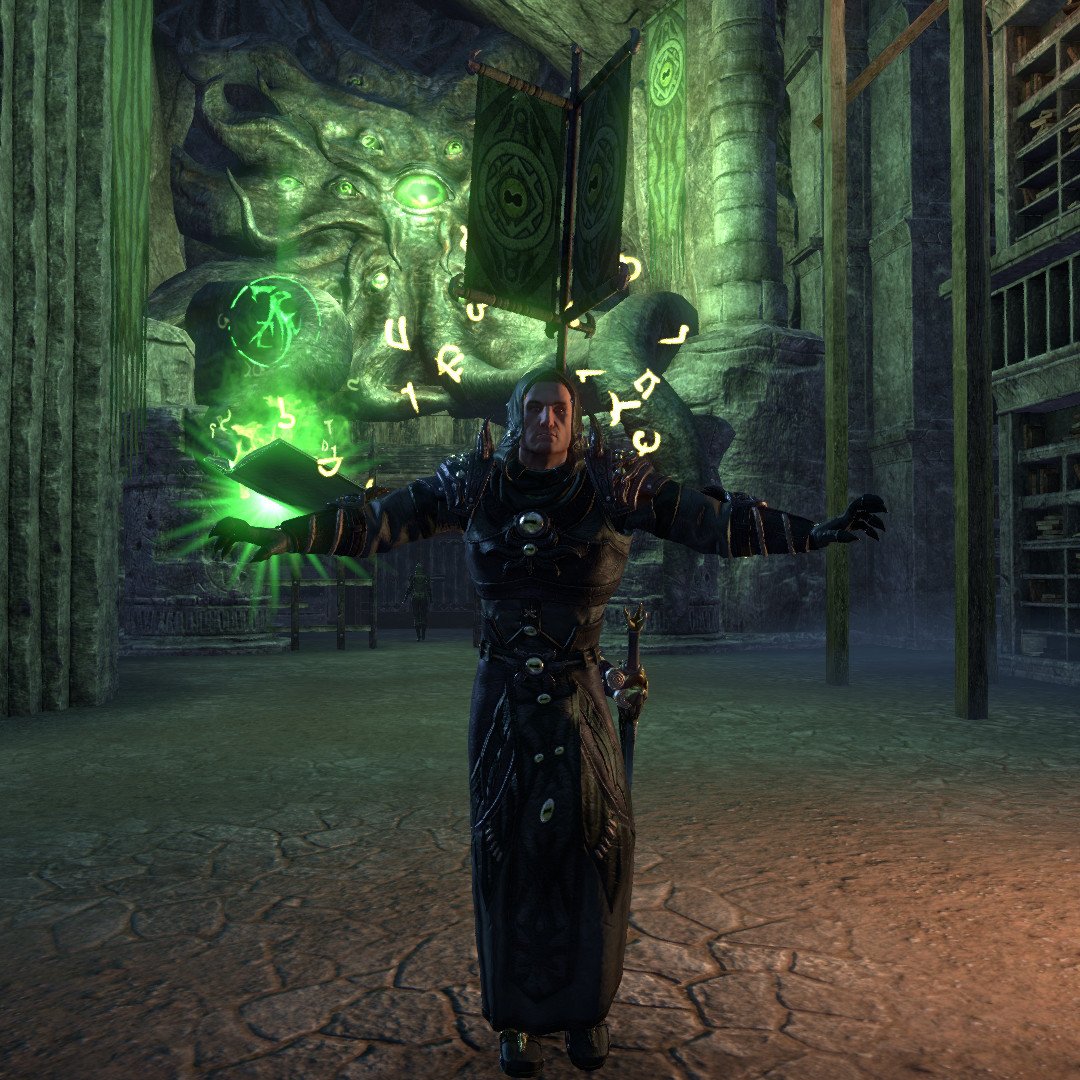
The first boss of the dungeon is an Arcane mage who will cast different spells on you and your group.
Boss’ healthpool –
- Normal: 3,367,972
- Veteran: 5,413,503
He is best described as a murderous and violent bookworm.
Riftmaster Maqri Abilities
Riftmaster Naqri's fighting style combines powerful melee strikes with a variety of magical attacks. He uses swift, high-damage physical moves, such as Sword Strike and Spinning Slash, to keep you on your toes.
| Ability | Description |
| Sword Strike | A basic melee attack that deals moderate physical damage. |
| Spinning Slash | Riftmaster Naqri winds up and performs a spinning strike that deals high physical damage. Block to reduce the damage. |
| Cyclonic Frost | Riftmaster Naqri summons a cyclone of books that shoot ice bolts, causing high frost damage in an area. |
| Unstable Literature | Riftmaster Naqri creates a storm of books in the center, dealing very high magical damage. The storm also sends out flying pages that deal moderate damage. Additional storms move around the arena, dealing lesser damage. |
| Runic Explosion | Riftmaster Naqri creates a rune that follows you and explodes, indicated by a growing circle. Time your dodge to avoid the damage. |
| Summon Allies | Additional Scribes of Mora enter the fight to assist Riftmaster Naqri. |
| Summon Illusion | Riftmaster Naqri summons a magical book in the center that creates an illusion of himself for special attacks. The illusion can be removed by finding and destroying the source book on the bookshelves. The center book also hints at the source's location with magical orbs. |
| Freezing Codex | A white book that creates an enemy illusion performing heavy frost attacks. Block to reduce the damage. |
| Burning Codex | A red book that creates an enemy illusion, causing flame damage with projectile attacks if not interrupted. |
| Poisonous Codex | A green book that creates an enemy illusion, forming poison circles. Roll-dodge out of the circles to avoid damage. |
| Profane Book | At 65%, 50%, 40%, and 25% health, Riftmaster Naqri dashes to the arena's edge, summons a glowing green book, and charges it to unleash massive magical damage. Get close and block to reduce the damage. |
Throughout the battle, you must stay alert to his diverse attacks and adapt quickly to survive.
Riftmaster Maqri Tactics & Strategy
If you want to defeat the Riftmaster, you must learn his moves and mechanics.
When the boss’ health hits a specific threshold, Maqri will summon a tome with one of three runes that can be identified by its colors. Each of these runes or books will have their own special ability:
- Red rune – spawns an add that attacks players
- Green rune – casts a homing AoE spell
- White rune – spawns ghosts that use chargeable heavy attacks.
Each time a book with a run is spawned, it deals more and more damage. Regardless of the Codex's color, the approach remains consistent. Monitor the book bearing the colored rune - periodically, it will launch a runic bolt toward one of the room's bookcases. Within these cases lies the Hidden Codex responsible for the spells. A DPS player must act swiftly, isolating themselves and utilizing defensive measures to locate and eliminate the book before it inflicts significant harm. Each instance of this mechanic requires the discovery and destruction of two books to disable it.
The boss doesn’t really have any phases, but he does change his tactics throughout the fight. To defeat the boss:
- Avoid the AoE attacks when Maqri teleports around. Spread your group out to make sure everyone can dodge those AoE attacks.
- Manage Adds and Mini-bosses: Taunt and eliminate Battlescribes as they appear.
- For tanks: Guide the boss away from danger zones, protecting allies. Keep adds contained and dispatch them efficiently.
When attempting to defeat this boss in Hardmode, keep in mind that he’ll be dealing way more damage. So, when he starts exploding his books and dealing AoE damage, it’s going to spawn two circles and the healer must be in one of them.
Ozezan the Inferno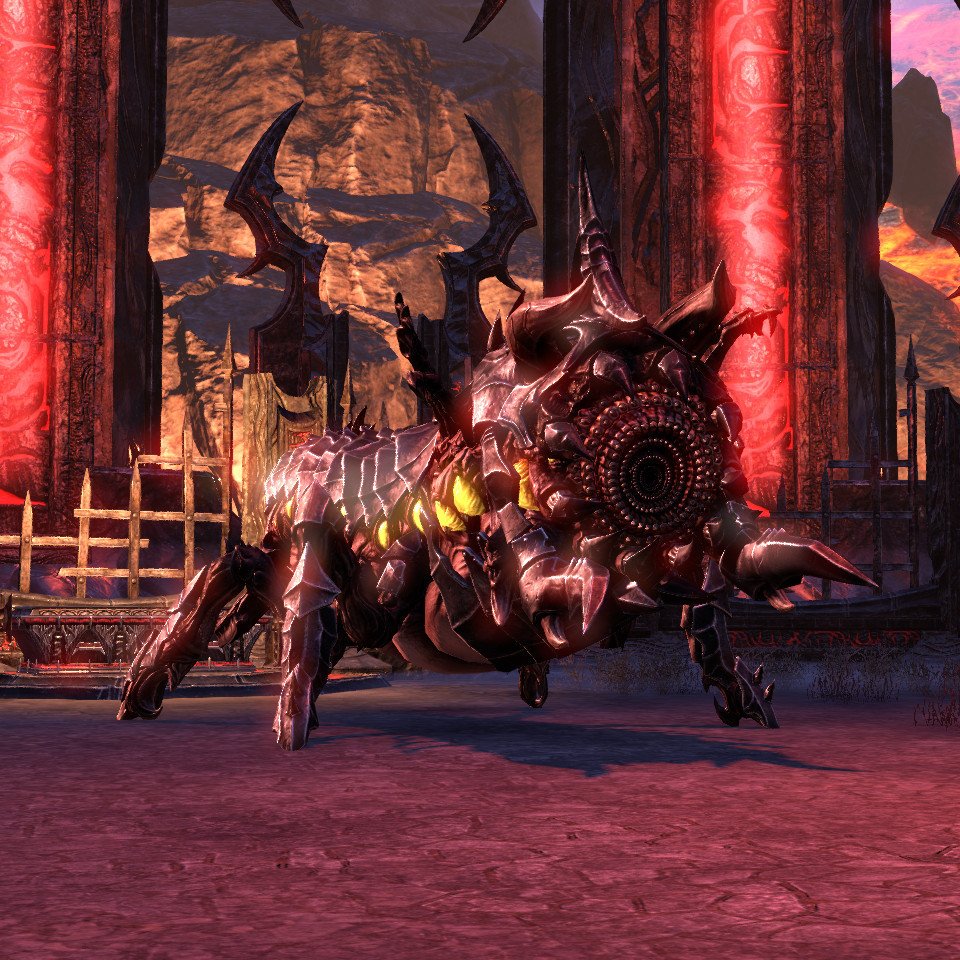
Also known as the Infernium, this creature can be found in the Deadlands rift of the dungeon. Defeating it gives you the staff required to complete the dungeon’s plot.
Boss’ healthpool –
- Normal: 4,546,762
- Veteran: 7,308,229
- Hardmode: 13,154,812
This is a difficult boss fight with a lot of AoE attacks. Your group must stay alert at all times.
Ozezan the Inferno Abilities
| Ability | Description |
| Vile Secretions | Ozezan spews poison in a cone in the tank’s direction for 3 seconds. It cannot be dodge-rolled, so it has to be blocked. It deals a moderate amount of damage that ramps up, so you can get away with not blocking the first few ticks to save stamina. It leaves a low DMG DoT that deals, on average, 1.2k damage per tick. |
| Fissure | Ozezan will burrow, cause an explosion that leaves lava AoE on the ground, and teleport either to the opposite side of the arena or to the middle. The explosion can be dodge-rolled. In non-hard mode, there can be up to 2 AoEs at a time, so when Ozezan spawns the third one, the oldest one will disappear. If she teleports to the side, she will channel the beam on every group member that deals damage that ramps up and slows you. |
| Spawn Broodlings | Adds that spawn on the ground. Depending on the amount of Broodlings killed, the boss will spawn Evolved Broodlings. |
| Evolved Broodlings | Their Light Attacks deal very little damage, but they will drain your stamina when you’re blocking the cone. After a while, they’ll port away to an edge of the arena and start channeling Rain of Fire which deals constant moderate, non-blockable damage to all group members. |
| Pincer | Light attack that deals, on average, 10k damage unblocked. The attack has a 0.45-second windup. |
| Chaw | Heavy attack that deals 20k damage when blocked with 1.66 second windup |
| Blood Boil | Ozezan will shoot 3 Blood Parasite Sacks on every group member, they can be dodged and if you don’t dodge them you’ll get afflicted with Blood Boil debuff which is a very hard hitting DoT that scales with max HP. |
| Corpulent Coagulant | An add that cannot be chained but can be stunned. It has a skill called Colony Collapse, which stuns enemies around the Coagulant. You have to block a bit more when these are around you, always be ready to quickly break free if you’re not blocking. |
| Iron Atronach | At 35% HP, Ozezan will spawn an Iron Atronach from inside a lava pool, his light attacks deal 5k damage unblocked. If the first Iron Atronach is killed, another will spawn at 15% of the boss’ HP. |
Ozezan the Inferno Tactics & Strategy
You start the fight by dragging the boss to the wall behind her. A few seconds into the fight, she’ll cast Fissure, and by dragging her closer to the wall, you make sure you’re not covering too much of the arena. BLOG20
It’s not that big of a deal in non-hard mode, where there can only be 2 AoEs up at a time, but it’ll be a problem in hard mode, where 4 of them can be up simultaneously.
You will basically follow the same simple pattern throughout the entire fight:
- Keep taunt on the boss
- Block Vile Secretions
- Dodge-roll or heal through Blood Boil
- Taunt Evolved Broodlings & Corpulent Coagulants (hard mode only)
Follow Ozezan after she burrows and make sure she’s next to a wall, when Ozezan goes to the middle to cast Firestorm, you have to run to the edge of the arena.

In hard mode, an Iron Atronach will spawn inside a lava pool at 35%, but it doesn’t put much pressure anyway.
One of the DDs or a healer has to equip Crushing Shock or another ranged interrupt since you will be keeping Ozezan close to a wall, so you won’t be able to reach Evolved Broodlings after they teleport away and channel. It’s the other group member’s job to interrupt them.
Valinna & Lamikhai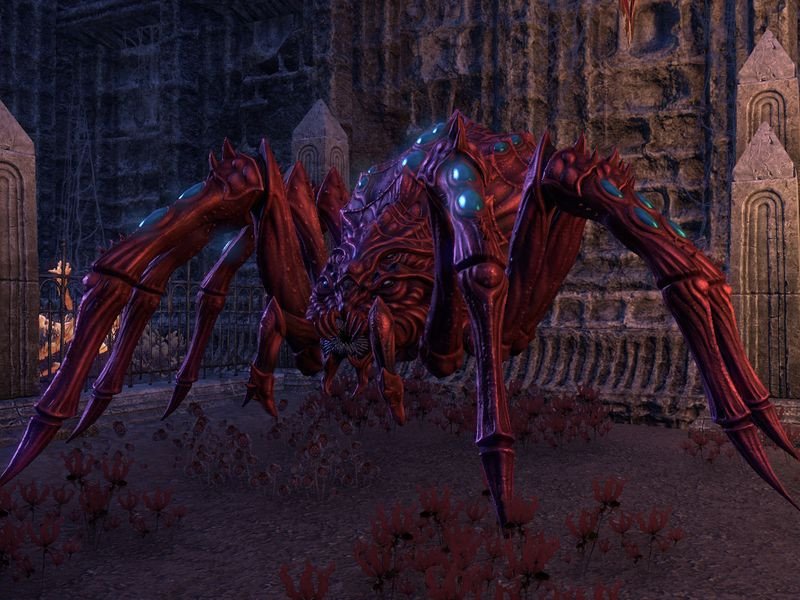
The third and final boss encounter consists of two bosses – Lamikhai, the Daedric spider, and Valinna, the new leader of the Scribes of Mora.
Bosses combined healthpools –
- Normal: 3.6mil
- Veteran: 13.3mil
- Hardmode: 24.7mil
As this is a two-boss encounter, prepare to deal with lots of mechanics and different types of attacks.
Valinna & Lamikhai Abilities
| Lamikhai | |
| Ability | Description |
| Bite | The light attack deals, on average, 7k damage unblocked and applies Venomous Fangs DoT. The attack has a 0.33-second windup |
| Venomous Fangs | A DoT that deals, on average, 3k damage per tick |
| Eviscerate | The heavy attack that deals 7k damage when blocked with a 1.5-second windup |
| Thirst | Lamikhai will turn red and enraged, causing his attacks to deal massively increased damage and reducing its movement speed. When that happens, an NPC Mazandi will spawn an ice trap on the opposite side of the arena. You have to drag the boss into the trap in order to remove the enrage |
| Rain of Fire | One person will get a red marker above their head, and after a while, an AoE will spawn below them. In hard mode, all 4 group members will be affected at the same time. You have to move to the edge of the arena to conserve space. |
| Ensnaring Spider | Lamikhai will summon a big spider that will start wrapping one of your group members into a cocoon, stunning them and pulling them towards himself. They cannot break free and if the spider isn’t killed until it finishes pulling them in, the group member will die. |
| Valinna | |
| Fireball | Valinna’s light attack that deals 10k damage unblocked. While Valinna is inactive, she’ll continue casting a weaker version of Fireball on random group members |
| Webdrop | Every now and then, 2 Spiders will drop into the arena. They have 80k HP, and their light attacks deal 1k damage unblocked to Damage Dealer. They can be completely ignored. |
| Blistering Heat | Valinna channels a cone in the tank’s direction for 5 seconds. The damage does ramp up and it cannot be dodge-rolled. In hard mode, each tick of damage will spawn a Bonfire AoE below you, so you have to kite while tanking it. |
| Immolation Trap | Valinna will spawn an AoE around you, and after a moment, the Immolation Trap will spawn on your position. Any member of the group crossing its line will cause it to explode, dealing massive damage to everyone around it. If you’re hit by it, you have to stay inside of it until it's gone. It will spawn on 2 people in normal and 3 people in hard mode. |
| Ignite | Valinna will put an 8-second DoT on every group member. It’s not a big deal for a tank, but DDs will need either healer’s attention, or if you’re playing with 3 DD comp, they’ll need to bring their own self-heals |
| Meteor | This mechanic happens only during the last phase. A meteor will drop dealing damage to anyone standing close to its destination. If the meteor isn’t killed fast enough it will explode dealing damage and knowing everyone back, but it can be blocked. |
| Hard Mode Only | |
| Flaming Boulders | 3 Flaming Boulders will spawn at the edges of the arena and pass through it after a short while. They don’t deal much damage and can be blocked, but if you get hit by one while not blocking, you can get pushed off the arena |
Valinna & Lamikhai Tactics & Strategy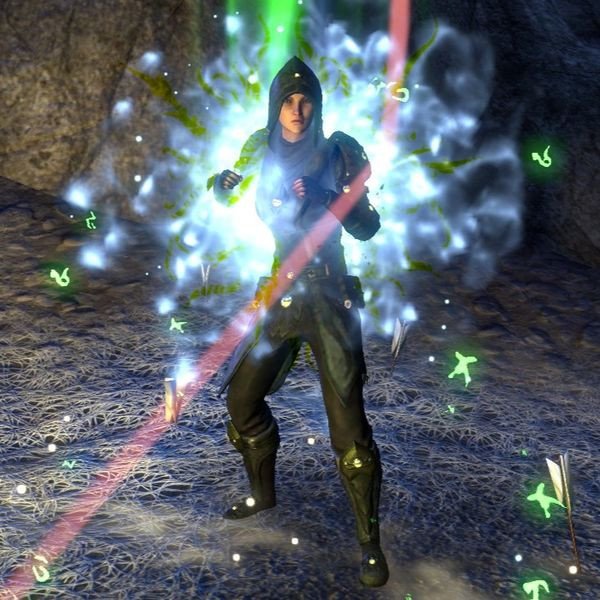
In the first phase, you'll only be fighting Lamikhai - the big spider. Valinna will stay outside of the arena, casting a weaker version of her light attack - Fireball - at random group members. When you get targeted with Rain of Fire, move close to a wall to drop the AoE there. When Lamikhai turns red and enraged, find the ice trap and drag him into it. At 50% of Lamikhai 's HP, he will leave the arena. A path towards 2nd arena will open, and the 1st arena will start exploding. You have to move into the 2nd arena. On your way there, 3 small spiders will spawn, but they're not dangerous at all.
In the 2nd phase, you'll start off by fighting Valinna - the humanoid. In this phase, she will start casting Immolation Trap, but it will never target the tank unless other people are dead. You still have to pay attention not to step into the Immolation Traps of other players. She will also start casting Ignite - an 8-second DoT. She'll also start casting Blistering Heat - the 5-second cone. If It's hard mode, you'll also have to kite it since Bonfire AoEs will spawn below you during that channel. When Valinna drops to 50% HP, she’ll leave the arena, and Lamikhai will drop down. This will be similar to the first arena with a single addition - Lamikhai will summon an Ensnaring Spider.
This add will wrap one of your teammates into a cocoon and pull them in. Your other Damage Dealers have to kill that spider before that happens otherwise, that teammate will die. You can help by debuffing it, but usually, with the way the mechanics line up, you'll be dragging Lamikhai into the ice trap while this Ensaring Spider is spawning. When Lamikhai dies, a path towards 3rd arena will open, and the 2nd arena will start exploding. You have to move into the 3rd arena. BLOG20
In the 3rd phase, you'll only Valinna. One of the new mechanics is Meteor - it will drop on the arena, dealing damage, and it will explode killing everyone if it isn't killed fast enough. Another mechanic that starts in 3rd phase is the Flaming Boulders, but this is a hard mode-only mechanic. They don't deal much damage, but they can knock you off the arena if you're not blocking.
Cartoqueen (secret boss)
This is a secret Scamp (Daedric creature) boss whom you will fight after unlocking the chests in the Scrivener's Hall vault as described earlier.
Boss’ healthpool –
- Normal: 2,273,381
- Veteran: 2,273,381
- Hardmode: 2,273,381
This boss has a few attacks, but they’re not comparable to the complexity of the previous boss encounter.
Cartoqueen Abilities
| Ability | Description |
| Claw Swipe | A melee attack that inflicts moderate physical damage. |
| Firebolt | A ranged attack that delivers moderate flame damage. |
| Fire Wave | Charges a spell and releases three fire waves, causing high flame damage. This attack lacks an indicator. |
| Flame Scatter | Fires fireballs in all directions, indicated by six circular AoEs. These deal high flame damage and leave lingering flames that cause moderate continuous damage. |
| Rolling Boulders | Summons portals that release large volcanic boulders. Impact deals high physical damage and knocks players down. |
| Rumble | Causes the ceiling to shake, dropping stalactites onto the floor. Marked by circular AoEs, these deal high physical damage and knock players down. |
| Molten Wall | Creates a protective barrier of molten pillars around herself. |
| Teleport | Teleports to a random far end of the arena. |
| Summon Totem | Occasionally summons a Fiery Totem that shoots continuous fireballs, each dealing moderate flame damage until destroyed. |
Cartoqueen Tactics & Strategy
Since this boss fight isn’t worth writing home about, we’ll just provide general tactics tips for each role:
- Tanks – Maintain aggro, manage boss positioning, and absorb Claw Swipe and Firebolt attacks. Keep the boss facing away from the group.
- DPS – Focus on sustained damage while avoiding AoEs and destroying summoned totems. Be ready to react to Fire Wave and Rolling Boulders.
- Healers – Keep the group healed, especially during high-damage phases like Flame Scatter, Rumble, and when totems are active. Support DPS players by healing them as they destroy totems.
Just maintain the pressure and this boss will soon be defeated. Upon death, Cartoqueen drops Scrivener’s Treasure map, pinpointing the treasure north of Mammoth Ridge PoI in the Rift.
Conclusion
This was marks the end of the Scrivener's Hall walkthrough. Scrivener's Hall is a dungeon with an interesting storyline that tells the tale of an order of Scribes whose leader got overthrown by someone who chases their own dark agenda. Your group is tasked to help the original leader bring down this impostor and restore the reputation of this group.
As far as dungeons go, there’s lots to do. You have 3 extremely difficult boss encounters with insanely tense mechanics in each fight. You also have a few secrets to uncover. The dungeon contains several locations, one of which is the Vault, which contains loot chests that can be opened with keys carried by cowardly creatures. If you unlock all chests in the room, a secret boss battle will commence. The rewards are plentiful as well. You can expect to collect one of four armor sets and unlock a bunch of achievements along with other vanity items.
All in all, this is a pretty dope dungeon worthy of your time. Hopefully, with this guide, you’ll have a good time completing this dungeon, so good luck!
F.A.Q.
Where is Scrivener's Hall located in ESO?
The entrance to the Scrivener's Hall is located in the south of the Rift between the Trollslayer’s Gully and Smokefrost Peaks Dolmen Dark Anchor.
How to get Scrivener's Hall Vault Door?
The Vault is located near the upper entrance of the River of Tomes location within the dungeon.
Who is the secret boss in Scrivener's Hall?
The secret boss is called Cartoqueen, and to fight it, you must open all chests in the Vault.
What DLC is Scriveners Hall?
To access Scriveners Hall, you need to have the Scribes of Fate DLC.