 Dallon Avery
Do any of these questions sound familiar? In this Monster Hunter Wilds gearing guide, we’ll explain everything you want to know, including two gear progression paths—one for Low Rank and one for High Rank prior to the first title update.
If you need help making your Hunter stronger, you should buy the Decorations Farm service at Skycoach. As you’re about to learn (if you didn’t know it already), Decorations grant direct stat boosts, such as increased defense or health, or they provide invaluable skills that enhance your survivability in hunts. However, farming materials to craft and upgrade these is a difficult and time-consuming process. We suggest entrusting this task to Skycoach’s professional gamers, who will gather the materials needed for crafting and upgrading Decorations for you. There are also similar services for crafting and upgrading armor and weapons!
Read our other articles:
- Best Builds for Each Weapon
- Most Useful Tips & Tricks
- Zenny Farming Guide
- Best Settings Guide
- Beginner's Guide
Note: At Skycoach, you can Buy Monster Hunter Wilds Boost at the best prices with fast delivery. Use our special PROMO CODE (in green) hidden in this article for a 20% DISCOUNT.
Browse our hottest Monster Hunter Wilds Boosting services


How Gearing Works in Monster Hunter Wilds

Gearing in Monster Hunter Wilds is different from traditional RPGs. There are no random drops or loot tiers—instead, you craft and upgrade gear using materials from monsters and the environment. Your power isn’t just determined by raw stats but by armor skills, weapon choices, and how well you customize your build.
Below, we’ll break down each gear type, how upgrades work, and what you should prioritize to avoid wasting resources. Then, we’ll give you a specific MH Wilds equipment progression plan for low and high ranks, which you can follow until you get your bearings with how things work.
Gear Types: What You Can Equip
A hunter’s effectiveness depends on the gear they wear and the upgrades they invest in. Equipment in Monster Hunter Wilds is divided into several key categories:
Weapons
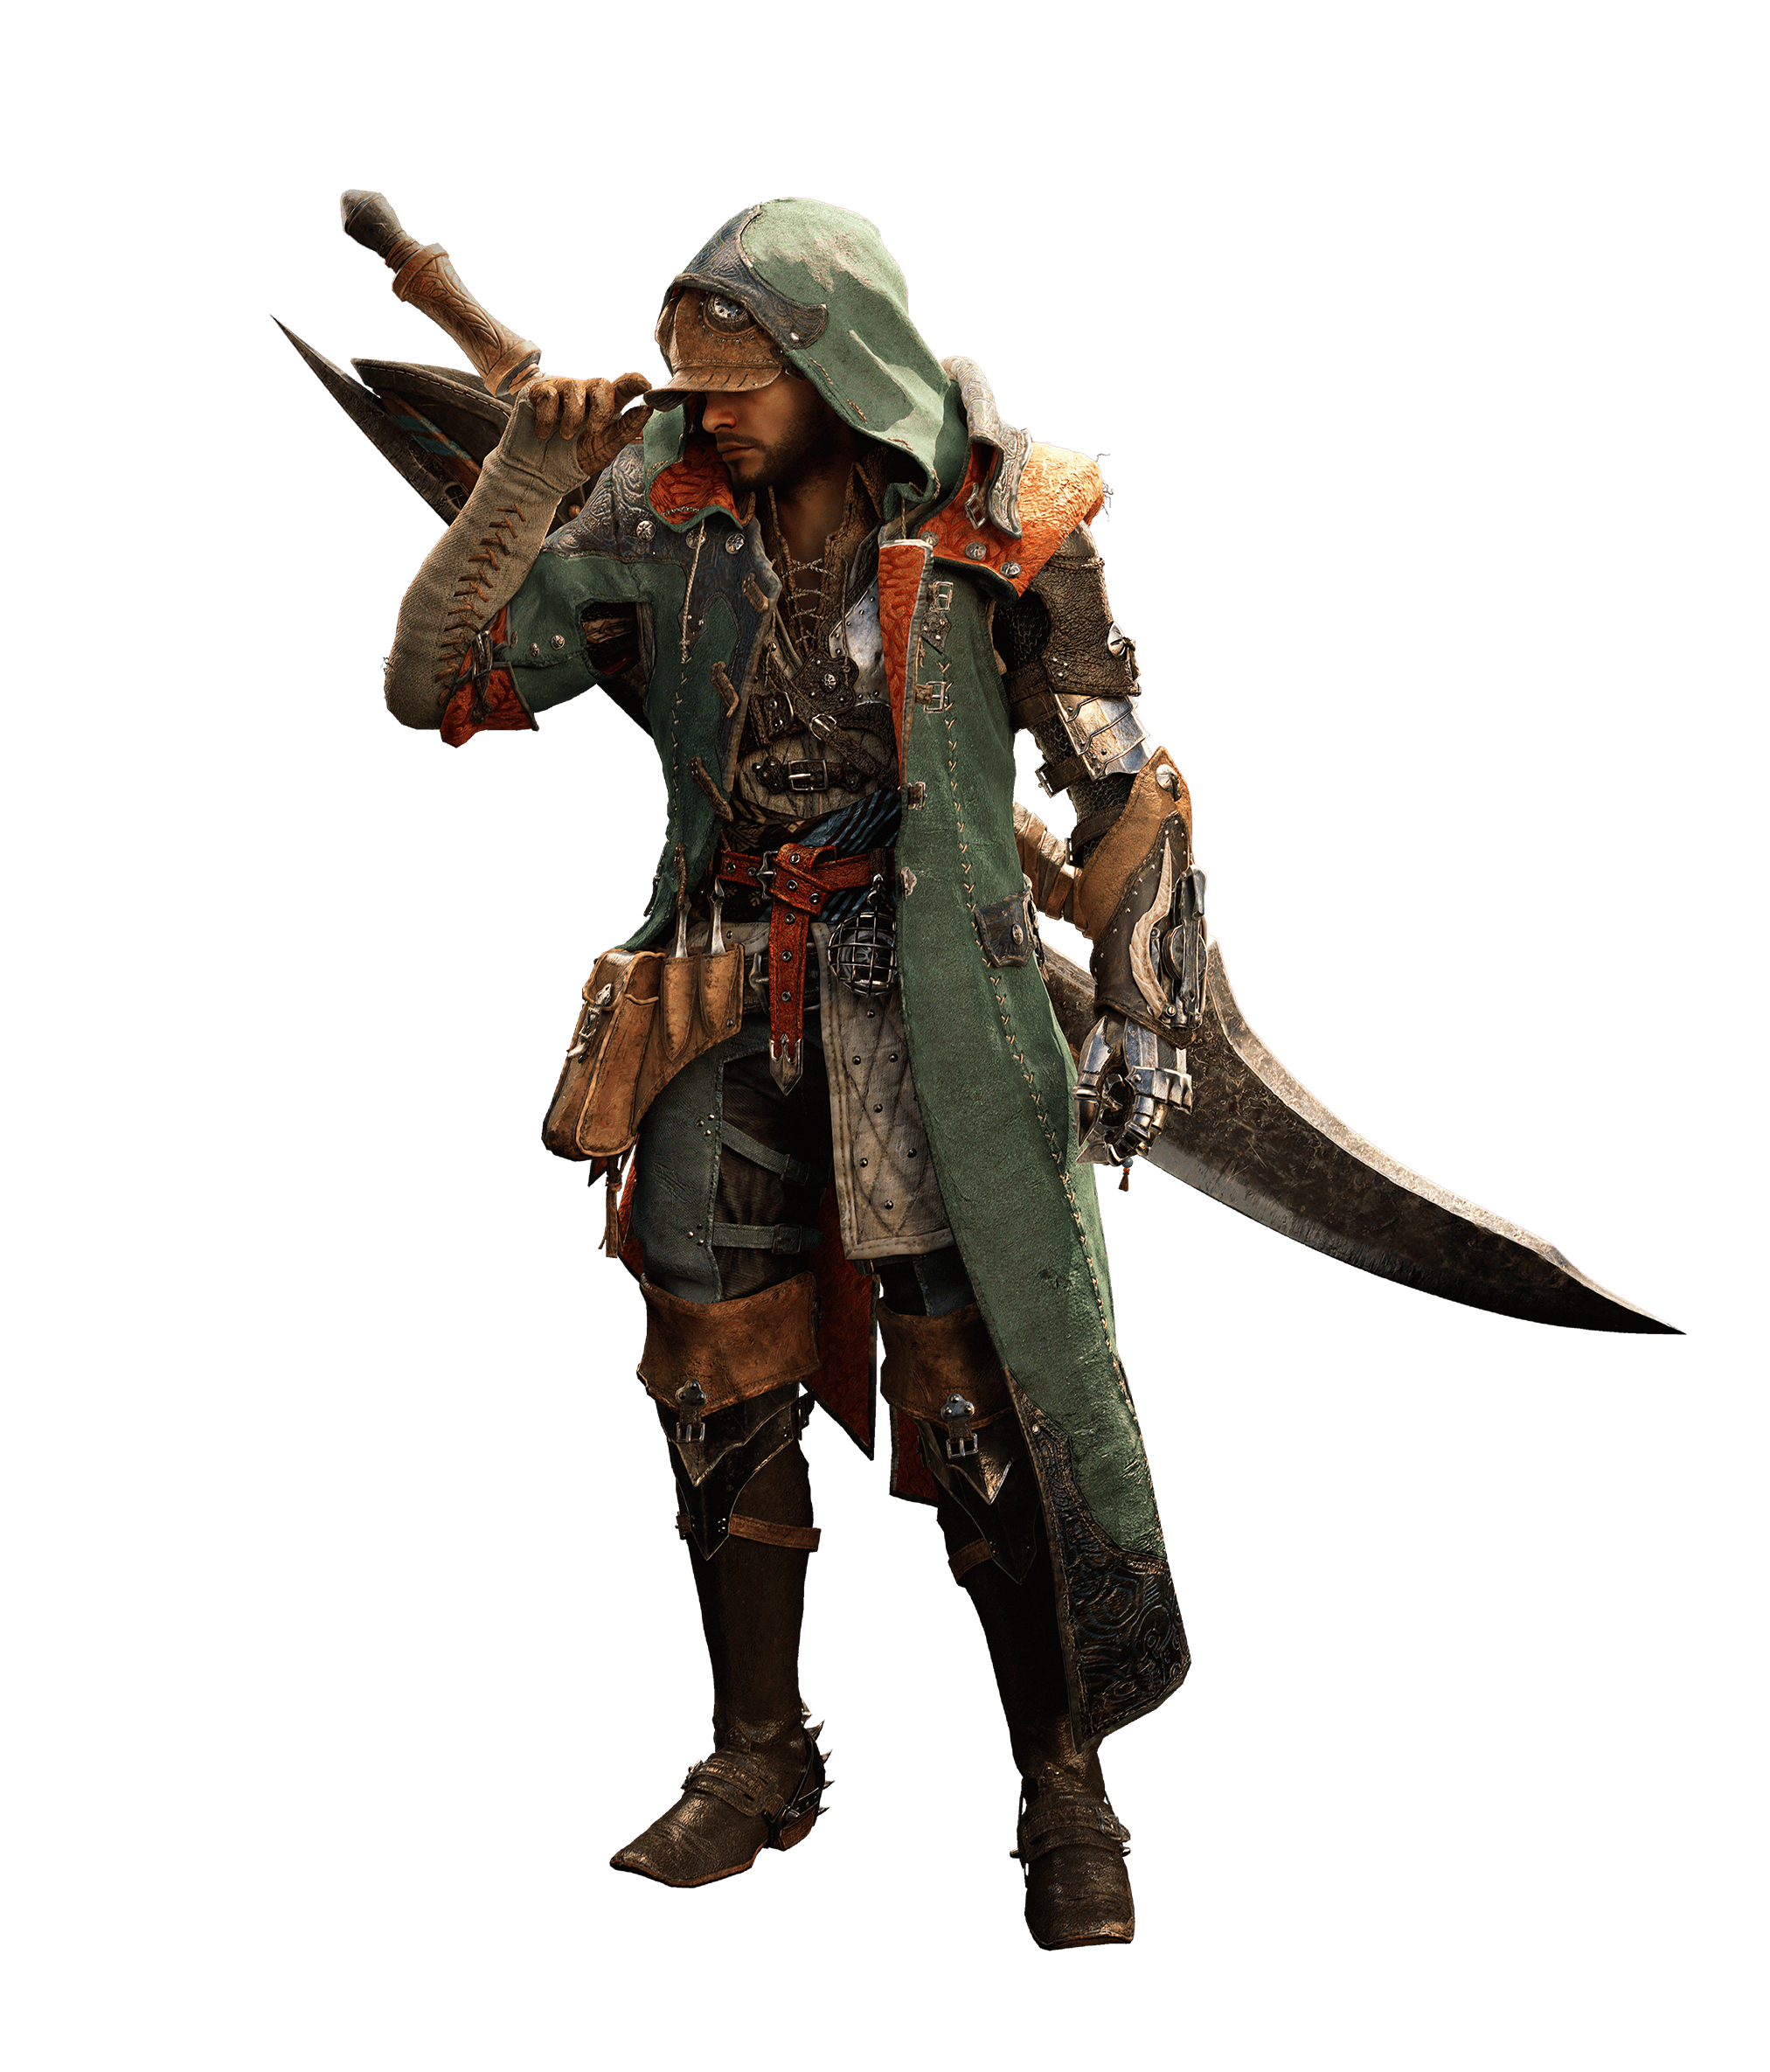
The backbone of your playstyle, weapons define how you fight. Monster Hunter Wilds features 14 weapon types, ranging from fast and agile options like Dual Blades to heavy-hitting choices like Great Swords and Lances.
- Each weapon type has its own moveset, strengths, and weaknesses.
- Weapons can be upgraded through branching upgrade trees using monster materials and zenny.
- Some weapons specialize in raw damage, while others excel in elemental damage or status effects.
You can equip up to two weapons and switch between them whenever you’re on your Seikret, which means that if you want to switch your weapon during combat, you have to call Seikret.
Armor
Armor provides defensive stats and skills that directly impact your combat performance. Instead of one-piece outfits, armor consists of five separate parts:
- Head
- Chest
- Arms
- Waist
- Legs
The main Armor stat is Defense, which represents how much damage the armor can absorb when you’re being hit by a monster. Elemental resistances, of which there are five, show how much elemental damage armor can absorb. Armor pieces can have both positive and negative elemental defense, with negative meaning that you take increased damage. Most armor is strong against one type of elemental damage, but weak against another. Which is why mixing and matching pieces is often more effective than wearing full sets because armor skills stack across different pieces. So, while there are thematic armor sets that come from the same monster, it is usually more effective to combine pieces. BLOG20
Talismans
Talismans do only one thing, and that is provide passive skill bonuses and can be equipped alongside armor. These may either be crafted or obtained through quest rewards and random drops, depending on how Wilds handles them.
Decorations
Decorations are customizable upgrades that can be slotted into weapons and armor. Think of them as jewels from other MMOs. They allow you to tweak your build by adding extra skills, improving resistances, or boosting specific weapon attributes. If Wilds follows previous games, these will be obtained through farming and crafting.
Monster Hunter Wilds Armor Skills & Set Bonuses
Unlike many RPGs where higher stats automatically mean better gear, Monster Hunter follows a skill-based gearing system. Luckily, you don’t need to read an entire Monster Hunter Wilds armor skills guide to understand how they work.
- Armor skills provide passive boosts that greatly influence combat effectiveness. These range from increased damage to better survivability or stamina management.
- Set bonuses activate when wearing multiple pieces of the same armor set, granting unique effects. However, full sets are rarely the best option because mixing pieces from different sets allows for greater customization.
Each skill has different levels of effectiveness, meaning stacking the same skill makes it stronger. For example:
| Skill Name | Effect at Level 1 | Effect at Max Level |
| Attack Boost | +3 Attack Power | +10 Attack, +5% Affinity |
| Evade Window | Slightly increases invincibility frames | Significantly extends dodge i-frames |
| Weakness Exploit | +10% affinity on weak spots | +50% affinity on weak spots |
What this means is – you can have any amount of skills you want based on what you equip, but you also want to have your equipped skills to be at their maximum efficiency and that’s where you start to use all of sources of skills – armor pieces, Talismans, Decorations, etc.
Armor skills are often more important than raw defense, as they enhance damage output, stamina management, or resistances. Rather than wearing a full set, mixing different pieces for the right skill combinations can make a huge difference in combat. MH Wilds armor skills explained how certain abilities stack, making smart gear choices essential for an optimized build
Mantles
Mantles provide additional utility and can be adapted for specific targets of playstyles. At the start of the game, you get the Ghili Mantle, which allows you to stay hidden if you don't want to be spotted by aggressive monsters. It can be abused mid-combat to disengage and create an opportunity for a sneak attack.
The second mantle you get is called the Rockstead Mantle – it reduces damage taken and prevents damage reactions when attacked. Grants protection from wind pressure, roars, and tremors. In the endgame you’ll have the opportunity to upgrade mantles to make them more effective and unlock Decorations slots, which is just great.
Weapon Upgrading
Weapons don’t drop as loot; instead, they follow upgrade trees that require specific monster materials. Choosing when and what to upgrade is crucial for efficient progression.
You start the game with 14 Hope weapons, originating from the Hope Upgrade Tree. But as soon as you defeat your first monster and collect its materials, you’ll unlock new weapon trees based on that monster’s drops.
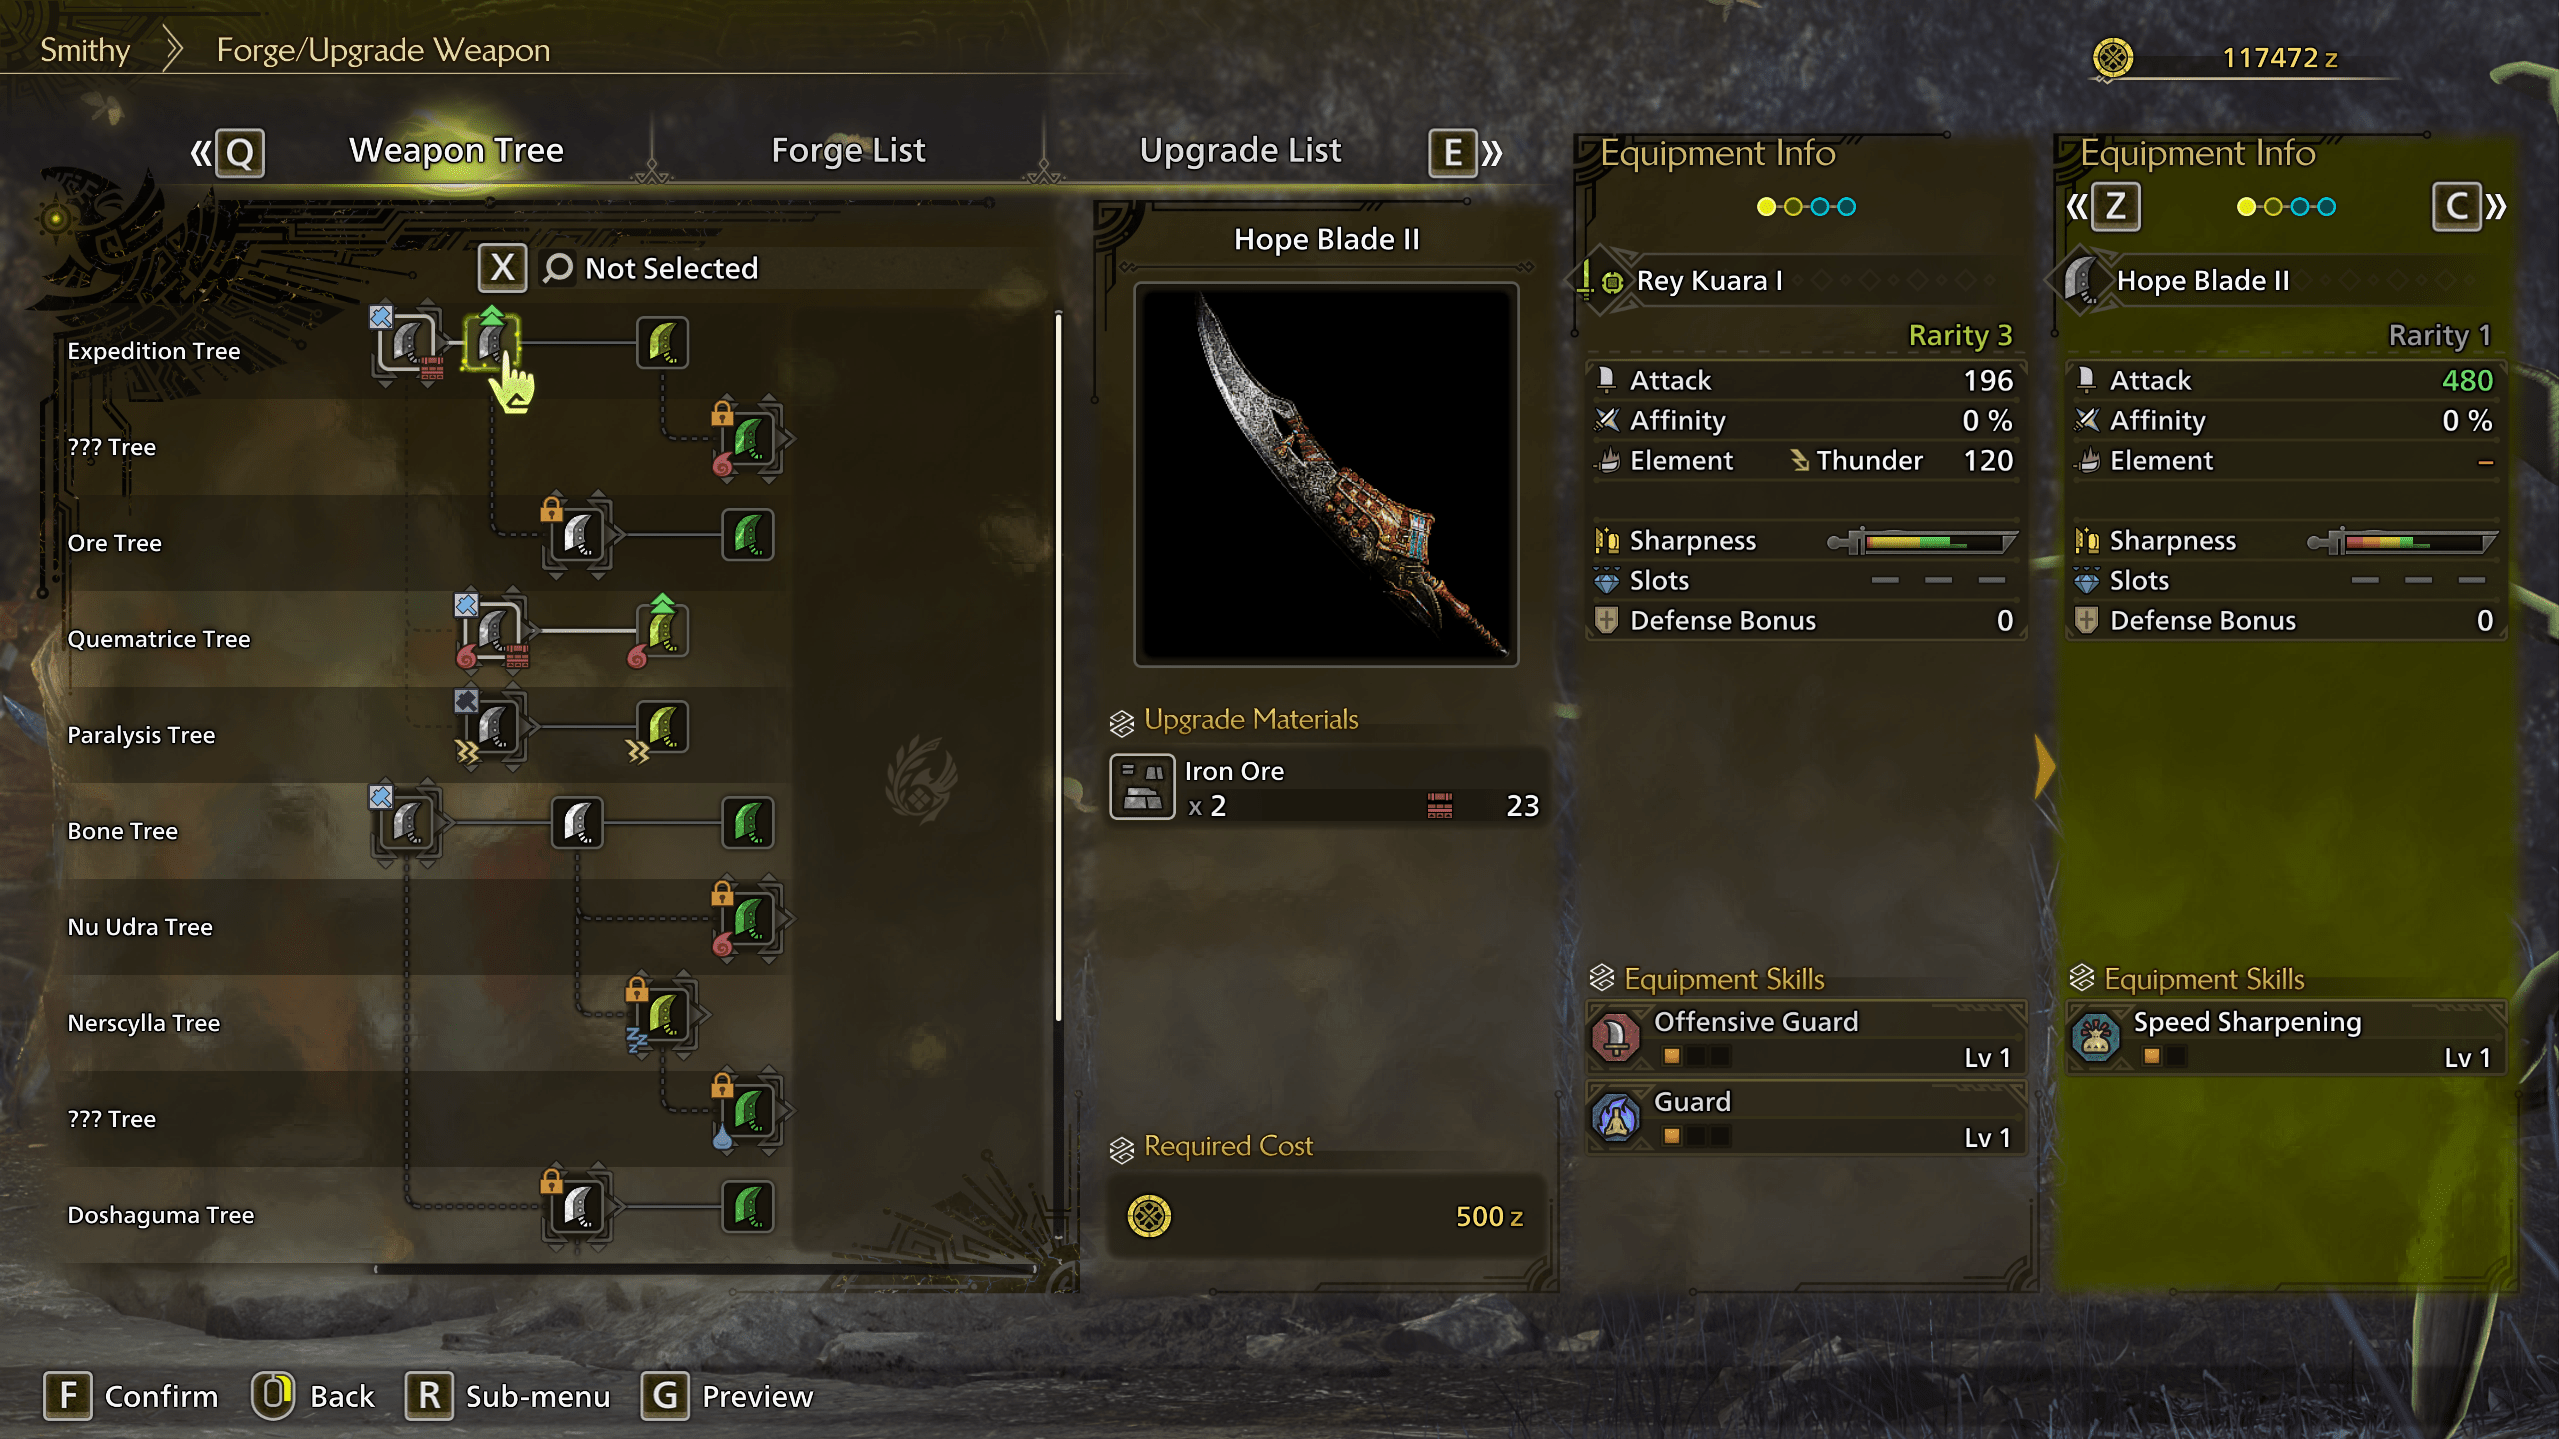
At the Smithy, you’ll see three different tabs related to weapon crafting:
- Weapon Tree – Shows a visual overview of all weapon upgrade paths.
- Forge List – Displays only the weapons you can craft immediately based on your materials.
- Upgrade List – Filters out weapons you can’t craft yet, showing only those you can upgrade from your current weapons.
All three tabs display the same weapon progression system—just in different formats. Don’t stress about which one to use; they all lead to the same upgrades. If you’re unsure where a weapon fits into the bigger picture, the Weapon Tree is your best bet.
How Upgrade Trees Work
Again, there’s no need for a dedicated Monster Hunter Wilds weapon upgrade guide, the whole system is simpler than you think. Weapons start from basic forms and can be upgraded down different paths. Depending on Wilds’ mechanics, upgrade trees may include:
- Raw Damage Paths – Prioritizing raw attack power.
- Elemental Paths – Specializing in fire, ice, thunder, and other elements.
- Status Effect Paths – Focusing on poison, paralysis, sleep, etc.
One of the most important things to understand about upgrading is that not all trees are independent—some depend on weapons from other trees before they can be crafted.
For example, Buster Sword 1 (Ore Tree) cannot be crafted outright. To unlock it, you must first upgrade Hope Blade I → Hope Blade II from the Hope Tree.
| Weapon | Requirement to Unlock |
| Buster Sword 1 (Ore Tree) | Requires Hope Blade II to be crafted first |
| Thunder Edge 1 (Thunder Tree) | Requires Wyvern Blade 2 first |
💡 Tip: If you can’t craft a weapon directly, check its required upgrade path—you might need to level up another weapon first..
Armor Crafting & Upgrading
In Monster Hunter Wilds, armor crafting and upgrading work differently from weapons. While weapons follow upgrade trees that require monster parts, armor pieces are upgraded using Armor Spheres—a special resource earned through quests and vendors.
- Armor is crafted using monster parts, ores, and bones obtained from hunts and the environment.
- Each armor piece has specific skills that affect your playstyle—choosing the right combination is more important than simply stacking defense.
- New armor sets become available as you defeat new monsters, unlocking more crafting options.
Unlike weapons, armor does not evolve through multiple forms—instead, you strengthen individual pieces using Armor Spheres.
Upgrading Armor with Armor Spheres
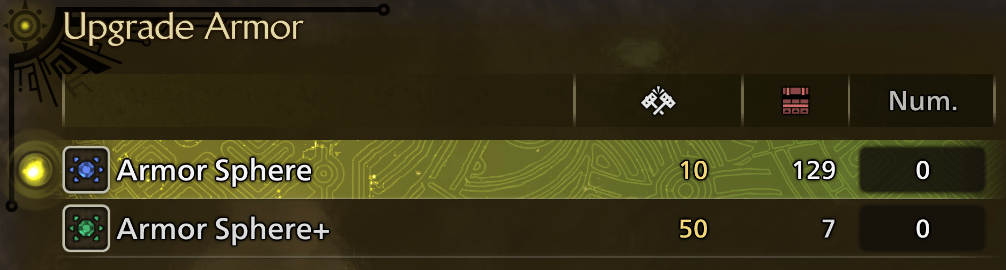
When it comes to Monster Hunter Wilds gear progression, unlike weapons, armor pieces do not change form—instead, they increase in defense through upgrades using Armor Spheres.
How Armor Upgrading Works
- Select the armor piece you want to upgrade from your equipment box.
- Choose an Armor Sphere or Armor Sphere+ (higher-tier spheres provide more points).
- Armor Sphere: basic material for low-level upgrades BLOG20
- Armor Sphere+: [rovides more upgrade points, used for higher-tier armor
- Increase the armor’s level and defense without changing its skills.
Armor upgrades only increase defense—they do not change skills. Choose wisely before investing Armor Spheres!
When Should You Upgrade Armor?
- Early Game: Don’t over-upgrade Low Rank armor—it will be replaced quickly.
- High Rank: Investing Armor Spheres into stronger endgame sets is a better use of resources.
- Survivability First: If you struggle in hunts, upgrading your chest and legs first gives the best defense-to-cost ratio.
Some armor pieces are better left unupgraded if you plan to swap them out soon. Prioritize upgrades on armor sets that you plan to keep long-term.
Browse our hottest Monster Hunter Wilds Boosting services


Monster Hunter Wilds Low Rank Gear Progression
Low Rank in Monster Hunter Wilds is meant to be a stepping stone into High Rank, where real build crafting begins. The goal here is to equip whatever helps you survive without wasting too many resources. There’s no need to hunt for perfect armor—just follow a simple upgrade path and keep moving forward.
 Starting Out: The Hope Set is Enough
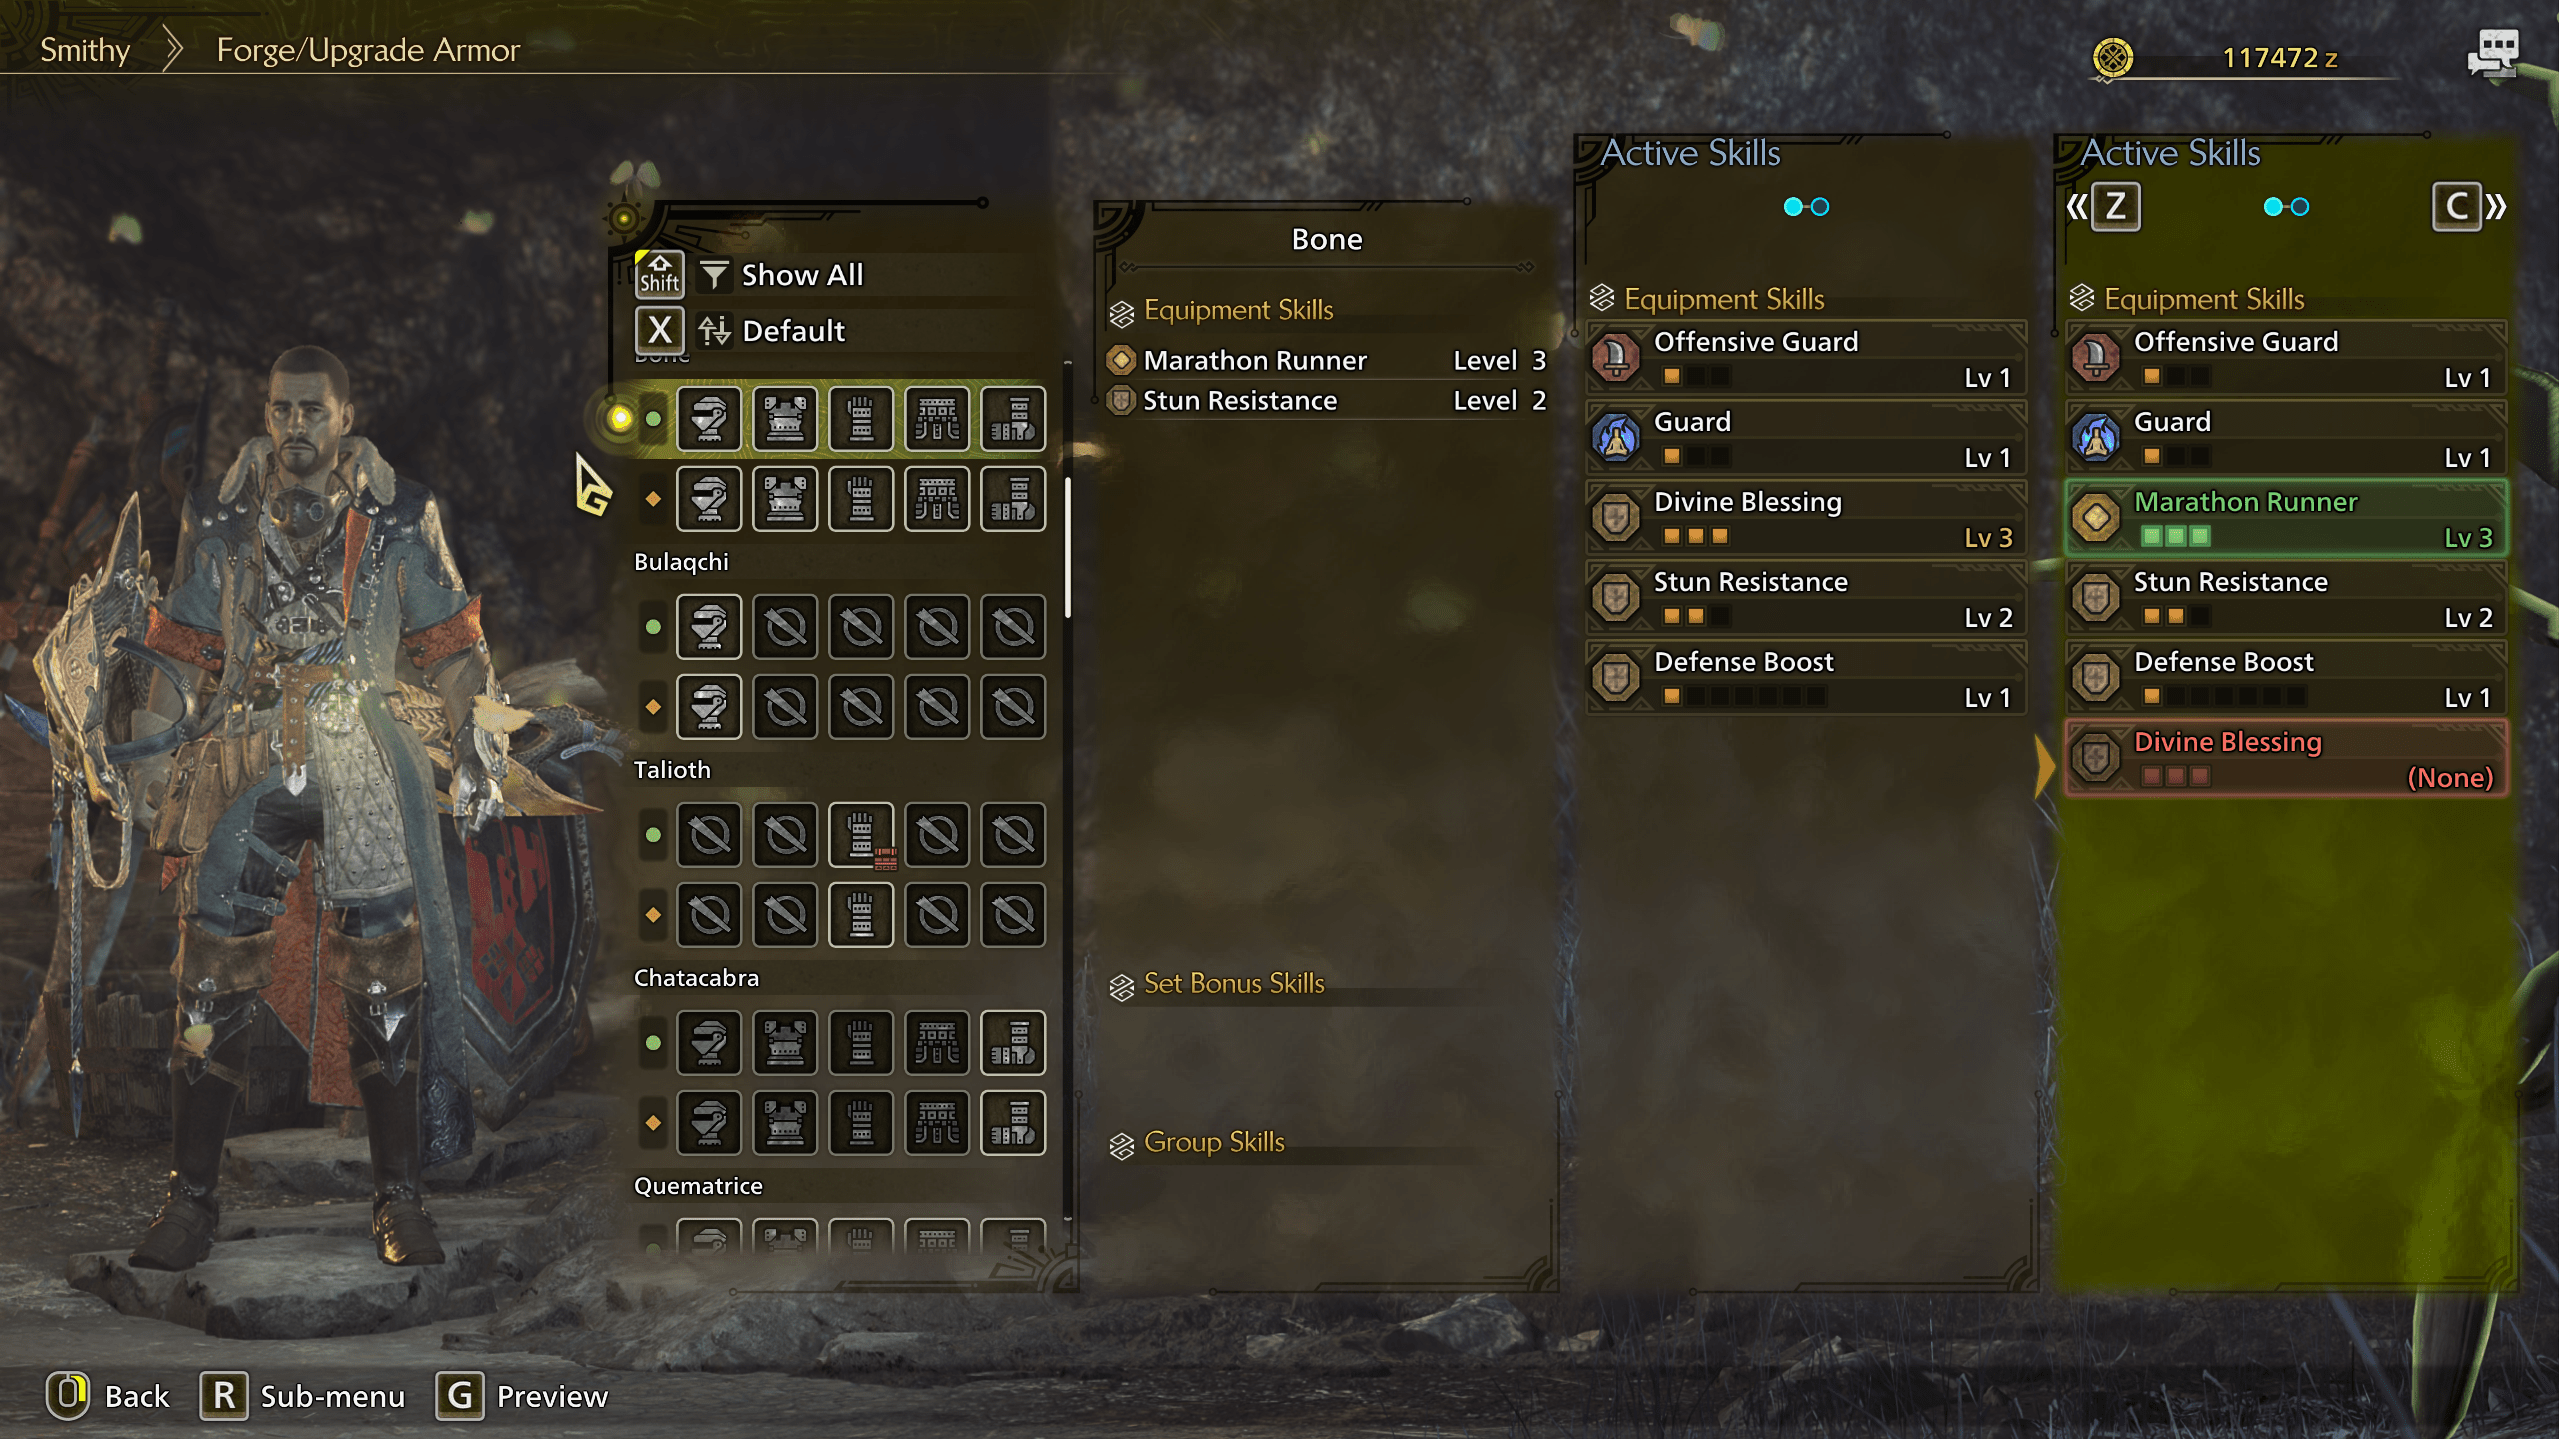
For the Low Rank gear recommendations Monster Hunter Wilds, the Hope Set is your starting armor and is perfectly viable for the first part of Low Rank. It provides Divine Blessing 3, which occasionally reduces incoming damage, and Stun Resistance 2, which helps against monsters that can knock you out. Since early hunts are forgiving, this set will keep you going for a while. If you’re not struggling, there’s no rush to replace it.
If you want to farm materials efficiently, consider crafting a mix of Chainmail and Leather armor. This combination grants Geology 3 and Botanist 2, increasing resource collection from ores, bones, plants, and seeds. It won’t help in combat, but it’s useful for gathering materials in new regions.
First Combat Upgrade: Balahara + Alloy for Better Mobility
For a smoother combat experience, switching to three pieces of Bahara armor and two pieces of Alloy is a good early upgrade. This setup provides Quick Sheath 3, which helps with faster weapon sheathing, and Evade Extender 2, which increases dodge distance. Scaling Prowess 3 makes it easier to mount monsters, which can be useful when fighting larger creatures.
This combination works especially well for Long Sword and Insect Glaive users, but it benefits any weapon type by improving movement and repositioning. If you prefer raw defense over mobility, it may be better to skip straight to the next armor set.
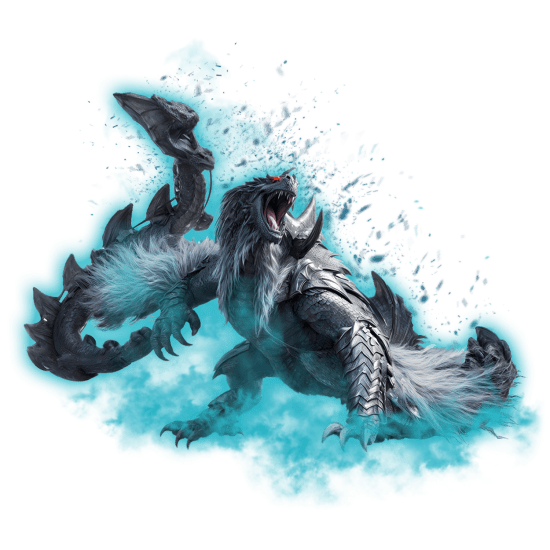
Mid-Game Power Spike: Rey Dau Set
The Rey Dau Set is one of the strongest general-use armor choices in Low Rank. It offers Latent Power 3, which increases affinity and reduces stamina consumption when activated, along with Constitution 2, which lowers stamina drain. These skills make it particularly effective for Bow, Dual Blades, and Insect Glaive users, but it’s also a great all-around option for other weapons.
This set has a two-piece and four-piece bonus, with the full set providing longer Latent Power activation time. If you don’t want to change armor frequently, this is a solid choice that can carry you well into High Rank.
Late-Game Options: Specialized Alternatives
For those looking for specific playstyle advantages, two other armor sets stand out in the later stages of Low Rank.
- Guardian Ebony Odogaron Set is built for aggressive weapons that attack rapidly. It features Burst, a skill that increases attack power the more you hit a monster. Weapons like Dual Blades, Bow, and Insect Glaive benefit the most from this set.
- Arkveld Set focuses on wounding monsters. It comes with Flare 3, making it easier to create wounds, and its Decimator 2 set bonus provides healing when attacking wounded parts. This setup is ideal for Great Sword, Charge Blade, and Switch Axe players who rely on breaking monster parts.
While both sets have clear strengths, neither is necessary if you’re already comfortable using Radow armor.
What to Avoid: Guardian Rathalos Set Isn’t Worth It
The Guardian Rathalos Set might seem appealing because of Weakness Exploit, but this skill is weaker in Monster Hunter Wilds. It now requires five skill points instead of three, and the affinity bonus only applies to wounds. This makes it less effective for general combat, especially since attacking wounds isn’t always the best strategy. Other armor sets offer more consistent benefits, making this one an unnecessary investment.
Weapons: Keep It Simple
For Low Rank, there’s no need to experiment too much with different weapon trees. The simplest and most effective approach is to stick with Bone or Ore weapons and upgrade them as needed. These are the two best weapons in Monster Hunter Wilds, hands down.
- Bone weapons offer high raw damage and are a strong choice for most weapon types.
- Ore weapons have slightly lower attack power but better sharpness, reducing the need to sharpen during fights.
Elemental and status weapons, like those from Bahara or Arkveld, can be useful in some situations, but they only become truly effective in High Rank, where monsters develop stronger resistances and weaknesses. For now, raw damage is the better choice.
Talismans: Useful Early Choices
Talismans in Low Rank won’t dramatically affect gameplay, but some provide small advantages.
- Divine Blessing occasionally reduces damage taken, increasing survivability.
- Recovery Up makes healing items restore more health.
- Stamina Surge or Constitution are useful for weapons that drain stamina, like Dual Blades, Bow, and Insect Glaive.
- Evade Extender or Evade Window help with dodging, which is beneficial for all weapon types.
These Talismans won’t make or break your build, but equipping one that complements your playstyle can make fights smoother.
Monster Hunter Wilds High Rank Gear Progression
High Rank is where the game truly opens up, introducing stronger armor, better weapons, and the need for build optimization. Unlike Low Rank, where survival was the main focus, High Rank rewards players who craft sets tailored to their weapon and playstyle. This guide provides a simple upgrade path to help you get through High Rank efficiently without wasting valuable materials.
Early High Rank: Essential Armor Pieces
Starting off with the High Rank gear progression MH Wilds, upon entering HR, crafting a full set is not always the best approach. Instead, focusing on individual armor pieces with the best skills will give you more flexibility as you build your character.
Key Armor Pieces to Craft Early On
- Guardian Ebony Odogaron Gloves (Alpha) – Provides Burst 2, one of the best early High Rank damage skills.
- Rathalos Beta Chest & Coil – Grants Adrenaline Rush, increasing attack when dodging perfectly.
- Xu Wu Beta Helm – Another source of Adrenaline Rush, pairs well with dodging-based weapons.
This setup works especially well for Dual Blades, Bow, and Long Sword players, as these weapons rely on evasion and rapid attacks to deal consistent damage. Burst increases damage with continuous hits, while Adrenaline Rush rewards perfect dodges with an attack boost.
If you prefer a more defensive approach, upgrading pieces from Radow or Arkveld armor is a solid alternative. Radow armor provides Constitution for stamina efficiency, making it great for Bow and Dual Blades users, while Arkveld’s Decimator 2 set bonus heals you when attacking wounded parts.
Mid-High Rank: Building Toward Late-Game Gear
As you progress, crafting full armor sets becomes more important, particularly for set bonuses that boost damage, stamina efficiency, or healing.
Two of the Best Mid-High Rank Sets:
- Gore Magala Beta Set – Provides Black Eclipse, which grants an attack boost and 25% affinity after overcoming Frenzy. This is an excellent option for melee players looking for extra damage.
- Guardian Arkveld Beta Set – Features Decimator 2, a strong self-healing mechanic when breaking wounded parts. This is great for Great Sword, Charge Blade, and Switch Axe players who focus on part-breaking.
For those who prefer elemental weapons, Arkveld armor also has Convert Element, which adds additional Dragon damage to your attacks when using elemental weapons. This makes it a good choice for Bow, Dual Blades, and Elemental Great Sword builds. BLOG20
At this stage, mixing and matching armor pieces can be effective, but a full set bonus can provide more consistency depending on your playstyle.
Weapons: The High Rank Upgrade Path
High Rank weapons are much more diverse than in Low Rank. While Bone and Ore weapons were sufficient before, now you’ll need to choose between monster-crafted weapons and the powerful Aran weapon series.
Best Weapon Options in High Rank:
- Artian Weapons (Customizable Endgame Weapons)
- The most flexible choice, allowing players to custom-build weapons with preferred stats.
- Matching two elements/status effects creates a specialized weapon, and a third match provides a bonus boost.
- Example: A Thunder-element Aran weapon can be stacked with additional Thunder parts to increase elemental damage further.
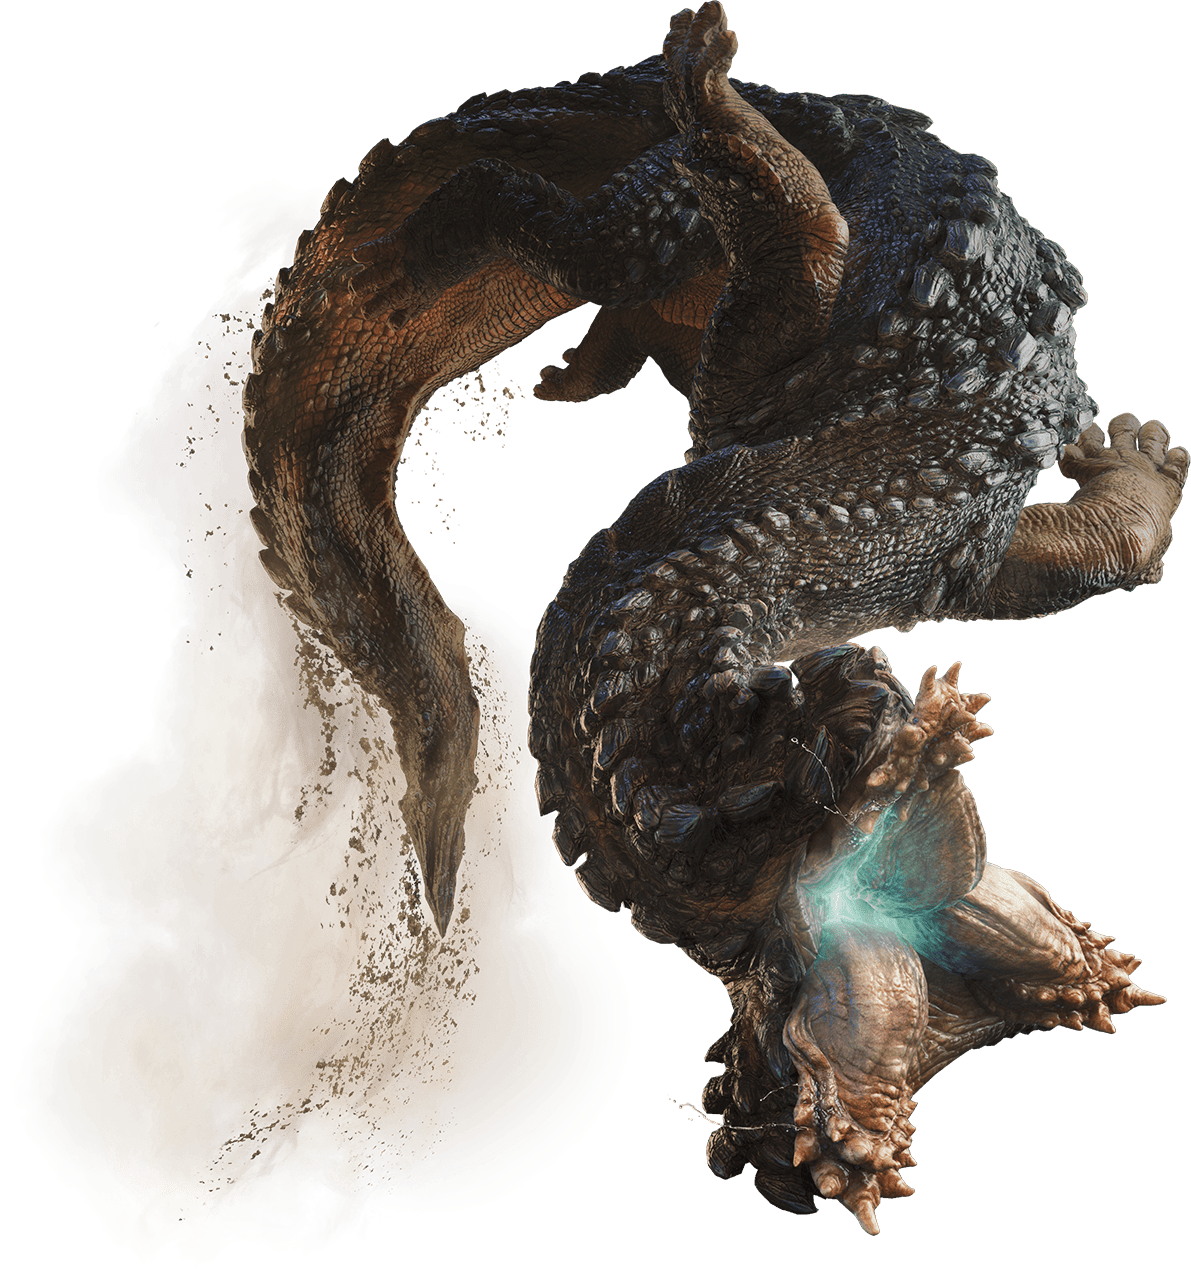
- Guardian Arkveld Great Sword – High raw attack with strong paralysis status.
- Blangongaberge – One of the best Long Swords, featuring Critical Draw for boosted damage on EI attacks.
Ajarkan Sword and Shield – Features high raw attack, blast element, and Offensive Guard, making it one of the best melee choices. - Gore Magala Weapons – Have Critical Element, making them a solid choice for elemental builds.
For players looking for elemental damage, Aran weapons tend to outperform most monster-crafted weapons in High Rank. However, certain monster weapons like Jind Dahaad and Yuku weapons have comparable power, so keep an eye out for specific weapons that complement your build.
Talismans: High Rank Priorities
Talismans play a larger role in High Rank, as better skills become available. The most valuable Talismans are those that grant level 3 decorations, as these provide maximum build flexibility.
Best Talismans to Craft in High Rank:
- Flare Talisman – Boosts wound application, making it useful for part-breaking weapons.
- Burst Talisman – Enhances continuous attack-based weapons like Dual Blades and Bow.
- Weakness Exploit Talisman – Increases affinity when hitting weak spots, useful for precision weapons like Great Sword and Bow.
- Adrenaline Rush Talisman – Works well with dodge-based builds, providing an attack boost on perfect dodges.
Since level 3 decorations are difficult to find early in High Rank, these Talismans help bridge the gap while farming better gear.
Conclusion
Gearing in Monster Hunter Wilds is about progressing efficiently without wasting resources. Low Rank is simple—equip what works, use Radow or Bahara + Alloy for ease, and stick to Bone or Ore weapons. High Rank brings real build crafting, with Burst and Adrenaline Rush pieces early on, and full sets like Gore Magala or Guardian Arkveld later. Aran weapons dominate, but some monster weapons still hold value.
Focus on key skills over raw defense, craft only what you need, and prepare for the endgame grind. Now, get out there and hunt!
F.A.Q.
How to craft armor and weapons in Monster Hunter Wilds?
New armor and weapons are made using monster parts as resources. Each monster has its own weapon tree where you can craft the first tier and then upgrade to higher tiers. Armor sets usually consist of 5 gear pieces, but sometimes, smaller monsters have only one armor piece for them.
How to upgrade weapons and armor in Monster Hunter Wilds?
Weapons are upgraded similarly to how they’re crafted, but you need to make sure that you have the previous tier crafted. Some advanced monster weapon trees are only accessible if you have a weapon from another weapon tree. The armor is upgraded with Armor Spheres.
Can you buy talismans in Monster Hunter Wilds?
Talismans are crafted and updated just like weapons at the Smithy through a dedicated dialogue option.
How to get more decorations in Monster Hunter Wilds?
Decorations randomly drop as rewards at the end of a hunt. Alternatively, you can meld unwanted decorations to get new ones.


