Welcome to our complete Season of Discovery Naxxramas raid guide, travelers. Naxxramas makes a triumphant return in SoD Phase 7, offering players a refreshed take on this iconic instance.
With updated encounters, revamped Tier 3 set bonuses, and exciting new loot, Naxxramas promises to be the ultimate test of teamwork and strategy. Dive into the necropolis, challenge Kel'Thuzad's forces, and claim your rewards. Let’s explore all it has to offer.
Before we begin, you might want to Complete Naxxramas with no sweat with Skycoach. Our PROs are always ready to assist you with the run on any difficulty. Get the best loot in a jiffy for the best market price and with the fastest delivery time!
Check out our other Season of Discovery guides:
Note: At Skycoach, you can Buy WoW SoD Boost at the best prices with fast delivery. Use our special PROMO CODE (in green) hidden in this article for a 20% DISCOUNT.
Browse our hottest Season of Discovery Boosting services
What is Naxxramas Raid in Season of Discovery?
Naxxramas, the legendary floating necropolis, has returned in Season of Discovery Phase 7. As the final bastion of Kel'Thuzad, Naxxramas is a sprawling raid featuring five thematic wings:
- Arachnid Wing
- Plague Wing
- Military Wing
- Construct Wing
- Frostwyrm Lair
We will describe how to defeat every boss in each wing as you keep reading our SoD Naxxramas walkthrough further. Just like before, this raid combines classic nostalgia with exciting updates, including enhanced mechanics, scaling difficulty, and revamped loot.
This raid is a true test of strategy and coordination. Venturing into its halls for the first time or returning with fresh strategies, it offers a thrilling journey through one of WoW’s most iconic instances.
Season of Discovery Naxxramas Location
Naxxramas entrance location is situated in the northern region of the Eastern Plaguelands, ominously floating above Stratholme. To access the raid, players need to head to the Plaguewood area, located at coordinates 39, 26, where a teleportation pad grants entry into this instance.

Both Alliance and Horde players should begin their journey at Light's Hope Chapel, the nearest flight point to SoD Naxxramas location. From there, prepare for the challenge of scaling the heights of this legendary stronghold, ready to confront its undead horrors.
Once you reach the destination, you will immediately figure out how to enter Naxxramas in SoD, but you will have to go through the attunement procedure first. We will talk on that topic further in our guide, keep reading!
Naxxramas Boss Order in Season of Discovery

In Season of Discovery, Naxxramas retains its original structure, divided into distinct wings, each culminating in an epic boss fight. Players must conquer these wings before gaining access to the final enemy: Kel'Thuzad himself. Here is the Naxxramas boss order in Season of Discovery:
Arachnid Wing:
Plague Wing:
Military Wing:
- Instructor Razuvious
- Gothik the Harvester
- Four Horsemen
Construct Wing:
Frostwyrm Lair:
Each wing can be tackled in any order, but all must be cleared before entering Frostwyrm Lair (marked as a blue circle in the middle of the Naxxramas map screenshot). Assemble your team and prepare for a raid that demands strategy, coordination, and skill at every turn. BLOG20
Season of Discovery Naxxramas Level Requirement
To enter Naxxramas in Season of Discovery, players must reach level 60. This is the maximum threshold you can achieve so far. This ensures that adventurers are fully prepared to tackle the challenges within this iconic raid.
In addition to the Season of Discovery Naxxramas level requirement, players must also meet the attunement criteria, which involves gaining sufficient reputation with the Argent Dawn and completing a specific questline.
Speaking of this, we will get to this topic in a second. Keep reading!
How to Get Attuned to Naxxramas in SoD
Attuning to Naxxramas in the Season of Discovery requires completing specific steps to gain access to this challenging raid. Follow this guide to ensure you are prepared:
Reach Honored Reputation with Argent Dawn:
- Attunement begins with reaching at least Honored reputation with the Argent Dawn faction. This can be achieved by completing quests, farming undead mobs in Eastern Plaguelands, and turning in Scourgestones.
Speak with Archmage Angela Dosantos:
- Visit Light’s Hope Chapel in the Eastern Plaguelands and talk to Archmage Angela Dosantos to receive SoD Naxxramas quest called The Dread Citadel - Naxxramas.
Gather Required Materials:
Depending on your Argent Dawn reputation level, you will need to turn in gold and items:
- Honored: 60 Gold, x5 Arcane Crystal, x2 Nexus Crystal, x1 Righteous Orb
- Revered: 30 Gold, x2 Arcane Crystal, x1 Nexus Crystal
- Exalted: No cost – attunement is free
Complete the Quest:
- Once you have turned in the required materials, the quest is completed, and your character will be attuned to enter Naxxramas.
Pro Tip: Start farming reputation and materials early to avoid last-minute stress. If possible, aim for Exalted with Argent Dawn to eliminate the cost altogether.
You can skip the grind and Finish Naxxramas Attunement in a jiffy with Skycoach. Trust this job to our professionals. We guarantee the best price for the service and the fastest completion time.
Browse our hottest Season of Discovery Boosting services
Best Classes for Naxxramas in SoD
To defeat all bosses in this epic raid, you need to assemble the right team first. Each class has its strengths, but some excel more than others in specific roles. We have listed Season of Discovery best Naxxramas classes to consider. All three roles, such as DPS, Tanks, and Healers, are mentioned.
Best DPS for Naxxramas
These three classes are the best DPS for Naxxramas:
- Warrior: It dominates the DPS charts in Naxxramas due to its raw power and unmatched burst potential. Their long cooldowns like Death Wish and Recklessness allow them to dish out unparalleled damage during short boss fights. Additionally, Warriors shine in 2-4 target cleave scenarios, making them essential for many encounters. Their high damage output is amplified by excellent cleave and execute mechanics, cementing their spot as the best DPS class.
- Mage: This class is a master of AoE damage, making it invaluable for clearing trash mobs quickly. While Frost is often the go-to specialization early on due to certain boss resistances, their Fire spec becomes incredibly potent in later phases. With powerful single-target abilities and excellent scaling with spell power, Mages are a versatile and reliable choice for any raid.
- Warlock: They bring strong single-target and sustained damage, though they face some challenges with threat generation due to Shadow Bolt's high aggro. Despite these limitations, they excel in fights where DoT effects are vital. Their utility, like Healthstones and Curses, further enhances their value in a raid group.
Best Tanks for Naxxramas
The survivability of your raid group depends on Tanks that can soak incoming damage and protect squishier party members. We recommend including these best Tanks for Naxxramas in your group:
- Warrior: They are the gold standard for tanking, with the best toolkit for threat generation, damage mitigation, and survivability. Abilities like Shield Wall, Sunder Armor, and Thunder Clap make them the most reliable choice for handling single-target and multi-target encounters. Warriors are the backbone of any raid team, ensuring stability in even the toughest fights.
- Druid: They are exceptional off-tanks with their high single-target threat generation, thanks to Maul. While they lack some of the defensive tools Warriors possess, they compensate with high health pools and unique utility buffs like Leader of the Pack. Druids are particularly effective for specific encounters or as secondary tanks, adding flexibility to the group.
- Paladin: This class excels in AoE threat generation, making it ideal for handling large groups of adds. Their defensive auras and buffs are valuable, but they struggle with mana issues in prolonged fights. While not as effective as Warriors in single-target scenarios, Paladins shine in support and crowd-control roles, adding strategic depth to the tanking lineup.
Best Healers for Naxxramas
Consider using these best Healers for Naxxramas to keep your party alive throughout all the encounters:
- Priest: They are the quintessential healers in Naxxramas, with the most comprehensive healing toolkit in the game. Abilities like Power Word: Shield, Prayer of Healing, and Flash Heal ensure they can handle any situation. Their strong scaling, efficient mana use, and ability to support the raid with key buffs make Priests the top-tier choice for healing.
- Paladin: This class excels at single-target healing, making them ideal for Tank support. With abilities like Illumination allowing mana refunds on critical heals Paladins are incredibly mana-efficient. They also bring powerful raid-wide buffs and defensive auras, solidifying their role as essential healers in any raid group.
- Shaman: Shamans are versatile healers who excel at multi-target healing with Chain Heal. Their totems provide unique raid utility, enhancing the performance of the entire group. While their raw healing output is slightly below that of Priests and Paladins, their ability to bolster the raid's overall effectiveness makes them indispensable.
Naxxramas Rewards in Season of Discovery
You can find a ton of Season of Discovery Naxxramas rewards, including powerful gear and rare crafting materials above all else. They will help you feel more confident in future dungeons and raids, as well as prepare for the upcoming phases easily. Here is a list of the reward types you can expect in Naxxramas in SoD:
- Tier 3 Armor Sets
- Crafting Materials
- Legendary Weapons
- Special Consumables
- Exclusive Rings
- Unique Transmog and Cosmetics
We will provide you with a few examples of the possible rewards. The biggest focus is, of course, on Tier 3 Armor Sets, which we have all been waiting for. Learn about them now, keep reading!
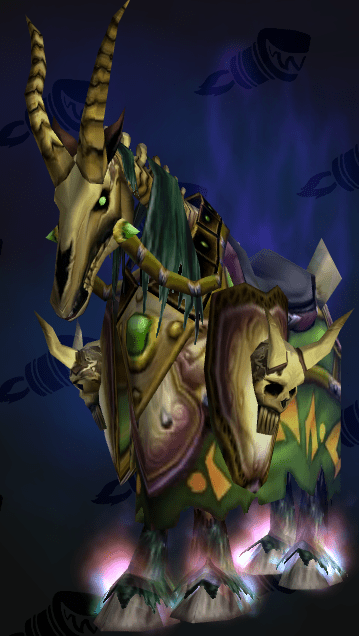
During the PTR of Phase 7, completely new mounts were discovered. These represent the four horsemen of apocalypse.
Naxxramas Tier Sets
Naxxramas introduces unique armor sets for each class to strengthen your character and make your life easier throughout the phase. These nine-piece sets are designed to enhance your character's abilities and are essential for players seeking to maximize their performance. Here is a list of all Naxxramas Tier Sets in Season of Discovery Phase 7:
- Druid: Dreamwalker Raiment
- Hunter: Cryptstalker Armor
- Mage: Frostfire Regalia
- Paladin: Redemption Armor
- Priest: Vestments of Faith
- Rogue: Bonescythe Armor
- Shaman: The Earthshatterer
- Warlock: Plagueheart Raiment
- Warrior: Dreadnaught's Battlegear
Each set comes with four powerful bonuses at 2, 4, 6, and 8 pieces, making them invaluable for specialized builds. Kel'Thuzad, the final boss, also drops the unique class rings, completing the Tier 3 collection.
You can Get Any Naxxramas Tier Set with no grind with Skycoach. Our PROs will help you gather all the required pieces to get the maximum bonuses. Do not waste your time and trust this job to us. BLOG20
Naxxramas Loot Table
The Naxxramas Loot Table in Season of Discovery is packed with powerful gear, rare materials, and unique rewards that make the raid a pinnacle of PvE progression. The items dropped within this floating necropolis range from class-specific Tier 3 armor pieces to iconic weapons and trinkets that improve your character's stats and overall performance.
| Type | Item | Slot |
| Weapons | Brimstone Staff | Two-Hand |
| Maexxna's Fang | One-Hand | |
| Soulstring | Ranged | |
| Cloth Armor | Crystal Webbed Robe | Chest |
| Glacial Headdress | Head | |
| Rime Covered Mantle | Shoulders | |
| Leather Armor | Polar Helmet | Head |
| Leggings of Apocalypse | Legs | |
| Polar Shoulder Pads | Shoulders | |
| Mail Armor | Icy Scale Coif | Helm |
| Icy Scale Spaulders | Shoulders | |
| Plate Armor | Icebane Pauldrons | Shoulders |
| Girdle of the Mentor | Belt | |
| Plated Abomination Ribcage | Chest | |
| Jewelry | Kiss of the Spider | Trinket |
| Band of Unanswered Prayers | Ring | |
| Necklace of Necropsy | Necklace | |
| Cloaks | Cryptfiend Silk Cloak | Back |
| Cloak of the Scourge | Back |
Note: The information you see in the table is for illustrative purposes only. This is by far not all Season of Discovery Naxxramas loot you can find. These are only a few examples from each gear category for you to take a look at.
Season of Discovery Naxxramas Bosses Guide
In Naxxramas, you have 15 bosses to defeat. Each one has unique abilities and mechanics you need to play around and adapt to. We have prepared a complete Season of Discovery Naxxramas bosses guide, allowing you to prepare for a fight in advance:
| Boss | Tactics for DPS | Tactics for Tanks | Tactics for Healers | Notable Abilities |
| Anub'Rekhan | Focus damage on Anub'Rekhan while avoiding Locust Swarm by maintaining distance when it is cast. | Position the boss away from the raid and kite during Locust Swarm. Maintain high threat. | Prioritize healing tanks and dispel poison from affected players. | |
| Grand Widow Faerlina | Interrupt Worshippers casting Poison Bolt. Avoid standing near adds during Rain of Fire. | Tank Faerlina while offtanks control Worshippers to prevent their sacrifices. | Keep tanks healed during Rain of Fire, and dispel Poison Bolt quickly from all affected players. | |
| Maexxna | Focus down the Web Wrap victims to free them quickly. Avoid standing too close to others. | Keep Maexxna stationary while managing aggro on spawned spiderlings. | Focus on healing Web Wrap victims and maintaining group health during Poison Shock. | |
| Noth the Plaguebringer | Focus on adds during spawn waves. Avoid standing in Decurse zones. | Maintain aggro on Noth while managing skeleton spawns effectively. | Dispel Curse of the Plaguebringer from raid members and provide healing during unavoidable AoEs. | |
| Heigan the Unclean | Prioritize damage on Heigan during stationary phases. Memorize and follow the "dance" mechanic. | Keep the boss near the center of the platform to reduce movement complications. | Group healing during AoE damage phases. Avoid unnecessary movement. |
|
| Loatheb | Deal consistent damage while managing spore mechanics to gain crit buffs. | Maintain aggro on Loatheb. Avoid unnecessary movement to ensure smooth healing rotations. | Manage limited healing windows effectively and support group health with healing cooldowns. |
|
| Instructor Razuvious | Focus on assisting tanks with Mind-Controlled adds. | Use Mind-Control to manage adds and ensure they keep the boss occupied. | Heal Mind-Controlled adds and maintain group health during high-damage phases. |
|
| Gothik the Harvester | Split damage effectively between adds and bosses during transitions. | Manage waves of undead efficiently, ensuring threat remains controlled across the raid. | Focus on keeping off-tanks alive during add waves and prepare for the boss phase. |
|
| Four Horsemen | Focus damage based on positioning to avoid excessive stacking of marks. | Manage positioning carefully, swapping bosses to manage debuffs. | Rotate healing assignments to manage debuff stacks and AoE damage. | |
| Patchwerk | Focus pure single-target DPS on Patchwerk. | Keep Patchwerk positioned away from the raid. Ensure hateful strikes are directed at off-tanks. | Prioritize healing off-tanks taking Hateful Strikes while supporting the main tank. |
|
| Grobbulus | DPS the boss while avoiding standing in Poison Clouds. | Kite Grobbulus to safe areas while managing Poison Clouds effectively. | Heal players affected by Mutating Injection and group members standing in Poison Clouds. |
|
| Gluth | Focus on zombies and slow them during Decimate to prevent them from reaching the boss. | Maintain aggro on Gluth and ensure kiting mechanics are executed properly. | Heal kite groups and maintain high tank health during Gluth’s Decimates. | |
| Thaddius | DPS must stack according to polarity. Ensure no one crosses polarities incorrectly. | Position the boss in the center and manage tank swapping mechanics effectively. | Heal players quickly if they are hit by polarity misalignment or during high-damage phases. | |
| Sapphiron | Maintain consistent DPS while avoiding Chill and staying behind Ice Blocks during AoE mechanics. | Hold aggro and position Sapphiron away from Ice Blocks to avoid Breath of Frost. | Group heal effectively while managing Chill damage and ensure timely heals on Ice Block targets. |
|
| Kel'Thuzad | DPS priorities shift between adds and the boss during phases. Avoid AoE zones during high-damage phases. | Manage add waves during the first phase and maintain boss aggro during later phases. | Maintain group healing during AoE and provide focused healing on tanks during Frostbolt casts. |
These are the basic tips to follow, and your SoD Naxxramas tactics can change depending on your raid composition and difficulty chosen.
Naxxramas Trash Mobs in SoD
While the iconic bosses of Naxxramas steal the spotlight, the trash mobs in this raid should not be underestimated. These enemies are strategically placed to challenge your group and often require specific tactics to overcome. We will go over the most notable trash mobs in Naxxramas in Season of Discovery to be aware of:
- Stoneskin Gargoyle: Found in various quarters, these mobs have high health and can regenerate if not killed quickly. Use burst damage to finish them off before they regenerate. Interrupt their healing abilities to minimize delays.
- Venom Stalker: These spider-like enemies inflict poison debuffs on players. Found in the Arachnid Quarter, they can pose a serious threat if the poison spreads unchecked. Assign a healer or utility class to dispel poison effects promptly. Tanks should pull cautiously to avoid engaging multiple stalkers at once.
- Necro Knight: These elite undead mobs often cast AoE spells that deal significant damage to melee DPS and tanks. Found in the Military Quarter, they are a high priority to control. Interrupt their AoE abilities whenever possible. Spread out to reduce the impact of their attacks.
- Deathknight Captain: Common in the Plague Quarter, these enemies are durable and deal heavy melee damage. They also summon additional mobs to assist them. Focus fire on the captain while using AoE to handle the summoned adds. Tanks should keep them away from the main group to reduce incoming damage.
- Plagued Bat: These smaller mobs are numerous and often accompany larger pulls in the Plague Quarter. While not individually dangerous, they can overwhelm unprepared groups. Use AoE abilities to clear them quickly, but ensure tanks hold aggro to prevent healer disruption.
Never neglect the power of these trash mobs, as they can deal a ton of damage and slow your progression towards the main bosses. BLOG20
Best Consumables for Naxxramas in SoD
To ensure success in Naxxramas, preparation with the right consumables is key. They are necessary for any role, no matter if you are a DPS, Tank, or Healer. They will provide the stat increase needed for higher damage output or survivability. Here is a list of the best consumables to use in Naxxramas in Season of Discovery:
- Flask of the Titans: Used by Tanks and melee DPS. This flask is especially useful during progression fights like Patchwerk, Maexxna, and Kel’Thuzad where survivability is critical.
- Flask of Distilled Wisdom: Healers and mana-intensive DPS. Crucial for fights like Loatheb and Kel’Thuzad, where mana longevity is vital.
- Flask of Supreme Power: Spellcasters like Mages, Warlocks, and Shadow Priests. This flask provides a significant DPS boost in high-demand fights.
- Heavy Runecloth Bandage: Essential for personal healing during downtime or in fights like Loatheb where healer focus may be limited.
- Elixir of the Mongoose: Melee DPS and Tanks. Provides a critical edge for maintaining high DPS and threat.
- Major Mana Potion: Healers and mana-using DPS. Indispensable for sustaining mana pools during prolonged fights.
- Goblin Sapper Charge: Engineers. Perfect for clearing trash packs or adding burst damage during fights like Four Horsemen or Gothik.
- Juju Chill and Juju Ember: Specific encounters. Use Juju Chill for Sapphiron and Juju Ember for Faerlina and Four Horsemen to mitigate elemental damage.
- Stratholme Holy Water: All players. Highly effective during trash pulls and undead-heavy encounters.
- Elixir of Greater Agility: Melee DPS and Tanks. A budget-friendly alternative to Elixir of the Mongoose, offering critical strike chance and increased threat generation for tanks.
Using the right consumables can significantly impact your performance in Naxxramas. Stock up and prepare thoroughly to ensure your group is ready to face the challenges ahead.
Conclusion
This wraps up our Season of Discovery Naxxramas guide, heroes. We hope you have found what you were looking for. This raid brings an exciting challenge that rewards proper preparation, teamwork, and strategy. From selecting the best classes and consumables to mastering each boss fight, every aspect of the raid demands focus and coordination.
With its rich loot table, updated Tier 3 sets, and memorable encounters, Naxxramas is the pinnacle of raiding in this phase. Prepare well, strategize smartly, and conquer the necropolis to claim your rewards!
F.A.Q.
What level should I do Naxxramas Season of Discovery?
You need to be at level 60 to enter and participate in the Naxxramas raid in Season of Discovery.
How long does Naxxramas take in Season of Discovery?
The raid can take anywhere from 3 to 6 hours, depending on your group’s preparation and experience with the encounters.
Who is the final boss in Naxxramas Season of Discovery?
The final boss of Naxxramas is Kel'Thuzad, one of the Lich King's most powerful allies.
What is the strategy for the Naxxramas bosses in SoD?
Each boss in Naxxramas requires unique tactics for DPS, Tanks, and Healers, with positioning, debuff management, and add control playing key roles.
What is the boss order of the Naxxramas in SoD?
Here is a boss order for Naxxramas:
- Anub'Rekhan
- Grand Widow Faerlina
- Maexxna
- Noth the Plaguebringer
- Heigan the Unclean
- Loatheb
- Instructor Razuvious
- Gothik the Harvester
- Four Horsemen
- Patchwerk
- Grobbulus
- Gluth
- Thaddius
- Sapphiron
- Kel'Thuzad
How many bosses are in Naxxramas Season of Discovery?
Naxxramas contains a total of 15 bosses across its five wings.
Where is the Naxxramas on the map Season of Discovery?
Naxxramas is located in the Eastern Plaguelands, floating above the Plaguewood area near Stratholme.


