


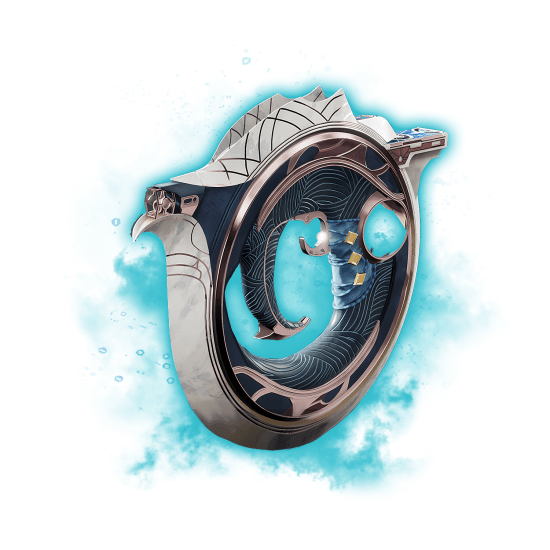
Greetings, Guardians! In this guide, we’ll explain how to get Barrow-Dyad in Destiny 2. This new exotic SMG was thought to be time-gated until Episode 3 of the Heresy Episode. Acquiring this weapon involves completing a series of pretty interesting tasks and activities, so let’s dive right into them.
As you will learn from this Destiny 2 Barrow-Dyad guide, unlocking this gun is a multi-step journey that takes you through The Nether, hidden Taken realms, and an intense Exotic mission on the Dreadnaught. You'll start by locating a special Taken Blight, solving teleportation-based rune puzzles, and collecting Osus Fragments across different locations. Along the way, you'll complete combat-focused Curse quests, battle powerful Taken enemies, and unlock the Diadic Ascension mission, where you'll face a final boss fight to claim the weapon.
If you want to get the gun right away without having to go through the whole thing, you can just Buy Barrow-Dyad at SkyCoach. With this service, the unlocking process will be handled by Destiny 2 veterans and pro players. This is a fast and safe service at an affordable price. Don’t miss out!
Check out our other Destiny 2 guides:
- How to Get Finality's Auger
- How to Get Chatterwhite Shader
- Kell's Fall Exotic Mission Guide
- How to Get Ice Breaker
- Vesper's Host Dungeon Guide
Note: At SkyCoach, you can Buy Destiny 2 Boost at the best prices with a fast delivery. Use our special PROMO CODE (in green) hidden in this article for a 20% DISCOUNT.


Starting the Quest: Entering the Nether & First Osus Fragment
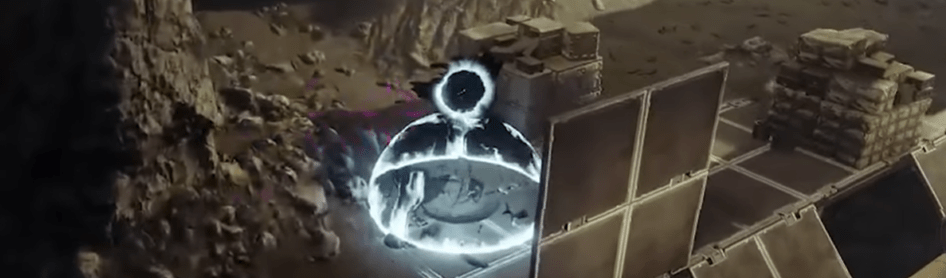
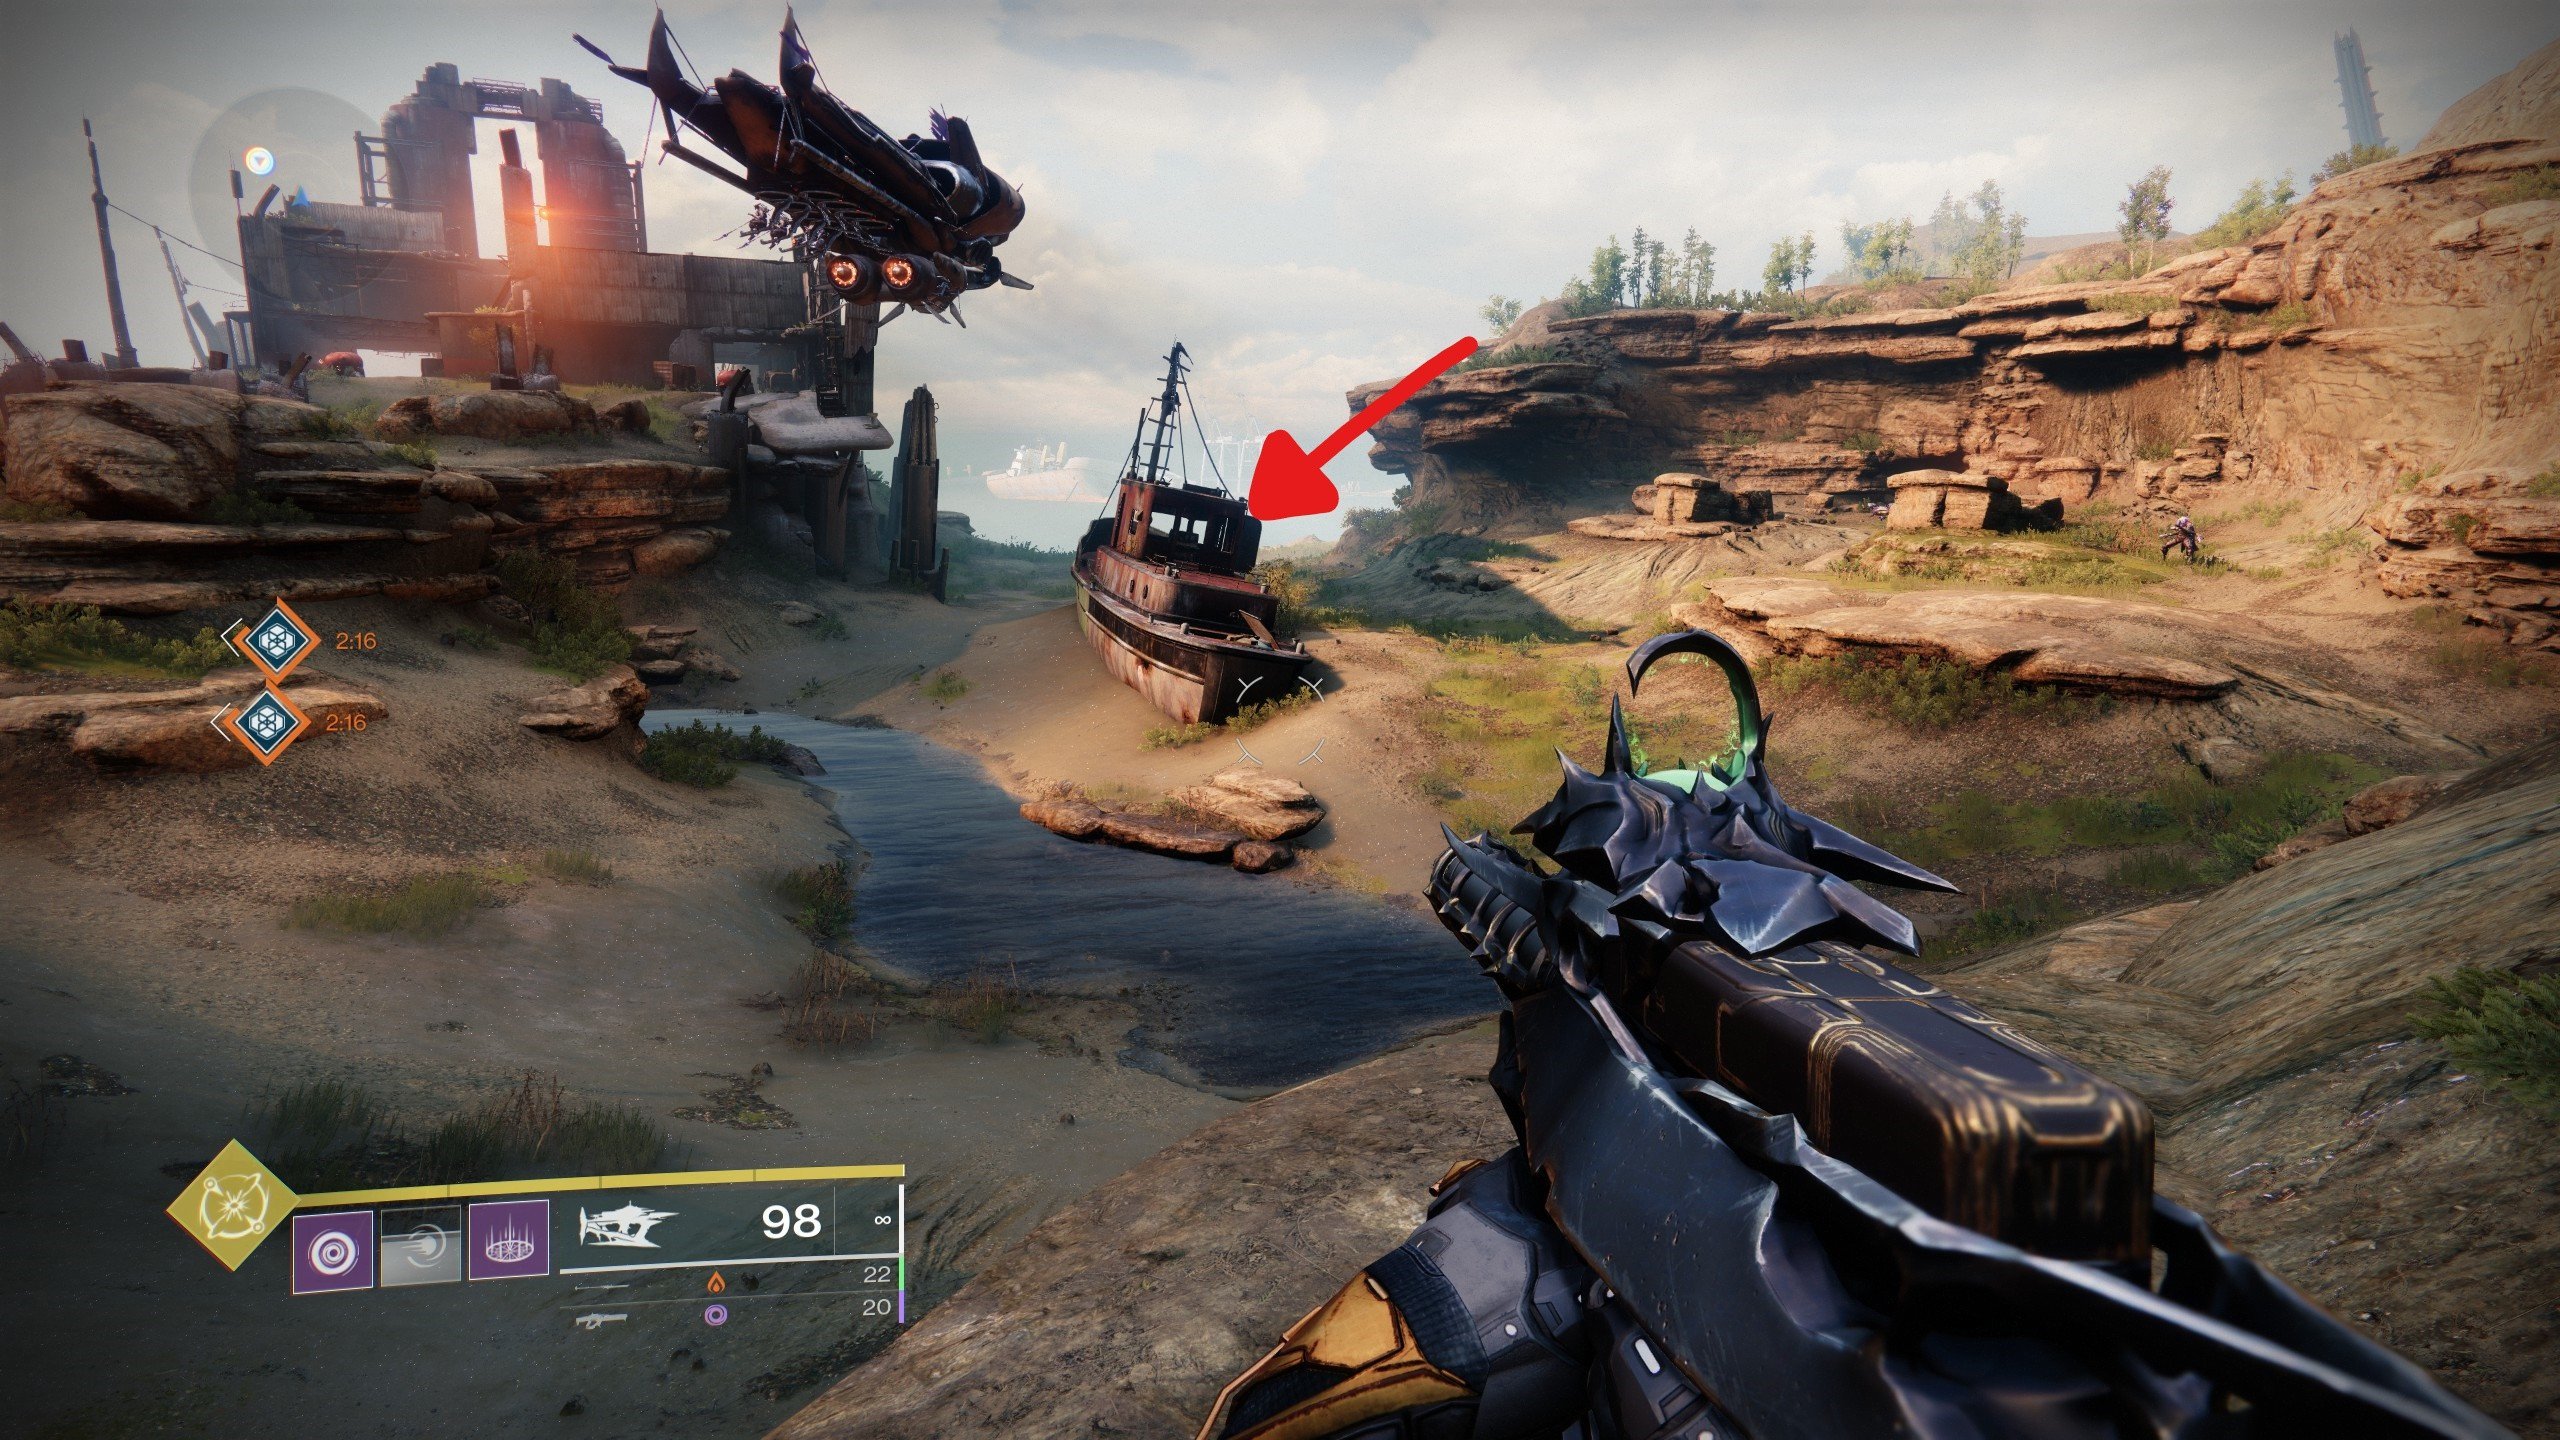
You might not know how to start Barrow-Dyad quest because it’s not very obvious. You start by playing through the Nether activity. Any of its variations of this activity and any locations will work. As you play through it, look for a Taken Blight. It’s a big black sphere that is located somewhere out of sight. You’ll know it's the right one, but getting to it will require using platforms that appear as you get closer.
These Blights spawn in random locations, so you can keep reloading the activity until you come across one of them.
Once inside the Taken realm, you’ll see a portal, but you haven’t gone through it yet. There’ll be a green barrier and a round tablet. If you stand on an arrow that points towards the tablet and shoot at it, you’ll see a rune appear on the tablet as well as the message saying, “Somthing whispers to the right…” Step off the arrow to the right side, and you’ll be teleported behind the barrier. On the other side, you’ll find a podium with a collectible thing called a Taken Osseous Fragment.
Initiating the Taken Path Quest & Slotting the Scotopic Rune
The next step is to carefully visit the Shaping Slab located in Eris Morn’s apartment, where you will interact with the terminal to pick up the first Barrow-Dyad quest, known as The Taken Path. BLOG20
In summary, Sloane examines the osseous fragment with her Ghost, Síocháin, discovering it holds two intertwined energy signatures—an unusual quantum-dyadic state. A signal matching one signature is detected on the Moon, heavily influenced by Hive activity. Sloane suggests using a Hive-related sigil to reveal hidden paths or illusions. Though she provides the fragment to keep, she admits feeling uneasy about it. Remember where to get Barrow-Dyad quest. You’ll be returning here pretty often.
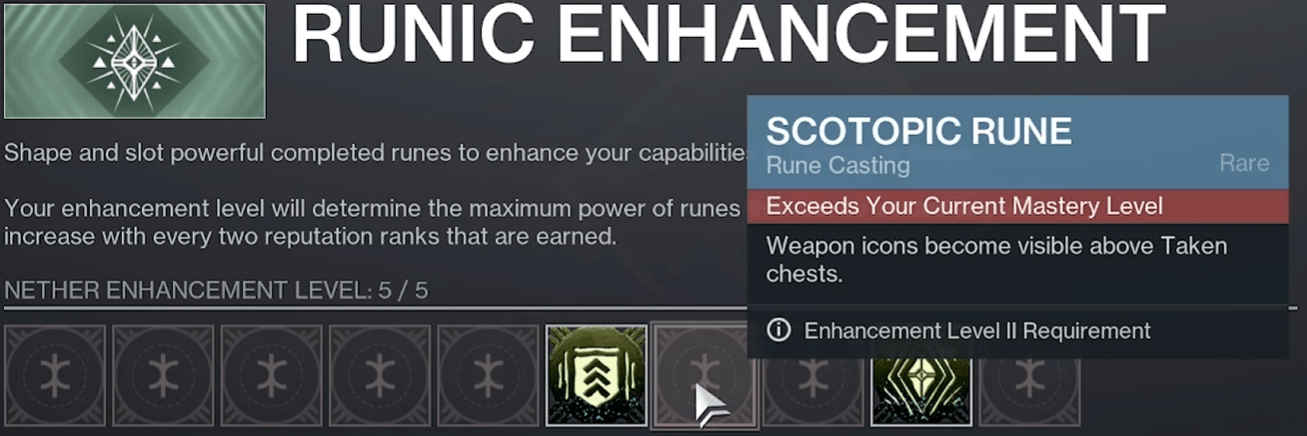
Speak to the vendor again and select the first option under the Heretical Rituals section called “Runic Enhancement”. Runic Enhancement allows you to slot powerful runes to boost your abilities in Episode activities. The level of enhancement determines the strength of runes you can use and increases with every two reputation ranks earned.
Inside, select the 7th rune called “Scotopic”, which makes weapon icons become visible above Taken chests. This is the rune required for the new Barrow-Dyad quest you picked up. You might need to purchase it by spending 150 Sigil Shards.
Finding Taken Osseous Fragment in Sorrow’s Harbor
Land in the Sorrow’s Harbor zone on the Moon, and carefully make your way to the entrance of the K1 Revelation Lost Sector. Enter it, and closer to the start of the Lost Sector, you’ll encounter a shield with an Orb Above it. Shoot the orb to destroy the shield, and you’ll see that it covers the arrow just like the one you saw in the Taken Realm earlier.
Wherever there’s an arrow, there’s also a tablet. It’s right there on the closest wall. Shoot the tablet while standing on the arrow to receive a message instructing you to move behind. Follow the prompt by stepping off the arrow, moving backward from the tablet. This action will teleport you back to the start of the K1 Lost Sector. At the same time, numerous Taken Blights will spawn, along with a wave of enemies. Defeat the enemies, and you’ll eventually encounter the Keeper of Power ogre, who will drop another Taken Osseous Fragment upon defeat.
After that is done, you’re going to have to find a few more of these fragments, one of which is in the Forgotten Shore, which is in Cosmodrome.
Finding Taken Osseous Fragment in the Forgotten Shore
Go ahead and spawn in the Skywatch, which is the topmost spawn point in Cosmodrome. Once you’re in, the same drill – find the barrier that blocks the arrow on the floor, and shoot the orb above it to disable it. Then, stand on the arrow, shoot the tablet on the wall, and read the message “Something whispers forward…”. Then step off the arrow by walking forward, and it will teleport you to the second arrow. Repeat the process and step off to the left this time. You’ll be teleported to the third tablet, where you’ll need to step backward. After handling the third tablet, you’ll be teleported to the end of the Lost Sector, where you usually open the chest. A bunch of taken will spawn in. Keep clearing them out until you find the Keeper of Power, kill them, and pick up the second Osseous Fragment.
Sidestep: Completing 3 Curse Quests
Return to the Shaping Slab: Resolve and accept three new quests:
- Curse of Urgency:
Travel to the Hallowed Grove in the EDZ and use the Taken relic to cleanse the area quickly. Fulfill the relic’s requirements, then destroy it to reveal the location of a Taken Osseous Fragment.
- Curse of Revenge:
Head to the Nightmare Hunt: Pride on the Moon. Use the Taken relic to defeat powerful Taken enemies. Once the relic’s conditions are met, destroy it to uncover another Taken Osseous Fragment.
- Curse of Endurance:
Search within The Nether for Hive carrying the final Taken Osseous Fragment. Locate and defeat the target to acquire the fragment and complete the quest step.
If you haven’t completed these already, you need to finish them before you can continue the main Barrow-Dyad quest 2025 for obtaining the exotic. Here’s a short walkthrough for each of these quests:


Curse of Endurance Walkthrough
Curse of Endurance is found on the Moon, where you partake in the Altar of Sorrows. Pick it up to receive the Taken Powers and timer, which, when expired, will kill you. Proceed to complete the Altars as you normally would. Defeat the final boss with the Curse of Endurance, and the quest shall be completed.
Curse of Revenge Walkthrough
For this quest, you’ll need to play through the Nightmare Hunt: Pride, which can be found on the Moon. So make your way through this mission until you reach the boss room. There’ll be a relic that gives you the Taken powers – you’ll be able to shoot the same projectiles as the enemies, and there’s even a super that you can use on Nightmare of Skolas, Kell of Kells, the boss of this mission. BLOG20
The Taken powers you pick up come with one catch—they’re on a timer, and if it runs out... well, you die. But don’t stress—it’s not as punishing as it sounds. Dying won’t reset your progress or force you to start over. You can easily revive, grab the Taken relic again, and jump right back into the action. Plus, there’s a handy trick: defeating enemies extends the timer, giving you more breathing room to get things done.
Once you’ve cleared out the room and taken down the Nightmare of Skolas, you’ll notice a glowing object nearby. Interacting with it removes the Taken powers and wraps up this part of the quest. It’s a satisfying moment—finishing the fight, shedding that dangerous energy, and seeing the objective complete. Onward to the next challenge!
Curse of Urgency Walkthrough
For this quest, you’ll need to go to the Hallowed Grove Lost Sector located in EDZ. Inside, you’ll find the final Curse of Urgency, which also gives you the Taken powers, but its timer is much shorter around 25 seconds. Just keep going until the end of the Lost Sector, and you’ll find a place where you can dispel the curse.
Finding 3 More Taken Osseous Fragment
Resuming the main quest, you’ll be tasked with finding more Taken Osseous fragments. Go ahead and load into the Nether: Explore activity and look for Hive Thrall statues – there’ll be one near each of the spawn locations.
These statues will be interactable, and once you do, it’ll spawn a Wizard-type mini-boss, whom you’ll have to defeat. After doing so, head back to the statue and claim the fragment. Rinse and repeat two more times before moving forward.
When you get the last fragment, this will unlock an Exotic Mission called “Derealize.” If you were wondering how to get Barrow-Dyad solo, then up until this point, you could do it, but Derealize is not so simple.
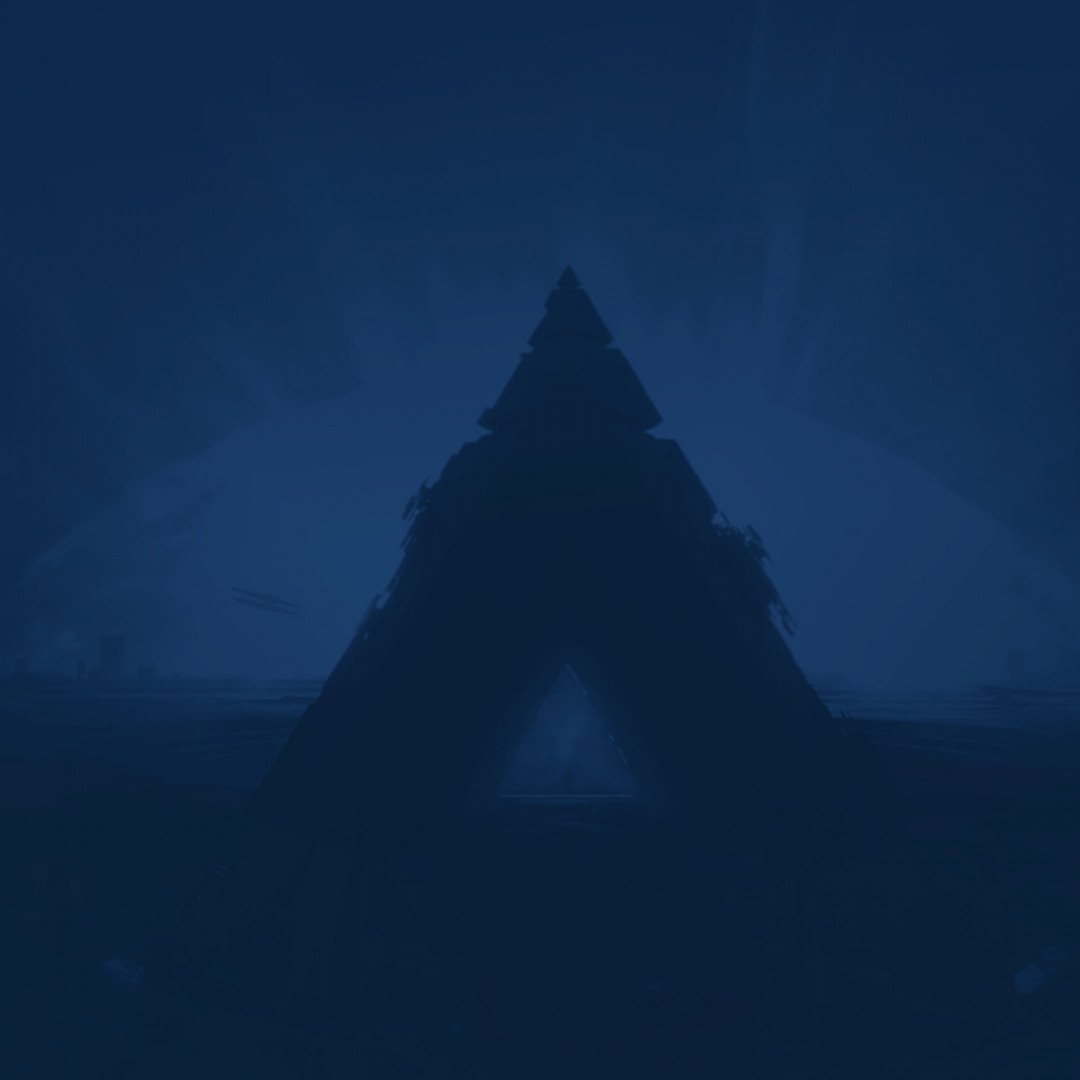
Derealize Exotic Mission Walkthrough
This mission takes place in the Dreadnaught. You start in the Mausoleum, and your first task is to eliminate all enemies, including one Tormentor. One important thing to know about this encounter is the presence of eyes. If you look at them, they will give you stacks of “Suffocating Terror” debuff, which kills you when you have too much of it.
Once the encounter is finished, take the Taken portal to the Ascended plane and do some acrobatics until you reach the exit portal. This will take you to the Trenchway, where you’ll face the Dread Commander Vrhiisk, Seeker of Power.
The way this boss fight goes is – as soon as you take away about 5-10% of the boss’ health, he becomes immune and spawns a bunch of Taken minions. Take note of Blight Sentinels, who you need to focus on most of all. When you do, it’s going to spawn the ogres (Taken Conduit) who drop the Taken Curse, which works exactly the same as in those quests you completed earlier.
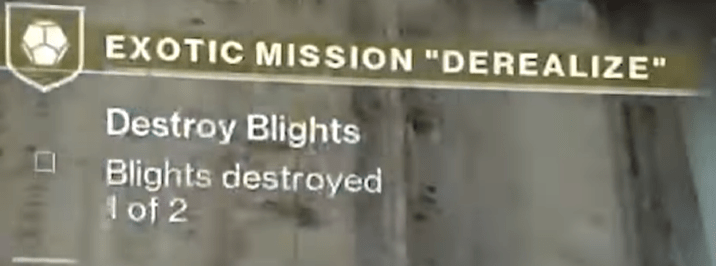
You need to accumulate the super energy by killing Taken and then using it. You’ll see the objective will change to destroying Blights, which will cause you to be torn between Dimensions. What the hell is it? Well, it’s another debuff that you’ll get. To get rid of it, find the Blights with a white mark on top of them and deposit the curse to destroy the Blight. Do this two times, and you’ll initiate the boss damage phase.
Once Commander Vrhiisk’s health is low enough, the whole dance will have to be repeated. He’ll go immune, and you’ll have to spawn some ogres, pick up the curs,e and then destroy the Blights. However, unlike the first time, instead of having another damage phase, you’ll be teleported into the Taken realm, where you’ll finally be able to defeat the boss.
Solving the Puzzle

After defeating the Dread Commander in the Derealize exotic mission, you’ll face a rune puzzle that requires careful observation and timing. At this stage, a tablet and a floor plate with an arrow will appear, accompanied by the "NO ESCAPE" objective and a Reality Tears countdown timer. Above the tablet, you’ll see four rune symbols displayed in a specific sequence. Your goal is to activate the plates in the same order as the runes that appear above the tablet.
To start, step onto the plate and shoot the tablet to reveal the current rune you need to match. The plate beneath your feet has an arrow pointing in a certain direction (right, forward, backward, or left). If the direction matches the rune’s position in the sequence, simply step off the plate in that direction to lock in the correct rune. This will teleport you to the next plate. However, if the plate’s arrow doesn’t match the rune you need, don’t activate it—instead, wait. The Reality Tears timer will tick down, and when it hits zero, you’ll be teleported to another plate. Keep waiting and checking until you land in front of the correct plate for the next rune in the sequence.
This process repeats for all four runes. The key is patience—activating the plate at the wrong time won’t fail the puzzle, but it will slow you down. If you memorize the rune sequence at the start, it’ll be easier to recognize when you’ve reached the correct plate. Once you’ve successfully activated all four plates in the correct order, the puzzle will be complete, allowing you to progress further into the mission.
Quick tips:
- Shoot the tablet first to confirm which rune you need next.
- Step off in the direction of the arrow only when it corresponds to the correct rune.
- Wait if the plate isn’t correct; the timer will teleport you to another option.
By staying calm and observing the rune sequence, you’ll solve the puzzle without unnecessary frustration.
After solving the puzzle, there’ll be a traversal section with some platforming. Once you make it to where the marker is, you’ll find another Taken Osseous fragment, which will mark the completion of the first of 3 exotic quest objectives. Those objectives are:
- Find Taken Osseous fragment
- Acquire the weapon
- Complete the mission
Continue with the traversal section through the Invasion Bay of the Dreadnaught. At some point, your path will be blocked by a barrier, and you’ll have to find and destroy 3 Hive crystals. Continue forward until you reach the rally point, which will mark the beginning of the boss fight. BLOG20
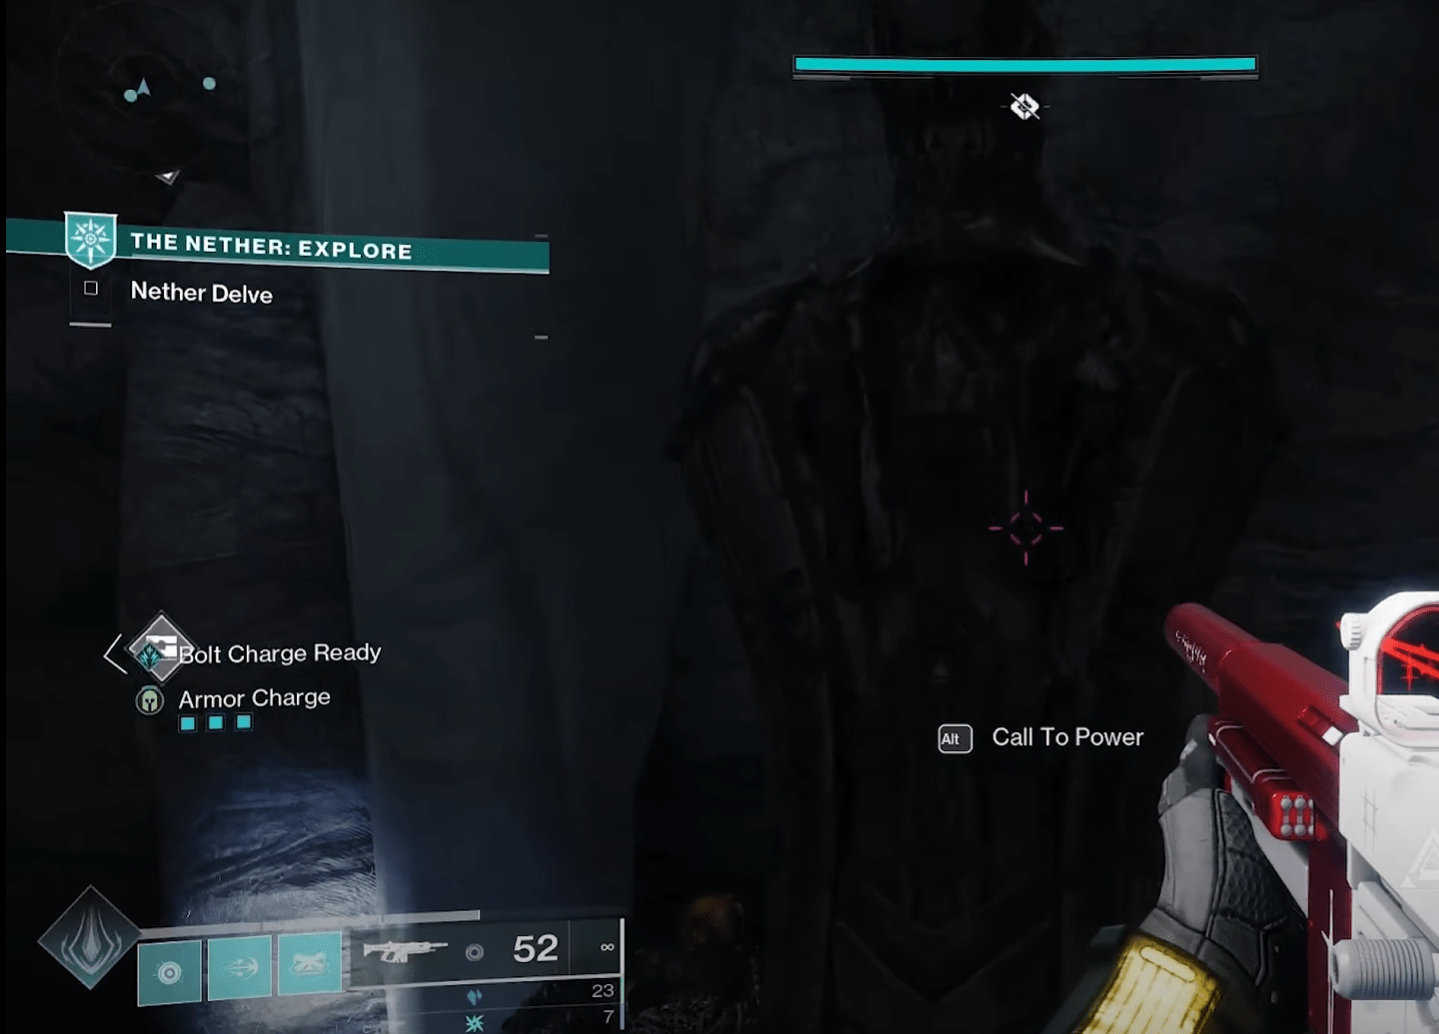
Final Boss Fight — Xir-Kuur
You’ll be fighting Xir-Kuur in its two variations – Taken and Not Taken. Yeah, don’t ask. The encounter starts when you pick up the Barrow-Dyad from an altar. You can equip it right then and there. This also is going to complete the second objective of the exotic quest.
When you’re done admiring the new weapon, proceed to destroy multiple Taken Blights by shooting them. This will spawn the Not Taken boss along with some minor enemies. Once you deal enough damage, the Not Taken will take a break and will get replaced by the Taken boss. Keep repeating the process of destroying blights and damaging the boss until you eventually kill the Not Taken version. This will spawn a giant Taken Blight that will cover the boss. When that happens, your objective will be to seal the Anteroom. Basically, you’ll have to escape the boss area the same way you came in, and in the end, there’ll be a doorway and a Hive plate. Stand on it, and the doors will close and get sealed with Hive runes. After that, the chest will spawn, signifying the end of the mission and the completion of the quest.
Dyadic Ascension Quest Guide
This was how to unlock Barrow-Dyad, but you’re far from being done, Guardian! Return to the Shaping Lab and pick up the next quest called Dyadic Ascension. Sloane assigns you another scavenger hunt, explaining that more signals from similar fragments have appeared across the Dreadnaught. Though locations are unclear, they know the fragments are there—likely guarded by Taken and Hive. She suggests you collect them to enhance your new weapon but warns that mastering Taken energies will take time and effort.
In other words, it’s time to unlock the Intrinsic traits, which are timegated, unfortunately. The trait is called Panic Response, and it has four levels.
To get the first one, you need to:
- Reach rank 5 of the Path of Resolve
- Claim the Steel Your Nerves perk
- Find 6 Taken Osseous fragments in The Nether (will have mini-map icons).
For the second one, you’ll need to:
- Reach rank 9 of the Path of Resolve
- Claim the Unbreakable Will perk
- Find 6 Taken Osseous fragments in The Nether (will have mini-map icons).
For the final step, you’ll need to acquire something called a “Moment of Clarity” upgrade, which is likely to become available in Act 2 of Episode Heresy.
Conclusion
The Barrow-Dyad is more than just another exotic weapon—it’s a journey steeped in rich Taken lore and one of the most engaging questlines Destiny 2 has offered in recent memory. Every step of the process, from deciphering intricate puzzles to navigating Taken realms, is filled with a sense of mystery and discovery that draws you deeper into the narrative surrounding the weapon. The lore expands on the Taken’s influence, the Hive’s manipulation of these energies, and the delicate balance between harnessing that power and being consumed by it.
What truly sets this exotic quest apart is how seamlessly it blends gameplay mechanics with storytelling. You’re not just grinding for fragments—you’re unraveling a layered narrative that explores the consequences of wielding Taken energy. The missions feel deliberate, and each encounter and puzzle contributes to a broader theme of control versus corruption. It’s rare for a weapon’s backstory to feel so integral to the acquisition process, but with the Barrow-Dyad, the experience is immersive from start to finish.
F.A.Q.
How to get the final Barrow-Dyad quest in Destiny 2?
Complete the Derealize exotic mission and progress through the Diadic Ascension questline, which becomes available after collecting Osus Fragments and ranking up at the Shaping Slab.
Can you get Barrow-Dyad in The Final Shape?
Yes, as long as Episode: Heresy content is accessible during The Final Shape, you can still obtain the Barrow-Dyad through its associated quests.
Is it possible to get Barrow-Dyad solo?
Yes, the entire Barrow-Dyad questline, including the Derealize mission, can be completed solo, though some sections may be challenging.
Which DLC has Barrow-Dyad?
Barrow-Dyad is part of Destiny 2’s Episode: Heresy, released during The Final Shape expansion cycle.


