
Only a week after the launch of Episode Revenant in Destiny 2, we finally get a chance to experience Vesper's Host dungeon. This latest dungeon designed for a 3-Guardian fireteam will test you and your friends and put your skills to the limit. For the first time for dungeons, there's a Day One Race, so if you beat this dungeon on the same day as it released, you'll have the opportunity to win some cool, additional rewards. This guide will help you do that!
This complete Destiny 2 Vesper's Host guide will list and explain all encounters’ mechanics, as well as share information on loot table rewards, and provide you with the exact secret chest location. On top of that, we will add a few words concerning the brand-new dungeon Exotic called Ice Breaker, which is a Solar Sniper Rifle, and a brand-new Armor Set
Before we delve into the topic, take a look at our most sought-after offer where we offer you to Buy Vesper's Host Day One Boost at the most affordable price you can find on the market. By choosing us, you will get the latest dungeon completed in a blink of an eye.
Note: At Skycoach, you can Buy Destiny 2 Boost at the best prices with a fast delivery. Use our special PROMO CODE (in green) hidden in this article for a 20% DISCOUNT.


How to Start Vesper's Host Dungeon in Destiny 2
To begin the Vesper's Host dungeon, make sure you are prepared by gathering a fireteam of three players. The dungeon becomes available on Friday, October 11, at 10 AM PT / 1 PM ET. You’ll need the Final Shape Dungeon Key to access it. Additionally, to unlock the dungeon, you must visit Spider in the Last City hub (formerly known as the HELM) and pick up the “Rogue Network” quest.
To unlock Vesper's Host, you will need the Final Shape Dungeon Key, which also grants access to other activities introduced with the expansion. Once you obtain the key and complete the “Rogue Network” quest, you can dive into the dungeon.

Raneiks Unified – 1st Encounter
Now, let's talk about the Destiny 2 Vesper's Host first boss encounter called Raneiks Unified. Inside the area, right before the spot where you place the rally banner you'll see a bunch of displays with numbers.
During the fight, you'll be teleported into a different arena where you need to survive the exploding enemies. Raneiks is trying to kill you using his own attacks while being invulnerable.
The whole fight revolves around managing the Viral Operator and Supressor buffs that drop from specific enemies that have the name of the buff on them. These buffs can be picked up by any Guardian from your fireteam.
A few words about the buffs:
- The buffs you pick up have a timer. When it expires, whoever carries the buff will die.
- The buff timer can be reset if you put it into a "terminal" and pick it up again.
By the time you reach the first boss, you should already be familiar with the concept of how these buffs work.
Once the person with the Viral Supressor buff damages Raneiks, he splits into a bunch of Servitors who will also be invulnerable. After some time, they will retreat and reassemble the boss.
Each Servitor has a number assigned to them. You have to pick up the Suppressor buff, pop the boss using it, and then look for a pair of servitors with glowing rings, noting the number in their names. Go back and shoot down the panels with numbers at the start to start the damage phase.
Repeat the process 4 times and make sure you deal enough damage to finish the boss off on the fourth damage phase, otherwise your team will be wiped.
The Corrupted Puppeteer – 2nd Encounter
As you advance deeper into Vesper's Host, the second major encounter introduces you to the Corrupted Puppeteer. Unlike the first boss fight, this encounter is more complex and puzzle-heavy, though the presence of a number-based mechanic will feel familiar. To start, you’ll find yourself in a relatively small room, and immediately, the Puppeteer summons waves of enemies to overwhelm you. Your priority here is managing these adds while paying attention to the environment, as the key to defeating the boss lies in the puzzle.
Much like the previous boss encounter, the Corrupted Puppeteer is protected by a shield that makes him invulnerable to any damage. This means you won’t be able to attack him directly right away. Scattered throughout the room, you’ll notice a series of glowing numbers. The core mechanic of this encounter revolves around these numbers, and your goal is to shoot the correct ones to solve the puzzle.

Step 1: Solving the Number Puzzle
The room is marked with numbers, each representing doors that lead to various side rooms. Your task is to shoot specific numbers in a particular sequence. Identifying which numbers to shoot is the tricky part, as the correct sequence is tied to subtle clues that can appear in the environment, such as markings or indicators on the walls, or a recurring pattern in the fight. Pay attention to these clues, as shooting the wrong number will waste valuable time and might spawn additional enemies.
Once you’ve successfully shot the right sequence of numbers, doors will open, allowing you access to different rooms.
Step 2: Bomb Room and Handling Enemies
Once the doors are open, you will need to fight your way through more enemies that the boss continues to summon. Be prepared for waves of tougher adds, and coordinate with your team to manage these while progressing through the opened rooms. In one of these rooms, you’ll encounter a bomb, a critical element of this phase of the fight. Defeating the enemies inside the room allows you to claim the bomb, which must then be transported to a specific area known as the "bunker room."
Step 3: Dunking the Bomb and Triggering the Explosion
After collecting the bomb, your goal is to carry it and deposit (or "dunk") it into a designated bunker area located in one of the newly unlocked rooms. The bomb's location will vary based on how you progress through the encounter, so it’s important to work quickly and efficiently to avoid being overwhelmed by enemies while moving the bomb.
Once the bomb has been placed in the bunker, an explosion will be triggered. This explosion is crucial because it significantly weakens the Corrupted Puppeteer’s shield, making him vulnerable and initiating the damage phase. Coordination is key here, as you only have a limited window to complete this bomb-dunking process and trigger the explosion before the enemies become too numerous to handle.
Step 4: Elevator to the Upper Arena and Damage Phase
Once the explosion occurs and the boss’s shield is weakened, the fight progresses to the next phase. You’ll need to move quickly to an elevator that takes you to a larger, more open arena above. This arena provides the space you need to deal damage, but it also exposes you to more risks, as enemies may continue to spawn, and the boss will have new attacks to throw at you.
The damage phase is a critical moment in the encounter. The goal here is to unleash as much damage as possible while the boss is vulnerable. This phase won't last long, so ensure your team is fully prepared to coordinate your strongest abilities and attacks. If executed efficiently, you should be able to deplete around 15% of the Corrupted Puppeteer’s health in this phase. While this may not seem like much, it is a significant chunk, and over multiple damage phases, it will eventually bring him down.
Step 5: Repeat and Adapt
After the damage phase concludes, the boss will regain his shield, forcing you to repeat the previous steps. You’ll return to the smaller room, face more waves of enemies, and once again need to solve the number puzzle to unlock the rooms, find the bomb, and deposit it into the bunker to trigger another explosion. Each cycle of this process will chip away at the boss’s health, with each subsequent damage phase giving you another opportunity to lower his health further.
As the fight progresses, the difficulty may increase, with more enemies spawning and the puzzle becoming trickier, so be ready to adapt your strategy. Make sure to manage the adds efficiently, communicate clearly with your team to solve the puzzle and carry the bomb, and maximize your damage during the limited windows when the boss is vulnerable.
Final Tips for Defeating The Corrupted Puppeteer
- Puzzle Focus: Ensure that one or two players focus on solving the number puzzle while others deal with enemies. Clear communication is vital to keep the fight moving smoothly.
- Add Management: The waves of enemies will become more intense as the fight continues, so having someone dedicated to crowd control or AoE damage will make it easier to keep the room clear.
- Damage Phase Preparation: Have your team's abilities, cooldowns, and damage buffs ready for the damage phase. Timing your high-damage abilities here can make a huge difference in how quickly you defeat the boss.
By following these steps and staying coordinated with your team, you’ll gradually wear down the Corrupted Puppeteer’s defenses and defeat him.


Destiny 2 Vesper's Host Secret Chests Locations & Rogue Network Quest Walkthrough
If you’re looking to unlock the secret chest in the Vesper's Host dungeon, here’s a step-by-step guide to help you out. You’ll need to complete the dungeon first and unlock the First Level Clearance by progressing in Spider's quest.
Step 1: Complete the Dungeon
After finishing the dungeon, make sure to interact with the terminal located to the left of the final chest. This will start a quest that requires you to collect three messages within the dungeon.
Step 2: Collect the Messages
Here’s how to find each message:
- First Message:
Re-enter the dungeon, and after the first encounter, head to the room marked with a red indicator above the doorway to the right. Inside, you'll find circular plates on the floor. One of them will be blinking; step on it to start the sequence. Continue stepping on the blinking plates until all of them are lit up. Completing this will give you the first message.
- Second Message:
Navigate through the servitor maze, and in the first half, look for another set of panels. In the room with the first nuke box, there’s a terminal you need to interact with. This will display a map showing the order of the plates you need to activate. Step on the indicated plates until all are lit, and you’ll receive the second message.
- Third Message:
Proceed to the jumping puzzle after the first encounter, where you’ll encounter orange lightning. Right before you jump onto the stationary arm, there’s another terminal. Interact with it, and it will show you the next plate to activate. Keep in mind that the display may be flipped horizontally, so some trial and error may be necessary. Light up all the plates to get the third message.
Step 3: Unlock the Secret Chest
After collecting all three messages, you’ll gain a First Level Access token, which allows you to access the first secret chest located in the servitor maze.

Unlocking the Second and Third Secret Chests
All of the secret chests and their puzzles tie into the completion of the quest, so consider this a Rogue Network quest walkthrough. To unlock the second secret chest, start after the second encounter. The first number pad is located near the Brig area. Jump across the platforms and turn around halfway; you’ll find the first pad on the wall. The fourth number pad can be found at the top of the area, positioned between the N9 and N10 circular plates before entering. After shooting all the required numbers, move to the second security clearance door you previously encountered.
On the wall beside this door, four numbers will be visible, and to your left, you'll see an operator buff. Picking up the operator buff allows you to shoot the pads beneath it, aligning the panels to reveal the numbers 1 through 4.
To unlock the chest:
- Shoot the Fourth Panel: This displays the number 4.
- Shoot the Second Panel: This displays the number 2.
Enter the code 42, obtained from Spider, by shooting the fourth panel and the second panel. Loot the chest to receive your class item for the dungeon, as this is the only way to obtain it.
This action also progresses the quest, prompting a visit to Spider. The reason for the code 42 relates to the class item, which includes the "Tech notice 42". All loot from the dungeon has a corresponding number that can be entered in this room. To locate these codes, access your collections, navigate to badges, select Vesper's Host, and view the associated armor and weapons. This feature enables you to farm specific items each week, guaranteeing drops by entering the respective codes.
Third Secret Chest
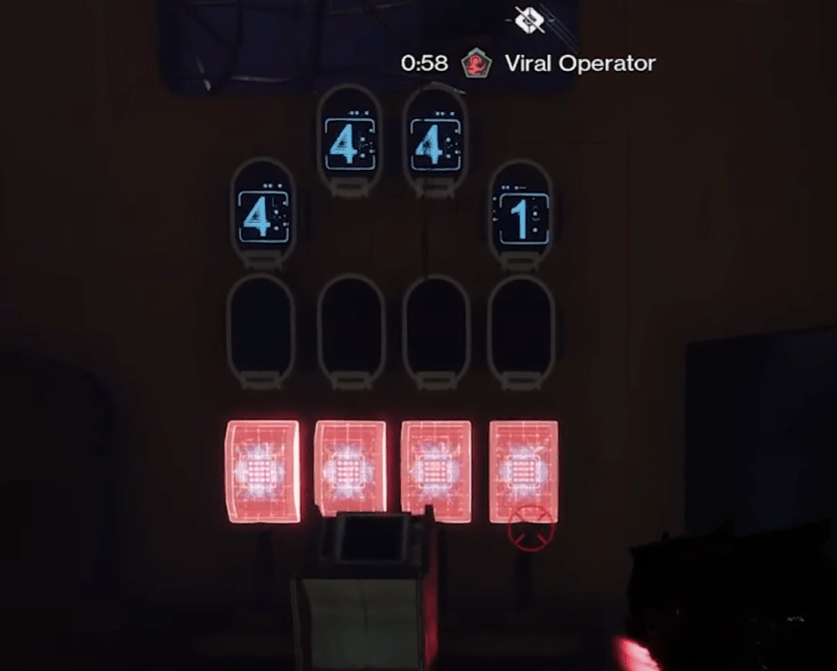
After obtaining the second chest, restart the dungeon to tackle additional puzzles. Return to the heart room after completing the first encounter; this is where new puzzles will commence. In front of the terminals with the augment buffs, you’ll see red numbers alongside blue screens displaying numbers. Your goal is to identify four numbers that add up to the left-side number.
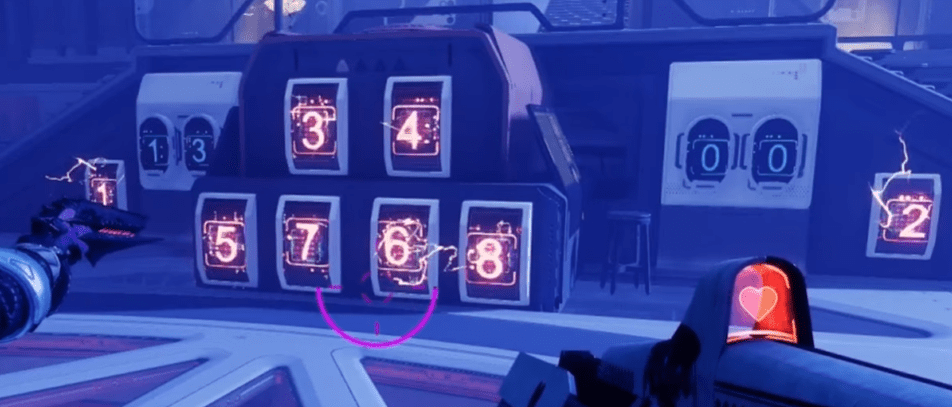
For example, if the number is 13:
- Choose Numbers: Shoot 6, 4, 1, and 2 to achieve the total of 13.
The specific numbers will vary for each player, so locate four numbers that meet the requirement. After successfully matching the numbers, you’ll receive an Ascended Alloy and can collect your message.
Next, after the Servitor Maze encounter, before jumping over the gap, turn around and shoot the blue numbers to stop them. Although it may not be necessary to shoot the four number pads each time, it’s prudent to do so.
After crossing the gap, you’ll encounter a terminal with the operator buff. This room will contain red numbers and two sets of blue numbers. The number on the right indicates what you need to multiply to achieve the target.
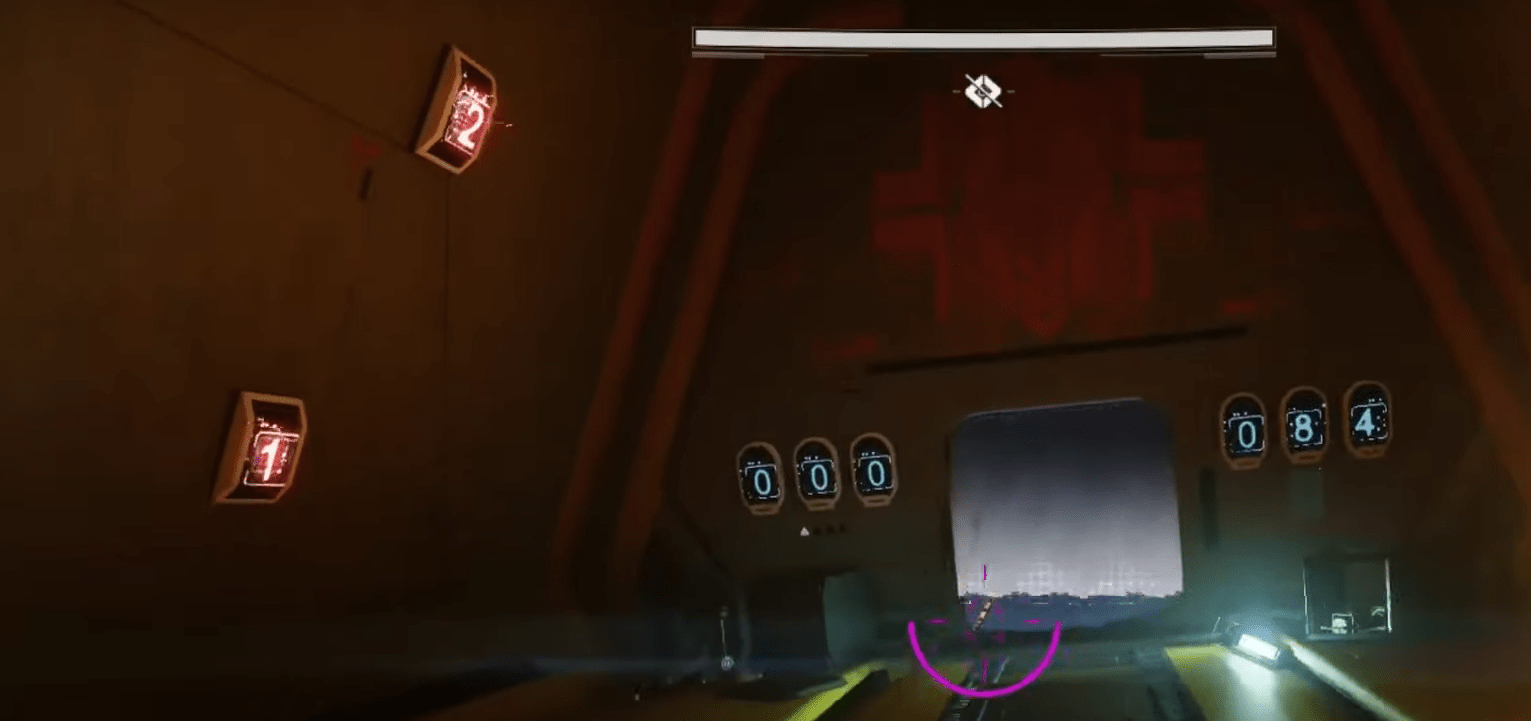
For example, if you need 84:
- Choose Numbers: Shoot 4, 3, 7, and 1, as 4×3×7×1=84.
Completing this puzzle will yield another Ascended Alloy and a message. Next, proceed to the stairs before reaching the security clearance door. Clear out any enemies, and at the top, you’ll find a more complex puzzle.
This puzzle involves two sets of panels on the left and right, and six blue panels in the middle with three numbers. Your task is to shoot four numbers that sum to the left-side total and four that match the right-side total, which can be multiplied to reach the large middle number.
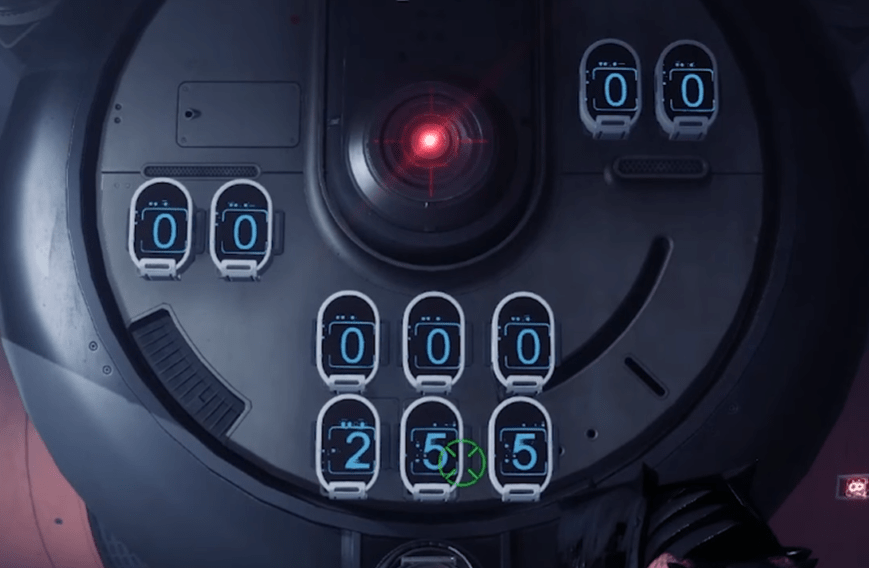
For example, to reach 255:
- Identify Divisors: Check for divisors like 15 and 17.
- For 15: Shoot 1, 2, 4, and 8.
- For 17: Shoot 1, 2, 6, and 8.
Successfully completing this will provide another Ascended Alloy and a message.
Final Puzzle and Rewards
With these puzzles complete, return to the level two security door located in the next room. Grab the operator buff again; you can shoot three numbers to focus on armor if desired.
Before finalizing your focus for weapons, head outside and veer left instead of dropping to the platforms. You’ll find a small gap in the wall leading to a challenging puzzle. In this room, a chest sits in the center surrounded by four pillars, each adorned with numerous numbers. Number the pillars as follows: top left, top right, bottom left, and bottom right.
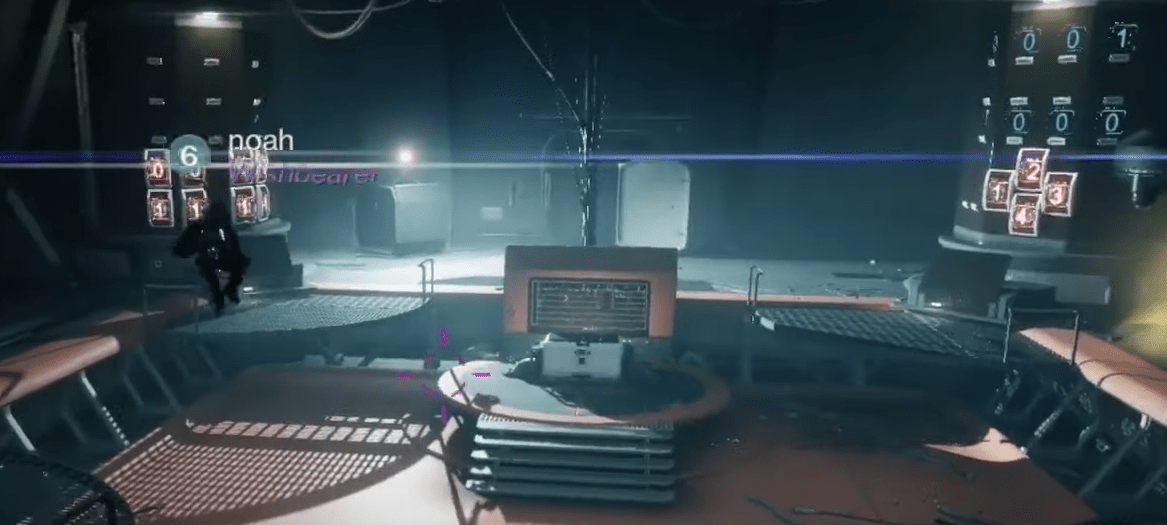
To tackle this puzzle, follow these steps:
- Activate the Top Right Pillar: Shoot 1, 0, 0, 0 (to equal 1,000).
- Activate the Bottom Right Pillar: Shoot the top right numbers 4, 1, 1, 1, 4.
- Activate the Bottom Left Pillar: Aim for the bottom right to shoot 0, 0, 1, 1.
- Activate the Top Left Pillar: Shoot 1 at the bottom left.
- Activate the Bottom Right Pillar: Shoot 0, 1, 0, 0.
- Activate the Bottom Left Pillar: Shoot 0, 0, 1, 0.
- Activate the Bottom Right Pillar Again: Shoot 3 at the bottom left.
- Go to the Top Right: Activate it, shooting 3 again at the bottom left.
- Finally, go to the Top Left: Shoot 1, 1, 4 at the top right.
Completing this intricate puzzle will grant access to additional rewards.
Destiny 2 Vesper's Host Loot Table

Just like previous dungeons, Vesper's Host loot table offers some very cool and exclusive items to add to your collection. Check them out:
| Category | Item Name | Type | Source Encounter |
| Weapons | Ice Breaker | Exotic Sniper Rifle | Vesper Station |
| VS Velocity Baton | Special Grenade Launcher | Vesper Station | |
| VS Chill Inhibitor | Heavy Grenade Launcher | Raneiks Unified | |
| VS Gravitic Arrest | Fusion Rifle | Raneiks Unified | |
| VS Pyroelectric Propellant | Auto Rifle | Corrupted Puppeteer | |
| Armor | Spacewalk Armor | Armor set | Vesper Station |
| Exotics | VS Tech Sledge | Exotic Sparrow | Various Encounters |
| Emblems | Anomalous Emblem | Cosmetic Item | Various Encounters |
| Station’s Servitor Emblem | Cosmetic Item | Various Encounters | |
| Vespertine Emblem | Cosmetic Item | Various Encounters |
Besides the Vesper's Host weapons and armor, there's a Twitch drop emblem called Effortless Flow.
Ice Breaker - Vesper's Host Weapons Exotic
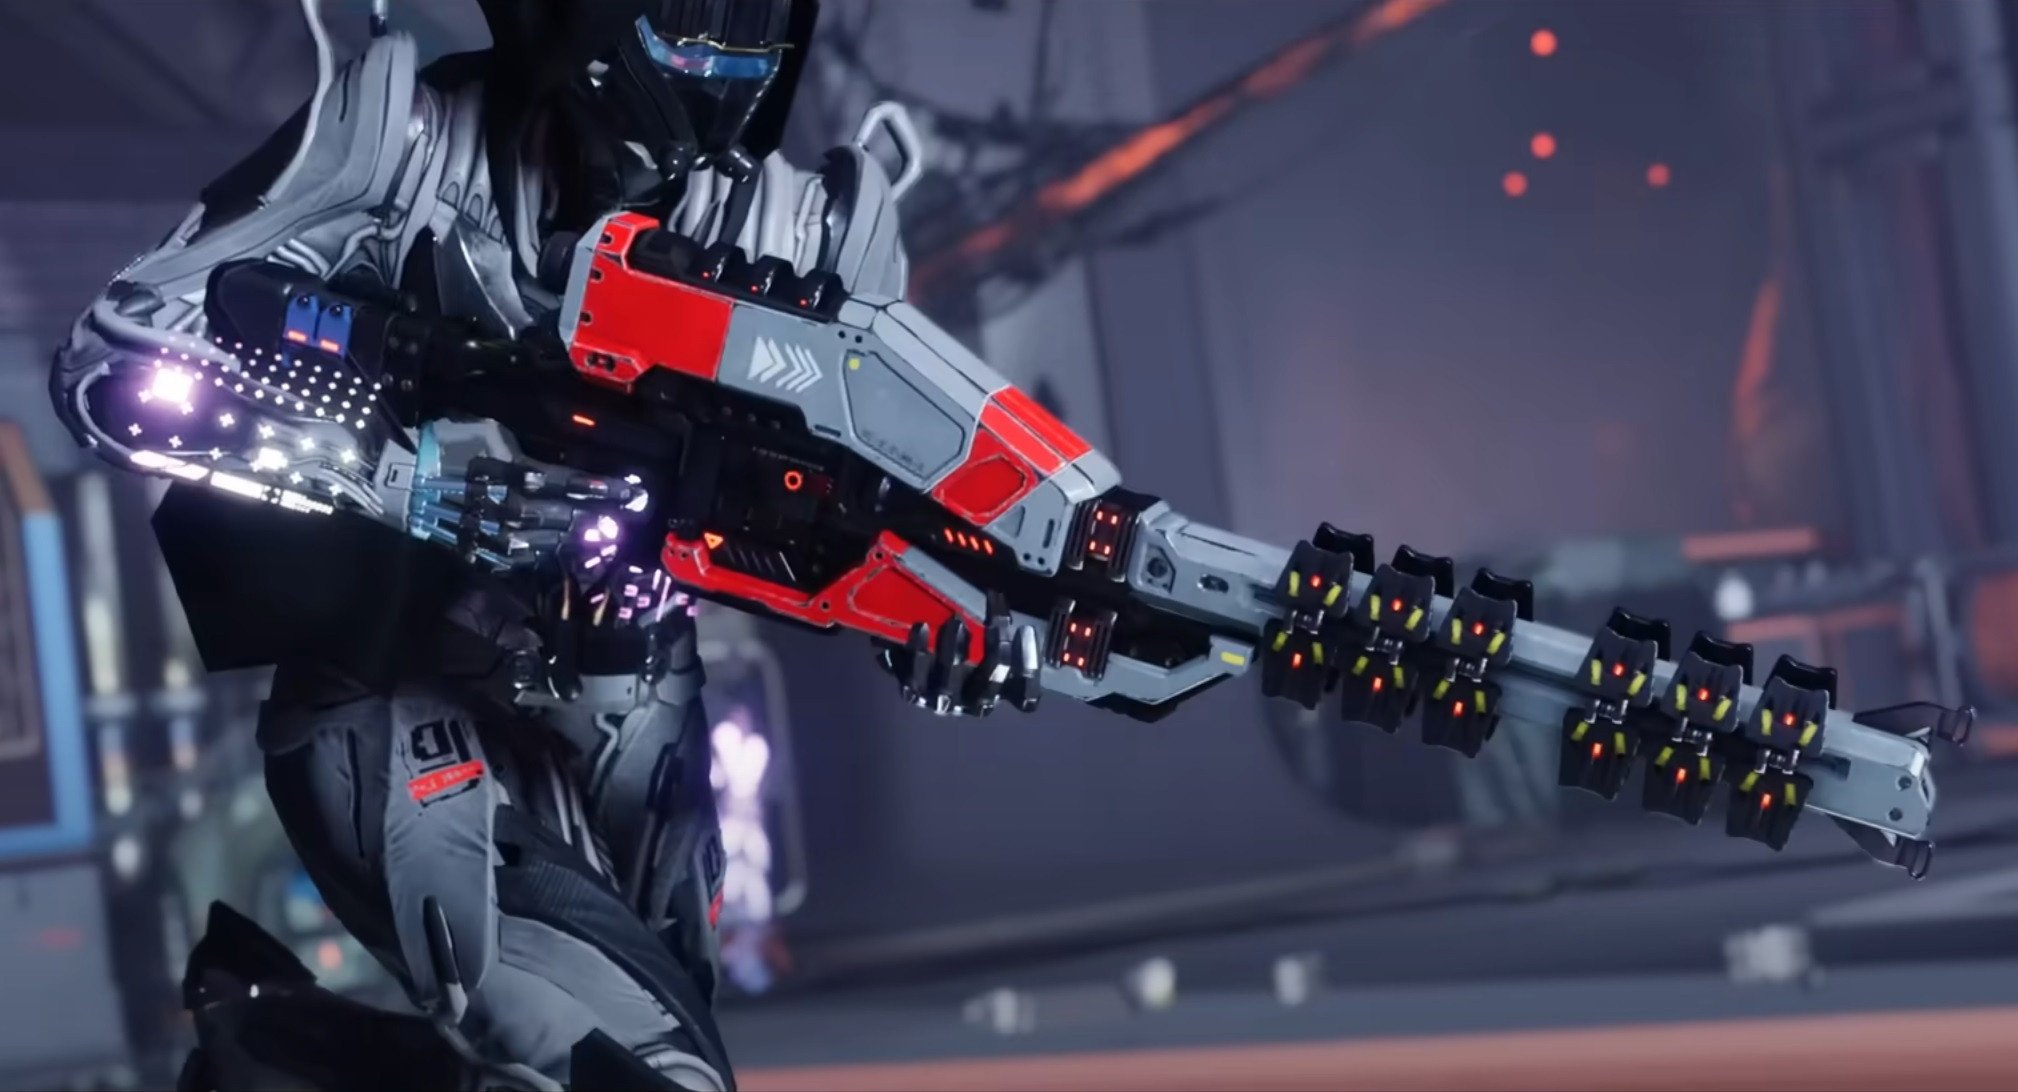
Let's talk a bit about the Vesper's Host exotic returning from the first Destiny - Ice Breaker.
This highly anticipated weapon revives a fan-favorite from Destiny 1, featuring perks that enhance its utility and damage potential.
Exotic Perks and Traits
Ice Breaker comes with unique perks, including:
- No Backpack: This perk enables passive ammo generation. Final blows or assists with any weapon or ability can create ammo for Ice Breaker, while defeating powerful enemies generates multiple rounds.
- Ice Breaker: Eliminating a target with this weapon causes them to explode. Precision kills or defeating a frozen target trigger an ignition effect.
Other traits, such as Corkscrew Rifling and Accurized Rounds, enhance range and stability.
Catalyst and Lore
The weapon features an Exotic Catalyst named Icing-Breaker, which offers a chance to return ammo to the magazine when hitting slowed or frozen targets. The lore surrounding Ice Breaker hints at its complex history, connecting it to various combat technologies and the challenges encountered during its creation.
Acquisition
Players can obtain Ice Breaker as a random drop after defeating the final boss in the dungeon. Importantly, completing the dungeon during its Contest Mode guarantees a drop for all fireteam members, increasing its desirability. Completion will be much easier if you follow this Episode Revenant dungeon guide, as it now has been fully updated.
Destiny 2 Vesper's Host Armor Set

Continuing our Destiny 2 Vesper’s Host walkthrough, players can earn the stunning Spacewalk armor set by overcoming the dungeon's various challenges. Each piece of this set reflects the menacing and elemental atmosphere of the dungeon, with jagged, molten shards and angular designs forming the core aesthetic. The fiery orange and deep red hues, combined with glowing cracks, give the impression that the armor has been forged in volcanic heat. The set’s sharp, crystallized structures protruding from the armor, along with its battle-hardened appearance, create a cohesive and imposing look for each Guardian class. This thematic connection between the armor and the high-tech, dangerous environment of Vesper’s Host makes the Revenant set a rewarding and visually striking outcome for those who triumph over the dungeon’s formidable bosses. BLOG20
Conclusion
In conclusion, D2 Vesper's Host delivers on its promise as a formidable addition to Destiny 2's endgame content. Now that the dungeon is live, players have been tackling its intense encounters, especially during the launch weekend’s contest mode, which pushed fireteams to their limits with its capped power levels. Those who managed to conquer it in this mode were rewarded with the highly sought-after Ice Breaker, the Exotic sniper rifle making its return, as well as the exclusive Orbital Tournament emblem. With our Vesper's Host guide, we hope that you managed to beat the dungeon as well!
The dungeon’s boss encounters have proven to be challenging yet rewarding, with Atraks making a return in a thrilling, lore-rich setting that ties directly to the Deep Stone Crypt raid. The loot table offers some impressive gear, with an armor set that evokes the aesthetics of Braytech and the Vex, adding a sense of continuity for long-time players familiar with the game's lore. Along with these thematic ties, the dungeon has solidified itself as a must-play for those looking to earn high-level rewards and tackle some of the most difficult content currently available in the game.
Whether you're diving into Vesper’s Host to complete its Triumphs, hunt for Ice Breaker, or simply enjoy the new dungeon experience with friends, it stands as one of the most challenging and rewarding activities available in Destiny 2.
F.A.Q.
How do you complete Vesper’s Host?
To complete Vesper's Host, you need to master its mechanics like managing energy fields and Vex data streams. Focus on utilizing buffs and gear effectively during boss damage phases. Success comes from a balance of strategy and firepower.
What is the best weapon for solo Vesper’s Host?
Sunshot is recommended for soloing Vesper's Host due to its explosive capabilities and ease of use.
What guns should I use in Vesper’s Host?
Consider using:
- Riptide
- Sunshot
- Apex Predator
Do I need the dungeon key for Vesper’s Host?
Yes, you need the Final Shape Dungeon Key to access Vesper’s Host.
How do I get the Vesper’s Host dungeon key?
You can buy the Final Shape Dungeon Key from the Eververse Store for 2000 Silver.
Is Vesper’s Host a free dungeon?
No, you need either The Final Shape + Annual Pass or the Final Shape Dungeon Key to unlock it.
Where to find secret chests in Vesper’s Host?
First, you need to complete the dungeon once and progress the "Rogue Network" quest to the next stage. Then, you need to locate and collect 3 messages, after which you'll be able to find and open the first secret chest. More chests will be revealed in the coming weeks.