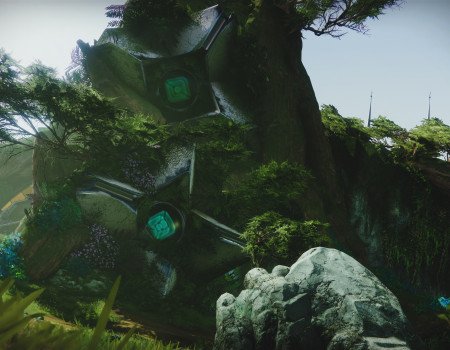
With the launch of The Final Shape, players have got tons of content. Among the most vital activities are a new Campaign and the Salvation Edge raid. The latter is full of complex encounters and mechanics you need to be aware of to succeed. In our Salvation’s Edge raid guide, we will explain all the intricacies of the most difficult activity added within this expansion.
Within the following pages, you will also learn when does Salvation’s Edge start. The same goes for the raid’s requirements, and so on. Completing this activity is a crucial step if you do not want to lag behind others. In case you are stuck or want to earn the Day One Emblem, Skycoach is here for you. On our website, you can Get Salvation’s Edge Week One Boost at the best market price. Let our PROs take care of the grind for you and enjoy the exclusive rewards.
IMPORTANT NOTE: Apart from reading our guide, you can also Buy Destiny 2 Boost from Skycoach. We offer a wide range of products at the lowest market price and with the fastest delivery. You can make your first purchase even CHEAPER if you find a special PROMO CODE (highlighted in green) hidden in this article and get a 20% DISCOUNT.
How to Start Salvation’s Edge
Pale Heart is the area where you can start working on the Salvation’s Edge. This is the main destination we are dealing with in the latest expansion. Instead of getting there by foot, you can start the raid via the map in your menu.
Salvation’s Edge became available at 10am PST/7pm CEST on Friday, June 7. From this point, you have 24 hours to complete the raid to get the Day One Emblem. The Contest Mode will also be active, meaning you can get exclusive rewards for finishing it within 48 hours.
Salvation’s Edge Requirements
If you cannot wait to jump into the brand-new raid, you need to meet the following Salvation’s Edge requirements:
- Complete The Final Shape Campaign
- Reach 1965 Power Level
While it does not seem like a big deal, we recommend finishing the campaign on the Legendary difficulty. By doing so, you can get closer to the required Salvation’s Edge power level of 1965. As a comparison, you will only reach a power level of 1940 by completing its Normal version.
You can enter the raid at earlier levels, but it is unlikely you will be able to get through any of its encounters. If you still decide to stick to the Normal version, you can at least do the Wild Card quest after you are done with the campaign.
Salvation’s Edge Loot Table
As always, we have plenty of unique rewards you can get by completing the raid. Most of them are brand-new Legendary guns. You can also find stunning Armor Sets for all three classes and a bunch of cosmetic items. Now, let’s jump to Salvation’s Edge loot table presented below:
| Reward | Type |
| Critical Anomaly | Legendary Sniper Rifle |
| Forthcoming Devlance | Legendary Glaive |
| Imminence | Legendary Submachine Gun |
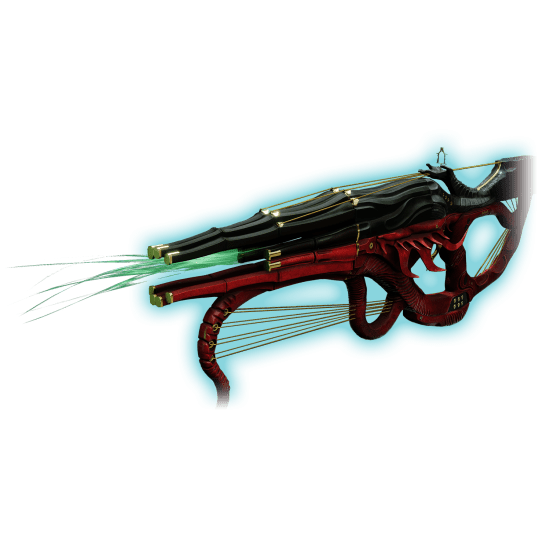
| Non-Denouncement | Legendary Combat Bow |
| Nullify | Legendary Pulse Rifle |
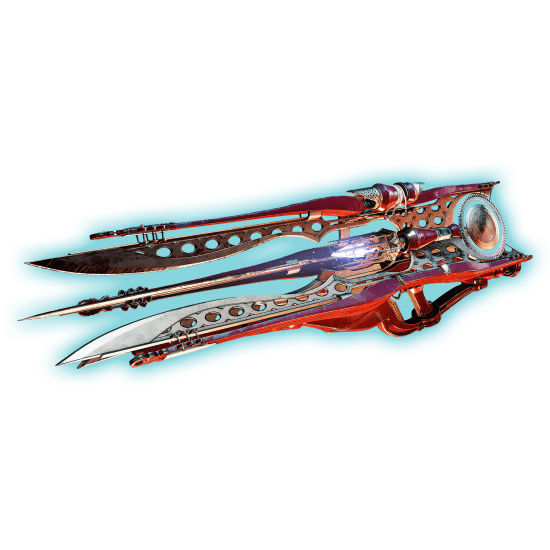
| Summum Bonum | Legendary Sword |
| Edification | Emblem |
| Timeless Bond | Exotic Ghost Shell |
| Turmoil Engine | Exotic Sparrow |
| Promised Reign | Hunter Raid Armor Set |
| Promised Victory | Warlock Raid Armor Set |
| Promised Reunion | Titan Raid Armor Set |
Apart from the items you see in the list above, you can also obtain Salvation’s Edge Exotic gun. This is going to be the greatest reward you can possibly earn from this activity. All other rewards seem like nothing compared to it.
It is particularly difficult to predict what Salvation’s Edge weapons will take their place in the current meta. Our team will need some time to run the tests to see, which of them are worth your attention.
For now, we only have a few speculations on what guns are going to be powerful enough. They are Nullify, Summum Bonum, and Critical Anomaly. Once we get more details, we will update this part of the article. As for other Salvation’s Edge rewards, they do not look too promising. Some players might want to use the raid’s unique armor due to its fancy look only. The same goes for cosmetic items if you find them appealing and suiting your style. BLOG20
To learn more details about the raid's loot, read our separate article on Salvation's Edge Loot available by clicking this blue link.
Salvation’s Edge Walkthrough
The largest segment of our guide is devoted to Salvation’s Edge walkthrough you can find here. Currently, we do not have confirmed information on how many encounters the raid will have. We also do not know what bosses you will have to face off against. You will find these and other details once the activity goes live today.
We will explain how to do Salvation’s Edge step by step and describe every boss separately. This description will include their main mechanics, as well as abilities and other things you need to know about to defeat them.
Substratum Encounter
Substratum is Salvation’s Edge first encounter players have to complete. To start this phase, make sure your firetime is standing near the doors. No matter how many people you have, everyone should gather simultaneously. Once you are all there, you can access a chamber. Inside it, you will spot a golden box, accepting a Resonance. At this point, see if all the team members are present in the room to make a Resonance spawn. After it does, take it and put it into the box.
This is where the action truly starts! You will see two hands dropping through the ceiling. They will also spawn triangles your team needs to avoid. Otherwise, you will suffer tons of damage. Standing under these hands is also a red flag, as it will wipe you quickly.
As the encounter goes on, you will notice the two doors open. After that, you will face the following types of enemies that must be slain:
- Weavers
- Goblins
- Hobgoblins
- Vex
We highly recommend that you focus on killing Weavers first. The main reason for this is their Dusk Grenades, dealing overwhelming damage. It is also essential to split your team into two separate groups for your own convenience and maximum efficiency.
Killing enough mobs will make a Hydra spawn in both rooms. Each team should deal with its own Hydra to open up a way to the next room. There, you will face off against a Hydra and Minotaur. Slaying them as quickly as possible is crucial here. The faster one team does this, the sooner another team will be able to open its doors.
Once both doors are open, return to the middle of the arena and start fighting a Tormentor. Slaying him opens two more doors. Here, the process is similar, with the only difference being that an Overload Champion spawns this time. Once he is defeated, you will see two linked plates illuminating. Meanwhile, you will see another Tormentor spawning in the center. You can either kill him altogether or split into two teams again. If you go for the second option, another team should be looking for the plate.
Two illuminating plates will materialize, marking the ends of the line you need to form. Meanwhile, a central plate will remain unilluminated. Each team member should take a plate. When the glowing line extends to their plate's position (not when the plate itself pulses), the two players stationed at the glowing plates should step onto them. This action will extend the glowing line to the third plate. Subsequently, the middle player should stand on this plate when the line reaches them.
The other team should focus on slaying the second tormentor, positioned at the room's center, along with any yellow-bar enemies and mobs to ensure the safety of the plate team.
If executed correctly, Resonance will spawn throughout the room. Grab them quickly, then aim to shoot the black pillar monoliths. These pillars will open up, revealing a golden node that needs to be shot and shattered. You will have a brief window of opportunity to achieve this, and the more Resonance stacks you accumulate, the more damage you will inflict on the pillar. Aim for just three Resonance stacks, as that is the number of Resonance that will appear in your room.
Once you destroy the pillar, you will activate it, earning a new Resonance that you can deposit in the center box.
Killing more tormentors will cause new plates to illuminate. Keep repeating this process until you have successfully shattered each of the pillars in the side rooms. However, be cautious — if you surpass two rounds, you will encounter new minibosses. Defeating the third Tormentor will summon a Subjugator, while defeating the fourth Tormentor will bring forth a Statis Subjugator.
Herald of Finality Encounter
Herald of Finality is the second encounter you will stumble upon in Salvation’s Edge. This part of the fight includes both playing around the plate mechanics as well as DPS checking. In fact, it strongly resembles the Substratum encounter with the addition of a real boss. The battle begins once you shoot the Taken blight located in the middle of the area.
Soon, you will spot several totems scattered around the zone. Each is placed in a different part — middle, left, and right. Here, you need to split your team into three, each consisting of two people. There will be two plates in each area, meaning you need to work as a team. It is basically the ping-pong mechanic you have already seen in the previous encounter. This time, both Resonance triangles and Resonance orbes will appear.
When three players receive a buff named Call to Reckoning, they should head to the center of the arena where the boss awaits. Once there, they need to search for Taken blights and slay them. Doing so will make the boss vulnerable to damage (until then, he takes no damage at all), allowing players to land critical shots on its head. This action grants them a buff named Stolen Favor, which unveils the correct shape required for their totem.
By learning the correct shape, you can make the Resonance buff spawn. Then, you need to collect the right shape and shoot the totems as before. On each side of the area, you will also spot a powerful enemy called Trammel of Conflict. They can be of several varieties, such as:
- Phalanx
- Wizard
- Ogre
Your task is to get rid of them before they can reach a corresponding totem. If you let this happen, your entire team dies, and you start over again.
Once all three totems are charged, you can make a Resonance box appear in the back of the area. Make sure every player deposits their Resonance to begin the DPS-check phase. You will have to repeat these actions before Herald of Finality is defeated.
Repository Encounter
Salvation’s Edge third encounter revolves around carving a path as you get closer to the Witness. Just as before, you will see a ton of plates a pads here again. Throughout the fight, hordes of ads will attack you from all directions. Work together to get rid of them, as you will face off against a much harder opponent further in the raid.
One of the tough enemies we have just mentioned is Threshold Sentinel. He will spawn immediately after the encounter starts. Eliminating him, along with all the swarming ads, is an essential step before you proceed to the mechanics. Just like in two previous encounters, you will have to work with the plate mechanic again. The only difference is that you will have triangles, orbs, and cubes this time around.
Here comes the ping-pong feature again. Charge the plates, totems appear, shoot them, and get Resonance. Then, deposit it into the box at the back of the arena and proceed to the next part of the encounter.
The second room is no different from the previous one. Get rid of the Tormentor and the Witness, charge the plates, and deposit Resonance. Once you are done, you are good to go to the final room of this encounter.
Once you arrive at the final stage, watch where you step and jump. There will be a lot of platforming and jumping here, which can cause you to fall and have to start again. Still, the main idea remains unchanged here. You need to activate three totems while also dealing with three Tormentors along the way. Once you do this, deposit Resonance to make a Champion spawn. Defeating him ends the third encounter in Salvation’s Edge.
Verity Encounter
The Verity puzzle is the fourth encounter you stumble upon in Salvation’s Edge. This is where things get super tough. Even the greatest Destiny 2 players spent hours trying to complete it for the first time. Everything starts with you and your fireteam arriving at the snow-covered zone. There, you will see several Guardian statues. Take a closer look at them, and you will realize how strongly they resemble your entire fireteam. Find the statue that is glowing yellow, interact with it, and start the encounter.
Similarly to other encounters, your team will be split up again. Three people stay in the main room, and three solo players are teleported in separate rooms. There, they will see three statues, one for each solo player. They will hold the shapes you need to look at and give this info to your three teammates in the main room.
Each solo player needs to locate the statue depicting themselves and take note of the shape it is holding. During this phase, the primary objective for solo players is to exchange shapes with one another to ensure that the shapes displayed on the wall correspond to the shape held by their respective statues. For instance, if a player's statue is holding a triangle, the aim is to have two triangles depicted on the wall as well.
To exchange symbols, eliminate the Splintered Curator Knights, retrieve their shapes, and deposit them into the statues. It is crucial not to pick up multiple shapes simultaneously, as they will lump into a 3D object. Additionally, make sure you do not collect your own shape. Simply defeat the knights and place their shapes into the corresponding statue. For instance, if you have a triangle shape, deposit it into the statue holding a triangle.
Once each solo player has exchanged enough shapes with others, ensuring that two shapes on their walls match the one held by their statue, the next objective is to swap shapes once more. This time, the aim is for each solo player to have one of each shape — one on their statue and two on the wall. To achieve this, eliminate the Splintered Curators and retrieve your shape from the statue. Deposit it into one of the other statues and repeat the process for the third statue. This action will result in your shape disappearing from the statues in the other rooms, leaving each solo player with only one statue holding their shape.
As you continue to trade shapes, The Witness will notice your actions and periodically slay some solo players. However, the trio of players in the main room can revive fallen solo players by locating their Ghost in the main room and then transporting it to the statue of the deceased player near the room's entrance. It is crucial to deposit Ghosts in the correct order from left to right, as failure will result in the depositor being killed. Similarly, if the Ghost is brought to the wrong Guardian statue, the depositor will also die.
While the solo players trade shapes and contend with The Witness, the trio of players in the main room must focus on Dissecting statues and exchanging shapes among them. Each statue in the main room holds a 3D object formed by two shapes. Dissecting two statues consecutively swaps the shapes between them and alters their 3D objects.
Therefore, it is essential to coordinate within your group to decide the order in which you want to Dissect. For instance, if a cone comprises a triangle and a circle, and a cube consists of two squares, Dissecting a triangle from the cone and a square from the cube will exchange them. Consequently, the statues will now display a cylinder (formed by a square and a circle) and a pyramid (formed by a square and a triangle) instead.
In essence, the objective of the trio of players in the main room is to dissect statues strategically. Ensure that they end up bearing 3D objects formed by shapes not held by the statues of the solo players in their respective solo rooms.
For instance, if a solo player's statue in a solo room is holding a triangle, then the corresponding statue in the main room should ideally be holding a cylinder (formed by a square and a circle). This underscores the importance of solo players communicating the shapes of their statues in sequence from left to right. This allows the main room team to craft the appropriate 3D objects accordingly.
Once the statues in the solo rooms are holding the appropriate 3D objects, the solo players can leave their respective rooms and rejoin the main room. To do so, they must eliminate Knights and collect both shapes to acquire a 3D shape aura buff. This buff allows them to traverse through the glass wall at the room's rear, allowing them to reunion with the rest of the team in the main room.
Finally, with the entire fireteam reunited in the main room, The Witness will freeze and eliminate five players. The sole survivor must then revive everyone else by retrieving their Ghosts and depositing them at the appropriate statues from left to right. Once all team members are revived, three new players will be transported to solo rooms. Repeat this process for three full cycles to successfully conclude the Verity encounter. BLOG20
The Witness Encounter
The Witness is Salvation’s Edge final boss that players have to go through. The entire fight can be split up into the following phases:
- Figuring out the mechanics;
- DPS check.
Starting with the most interesting part, let’s cover the mechanics. When arriving at the arena, you will see the hands appearing with the bracelets on them. Any player can enter yellow AoE zones, shoot a bracelet, and see what Resonance is required.
Throughout the fight, you should be prepared to deal with the three options of the hands:
- The hands appear from the floor in the form of a flower, creating a round AoE zone. Standing in this zone lets you receive the Sphere Resonance;
- The hands descend from the sky, creating a crossing and a triangle AoE zone. Standing in this zone lets you receive the Pyramid Resonance;
- The hands appear from the walls, creating a crossing, but the AoE zone looks like a laser this time. Standing in this zone lets you receive the Cube Resonance.
Apart from the hands varieties, you also have the three bracelets options:
- Yellow = Circle (Sphere Resonance)
- Green = Triangle (Pyramid Resonance)
- Red = Cube (Cube Resonance)
Here is one of the examples of how your fight might look like. One player enters any AoE zone, shoots the bracelet on the “flower” hands, and sees the yellow color. Then, they should make a call to the entire team saying the “flower” hands equals yellow.
After that, any other player starts looking for a yellow AoE zone and stands in it for 2 seconds. Make sure not to stay there any longer, as it will explode in 4 seconds. They will be granted the Sphere Resonance buff. Then, they need to enter any zone and shoot the corresponding bracelet. If you shoot the right bracelet on the hand, it dies. After that, the player can destroy one button on the boss’s chest.
The mechanic repeats until The Witness has only one button left. Once the last button is destroyed, the DPS check phase starts. Also, be prepared for a one-shot mechanic you can dodge by jumping.
During the DPS check phase, you need to shoot at the boss’s heart in the chest. You only have 3 stages here before The Witness wipes the entire raid. Here, you will also have three versions of possible attacks, such as:
| Type | Description |
| First Attack | The first half of the arena is hit by the AoE attack. Once it is finished, the same happens with the second half. Make sure you stand closer to the middle of the arena and dodge the attack timely. |
| Second Attack | This is basically the same attack as the previous one with only one difference – it now happens diagonally. |
| Third Attack | The entire arena is covered during this type of attack. You can only dodge it by double jumping at the right time. Look at the boss’s hands, as they will start glowing before this attack happens. |
Speaking of glowing. Everyone should get out of the platform when the boss starts radiating the blue light. Otherwise, you will get wiped and have to start over again. Repeat all the steps described in the DPS check phase until The Witness is down.
Salvation’s Edge Secret Chests
Step carefully when progressing through the raid and always take your time to explore the surroundings. You might be lucky to find Salvation’s Edge secret chests scattered around the activity. If you can’t, you have come to the right place of our article. Here, we will list all their exact locations to ensure you get extra rewards.
First Secret Chest
The first secret chest can be found between the second and third encounters in Salvation’s Edge. To be more specific, it is located towards the end of the lengthy jump puzzle. Look for a long orange hallway with a bunch of giant cubes on the left side. There you will discover several rooms. You need the one located in the back left corner. Jump into it, crouch, and you will get the desired chest.
Second Secret Chest
The second secret chest can be found before the fight with The Witness. You are going to come across the area where you need to walk around a giant root spiral to get to the final boss. When moving through it, you will spot floating platforms that make their ways towards the center underneath the boss arena. There will be a couple of ledges you can jump on. Follow this chain and you will arrive at the cube room with the chest you are looking for.
Conclusion
This marks the end of our Destiny 2 Salvation’s Edge guide, Guardians. We hope you have found all the details you were after. Now, you are fully prepared to conquer this brand-new raid and claim its exclusive rewards. Apart from the powerful items, you will also learn an important part of the game’s lore.
Without a doubt, this activity is worth your attention from any perspective. As always, stay tuned, save this page to your bookmarks and return here later for the freshest updates. We will keep providing them for you once we learn any details.
F.A.Q.
Where are secret chests in Salvation's Edge?
The first secret chest can be discovered between the second and third encounters. The second secret chest will be waiting for you before The Witness fight.
How long is Salvation’s Edge?
The Salvation's Edge raid consists of 5 encounters, each revolving around solving the mechanics or slaying bosses.
How to defeat The Witness in Salvation’s Edge?
The final encounter consists of both solving the mechanics and dealing DPS to the boss. It is essential to prepare for the three different attacks by the hands with various bracelet colors.
What exotic do you get from Salvation’s Edge?
Euphony, Linear Fusion Rifle, is the raid Exotic you get from Salvation's Edge. It can randomly drop from the final boss, The Witness.
What are Salvation’s Edge level requirements?
It is recommended to hit a light level of 1965 before entering the Salvation’s Edge raid.
Is Salvation’s Edge difficult?
Salvation’s Edge has turned out to be one of the most difficult raids in the game’s history.
Do you need to complete The Final Shape campaign to do Salvation’s Edge?
One of the requirements to start Salvation’s Edge is to finish The Final Shape campaign first.
Why is Salvation’s Edge so easy?
Salvation’s Edge might seem easy only for well-prepared fireteams. Casual players will have to try hard to complete it, especially within the first 48 hours.
Can you solo Salvation’s Edge?
You need a full fireteam to complete Salvation’s Edge. Otherwise, you will not get past the first encounter and get wiped.
Where to find Salvation’s Edge in Destiny 2?
You can find Salvation’s Edge in the Pale Heart destination. As always, it is possible to launch this raid via the map.
Is Salvation’s Edge free to play?
To enter Salvation’s Edge, you need to have The Final Shape expansion purchased on your account.
Can you farm Salvation’s Edge raid?
You only have one attempt to farm Salvation's Edge per week per character. Once you use it, you can no longer hope for the Euphony Exotic drop.

