 Dallon Avery
It’s time to cover all large monsters in Monster Hunter Wilds. In this guide, we’ll go over their weaknesses to damage and elemental types, list their breakable and weak parts, reveal where they can be found, and provide tips on how to beat them. We won’t be covering Tempered and Frenzied monsters, as they are simply variations of standard monsters. However, we will highlight Guardian monsters, as they are not only a new type but also a unique species created to serve as Guardians in Wilds.
If you're eager to hunt these monsters but don’t want to spend hours grinding, you can Buy Monster Kills service at Skycoach. Their expert hunters will take down any monster you need, helping you farm rare materials, crowns, and Hunter Rank increases with ease. Whether you're after a specific monster or just want to clear multiple hunts quickly, Skycoach provides a fast, secure, and stress-free way to achieve your goals while you focus on the adventure.
Read our other articles:
- Artian Weapons Guide
- Multiplayer Guide
- Gearing Guide
- Best Builds for Each Weapon
- Most Useful Tips & Tricks
- Zenny Farming Guide
- Best Settings Guide
- Beginner's Guide
Note: At Skycoach, you can Buy Monster Hunter Wilds Boost at the best prices with fast delivery. Use our special PROMO CODE (in green) hidden in this article for a 20% DISCOUNT.
Browse our hottest Monster Hunter Wilds Boosting services


Chatacabra – A Hunter’s First Test
- Type: Amphibian
- Weakness: Thunder
- Breakable Parts: Arms, Tongue
Chatacabra is a cunning amphibian that uses its long tongue to seize and devour prey like Bulaqchi. This is also the first large monster hunt in the long Monster Hunter Wilds monster list that you’ll do. Its forelimbs store a sticky mucus-like substance, allowing it to gather stone and ore when agitated, reinforcing its arms for devastating attacks. Though not the most fearsome monster, its hardened strikes and extended tongue attacks make it a solid first challenge for hunters.
How to Beat Chatacabra
- Break its arms to remove the stone coating and weaken its attacks.
- Avoid its tongue attacks by dodging sideways—they have extended reach.
- Lure it into terrain traps, as it can sometimes get stuck in wall fissures, giving you free damage windows.
Where to Find It
Commonly found in Windward Plains. Appears in low and high-rank hunts.
Quematrice - The Fire-Tailed Menace
- Type: Brute Wyvern
- Weakness: Water
- Breakable Parts: Head, Tail
A Monster Hunter Wilds full monster roster would not be good enough without any new species, never seen before in older titles. Brute wyverns with disproportionately long tails. They spread a flammable substance which vaporizes quickly, then ignite it by dragging their tails along the ground. By nature, Quematrice rarely hunt their own prey, and instead scavenge herbivore carrion left behind by other predators. This often leads to confrontations with other, smaller carnivores.
How to Beat Quematrice
- Stay near its legs to avoid its sweeping tail attacks.
- Break its wounds to knock it down and limit its movement.
- Roll in water or use a Nullberry to remove Fireblight.
Where to Find It
Commonly found in Windward Plains. Appears in low and high-rank hunts.
Lala Barina – The Paralyzing Dancer

- Type: Temnoceran
- Weakness: Fire
- Breakable Parts: Petals, Claws
Temnocerans native to the Scarlet Forest with distinctive, pirouette-like movements. Their fluids contain a neuroplegic agent which they mix with water to produce red, petal-like bristles on their abdomens. When agitated, Lala Barina open these bristles like a deadly, blossoming flower and release them as florets that paralyze whatever they come into contact with.
How to Beat Lala Barina
- Avoid its paralyzing florets—getting hit too many times will leave you vulnerable.
- Focus attacks on its tail and claws to deal the most damage and weaken its movement.
- Lure it into a Turf War with Doshaguma for a big damage opportunity.
- Use traps and sneak attacks to get the upper hand.
Where to Find It
Commonly found in the Scarlet Forest. Appears in low and high-rank hunts.
Congalala – The Flatulent Fanged Beast
- Type: Fanged Beast
- Weakness: Fire
- Breakable Parts: Head, Tail, Forelegs, Rear
While there are Monster Hunter Wilds new and returning monsters, this one is definitely a returning one. Those who know, know.
Congalala is a mischievous yet dangerous Fanged Beast that uses its inflatable belly, toxic breath, and gas attacks to keep hunters off balance. Its behavior changes depending on what it eats—certain mushrooms allow it to inflict Poison, Paralysis, or Blastblight. It’s accompanied by small Congas, which can be a nuisance during the hunt.
How to Beat Congalala
- Bring Deodorants to remove Stench, which prevents item use.
- Interrupt it while eating to stop it from gaining enhanced breath attacks.
- Aim for its head, the weakest spot, and avoid attacking its tough belly.
- Clear out the smaller Congas first to prevent distractions.
Where to Find It
Commonly found in the Scarlet Forest. Appears in low and high-rank hunts.
Balahara – The Sandsea Stalker
- Type: Leviathan
- Weakness: Thunder
- Breakable Parts: Head, Chest, Back, Wings, Legs, Tail (cuttable)
Desert-dwelling leviathans that build carapaces out of the fulgurite formed by lightning strikes. They use their flexible skeletons and serpentine bodies to create quicksand traps for unwary prey. Inside their mouths are multiple eye-like sensory organs. The mucus they secrete contains luminous bacteria and is believed to aid visibility while they are submerged and other low-light conditions like sandstorms.
How to Beat Balahara
- Use Screamer Pods to force it out of hiding and briefly stun it.
- Strike its mouth while it spits mud for a chance to topple it.
- Stay mobile—most of its attacks are frontal, so dodging sideways is key.
- Knock down Fulagrite Pillars when it climbs them for big damage opportunities.
Where to Find It
Commonly found in the Windward Plains. Appears in low and high-rank hunts.
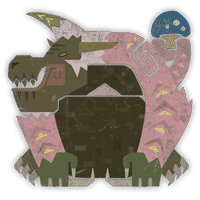
Doshaguma – The Alpha Juggernaut
- Type: Fanged Beast
- Weakness: Fire
- Breakable Parts: Forelegs (x2), Tail Hair
- Weak Point: Belly
Fanged beasts that are sometimes seen traveling in packs. Ruggedly built and extremely aggressive, Doshaguma won't hesitate to throw everything they've got at enemies - even other small monsters. They have been known to take prey back to their dens, which sometimes leads to violent disputes.
How to Beat Doshaguma
- Use Large Dung Pods to disperse its pack and isolate the alpha.
- Avoid its Ground Break attack by dodging sideways—never backward.
- Take advantage of Turf Wars to deal massive damage while it fights other monsters.
- Trigger Power Clashes by perfectly guarding its charging or claw slam attacks.
Where to Find It
Commonly found in the Windward Plains and Scarlet Forest. Appears in low and high-rank hunts.
Uth Duna – The Veiled Leviathan
- Type: Leviathan
- Weakness: Thunder
- Breakable Parts: Head, Forelegs, Tail
This one makes every large monster in Monster Hunter Wilds in that area run away with tails behind their legs. This is the first apex monster you will face.
The leviathan that reigns supreme over the Scarlet Forest's ecosystem. It has adapted to water-rich environments and is sighted most often during the Downpour. Uth Duna's secretions when combined with water form a protective veil that not only absorbs hostile blows but also adds weight, which it slams down with enough force to sweep away surrounding threats in the resulting wave.
How to Beat Uth Duna
- Target its veiled body parts when the veils are spread out for increased damage.
- Use Nulberries to cure Waterblight, which slows stamina recovery.
- Dodge sideways to avoid its charging and belly flop attacks.
- Knock down Dam Rubble in Area 15 to deal massive environmental damage.
Where to Find It
Commonly found in the Scarlet Forest. Appears in low and high-rank hunts.
Rompopolo – The Venomous Inferno
- Type: Brute Wyvern
- Weakness: Water
- Breakable Parts: Head, Forelegs, Back, Tail
Dappled brute wyverns that prowl Oilwell Basin. They use their tails to inject gas into the ground and detonate it, then feed on the small creatures that are unearthed. The toxic gas they spray from their tongues serve to weaken prey, which they then finish off with the blasts. Rompopolo are extremely territorial and will readily engage their own kind.
How to Beat Rompopolo
- Bring Antidotes or Herbal Medicine to counter its poison-based attacks.
- Lure it near Oilsilt Spouts and ignite them with Torch Pod Slinger ammo for explosive damage.
- Use Pitfall Traps to immobilize it and target its hard-to-reach back.
- Dodge sideways when it begins to spray poison or ignite oil beneath you.
Where to Find It
Commonly found in the Oilwell Basin. Appears in low and high-rank hunts.
Rey Dau – The Thunderclad Tyrant
- Type: Flying Wyvern
- Weakness: Ice
- Breakable Parts: Horns, Wings, Tail (cuttable)
The flying wyvern that reigns supreme over the Windward Plains' ecosystem. It has adapted to the Sandtide - when it most frequently appears - and is able to store, amplify, and discharge the storm's heavy lightning to lethal effect. Rey Dau is highly territorial and will attack any and all intruders on sight. The fulgurite against its carapace emits a sound that puts every monster in the region on guard.
How to Beat Rey Dau
- Use Flash Pods to knock it out of the air and create openings.
- Strike its horns when they overheat to topple it and deal massive damage.
- Bring Nulberries to cure Thunderblight, preventing follow-up stuns.
- Use Falling Boulders in Areas 7 and 17 to deal heavy damage.
- Dodge diagonally when it prepares lightning beams, avoiding direct hits.
Where to Find It
Commonly found in the Windward Plains. Appears in low and high-rank hunts.
Nerscylla – The Shadowed Webspinner
- Type: Temnoceran
- Weakness: Fire
- Breakable Parts: Mantle, Stinger x2, Left Claw
Nerscylla is a stealthy, web-weaving predator that lurks in the Iceshard Cliffs, waiting to ensnare unsuspecting prey. Using its paralyzing webbing and venomous fangs, it immobilizes hunters before moving in for the kill. Its stinger inflicts Sleep, making it even more dangerous if left unchecked. When hanging from webs, it can swing across the battlefield, but skilled hunters can flinch it mid-air, causing it to fall into its own traps.
How to Beat Nerscylla
- Bring Antidotes, Energy Drinks, and Cleansers to counter Poison, Sleep, and Webbed ailments.
- Avoid attacking its claws, as they are too tough and will deflect most strikes.
- Flinch it over its own webbing to trap it for free damage opportunities.
- Interrupt its mid-air swings using well-timed Slinger shots or Palico assists.
Where to Find It
Commonly found in the Iceshard Cliffs. Appears in low and high-rank hunts.
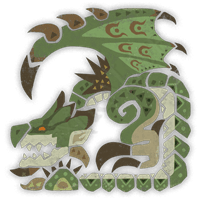
Hirabami – The Glacial Serpent
- Type: Leviathan
- Weakness: Fire
- Breakable Parts: Head, Tail
Leviathans that inhabit the Iceshard Cliffs. They have sharp, pincer like tails and peculiar membranes on their necks that catch the wind and keep them aloft. Hirabami can sometimes be sighted nesting in groups along the cliffs, using their scales or foreclaws to cling to walls or ceilings while they sleep.
How to Beat Hirabami
- Use Large Dung Pods to separate the pack and fight them one at a time.
- Break its tail to obtain Heavy Slicing Pods, which can bring it down from the air.
- Trigger Ice Spikes and Brittle Ice Pillars to deal massive environmental damage.
- Bring Cleansers to remove Frostblight, which reduces stamina recovery.
Where to Find It
Commonly found in the Iceshard Cliffs. Appears in low and high-rank hunts.
Ajarakan – The Scorching Simian
- Type: Fanged Beast
- Weakness: Water
- Breakable Parts: Back, Arms, Tail
Characterized by their highly developed carapaces, Ajarakan wrap themselves in molten metal that they rub together to heat up and create explosions. Presumably due to the friction of the metal, they can reach high enough temperatures to melt even the ground or bullets. They can also use their strong limbs to grip onto the ceiling and move around freely, so a hunter must watch out from every angle, including above.
How to Beat Ajarakan
- Beware its Ignition Phase – its attacks become deadlier and can cause lava eruptions.
- Target its Arms and Back – breaking these parts reduces its strength and rewards more loot.
- Bring Nulberries and Deodorant to counter Fireblight and Blastblight.
- Use Environmental Traps like Chillmantle Bugs to cool down its fiery state.
Where to Find It
Commonly found in the Oilwell Basin, appearing in low and high-rank hunts.
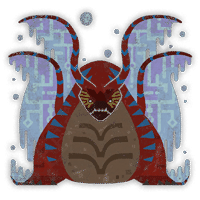
Nu Udra – The Black Flame Cephalopod
- Type: Cephalopod
- Weakness: Water
- Breakable Parts: Tentacles, Head, Horn
The cephalopod that reigns supreme over Oilwell Basin's ecosystem. Usually when sighted, Nu Udra is covered in oilsilt, but when enraged it will ignite the coating, transfiguring itself into a horror of flame. The oculi that appear on its body and many arms are presumed to be sensory organs, but the truth is still being investigated.
How to Beat Nu Udra
- Focus on the Tentacles First – These are the easiest parts to target and can limit Nu Udra’s mobility when damaged.
- Use Watermoss to douse its flames and prevent Fireblight buildup.
- Stay Alert for Flame Breath – This attack drains stamina if blocked, so dodging is preferred.
- Break its Head or Horn for better loot and to reduce its flame attacks.
Where to Find It
Nu Udra resides in the Oilwell Basin, appearing in high and low-rank quests.
Guardian Doshaguma
- Type: Construct
- Weakness: Fire
- Breakable Parts: TBD
Guardian Doshaguma is a mysterious, golem-like Construct found in the Ruins of Wyveria. Unlike its organic counterpart, this mechanical behemoth is designed for defense, utilizing shockwave-infused attacks and massive forelimb strikes to deter intruders. With its reinforced plating, Guardian Doshaguma can shrug off weaker hits, making blunt and severing weapons ideal for breaking through its defenses.
How to Beat Guardian Doshaguma
- Focus on the Forelegs – This allows you to topple the monster and avoid its claw swipes.
- Dodge Sideways – Many of its attacks trigger shockwaves, which can instantly follow up its slams and sweeps.
- Use Fire Weapons – Fire is its main weakness, so prioritize fire-based weapons to maximize damage.
Where to Find It
Guardian Doshaguma can be found in the Ruins of Wyveria, where it appears in both main and optional quests.
Guardian Ebony Odogaron

- Type: Construct
- Weakness: Water
- Breakable Parts: TBD
Guardian Ebony Odogaron is a mechanized enforcer found in the Ruins of Wyveria, resembling its organic counterpart but with reinforced plating and Dragon-elemental enhancements. With its agile movements, razor-sharp claws, and relentless attacks, this construct is a formidable opponent, capable of inflicting Dragonblight and Bleeding on unsuspecting hunters.
How to Beat Guardian Ebony Odogaron
- Immobilize It As Much As Possible – Use Great Thunderbugs and Flashflies to paralyze or blind it momentarily.
- Drop Entangled Rocks – Ceiling Entangled Rocks in some areas can knock it down for a huge opening.
- Flinch It Over Roots – Rooted floors can trap Guardian Ebony Odogaron if you flinch it on top of them.
- Explode Extended Roots – Use Frost Pods from Frostlanterns to damage it with environmental traps.
- Cure Dragonblight with Nulberries – Stock up on Nulberries to remove Dragonblight, which negates your elemental and status effects.
Where to Find It
Guardian Ebony Odogaron is primarily found in the Ruins of Wyveria, appearing in Assignments and Optional Quests.
Guardian Rathalos
- Type: Construct
- Weakness: Dragon
- Breakable Parts: Wings, Tail
Guardian Rathalos is an ancient mechanized wyvern, acting as the flaming sentinel of the Ruins of Wyveria. Unlike its organic counterpart, this construct monster can channel fire through Guardian Crystals, making it a dangerous battlefield manipulator. Avoid the flames, target its wings, and use environmental traps to your advantage!
How to Beat Guardian Rathalos
- Bring Nulberry to Counter Fireblight – Many of its attacks ignite hunters, so carry Nulberries to quickly remove Fireblight.
- Move Away from Guardian Crystals During Fire Attacks – Its fire-based moves trigger explosions when near Guardian Crystals. Stay clear!
- Use Flash Pods to Ground It – If Guardian Rathalos takes flight, a well-placed Flash Pod can knock it down, opening it up for melee attacks.
- Thunder & Dragon Pods Can Trigger Guardian Crystal Explosions – If Rathalos is near Guardian Crystals, use Thunder or Dragon Pods to cause explosions that stagger it.
- Focus on Its Wings and Tail – Breaking its wings reduces aerial mobility, and severing its tail weakens its tail-based attacks.
Where to Find It
Guardian Rathalos patrols the Ruins of Wyveria.
Guardian Fulgur Anjanath

- Type: Construct
- Weakness: Ice
- Breakable Parts: Head, Legs, Tail (Severable)
Guardian Fulgur Anjanath is a mechanized behemoth infused with crackling thunder, dominating the Ruins of Wyveria with relentless aggression. Its electrically charged attacks can summon Guardian Crystals that amplify its power, making the battlefield even more dangerous. Stay mobile, target its weak points, and use environmental hazards to turn the tide in your favor.
How to Beat Guardian Fulgur Anjanath
- Bring Nulberry to Counter Thunderblight – Its lightning attacks can inflict Thunderblight, making you more vulnerable to stuns. Carry Nulberries to instantly remove this status effect.
- Use Slinger Pods to Trigger Guardian Crystal Explosions – Guardian Crystals scattered in its territory can be used against it. Fire Puddle, Frost, or Dragon Pods at them when Fulgur Anjanath is nearby to trigger an explosion.
- Aim for Its Mouth – The mouth is its weakest point, so prioritize attacks there for maximum damage. Severing the tail will also weaken some of its attacks.
- Destroy Back Wounds to Disable Lightning Attacks – Using Focus Mode to break its wounds will disable its lightning abilities temporarily, making the fight much safer.
- Use Traps and the Environment to Gain an Advantage
- Shock Traps & Pitfall Traps can immobilize it
- Lure it onto Crumbling Terrain to make it stumble
- Use sneak attacks when it moves to a different area to reposition
- Mount it often to topple it and create openings
Where to Find It
Guardian Fulgur Anjanath roams the Ruins of Wyveria, commonly appearing in: Wyveria 14, Wyveria 10, 13, Wyveria 9 (Resting Area).
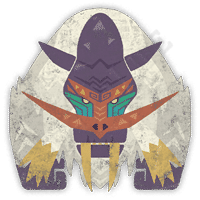
Guardian Arkveld
- Type: Construct
- Weakness: Dragon
- Breakable Parts: Chainblades, Head, Tail
Guardian Arkveld is a mechanized wyvern wielding deadly chainblades that unleash explosive dragon energy. It dominates Ruins of Wyveria, using sweeping chain attacks and guardian crystals to control the battlefield. Breaking its chains when they glow is the key to victory, creating massive openings and shutting down its most dangerous attacks.
How to Beat Guardian Arkveld
- Focus on the Chains When They Glow – Its chains charge up before unleashing explosive dragon energy. Attacking them while glowing causes them to detonate, knocking Arkveld down and making it vulnerable.
- Target Its Chainblades, Head, and Tail – Damaging the chainblades reduces its attack range, while breaking its head and tail weakens its ability to control the fight.
- Use Slinger Pods to Escape the Grab Attack – If Arkveld grabs you, fire any Slinger Pod to break free before it follows up with a devastating slam.
- Destroy Guardian Crystals with Slinger Pods – Arkveld's chains generate Guardian Crystals that amplify its attacks. Shooting Slinger Pods at these crystals triggers explosions, turning them against it.
- Avoid Its Charged Dragon Blast – When Arkveld roars and its chains spark, it's preparing a massive forward explosion. Dodge to its sides or rear to stay safe and counterattack.
- Interrupt Its Flying Sweep Attack – When Arkveld leaps backward and soars for a chain sweep, use a Flash Pod to ground it, creating an opening for heavy damage.
Where to Find It
Guardian Arkveld patrols Wyveria 13 and 14, retreating to Wyveria 15 when weakened.
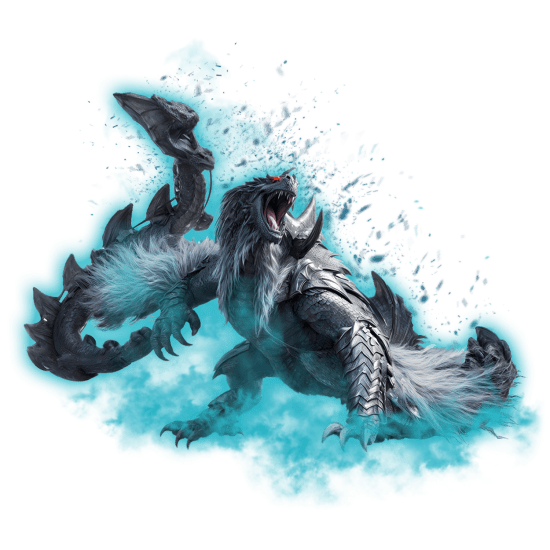
Jin Dahaad – The Glacial Apex
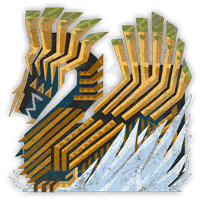
- Type: Leviathan
- Weakness: Fire
- Breakable Parts: Cranial Iceplate, Foreleg, Lg. Iceplate (Exposed), Hind Leg, Abdominal Iceplate, Tail Iceplate (Severable)
A leviathan that sits at the peak of the Iceshard Cliff's ecosystem. It surrounds its massive form in cold temperatures via ridge-like cooling organs across its body; the frost its limbs produce doubles as a potent weapon and a way to travel along walls and floating rocks.
How to Beat Jin Dahaad
- Take Cover from Its AoE Frost Nova – Midway into the fight, it unleashes a battlefield-wide explosion that can instantly cart hunters. Knock down a Giant Ice Chunk before it uses this move to create cover.
- Target Its Forelegs to Topple It – Breaking the forelegs knocks Jin Dahaad down, exposing its weak points on the head and back for massive damage.
- Prioritize Its Head or Rear When Downed – Once toppled, focus on its head or rear for the highest damage output. Use Focus Mode to locate wounds and maximize damage.
- Destroy the Giant Frozen Pillar When It Climbs – In its final phase, Jin Dahaad climbs an icy pillar to attack from a distance. Use your Slinger to bring it crashing down, dealing huge damage and creating an opening.
- Use Environmental Traps for Extra Damage – Knock down Brittle Ice Pillars, Crumbling Ice Walls, and Giant Ice Chunks to deal bonus damage and stagger Jin Dahaad.
- Bring Cleansers to Remove Frostblight – Frostblight immobilizes you, leaving you open to attacks. Keep Cleansers on hand to remove the effect instantly.
Where to Find It
Jin Dahaad roams Iceshard Cliffs, making its final stand near a towering frozen pillar in the deepest parts of the region.
Xu Wu – The Void Maw
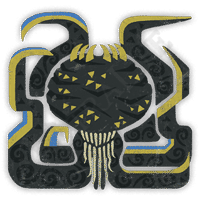
- Type: Cephalopod
- Weakness: Ice
- Breakable Parts: Mouth, Head, Arms, Hind Tentacles (Severable)
Cephalod predators whose prey includes Guardian monsters. The mucus secreted from their tentacles hardens quickly into sharp edges that resemble blades or spears, which is why some call Xu Wu the "Piercing Assassin." The sizable mouth hidden on their underside allows them to devour even rather large prey.
How to Beat Xu Wu
- Attack the Mouth When Exposed – Certain attacks leave Xu Wu’s massive mouth open, making it vulnerable. Focus all attacks here to topple it and deal heavy damage.
- Use Slinger Pods to Escape Its Grab Attack – Xu Wu lunges at hunters to grab and crush them. Fire Slinger Pods immediately to break free.
- Go for the Mouth, Head, and Arms – These are its primary weak points. Severing 4 of its hind tentacles will also reduce its mobility and yield extra rewards.
- Knock It Down with Great Thunderbugs – If Great Thunderbugs are present, lure Xu Wu near them to paralyze it, giving you free hits.
- Destroy It with Wyrmsbane Clusters – Xu Wu takes massive burst damage from Lumps of Wyrmsbane found in the area. Use these whenever possible to end the fight faster.
Where to Find It
Xu Wu lurks deep within the Ruins of Wyveria, primarily appearing in Wyveria 8, 6, and 12. It moves unpredictably, so be prepared for an intense hunt.
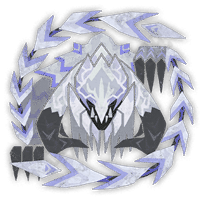
Zoh Shia – The Crystalline Tyrant

- Type: Construct
- Weakness: Dragon
- Breakable Parts: Crystals, Head, Forearms, Wings
Zoh Shia is the final boss of Monster Hunter Wilds' Low Rank, a colossal crystalline behemoth that wields fire and thunder in battle. Encased in an armored crystal shell, it erupts with elemental fury as the fight progresses, demanding precision and endurance from hunters. Break its crystals, use the environment, and adapt to its three phases to emerge victorious.
How to Beat Zoh Shia
- Hide Behind Crystals to Avoid Its AoE Attack – Midway through the fight, Zoh Shia unleashes a devastating area-wide explosion. Take cover behind spawned crystals to avoid getting instantly carted.
- Break Off Its Crystals to Deal More Damage – Zoh Shia’s crystal armor significantly reduces damage. Prioritize breaking its head and forearms to increase damage output.
- Use Heavy Piercing Pods to Shatter Crystals – Crystals drop Crystal Fragments, which can be used as Slinger ammo to break off more armor and stagger Zoh Shia.
- Explode Crystal Shards for Bonus Damage – Zoh Shia spawns Crystal Shards that can explode when hit by elemental attacks. Use Thunder Pods from Thundercrysts to detonate them.
- Flinch It with Dragon Pods – Wyrmsbane in the area provides Dragon Pods, which can be used to interrupt powerful attacks. However, use them sparingly, as Zoh Shia builds resistance over time.
- Drop Shrine Fragments for a Knockdown – Shrine Fragments hang above the battlefield. Lure Zoh Shia underneath and drop them for massive damage and an easy opening.
- Adapt to Its Three Phases –
- Phase 1 – Fully Crystallized: Moves are slow, primarily ground-based, and armor is unbroken.
- Phase 2 – Head and Wings Exposed: Gains fire attacks, can regrow crystals, but becomes vulnerable to critical hits.
- Phase 3 – Fully Revealed: All crystals break permanently, damage potential skyrockets, but gains access to thunder attacks.
Where to Find It
Zoh Shia resides in the Ruins of Wyveria, awaiting hunters in a grand arena for the ultimate battle.
Yian Kut-Ku – The Panic Wyvern
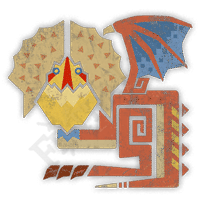
- Type: Bird Wyvern
- Weakness: Water
- Breakable Parts: Head, Ears, Wings, Tail
Yian Kut-Ku is a small yet frantic Bird Wyvern, known for its oversized ears and erratic behavior. It relies on wild pecking attacks, fireballs, and sudden charges to overwhelm hunters. Its ears make it vulnerable to Sonic Pods, and Water-based weapons will take it down faster.
How to Beat Yian Kut-Ku
- Bring Sonic Pods to Disorient It – Yian Kut-Ku's large ears make it susceptible to Sonic Pods, temporarily stunning it and leaving it open for attacks. Be cautious, as it will immediately enter Rage mode upon recovery.
- Use Dung Pods to Isolate It – Kut-Ku often appears in groups, so use Dung Pods to drive away extra monsters and fight just one at a time.
- Exploit Its Weakness to Water – Yian Kut-Ku takes extra damage from Water element weapons. Bring Water melee weapons or Water Ammo for Bowguns to maximize damage.
- Avoid Its Peck Attack – This attack can stunlock you if you don’t move away. Dodge or block when it starts pecking, or position yourself behind it.
- Be Wary of Its Side-to-Side Fireball Spit – When enraged, it spits fireballs while charging in a zigzag pattern. Stay mobile and dodge to the side to avoid getting burned.
Where to Find It
Yian Kut-Ku can be found in Scarlet Forest, commonly appearing in Areas 6, 8, 10, 12, and 16.
Gypceros – The Trickster Wyvern
- Type: Bird Wyvern
- Weakness: Fire
- Breakable Parts: Head, Wings, Tail
Gypceros is a deceptive Bird Wyvern with two main tricks up its sleeve: blinding flashes from its crest and deadly poison spit. It’s notorious for faking its own death, tricking hunters into lowering their guard before striking back. To counter its abilities, break its head to disable its flash attacks, carry Antidotes for poison, and avoid attacking recklessly when it collapses.
How to Beat Gypceros
- Break Its Head to Prevent Flash Attacks – Gypceros uses its crest to emit blinding flashes. Breaking its head will disable this attack, making the fight much easier.
- Focus Strike Its Head During Flash Attacks – If timed correctly, a Focus Strike on its head while it prepares to flash can cancel the attack and knock it down.
- Beware of Its Fake Death – Gypceros pretends to be dead, even causing the music to stop. However, after a few moments, it springs back to life with a powerful area attack. Get a few hits in, but stay back before it revives.
- Carve Twice While It’s Down – If you’re feeling risky, you can carve Gypceros up to two times while it fakes death, but leave before it wakes up.
- Bring Antidotes for Poison – Gypceros spits poison and spreads toxic puddles. Always carry Antidotes or Herbal Medicine to counteract its effects.
- Use Pitfall Traps Instead of Shock Traps – Gypceros is immune to Shock Traps, so use Pitfall Traps for capturing or creating a damage window.
Where to Find It
Gypceros spawns in Windward Plains but only during Fallow weather conditions. You can force this weather change by resting inside your tent. It has also been rumored to appear in Oilwell Basin and Iceshard Cliffs (TBD).
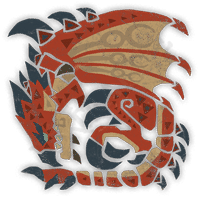
Rathian – The Queen of the Land
- Type: Flying Wyvern
- Weakness: Dragon
- Breakable Parts: Wings, Tail (Severable)
Rathian is a ferocious wyvern known for its deadly poisonous tail and powerful aerial fireball attacks. This Queen of the Land dominates the Scarlet Forest, often attacking with sweeping tail strikes and rapid dashes. To take it down efficiently, sever its tail to remove its poison-inflicting attack and avoid its charged fireballs by dodging sideways.
How to Beat Rathian
- Cure Poison with Antidotes – Rathian’s tail and claw attacks inflict Poison, so always carry Antidotes or Herbal Medicines to stay in the fight.
- Cut Off Its Tail – Severing Rathian’s tail removes its ability to poison you and shortens its melee reach, making it easier to fight. Use a Severing weapon like a Long Sword, Great Sword, or Dual Blades to cut it off.
- Dodge Fireballs Carefully – Rathian launches a single fireball normally, but when enraged, it fires three in a cone pattern. Always dodge sideways to avoid getting hit.
- Beware of Its Charged Fireball – If Rathian takes a step back while charging fire in its mouth, it’s about to unleash a massive fireball. Start running sideways immediately to avoid the explosion.
- Stay Alert for Tail Swipes – Rathian swings its tail both on the ground and mid-air, often poisoning those caught in it. Dodge sideways as soon as you see it coil its tail back.
- Use Flash Pods to Ground It – If Rathian takes to the air too often, a Flash Pod can knock it out of the sky, giving you a window for attacks.
Where to Find It
Rathian can be found roaming the Scarlet Forest, frequently appearing in Areas 6, 9, and 11. It rests in Area 11 when weakened.
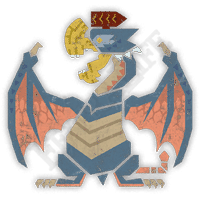
Rathalos – King of the Skies
- Type: Flying Wyvern
- Weakness: Dragon
- Breakable Parts: Wings, Tail (Severable)
Rathalos is the apex predator of the Oilwell Basin, ruling the skies with deadly fireballs and poisonous talon strikes. This King of the Skies relentlessly hovers above the battlefield, striking from above and setting the ground ablaze. Grounding Rathalos with Flash Pods, severing its tail, and focusing on its legs to trip it are the best strategies for bringing it down.
How to Beat Rathalos
- Bring Antidotes to Counter Poison – Rathalos’s tail somersault attack and talon stomps inflict poison. Always have Antidotes or Herbal Medicines ready.
- Use Nulberries Against Fireblight – Its fireball attacks will leave you with Fireblight, causing damage over time. A Nulberry instantly removes this effect.
- Flash Pods Can Ground It – Since Rathalos spends a lot of time in the air, use Flash Pods with your Slinger to knock it out of the sky, opening a massive damage window.
- Attack Its Legs to Trip It – Targeting Rathalos’s legs can make it stumble and fall, leaving it vulnerable for big combos.
Sever Its Tail to Disable Poisonous Attacks – Rathalos’s somersault tail attack is dangerous. Cutting its tail off reduces its attack range and removes its poison effect. - Use Dung Pods to Repel Rathian – Sometimes, Rathians will interfere in the fight to assist Rathalos. Using Dung Pods will force them to retreat.
Where to Find It
Rathalos primarily patrols the Oilwell Basin, appearing in Areas 12, 13, 14, and 15 before resting in Area 16 when weakened.
Gravios – The Living Fortress
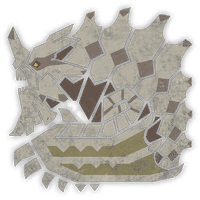
- Type: Flying Wyvern
- Weakness: Water
- Breakable Parts: Head, Belly, Back, Wings, Legs, Tail (Severable)
Gravios is a massive, armor-plated wyvern that soaks up damage while retaliating with deadly fire beams and toxic gas attacks. This living fortress can inflict Sleep, Poison, and Fireblight, making it a battle of endurance for hunters. Attacking from its sides, bringing status-curing items, and focusing on breaking its tough armor are key to overcoming this behemoth.
How to Beat Gravios
- Attack from the Side to Avoid Its Head and Tail Strikes – Gravios relies heavily on headbutts and tail smashes, so staying at its flanks is the safest approach.
- Bring Energy Drinks, Antidotes, and Nulberries – Gravios inflicts Sleep, Poison, and Fireblight. Energy Drinks wake you up instantly, Antidotes cure Poison, and Nulberries remove Fireblight.
- Break Its Belly to Lower Its Defense – Gravios's belly is its weak point. Once broken, it takes increased damage, so focus your attacks there.
- Avoid the Gas Release and Flame Release – If you see gas or flames leaking from its belly, immediately back away to avoid Sleep, Poison, or Fire damage.
- Dodge Its Fire Beam Patterns – Gravios fires beams in straight, sweeping, and downward patterns. Move sideways, stay behind it, or create distance depending on the attack.
Where to Find It
Gravios roams the Oilwell Basin, mainly patrolling Areas 13, 15, and 16, before retreating to Area 16 when exhausted.
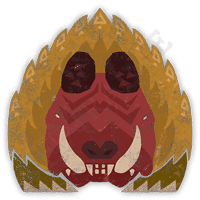
Blangonga – The Icy Berserker
- Type: Fanged Beast
- Weakness: Fire
- Breakable Parts: Head, Tail
Blangonga is a ferocious, ape-like beast that commands icy winds and Blango minions to overwhelm hunters. It relies on brute strength and frost breath attacks to control the battlefield. Eliminate its pack, avoid its ice-based moves, and exploit its weaknesses to take it down.
How to Beat Blangonga
- Bring Nulberries and Cleansers – Blangonga can inflict Iceblight and Frostblight, which slow stamina recovery and movement. Nulberries and Cleansers will quickly remove these effects.
- Defeat Blangos First – Blangos will constantly harass you if left alive, making the fight more difficult. Take them out early.
- Take Advantage of Turf Wars with Hirabami – If Hirabami enters the fight, let them battle to weaken Blangonga.
- Focus on the Rear, Head, and Tail – Its rear is the weakest spot, and breaking the head and tail yields valuable rewards.
- Dodge or Block Heavy Punches and Ice Attacks – Blangonga’s frost breath and smashes deal massive damage. Learn its attack wind-ups and time your dodges accordingly.
Where to Find It
Blangonga is primarily found in the Iceshard Cliffs, patrolling Areas 2, 6, 13, and 17 before resting in Area 12 when fatigued.
Gore Magala – The Frenzied Shadow
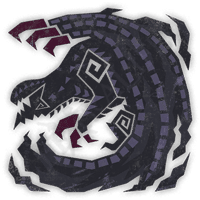
- Type: Unclassified Large Monster
- Weakness: Fire
- Breakable Parts: Antenna, Wings, Tail
Gore Magala is a mysterious and aggressive wyvern, known for spreading the Frenzy virus that can either weaken or empower hunters. With its hidden horns, shadowy presence, and unpredictable attacks, it becomes even deadlier when enraged. Break its antenna while it’s frenzied to limit its power and prevent it from evolving mid-fight.
How to Beat Gore Magala
- Keep Attacking Once You're Frenzied – The Frenzy virus builds up over time, and if your gauge fills, you’ll suffer reduced healing and increased damage intake. However, if you keep attacking before the gauge maxes out, you’ll gain an Affinity boost instead!
- Use Nullberries to Control the Frenzy Gauge – If you can't attack fast enough, consuming a Nullberry will lower the Frenzy gauge before it fills completely.
- Break Its Horns While It's Frenzied – Gore Magala's horns only emerge when frenzied. Breaking them during this phase reduces its aggression and weakens its attacks. Use traps like Pitfall or Shock Traps to create openings for breaking them.
- Stay Mobile to Dodge Frenzy Breath Attacks – Its breath attacks spread Frenzy across the battlefield. Dodge forward or to the side to avoid getting caught in its deadly blasts.
- Punish After Its Dive Attack – Gore Magala dives aggressively from the air, but this move leaves it open for counterattacks. Use this window to deal damage before it recovers.
Where to Find It
Gore Magala lurks in the Iceshard Cliffs, primarily seen in Areas 12, 13, 15, and 16, where it moves between zones spreading the Frenzy virus.
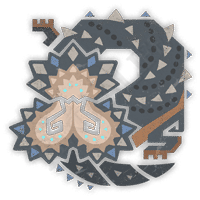
Arkveld – The Chains of Ruin
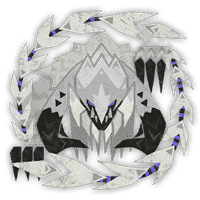
- Type: Flying Wyvern
- Weakness: Dragon
- Breakable Parts: Horns, Wings, Tail
Arkveld is the “poster-boy” of this installment of the franchise, and a cherry on top of this complete monster list for Monster Hunter Wilds. A formidable new wyvern known for its massive chainblades, which it uses to lash at hunters from a distance and crush them with devastating Dragon energy attacks. Target its glowing chains to stagger it and create openings for heavy damage!
How to Beat Arkveld
- Focus on Arkveld’s Chains When They Are Glowing – When Arkveld's chains begin glowing, attacking them will cause an explosion that topples the monster, leaving it vulnerable for an extended period.
- Use Falling Boulders for Bonus Damage – Certain areas contain environmental hazards like Falling Boulders that can deal massive damage and stagger Arkveld. Lure it beneath them for an easy DPS window!
- Use Flash Pods to Ground Arkveld – When Arkveld performs its Flying Sweep attack, shoot a Flash Pod to knock it out of the air, creating another opportunity for high-damage attacks.
- Escape Grab Attacks with Slinger Pods – If Arkveld grabs you with its chains, use any Slinger Pod to break free immediately and avoid massive damage.
- Use Focus Strike After the Charged Dragon Blast Attack – After Arkveld charges up and slams its chains down, there’s a brief moment when Focus Strike can knock it down for an extended opening.
Where to Find It
Arkveld soars through the Windward Plains, frequently moving between Areas 7, 8, 13, and 17, where it hunts and ambushes unsuspecting prey.
Conclusion
Monster Hunter Wilds delivers an expansive and diverse ecosystem filled with returning favorites, brand-new creatures, and powerful variants that challenge hunters in fresh ways. Classic monsters like Rathalos and Gore Magala make their return, while new species such as Arkveld and Quematrice introduce unique mechanics and behaviors. The game also introduces Guardian Monsters—ancient, artificial creations left behind by the Wyverians, bringing a mysterious and formidable presence to the world.
The inclusion of Frenzied and Tempered versions ensures that even familiar foes require new strategies, keeping every hunt dynamic and engaging. And with the promise of event quests and future title updates, the wilds will only continue to grow—new threats and discoveries are sure to await.
F.A.Q.
How many large monsters are in Monster Hunter Wilds?
There are 29 large monsters in Monster Hunter Wilds, not counting the tempered and frenzied versions. More monsters will be released with future title updates.
Who is the final boss in Monster Hunter Wilds?
Zoh Shia is the final boss of Monster Hunter Wilds, serving as the last major encounter in the game's Low Rank storyline. The final boss of High Rank is Arkveld.
What are Guardian monsters in Monster Hunter Wilds?
Guardian monsters are artificial creatures created by the Wyverians long ago. These powerful beings serve as protectors of key locations in Monster Hunter Wilds and have distinct combat mechanics compared to natural monsters.
What is the difference between tempered and frenzied monsters in Monster Hunter Wilds?
- Tempered monsters are highly aggressive variants with increased health and damage, making them tougher to hunt.
- Frenzied monsters are infected by the Frenzy Virus, gaining unpredictable attack patterns and enhanced abilities, but become weaker to damage when properly countered.
Will there be more monsters added to Monster Hunter Wilds post-launch?
Yes, Monster Hunter Wilds will receive additional monsters through event quests and future title updates, expanding the game's roster over time.


