 Dallon Avery
It’s high time for a new raid adventure, heroes of Azeroth! Welcome to the Liberation of Undermine guide, which is written to be the only guide about this raid you’ll need to read. It includes the general overview of the theme and plot, how to find the raid’s entrance, the list of bosses, an entire section with detailed tactics and strategy for every boss encounter (8 for this raid), and a list of loot, rewards and how to get them. Now, isn’t that everything we need in a guide? Of course, it is! Now, let’s dive right into it!
Oh, by the way, why not gift yourself some of that loot right away through the Liberation of Undermine Boosting service at Skycoach. Just select the difficulty and place an order, and you’ll get everything you need shortly! Click the link to find out the details and check out other offers that might spark your interest.
You might also want to check out our other The War Within guides:
Note: At Skycoach, you can Buy WoW Boost at the best prices with fast delivery. Use our special PROMO CODE (in green) hidden in this article for a 20% DISCOUNT.


Liberation of Undermine Overview
Welcome to the Liberation of Undermine overview. The second new raid in WW was introduced in Patch 11.1: Undermine(d). In the heart of the Goblin Trade Empire lies Undermine, a bustling capital that showcases the ingenuity and creativity of Goblins as masters of technology. As you traverse this chaotic city, you ally with various Goblin cartels to face incredible challenges in this thrilling Season 2 raid.
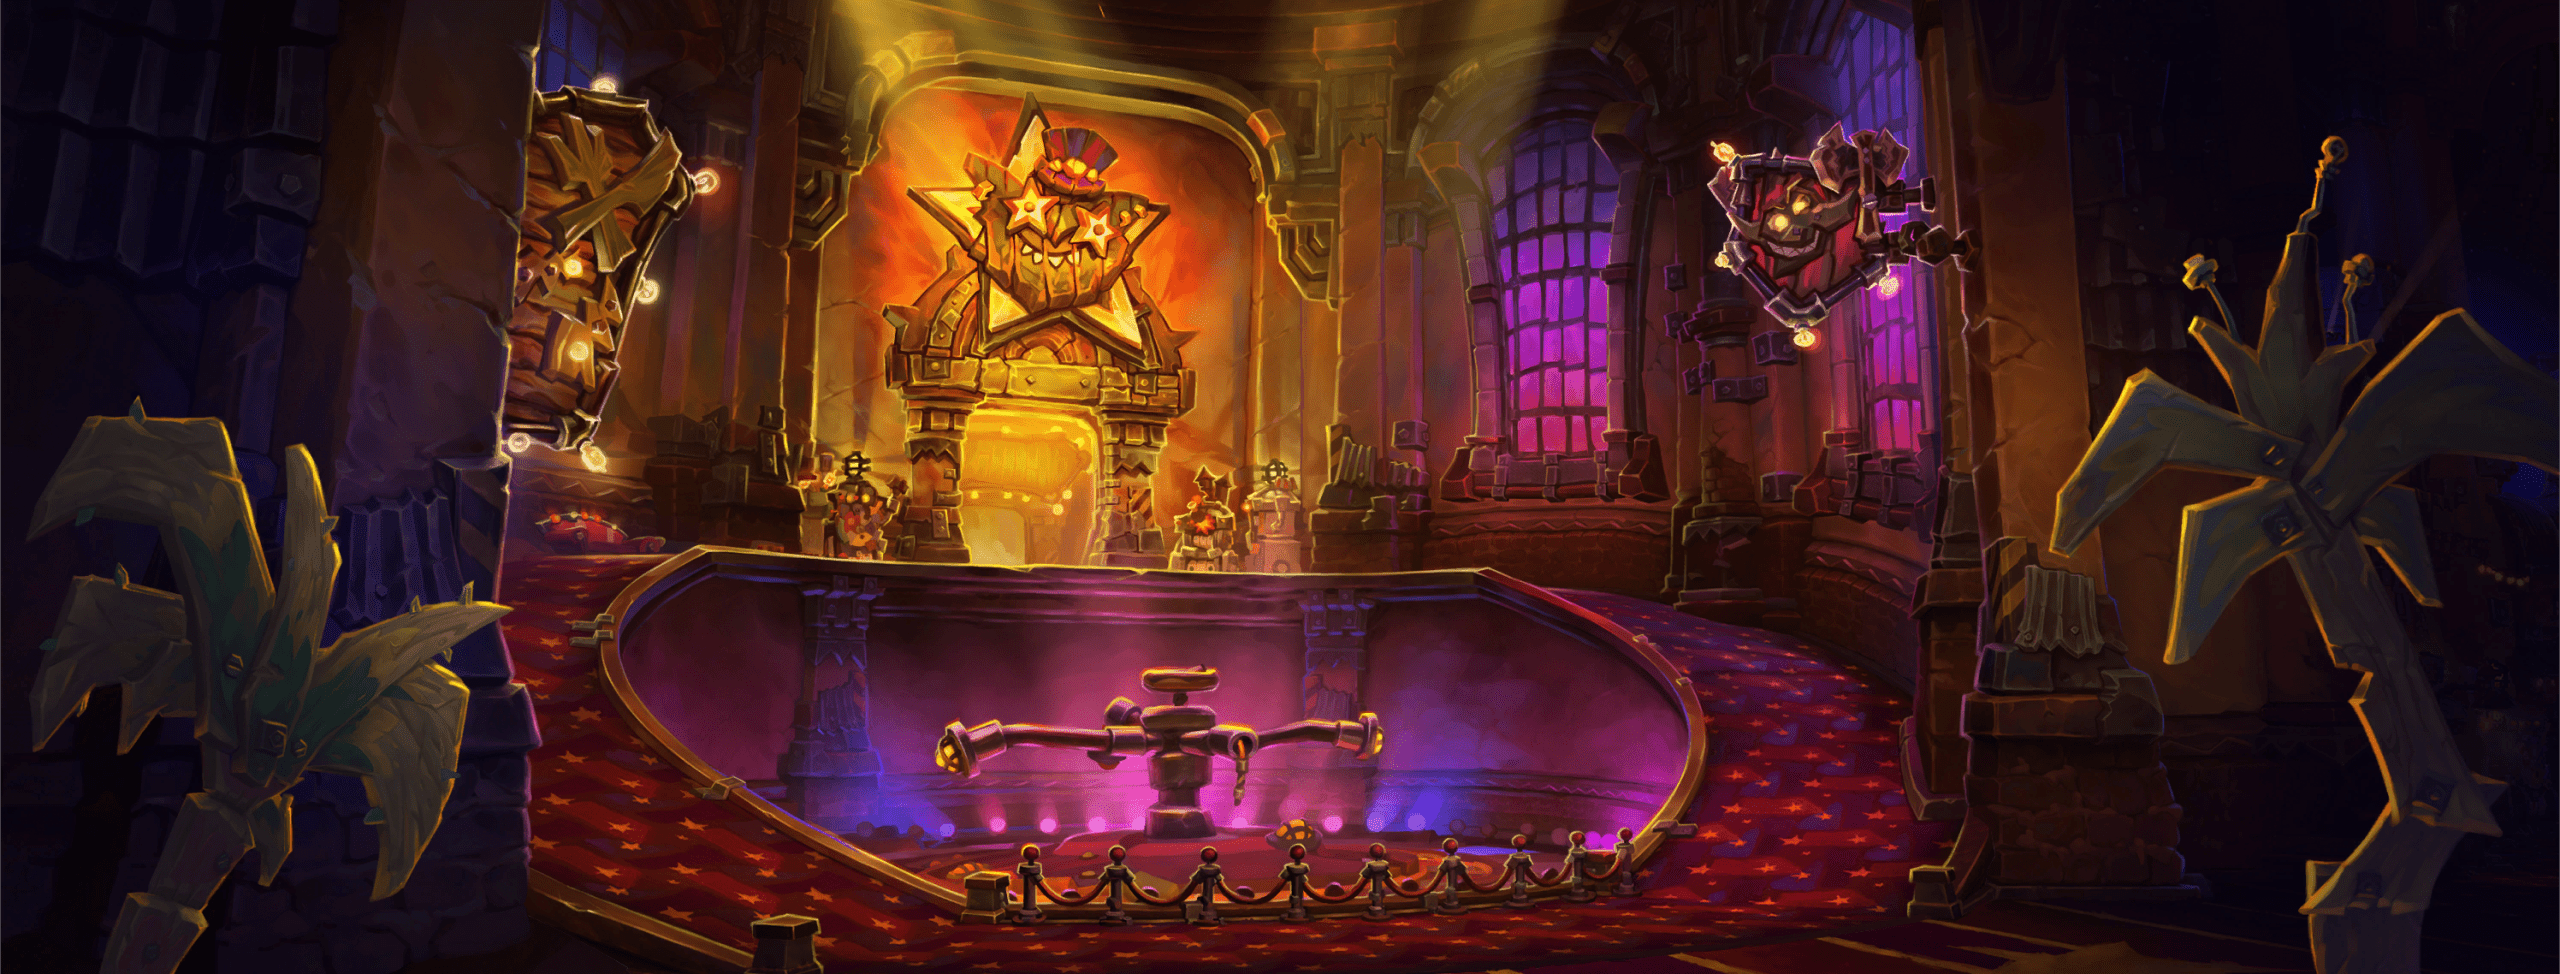
This 8-boss raid takes you through the vibrant streets of Undermine, culminating in a showdown with the notorious former Horde leader, Gallywix. His extravagant hideaway, Gallagio, is filled with dark secrets, mechanized monstrosities, and deadly Goblin gadgetry.
Gallywix, last seen fleeing Orgrimmar at the end of Battle for Azeroth and briefly negotiating with Cartel Xy in Tazavesh, the Veiled Market during Shadowlands, now returns with sinister plans. The raid offers explosive encounters as you confront his schemes and the mechanized horrors of Undermine.

Liberation of Undermine Location
To access the Liberation of Undermine location, you’ll need to travel to one of the faction capitals, either Orgrimmar or Stormwind. In these cities, you can find Nexus-Lord Donjon Rade V, who offers a teleport directly to the raid entrance.
The raid is located in the heart of Undermine, the bustling capital of the Goblin Trade Empire. While Nexus-Lord Donjon Rade V provides convenient teleportation, you’ll find the entrance to the raid marked by Goblin-themed structures and surrounded by vibrant, mechanized surroundings that reflect the ingenuity of the Goblins.
Ensure that your raid group is prepared before teleporting, as this chaotic city raid promises an explosive series of encounters filled with mechanized monsters and Goblin gadgetry.
The raid consists of several small maps, the main one you can see below. This is the Liberation of Undermine map for all of the known boss encounters.
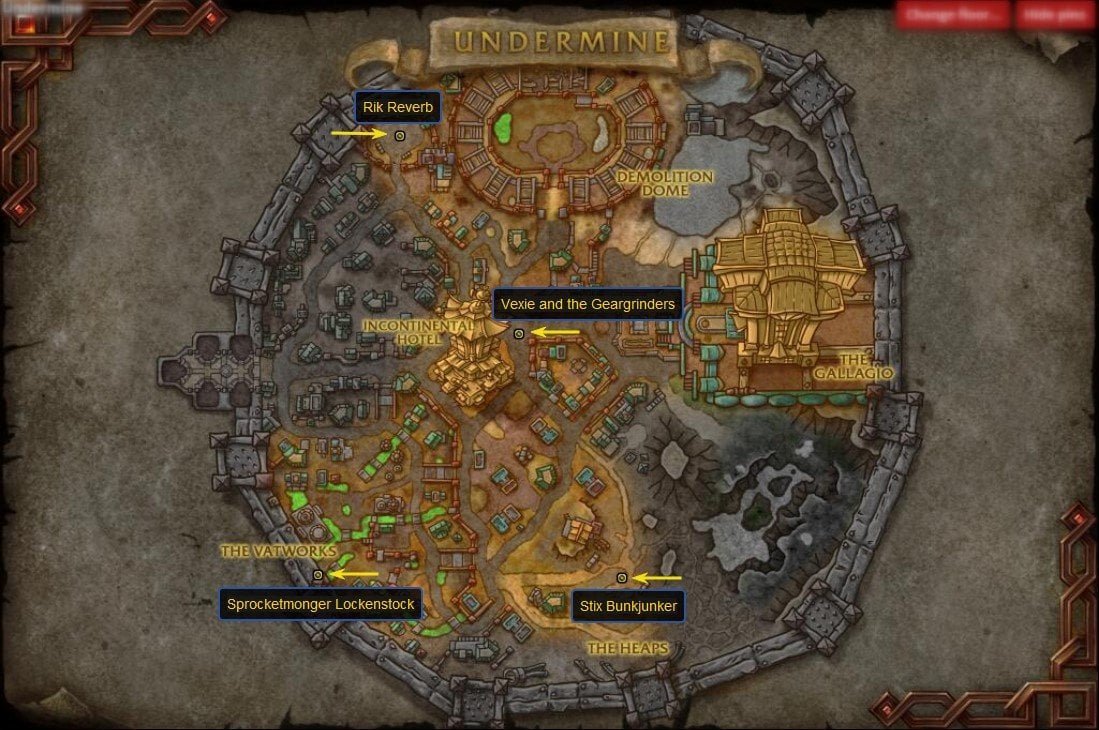
As for the Liberation of Undermine entrance itself, it will presumably be available in the adjacent zone, but for the testing a portal is provided in both capital cities for quick access.
Liberation of Undermine Bosses
The raid features a total of 8 Liberation of Undermine bosses, each embodying the chaotic and inventive nature of Goblin ingenuity. Below is a list of the bosses you will face as you navigate the mechanized streets of Undermine:
- Stix Bunkjunker
- Vexie and the Geargrinders
- Cauldron of Carnage
- Rik Reverb
- Sprocketmonger Locknstock
- One-Armed Bandit
- Mug’Zee, Heads of Security
- Chrome King Gallywix
This Liberation of Undermine boss order is not final (PTR), although the first encounter will not be changed. Each boss offers unique challenges and mechanics, ensuring that this raid will keep your group on its toes from start to finish. Stay sharp and prepare for Goblin-inspired chaos!

Liberation of Undermine Boss Tactics
This section of the guide is dedicated to Liberation of Undermine tactics, offering insights into the encounters you will face within this explosive raid. While detailed strategies for each boss are provided in their respective sections below, this overview serves as a quick reference for players preparing to take on the challenges ahead.
If any particular fight proves too difficult, remember that professional assistance, like Liberation of Undermine Raid Boost, is available through trusted services. With expert players on your side, you can clear encounters efficiently and secure top-tier loot without the stress of trial-and-error gameplay.
Stix Bunkjunker Strategy (based on PTR)
Let’s start this Liberation of Undermine raid walkthrough with the first and only (so far!) boss encounter. The Stix Bunkjunker encounter is a multi-phase battle focused on ad management, positioning, and coordinated execution of mechanics. In here, we outlined the critical aspects of the fight to help you and your team successfully navigate this unique challenge.
Phase 1: Mechanics Overview
The fight begins with a straightforward single-target phase where tanks should position Stix Bunkjunker centrally, allowing for easy access by melee DPS and healers. Watch out for Incinerator, which requires players to spread out to avoid overlapping damage zones. Early in the phase, players are introduced to the ball transformation mechanic and bomb management.
- Ball Transformation: Several (six) players are chosen to transform into balls aka Rolling Rubbish. As a ball, you must:
- Roll over small garbage piles to grow larger.
- Progress through small, medium, and large ball stages by collecting garbage.
- Once fully charged, collide with the boss to deal damage or with a bomb to neutralize it.
- Bomb Management: Large bombs periodically spawn and must be neutralized by players in their big ball state. Tanks typically handle the first bomb, while another designated player deals with additional bombs in later phases. Failure to neutralize bombs results in a raid wipe.
Phase 2: Ad Management and Overdrive
As the fight progresses, Territorial Bombshell adds tethered to garbage piles spawn. These must be addressed quickly:
- Players free the adds by reducing their health to 75%, breaking their tether, and then killing them within 30 seconds.
- Failing to kill them in time causes explosions, leading to heavy raid damage.
Players in the ball state must avoid rolling over tethered adds to prevent accidental detonations.
During Overdrive, Stix Bunkjunker becomes untargetable and flies into the air, dealing raid-wide damage and unleashing abilities like Trash Compactor, which knocks players back. Position carefully to avoid being knocked into hazards. After Overdrive, the boss returns with increased attack speed and more frequent bomb spawns, escalating the fight's intensity.
Strategy Summary
To secure victory, clear coordination and role assignment are critical:
- Assign tanks and specific players to manage bombs during both phases, ensuring no bomb is left unattended.
- Focus on efficient ad management by prioritizing Territorial Bombshells and keeping them under control. Use cleave damage to take down clusters quickly.
- Healers must monitor raid-wide damage during Overdrive and the stacking debuff caused by ignited garbage piles.
- DPS should focus on maximizing boss uptime during calm moments while swiftly switching to adds when required.
- Avoid igniting garbage piles with Incinerator Circles, as this increases the difficulty of bomb management and adds additional pressure to the group.
This strategy was written based on the Patch 11.1 PTR raid preview. So, there’s a good chance that some of these values and details about the fight will change. When this happens, we’ll update the guide, so that you have the latest and most accurate info on your hands.
Plus, additional boss encounters will be available at a later date according to the established testing schedules. Therefore, as the new boss encounters become available, we’ll add them into this guide, until all eight encounters are covered. So, stay tuned for that!


Vexie and the Geargrinders Strategy
Vexie and the Geargrinders features a two-phase encounter centered around positioning, adds management, and strategic timing of mechanics. Below is a complete guide to help your team successfully navigate this fight. Let's first outline the key mechanics and hazards players need to understand clearly.
- Boss Plating Stacks: Boss begins phase one with plating stacks. Players must remove these stacks by utilizing biker adds.
- Biker Adds: Spawn periodically at a distance and charge towards random players, leaving bikes behind upon death.
- Bikes: Players must use bikes dropped by adds, launching them at the boss to remove plating stacks and deal damage.
- Oil Pools (Heroic only): Spawn under the boss and targeted players; pools damage and slow players, and can stun biker adds.
- Incendiary Fire Circles: Targeted players drop fire zones, damaging anyone standing within.
- Spew Oil: Targeted players create purple circles applying dots to anyone within when expired.
- Tank Buster: A heavy hit on the tank that knocks back and applies stacking debuff; causes raid-wide AoE damage.
- Repair Adds: During phase two, these spawn around the room attempting to repair the boss, shortening phase two.
Here's a detailed breakdown of abilities and tactics for handling this encounter:
| Ability | Description | Strategy |
| Biker Adds | Adds spawn away from the boss and charge random players, leaving bikes upon death. | Stack near walls to bait adds into predictable spawn points for quick AoE. Quickly kill adds before charges scatter them. |
| Bike Launch | Players mount bikes left by adds and launch them into the boss, removing plating stacks and dealing damage. | Immediately use bikes after adds die. Aim carefully at the boss and launch promptly; missed bikes extend phase duration. |
| Tank Buster | Heavy physical damage attack against tank causing knockback, stacking DoT, and raid-wide damage. | Tanks must taunt swap after every cast. Healers should prepare cooldowns for increased raid-wide damage later in the phase. |
| Incendiary Fire | Random players drop damaging fire zones on the ground for several seconds. | Affected players move away from group immediately. Aim fire circles to burn away oil pools, clearing space as needed. |
| Spew Oil | Purple circles appear on random players, leaving DoTs on anyone inside after expiration. Heroic: Creates oil pools underneath targeted players. | Move purple circles away from the raid. On Heroic, drop pools toward room's center to avoid obstructing the fight area. |
| Oil Pools (Heroic) | Oil pools spawned by the boss and purple circles slow and damage players, stunning biker adds crossing over them. | Tanks continually reposition boss around edges. DPS leverage oil pools to stun incoming adds strategically. |
| Repair Channel | In phase two, boss channels repairs, takes double damage, and spawns repair adds that attempt to accelerate the repair process. | Interrupt, CC, and cleave down repair adds rapidly to maximize double damage window. Bloodlust in this phase to capitalize. |
The fight alternates between two clear phases:
Phase 1: Breaking Plating
The goal here is to efficiently remove all plating stacks:
- Positioning: Stack the raid near walls to control add spawn location. Quickly AoE biker adds and use bikes promptly. Tanks continuously adjust boss position around the room’s edges to avoid stacking oil pools (Heroic).
- Mechanics Management: Assign players to immediately handle bikes to minimize plating stacks quickly. Maintain disciplined positioning to manage Incendiary Fire and Spew Oil effectively.
- Tank and Healer Coordination: Tanks coordinate taunt swaps to manage stacking DoTs and raid-wide damage. Healers anticipate escalating raid damage as the phase progresses.
Phase 2: Repair Channel (Damage and Adds Management)
Triggered when all plating stacks are removed, the boss channels for approximately 45 seconds, receiving double damage:
- Damage Maximization: Utilize Bloodlust during this phase. Focus all damage output aggressively.
- Repair Adds Control: Interrupt, CC, and cleave down all spawned repair adds rapidly to extend the damage window. Each successfully cast repair shortens this critical burn phase.
- Healer Focus: Intense raid-wide damage during this phase requires strong healer cooldowns and sustained healing attention.
After the channel concludes, return to phase one and repeat until defeated.
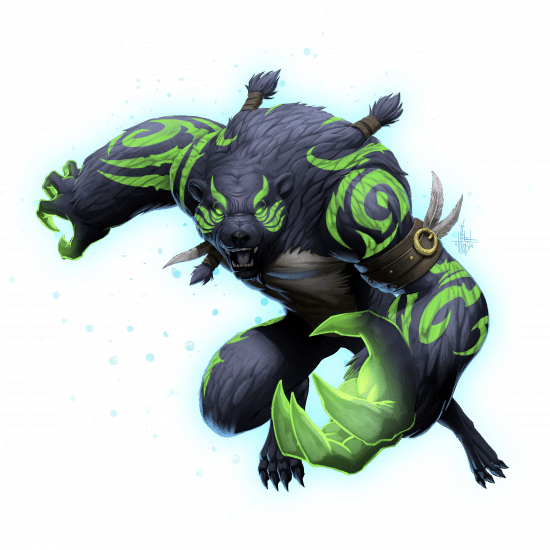
Cauldron of Carnage Strategy
Cauldron of Carnage features a two-boss fight involving simultaneous mechanics, careful raid positioning, and frequent side swaps. Below is a detailed guide to navigate this encounter effectively.
- Dual Bosses (Flarendo & Torq): Bosses must remain at least 40 yards apart to avoid immunity.
- Separation Required: Players should keep 60 yards away from the opposite boss to avoid stacking debuffs.
- Simultaneous Kill: Kill bosses around the same time to avoid enrage.
- Central Clash: Periodically, bosses meet in the middle, causing heavy raid damage and mechanics.
- Energy Mechanic: Bosses clash at full energy; after clash, players swap bosses to reset debuffs.
Here’s a detailed breakdown of abilities and tactics for handling this encounter:
| Ability | Description | Strategy |
| Boss Proximity | Bosses gain immunity if within 40 yards of each other. | Tanks position bosses on opposite sides of the room at all times. |
| Flarendo’s Bomb | Bomb placed near random player, reduced raid damage when soaked by multiple players. Heroic: leaves fire pools. | Stack near wall to bait bombs, soak explosions together. Heroic: manage fire pools carefully. |
| Flarendo’s Beam | Targets random player, dealing heavy directional damage. | Affected player points beam away from opposite side; raid dodges beam. |
| Eruption Stomp | Heavy damage and knock-up on tank, creates lava waves radiating outward. | Tank uses defensives; raid dodges lava waves. |
| Heroic Fire Circles | After bomb soak, players pulse AoE fire damage for several seconds. | Spread immediately after soak, stay near wall to control next bomb spawn location. |
| Torq’s Movement Bar | Bar fills while moving; if full, player is stunned briefly. | Limit movement, stutter-step carefully to avoid full bar during forced mechanics. |
| Marked Circles | Players drop damaging circles at their feet for several seconds, forcing movement. | Carefully stutter-step to manage resource bar while avoiding circles. |
| Lightning Bash | High tank damage ability. | Tanks use defensive cooldowns. |
| Voltaic Image (Heroic) | Adds fixate random players, exploding and leaving hazardous zones if contacted. | CC and kite adds until they despawn; avoid contact completely. |
| Boss Clash | Bosses meet centrally, causing heavy AoE damage, spawning circles and waves. | Raid stacks near center for healer coverage; dodge mechanics, then switch sides afterward. |
Now, how to actually defeat this boss:
General Positioning:
- Assign the raid evenly between both bosses initially.
- Keep each boss separated by at least 40 yards to prevent immunity.
- All players maintain a 60-yard gap from the opposite side’s boss to avoid stacking debuffs.
Left Side (Flarendo, the T-Rex):
- Group near walls to control bomb spawns.
- Immediately soak bomb explosions collectively to minimize damage.
- On Heroic, manage permanent fire pools carefully, preserving room space.
- Aim directional beam away from the opposite boss’s area.
- Tanks mitigate heavy damage from Eruption Stomp; raid dodges lava waves afterward.
- Spread briefly after bomb soak on Heroic difficulty due to pulsing AoE fire circles.
Right Side (Torq, the Gorilla):
- Limit movement to prevent filling your resource bar and avoid getting stunned.
- Stutter-step to manage dropping marked circles efficiently without filling the resource bar.
- Tanks mitigate damage from Lightning Bash.
- On Heroic, CC Voltaic Image adds and avoid contact entirely; let them despawn naturally.
Boss Clash Phase:
- Bosses charge to center periodically when reaching full energy.
- Stack raid centrally for effective healing.
- Dodge circles and waves while dealing maximum damage.
- After clash ends, entire raid swaps bosses to reset stacking debuffs.
- Continue swapping after each clash to manage debuff stacks effectively.
Rinse and repeat this strategy until both bosses are defeated.
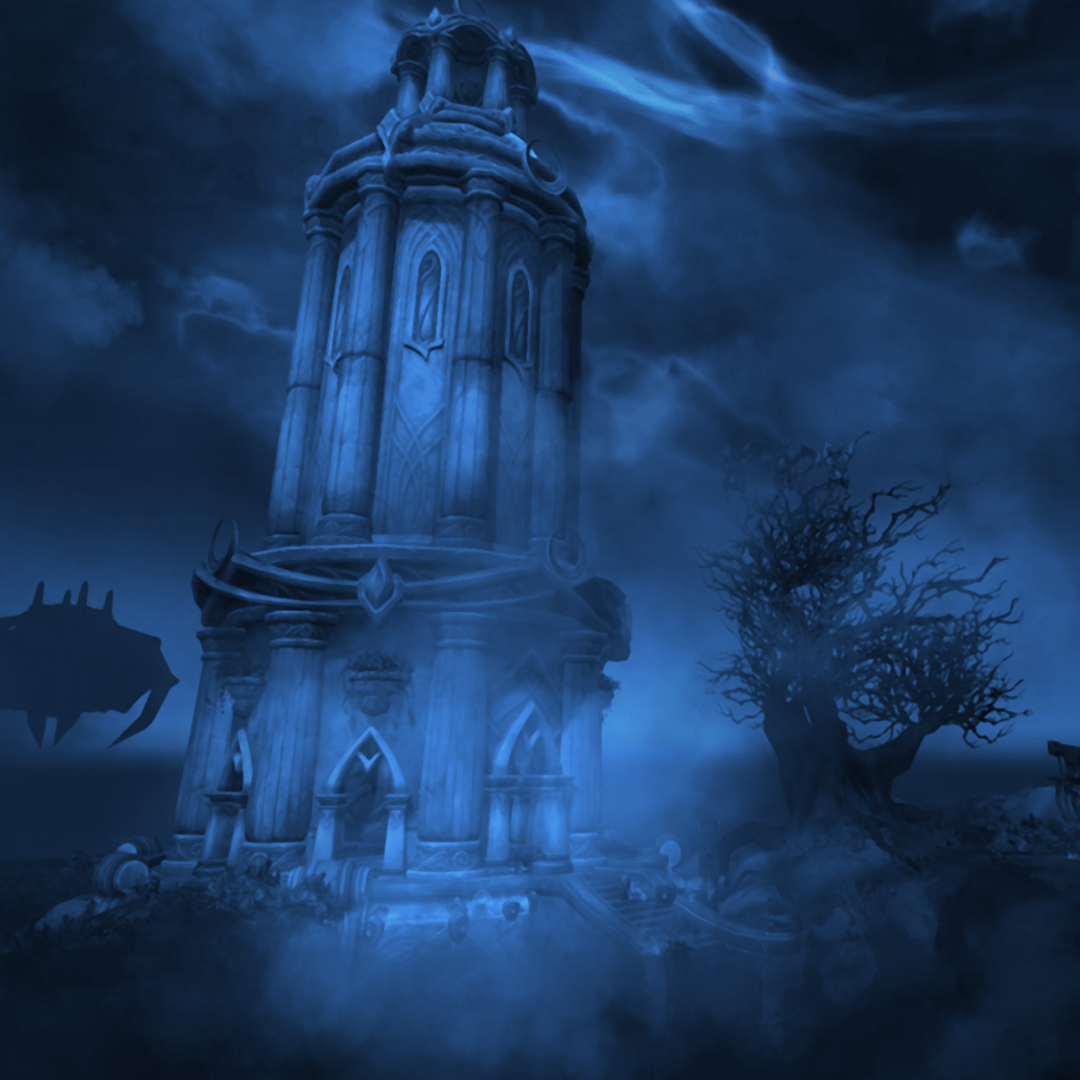
Rik Reverb Strategy
Rik Reverb features two alternating phases with mechanics emphasizing strategic positioning, debuff management, and precise timing. Below is a detailed guide to efficiently handle this encounter.
- Amplifiers: Spawn periodically, slowly gaining energy. Must be drained to avoid massive raid damage.
- Amplifier Drain: Players drain amplifiers, receiving significant damage and debuffs.
- Phase One Positioning: Stack ranged players near each other to control amplifier spawn locations.
- Boss Frontal: Boss melee swings hit in a frontal cone, stacking debuff that increases damage taken.
- Sound Cannon: Random player targeted with a beam, raid must dodge blast.
- Echoing Chant: Amplifiers shoot damaging circles; raid dodges continuously.
- Heroic Difficulty: Adds explosive barrels that must be quickly destroyed.
- Phase Two Mechanics: Expanding ring mechanic that one-shots; survive by using specific amplifiers.
Here's a detailed breakdown of abilities and tactics:
| Ability | Description | Strategy |
| Amplifiers | Objects spawn under the boss and near ranged players; gain energy, causing heavy raid damage if full. | Stack ranged group to manage spawns. Move boss 20 yards away immediately after amplifiers spawn. |
| Amplifier Drain | Draining amplifiers inflicts heavy DoT damage; on Heroic, stacking debuffs increase future drain damage significantly. | Assign dedicated players or use a third tank (Heroic) to drain consistently. Rotate if necessary. |
| Boss Frontal | Melee swings hit in frontal cone, applying stacking damage-increase debuff. | Tanks swap around 4-5 stacks. Raid stays behind the boss at all times. |
| Sound Cannon | Targets random players with a damaging beam blast. | Marked player stands still, allowing raid to easily dodge beam. |
| Echoing Chant | Amplifiers emit circles, causing DoT damage. | Entire raid dodges continuously; avoid being hit at all costs. |
| Blue Circles | Players receive blue circles pulsing AoE damage; increase nature damage taken. | Spread out immediately, avoid amplifier draining while debuffed. |
| Explosive Barrels (Heroic) | Adds spawn around boss, exploding after 15 seconds; wiping raid if detonated. | Highest priority; raid quickly kills barrels to gain haste buffs and prevent explosions. |
| Phase Two: Blaring Drop | Boss goes immune, casts deadly expanding rings. | Move quickly into amplifier circles with blue glow to be knocked into the air, dodging the ring. |
And here's how to defeat him:
Phase 1: Amplifier Management
Begin by positioning the boss exactly where he spawns, with all ranged DPS and healers stacking roughly 20 yards away toward the center of the room. This positioning helps ensure that amplifiers spawn close to each other, making management easier throughout the fight. When the boss casts Amplification, amplifiers will spawn directly beneath the boss and near random ranged players. Immediately move the boss about 20 yards away from the amplifiers, as staying too close to them rapidly increases their energy gain.
Throughout this phase, assign dedicated players (one or two for Normal, or several rotating players—or even a dedicated third tank—on Heroic) to drain the amplifiers periodically, preventing them from reaching full energy. Players performing the drain will take heavy DoT damage and require focused healing. On Heroic difficulty, draining amplifiers gives a stacking debuff that significantly increases future damage taken from drains. Thus, either rotating drainers or using a third tank dedicated solely to amplifier management can simplify this mechanic considerably.
Additionally, tanks should taunt-swap around every four or five stacks of the debuff caused by the boss's frontal melee swings. The raid must avoid standing in front of the boss at all times. When the boss casts Echoing Chant, amplifiers release damaging projectiles in all directions, requiring constant movement to dodge. If a player is targeted by Sound Cannon, they should remain stationary so the rest of the raid can more easily avoid the blast. Players affected by the blue circles must spread out quickly, as these circles pulse AoE damage and increase nature damage taken. They should also avoid draining amplifiers while affected.
On Heroic difficulty, explosive barrels periodically spawn around the boss. These barrels must be destroyed rapidly to prevent a raid-wiping explosion. Eliminating barrels promptly also grants the raid a valuable haste buff.
Phase 2: Blaring Drop and Ring Dodging
When the boss reaches full energy, he becomes immune and transitions into Phase 2. During this phase, the boss creates a deadly, expanding ring that will instantly kill any player it touches. The only way to survive is by quickly identifying and entering the amplifier circle highlighted in blue. Standing within this circle causes players to be safely knocked into the air, completely avoiding the deadly ring. Players must swiftly move between amplifier circles as each new deadly ring expands.
This phase emphasizes the importance of having previously positioned amplifiers close together, enabling the raid to easily transition from one safe zone to another. Throughout Phase 2, amplifiers also continuously fire projectiles, requiring constant vigilance and careful dodging.
Returning to Phase 1 and Final Enrage
After Phase 2 concludes, one amplifier remains active. Reposition the boss about 20 yards away from this amplifier and repeat the Phase 1 mechanics. If the encounter reaches the third instance of Phase 2, the boss will enrage, no longer becoming immune, and continuously casting deadly rings. Once the raid exhausts its amplifier safe zones, survival becomes impossible. Thus, the boss must be defeated before reaching this enrage scenario.
Sprocketmonger Lockenstock Strategy (based on PTR)
Sprocketmonger Lockenstock is the fifth boss in Liberation of Undermine, offering a chaotic and mechanically intense encounter. Featuring conveyor belts, explosive mines, and escalating weapon mechanics, this fight challenges players to manage overlapping hazards and maintain precision. Below is a complete guide to help your team navigate this encounter. First, we're going to take a look at the arena hazards, because in this fight its important to keep those in mind.
- Conveyor Belts: The arena features multiple conveyor belts: Central belts with traps and holes. Avoid these as they can knock players back or even kill them outright.
- Side belts that may serve as safe zones during specific phases.
- Holes: Hard to spot, these can cause immediate death or disrupt your positioning. Avoid them to stay in the fight.
- Side belts that may serve as safe zones during specific phases.
- Mines: Sprocketmonger periodically places four mines on the ground. These mines must be detonated one at a time to avoid raid-wide damage.
- On Heroic, players must be organized into groups to stagger mine detonations, avoiding multiple explosions at once.
- Failure to coordinate detonations can result in overlapping debuffs and unnecessary deaths.
- On Heroic, players must be organized into groups to stagger mine detonations, avoiding multiple explosions at once.
These are the things to keep in mind while fighting Sprocketmonger. But, that's not all. This boss has a slew of abilities that he will use at different stages of the battle.
| Ability | Description | Strategy |
| Foot Blaster Mines | Sprocketmonger places four mines on the ground. Stepping on them triggers an explosion that applies a stacking debuff, increasing damage taken from subsequent mines. | Assign groups to detonate mines in a staggered order to avoid raid-wide damage and debuff overlaps. |
| Conveyor Belts | Central conveyor belts are filled with traps and holes. Electrified belts and magnets appear during certain phases. | Stay clear of the central belts unless necessary. Use the edges during survival phases for faster, safer movement. |
| Beam Weapons | Laser beams sweep across the room, dealing massive damage to anyone caught in their path. Enhanced beams appear in later phases, covering more area. | Position ahead of time using visible telegraphs to avoid beam paths. Prioritize movement and prepositioning. |
| Rocket Barrage | Rockets land randomly across the arena, dealing AoE damage upon impact. Rockets are harder to see in overlapping phases. | Maintain awareness of rocket landing zones. Keep moving and stay spread out to minimize splash damage. |
| Magnetic Pull | Magnets appear during later phases, pulling players toward electrified belts and other hazards. | Use movement abilities and defensive cooldowns to counteract the pull. Stay away from the electrified belts. |
| Tank Bomb Mechanic | Applies a slow debuff and a bomb to the active tank. The bomb detonates after a short delay, causing AoE damage. | Tanks must move away from the group while slowed and execute a taunt swap to manage the debuff effectively. |
| Phase Transition: Conveyor Survival | Knocks players back and electrifies central conveyor belts. Lightning and debuff zones appear along the belts. | Use the edges of the conveyor belts for safer movement. Dodge lightning and avoid debuff zones to maintain survivability. |
Strictly speaking, the boss has two primary phases that repeat with escalating mechanics as the fight goes on. But, we've decided to break down the whole thing into smaller, more digestible parts to explain each mechanic and the way it escalates clearly. Just know that the whole structure of this boss fight is more cyclical, with increasing complexity rather than distinct, separate phases.
 Phase 1: Setting the Stage and Managing Mines
As the fight begins, players must spread out and establish positions to handle Foot Blaster Mines effectively. The boss places mines that need to be detonated strategically to avoid excessive damage. Divide the raid into groups, assigning each group to a mine to ensure staggered detonations. This prevents the stacking debuff from overwhelming the group.
Stay away from the central conveyor belts during this phase. These are littered with traps and holes that can knock players into dangerous areas or even result in instant death if mishandled. Use the edges of the room for safe positioning and focus on staying mobile to avoid other hazards.
Tanks should prepare for the Tank Bomb Mechanic, which requires them to move away from the group while under the effects of a slowing debuff. Coordinate taunt swaps to mitigate the damage effectively.
Phase 2: Conveyor Belt Survival
At this point, the boss knocks players toward the central conveyor belts, electrifying them and forcing movement. Use the edges of the belts to avoid damage and keep an eye on debuff zones that can reduce healing and cause dazes. The belts also feature lightning hazards that players must dodge while staying mobile.
This phase is primarily about survival. Healers should focus on keeping the raid healthy while players reposition and avoid hazards. Any downtime can be used to prepare for the next phase or recover from earlier mistakes.
Phase 3: Weapon Mechanics and Escalation
The boss begins activating weapon systems, including Beam Weapons, Rocket Barrage, and Magnetic Pull. Each of these introduces its own challenges:
- Beam Weapons: Large laser beams sweep across the room, requiring players to pre-position in safe zones. Enhanced beams in later phases will cover more area, making preemptive movement crucial.
- Rocket Barrage: Rockets land randomly, dealing AoE damage on impact. Awareness is key, as these can be hard to see, especially during overlapping mechanics.
- Magnetic Pull: Magnets appear, pulling players toward electrified conveyor belts. Use personal movement abilities to resist the pull and avoid being dragged into hazards.
Tanks will continue to handle the bomb mechanic, moving away from the group as needed. Communication during this phase is critical to ensure players handle their assigned responsibilities and maintain positioning.
Phase 4: Overlapping Chaos
As the fight progresses, mechanics begin to overlap, creating periods of intense raid-wide pressure. Mines, beams, rockets, and magnets may all be active simultaneously, testing the raid’s coordination and adaptability. This phase demands precise execution:
- Focus on survival above all else. Moving out of hazards and avoiding overlapping mechanics should take priority over maximizing damage.
- Use raid cooldowns to mitigate burst damage during particularly heavy overlaps.
- Keep movement abilities on cooldown for quick repositioning, especially when magnets and beams overlap.
Healers should be prepared to respond to spikes in damage, and players must take personal responsibility for dodging hazards to reduce strain on the raid.
Phase 5: Conveyor Knockback and Final Push
During the final phase, the boss uses an enhanced version of the Conveyor Survival Mechanic, electrifying the belts and knocking players back. Players must navigate the belts carefully, using the edges for faster and safer movement while avoiding lightning zones.
The goal here is to stay alive and return to the boss quickly to resume dealing damage. Melee players can utilize the side belts to maintain uptime, but ranged players should focus on positioning in safe zones to free-cast while dodging hazards.
The boss enhances previous mechanics during this phase, with larger beams and faster rockets adding complexity. Maintain discipline and avoid unnecessary deaths to secure victory.
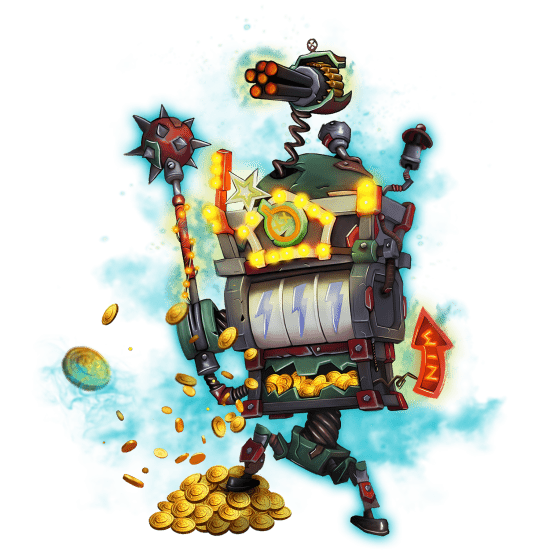
The One-Armed Bandit Strategy (based on PTR)
The One-Armed Bandit is the 6th boss fight, introducing unique mechanics involving casino-themed elements such as slot machine mechanics, casino chips, and tokens. Players must manage their priorities carefully while dealing with overlapping mechanics, which ramp up in difficulty throughout the encounter. First, we'll break down the boss' abilities and then move to tactics and strategy broken down into phases.
| Ability | Description | Counter/Strategy |
| Casino Tokens | Rolls blue casino chips that stun players hit for 8 seconds but grant a haste buff if avoided properly. | Stand close enough to avoid the stun and receive the haste buff or destroy them to avoid risks. |
| Slot Machine Adds | Three types of adds spawn at full energy: Coin Assistant, Shock Assistant, and Flame Assistant. Each drops a token upon death. | Quickly nuke the adds and collect two unique tokens to deposit into the boss. |
| Token Combinations | Depositing tokens into the boss triggers specific mechanics depending on the combination. | Rotate through unique token combos to manage mechanics and avoid repeating a combo. |
| Shocking Fields | Tank mechanic that leaves electric fields on the ground with each tank hit. | Tanks can clear fields by activating coils, which spawn additional mechanics. |
| Beam Coil Mechanic | The boss spawns a coil and creates a deadly beam between the coil and itself. | Avoid the beam at all costs; players marked for beams must position carefully to avoid wiping the raid. |
| Fixating Bomb Adds | Adds spawned from specific token combos that fixate on players and explode if not killed. | Cleave the adds quickly and stay away from their target paths. |
| Phase 2 Mechanics | In the final phase, the boss randomly chooses mechanics while applying heavy raid-wide damage. | Prioritize survival and damage output to defeat the boss before reaching enrage. |
 Phase 1: Add Management and Token Coordination
The fight begins with the boss cycling through its core mechanics, including the adds, tokens, and casino chips. Coordination is key to surviving this phase.
Managing Adds and Tokens
- At full energy, the boss spawns three adds: Coin, Shock, and Flame. Each add drops a corresponding token when defeated.
- Players must collect two tokens and deposit them into the boss using an extra action button.
- Each combination of two tokens activates a unique mechanic for the raid to handle. The six possible combinations are:
- Coin + Shock: Summons a coil that applies a buff or debuff.
- Coin + Flame: Spawns fixating bomb adds that explode on contact.
- Shock + Flame: Summons CC-able fixating adds for easy control.
- Coin + Coin, Shock + Shock, or Flame + Flame: Repeating a combination results in an instant wipe.
Visual Tip: Indicators around the room show which token combinations have already been used, helping players avoid repeats.
Casino Chips
The boss throws casino chips, creating a high-risk, high-reward mechanic:
- Risk: Chips stun anyone hit for several seconds, causing significant raid disruption.
- Reward: Standing close to a chip without being hit grants a haste and damage buff.
Players must decide whether to shoot the chips into the raid for buffs or safely direct them toward the walls to minimize risk.
Tank Mechanics
The tank faces periodic mechanics that create electric fields. Each electric field persists, reducing available space over time. Tanks can clear these fields by activating coils with an extra action button, but doing so triggers additional mechanics tied to the coil type.
Phase 2: High-Stakes Finale
As the fight progresses, the boss intensifies its mechanics, culminating in an enrage phase.
Escalating Mechanics
The boss begins randomly selecting previously activated mechanics, combining them with ongoing raid damage:
- Beam Coils: Coils connect to the boss with deadly beams that must be avoided.
- Fixating Adds: Adds chase players, requiring quick coordination to handle safely.
- Scattered Payout: Raid-wide damage increases rapidly, pushing healers to their limits.
The randomness of ad spawns and token combinations makes each pull unpredictable.
By Phase 2, electric fields from the tank mechanic cover much of the arena. Players must navigate these fields while handling beams, casino chips, and other mechanics, ensuring they maintain safe zones for movement.
Soft Enrage
As the boss approaches the final moments, it enters Scattered Payout, causing extreme raid-wide damage. The fight becomes a DPS race to kill the boss before the final mechanic, which results in an instant wipe.
Mug'Zee: Heads of Security Strategy (based on PTR)
Mug'Zee is a two-headed enforcer guarding the penultimate chamber of the raid. This encounter is a dynamic and chaotic fight that splits mechanics across two modes, determined by which side of the room the raid favors. Each head brings its unique set of challenges, requiring precise coordination, positional awareness, and adaptability to overcome. Mug represents explosive chaos, while Zee introduces icy discipline, culminating in an intense final phase where both sets of mechanics overlap.
| Ability | Description | Phase/Side |
| Unstable Crawler Mines | Randomly spawned mines fixate on players and detonate on contact, spawning smaller bombs that must be soaked individually to prevent raid-wide damage. | Left Side |
| Cluster Bombs | Detonated mines create three smaller bombs that require soaking by different players. Missing any results in massive raid damage. | Left Side |
| Gatling Spray | Mug fires a frontal cone attack, damaging all players caught in its path. | Left Side |
| Intercept Beam | A deadly beam targets a random player. Tanks must intercept it to reduce damage and prevent the death of the targeted player. | Left Side |
| Jail Walls | Two players are trapped in line-of-sight barriers with adds, cutting them off from the rest of the raid. | Right Side |
| Ice Spears | Players outside the jail walls are targeted with ice spears that deal lethal damage unless blocked by a wall or another valid object. | Right Side |
| Golden Pools | Tanks drop persistent golden pools that limit movement space. | Right Side |
| Combined Mechanics | In the final phase, all abilities from both Mug and Zee occur simultaneously, ramping up intensity and requiring flawless execution. | Final Phase |
 Phase 1: Mug’s Explosive Chaos
The encounter begins with Mug’s mechanics dominating the battlefield. The raid must focus on managing mines, soaks, and tank mechanics.
Mines and Cluster Bombs:
Mug periodically spawns Unstable Crawler Mines that fixate random players. To deal with these, the fixated player must intentionally detonate the mine by allowing it to reach them. When detonated, the mine spawns Cluster Bombs, which create multiple small soak zones that must be covered by the raid.
- Assign players to handle specific mines or designate a high-mobility tank or DPS to detonate multiple mines if possible.
- All cluster bomb soak zones must be covered promptly, as even one missed soak can cause devastating raid-wide damage.
Intercept Beam (Tank Mechanic):
Mug targets a random player with a high-damage beam. The tank must intercept the beam by stepping in front of the targeted player, reducing the damage they take.
- Ensure the targeted player stops moving to give the tank time to position correctly.
- The player hit by the beam gains a bomb debuff that must be dropped away from the group.
Gatling Spray: Mug unleashes a frontal cone attack. The boss must be faced away from the raid at all times to avoid unnecessary damage to the group. Transition Preparation: Clear as many mines and cluster bombs as possible before transitioning to Zee’s side to reduce leftover mechanics that could complicate the next phase. Players should begin pre-positioning near the center of the room once Mug reaches 50% energy.
Phase 2: Zee’s Icy Discipline
Switching to Zee introduces entirely different mechanics that require coordination and controlled movement.
Jail Walls and Add Management:
Two players (one melee, one ranged) are selected to soak Jail Wall Zones, which create line-of-sight barriers. These zones trap the players inside with two adds that must be defeated to escape.
- Assign high-DPS players to these roles to ensure quick add kills.
- Players outside the jails focus on managing external mechanics while the jailed players handle the adds.
Ice Spears:
Players outside the jails are targeted with Ice Spears that must be redirected to hit barriers (walls, leftover bombs, or jails) to avoid lethal damage.
- Targeted players should plan their movement to ensure the spears hit valid barriers while avoiding group members.
- If barriers are used efficiently, spears can also contribute to managing leftover mechanics, such as mines or bombs.
Golden Drip (Tank Mechanic):
Tanks deal with a debuff that drops harmful golden pools on the ground.
- Kite Zee around the room to drop pools in low-traffic areas, ensuring they don’t obstruct group movement or create danger zones during transitions.
After handling two cycles of Zee’s mechanics, the group must transition back to Mug. Clear any golden pools near the center of the room to maintain a safe path during the transition.
Final Phase: Combined Onslaught
In the final phase, Mug and Zee combine their mechanics, creating an intense overlap of all prior abilities. Coordination is key to survival.
- Mines and Cluster Bombs from Mug’s side will overlap with Zee’s Ice Spears and Jail Walls. Assign clear roles to handle each mechanic and avoid duplication of efforts.
- Tanks must continue managing Golden Drip while ensuring Intercept Beam is properly mitigated.
- Healers should stagger cooldowns to counter escalating raid-wide damage caused by the overlap of Mug’s and Zee’s mechanics.
- DPS players should maximize output while prioritizing survival, as the phase has a hard enrage.
This phase demands precise execution of mechanics learned in the first two phases, with little margin for error. Assign responsibilities clearly and focus on surviving until the boss is defeated.
Chrome King Gallywix Strategy
Chrome King Gallywix is the final boss encounter in Liberation of Undermine, consisting of three phases with an intermission, featuring intensive mechanics, critical add management, and precise raid coordination. Bloodlust is recommended for Phase 3 due to its increased difficulty.
- Split Damage Frontal: A frontal cone aimed at the tank requiring multiple soakers to share damage and heal-absorb debuffs.
- Bomb Mechanics: Various bombs spawn frequently, requiring careful dodging and management.
- Giga Coil Activation: Boss periodically tries activating deadly structures; prevented using Giga Bombs from adds.
- Intermission: Heavy raid damage and a large absorb shield that must be quickly broken to interrupt the boss.
- Increasingly limited space: Destroyed Giga Coils leave permanent lightning pools, gradually limiting raid positioning.
Here's a detailed breakdown of abilities and tactics for this encounter:
| Ability | Description | Strategy |
| Split Damage Frontal | Frontal cone attack targeting the tank, requiring multiple players to soak damage. | Rotate soak groups each cast due to debuffs; quickly heal off resulting absorb shields. |
| Bomb Spawn | Varied bombs and rockets spawn throughout phases, leaving damaging circles or applying dots. | Continuously dodge circles and rockets. Tanks interact with large bombs immediately (Heroic). |
| Suppression | Channel causing raid-wide damage and spawning circles to dodge. | Constantly move to avoid circles while managing raid healing cooldowns. |
| Venting Heat | Applies raid-wide DoT increasing in duration each cast. | Raid uses cooldowns increasingly as fight progresses; healers plan accordingly. |
| Gatling Cannon | Heavy tank damage, increased by tank distance from boss. | Tanks remain close; manage heavy tank healing. |
| Trick Shots | Stacking buff boss transfers onto tank swaps or at 10 stacks, causing burst damage and DoT. | Tanks regularly taunt swap to avoid high stacks, preemptively use defensive cooldowns. |
| Giga Coils (Phase 2/3) | Boss attempts activation, causing fatal raid-wide pulses unless stopped by Giga Bombs. | Kill bomb-carrying adds promptly, carefully timing bombs to disable coils efficiently. |
| Fused/Tick-Tock Canisters | Exploding circles needing group soaking; cause heal-absorbs. | Minimal players soak explosions to reduce absorb stacking; manage healing efficiently. |
| Sharpshot Sentry Adds | Channel heavy damage into random players, must be interrupted. | Prioritize interrupts and kill swiftly. |
| Wrenchmonger Adds | Tankable adds applying damage-increasing debuffs; removable enrage (Heroic). | Tanks kite or remove enrage; DPS down quickly. |
| Intermission Shield | Boss gains massive absorb shield, channels increasing raid damage. | Quickly break absorb shield to interrupt channel; dodge additional mechanics (Heroic). |
And here's how you put an end to this Chrome King:
Phase 1: Initial Mechanics and Bomb Control
Position the boss centrally. The primary mechanic here is a heavy frontal cone aimed at the tank that must be soaked by at least three players. All soaking players receive a heal-absorb shield requiring fast healing to minimize raid damage. Alternate groups for soaking due to debuffs doubling damage from consecutive casts.
Simultaneously, multiple bomb mechanics occur. Players consistently dodge falling bombs and rockets, while players marked with bombs move away from the group. On Heroic difficulty, the tank without boss aggro quickly handles large bombs, receiving significant damage and knockback upon interaction, requiring precise positioning.
The raid continuously deals with two significant raid-wide damage mechanics: Suppression, spawning dodgeable circles, and Venting Heat, applying stacking raid-wide DoTs extending duration each cast. Tanks manage two mechanics: Gatling Cannon, requiring close positioning, and Trick Shots, necessitating regular tank swaps.
Phase 2: Giga Coil Management
At full energy, the boss attempts activating one of four Giga Coils, dealing fatal pulsing damage if successful. A Darkfuse Technician carrying a Giga Bomb spawns periodically. The raid must quickly kill this add, dropping the bomb, which a player picks up and uses to destroy one of two control panels ("Giga Controls") on the targeted coil. Destroying a control prevents coil activation for one minute.
Repeat this mechanic by destroying the second control after the minute expires, permanently disabling that coil and creating a lasting lightning pool. Balance bomb usage carefully to avoid prematurely exhausting controls or flooding the arena with lightning. Unused bombs explode after 30 seconds; plan accordingly.
Additional mechanics include dodging a random-direction boss beam, group-soaking Fused Canisters with minimal players due to heal-absorbs, interrupting Sharpshot Sentries, and carefully tanking or kiting Darkfuse Wrenchmongers, removing their enrage debuff on Heroic.
Repeat these coil-destruction cycles until reaching 50% boss health.
Intermission: Shield Break and Heavy Damage
At 50% health, the boss initiates an intermission phase, landing forcefully and gaining a large absorb shield while channeling increasing raid-wide damage. The raid must quickly break this absorb shield to make the channel interruptible, stopping severe damage escalation. On Heroic, additional lightning beams or rotating hazards appear, requiring extra dodging during this high-damage phase.
Phase 3: Final Giga Coils and Increased Intensity
Phase 3 mirrors Phase 2 mechanics with greater intensity. The boss resumes attempting coil activations, repeating bomb add mechanics. Limited space from previous destroyed coils further restricts movement.
Tanks must manage a new heavy-damage ability that hits them, applies a damage-taken increase, and spawns additional bomb mechanics. Tank swaps after every cast become mandatory, positioning carefully away from the raid due to large AoE explosions and bomb spawns. Attached player bombs from earlier phases now become rockets firing after a delay; affected players should aim away from raid groups.
The boss also drops Tick-Tock Canisters, each requiring at least one player soak, applying heal-absorbs similar to earlier phases. Lastly, Suppression now ends with an additional massive shock dealing falloff damage, forcing raid repositioning.
Phase 3 demands careful bomb management, precise tank positioning, and efficient space usage, ultimately requiring defeating the boss before the platform becomes entirely unmanageable due to persistent lightning zones from destroyed coils.


Liberation of Undermine Loot
While we don’t yet have the full list of all Liberation of Undermine loot, we can already preview all of the tier sets from this raid. So, below is a table showcasing the Season 2 Tier Sets available in the Liberation of Undermine raid. These Tier Sets include unique appearances, class-specific bonuses, and are integral to optimizing performance across various roles.
| Class | Tier Set Name | Bonus Highlights |
| Death Knight | Cauldron Champion's Encore |
- Blood: Icebound Fortitude proc, enhanced Death Strike and AoE effects. - Frost: Stacking Frost Strike/Glacial Advance buff with Frostscythe proc. - Unholy: Boosted Death Coil/Epidemic with Dark Transformation synergy. |
| Demon Hunter | Fel-Dealer's Contraband |
- Havoc: Stacking damage boost for Blade Dance/Chaos Strike with Demon Form synergy. - Vengeance: Defensive Metamorphosis proc with cooldown reduction on The Hunt. |
| Druid | Roots of Reclaiming Blight |
- Balance: Auto-spawning Wild Mushrooms for bonus damage. - Feral: Periodic effect damage boost and Apex Predator synergy. - Guardian: Defensive Survival Instincts proc with boosted ability chain. - Restoration: Healing over-time bonus with emergency heal triggers. |
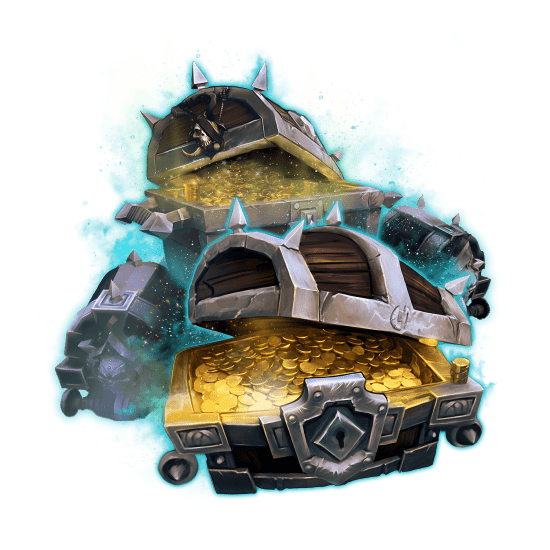
| Evoker | Opulent Treasurescale's Hoard |
- Augmentation: Upheaval synergy with Essence Burst generation. - Devastation: Empower spell damage boost with Jackpot synergy. - Preservation: Healing over-time Insurance bonus and Verdant Embrace buff. |
| Hunter | Tireless Collector's Bounties |
- Beast Mastery: Barbed Shot Jackpot proc with mutagen pet boosts. - Marksmanship: Auto-shot Jackpot synergy and Explosive Shot bonus. - Survival: Wildfire Bomb damage stacking and enhanced Kill Command follow-up. |
| Mage | Jewels of the Aspectral Emissary |
- Arcane: Clearcasting Jackpot proc with spell damage boosts. - Fire: Jackpot damage amplification and Combustion synergy. - Frost: Jackpot Frostbolt Volley with sustained Icy Veins buff. |
| Monk | Ageless Serpent's Foresight |
- Brewmaster: Defensive Fortifying Brew proc with Blackout Kick buff. - Mistweaver: Healing over-time Insurance with Renewing Mist boost. - Windwalker: Stacking damage boost for Rising Sun Kick and Spinning Crane Kick. |
| Paladin | Oath of the Aureate Sentry |
- Holy: Healing over-time Insurance with Divine Toll bonus. - Protection: Shield of the Righteous refund with defensive uptime boost. - Retribution: Holy Power return and temporary invincibility for burst windows. |
| Priest | Confessor's Unshakable Virtue |
- Discipline: Healing Insurance bonus with absorption effectiveness. - Holy: Insurance proc synergy with Holy Word abilities. - Shadow: Void Bolt Jackpot proc with Power Infusion synergy. |
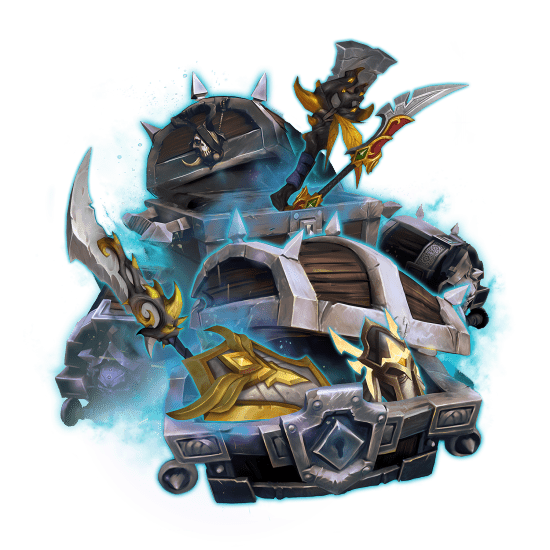
| Rogue | Spectral Gambler's Last Call |
- Assassination: Jackpot buff for Envenom/Rupture with bonus stack retention. - Outlaw: Winning Streak bonus for Dispatch and enhanced Roll the Bones effects. - Subtlety: Shadow Dance synergy for stacked burst damage. |
| Shaman | Currents of the Gale Sovereign |
- Elemental: Jackpot bonus summons elemental pets for burst damage. - Enhancement: Winning Streak stacks for boosted melee abilities. - Restoration: Healing over-time Insurance with enhanced Chain Heal/Healing Surge. |
| Warlock | Spliced Fiendtrader's Influence |
- Affliction: Jackpot haste boost with amplified Unstable Affliction spread. - Demonology: Jackpot Dreadstalker summon with enhanced Hand of Gul'dan effects. - Destruction: Jackpot Demonfire burst with Mastery boost. |
| Warrior | Underpin Strongarm's Muscle |
- Arms: Winning Streak proc for Mortal Strike/Cleave with bonus Overpower damage. - Fury: Stacking Rampage buff with alternating Bloodthirst/Raging Blow bonuses. - Protection: Shield Wall proc with boosted critical strikes. |
Of course, there’ll be more stuff in the Liberation of Undermine loot table to earn – achievements, possibly mounts, pets, etc. As soon as we have the info about any of them, we’ll add them here.
Conclusion
Liberation of Undermine is a very cool raid with some of the most creative bosses. While this is not the first ever goblin-themed instance in the game, it’s definitely the first one where you get to explore the Goblin Trade Empire's capital city, Undermine, which is something genuinely impressive. As far as the raid and boss mechanics go, if the first boss is any indication of what to expect from the rest of the raid, LoU shapes up to be a pretty fun one. While experienced players will probably not be caught off guard here, you can’t deny the unique theme that creates memorable experiences and that’s exactly what a raid should be able to do – leave an impression.
F.A.Q.
What level should I do Liberation of Undermine?
You can access the Liberation of Undermine raid at level 80, the maximum level in the War Within expansion.
How long does Liberation of Undermine take in WoW?
The raid typically takes about 2 to 3 hours to complete, depending on your group's preparation, gear level, and familiarity with the boss mechanics.
What level can you enter Liberation of Undermine WoW?
You need to be at level 80 to enter Liberation of Undermine.
Who is the final boss in Liberation of Undermine?
The final boss of Liberation of Undermine is Chrome King Gallywix, who awaits players in his extravagant hideaway.
What is the strategy for the Liberation of Undermine bosses?
To succeed, plan a strategy for each boss encounter beforehand. Make sure all raid members understand their roles, and study the mechanics and abilities of each boss to avoid unnecessary wipes.
What is the boss order of the Liberation of Undermine?
- Stix Bunkjunker
- Vexie and the Geargrinders
- Cauldron of Carnage
- Rik Reverb
- Sprocketmonger Locknstock
- One-Armed Bandit
- Mug’Zee, Heads of Security
- Chrome King Gallywix
How many bosses are in Liberation of Undermine?
The Liberation of Undermine raid features 8 unique bosses, each with distinct mechanics and challenges.
Where is the Liberation of Undermine on the map WoW?
The Liberation of Undermine raid is located in the heart of Undermine, the capital of the Goblin Trade Empire. It is accessible from Orgrimmar and Stormwind via portals provided by Nexus-Lord Donjon Rade.
What level is Liberation of Undermine raid?
You must be level 80 to participate in the Liberation of Undermine raid.


