 Dallon Avery
Mists of Tirna Scithe is one of the few returning dungeons from previous expansions available to you during Season 1. In this Mists of Tirna Scithe mythic+ guide, we’ll give you a full walkthrough of this dungeon, so you can easily farm it at any difficulty for rewards and achievements. The guide will explain the dungeon mechanics and buffs, teach you how to complete the dungeon puzzles and give you the ultimate strategy for defeating every boss encounter. This guide is for Mythic+ difficulty, which means that on top of increased damaged from monsters and bosses, you'll also have to keep in mind the various affixes and their effects on your dungeon run. If you’re all ready to go, let’s dive straight into it.
By the way, if you need help completing multiple runs of Mythic+ dungeons, or you simply don’t have time to do it as many times as you want, you can always Buy Mythic Dungeons Boost at Skycoach. In this simple yet highly customizable boosting service, you can pick the desired Keystone level, the dungeon, and the number of runs you need for your veteran WoW players to complete for you. Then, all you have to do is place an order, and our PROs will handle the rest. This is literally the easiest and most affordable way to farm some missing gear and make your character stronger. Click the link for more information.
IMPORTANT NOTE: Apart from learning everything about Mists of Tirna Scithe, you can also Buy WoW Boost from Skycoach. We offer a wide range of products at the lowest market price and with the fastest delivery. You can make your first purchase even CHEAPER if you find a special PROMO CODE (highlighted in green) hidden in this article and get a 20% DISCOUNT.
Browse our hottest WoW Boosting services


Dungeon Overview

Mists of Tirna Scithe is a dungeon from Shadowlands expansion located in the Ardenweald zone. This dungeon embodies the mystical and enchanting nature of Ardenweald, with its lush, otherworldly landscapes, magical flora, and various fae creatures.
You venture into this dungeon to aid the Night Fae in resolving the disruptions caused by the Drust, a group of dark and twisted beings who are corrupting the natural balance of the area. The dungeon's atmosphere is vibrant yet eerie, combining the beauty of Ardenweald with the menace brought by the Drust invasion.
As you progress through Mists of Tirna Scithe m+, you'll navigate through three primary areas, each with unique challenges and enemies. The dungeon is known for its maze-like paths, where you must solve puzzles and overcome obstacles to move forward. Key encounters include:
- Ingra Maloch: The first boss, a Drust satyr wielding powerful nature magic. He is accompanied by Droman Oulfarran, who is initially mind-controlled and must be freed to aid you in the battle.
- Mistcaller: The second boss, a playful yet deadly fae creature who challenges you with illusions and deceptive mechanics. Quick thinking and coordination are essential to defeat her.
- Tred'ova: The final boss, a monstrous gorm that has been corrupted by the Drust. This encounter tests you with complex mechanics, including managing adds and avoiding dangerous area-of-effect abilities.
Throughout the dungeon, you must remain vigilant and adaptive, making use of your environment and working with your group to overcome the mystical and dangerous challenges presented by the Mists of Tirna Scithe.
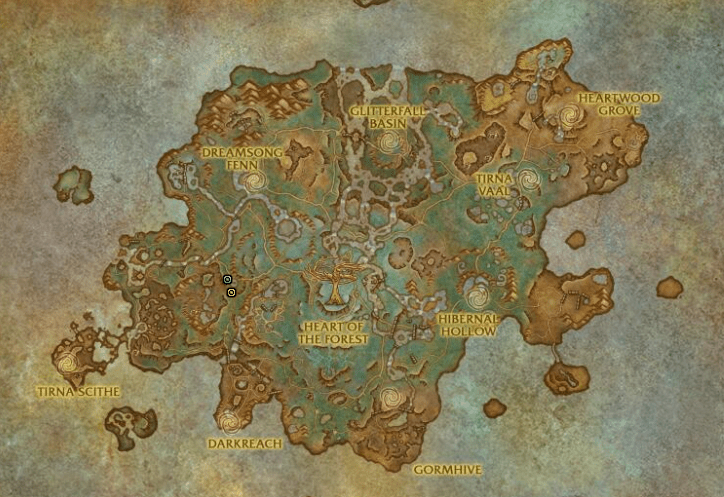
To find the Mists of Tirna Scithe location, go to these coordinates: Ardenweald 32.4, 52.2. Alternatively, you can just start the dungeon from the Dungeon Finder.
Mists of Tirna Scithe Route
Before we get into the detailed walkthrough of the dungeon, we'd like to offer you the best Mists of Tirna Scithe route. If you're not familiar with this term, a route refers to the planned path and strategy players use to navigate through a dungeon. This involves deciding the order in which to tackle various enemies, bosses, and objectives within the dungeon to optimize efficiency and success. Dungeon routes are particularly important in the context of Mythic+ dungeons, where speed and precision are crucial. And since this is a guide for the Mythic+ version, following a route is the safest thing to do for a successful run, especially when the time is limited. Here's how to read a route:
- Pulls: Each pull indicates a specific group of enemies that should be engaged together. They have numbers from 1 to 20. Meaning that Pull 1 is the first batch of enemies you'll engage and Pull 20 is the final boss.
- Percentages: These indicate how much each pull contributes to the total trash percentage needed to complete the dungeon. By the end of the dungeon, these pulls should collectively add up to 100%.
- Special Mobs and Bosses: Certain enemies (like Incinerator Arkolath and Oros Coldheart) and bosses (like Ingra Maloch) do not contribute to the trash percentage but are necessary to progress through or complete the dungeon.

What you see above is the most optimal route preferred by most players. It's not the only possible path from the dungeon start to the final boss, but it's one of the most commonly used ones. To make it easier for you to look through this image, here's a table that lists all pulls from this route:
| Pull number | Monsters | Percentage |
| 1 | x5 Drust Spiteclaw | 3.8%% |
| 2 |
x2 Drust Soulceaver x1 Drust Harvester x1 Tirnenn Villager |
11.2%% |
| 3 |
x2 Drust Soulceaver x2 Drust Harvester |
17.3% |
| 4 | x2 Drust Boughbreaker | 21.9% |
| 5 | Ingra Maloch (boss) | 21.9% |
| 6 |
x3 Mistveil Defender x1 Mistveil Shaper x1 Mistveil Guardian x1 Mistveil Tender x1 Mistveil Stalker x1 Mistveil Stinger |
34.2% |
| 7 |
x2 Mistveil Defender x1 Mistveil Stalker x1 Mistveil Stinger |
40.4% |
| 8 |
x1 Mistveil Defender x1 Mistveil Shaper x1 Mistveil Guardian x1 Mistveil Tender |
46.5% |
| 9 |
x2 Mistveil Defender x2 Mistveil Tender |
52.7% |
| 10 | x1 Mistveil Nightblossom | 58.8% |
| 11 |
x2 Mistveil Defender x1 Mistveil Guardian x1 Mistveil Shaper x1 Mistveil Tender |
66.5% |
| 12 | Mistcaller (boss) | 66.5% |
| 13 |
x1 Spinemaw Staghorn x2 Spinemaw Acidgullet |
71.5% |
| 14 |
x1 Spinemaw Staghorn x2 Spinemaw Reaver x6 Spinemaw Lavra x1 Spinemaw Gorger |
80.4% |
| 15 |
x1 Spinemaw Staghorn x2 Spinemaw Acidgullet x1 Spinemaw Gorger |
86.9% |
| 16 |
x1 Spinemaw Acidgullet x5 Spinemaw Lavra x1 Spinemaw Gorger |
91.9% |
| 17 |
x2 Spinemaw Acidgullet x2 Spinemaw Gorger |
98.1% |
| 18 |
x1 Spinemaw Acidgullet x6 Spinemaw Gorger x1 Spinemaw Gorger |
103.8% |
| 19 |
x1 Spinemaw Staghorn x2 Spinemaw Acidgullet x1 Spinemaw Gorger |
110.4% |
| 20 | Tred'ova (boss) | 110.4% |
Further below, we will provide a detailed explanation of the enemies you will encounter, including their abilities and the most effective strategies for dealing with each one.
The Covenant Benefits Explained
A player with the Night Fae Covenant in your dungeon group will be a huge help in completing this dungeon as they will be able to interact with various parts of the dungeon, providing some huge benefits to all players in the group. Here are all the benefits explained:
- Using Overgrown Roots to skip parts of the dungeon – A member of the Night Fae Covenant can interact with the roots to open hidden paths in the dungeon, which in some cases allows you to skip packs of monsters (in the beginning) or open rooms with other buffs.
- Access to buffs – prior to the first boss encounter, a member of the Night Fae Covenant can open up a room with mushrooms that provide buffs to the entire group:
- Green mushrooms – increases your stats for 10 minutes.
- Red mushrooms – gives HP buff and increased stamina for 10 minutes.
- Unlocking a checkpoint – after each boss encounter, a member of the Night Fae Covenant can activate the Depleted Anima Seed, which serves as a checkpoint at which fallen players will resurrect the next time they fall in battle.
These benefits will help you a lot when clearing this dungeon in Mythic+ difficulty, as the fights will be considerably more difficult.

Mists of Tirna Scithe Dungeon Walkthrough
We’ll start our guide with the Mists of Tirna Scithe m+ tactics for the first area. Out of all areas, this one is probably the toughest, so be careful right out of the gate. Using the Night Fae shortcut at the beginning can save some time, so ideally, you'll have a Night Fae. Watch out for the enemies that you will encounter here. Here’s a short summary table:
| Monster | Abilities and Effects | Strategy |
| Drust Spiteclaw | Leap to random players, hit everyone nearby for physical damage, stacking bleed. Curse on death (30s, +10% damage taken, stacks). | Use AoE stuns and mob displacement to keep them together. Dispels are crucial for the curse. |
| Dread Soulcleavers | Soul Split on the tank (magic damage, +20% damage taken for 8s). | Dispel Soul Split immediately. Non-healers should handle curses so healers can focus on this. |
| Drust Harvesters | Spirit Bolt (magic damage to target). Harvest Essence (channel, heals for all damage done). | Prioritize kicking Harvest Essence to save time and prevent healing. |
| Tirnenn Villager | Bewildering Pollen (frontal cone, large damage, 4s disorient). Overgrowth (stuns the random target, creates seed). | Avoid Bewildering Pollen; destroy seed quickly to free stunned ally. Can be skipped with stealth. |
| Drust Boughbreaker | Bramble Burst (slows, light damage). Furious Thrashing (50% health, heavy physical damage to party for 6s). | Focus one at a time to avoid simultaneous thrashing. Use defensives and healing cooldowns when thrashing. |
Now, let’s get into a little bit more detail regarding each of these mobs.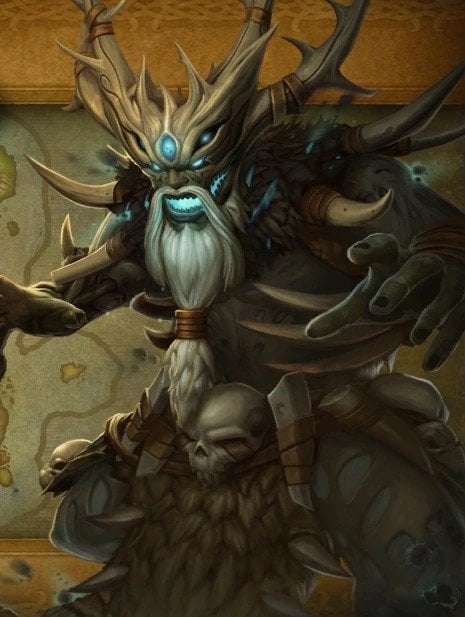
- Spiteclaws leap to random players and then hit everyone nearby for a decent amount of physical damage as well as a stacking bleed. Try to use AoE stuns and mob displacement, if possible, to keep them together to nuke down. When they die, the Spiteclaws put a curse on everyone within 30 yards for 30 seconds that increases damage taken by 10 percent. This also stacks, so make sure you're dispelling whenever possible.
- Dread Soulcleavers are incredibly dangerous mobs that cast Soul Split on the tank. This does a large amount of magic damage and also increases the damage they take by 20 percent for 8 seconds, so be sure to dispel this immediately. Ideally, you have a non-healer that can dispel the curses while the healer focuses their dispels on this magic effect, or else the tank is going to be hit hard.
- Drust Harvesters are ranged casters with two abilities. Spirit Bolt deals a large amount of magic damage to whoever is targeted. Harvest Essence is a long channel that deals less damage but heals the Harvester for all of the damage done, so this is the highest priority kick if you're looking to save time.
- Tirnenn Villager is the toughest mob in this area. These have an absolute ton of health. However, they become friendly at twenty percent, so you don't have to bring them down to zero. The Villagers cast Bewildering Pollen, a frontal cone that deals a large amount of damage if you're hit and also disorients anyone for four seconds. This is easily telegraphed, although it can be hard to dodge in tight spaces if you're trying to sneak through the area and not pull any additional packs. They also cast Overgrowth, stunning a random target and creating a seed around them until it's destroyed. The seed has a low amount of health and can be almost immediately broken out if the target is in some ground effects from the team nuking down the Spiteclaws.
- Before you engage the first boss, you have to deal with two Boughbreakers. These mobs occasionally cast Bramble Burst, springing branches from the ground that slow you and deal a light amount of damage. At 50% health, they cast Furious Thrashing, dealing large amounts of physical damage to your entire party for six seconds. It's best to focus them down one at a time so they aren't both thrashing together, but with a coordinated group, it might not be a bad idea to keep them even and then use all your defensives and healing cooldowns during that time.
Since this is a very dangerous area, it's a good idea to sneak by as many mobs as possible using out-of-combat CCs like Sap or Imprison. Even Priests' Mind Soothe can prove helpful here. All of the packs are a mix of the four mobs mentioned earlier.
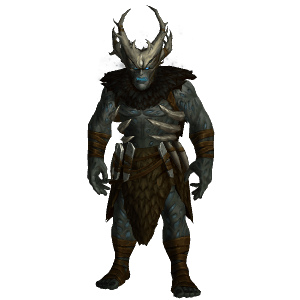
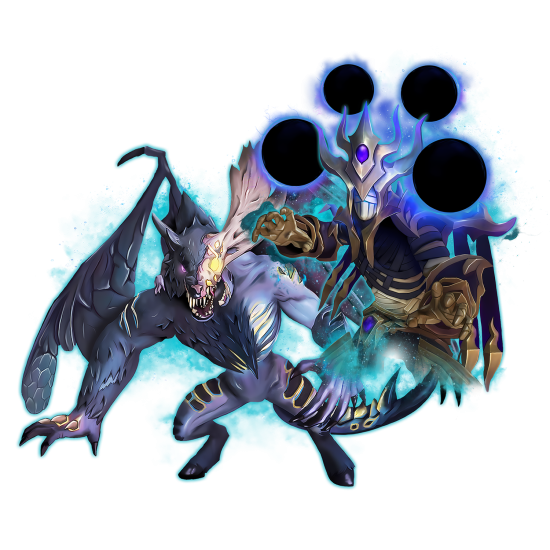
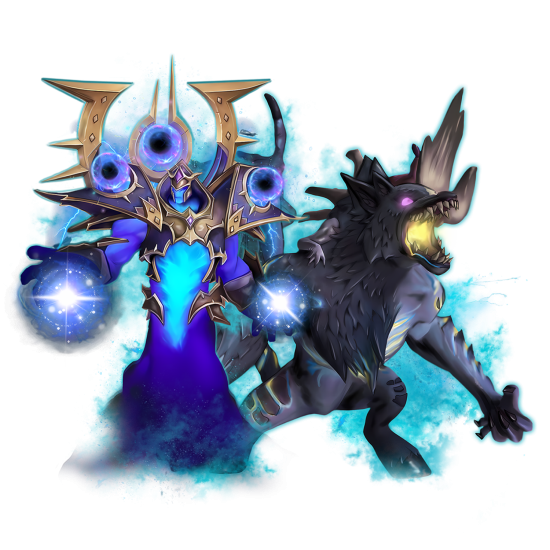
Ingra Maloch Boss Encounter Strategy
After the Boughbreakers are dead, you can finally pull the first boss, Ingra Maloch. This is a council-style fight with two Mists of Tirna Scithe mythic+ bosses: Ingra and Droman.
Ingra Abilities
Ingra’s abilities include powers that help him control Droman and deal damage to players.
| Ability | Description |
| Soul Shackle | Maloch uses drust magic to take control of Droman Oulfarran's mind, forcing them to attack players while above 20% health. |
| Force Compliance | Maloch periodically forces Oulfarran to cast Tears of the Forest. |
| Spirit Bolt | Maloch fires a bolt of deathly energy that inflicts heavy Shadow damage to a player. |
| Embrace Darkness | Maloch shrouds himself in dark energy, applying Death Shroud to all players and reducing all damage he takes by 80%. |
| Death Shroud | Inflicts Shadow damage to all players every 1 second while Maloch is protected by Embrace Darkness. |
| Bewildering Pollen | Oulfarran expels a cone of enchanted pollen that inflicts Nature damage and disorients players for 4 seconds. |
| Tears of the Forest | Anima bursts from Oulfarran's bark and rains down around players, inflicting Nature damage and leaving Anima Puddles. |
| Anima Puddle | Inflicts Nature damage every 1 second to players standing in the puddle. |
| Droman's Wrath | At 20% health, Oulfarran breaks free of Maloch's control, stunning him and increasing all damage he takes by 200% for 15 seconds. This removes the effects of Embrace Darkness and Death Shroud. |
Droman Abilities
Droman shares abilities with Ingra when he is mind-controlled.
| Ability | Description |
| Anima Puddle | Inflicts Nature damage every 1 second to players standing in the puddle. |
| Bewildering Pollen | Expels enchanted pollen, inflicting Nature damage and disorienting players for 4 seconds. |
| Droman's Wrath | Overwhelms Maloch, stunning him and increasing all damage he takes by 200% for 15 seconds. Removes Embrace Darkness and Death Shroud effects. |
| Regeneration | Heals the caster for 15% health every 2 seconds. |
| Tears of the Forest | Anima bursts inflict Nature damage to nearby players and leave behind Anima Puddles. |
You have to fight these two bosses in a particular manner to win. Here’s what you should do
Ingra & Droman Tactics
You have to continuously DPS down Droman, the big tree, in order to make Ingra vulnerable again.
Once you bring the tree to 20% health, it will stun Ingra and increase the damage he takes by 200% for 12 seconds. It's ideal to save your cooldowns for this moment since the damage amp is so large. After the stun wears off, Droman, the tree, will heal back to full again, and you start the cycle. After about 30 seconds in a phase, Ingra will cast Repulsive Visage, which fears all players, and then he shrouds himself in darkness, reducing all damage taken by 80%, and also starts pulsing damage to the party.
The goal is to drop the tree low to stun the boss before this phase, but depending on the difficulty and your group's damage, you may not be able to achieve this. During the fight, Ingra will occasionally cast Spirit Bolt, which deals heavy damage to the tank and should be kicked.
The tree will also cast spells against you while active. Tears of the Forest are just swirlies that spawn over the room, dealing initial damage and also leaving a puddle. Droman also has the same Bewildering Pollen frontal cast that the other trees did earlier. When you're leaving the first boss room, don't forget to activate the depleted anima seed to update your graveyard. The walk back is already really long.

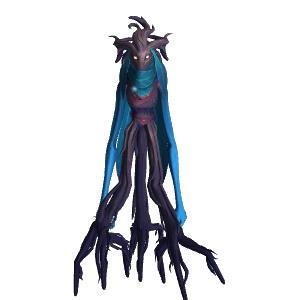
Mistcaller Maze Walkthrough
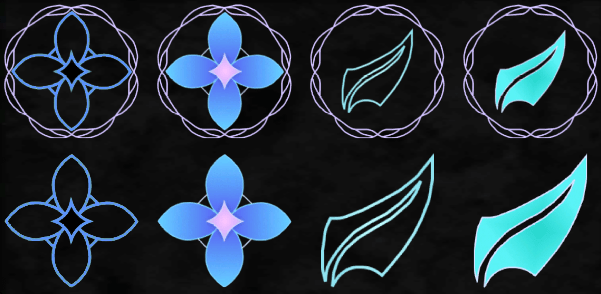
Mistveil Tangle is a maze in which the true path is revealed by the symbols hidden in the mist. Each room has four symbols, and each symbol has three different attributes:
- Flower or leaf
- Filled or empty
- Circled or not.
One of the four symbols will have an attribute that is different from all the others. For example, three of the symbols will be flowers, and the fourth one will be a leaf, so that means the leaf shows the correct path. It might seem a bit complicated at first, but once you grasp the idea, it's pretty easy.
A quick tip: in the very first room, the Mistcaller will always go in the right direction, so you can skip the game in the first room and just follow the Mistcaller.
While you are navigating the mist, you have to completely clear the room before you can move on to the next. The mist won't open until the room is clear. If you guess wrong, you and your entire party will be teleported back to the beginning of the maze.
When in a maze, you’ll encounter a few enemies:
- Mistveil Defenders' main ability is Spear Flurry. They deal pulsing damage in a frontal cone while channeling this. It's a good idea to stun these when possible, especially when they are enraged. When their allies die, they gain one stack of Enraged, increasing damage done by 50%.
- Mistveil Tenders, on the other hand, only have a healing cast, Nourish the Forest, that they cast every 15 seconds. This must be kicked, or it will heal all nearby allies.
- Mistveil Stingers cast Anima Injection, leaving a debuff on a target that deals nature damage for 6 seconds. If not dispelled, the target will explode for a large amount of damage, hitting any nearby players as well. The healer needs to dispel all of these within that 6-second window whenever possible.
- Mistveil Stalkers are deceptively dangerous. Their only ability, Bite, teleports them to a random target, dealing a very high amount of physical damage and inflicting a bleed for 12 seconds. You want to stun or lock down the cast whenever possible. If you do lock it down, it won't recast it again for 15 seconds.
- Mistveil Shapers are also important mobs to lock down. Their main ability, Bramblethorn Coat, gives themselves an absorb shield while rooting players for 8 seconds and dealing heavy amounts of damage, so it must be interrupted.
- Mistveil Guardians have a long wind-up ability called Bucking Rampage that deals damage to everyone around them in a circle. It's fairly easy to sidestep.
You can potentially run into one of three mini-bosses in the mist as well.
The Mistveil Matriarch can be a bit of a pain for the tank, so be careful if you run into this one. Radiant Breath is a frontal cone that disorients players, similar to the trees earlier in the dungeon. Pools of Radiance is a cast that cannot be stopped. It places a pool under the Matriarch, healing itself or any players inside for four percent per second. Drag it out as soon as possible, or else it can heal very quickly. Be careful of the tank hit, though, Shred Armor, which deals a large amount of damage. This isn't particularly dangerous for the tank; however, if the tank is out of range, it will hit any random nearby player instead. When you're tanking this, be sure that you're kiting the mob slowly to drag it out of the pool while still staying in range to take the hit.
Gorgegullet is the second mini-boss. The big frog is significantly easier to manage. Poisonous Secretion hits enemies around in a circle with initial damage and a damage-over-time effect, but it's pretty easy to step out of. Otherwise, the frog jumps around the room, dealing damage to anyone who decides not to move out of it, and also has a tank hit similar to the Matriarch. This one, however, is a frontal, so make sure it's not pointed at your allies.
Lastly is Mistveil Nightblossom. Like the others, there's a heavy tank hit called Triple Bite, which is a frontal that also leaves behind a poison debuff. Poison Discharge sends swirlies around the room that have to be dodged. This one's pretty easy to handle, too, but can still take some time because of how much health it has.
Mistcaller Boss Encounter Strategy
Once you make your way through the mist, you'll run into the Mistcaller. This boss uses various mechanics such as Dodge Ball, Freeze Tag, and Patty Cake. Players must dodge Dodgeballs indicated by arrows, avoid contact with fixating Vulpins that explode on contact, and interrupt Pattycake to avoid disorientation and heavy damage.
Mistcaller Abilities
Let’s learn the boss’ abilities first:
| Ability | Description |
| Guessing Game | Mistcaller initiates a Guessing Game, spawning 4 illusionary clones. Identifying the unique sigil on one clone ends the game. In Mythic+ difficulty, Mistcaller takes no damage until the correct clone is identified. |
| Illusionary Clone | Mimics Mistcaller's appearance. |
| Penalizing Burst | Deals escalating Nature damage to all enemies with each successive cast. |
| Oopsie | If the incorrect Illusionary Clone is destroyed, it detonates, causing massive Nature damage to all enemies. |
| Dodge Ball | Throws an anima ball, dealing heavy Nature damage to enemies in its path. |
| Patty Cake | Engages in Patty Cake, inflicting significant Nature damage and confusion to the target. Can be interrupted. |
| Freeze Tag | Summons an Illusionary Vulpin to chase enemies, triggering a freezing explosion upon contact. |
| Illusionary Vulpin | Appears to chase after designated targets. |
| Freeze Tag Fixation | Selects a specific enemy to pursue during Freeze Tag. |
| Freezing Burst | Upon reaching its target, explodes, stunning nearby enemies with Frost damage. |
Mistcaller was actually one of the best-designed dungeon bosses in the entire expansion thanks to these abilities and the overal idea of the battle with him.
Mistcaller Tactics
Throughout the fight, Mistcaller will cast Dodge Ball, indicated by an arrow that gets pointed towards every player. These are easy to dodge, however, it can get hectic during later stages of the fight.
Freeze Tag creates a vulpin that fixates on a random player for 14 seconds. If you come into contact with the vulpin, it explodes, dealing large amounts of damage and freezing you for 8 seconds. Because of the frequent Dodge Ball casts, getting hit by the vulpin almost always leads to death, as you can't get out of the way of the Dodge Ball when frozen.
Patty Cake is a tank mechanic that must be interrupted by the tank, nobody else. If you fail to interrupt it, you'll be disoriented for five seconds and take heavy damage.
At 70%, 40%, and 10%, the boss phases, creating clones of itself. During this phase, the boss will take 99% reduced damage, so there's not much point in hitting it. Each one of the four illusions will have a symbol above its head, and just like navigating the maze, you must find the odd one out and kill it. Until you do, the entire party will be taking increasing pulsing damage, so find it and focus it down quickly. If you destroy the wrong one, it's game over, and the entire party takes lethal damage. Considering all of the damage outside of the illusion phase is avoidable, this is a great time to use defensives and healing cooldowns. Once you deal with the last illusion phase at 10% health, the boss should be nearly dead, and the fight is basically over.
Browse our hottest WoW Boosting services


Tirna Scithe Walkthrough
Jump down the waterfall to head to the next area. If you have a Night Fae member, be sure to activate the second depleted seed, giving you an updated respawn point.
This area is a bit easier than the first two for the most part. The only concern is that the passageways are narrow, and you can easily fall off. There are also several diseases here, so not having a party member who can dispel disease is a bit of a problem. Now, let’s talk about the monsters you’ll encounter here:
- The Spinemaw Acidgullets have only one ability, Volatile Acid. This puts a circle around a random player, dealing nature damage to them and everyone else inside for eight seconds. The damage is pretty light; however, try not to stay stacked up, especially if there are more than one.
- Spinemaw Staghorns are high-priority mobs to lock down because they have two different defensive abilities. Stimulate Resistance gives them a magic absorb shield, and Stimulate Regeneration causes all allies to gain large amounts of health for 8 seconds.
- Later on, you'll run into Spinemaw Larva. These small mobs are easy to handle, however, their death triggers a Decomposition Pool that deals area-of-effect damage in a puddle around them. It doesn't do a whole lot of damage but can take up a lot of space on these narrow walkways.
- Spinemaw Gorgers shoot out acid globules on the ground, indicated by green swirlies. If you're hit, you'll take a large amount of damage and get knocked pretty far back. It's quite easy to get knocked off here, so it may be a good idea to stop these casts. Although you can't interrupt it, if you disrupt it in some other fashion, it won't recast for 15 seconds.
- Lastly, the Spinemaw Reavers patrolling the skies. These mobs can be hard to see because they're in the air, but they're quite easy to pull on accident, so be careful if they jump in halfway through a pull. Their main ability is Stinging Assault. They charge to a player, dealing initial damage and applying a damage-over-time disease effect. This effect can stack, so if you're charged by multiple Reavers, be sure to get the dispel off or at least use a defensive ability.
Work your way through multiple packs of these enemies until you reach the final boss – Tred’ova.
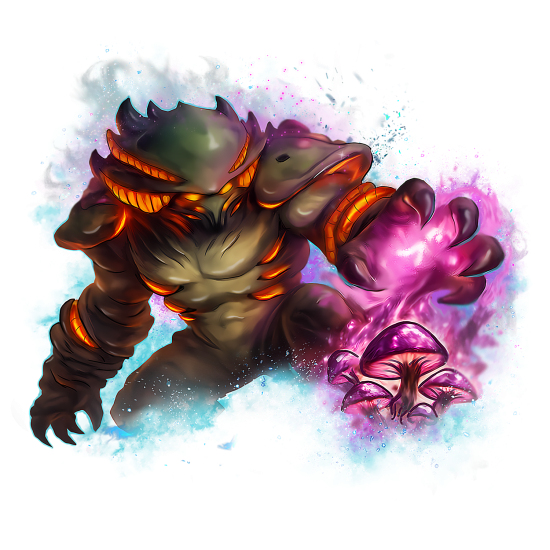
Tred’ova Boss Encounter Strategy
Tred'ova is the final boss of the dungeon, featuring intense mechanics that test the coordination and awareness of the group. The fight is divided into several phases, each progressively challenging as the boss's abilities escalate.
Tred’ova Abilities
Tred'ova is a formidable boss encountered in the dungeon, possessing several challenging mechanics:
| Ability | Description |
| Consumption | Tred'ova consumes the depleted Cocoon of Lakali, causing anima to erupt, inflicting 156271 Nature damage every 2 sec to all enemies for 14 sec. |
| Gorging Shield | Tred'ova hardens her shell, absorbing 1465794 damage. While this shield is active, Consumption cannot be interrupted. |
| Anima Rejection | Anima erupts from Tred'ova, inflicting 156271 Nature damage to all players. |
| Anima Shedding | Tred'ova unleashes a blast of anima that impacts a random location nearby, inflicting 586904 Nature damage to all players within 8 yards of the impact. |
| Accelerated Incubation | Tred'ova quickly incubates nearby eggs, summoning 4 Gormling Larvae. |
| Gormling Larva | Upon death, Gormling Larvae explode into a pool of acid, inflicting 195564 Nature damage every 1.5 sec to anyone within the pool. |
| Mind Link | Tred'ova tethers a target to multiple allies, inflicting 97669 Shadow damage every 1 sec. All damage taken is duplicated to the tethered player as Shadow damage. |
| Marked Prey | Tred'ova marks a random player as prey, causing Gormling Larvae to fixate on them for 20 sec. |
| Acid Expulsion | Tred'ova spits a glob of acid at nearby players, inflicting 625972 Nature damage to any player within 4 yards of impact. |
| Decomposition Pools | In Mythic+ difficulty, Decomposition Pools are left upon missile impact, causing ongoing Nature damage to players standing in them. |
The main thing to note here is how the boss is able to summon adds, Gormling Larva, that have two of their own abilities.
Tred’ova Tactics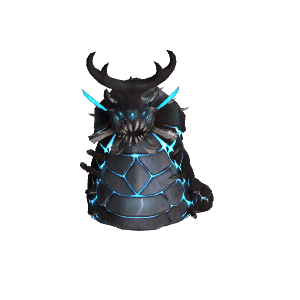
It's a good idea to have most major cooldowns, including Bloodlust, going into this fight because the faster you kill the boss, the easier it gets.
Throughout the fight, Tred'ova casts several abilities.
Mind Link attaches a random player to all of their allies, dealing damage to all of them until they run 40 yards apart. This might not seem too difficult, but with all the other mechanics going on, it can cause some chaos and end up spreading your group out, making it very difficult for the healer.
Tred'ova spawns Larva throughout the fight using Accelerated Incubation. These Larva fixate on random players and leave the same Decomposition Pool you saw earlier behind them.
This room is quite big, so the tank just needs to move the boss over if an area gets too crowded in pools. Occasionally, the boss will also summon individual Parasites that latch onto a player, incapacitating them. As the fight goes on, these Parasites will get stronger, and in the end, they'll even mind-control you. This cast isn't a big problem because it can be interrupted, so be sure to stop this every time you see it.
The last part of the fight is Acid Expulsion. Tred'ova shoots acid at every player, doing much damage if you stand at the location it hits. It's easy to dodge the first time. Each subsequent time, the boss fires, even more acid at your location as well as each location you dodged previously. What makes this hard is that Tred'ova is doing this to everyone. This means that, on the fourth or fifth acid cast, there will be over 20 different projectiles in the room.
The key to the fight is to manage the first few casts so that they are not a big risk to your allies. At 70% and 40% health, the boss phases into an intermission and casts Consumption. This ability gives her an absorb shield, does pulsing damage to all party members, and also creates a ton of blue swirlies all over the room.
Once you break the shield, you can interrupt the cast, but it's best that you don't. Here's why: while the boss is channeling, it doesn't use any of its main abilities like Mind Link or Acid Expulsion.
The Consumption phase is a bit annoying, but it does give you some free time to damage the boss without having to worry about the other difficult mechanics. This fight is a DPS race to down the boss before the acid and larva pools overwhelm you, so an opportunity to hit the boss for free shouldn't be passed up. Do your best to keep the acid pools grouped as long as possible while dealing with the other mechanics, and slam the boss. Once the boss is dead, the dungeon is over.
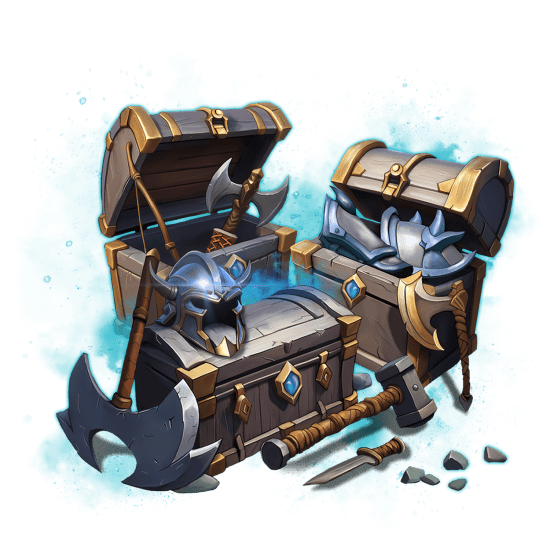
Mists of Tirna Scithe Rewards
As we’ve said before, completing this or any other available dungeon (new or returning) on Mythic+ difficulty is going to help you a lot with gear progression. Check out the full list of all available Mists of Tirna Scithe rewards that you can get. Spoiler – there are lots of cool transmog pieces here:
The Mists of Tirna Scithe loot table consists of a wide array of items that even include some legendary recipes. Don’t miss out!
Conclusion
Mists of Tirna Scithe is a complex dungeon, especially in Mythic+ difficulty. It features 3 boss encounters, a maze, and some pretty nasty packs of mobs that you have to pull carefully in order to beat them all. To pass the maze, all players must communicate to find the correct symbol that opens the path to the next room. The areas between boss encounters feature packs of monsters with unique abilities, and when you pull one too many packs, it becomes almost impossible to keep track of all of those abilities they will use on your group. So, be smart and take your time.
The bosses also have a few tricks up their sleeves. In the first boss encounter, you’ll be facing two bosses. You’ll have to deal enough damage to one of them to make the other vulnerable. The second boss encounter has a playful design where it even uses the maze’s puzzle to keep you on your toes. The final boss encounter has several phases and must be dealt with quickly, or it will become impossible to defeat. Overall, it’s a pretty fun dungeon to run in Mythic+.
F.A.Q.
How to do a Mists of Tirna Scithe dungeon WoW?
You have two options, but the fastest way is this – in WoW The War Within Season 1 open the Dungeon Finder, and select the Mists of Tirna Scithe dungeon.
Can I solo Mists of Tirna Scithe dungeon?
Unlike timewalking dungeons and other types of content, the Mythic+ difficulty of Mists of Tirna Scithe dungeon is not possible to do solo.
What level should I run Mists of Tirna Scithe dungeon?
There are no hard requirements to the gear score, but we recommend running any Mythic+ dungeon at the maximum level, which is level 80.
Is Mists of Tirna Scithe dungeon hard?
Mists of Tirna Scithe can be pretty difficult for players who aren’t familiar with the dungeon’s monsters, boss encounters, or the maze puzzle. Not knowing how to pull monsters in this dungeon could lead to multiple wipes. This means that there’s a need for a pep talk before this dungeon.
What are the rewards of the Mists of Tirna Scithe dungeon?
One of the most desired rewards of Mists of Tirna Scithe dungeon that most players have been after when this dungeon first came out are the legendary recipes:
- Memory of the Soulforge Embers
- Memory of the Disciplinary Command
- Memory of the Duskwalker's Patch
- Memory of a Timeworn Dreambinder
Can you get gear from Mists of Tirna Scithe dungeon?
Definitely! You’ll be able to get gear with up to 593 item level in Mythic+ difficulty, which is the highest ilvl before the raid.
What are the requirements for the Mists of Tirna Scithe dungeon?
Just have a good build on your character. It will also help to make sure that everyone in your group knows the mob mechanics, how to solve the maze puzzle and are at least familiar with the boss encounters.
How do I start the Mists of Tirna Scithe dungeon?
Open the Dungeon Finder and select the Mists of Tirna Scithe dungeon, or go to these coordinates: Ardenweald 32.4, 52.2.


