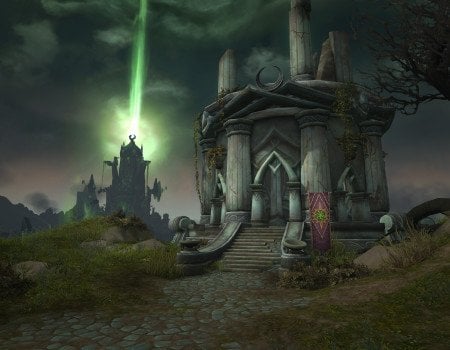
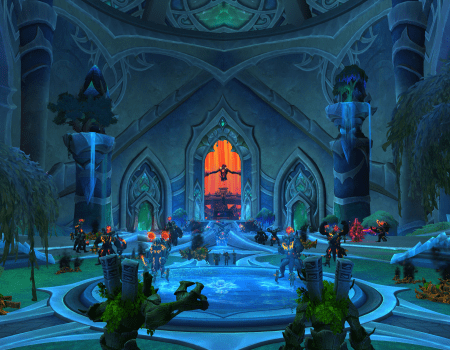
To start our Aberrus the Shadowed Crucible Raid Overview, we first need to talk a bit about the lore side of things. At least about what is currently known. So, Aberrus, the Shadowed Crucible (ASC) is an ancient laboratory, hidden deep beneath the Dragon Isles, was once the site of Neltharion's most secretive and forbidden experiments. Neltharion, also known as the Black Aspect, was corrupted by the Old Gods and ultimately became Deathwing, a powerful and feared dragon who ravaged the world of Azeroth, but was defeated by combined forces of fours Aspects and Heroes of Azeroth.
In the ASC raid, players are tasked with infiltrating this mysterious laboratory and putting a stop to the forces of the Incarnates, who are attempting to seize the legacy of Neltharion. The raid features challenging boss encounters and unique mechanics, including battles against mutated experiments and the corrupted echo of Neltharion himself.
IMPORTANT NOTE: At Skycoach, you can also Buy WoW Boost at the lowest prices and with the fastest delivery. You can make your first purchase even CHEAPER if you find our special PROMO CODE (highlighted in green) hidden in this article and get a 20% DISCOUNT.
Browse our hottest WoW Boosting services
The Aberrus, the Shadowed Crucible raid is not only an opportunity for players to test their skills and teamwork in battle, but also a chance to explore the lore and history of World of Warcraft's expansive universe, as well as reward themselves with tons of powerful gear.
The list of encounters in Aberrus is as follows:
- Kazzara, the Hellforged;
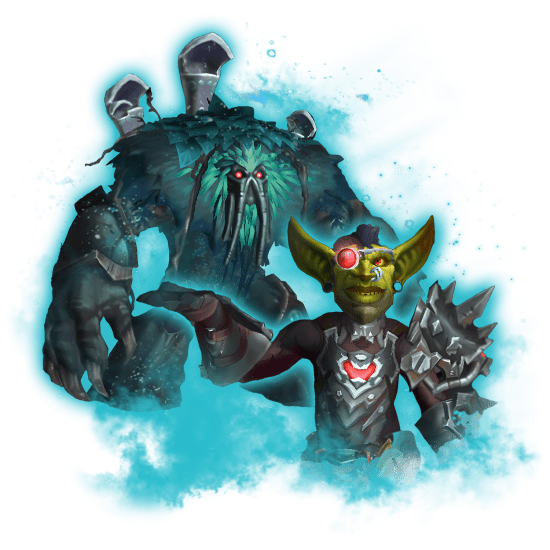
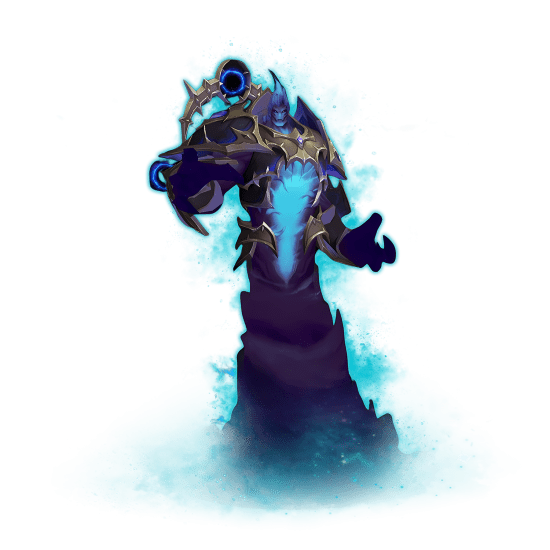
- The Amalgamation Chamber;
- The Forgotten Experiments;
- Assault of the Zaqali;
- Rashok, the Elder;
- The Vigilant Steward, Zskarn;
- Magmorax;
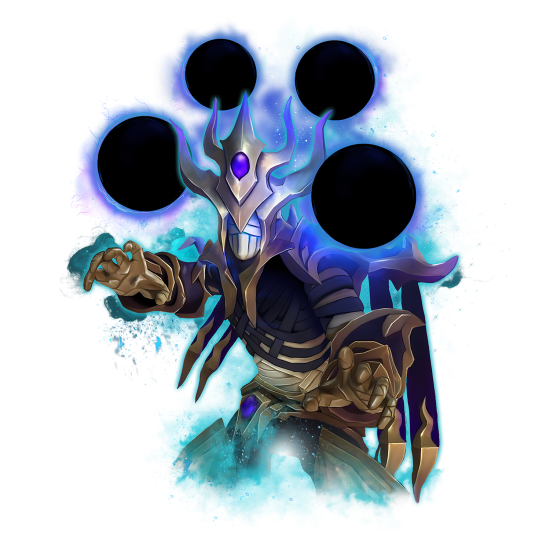
- Echo of Neltharion;
- Scalecommander Sarkareth.
As always, players of different skill levels will be able to experience the Aberrus raid at their own pace and level of challenge, with Normal, Heroic, and Mythic difficulties all available simultaneously. The raid will also feature new class sets with powerful set bonuses, which are going to significantly boost your performance in all PVE activities.
The Aberrus, the Shadowed Crucible Location
The entrance portal to the Aberrus raid in Dragonflight 10.1 Patch can be found in the Zaralek Cave, accessible from the Plains of Ohn'arha. Once in the area, players need only head north to find a huge building where the portal can be located (as shown in the picture below).
Aberrus the Shadowed Crucible Bosses Strategy
As stated above, there are 9 powerful bosses that players are going to face in this raid. Depending on the difficulty, any of them can be a pain even for the most well-coordinated raid groups. Below you will find a detailed description of every boss fight presented in the raid and that we have reliable information about. This, sadly, means that for now we cannot yet provide you with Scalecommander Sarkareth overview and strategy. However, our boss overview for Aberrus, the Shadowed Crucible raid will be updated regularly, so you can prepare yourself for a new raid in advance! BLOG20
Kazzara, the Hellforged
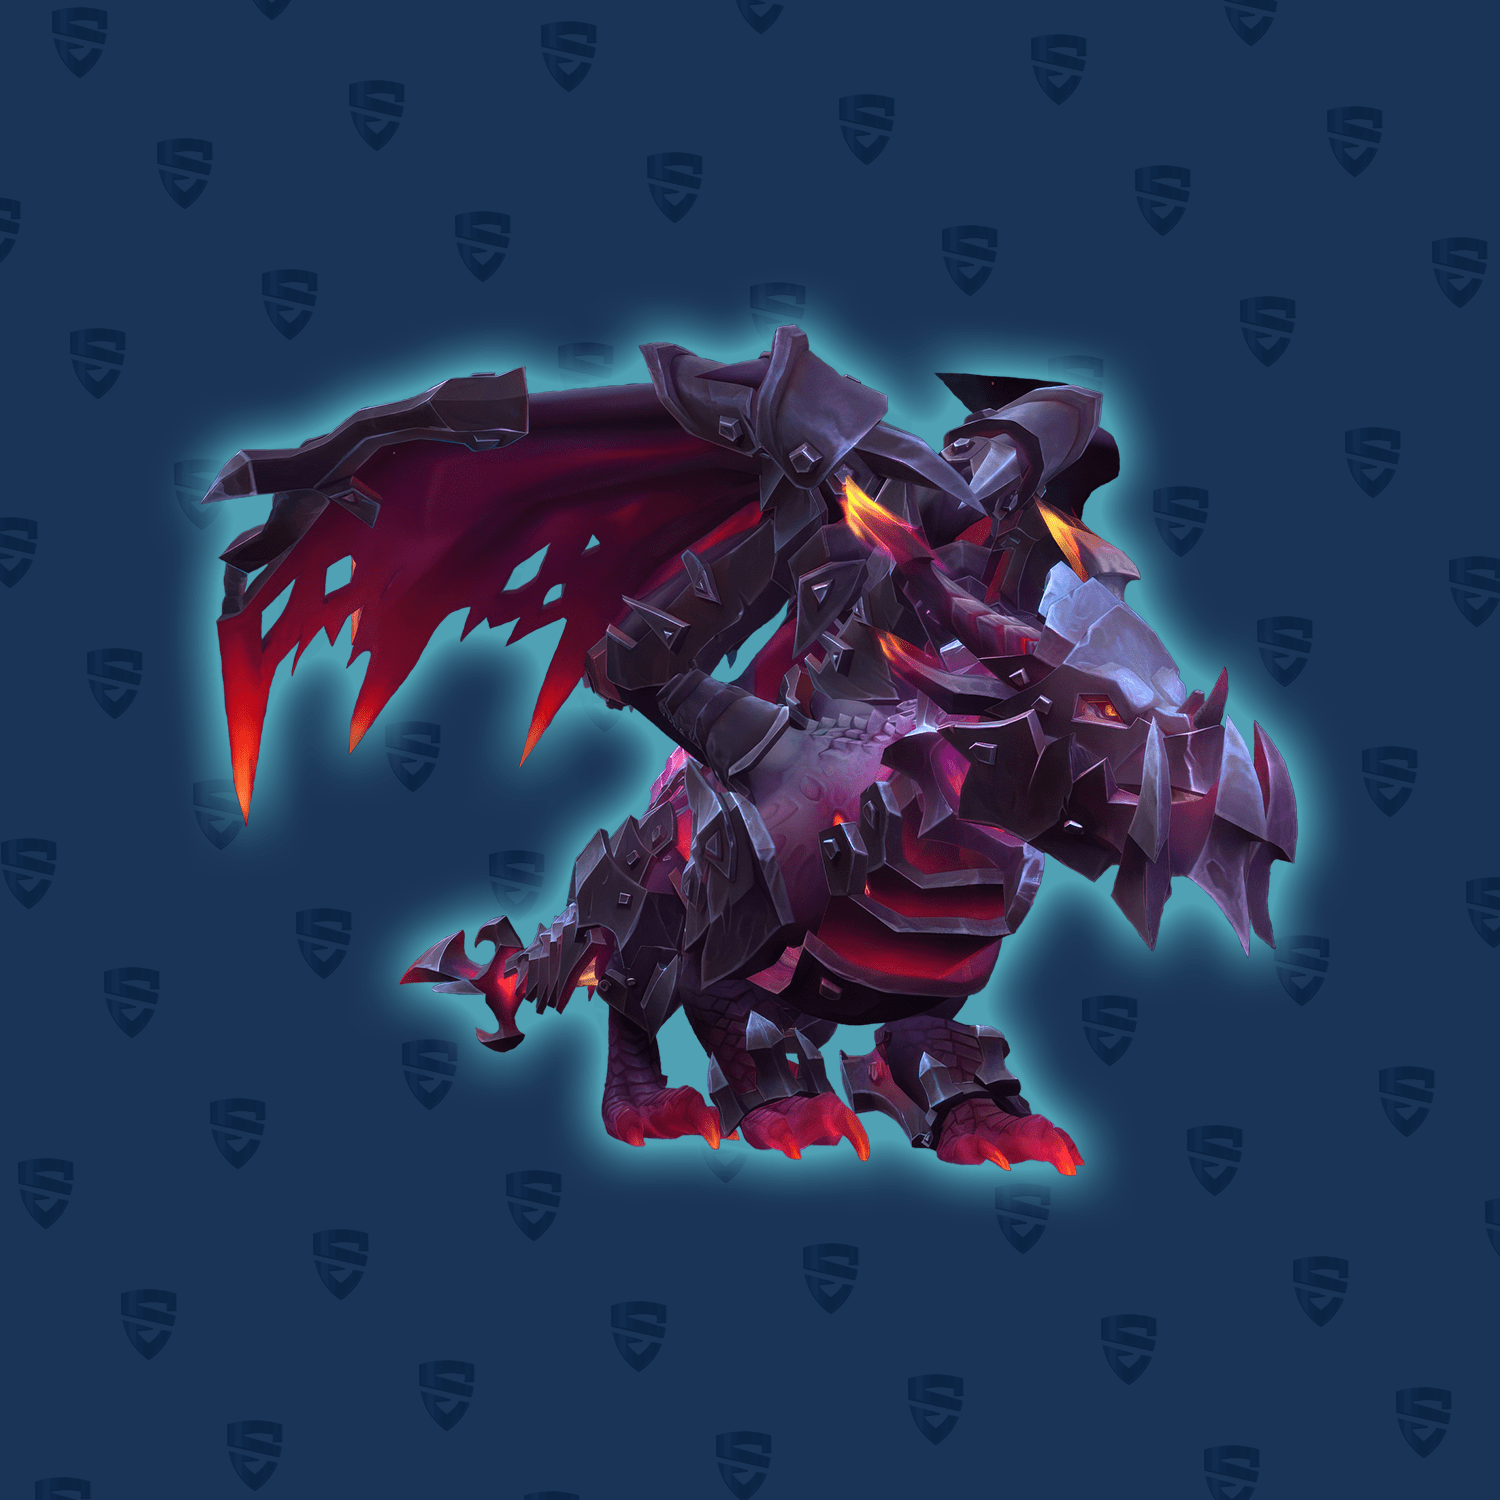
The first boss in the ASC raid is an ancient dragon-like creature named Kazzara, the Hellforged. This is a single target encounter and the recommended raid set up is as follows:
- 2 Tanks;
- 4 Healers;
- 14+ DPS.
Kazzara, the Hellforged Abilities
| Hellsteel Carnage |
At 70%, 50%, and 30% HP, Kazzara will hit the raid with a moderate amount of Shadowflame damage, and a permanent damage-over-time (DoT) effect will be applied to everyone. The DoT inflicts significant Shadowflame damage every 4 seconds, with the ticking rate increasing as the boss's health decreases. Furthermore, players will need to avoid Hellsteel Fragments and Revenants Blood puddles that spawn on the ground during these phases. |
|---|---|
| Dread Rifts |
The boss marks several players, and after 5 seconds, they will drop a Rift (puddle) that deals a moderate amount of Shadowflame damage to any player standing within 5 yards. Standing in the puddle inflicts additional damage. Additional players per set will be targeted by this when the boss's health reaches 70%, 50%, and 30%. These Rifts can be used to remove Rays of Anguish. |
| Rays of Anguish | During the fight, random players will be targeted by a laser (Red Arrow) that tracks their movement, dealing significant Shadowflame damage every 0.3 seconds and leaving fire puddles on the ground. To get rid of the laser, kite it into a Dread Rift. |
| Hellbeam |
When Kazzara's energy reaches 100, she will select a random player and unleash a fiery breath in their direction, dealing a significant amount of Shadowflame damage every 0.3 seconds. To avoid this attack, simply move out of its path. |
| Wings of Extinction | The boss has a small knockback ability that inflicts a moderate amount of Shadowflame damage to all players, as well as a damage-over-time effect that ticks for some Shadowflame damage every 2 seconds for a duration of 20 seconds. |
| Terror Claws |
This attack deals a near-lethal amount of Physical and Shadowflame damage to the Tank, and applies a damage-over-time effect that deals Shadowflame damage every 1 second. In addition, it increases the Tank's vulnerability to Terror Claws by 200% for a period of 25 seconds. To handle this attack, simply swap the Tank. |
Strategy
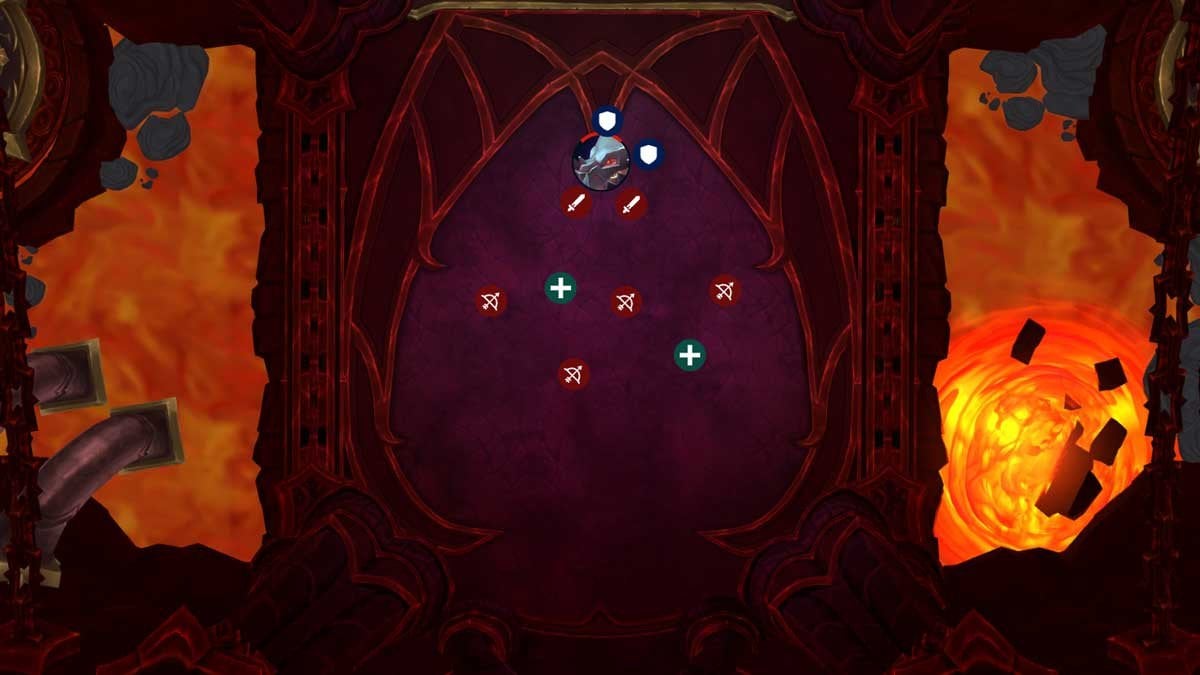
To keep the boss in check, tanks should make sure she's facing away from the raid and keep her where she is standing. While she doesn't have any frontal attacks, facing her away will help everyone stay aware of her Hellbeam ability (which requires a 180-degree turn). For the best results, tanks should swap roles every time a Terror Claws is on the loose.
To get the upper hand, use Hero/Lust at the start and spread out loosely behind the boss. This way, players won't get caught by the random lasers that spawn near them, and they can also bait other abilities. However, keep in mind that the boss will hit 70% rather quickly, so players should stay alert and avoid the puddles as much as possible.
At 70%, 50%, and 30%, the boss will spawn puddles that can deal significant damage, so players should avoid them at all costs. While the Hellsteel Fragments only spawn at these breakpoints, Revenant's Blood puddles will spawn throughout the fight, increasing in intensity as the boss's health decreases.
To deal with the lasers, players should lure them into the Dread Rifts puddles. The placement of these puddles isn't crucial since there is enough space behind the boss, but players should avoid putting them too far away, as this will force them to kite for longer.
When the boss reaches 100 energy, players should be ready to dodge her frontal breath ability (Hellbeam). Once she starts casting, she'll lock her position, so players only need to dodge once.
The Wings of Extinction cast will knock players back slightly, so they should be careful not to get knocked into a laser or a puddle, which could cause unnecessary damage.
When the boss's health drops below 30%, the raid-wide damage will increase significantly. At this point, players should be extra careful to avoid taking damage from other abilities since it could lead to deaths.
The Forgotten Experiments

The Forgotten Experiments is an encounter consisting of three bosses, with a focus on single-target damage and light add-cleave mechanics. Each boss is tackled individually, with the next one entering the fray after the previous is vanquished. Players must overcome the unique abilities of each boss, posing distinct challenges. The final boss is particularly noteworthy, as it will test players' football skills and may elicit excitement from the team.
The recommended raid setup for this encounter is:
- 2 Tanks;
- 4-5 Healers;
- 13+ DPS.
In this encounter your raid will also benefit greatly from abilities like: Stoneform (dwarf racial), Priest's Mass Dispel, Monk's Tiger’s Lust, Paladin's Hand of Freedom.
Neldris Abilities
| Rending Charge | After marking several players with a red arrow, the boss will charge at them after a short period of time, dealing a large amount of Physical damage and inflicting a Bleed effect that causes physical damage every second for 30 seconds. It is important for other players to avoid being in the charge path to prevent being hit by the boss's attack. |
|---|---|
| Massive Slam | The boss will generate large swirls that can deal a near lethal amount of physical damage upon impact. It is recommended to avoid getting hit by them by dodging. |
| Bellowing Roar | The boss will cast an area-of-effect (AoE) attack that deals large amount of Arcane damage, and its range is determined by distance. It is advised to move away from the boss when this attack is being cast to avoid taking damage. |
| Infused Strikes | Each melee attack from the boss will inflict a stackable DoT effect, dealing Arcane damage every second. If a player comes into contact with another, the stacks will reset, but it will also cause the whole raid to suffer Arcane damage and apply a DoT effect. It is recommended to reset the stacks when there is no significant overlap happening. |
Thadrion Abilities
| Unstable Essence |
Players will receive a DoT effect that can be dispelled, but it will increase in intensity the longer it remains active. When dispelled, it will jump to another player and create a large circle on the ground that deals a large amount of Arcane damage to any player within it. In addition, an add will spawn that will cast Erratic Burst, dealing 46,806 arcane damage to all players unless it is defeated first. To minimize the number of adds spawned, players should try to maintain the DoT effect for as long as possible before dispelling it. The number of Essences the boss casts during the fight may increase depending on the group's damage output, which can significantly raise the difficulty of the encounter. |
|---|---|
| Volatile Spew | Multiple swirls will appear on the ground that must be avoided, as they can deal a near lethal amount of Arcane damage upon contact. It is important to successfully dodge these swirls to prevent taking damage. |
| Violent Eruption | The boss will unleash an attack that deals a large amount of Arcane damage per second to all players for a duration of 8 seconds. Furthermore, if any Erratic Remnants are active at the time, they will also perform this ability and deal an additional large amount Arcane damage per second during the Violent Eruption cast. |
| Infused Strikes |
The boss's melee attacks will inflict a DoT effect, dealing Arcane damage every second and stacking with each hit. If two players come into contact with each other, the stacks will reset, but the raid will suffer a moderate amount of Arcane damage and be afflicted by a DoT effect that ticks with Arcane damage every second. It is recommended to reset the stacks only when there is no significant overlap happening between players. |
Rionthus Abilities
| Deep Breath | The boss to fly in multiple directions, dealing fatal damage to any player struck by it. It is crucial to avoid this attack at all costs. |
|---|---|
| Temporal Anomaly | A luminous sphere will appear, and players must intercept it by kicking it away. If it reaches the boss, he will generate an absorb shield that amounts to 10% of his health. Additionally, the player who kicks the ball will also suffer damage from the ability. |
| Disintegrate |
The boss will fire a beam at several players, causing a moderate amount of Spell Frost damage per second for a duration of 3 seconds. Affected players will subsequently become slowed by 30% and deal damage to anyone within 5 yards for 16 seconds. To avoid harming fellow players, it is recommended to move away from others when targeted by this ability. |
| Infused Strikes |
The boss's melee attacks will cause players to suffer a DoT effect that deals Arcane damage every second, and the effect stacks with each hit. When two players come into contact, the stacks will reset, but the raid will receive Arcane damage and suffer from a DoT effect that deals Arcane damage every second. To minimize the negative impact on the raid, it is advisable to reset the stacks only when there is no significant overlap between players. |
Overview of the Fight:
- You will face one boss at a time, starting with Neldris, then Thadrion, and finally Rionthus, defeating each boss until their health is at 0%.
- The room is small, but there are no specific positional requirements, and the key is to dodge the bosses' abilities.
- Use Hero/Lust during the Thadrion fight to skip unnecessary Unstable Essence applications.
Tips for Tanks:
- Try to keep the Infused Strikes DoT for as long as possible to avoid extra raid damage.
- Mark the tanks, and keep all players far away from them to prevent accidental overlaps.
Now, let us talk about what to keep in mind about the three bosses of the encounter:
Neldris:
- Avoid getting extra Rending Charge stacks, which can result in bleed damage.
- Dodge swirls, and move out of melee range when Bellowing Roar is being cast.
Thadrion:
- Use Hero/Lust and all cooldowns to kill him as quickly as possible.
- Players with the Unstable Essence DoT should hold it for as long as possible to avoid frequent spawns of adds.
- Dispel the Unstable Essence debuff at around 6-8 stacks, and move the boss on top of the add for extra cleave.
- Be aware of the Violent Eruption ability, which does moderate damage to the entire raid and can ramp up quickly if there are leftover adds alive.
- Dodge the swirls, as they can one-shot you.
Rionthus:
- Deal with Unstable Essence the same way as in the prior boss phase, but with less focus since there are no Violent Eruption casts.
- Place a world marker to make dealing with Unstable Essence easier, and have all players with the debuff stack on it for mass dispel and extra cleave damage.
- Knock away the Temporal Anomaly when it spawns, and avoid getting hit by it.
- Stand to the side during the Disintegrate ability, and be extra careful during Deep Breath, which can kill anyone in its path.
Browse our hottest WoW Boosting services
The Amalgamation Chamber
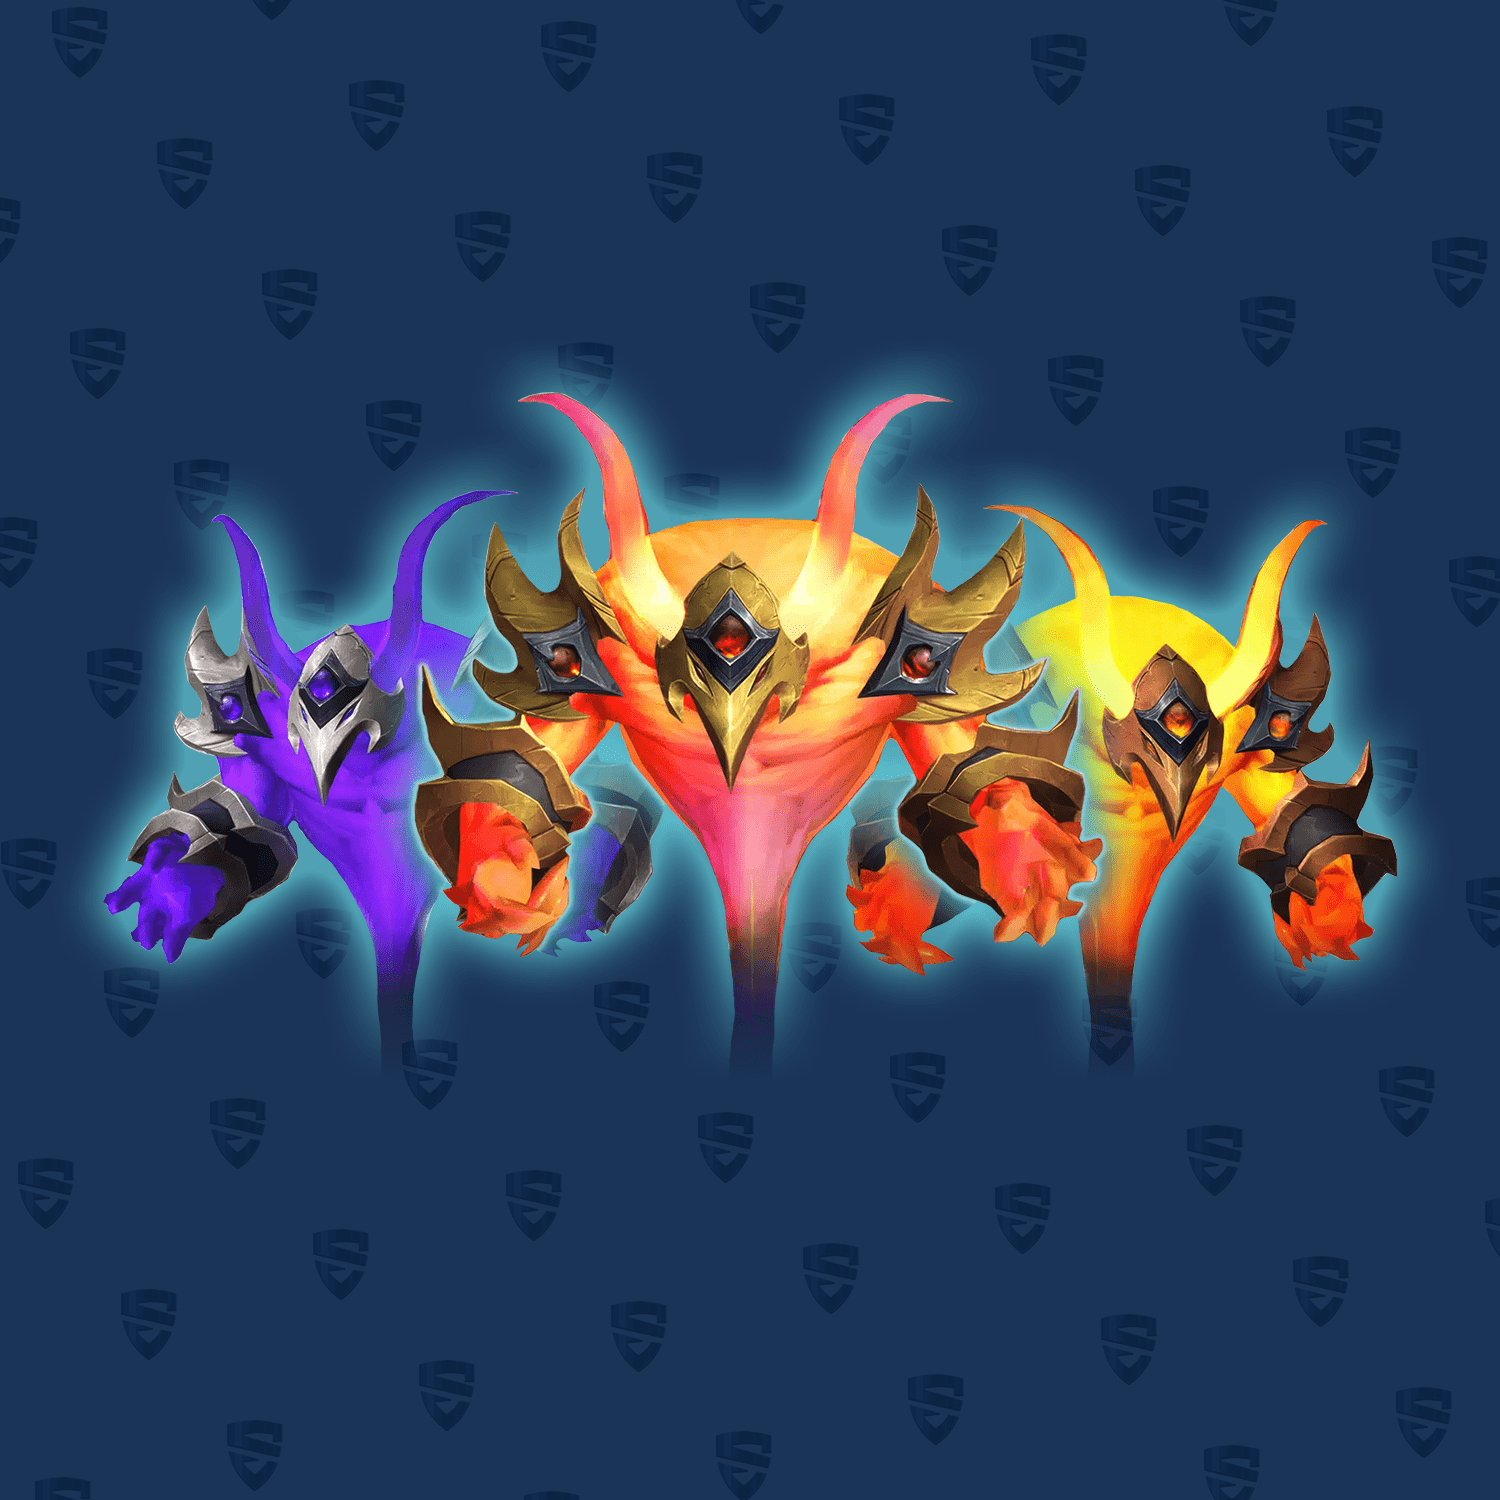
The Amalgamation Chamber is a Single-Target battle consisting of two phases. In the initial phase, players confront two bosses who merge to form a powerful mega-boss. The encounter presents various intricate mechanics, testing the players' aptitude to avoid and endure incoming attacks. As the confrontation advances, the challenges become more demanding, requiring both the DPS and healers to push their limits.
The recommended raid setup for this encounter is:
- 2 Tanks;
- 4-5 Healers;
- 13+ DPS.
Krozgoth Abilities
| Corrupting Shadow | When the Boss is within range, all players will receive a Damage over Time effect that lowers their health by 2% and inflicts damage every 5 seconds for each stack. Additionally, being struck by any other ability of Krozgoth will result in the application of a Corrupting Shadow stack. |
|---|---|
| Coalescing Void | One player will be selected at random to spawn a bomb that deals significant damage upon detonation, with the amount of damage decreasing based on the distance from the explosion. |
| Umbral Detonation | Several players will be targeted by a circle, which will cause damage to nearby players after a delay and also create a puddle on the ground. |
| Shadows Convergence | Multiple orbs will materialize behind the players and subsequently propel towards the boss, dealing significant damage if they collide with a player. |
| Shadow Spike | This ability deals a moderate amount of Shadow damage to the Tank and also afflicts them with Corrupting Shadow. It is possible to avoid the accumulation of stacks by using an immunity. |
Moltannia Abilities
| Blazing Heat | When within range of the Boss, all players will receive a Damage over Time effect that deals a small amount of damage every second. In addition, any other ability used by Moltannia that hits a player will also result in the application of a stack of Blazing Heat. |
|---|---|
| Fiery Meteor |
A significant swirling effect will appear on the ground and requires multiple players to absorb the damage by standing within it. Using personal immunities alone is also effective and can assist in minimizing the accumulation of Blazing Heat stacks on the raid. |
| Molten Eruption | Multiple small swirling effects will appear around the boss and require players to absorb them. If a player fails to soak one, the raid will suffer a collective damage of 124,815. On the other hand, successfully soaking a swirling effect will inflict 49,926 damage. |
| Swirling Flame | The Boss will unleash multiple Fire tornadoes in a frontal cone-shaped pattern aimed at a random player. Players should avoid these tornadoes by moving out of their trajectory. |
| Flame Slash | This ability inflicts a significant amount of Fire damage to the tank and also applies a stack of Blazing Heat. The accumulation of Blazing Heat stacks can be reset by utilizing an immunity. |
Molgoth Abilities
| Shadowflame | Any player within the Boss's range will receive a damaging Damage-over-Time effect that reduces their health and inflicts fire damage. This ability functions as a soft enrage mechanic, as it cannot be evaded, and as the stacks accumulate, the damage will eventually become overwhelming. |
|---|---|
| Gloom Conflagration | Multiple players must soak a large ground swirl to divide the damage. Solo immunities can be used to lessen the number of Shadowflame stacks affecting the raid. Afterward, a Coalescing Void from Phase 1 (Krozgoth) will be left behind. |
| Blistering Twilight | After a brief delay, several marked players will trigger an explosion that damages nearby players for a significant amount and leaves a damaging area on the ground. Additionally, the boss will unleash several fire tornadoes that must be avoided by all players. |
| Convergent Eruption |
Multiple small swirls will appear around the boss, which require soaking. Each swirl will deal a moderate amount of damage upon soaking. However, failing to soak a swirl will result in the entire raid taking a significant amount of damage. After the swirls are soaked, orbs will emerge and move towards the center of the swirl area. Touching one of these orbs will inflict a near-lethal amount of damage. |
| Crushing Vulnerability | Deals a lethal amount of Physical damage to the tank and increases their vulnerability to Shadowflame damage by 200%. You will have to perform a tank swap to prevent being hit by Shadowflame Burst. |
| Shadowflame Burst | This ability deals a lethal amount of Shadowflame damage in a frontal cone. |
Strategy
Currently, there are two popular strategies for Phase 1, and Phase 2 will always follow the same pattern. Regardless of which strategy you choose, the initial setup will remain the same. You can adjust the team balance as needed, but generally, it's best to have ranged players start on Krozgoth and melee players on Moltannia. You should aim to get both bosses to 50% health at roughly the same time to reduce the HP pool of Megazord (Molgoth) at the end.
The first strategy is a No Boss Swap Strategy, which means the bosses will never swap sides, and each group will only deal with their side's boss abilities throughout Phase 1. The downside of this strategy is that the damage taken toward the end of the phase will ramp up quite high, so your healers need to be prepared for that. After the bosses turn into Molgoth, the stacks will reset.
The second strategy is the Boss Swap Strategy, where the tanks will perform a boss swap midway through Phase 1. This way, the Shadow/Fire stacks won't get as high, but you will have to deal with different abilities once the new boss is in range.
Phase 1
Krozgoth Side
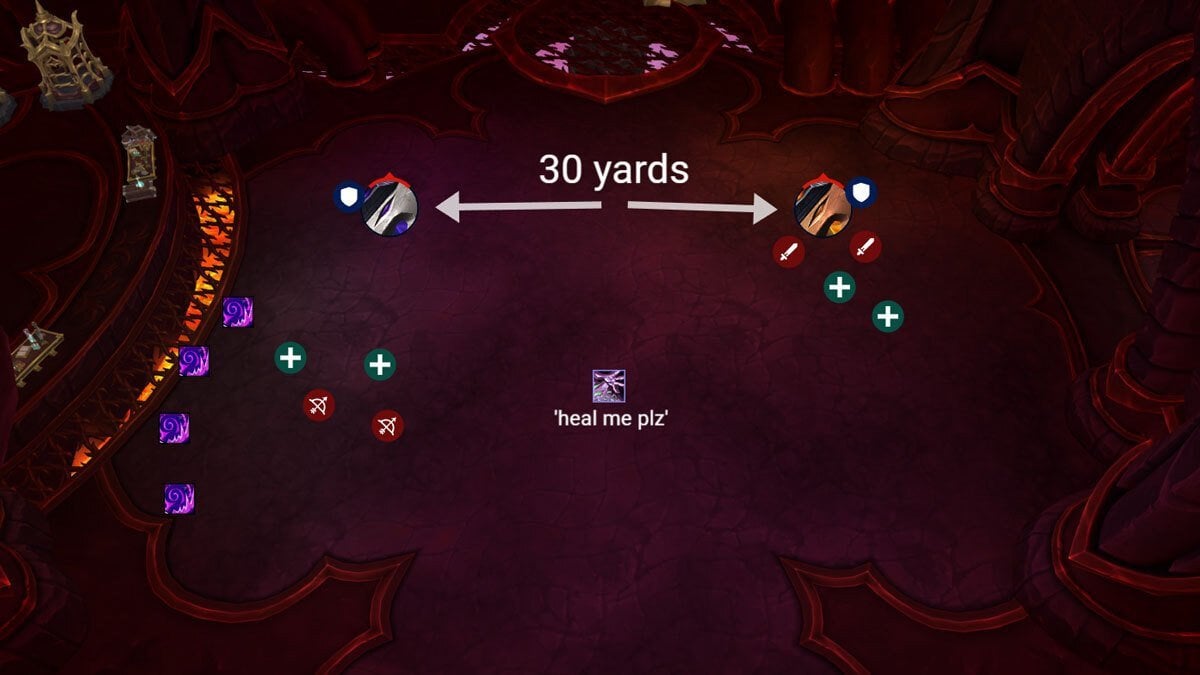
On the Krozgoth side, it's recommended to position the Umbral Detonation swirls towards the side or back of the room to create ample space in the middle of the left side. Ranged players should group together to bait the Coalescing Void bomb onto them, and then use a Warlock gateway to quickly move away to avoid extra damage. Keep an eye on the opposite side of the room as the fire tornadoes may move towards the ranged group if a melee player baits them in that direction. Additionally, when the stacks become too high, use personals/externals for Umbral Detonation and strong raid cooldowns for Coalescing Void.
Moltannia Side
On the Moltannia side, players with immunities should be assigned to a soak rotation for the Fiery Meteor to avoid unnecessary stacks from multiple people soaking. If there are no immunities left, all players on that side should soak each meteor to reduce the damage. It's crucial to soak the Molten Eruption circles; failing to do so can result in several players on the other side getting killed as they have reduced HP pool due to Corrupting Shadows stacks. Swirling Flame should be baited and dodged towards the safe side of the room to prevent players on the other side from getting hit.
Phase 2
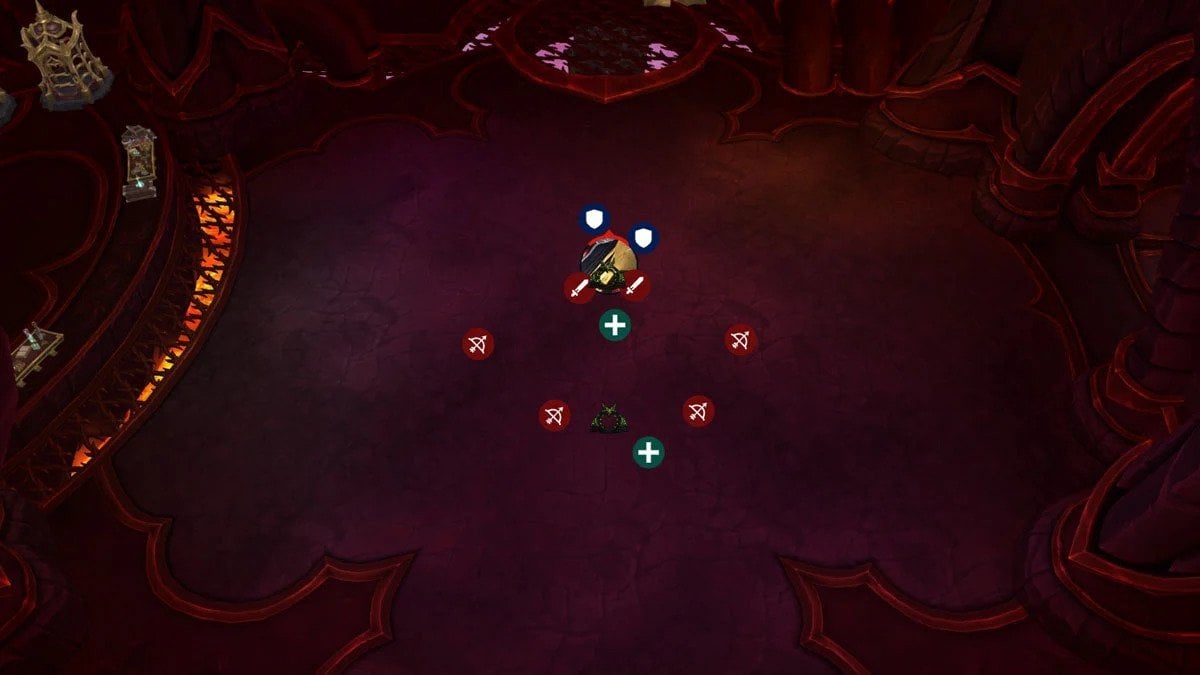
Note: If you opted for the No Boss Swap Strategy, it's essential to stack up in the middle of the room when the bosses transform to assist with healing until the stacks reset since you will still have high stacks ticking.
For the opening positions in Phase 2, use Hero/Lust to eliminate the boss as soon as possible before stacks become too high. Depending on the push timing, it may be advisable to hold Hero/Lust until your main DPS cooldowns are available, or when execute kicks in.
Tanks should ensure to always face the boss away from the raid because of the Shadowflame Burst frontal ability. Additionally, avoid getting hit by significant abilities that deal Shadowflame damage if you have a vulnerability debuff.
Melee players need to soak the Gloom Conflagration (Meteor) and then use the Warlock gate to move out of range of the Coalescing Void bomb left behind to decrease the damage taken. Immunities, similar to Phase 1, are also an excellent option.
Players targeted by Blistering Twilight should move away from the raid to place fire puddles in safe spots and create more distance for others to evade fire tornadoes that spawn upon impact.
It's crucial for everyone to soak Convergent Eruption circles and avoid the Orbs that spawn afterward. Failing to soak even one circle will most likely lead to a wipe.
Assault of the Zaqali
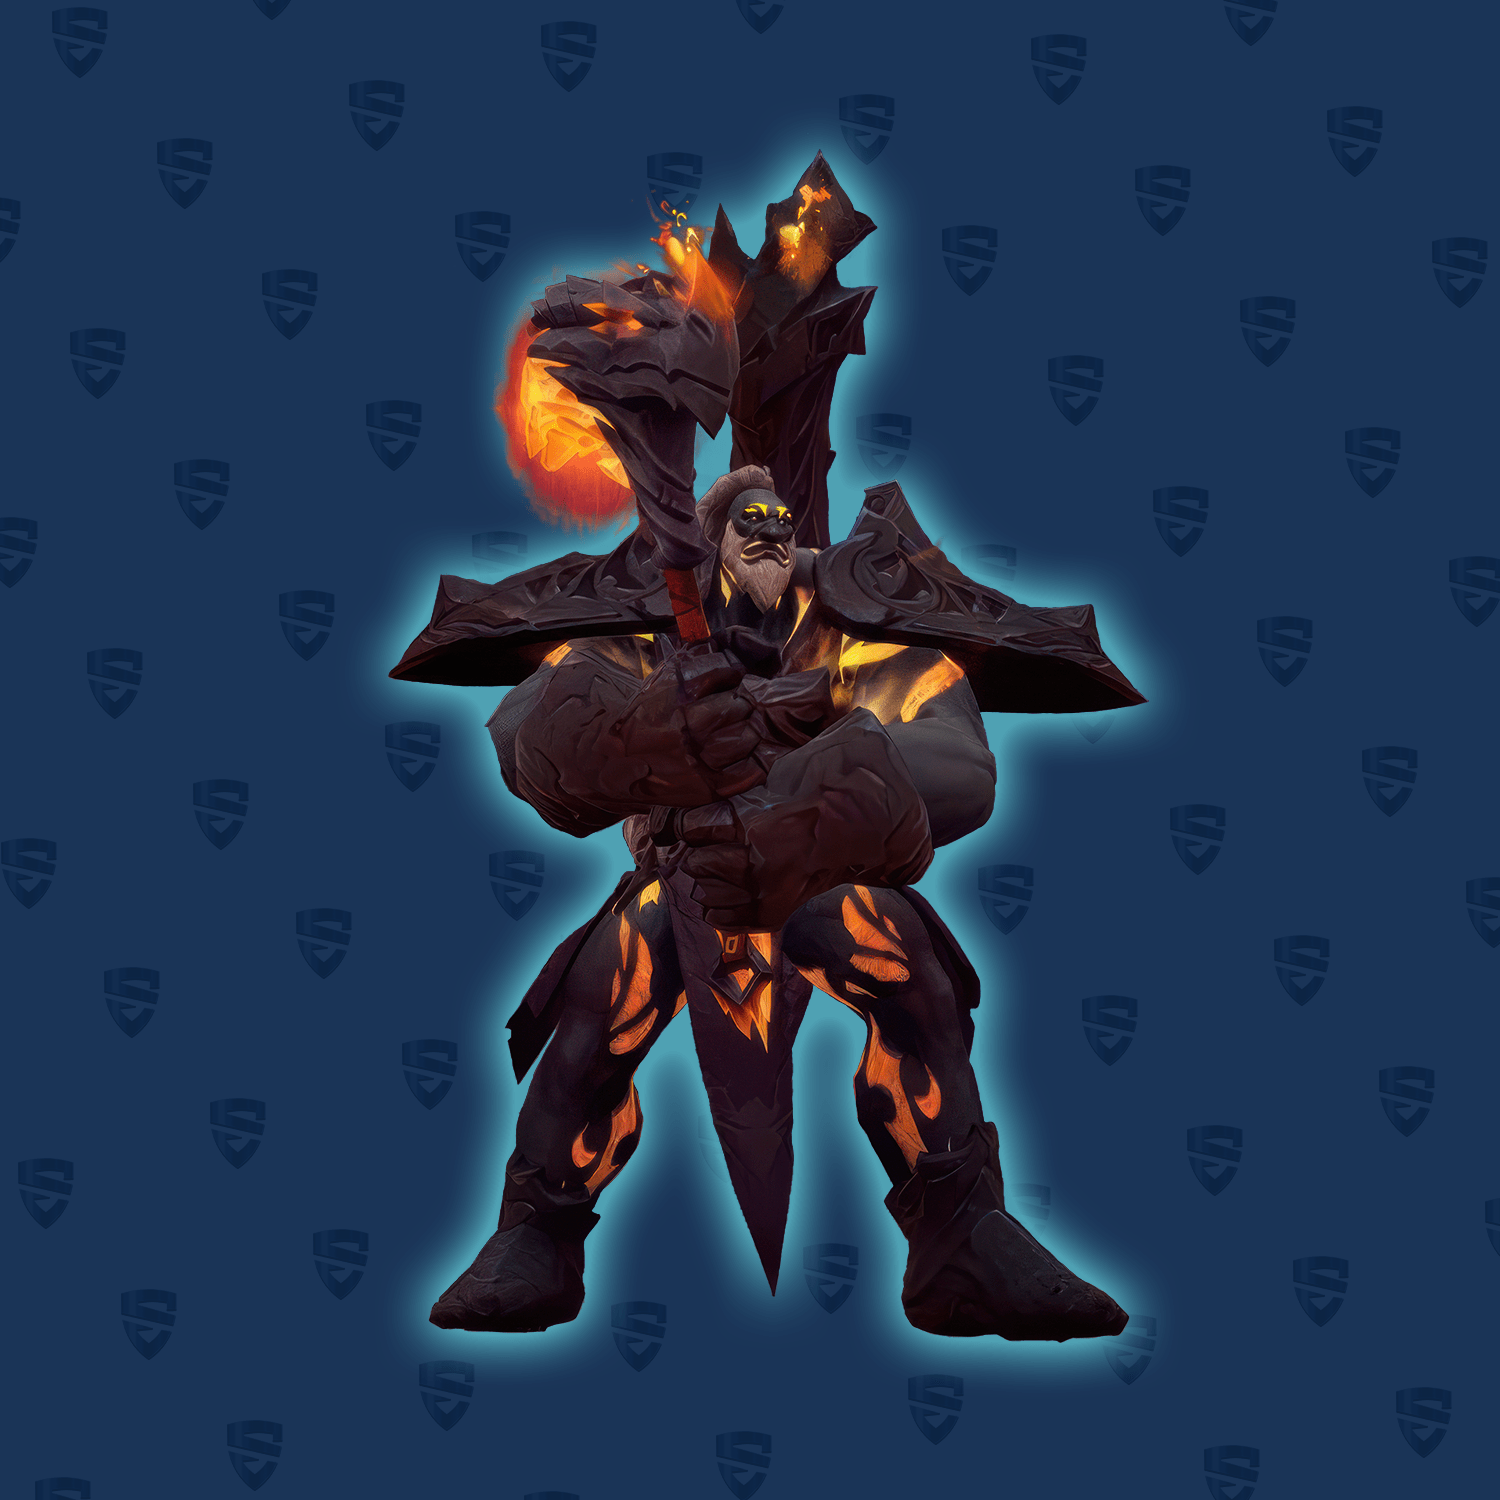
The Assault of the Zaqali presents a formidable challenge that demands a well-coordinated team effort. This encounter entails dividing your team into two evenly-matched and well-balanced groups, each stationed on a designated platform to fend off successive waves of Zaqali forces. These forces aim to breach a magical door, and any contact with it results in immediate wipe for your raid. The primary boss switches platforms intermittently, triggering the appearance of numerous rocks that must be hurled off the edge to defeat the incoming reinforcements - as unbelievable as that may sound. Following several enemy waves and a critical drop in the boss's health, your group will face the primary boss in a final, climactic battle - a 20 vs 1 showdown.
In this encounter you will need to deal with multiple enemies simultaneously. So do not hesitate to switch to your M+ build for this fight.
The recommended raid composition is as follows:
- 2 Tanks;
- 4-5 Healers;
- 13+ DPS.
This encounter is divided into two phases, with different sets of abilities.
Phase 1
Zaqali Abilities
| Barrier Backfire | If Zaqali reaches the door and strikes it, all players will suffer a near-lethal amount of Shadowflame damage and will be affected by a DoT that causes a moderate amount of Shadowflame damage per tick. This is essentially an enrage mechanic and should be avoided at all costs. |
|---|---|
| Arbalest Fire | Beware of the circles as they cause Physical damage to all players standing within 12 yards of their impact. Be sure to avoid them! |
Warlord Kagni Abilities
| Devastating Leap |
When Kagni reaches full energy, he will move to another platform and leap to the center of the new platform. Being present in the landing area will cause players to suffer a serious amount of Volcanic damage within a range of 12 yards and will push away those who are caught in the impact. Moreover, a few lines of fire will be emitted in various directions, which will result in another portion of Volcanic damage per second for 8 seconds to anyone hit by it. |
|---|---|
| Heavy Cudgel |
Kagni unleashes a frontal cone attack that inflicts a near-lethal amount of Physical damage to the Tank and increases their damage taken by 15% for 45 seconds. Furthermore, every hit generates Cave Rubble (stones), which must be gathered and transported to the yellow arrows that appear on either side of the platform. You can toss them down the wall by using the extra action button. Throwing the stones will halt any wall climber adds that are attempting to ascend. It is crucial to have one player assigned to each yellow arrow, as throwing multiple rocks at the same spot is not an efficient strategy. |
Magma Mystic Abilities
| Molten Barrier | When this add first appears, it has an absorb shield and unleashes fire damage every 4 seconds, with the damage increasing gradually over time. It's crucial to destroy the shield as soon as possible to prevent any unwarranted harm. Focus on nuking down the shield! |
|---|---|
| Magma Flow | There is a Dispellable DoT that inflicts large amount of Lava damage upon impact, followed by an additional Lava damage every 3 seconds for 15 seconds. |
| Lava Bolt | Once the Molten Barrier is shattered, the boss will cast an Interruptible Lava Bolt spell that inflicts Volcanic damage. Interrupt this ability to avoid suffering any unwarranted harm. Please note that this ability is only activated after the Molten Barrier has been destroyed. |
Flamebound Huntsman Abilities
| Blazing Spear |
Flamebound Huntsman hurls spears at random players, causing large amount of Physical damage to all players standing within an 8-yard radius. The affected area will remain visible after the initial hit and will inflict an additional Fire damage to anyone within its range. If targeted by this ability, move away immediately and avoid standing in the affected area afterward to prevent any further damage. |
|---|
Obsidian Guard Abilities
| Scorching Roar | Obsidian Guard lets out a deafening Roar that inflicts Fire damage every 0.5 seconds for 1.5 seconds to any players within a 25-yard radius. |
|---|---|
| Volcanic Shield | The boss creates a frontal shield that obstructs incoming attacks for 5 seconds. Once the shield dissipates, it will unleash a line attack towards a random player, inflicting large amount of Volcanic damage to all players caught in its path. |
Zaqali Wallclimber
| Battering Slam | In case the Tank does not aggro the adds, they will make a run for the door. Once they reach it, they will use a Battering Slam ability, which will subsequently trigger Barrier Backfire. |
|---|
Strategy
Prior to engaging the boss, divide the raid into two equal groups, assigning one group to each platform. Each group should have:
- 1 Tank;
- 2 Healers;
- 6 DPS.
Pull the boss where it stands using Hero/Lust on pull, ignoring the initial rocks that spawn at the boss. After roughly 27 seconds, the boss will fly away, and each group should move to their designated platform.
At first, each group will face a Mystic add and smaller ones. Bring them all on top of the Mystic and eliminate them. The group that gets the boss first will also receive rocks. Immediately have random players pick them up and throw them off the edge at the indicated yellow arrows. Make sure each player throws their own rock at a different arrow to prevent spawning extra adds.
When the boss reaches 100 energy, it will jump to the opposite platform, inflicting damage on players at the spot where it lands. Be ready to avoid the lines emanating from that area. Tanks should grab adds as soon as possible to prevent them from attacking random players, except for Wallclimbers, who will run towards the door unless attacked.
Healers should avoid standing close to the edges of the platforms to avoid aggroing adds. Players can use push-backs, slows, and stuns to help Tanks control the adds and kick the Lava Bolt cast to reduce unnecessary damage.
In Phase 1, the priority is to nuke down packs of adds and avoid abilities. As long as you deal with the rocks correctly, you should avoid being overrun by the adds until the boss reaches 15% health.
The DPS target priority is:
- Magma Mystic (until the shield is broken);
- Obsidian Guard;
- Flamebound Huntsman;
- Boss;
- Wall Climbers.
The Tank aggro priority is:
- Boss;
- Zaqali Wallclimber;
- Flamebound Huntsman;
- Obsidian Guard.
Phase 2
Abilities
| Catastrophic Slam | Upon casting, a large circle will appear at the door, dealing a lethal amount of Physical damage, evenly divided among all players inside it. The damage dealt by this ability is enhanced by 75% with every soak, which will grant the debuff Weakened Vitality. |
|---|---|
| Desperate Immolation | At the onset of Phase 2, the boss will initiate this ability and restore large amount of HP upon completion of the channel. Once the channel is done, the boss will acquire the Ignara's Fury buff. |
| Ignara’s Fury | Once the boss finishes channeling Desperate Immolation, the raid will suffer from a large amount of Fire damage every 10 seconds until the end of the encounter. |
Strategy
Once the boss’s health drops to 15%, it will move towards the center of the room and initiate the Desperate Immolation channel. During this phase, the boss will heal himself for a large amount of HP and gain the Ignara’s Fury buff. This buff will inflict large amount of Fire damage to all players every 10 seconds until the end of the fight.
Bring all the remaining adds to the boss and use area of effect (AoE) attacks to defeat them. The boss will then use Flaming Cudgel on the Tank, which is still a frontal attack. It's important to make sure the boss is faced away from the raid during this phase. The attack will generate fire swirls that must be avoided.
As the fight progresses, the boss will eventually use Catastrophic Slam on the door. This will spawn a circle that the entire raid must soak to reduce the damage taken by each player. However, each soak will increase the damage taken by this ability by 75%.
The key to success is to defeat the boss before the damage becomes too high to heal.
Rashok, the Elder

Rashok is the master of molten mayhem. This is a Single-Target encounter that involves a repeating cycle of one phase and an intermission. The secret of winning in this fight lies in strategically placing the Lava pools while sidestepping the lava puddles. Additionally, players must soak the potent Charged Smash attack to stay alive. As the battle intensifies, the number of lava puddles and pools will surge dramatically, creating a daunting obstacle course that demands meticulous planning and flawless execution. Get ready to push your limits in the ultimate showdown against Rashok! BLOG20
The recommended raid composition here is as follows:
- 2 Tanks;
- 4-5 Healers;
- 13+ DPS.
Rashok will actively use the following abilities:
| Ancient Fury | Should Rashok's energy reach 100, he will unleash an onslaught of lethal damage to the entire raid every 3 seconds. Once this mechanic is triggered, it operates as an unstoppable enrage, meaning there is no way to prevent or halt its effects. |
|---|---|
| Molten Wrath | At regular 15-second intervals, Lava puddles will erupt in random directions from the Living Lava pools. It's important to avoid them, as each puddle deals a large amount of Fire damage every 1.5 seconds, posing a significant threat to your health. |
| Searing Slam |
During the encounter, the boss will target a player with a yellow arrow and a circle, indicating where he will jump to and deal a moderate amount of damage to all players in the area. It appears that the targeted player does not suffer any additional damage from this ability. As the number of Lava Pools in the room increases, the damage of this ability will also rise, making it a soft enrage towards the end of the fight when the entire room is flooded with pools. In fact, Searing Slam could potentially wipe out the entire raid in one hit. It's crucial to avoid hitting any additional Lava Pools with Searing Slam, as doing so will trigger Scorching Outburst and likely result in a wipe. Furthermore, the Slam will cause all Lava Pools to emit Lava puddles in random directions, so be prepared to dodge a considerable amount of these projectiles. |
| Doom Flame | Multiple circles will appear around the room that must be soaked. Each circle deals a large amount of damage on impact, followed by a stackable DoT, which deals a moderate amount of damage per second. Neglecting to soak any of these circles will cause the entire raid to take significant damage instead. |
| Shadowlava Blast | The boss has a devastating frontal attack that inflicts lethal damage to any unfortunate players hit by it. The raid can lure the attack to a specific direction or a wall, or simply avoid it altogether. |
| Charged Smash | Multiple players need to soak the Smash ability, as failure to do so results in high damage to those who didn't soak it. It is recommended that all players participate in soaking the ability to avoid unnecessary damage. |
| Volcanic Combo |
This is a standard tank combo mechanic where the boss alternates between two types of attacks: Fire and Earth. It's crucial to avoid getting hit by the same attack type twice, unless you have the ability to immune it. |
| Siphon Energy |
Moving the boss to the center of the large circle in the room triggers Siphon Energy (Energy Drain), during which the boss will be inactive and inflict a larger amount of damage to all players every 1.5 seconds until his energy reaches 0. To make healing easier, players should stack up in a safe location and be aware of the line of shadows that randomly spawn around the boss and dodge them accordingly. |
|
Unyielding Rage |
When Siphon Energy is finished, the boss will knock everyone away and deal a small amount of damage. Additionally, you receive a debuff that prevents you from draining the boss again for a certain amount of time. |
Strategy
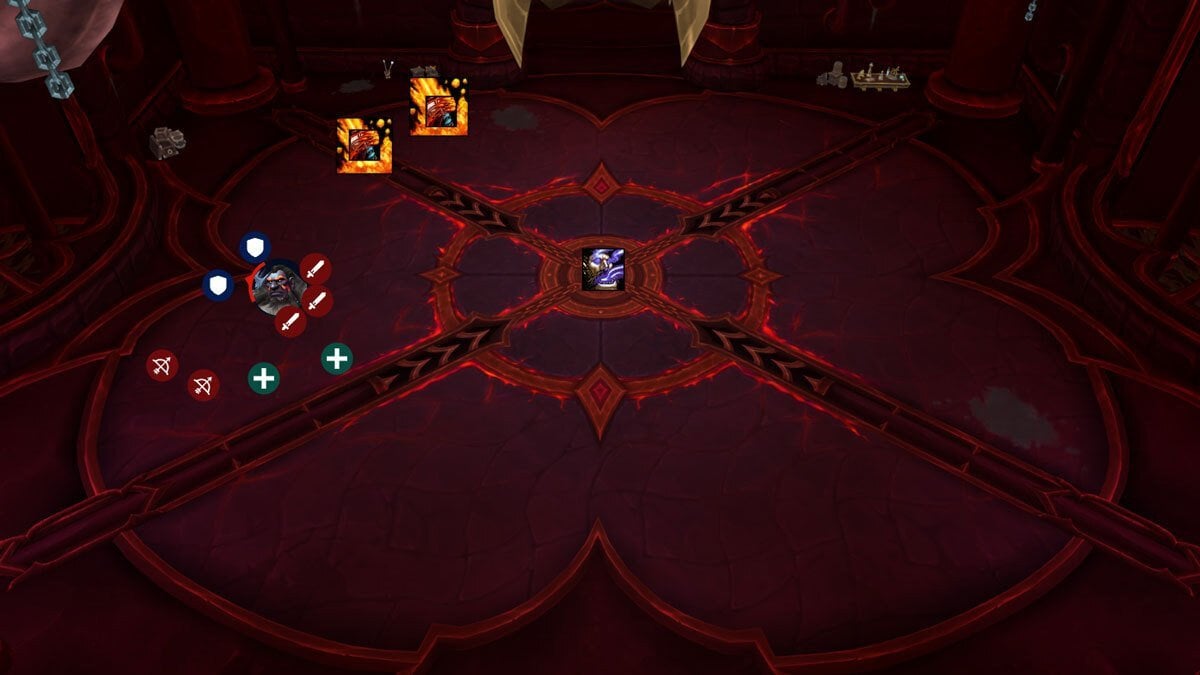
For Searing Slam, players targeted by it should move it away from the raid, ideally to a corner of the room. Place subsequent Searing Slams counterclockwise (or clockwise) and avoid hitting other lava pools to prevent triggering Scorching Outburst and wiping the group.
Keep the boss and Living Lava pools in line of sight to avoid being caught off guard by moving lava puddles.
Ensure all Doom Flame circles are soaked and have nearly everyone soak Charged Smashes to minimize damage. Beware of Searing Slam's ramping damage with two DoTs ticking on you.
For Shadowlava Blast, try to bait it towards a wall or dodge with speed boosts and proximity to the boss.
As the boss approaches 100 energy, move him to the center of the room while placing the last Searing Slam and dodging lava puddles.
Upon reaching the center, the boss triggers the Siphon Energy (Conduit) intermission. Group up and avoid Shadow Lines while dodging the boss's periodic damage until his energy reaches 0.
Repeat the encounter, but with increasing lava puddles and Searing Slam damage to dodge.
The Vigilant Steward, Zskarn
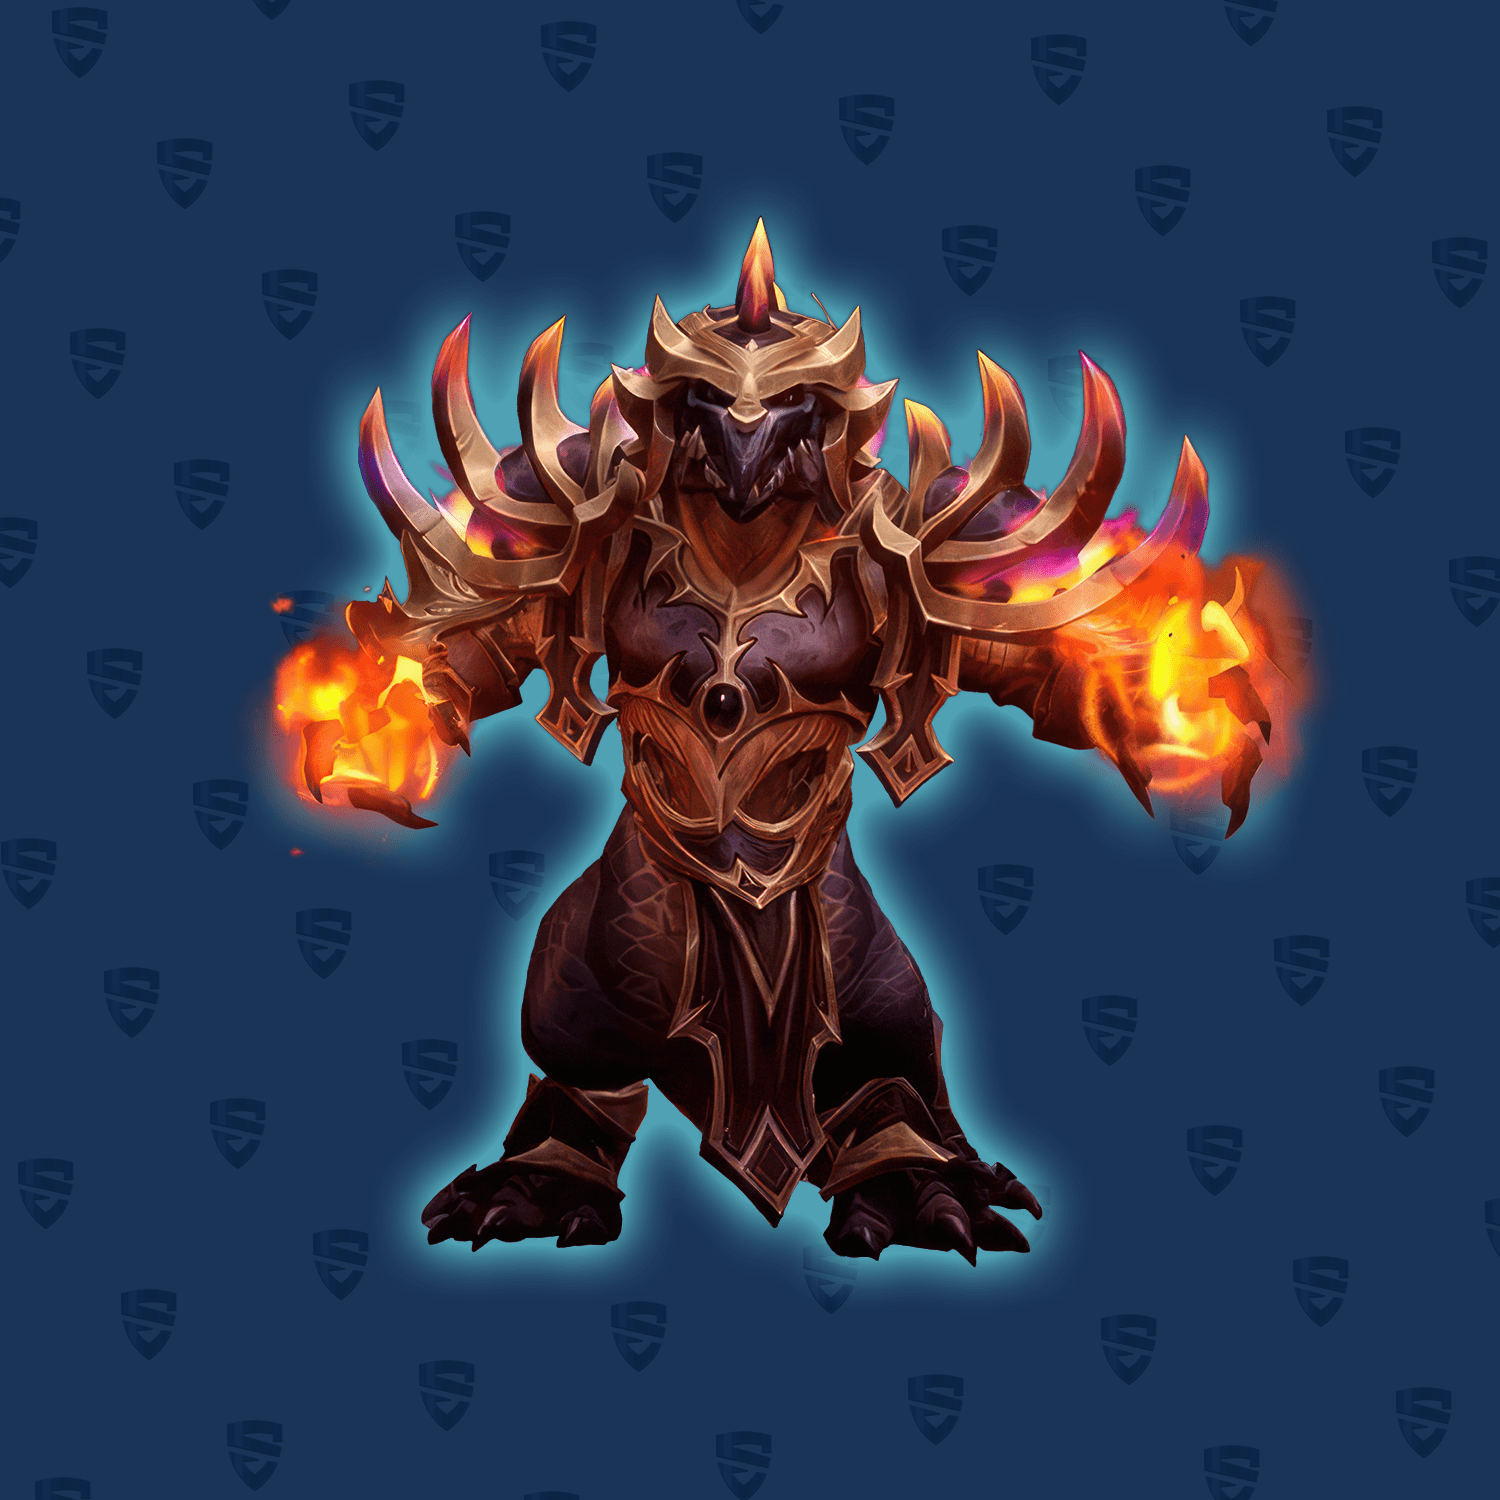
This is a dynamic, one-phase fight against the Vigilant Steward, Zskarn, where players must exhibit agility, add-cleave abilities, and multi-dotting prowess. To emerge victorious in this encounter, players must adeptly crowd-control several golem-constructs, defeat them, and employ the tools they drop to disable traps dispersed throughout the room. The boss will frequently unleash a potent knock-back attack, challenging players' positioning aptitude and ability to evade treacherous traps. Players must also beware of the ornate dragon statues positioned on either side of the room, as they unleash a devastating fire attack that covers almost half of the room, putting players in grave danger.
The recommended raid setup for this fight is pretty standard, though:
- 2 Tanks;
- 4-5 Healers;
- 13+ DPS.
The boss wil actively use the following abilities:
| Dragonfire Traps | Zskarn will trigger several Dragonfire Traps in his vicinity, as well as one at a random location within the arena. These traps emit pulses of fire within a 10-yard radius. If someone comes into contact with a trap, they will be inflicted with a Damage over Time effect that deals a moderate amount of Fire damage every second for 6 seconds. The effect can stack if triggered multiple times. |
|---|---|
| Animate Golems |
Up to 3 Golems will be spawn, with the objective to activate inactive traps randomly by employing the Activate Dragonfire Trap ability. Your primary focus should be to interrupt this ability. Upon their demise, you can obtain Salvage Parts by interacting with the Golem, which can be used to disable any active traps by pressing the extra action button when you are in close proximity to the trap. Golems are susceptible to slowing, stunning, and gripping effects. |
| Tactical Destruction |
Once the boss accumulates 100 Energy, Dragon statues situated throughout the room will initiate a pizza slice-shaped attack, dealing a lethal amount of Fire damage to all players within its range. It seems that the number of activated statues will increase depending on the number of active traps on the field. However, it is currently uncertain whether this is determined by the quantity of traps or the duration of the encounter. Additionally, it seems to target the side where the traps are currently active. The size of the cone-shaped attack will gradually expand as the battle progresses. |
| Shrapnel Bomb |
The boss generates three bombs that must be absorbed by either the tank or a player with an immunity. If unsoaked, the bombs will detonate after 30 seconds, resulting in a near-lethal amount of Physical damage to all players, accompanied by a damage-over-time effect that deals an almost unhealable amount of Physical damage every second for 10 seconds. In the event that a Bomb is triggered, the player absorbing it will instead be inflicted with a lethal amount of Physical damage and a DoT that deals large amount of Physical damage every second for 8 seconds. Although the off-tank should be able to manage all the bombs alone, immunities are still advantageous and should be utilized whenever possible. |
| Unstable Embers |
The boss will select multiple players as targets (indicated with a red arrow), and these players will radiate a large amount of Fire damage to all players within a 5-yard radius. It is essential to spread out and avoid damaging other players with this effect. |
| Blast Wave |
This is a knockback ability that strikes all players, dealing a large amount of Fire damage and applying a DoT effect that inflicts Fire damage every 0.5 seconds for 6 seconds. Although it may appear unthreatening, this ability is the most challenging aspect of the encounter since the knockback effect can push you towards active Traps and Dragon Statues that are casting Tactical Destruction. You must be mindful of your positioning when the boss employs this ability. |
| Searing Claws |
This ability applies a DoT to the current tank, dealing a significant amount of Fire Damage every 2 seconds for 20 seconds. It is a relatively weak ability since the tank will utilize robust defensive abilities to absorb the bombs. When the damage reaches a critical level, alternate who is tanking the boss. |
The Vigilant Steward, Zskarn Strategy
Opening
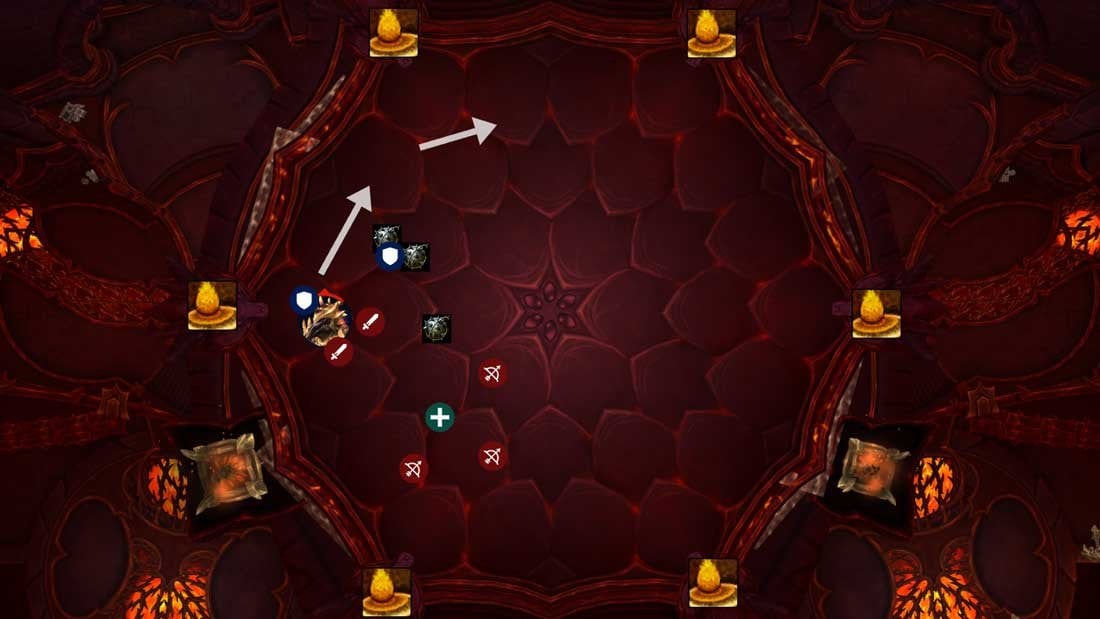
The tank should position the boss near one of the Dragon Statues located at the side of the room and remain there until the first set of traps become active. Afterward, the group should move clockwise while keeping the boss close to active traps. As trap activation has an element of randomness, positioning will vary throughout the encounter.
The off-tank should concentrate on soaking the Shrapnel Bombs as soon as they spawn. If necessary, players with immunities (like Mages or Paladins) should be called upon to soak the bombs instead. This is particularly important toward the end of the fight, as the room will have many active traps that may make some Shrapnel Bombs difficult to reach without taking considerable damage. In such cases, players with immunities should be called upon to soak the bombs. It's important to note that the damage from the bombs is physical, so abilities like Rogue’s Cloak of Shadows won't work.
Players targeted by Unstable Embers should move away from others or have other players move away from them. Generally, the group should remain loosely spread out, as Unstable Embers are used frequently throughout the fight.
When Golems spawn, the raid should attempt to bring them to the boss to increase cleave damage. Golems should be the group's top priority while active. Interrupt their casts and defeat them as quickly as possible. Once defeated, pre-assigned players with good mobility should collect the tools dropped by the Golems and use them to deactivate a trap. Traps near the center of the room should be prioritized as the knockback effect will usually push players toward the center. Golems do not need to be tanked since they are fixated on activating traps.
Traps Clearing
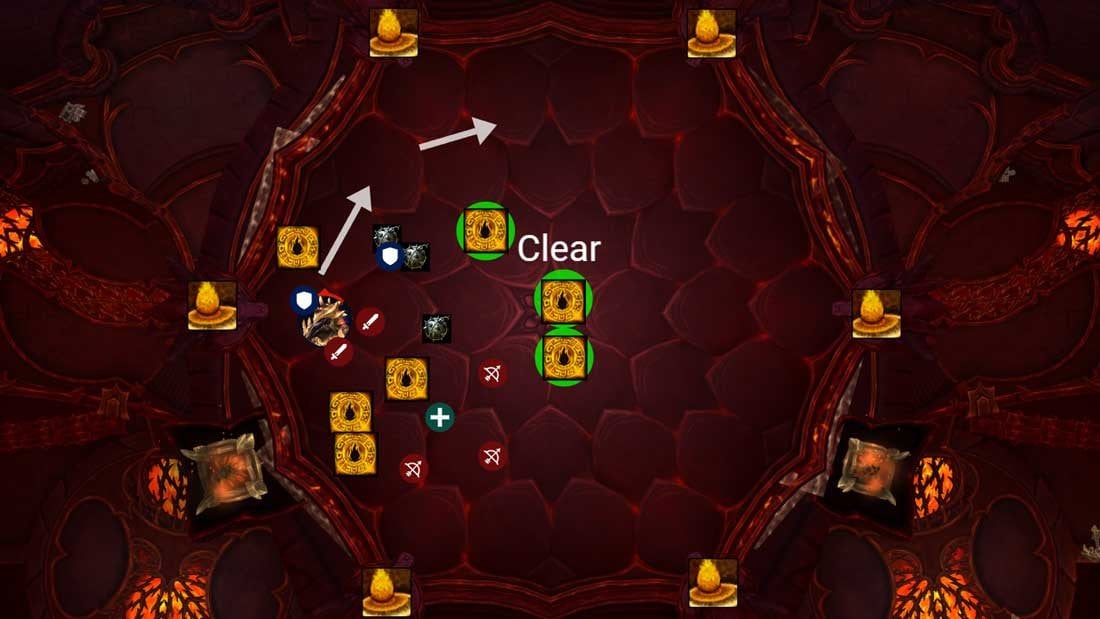
Ensure proper positioning to avoid getting knocked into a trap or towards an active Dragon Statue during the Blast Wave. Healers should be prepared for extra raid damage and the DoT, and players knocked into an active trap will require additional attention due to multiple ticking DoTs. Don't worry about being knocked off the platform as it's not possible.
At 100 Energy, the boss will activate multiple Dragon Statues, and players must immediately move to a safe location to avoid being one-shot.
Note: During testing, the ability's range was found to be greater than the spell animation. Therefore, it's advisable to run 15 yards further even if you believe you're safe.
The number of activated Dragon Statues and their range increase as the fight progresses.
This encounter has no phases, but it becomes progressively harder as more traps spawn, which limits space to dodge knockbacks and the Dragon Statue's frontal.
As long as all three tools are used to disable a trap and a Golem is prevented from casting Activate Dragonfire Trap, there's nothing more you can do to control the traps.
Magmorax

Magmorax is a Single target encounter that presents both high DPS and HPS challenges. Players must remain vigilant and swiftly soak up lava puddles to reduce their size, lest they run out of space in the arena. The Boss will also inflict a heavy knockback on the entire raid, testing players' positioning abilities. If the boss stands in fire, it will amass extra energy, and if it reaches 100, it will unleash a catastrophic attack that can wipe out your group in a flash. Get ready to engage in a scorching battle with Magmorax as it brings the inferno to your raid team. Here your raid can benefit greatly from Warlock's Gateway abillity and any knock-back interrupts you have at your disposal (like Shaman's Thundering, for example).
The recommended raid setup for this boss is:
- 2 Tanks;
- 4-5 Healers;
- 13+ DPS.
The boss will actively us the following abilities:
| Catastrophic Eruption | Once Magmorax's energy level hits 100, a powerful enrage mechanic will trigger. The boss will unleash devastating attacks, dealing a whopping 150% increased physical damage and inflicting significant Fire damage to all players. Additionally, every 2 seconds, Magmorax will increase your Fire damage taken by players by 50%. This deadly combination will continue until either all players are defeated or the boss has been successfully defeated. It is imperative to be aware of this mechanic and develop a strategy to counter it, as failing to do so can quickly lead to defeat. |
|---|---|
| Molten Spittle | During the fight, a select group of players (usually 2-3 depending on the raid size) will receive a circle around them. This circle will tick for a significant amount of Fire damage every 1.5 seconds for a total of 6 seconds. Once the duration has expired, the circle will explode, causing a large amount of Fire damage to anyone within a 10 yard range. The explosion will also create a Magma Puddle on the ground, which poses an additional hazard for the players. It is crucial to take caution and avoid standing in the Magma Puddle, as it can deal significant damage over time. Proper positioning and coordination amongst the raid team is key to minimizing the impact of this mechanic and ensuring a successful encounter. |
| Magma Puddle | Unless players soak them, magma puddles will gradually increase in size. These puddles do not have a maximum size, meaning they will cover the entire map if left unattended. Standing in a magma puddle will grant players Searing Heat stacks. Each stack inflicts a small amount of Fire damage per second for 20 seconds. However, the more stacks acquired, the less effective they become due to diminishing returns. Therefore, it is advisable to stop at approximately 5-7 stacks. If a player obtains 10 stacks, they will become Overheated and unable to shrink any magma puddles for 20 seconds. |
| Blazing Tantrum | Whenever the boss is standing in a Magma Puddle, they receive a boost of 5 energy and inflict a moderate amount of Fire damage per second. |
| Igniting Roar | Upon casting, the boss unleashes an attack that hits all players for a significant amount of Fire damage and applies a damage-over-time effect. This effect stacks and persists until the end of the encounter, leading to increased difficulty in healing as the fight progresses. Furthermore, the ability triggers additional Magma Puddles to appear on the ground. |
| Overpowering Stomp | The ability inflicts a near lethal amount of Physical damage to all players and forcefully knocks them away. It's crucial to avoid the knockback as it covers a substantial distance. At present, players can prevent being knocked back by using abilities such as blinks and teleports that cancel knockbacks, or by employing the Warlock gateway cheese strat. This involves triggering the gateway just before the ability's cast is completed, ensuring that players are in transit when the knockback occurs, thereby nullifying its effect entirely. |
| Blazing Breath | This ability selects a random player and targets them with a frontal cone, inflicting a lethal amount Fire damage to any player caught in its path. |
| Incinerating Maws | This is your somple tank-swap mechanic. Swap tanks after 2 stacks. |
Magmorax Strategy
Starting Positions
To optimize knockbacks, tanks should position the boss on one side of the room, ensuring that any players standing behind the boss will be knocked towards the back of the room and away from the lava (unless they are positioned to the side). It's essential to move the boss away from any Magma Puddles to prevent damage to the raid and energy gain by the boss.
Tanks should swap every 1-2 stacks of Incinerating Maws.
Melee players should initially place their puddle close to the boss, allowing the entire melee group to soak it. Similarly, range players should keep their puddles nearby.
It's crucial to have three players soak each puddle, as a single player will experience diminishing returns, and two players will result in high stacks. Soaking with three players ensures that the puddle is fully absorbed without any player gaining too many stacks. BLOG20
If you are away from the raid and get a Magma Puddle circle, drop the puddle to the side. Your primary objective is to clear the area around the boss and the middle of the room as much as possible. When the boss drops below 30% health, drop puddles only to the side, soaking only the puddles that are moving towards the boss.
Before Igniting Roar is cast, avoid getting high stacks from soaking Magma Puddles. The initial hit combined with high stacks can be lethal.
When the boss is about to use Overwhelming Stomp, position yourself within range of the Warlock Gateway. In the last half-second before the cast completes, use the Gateway, and you'll travel during the knock-back, fully negating its effect. Early in the fight, getting knocked back is fine (as long as you don't fall into the lava). However, as the boss's energy level surpasses 80%, skipping the knockback is advisable. This is because the room will be filled with magma puddles, and the ticking damage from the Igniting Roar stacks will already be high.
Once the call is made to place the puddles to the side and avoid soaking unless the puddles are creeping in, the entire raid should stack behind the boss for extra healing. Passive raid damage will already be high at this point in the fight, making stacking a significant help.
The fight ultimately boils down to avoiding running out of space and ensuring that the boss is not standing in Magma Puddles. All players must help soak the puddles; if several players avoid soaking, others will have to soak more, leading to higher stacks than necessary.
Echo of Neltharion

In the battle against the mighty Echo of Neltharion, the fight will quickly transforms into a cleave-heavy encounter in later phases. One of the main features of the fight is thet the raid members should do their best to destroy portions of a stone wall to create gaps for players to navigate. In phase 2, several players will succumb to mind control and become hostile (an excellent opportunity for Warlocks to demonstrate their prowess), and their objective is to defeat a Void creature that only they can assail. In the final stage, the raid must utilize a protective portal to withstand a massive explosion from Neltharion while simultaneously eliminating the small Voidlings that materialize.
The recommended raid setup is as follows:
- 2 Tanks;
- 4-5 Healers;
- 13+ DPS.
Boss Abilities
| Twisted Earth | The boss summons walls, which split the room. All players standing in the location of walls erupting will receive a serious amount of Nature damage and will be knocked back. This ability also deals Nature damage to the whole raid. |
|---|---|
| Rushing Darkness | The boss targets a few players and knocks them back, dealing a serious amount of Shadow damage and breaking the walls if players are knocked into them. |
| Calamitous Strike | The boss strikes his melee target, dealing a huge amount of Physical damage and knocking it far off, while also increasing the target's damage taken by 200% for 3 seconds. If the target hits a piece of Twisted Eruption, it will Shatter. |
| Shatter | A piece of Twisted Eruption explodes after it gets hit by a player after Calamitous Strike, dealing a moderate amount of Physical damage to the player and an amount of damage to the whole raid. Shattered Twisted Eruption will also send a shrapnel of stone pieces across the room. |
| Echoing Fissure | The boss shatters the ground causing a lethal amount of Volcanic damage to all players. The further away from the boss you are, the less damage you will receive. This ability also causes Collapsed Earth to fall from the ceiling. |
| Voice from Beyond | The boss causes a raid-wide 10 seconds DoT and additionally deals a large amount of Shadow damage, when the DoT is expired. But the most important part of this ability is that it will "corrupt" all players of the same class in the game, giving them a unique buff/debuff, which will significantly alter the encounter mechanics depending on what class has been corrupted and how many players of this class are in your raid. |
| Sunder Shadow | The boss takes control over the target's shadow, dealing a large amount of Physical damage and attacking the target's helpless body with Shadow Strike. While being under control a player can freely move though Twisted Eruption walls. |
| Shattered Reality | The boss draws nearby Twisted Eruption to Void portals dealing damage to all players within 150 yards of the destination. Also, plenty of Twisted Aberrations will come into reality through the portals. If you stand in the portal you will be drawn out of the reality and receive a DoT, which deals significant damage every second every 1.5 seconds, reducing their damage done by 99% and damage taken by Ebon Destruction. |
| Ebon Destruction | The boss deals a lethal amount of damage Volcanic damage and additional Fire damage every 1.5 seconds for 15 seconds. This ability dispels all Shattered Reality portals. |
Strategy
The Neltharion boss fight consists of three phases:
- Earth Warder;
- Corruption Takes Hold;
- Reality Fractures.
In the first phase, players must dodge the Echoing Fissure spell, which damages them based on their proximity to the caster. Twisted Eruption then splits the room with a rock wall, and players at the wall's location are hit by Twisted Eruption. Rushing Shadows attacks random enemies and knocks them back, potentially triggering Eruption's Shatter effect. Tanks must manage Calamitous Strike's knockback and Shatter mechanics.
The second and third phases focus on Shadow AoE Attacks and mobs. Neltharion will Corrupt raid members for 30 seconds, forcing them to stay apart. Sunder Shadow will target tanks and kick them away from their bodies, requiring them to run back quickly. Shattered Reality spawns Twisted Aberrations and deals massive AoE damage in a 150-yard radius. Players must also hide from Ebon Destruction's potentially deadly cast in portals created by a previous ability.
Scalecommander Sarkareth
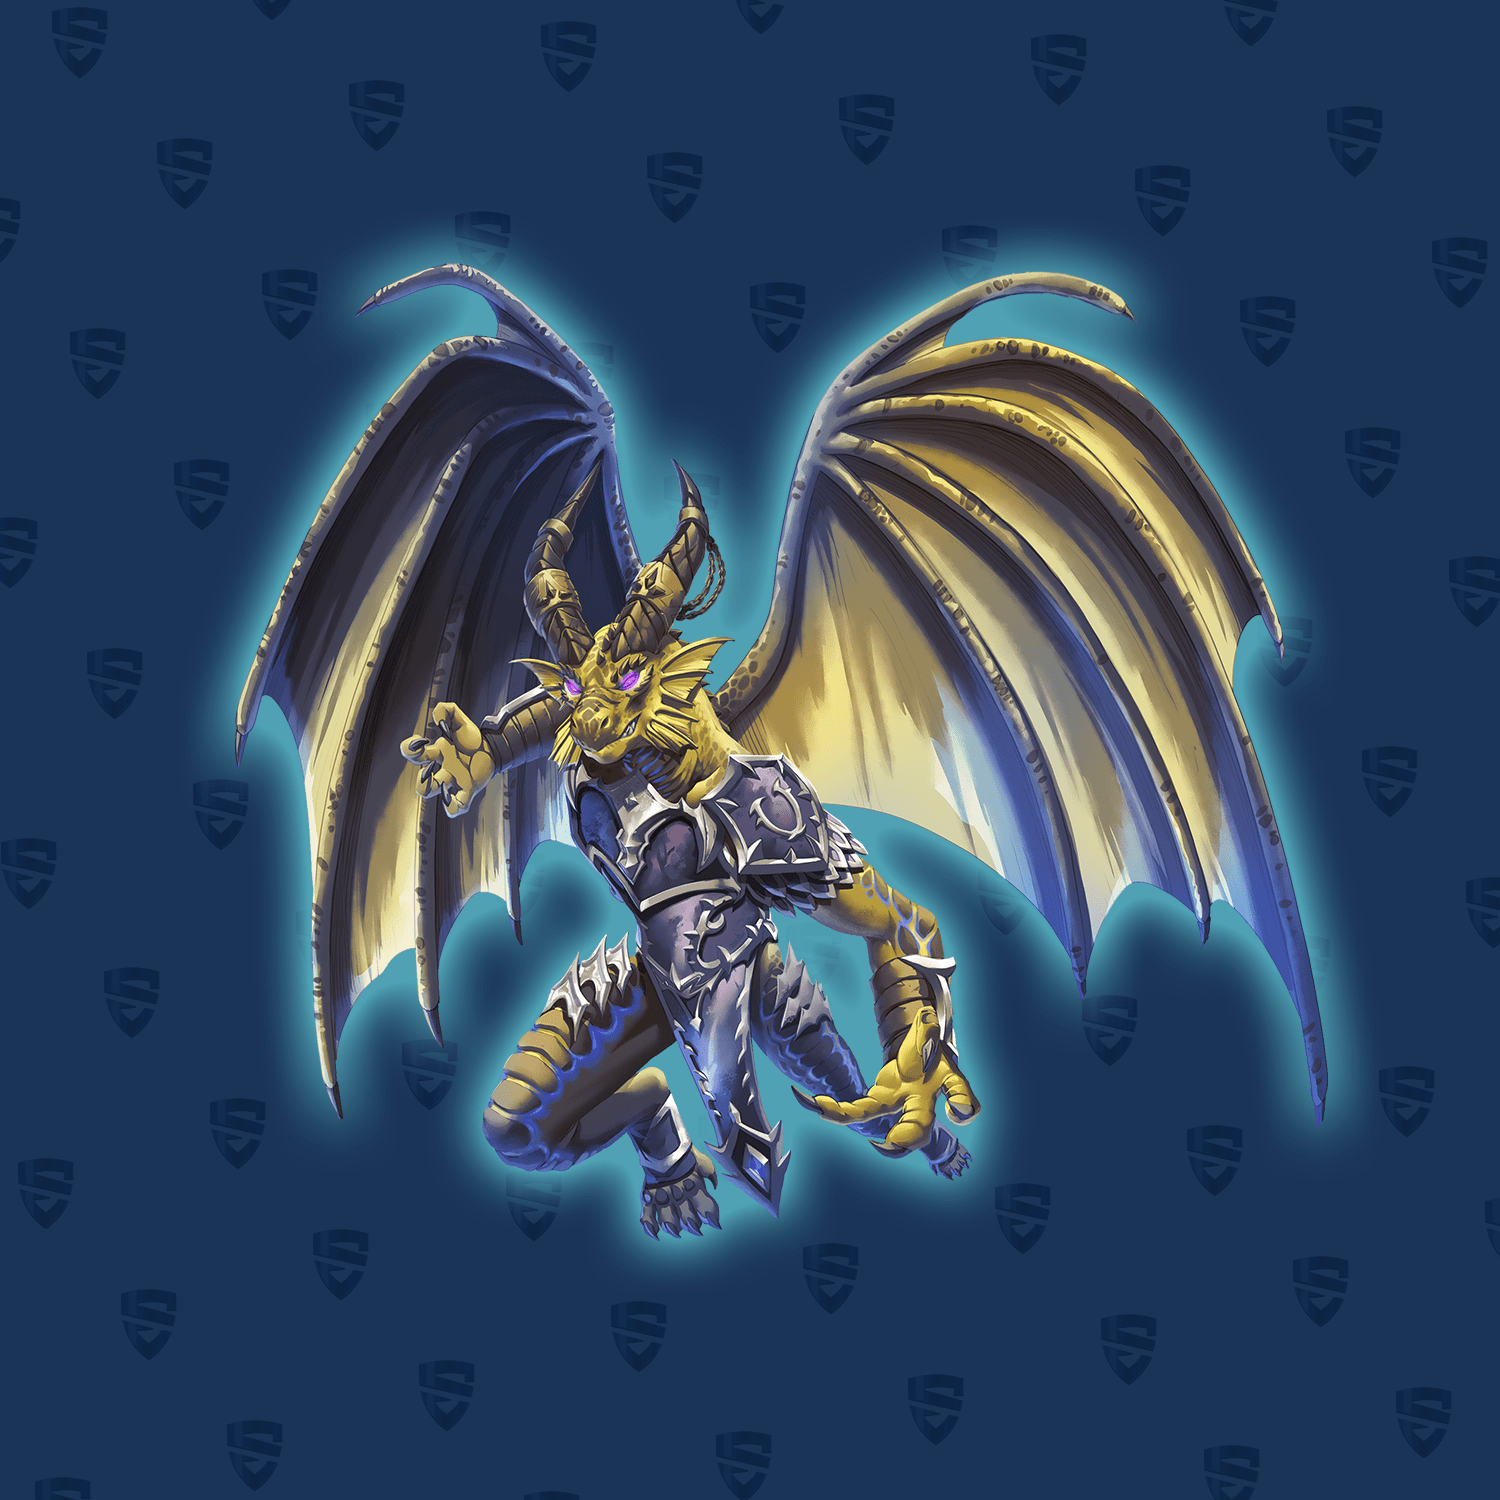
Note: The developers continue their tradition of not testing the final boss on PTR. Thus, this section of the guide is based solely on datamining and our speculation. Rest assured that it will be updated as soon as the patch goes live.
This is a complex multi-phase encounter with several types of adds. The recommended raid setup is as follows:
- 2 Tanks;
- 4-5 Healers;
- 13+ DPS.
Boss Abilities
| Oblivion | Being struck with most Void abilities causes Oblivion, inflicting Shadow damage every 1 sec for . Upon reaching 10 applications, the affected player is lost in the Emptiness Between Stars, reducing damage done by 99%. After 15 sec, if the target has not recovered fragments of their mind, they are lost forever and perish. |
|---|---|
| Astral Flare | While stranded within the Emptiness Between Stars, players can absorb Astral Flares to gain 5% increased Haste and 10% increased movement speed for 18 sec. This effect stacks. |
| Phase 1 | |
| Oppressing Howl | Sarkareth releases a bone-shaking howl at all players, pushing them away and increasing the incoming effects of Mass Disintegrate, Searing Breath, and Glittering Surge. When struck by any of these, Oppressing Howl is removed. When Oppressing Howl is removed from a player, echoing darkness erupts forth and inflicts Shadow damage to all players. |
| Glittering Surge | Sarkareth releases pure magic, inflicting Arcane damage to all players every 1 sec for 8 sec. If Glittering Surge strikes a player with Oppressing Howl, it removes that effect and applies Dazzled, stunning them and inflicting Arcane damage every 1 sec. |
| Scorching Bomb | Sarkareth places several Scorching Bombs nearby players. Each inflicts Fire damage to players within 10 yards every 1 sec. After 12 sec, the bombs explode with a Scorching Detonation, inflicting Fire damage to all players instantly with an additional Fire damage every 1 sec for 5 sec. When a Scorching Bomb erupts, it creates a patch of Burning Ground. This ground inflicts Fire damage every 1 sec to players within. |
| Mass Disintegrate | Sarkareth forms a shimmering image that marks players. After 6 sec, energy erupts from the image in a line towards its targets inflicting Arcane damage. If Mass Disintegrate strikes a target with Oppressing Howl, it removes that effect and applies Disintegrated, reducing movement speed by 25% and inflicting Arcane damage every 5 sec. |
| Searing Breath | Sarkareth breathes flames in a frontal cone, inflicting Fire damage instantly with an additional Fire damage every 1 sec for 12 sec. This attack repeats 3 times and stacks. If Searing Breath strikes a target with Oppressing Howl, it removes that effect and applies Seared, inflicting Fire damage every 1 sec. |
| Burning Claws | Sarkareth slashes his current target, inflicting Physical damage with an additional Fire damage every 1 sec for 27 sec. This effect stacks. Upon expiration, releases a Blazing Blast, inflicting 15% of the total Fire damage taken from Burning Claws to all players as Fire damage. |
| Phase 2 | |
| Void Bomb | Sarkareth places Void Bombs nearby players. Each inflicts Shadow damage to players within 12 yards every 1 sec. After 20 sec, the bombs explode with a Void Surge, inflicting Shadow damage to all players every 1 sec for 4 sec. |
| Void Fracture | A player stepping into the Void Bomb causes the void energy to dissipate into the player. Upon removal, the void energy erupts with a Void Surge unless that player is within the Emptiness Between Stars. |
| Abyssal Breath | Sarkareth takes in a deep breath and flies to a location, inflicting Shadow damage in a line and knocking players back. Upon casting Abyssal Breath, Sarkareth leaves behind images of himself. They periodically release a mighty scream, inflicting Arcane damage to all players and interrupting spellcasting, and attempt to heal themselves with Rescind. |
| Desolate Blossom | Sarkareth grows bulbs of void energy at player locations which pulse waves to all players and creatures within them every 0.5 sec, absorbing up to healing for 1 min and removing Rescind. |
| Ebon Might | Upon casting any spell, Sarkareth empowers his allies with the might of the Black dragons. This effect increases their damage done and movement speed by 15%. Upon reaching 5 applications, the target becomes immune to crowd controlling and interrupting effects. |
| Void Claws | Sarkareth slashes his current target, inflicting Physical damage with an additional Shadow damage every 3 sec and reducing healing received by 25% for 18 sec. This effect stacks. Upon expiration, releases a Void Blast, inflicting 40% of the total Shadow damage taken from Void Claws to players within 20 yards as Shadow damage. |
| Phase 3 | |
| Void Bomb | Same as in Phase 2. |
| Void Fracture | Same as in Phase 2. |
| Cosmic Ascension | Sarkareth flies up through a void portal before crashing through the floor and inflicting Shadow damage to players within 30 yards and knocking back players struck. |
| Astral Formation | Sarkareth pulls several asteroids out of space to crash into the ground. These formations inflict Shadow damage to nearby players every 1 sec. |
| Void Might | After ascending to the stars, Sarkareth empowers himself with Cosmic energy, increasing his damage done by 10%. This effect stacks. |
| Hurtling Barrage | Sarkareth tears open portals to infinity, conjuring void images of himself that rush out in a line through a player. These images inflict Shadow damage to targets struck. |
| Scouring Eternity | Sarkareth causes a massive supernova to grow and erupt, inflicting Shadow damage and knocking back all players not behind an Astral Formation. Astral Eruption destabilizes Astral Formations, causing them to explode and inflict Shadow damage to and knock back players within 10 yards. |
| Embrace of Nothingness | Sarkareth focuses the crushing weight of space upon a player. After 8 sec, a black hole is formed inflicting Shadow damage, split evenly among players struck. The black hole also pulls in and absorbs nearby Astral Formations before finally erupting and inflicting Shadow damage to all players within 12 yards. |
| Motes of Oblivion | Oblivion motes rain from above, inflicting Shadow damage in addition to 5 applications of Oblivion to players within 3 yards of the impact. |
| Void Slash | Sarkareth slashes his current target and a frontal cone, inflicting 715340 Physical damage with an additional 183617 Shadow damage every 3 sec and reducing healing received by 25% for 18 sec. This effect stacks. Upon expiration, releases a Void Blast, inflicting 25% of the total Shadow damage taken from Void Slash to all players as Shadow damage. |
Overview
The battle commences as Sarkareth, the Scalecommander, unleashes his first attack, the devastating Oppressing Howl, and follows up with Glittering Surge to overwhelm and crush his opponents. As the players gradually weaken him, Sarkareth taps into the power of the Void, augmenting his already formidable draconic abilities with the deadly Abyssal Breath and the strengthening Ebon Might, conjuring terrifying images of himself to further bolster his onslaught. When Sarkareth is on the brink of defeat, he unleashes his ultimate power, unleashing the full force of the Void to utterly devastate the surrounding area and transform his abilities into their most potent forms.
Tips for Everyone:
- When Sarkareth uses Glittering Surge, it applies Dazzled to all players who still have Oppressing Howl.
- Void Bomb erupts for high raid damage unless detonated within the Emptiness Between Stars.
- Scouring Eternity inflicts lethal damage to players not safely hidden behind an Astral Formation.
Tips for Tanks:
- Blazing Blast inflicts damage to the raid based on the total Fire damage taken from Burning Claws over its duration. Tank swap accordingly.
Tips for Damage Dealers:
- Abyssal Breath creates temporal images of Sarkareth, which then gain power over time from Ebon Might. Kill these ASAP.
Aberrus, the Shadowed Crucible Tier Sets
As most of you surely already know, the Aberrus, the Shadowed Crucible Raid loot includes a new portion of tier-sets (finally, this good old tradition is coming back). So, no wonder, many players want to take a closer look at them. The displayed images showcase sets for all classes. It's important to note that the Normal, Heroic, and Mythic modes will all be available concurrently, highlighting the significance of this feature.
So, here is what you might expect from Aberrus the Shadowed Crucible drops:
Druid, Warrior, and Shaman

Hunter, Monk, Demon Hunter, and Evoker

Mage, Rogue, and Warlock
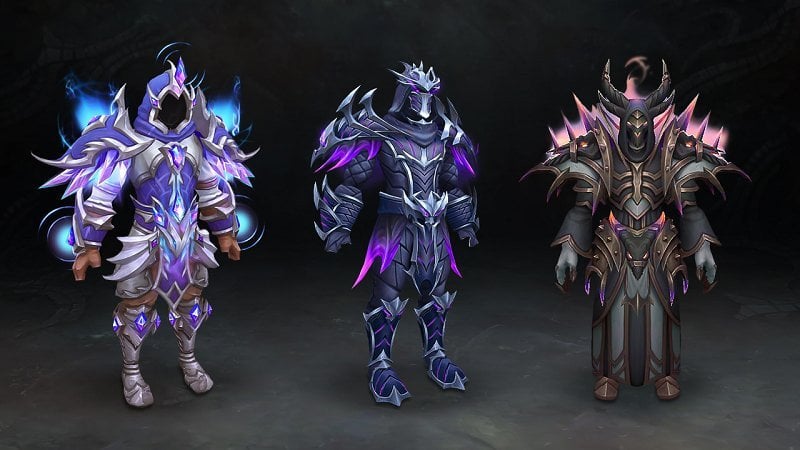
Death Knight, Priest, and Paladin

Conclusion
The Aberrus, Shadowed Crucible Raid in World of Warcraft is a thrilling and challenging experience that requires players to work together and use their skills to overcome a series of obstacles. Players must be careful and strategic as they navigate the area and battle their way through waves of enemies. The ASC raid offers a rewarding experience for those who are up to the challenge, with the potential to earn powerful loot and valuable rewards.
We understand that for now the information presented in our ASC raid guide is incomplete (for example, we did not mention anything about Aberrus, the Shadowed Crucible DPS rankings), but we will update this article as new information becomes available.
We really hope that this article was helpful for you and if you have any questions or suggestions, feel free to contact our Customer Support team.
F.A.Q.
Where is the Aberrus the Shadowed Crucible?
Actually, a lot of people are asking: How to Find Aberrus the Shadowed Crucible in Dragonflight? It is easy! The ASC raid is located in the Zaralek Cave, the entrance to which is in the Plains of Ohn'arha location.
What item level should I be for Aberrus the Shadowed Crucible?
As the ASC raid is a part of the actual PVE content, you will need to be max level to go inside this raid dungeon.
Is Aberrus the Shadowed Crucible hard?
The Aberrus, Shadowed Crucible is not a run-of-the-mill raid with easily defeated bosses, but rather a formidable challenge that tests the mettle of both novice and seasoned World of Warcraft players alike. It demands a thorough understanding of boss mechanics and finely honed skills to overcome its obstacles.
How much loot drops from Aberrus the Shadowed Crucible?
When completing Heroic loot runs in Aberrus, players have a chance to obtain gear with an ilvl range of 428-437, which is dependent on the boss defeated. Additionally, participants will have the opportunity to acquire new class tier set pieces, each offering useful bonuses for their respective class and specialization. Completing this challenging raid also presents the opportunity to earn any Heroic Aberrus The Shadowed Crucible achievements desired.


