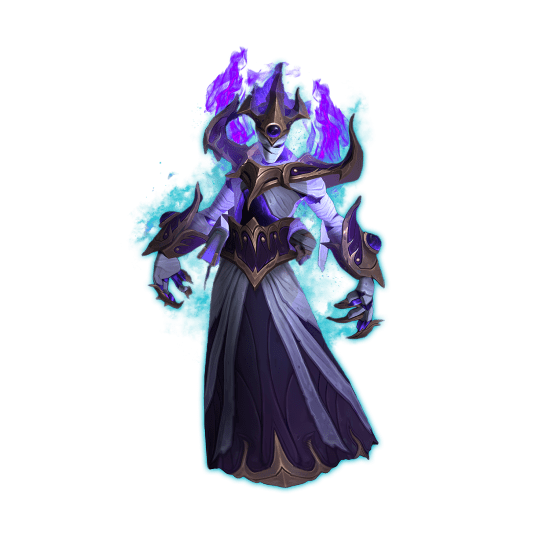
 Crispy Jackie
The good old tradition of bringing back old content continues to be the developer’s little hobby. And do not get us wrong, we do not think that this is a bad thing. On the contrary, it is good to let new players a glimpse of how cool World of Warcraft was back in the days.
This is especially true for Mage Tower, which is a truly unique PvE experience. Very challenging and very rewarding. And now we can experience it in a new way. With The War Within hero talents, gear Embellishments, Vault of the Incarnates trinkets, and the new Evoker class. Those of you who have completed it in Shadowlands should remember that completing Mage Tower is not an easy feat, so we decided to help you conquer your spec’s Mage Tower encounter (or all of them if you are really after that cool spellbook mount). In this WoW The War Within Mage Tower Guide and in our series of Mage Tower Specs Guides you will find everything you need to succeed in this incredibly difficult challenge and get your well-deserved rewards.
Tired of grinding? Our PROs at Skycoach will gladly help you Complete Mage Tower challenge in a jiffy. No matter what class you're playing. Your rewards are just a few clicks away from you. We provide the best price and the fastest results!
IMPORTANT NOTE: At Skycoach, you can also Buy WoW Boost at the lowest prices and with the fastest delivery. You can make your first purchase even CHEAPER if you find our special PROMO CODE (highlighted in green) hidden in this article and get a 20% DISCOUNT.


What is Mage Tower?
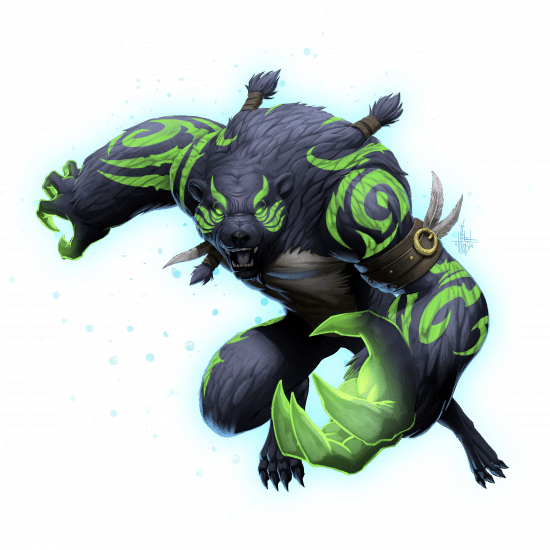
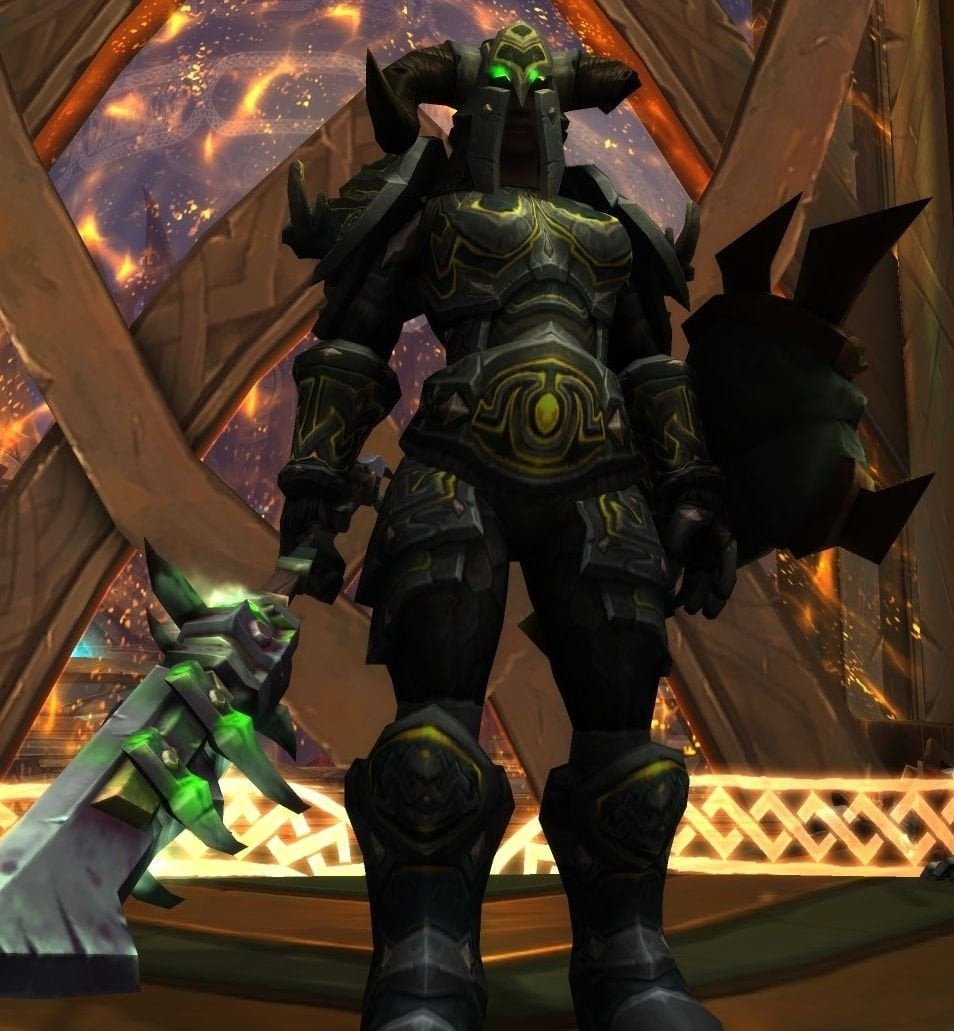
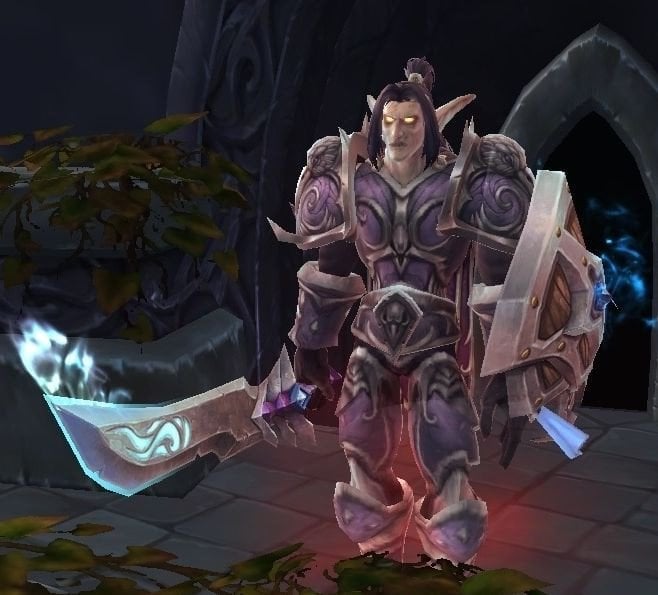
WoW Mage Tower is an ultimate PvE experience for one player, designed to provide incredibly hard challenges and a range of cool, unique rewards (different for all classes and specializations). These rewards, especially Fel Werebear Form for Guardian Druids, will definitely help you stand out from the crowd.
Actually, Mage Tower is nothing new to World of Warcraft. It was first added in the Legion expansion and was available very recently in the Shadowlands expansion. With the release of patch 10.0.5 this exciting activity has become available again. Mage Tower 11.1.5 will be the same as its previous iterations, with, of course, some tuning to make it more suitable to the current game’s mechanics. Aside from the brand new talents system, there is finally a new class (first addition of this kind since the Legion expansion). So we can safely say that The War Within Mage Tower will be interesting at least in terms of build variety.
Knowing that a great many players will surely struggle to complete Mage Tower, we have decided to remind you about what Mage Tower is all about and how to complete this challenge as efficiently as possible.

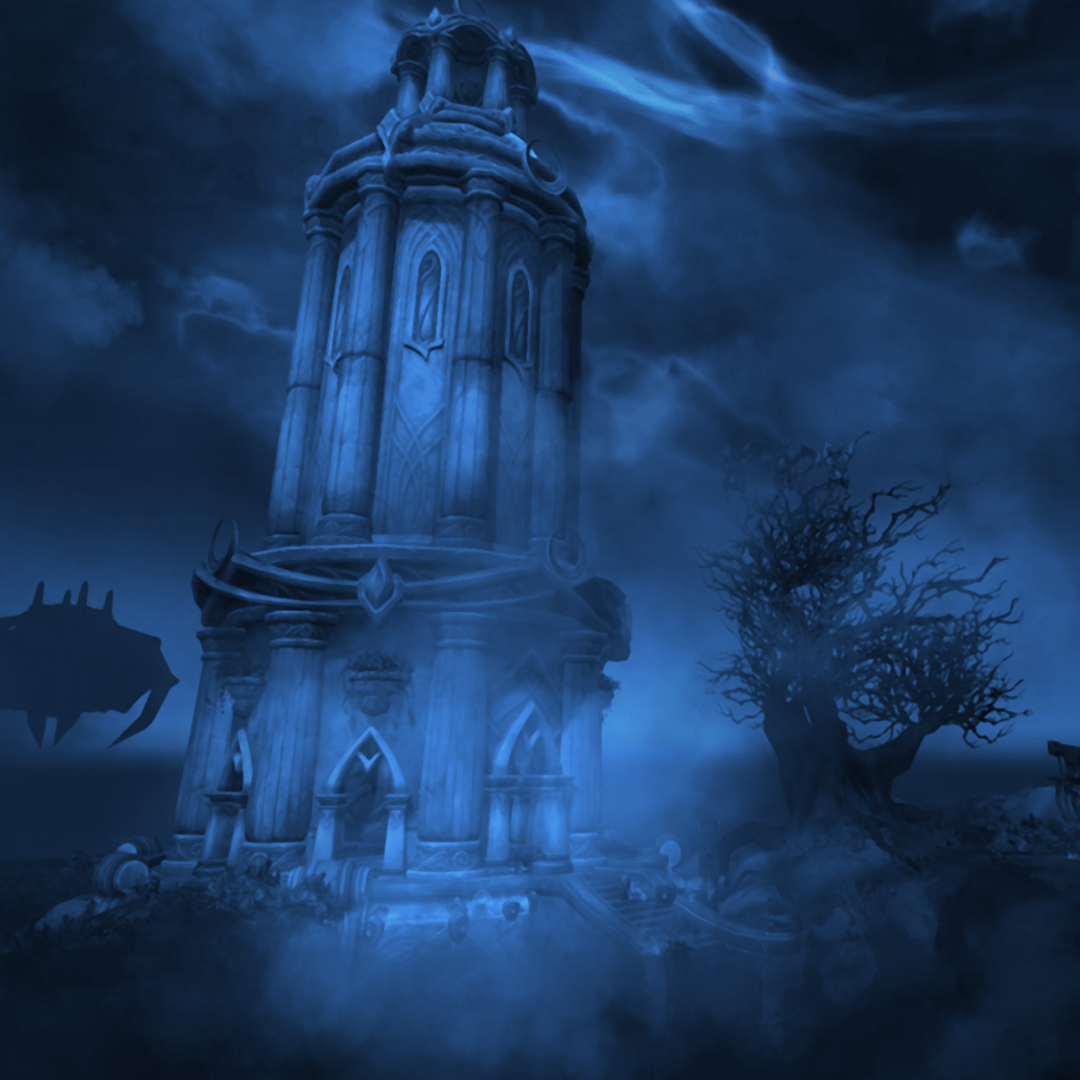
Where is Mage Tower in The War Within?
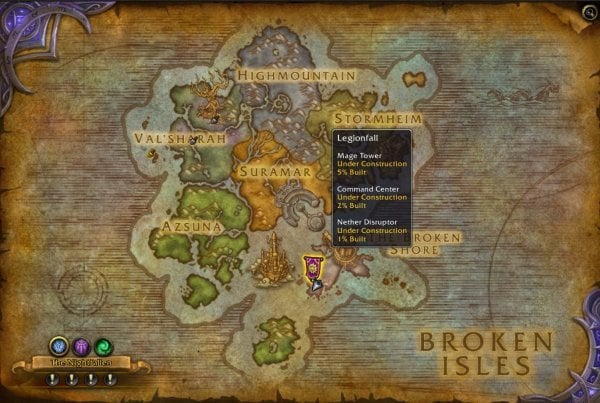
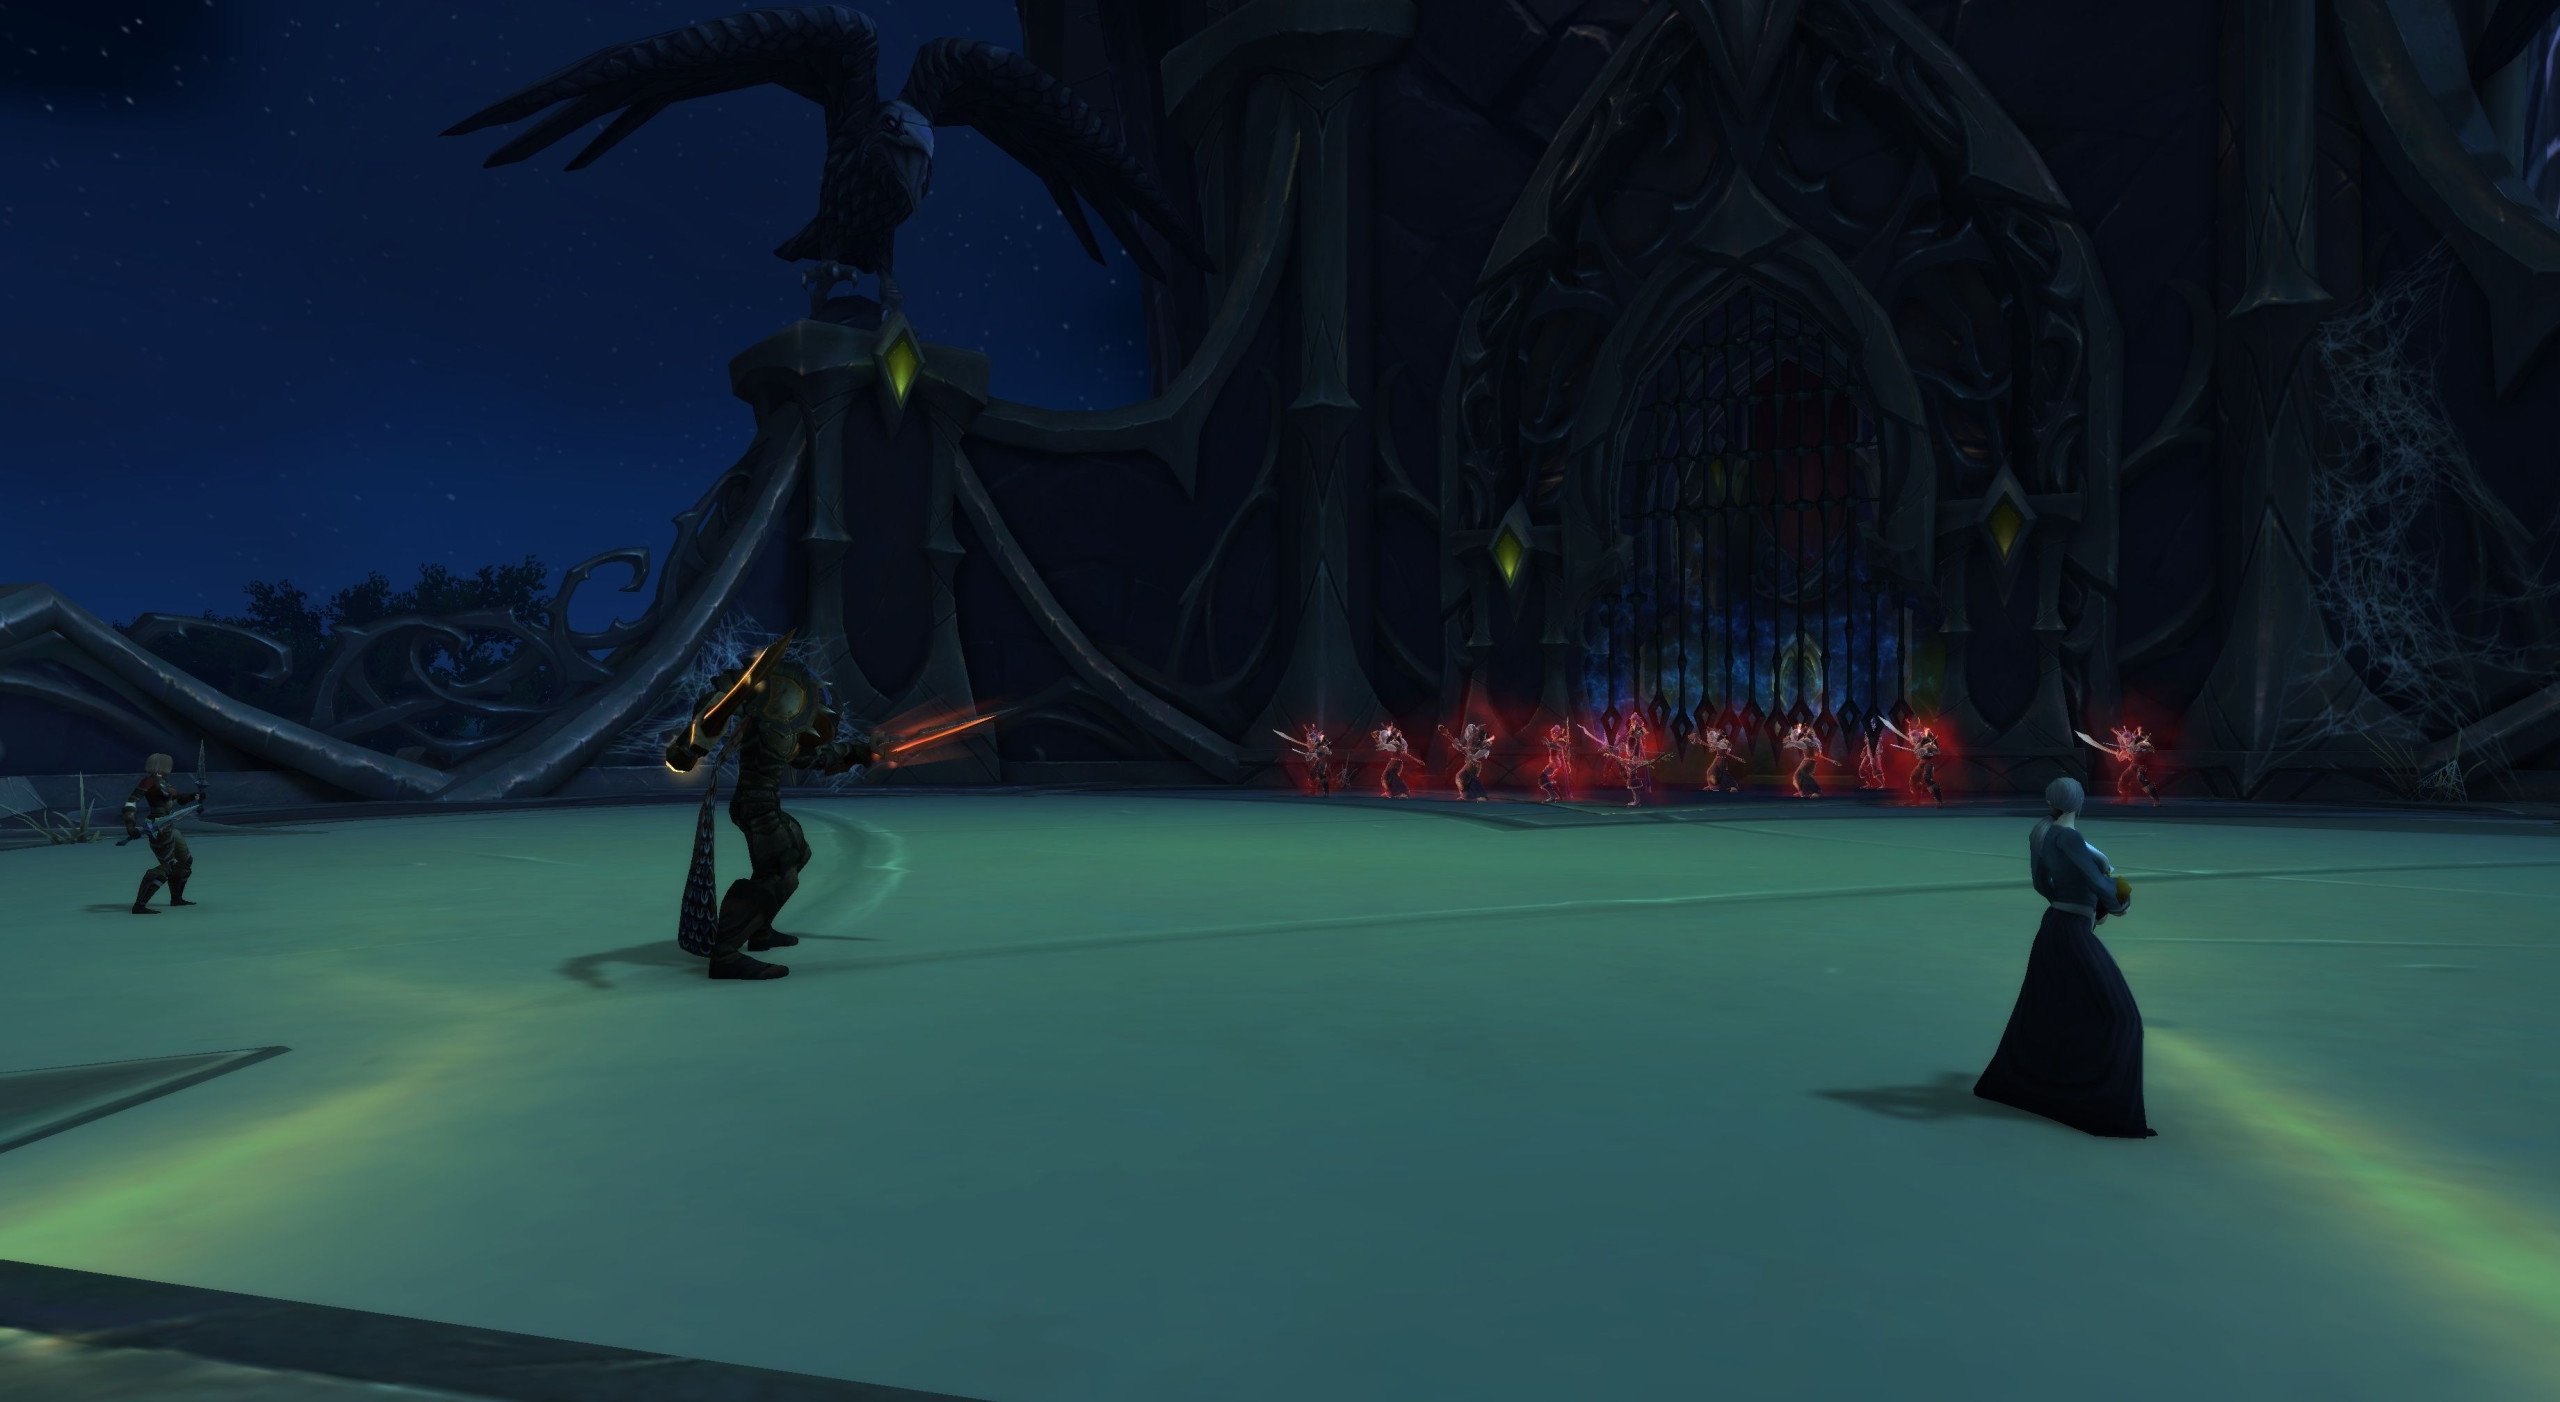
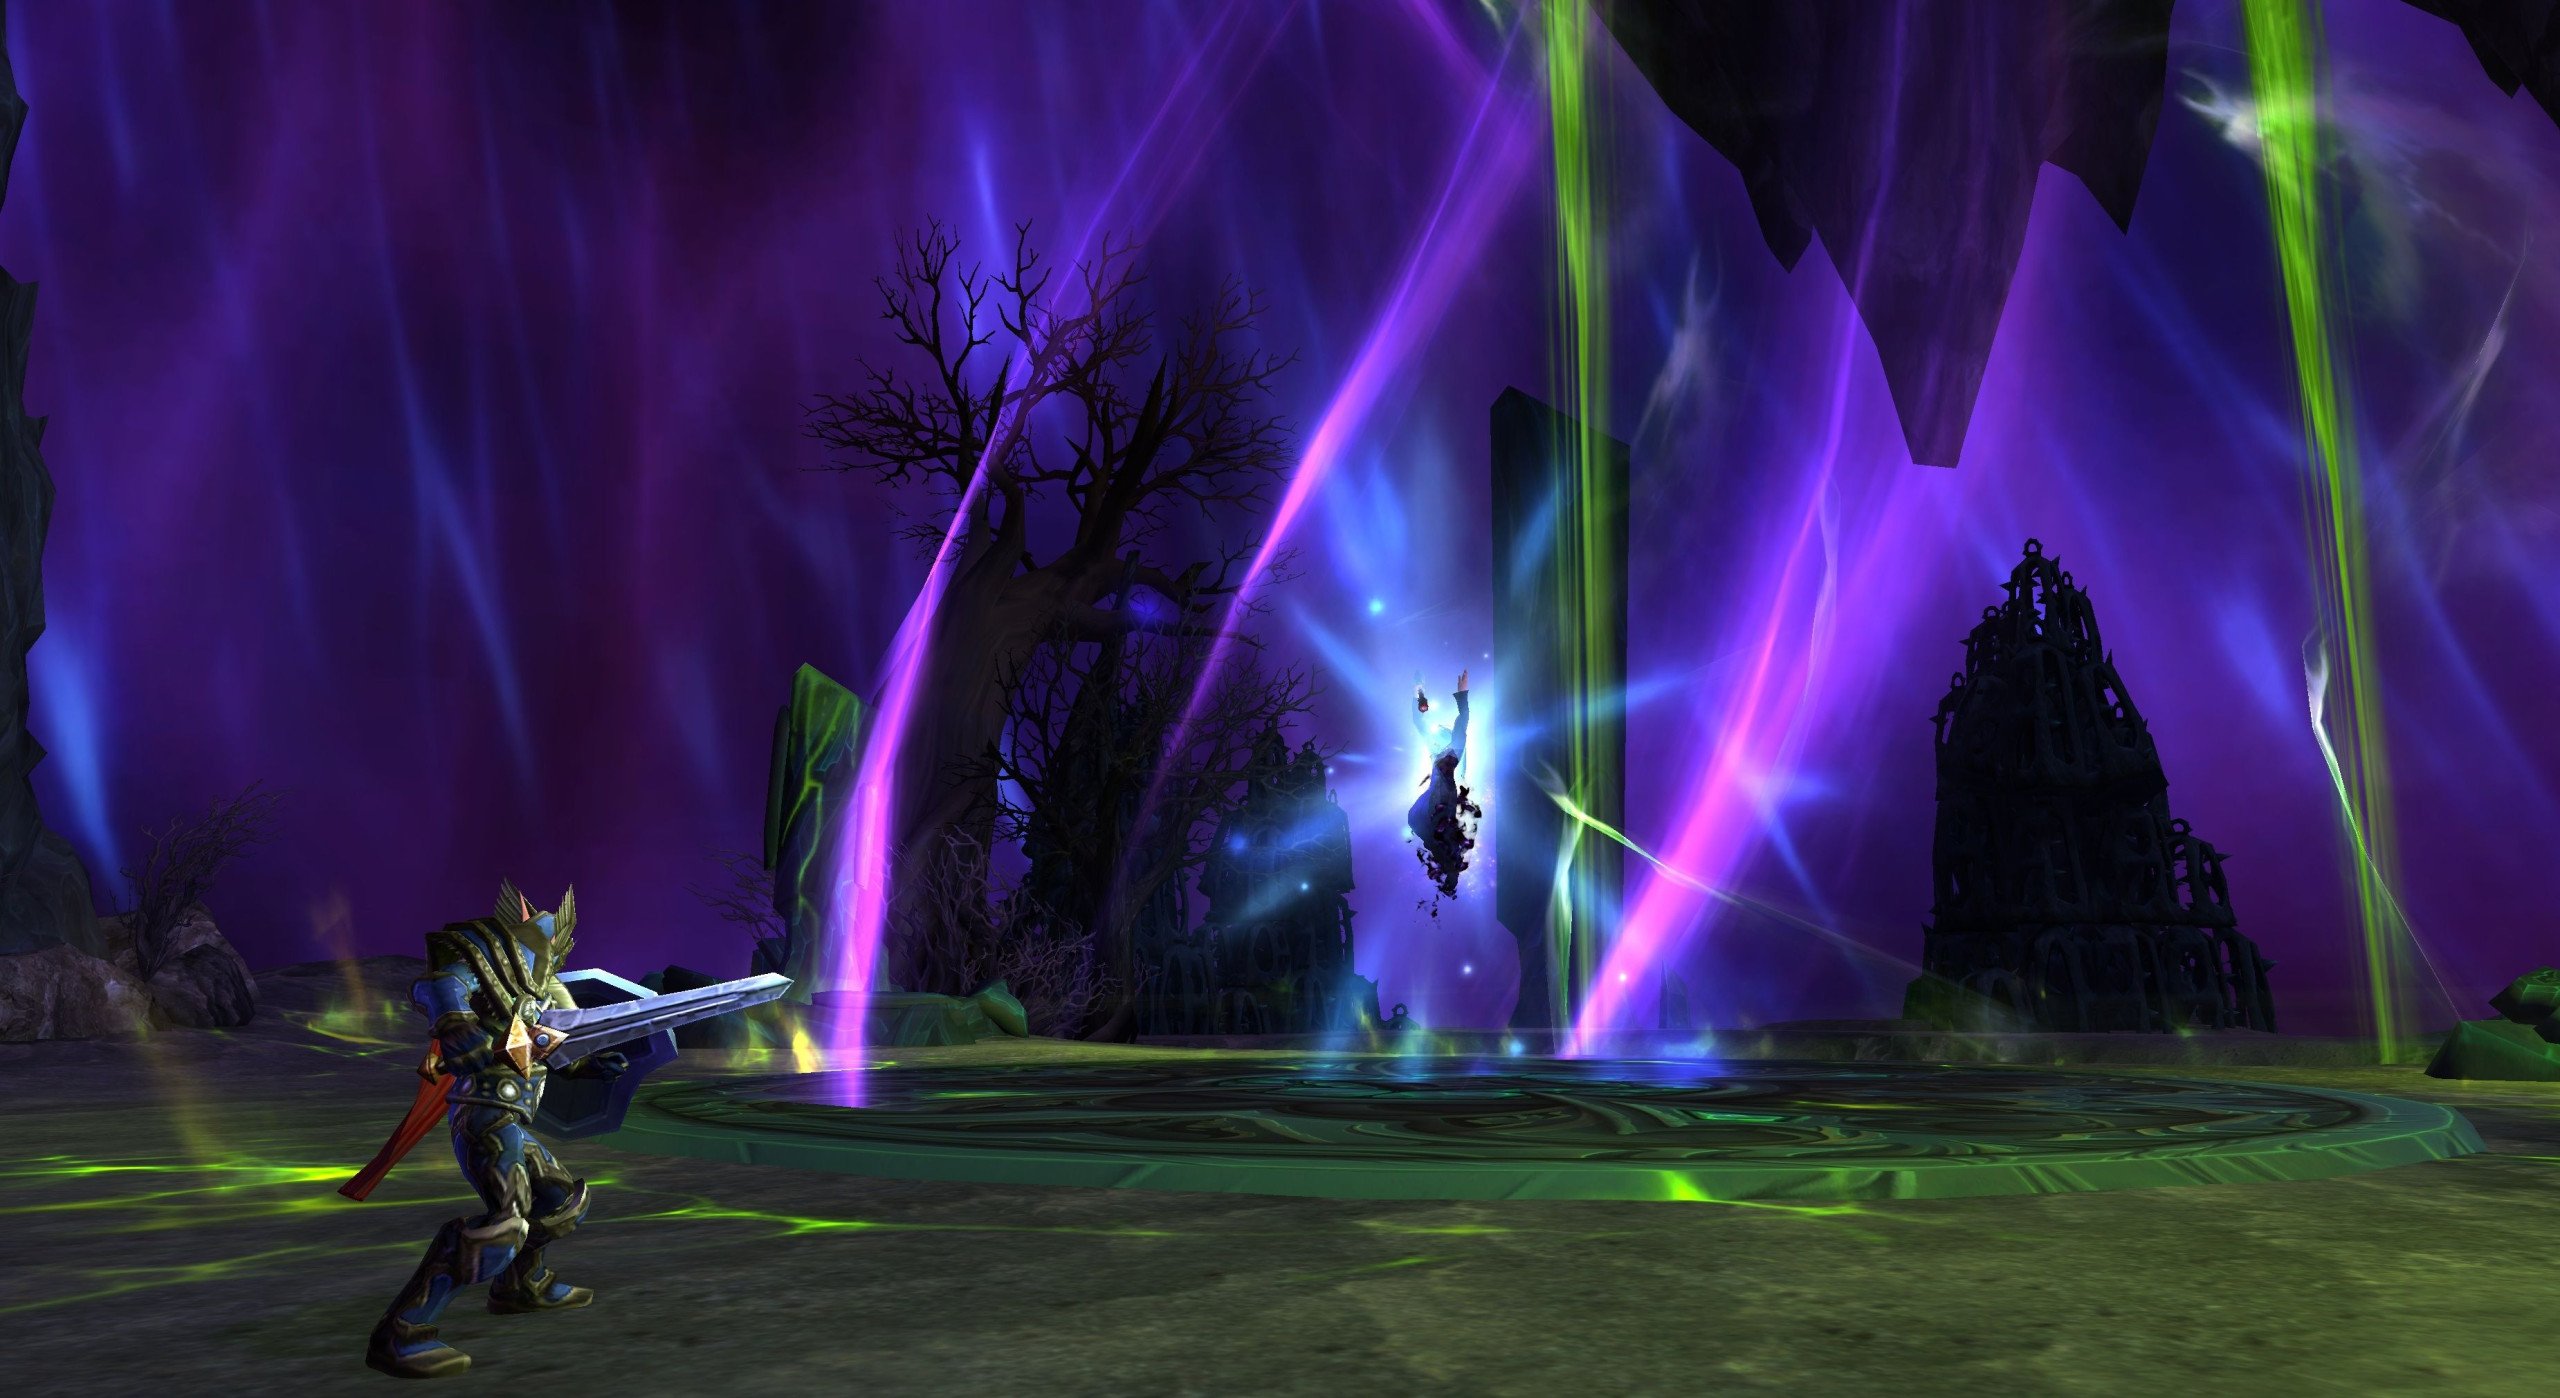
Mage Tower is a tall tower (yeah, no wonder here) located at Deliverance Point in Broken Shore. WoW Mage Tower location is very close to major player hubs. The fastest way to get there is using a portal to Dalaran in Valdrakken and then flying southeast, as shown in the picture below.
There are 7 Mage Tower Challenges, all of which require a lot of skill and concentration to get through. See more about that later in this article.
How to Start Mage Tower Challenge?
To start the Mage Tower challenge, you will need to speak with War Councilor Victoria. You can find her near the entrance to the Mage Tower.
By the way, our Customer Support managers very often receive the following question from our customers: “How to get the Mage Tower quest?” Well, there is no such thing as a Mage Tower quest. To start the challenge, you will only need to speak to War Councilor Victoria. BLOG20
Best Gear for Mage Tower in The War Within
Because Mage Tower is so specific with all those different encounters for various specializations, it is nearly impossible to point out the best gear or consumables for Mage Tower as a whole. So, we decided to create a separate Mage Tower gearing guide for every specialization. There you will find not only the best gear for every Mage Tower Timewalking challenge, but also some useful tips on how to best utilize your specialization’s mechanics in this ultimate PvE challenge. You can access each of them here:
- Guardian Druid
- Preservation Evoker
- Demonology Warlock
- Marksmanship Hunter
- Subtlety Rogue
- Fury Warrior
- Havoc Demon Hunter
- Windwalker Monk
- Retribution Paladin
- Outlaw Rogue
- Frost Mage
- Shadow Priest
- Frost Death Knight
- Elemental Shaman
- Arms Warrior
- Feral Druid
- Enhancement Shaman
- Restoration Druid
- Mistweaver Monk
- Destruction Warlock
- Protection Warrior
- Fire Mage
- Unholy Death Knight
- Beast Mastery Hunter
- Assassination Rogue
- Arcane Mage
- Protection Paladin
- Affliction Warlock
- Vengeance Demon Hunter
- Balance Druid
- Brewmaster Monk
- Blood Death Knight
- Holy Paladin
- Holy Priest
- Restoration Shaman
- Discipline Priest
- Survival Hunter
And if you want to get really powerful gear quickly and without struggling with random players who do not know what they are doing, we recommend you to consider using one of our Mythic Carry services or WoW Raid carry services. With the help of our pro-players you can easily skyrocket your Mythic Score, get best-in-slot trinkets and weapons, and quickly get access to 4-pieces Tier Set bonus, which is crucial for most specializations. We can help with anything you can possibly want in the game, so contact our Customer Support now and get started!
How Hard is Mage Tower?
We can only say this: it is very hard. You will need to put all your skill and class understanding to complete this ultimate challenge, especially considering the fact that you will need to do this alone, without someone to take all the incoming damage and keep your health bar full. Sure, all Mage Tower encounters are more than doable, but you will need to tune your build, rotation, and consumables very carefully to survive there.


All Challenges Explained
Below you will find some useful tips on all 7 Mage Tower encounters, which will definitely be helpful for anyone who does not have any Mage Tower experience from the previous expansions.
Closing the Eye
Your objective in this challenge will be to defeat Archmage Xylem. The encounter is designed for:
- Arms Warrior;
- Frost Death Knight;
- Havoc Demon Hunter;
- Subtlety Rogue;
- Survival Hunter.
The battle takes place in a big circular arena where the player’s objective is to defeat Archmage Xylem, a wielder of great arcane power corrupted by a mighty Corrupting Shadows. In this encounter, you will fight your way through 3 Phases with plenty of lethal-damage abilities aiming at you.

Phase 1 Frost
During this part of the fight (which will last only 90 seconds), you will face Archmage Xylem using his regular Frost Magic, including:
- Frostbolt - This is just a regular Ice Magic attack. Can and should be interrupted when possible.
- Razor Ice - Xylem teleports away and traps the player in a wall of ice shards. While trapped, the player will receive significant damage from Comet Storm. You can either use your mobility spells like Rogue’s Shadowstep or Warrior’s Heroic Leap to get out, or simply destroy the shards and run out of the AoE zone.
Before going into Phase 2 Xylem will start an Intermission. During this short phase, he will teleport away and use an invisibility spell, while summoning a whole lot of Mirror Images. While invisible Xylem will start casting Arcane Annihilation for 40 seconds. Your goal here is to find him by a small shimmering effect he produces while casting, otherwise Arcane Annihilation will instantly kill you. When you find Xylem, Phase 2 will start.

Phase 2 Arcane and Shadow
During this phase (which will last 50 seconds) of the fight, Xylem will start using his Arcane and Shadow abilities, such as:
- Arcane Barrage - This spell simply deals damage. Can be interrupted to save you some HP, however, if you are sure you can tank a few shots, you can save the interrupt to use it when you have low HP.
- Shadow Barrage - This spell has a rather interesting mechanic: a lot of Shadow spheres will appear behind Xylem and move in straight lines towards you. Move left and right to dodge them and try to not lose DPS bauce of that.
- Draw Power - The longer Xylem casts this spell, the stronger damage buff he will receive, so, obviously, you should interrupt this cast as quickly as possible (or crowd-control Xylem to stop his casting). If you let Xylem buff himself too much, this will mean a certain wipe.
During 1 and 2 Phase Xylem will also randomly teleport around the arena, so while you follow him you will need to avoid those big purple beams. These two phases will repeat themselves with an intermission between them until Xylem is at 10% HP. BLOG20
Phase 3 Corrupting Shadow
This phase starts once Xylem’ HP is lowered to 10%. Then you will have a few moments to change your talents or gear composition if needed. In this phase, you will need to keep a balance between strong single-target damage to deal enough damage to Corrupting Shadow and AoE burst to quickly deal with smaller adds. There are two main things to keep in mind in this phase:
- Corrupting Shadow will leave Void underneath him. This will deal lethal damage, so you will need to kite Corrupting Shadow very slowly across the arena, so you have as much time as possible before the Void leaves you no place to stand.
- Corrupting Shadow will cast Seeds of Darkness on you. This spell will summon three Darkness Within after 8 seconds. They will move towards Corrupting Shadow and heal him if they manage to reach their target, so when the boss starts his cast, you will need to run as far away as possible to the edge of the platform and then quickly kill all adds before they reach the boss. Use whatever crowd control you have on them.
The last phase is a huge DPS check so you will need to use everything you can to finish off Corrupting Shadow quickly. During Phase 1 and 2 try to keep yourself and the boss closer to the center of the arena. This way you have less distance to cover when Xylem starts blinking around the room. Also note that there are a lot of casts, more than you possibly can interrupt, so we recommend you to save your kick-spells for when you have low HP. Also, you should ALWAYS interrupt Draw Power as quickly as possible.
Because you will have time to change your setup between the first two phases and the last phase, we recommend you to start with pure single-target damage build for the first half of the fight, and take more talents into AoE damage for the last phase.

An Impossible Foe
The second encounter in our list is all about defeating demoness Agatha and is created especially for the following specializations:
- Elemental Shaman;
- Feral Druid;
- Fire Mage;
- Fury Warrior;
- Outlaw Rogue;
- Unholy Death Knight.
This fight will take place in two relatively small connected rooms, with plenty of adds and void zones spawning. Your main enemy here will be the powerful demoness Agatha and a lot of her minions. In this encounter, there will be two phases.
Phase 1 Meet Agatha
During this part of the fight Agatha will stay in place damaging you and spawning waves of adds. The list of her abilities here goes as follows:
- Shadow Stab - this is Agatha’s main damaging spell. You will not be able to interrupt it, but thankfully, it does not deal too much damage.
- Agatha’s Fury - If you kill an imp, the boss will fire a shadow projectile to her dead minion’s location. Deals large amounts of damage, but is avoidable.
- Dark Fury - Every 50 seconds the boss will cover herself in a shield and start casting multiple Shadow projectiles. The spell deals significant stacking damage, but can be interrupted, once you take down the shield.
During the fight Agatha will spawn her minions to help her in battle, namely:
- Smoldering Imp - these little creatures are spawning very quickly and die easily. However, they will cast Fire Bolt, with their damage increases by 50% every time they successfully cast the spell.
- Imp Servants - These minions will spawn at the far end of the room 15 seconds after the fight starts and then every 45 seconds. After spawning they will run towards Agatha and use Funnel Energy to heal her. You should kill them as quickly as possible, or, if they manage to start their casting, quickly interrupt it.
- Umbral Imps - These minions will spawn every minute and give Agatha an impenetrable Shadow Shield and so should be killed at once.
- Firing Imps - These minions will spawn 30 seconds after the fight starts and then every 55 seconds. They will use Plague Zone which is a permanent void zone that slows you down and deals damage. Firing Imps will start casting this spell only when you are in their melee zone. You cannot interrupt the cast, but you can crowd-control Firing Imps to stop them from using this ability.
When Agatha spawns an imp she will receive a stack of Agatha’s Vengeance, which will increase her overall damage by 3% per stack. So, the longer you fight her, the more damage the boss will deal to you, up to the point where you simply cannot tank it anymore.
Phase 2 Boulders of Fel
This phase starts when Agatha reaches 50% health. She will then teleport to the far end of the arena and start casting new abilities (plus all the abilities from the Phase 1):
- Smouldering Boulders - Huge enveloped in demonic flame boulders will start to roll towards you, stunning and dealing great damage upon impact. Avoid them at all costs.
- Fel Lava Blast - This spell will create a small fire zone in a target location, which will deal moderate damage to you if you stand in it, so, you know, do not stand in fire.
Phase 3 The End
This phase will start when Agatha reaches 33% health. She then will teleport again to the opposite side of the room and start using Phase 1 abilities. The only difference here is that in this Phase she will teleport back and forth every minute.
The list of tips for this encounter is not that long:
- First off, you will need to kill adds as quickly as possible;
- Secondly, use whatever crowd-control you have to stop Imp Servants to come close to the boss (this includes getting more crowd-control abilities in your talent tree);
- And, last but not least, try to avoid incoming damage when possible (yeah, this is obvious enough, but still) since the specs available for this Mage Tower challenge are not that great in self healing, except, of course, Elem Shaman and Feral (Cat) Druid.
The God-Queen's Fury
In this challenge, your objective will be to defeat God-Queen Sigryn and two of her lieutenants: Jarl Velbrand and Runeseer Faljar. This encounter is available for:
The fight will take place in the central room of the Halls of Valor just before the light bridge that leads to Odin’s throne. All three bosses here will share the same life pool and will die in the following order:
- Jarl Velbrand;
- Runeseer Faljar;
- Sigryn.
This encounter also has an enrage timer, which is 6:30 minutes, so you will need to optimize your damage output and stick bosses together in order to beat the clock.
All three bosses will have their own unique mechanics:
Jarl Velbrand - This is a furious Vrykul capable of dealing devastating damage in melee, so you should keep your distance with him whenever possible. Velbrand have the following abilities:
- Hurl Axe - Velbrand throws his axes at targeted locations and they start to spin, dealing significant damage. SImply avoid them.
- Bladestorm - This ability will pull you towards Velbrand and deal damage based on your distance to the boss.
- Berserker’s Rage - Increases Velbrand’s damage by 500% but slows his movement speed for 20 seconds. You should kyte him while this buff is active.
Runeseer Faljar - This is a powerful caster with a range of unique abilities, such as:
- Shadowbolt - Faljar will constantly use this ability to deal medarate damage to you. Can be interrupted.
- Ancestral Knowledge - This spell deals a huge amount of damage and should be interrupted at all costs. However, before you can stop the cast you will need to destroy a large shield Faljar covers himself with, which makes Faljar casting Ancestral Knowledge your top priority.
God-Queen Sigryn - This is your main enemy in this encounter. Sigryn is a furious Vrykul queen, with a range of powerful abilities at her disposal:
- Throw Spear - Sigryn throws her spear at the player's location. Upon impact the spear leaves a big green paddle, which deals damage while you are standing in it.
- Blood of the Father - After 3 seconds cast makes Sigryn radiate large amounts of Fire damage every second for 27 seconds. The cast can be interrupted with any crowd-control ability.
- Dark Wings - This ability will spawn a line of Valkir outside of the arena, who will run through the arena and deal near lethal damage if you did not manage to squeeze through the gap in the Valkir line. Note that you cannot prevent Sigryn from using this ability.
Aside from bosses’ abilities, there will be other mechanics in this Mage Tower challenge:
- Runic Detonation - Purple runes will periodically appear in the arena. They will deal very high damage if you let them shrink completely, so you should deactivate them by simply stepping on them.
- Orb of Valor - In this fight you will receive some help in the form of Orbs of Valor, which will fully heal you when you step in them. Use them wisely.
The key to success in this encounter is good managing the Sigryn’s Blood of the Father ability. You should use any means necessary to stop Sigryn from casting this ability: Polymorph, Repentance, Hammer of Justice, Hex, Fear, you name it. If she, despite all your efforts, manages to use the ability, you will need to do your best to survive the damage using your defensive cooldowns.
Also, you should always deactivate Runic Detonation before they shrink completely and do your best to not get yourself caught in Dark Wings.
Regarding two other bosses of this encounter, as stated above you should always keep your distance with Jarl Velbrand when he gets empowered and use all the damage you have to bring down Runeseer Faljar’s shield when he casts his Ancestral Knowledge and interrupt the cast.
Feltotem's Fall
Here, you will need to defeat Tugar Bloodtotem and his pet-worm Jormog the Behemoth, playing one of the following specializations:
- Beast Mastery Hunter;
- Destruction Warlock;
- Discipline Priest;
- Windwalker Monk.
There will be two phases in this encounter. In Phase 1, you will fight both Tugar and Jormog, and in Phase 2, you will need to finish off Jormog while he is under a damage buff.
Note that Jormog the Behemoth will start the fight with 9 stacks of Fel Hardened Scales which decreases incoming damage by 10% per stack. There is a way to remove those stacks, so when you remove most of them it is worth trying to keep both bosses close to each other so you can cleave them together.
But let us explain the fight in more details:
Phase 1 The Master and The Pet
In this part of the fight you will need to kill Tugar Bloodtotem (while constantly interrupting his Fel Burst) and lower Jormog’s HP. This part of the fight’s mechanics are:
- Earthquake - Small brown circle will appear on the floor and after a few moments stone from the ceiling will fall there. While you obviously should avoid them, you can also stand near to falling rocks when Jormog uses its Jormog’s Fury ability. This will remove a stack of Fel Hardened Scales.
- Periodically there will be a huge X-pattern AoE on the floor. Step out of it.
- Sonic Scream - When Jormog uses this ability he will deal moderate damage to you and interrupt your casting, so, to avoid getting silenced, keep an eye on this. Also, this cast can be interrupted, but doing so instead of interrupting one of Tugar casts will be just a waste of a valuable cooldown.
- There are two unavoidable abilities: Fel Shock and Fel-Infused Saliva. You will need to tank them with the help of some defensive cooldowns.
- Always prioritize killing Bile Spitter Eggs. If you fail to do that quickly enough the eggs will spawn Bile Spitters, whose health depends on how much HP the egg has before it hatches.
- Fel Surge Totems will stun you for 4 seconds if you do not kill them before their cast goes off. Those totems have very low HP so this should not be a problem.
- Very important thing to remember in Phase 1 is that you should not kill Tugar before all 9 stacks of Fel Hardened Scales are removed from Jormog, because you will not be able to remove them once Tugar is dead. Sure, the fight will be way easier with only Jormog to deal with, but if it has 5-4 stacks left, it will be a certain wipe.
Phase 2 A Bird Catches the Worm
This phase will start the moment Tugar is dead. The fight in this phase will be significantly easier because you will have to deal with only Jormog’s abilities (Sonic Scream and Fel-Infused Saliva). However, due to Fel Rage, this creature will deal 150% more damage and even more later on in the fight. This is why it is very important to remove all Fel Hardened Scales in Phase 1.
There are not many tips for this encounter aside from those mentioned above. First off, concentrate on interrupting Fel Burst and removing stacks from Jormog. And secondly, avoid AoE damage, which there will be plenty of.
The Highlord's Return
This challenge is considered to be one of the hardest, so it will not be easy to defeat Inquisitor Variss and Highlord Kruul. This is purely a tank-oriented challenge, so only the following specializations will be available:
- Blood Death Knight;
- Brewmaster Monk;
- Guardian Druid;
- Protection Paladin;
- Protection Warrior;
- Vengeance Demon Hunter.
In this Mage Tower challenge you will need to deal with plenty of powerful abilities Inquisitor Variss is going to use against you, while protecting Prophet Velen and cleaving tons of adds. In the Phase 2, when Variss is dead, your main target will be Highlord Kruul. In this fight you will need to manage your defensive cooldowns very carefully as well as dealing plenty of good damage to enemies, which there will be plenty of.
Phase 1 Dealing with Variss
In this phase, you will fight Inquisitor Variss and three types of adds. The objective here is not only to defeat all enemies but also to keep Prophet Velen alive. Velen will stay in place all fight, so you should take that into consideration. He will occasionally heal you a little bit, but his main contribution is his Holy Ward. Velen will use this ability every 30 seconds and if you step into it you will be fully healed and free from all negative effects. This ability can also disorientate enemies and interrupt their casting. You will need to use Velen’s Holy Wards very tactically, which is a key to success in this Mage Tower Challenge.
Note that you can stockpile Holy Wards because they have about 2 minutes lifespan. It is good to have a few of them ready to use when you start getting heavy damage, run out of means to interrupt Variss’ Drain Life, or there are too many enemies attacking you and you need to stabilize the situation.
In Phase 1, your main enemy is Inquisitor Variss, who will use the following abilities against you:
- Drain Life - As the name suggests, with this ability Variss will drain your life to heal himself. Interrupt at all costs.
- Aura of Decay - Creates a medium-size puddle, which damages
- Mind Rend - This ability is more like a filler that constantly deals moderate amounts of Shadow damage. While you can interrupt it you should not do that, and save you interrupts for Drain Life instead.
Aside from Variss himself, you will also face other enemies during Phase 1.
First of them is Tormenting Eye. These have pretty low HP and most of the time can be killed very easily, however, there will be a lot of them, so you should do your best to deal with them quickly. Especially considering that they will constantly use their Inquisitive Stare ability on you. This spell has a rather interesting mechanic: when the cast is finished you will be knocked back if you are not facing the caster. So you should always group Tormenting Eyes together and quickly cleave them down, before they manage to knock you off the platform.
Smoldering Infernal is another add you will face in this encounter. Several of them will spawn at the start of the fight and be constantly resurrected throughout Phase 1. Good thing is that Smoldering Infernals will have a debuff on them, which will slowly but surely damage them, so most of the time you will not need to actively focus on them. Once a Smoldering Infernal is dead he will start to resurrect until it comes back to live. They will use two abilities:
- Smash - This is a straight-line ability, which will most likely knock you off the platform if you get hit by it. Simply avoid it and you will be fine. You can use things like Goblin Glider Kit to safely return back to the platform if you get hit by this ability.
- Fel Resonatin - This ability deals damage to all nearby enemies at the cost of Smoldering Infernal’s health. You can safely ignore it, because the damage this ability is going to inflict is pretty low.
Nether Horrors will spawn from big demonic gates, which periodically appear around the arena. Once spawned, Nether Horrors will start attacking Prophet Velen, so you should take their aggro straight away. Nether Horrors have pretty low HP, so it should not be a problem to take them down quickly.
Nether Horrors will use the following abilities:
- Psytalons - Every Nether Horror attack will add a debuff, which increases Arcane damage taken by 10%.
- Nether Storm - SImply deals damage. Can be interrupted, but it is easier to just kill the add before the cast goes off.
The overall strategy for Phase 1 is rather complicated. First off you will need to damage Inquisitor Variss until you have 5 stacks of Aura of Decay, while interrupting Drain Life and facing Tormenting Eyes when they are casting Inquisitive Stare. You also should keep an eye on Smoldering Infernals and their Smash, and protecting Prophet Velen from Nether Horrors. And do not forget about using Holy Wards when needed.
Once you have received 5 stacks of Aura of Decay, run out of the boss’ aura and start focusing adds. When you lose all Aura of Decay stacks go back to Variss. BLOG20
Phase 2 A Tete-a-Tete with the Highlord
This phase will start once Inquisitor Varris is dead. Highlord Kruul will appear in the arena to become your main target. All adds from Phase 1 will still be present, except for Tormenting Eyes. One of the new mechanics here is those purple beams, which periodically appear in the arena. Try to avoid them, otherwise they can easily push you off the platform.
Highlord Kruul has three main abilities that he will use throughout the encounter:
- Annihilate - This is a rather hard-hitting physical attack, which is applying a debuff that increases your damage taken. Use all defensive cooldowns you have to survive this.
- Netherstomp - This is a small AoE-radius attack that knocks your back and leaves a near-lethal damage AoE on the floor. You can easily avoid it by simply moving out of the area of effect.
- Twisted Reflection - This spell heals Kruul and apply a debuff on you, which will also heal him with your every attack. Interrupt this at all costs, because even one Twisted Reflection can easily ruin your walkthrough.
- Void Bolt - Deals damage and reduces your movement speed.
The overall tactic for Phase 2 of this Mage Tower challenge is pretty straightforward. You will need to burst down Kruul as quickly as possible, while always interrupting Twisted Reflection and keeping an eye on Annihilate and Smoldering Infernals’ Smash. And do not forget about protecting Prophet Velen from Nether Horrors. Also, note that Holy Wards can help you interrupt Twisted Reflection.
This whole fight is a DPS-race, especially in Phase 2, where you need to carefully manage your cooldowns and always protect Prophet Velen. As many times mentioned above, the essential part of success in this encounter is Holy Wards managing. You will not have enough crowd-control and interrupts for this fight, so Velen’s Holy Wards will be a huge hellp.
End of the Risen Threat
Much like the previous encounter, which was designed for tank specializations, this one is for healers. Here you will need to help a party of NPCs defeat Lord Edris Thorn and his army of vengeful spirits. All heal-specializations can try to complete this challenge:
- Holy Priest;
- Holy Paladin;
- Mistweaver Monk;
- Restoration Druid;
- Restoration Shaman.
The End of the Risen Threat Mage Tower challenge is a pretty complex multi-stage encounter, where, rather than dealing tons of damage yourself, your task is to keep alive a bunch of friendly NPCs. This Healer Mage Tower encounter is perhaps the most difficult one, as you will need to heal through a lot of damage (with mostly single-target healing) and dispel a lot of debuffs while not having the raid or party frames you are used to.
There will be six phases in total, so the challenge is going to be long and tiring.


Phase 1 Banging the Gates
Fist, note that this phase is the hardest in this encounter, so if you manage to fight your way through this, chances of succeeding in the whole encounter is pretty high. There you and three of your allies will face waves of different types of enemies, all of which have abilities that can easily end your walkthrough right there:
- Corrupted Risen Mage - These enemies use Arcane Blitz, which not only deals pretty high damage, but also applies to the caster a stackable buff that increases the damage done by this ability. You can help the Mage lose this buff by simply interrupting the cast of this ability. We recommend you doing so before Mage starts one-shotting your allies.
- Corrupted Risen Soldier - This is a furious warrior capable of dealing devastating blows, especially when enraged with his Frenzied Assault ability. If this foe gets enraged he will fixate on you or one of your allies while dealing significantly increased damage. You should kyte or crowd-control him until he is dead. He also will use his Knife Dance ability, which deals serious AoE-damage to all your party.
- Corrupted Risen Arbalest - This enemy will use his Mana Sting ability, which, aside from dealing some damage upon impact, will also apply a dispellable debuff that will drain Mana and deal serious damage per tick. This ability is not fired at target and flies in a straight line instead. We recommend you to let one of your allies take the shot by placing them between yourself and Risen Arbalest and then quickly dispel it.
In this phase you will be attacked by five waves of enemies, which will go as follows:
- Wave 1: 1 Corrupted Risen Arbalest - The easiest one, avoid the damage as described above.
- Wave 2: 1 Corrupted Risen Arbalest and 1 Corrupted Risen Mage - Here you should focus the Mage and make sure to interrupt his Arcane Blitz.
- Wave 3: 1 Corrupted Risen Soldier and 1 Corrupted Risen Mage - Here you should also focus on Mage but do not forget to control the Soldier, because he can easily ruin your run.
- Wave 4: 2 Corrupted Risen Soldiers and 1 Corrupted Risen Mage - This is the hardest wave, because two Soldiers can deal really devastating damage with double Knife Dance. Also make sure to use your cooldowns if you or your ally gets double fixates from them. Here you should also focus and interrupt the Mage. If you have some really strong cooldowns (like Bloodlust or Heroism for example) here is just the time to use them.
- Wave 5: 1 Corrupted Risen Soldier, 1 Corrupted Risen Arbalest, and 1 Corrupted Risen Mage - This wave is similar to Wave 3 in terms of your tactic. Control the Soldier, focus the Mage, and carefully manage the Arbalest’s Mana Sting.
Do not hesitate from using everything at your disposal to keep your party alive, especially in situations like Mage with two stacks of Arcane Blitz and Soldier with his Knife Dance targeting the same target. Also note that if you interrupt Knife Dance before the cast goes off, Soldier will immediately use it again, so do not use your interrupts in vain.
Phase 2 Time to Rest
This is more of an intermission than a fight phase. Here you can change your talents or gear composition, wait for your cooldowns to reset, and mentally prepare yourself for what awaits further. You will proceed into the next Phase once you reach the locked gate.
Phase 3 Finding the Way
This phase has a timer limit, which is 5 minutes. Do not worry, though, this is more than enough time as long as you are constantly pushing forward. First off, you will find yourself in a locked room full of Flickering Eyes, which you will need to kill in order to move forward. These enemies do not deal a lot of damage and are pretty easy to kill, however, they will explode upon death, dealing rather serious damage, so make sure you have close to full health when another Flickering Eye is about to die.
In the next room you will face Felspite Dominator, three Fel Bat Pups, and several Unstable Fel Orbs, which you should quickly deactivate by dealing any damage to them. Note that Fel Bat Pups will enrage very quickly, so you should focus them first and then finish off Felspite Dominator.
The next stage of this phase will take place in a big stairway. There you will find one Panicked Souls (dispel it to avoid being feared), three Damaged Souls (which you have to heal up to prevent them from turning into a powerful enemy), and Corrupted Risen Arbalest at the top of the stairs. After you heal up all Damaging Souls kill Arbalest to proceed further. Here you can also avoid Mana Sting using healed Damaging Souls by simply staying behind them.
The next room will be full of Unstable Fel Orbs. Here you will need to quickly deactivate all of them as you make your way to the gate at the opposite side of the room. Be careful with your timings because if Unstable Fel Orb reactivates when you are still opening the gate, this will certainly ruin your day.
In the final room you will face Dread Corruptor, who is guarding your allies, and three Flickering Eyes. Dread Corruptor does not deal a lot of damage, but has a pretty big health pool and will spawn green beams on the floor that will rotate and increase your damage taken if you will be careless enough to hit them. This means that when you kill Flickering Eye with the beam’s debuff on you it can easily one-shot you, so we recommend to focus Flickering Eyes first, to make it easier to maneuver. And do not forget to keep your HP at full when you kill Flickering Eyes!
Phase 4 Time to Rest, Again
This is another intermission, where you can rest and prepare yourself for the last phases of the challenge. Change your build and gear if you need, wait for strong cooldowns to reset, and proceed further.
Phase 5 Break the Madness
Here you will finally meet the boss of this Mage Tower challenge - Lord Edris Thorn. After a short talk he will cast an impenetrable shield upon himself and curse your allies and they will start to fight each other, so your job is to not let them kill one another.
While they are fighting, Edris will start to drag Damaged Souls to himself to convert them into his minions for the next Phase, so you will need to heal them to full health before the boss manages to turn them. If you heal up 8 Damaged Souls this will immediately end the phase and you will start the last phase of the challenge straight away and you also will have time to restore some mana before it begins.
All Damaged Souls you did not manage to heal in time will then be turned into one of the enemies from Phase 1, with all above mentioned tactics still relevant. One or two enemies will not be a problem, but if you have four or five things will get nasty very quickly.
Phase 6 End the Threat
Finally, it is time to deal with Lord Edris Thorn. This phase will have a soft enrage timer, which is pretty tight, so you better start dealing some DPS as soon as the boss becomes active. But do not forget to keep all your allies alive, because there will be plenty of AoE in this stage of the fight. There will be two main things to worry about:
- Fel Zone AoE, which is your soft enrage. Edris will periodically jump on you, dealing significant damage and leaving medium-sized permanent AoE-zone. You will need to move very slowly around the room while always trying to overlap fel zones as much as possible, thus leaving more room to maneuver.
- Ignite Soul. This is a very powerful ability with a rather interesting mechanic, which, when combined with everything else, will make your job in this fight way harder. The boss will periodically apply a debuff on you, which, after 9 seconds, will deal AoE damage based on your current HP.
So, the tactic here is that while you slowly kiting the boss around the room, you will need to have enough health to survive the jump from the boss, one or two ticks of the fel zone, but not so much health that the Ignite Soul debuff one-shots your allies. You can even step into the fel zone to lose some HP, just be careful and do not die from the next boss’ jump. This is a rather difficult mechanic as you will need to keep your party’s HP high enough and your own HP low enough, while also dealing some damage to the boss in order to beat the soft enrage timer. Also note that even if you die, your allies can still finish off the boss and the challenge will be completed. Do not count on it too much, though.
Thwarting the Twins
In this challenge, your task will be to help Karam Magespear defeat his fallen brother Raest Magespear. The following specializations are available:
- Affliction Warlock;
- Balance Druid;
- Frost Mage;
- Marksmanship Hunter;
- Shadow Priest.
This encounter is mostly about kiting and slowing down enemies. There will be two main targets and a lot of adds you will need to nuke as quickly as possible with the fight’s phases circling after one another.
There will be several phases in this Mage Tower challenge:
Phase 1 Practice Your Route
At the very start of the fight Raest will use his Possesed ability on his brother and Karam will start to chase you around the arena. You should keep him at a distance at all costs, using whatever slowing and controlling abilities you have. If he manages to come into a 10 yards radius from you he will use his Rising Dragon ability to knock you back and deal significant damage. You will need to kite Karam around the room, dealing damage and avoiding purple AoE zones on the floor. Once he is at 35% health, Raest will use the Dismiss ability, which stuns him and start restoring his HP. At this point Phase 2 begins.
Phase 2 Getting Complicated
Raest will use Shadow Bolt and summons Tear Rift, which in turn will be constantly summoning Shadowy Fiend and Shadowy Vestige. You should quickly focus on the Tear Rift, before there are too many adds. We recommend you to either keep to the center of the arena to make it easier to quickly kill the adds with the rift, and damage the boss. However, if you are, say, Frost Mage, and have a lot of slowing AoE, it may be beneficial to you to kite from a distance. In this phase you will have only 30 seconds to deal damage to Raest Magespear before he covers himself with an impenetrable Shadowy Energies shield.
Phase 3 That Escalated Quickly
In this phase Karam will start chasing you again, this time with the help of all the adds from the Phase 2. Also, Raest will periodically summon a Hand from Beyond, which will start to cast the Grasp from Beyond ability. You MUST interrupt it and quickly kill the add, because if the cast goes off you will be 100% dead, unless you manage to survive it with abilities like Mage’s Ice Block or Hunter’s Aspect of the Turtle. Hand from Beyond has a very small health pool, but focusing it while simultaneously dealing with all other adds and Karam can be a bit tricky.
Once you make Raest use his Dismiss ability again, another new mechanic will appear: Raest will create Rune of Summoning on the floor, which, after some time will summon a powerful Thing of Nightmare, which will most certainly wipe you if you do not soak the rune by standing in it. Hunters and Mages can order their pets or water elemental to stand in the rune to soak it.
After another 30 seconds Karam will become active again, but you will also be able to damage Raest. From this time on you will need to kill Raest as quickly as possible before the two bosses’ combined abilities finish you off.
Keep in mind that the longer you fight the encounter the Karam will get, which is a kind of a soft enrage. So we do not recommend you to use all your DPS cooldowns at the first stages of the fight, while Karam's speed is still manageable. BLOG20
Mage Tower Rewards
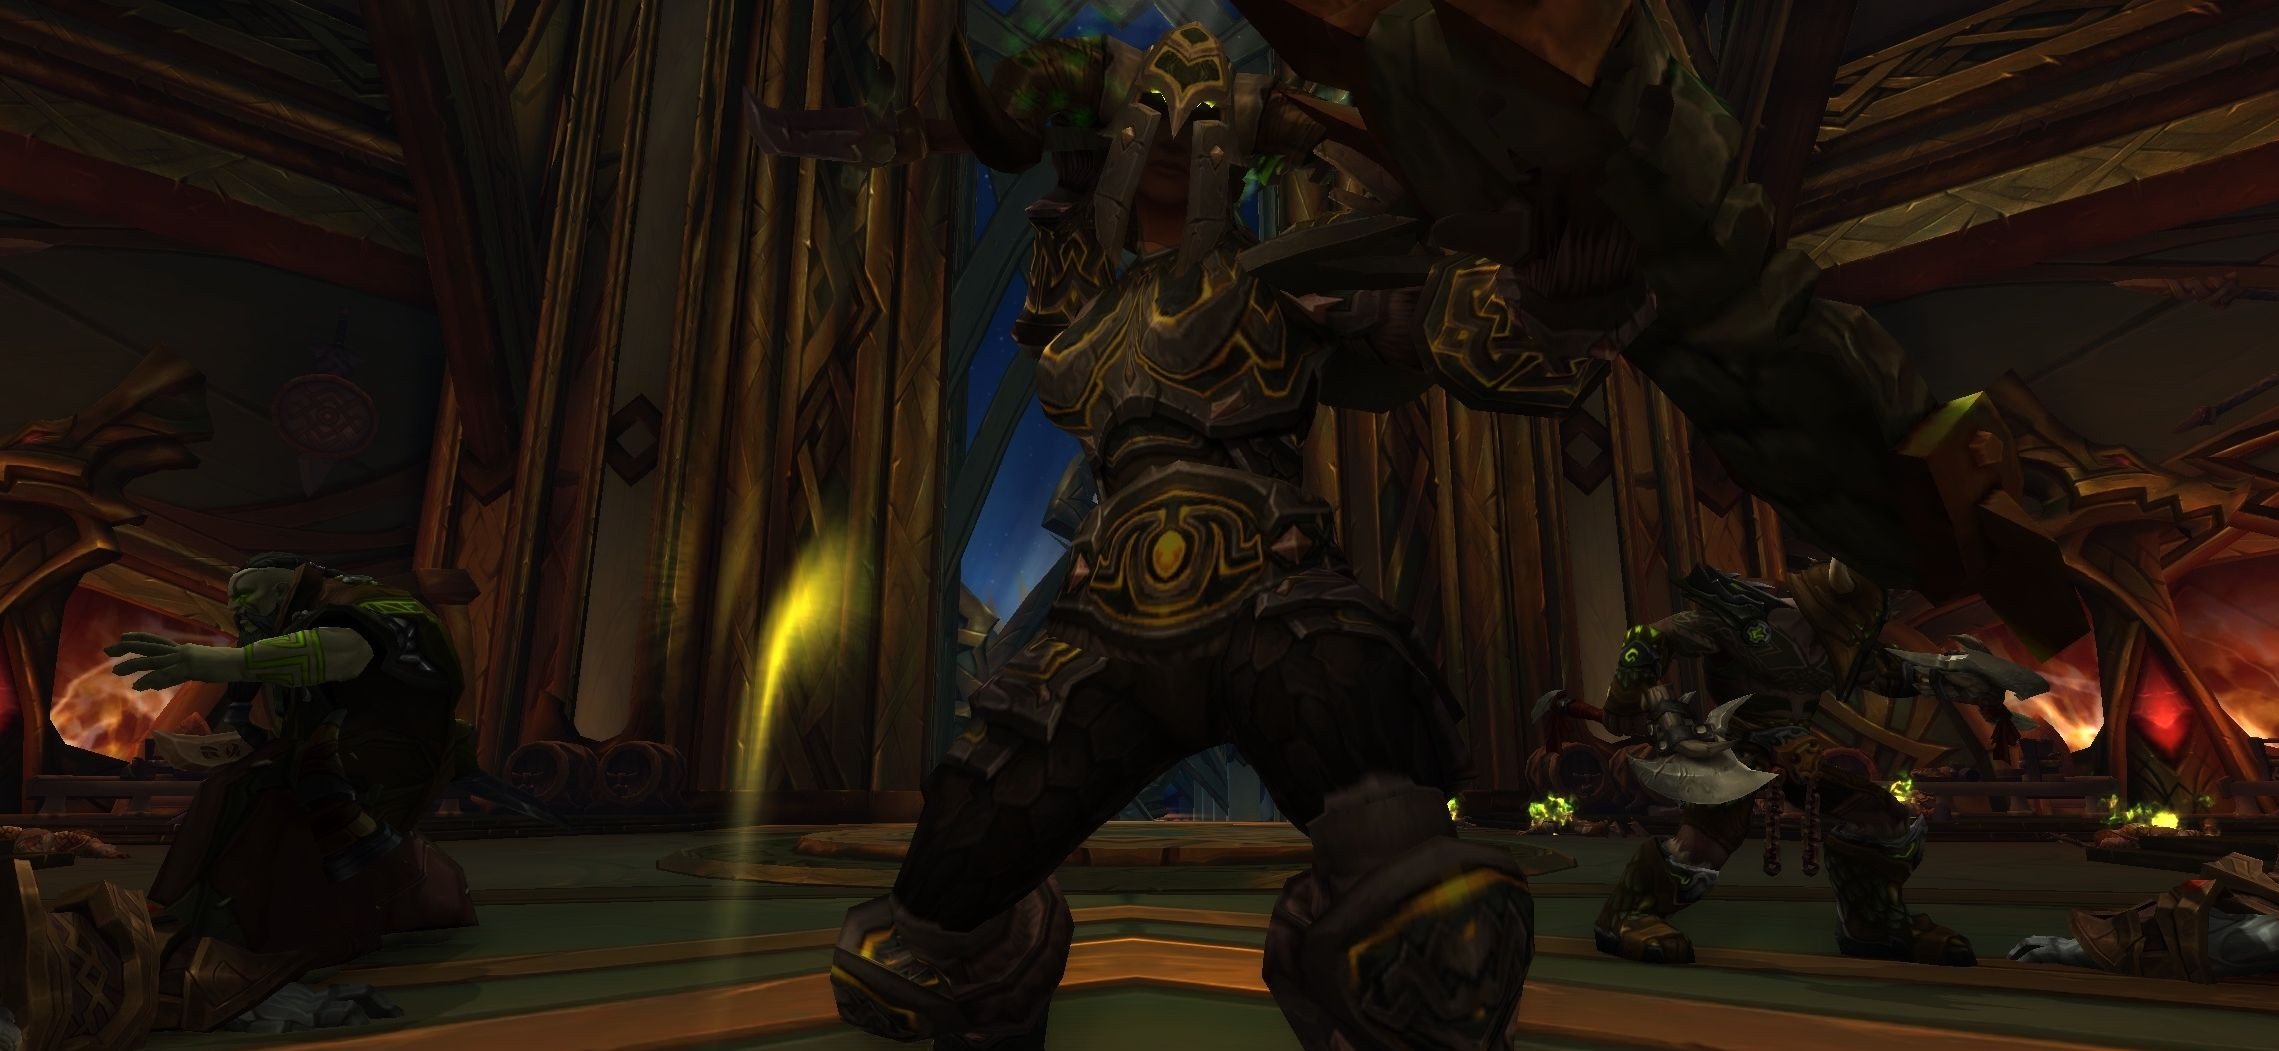
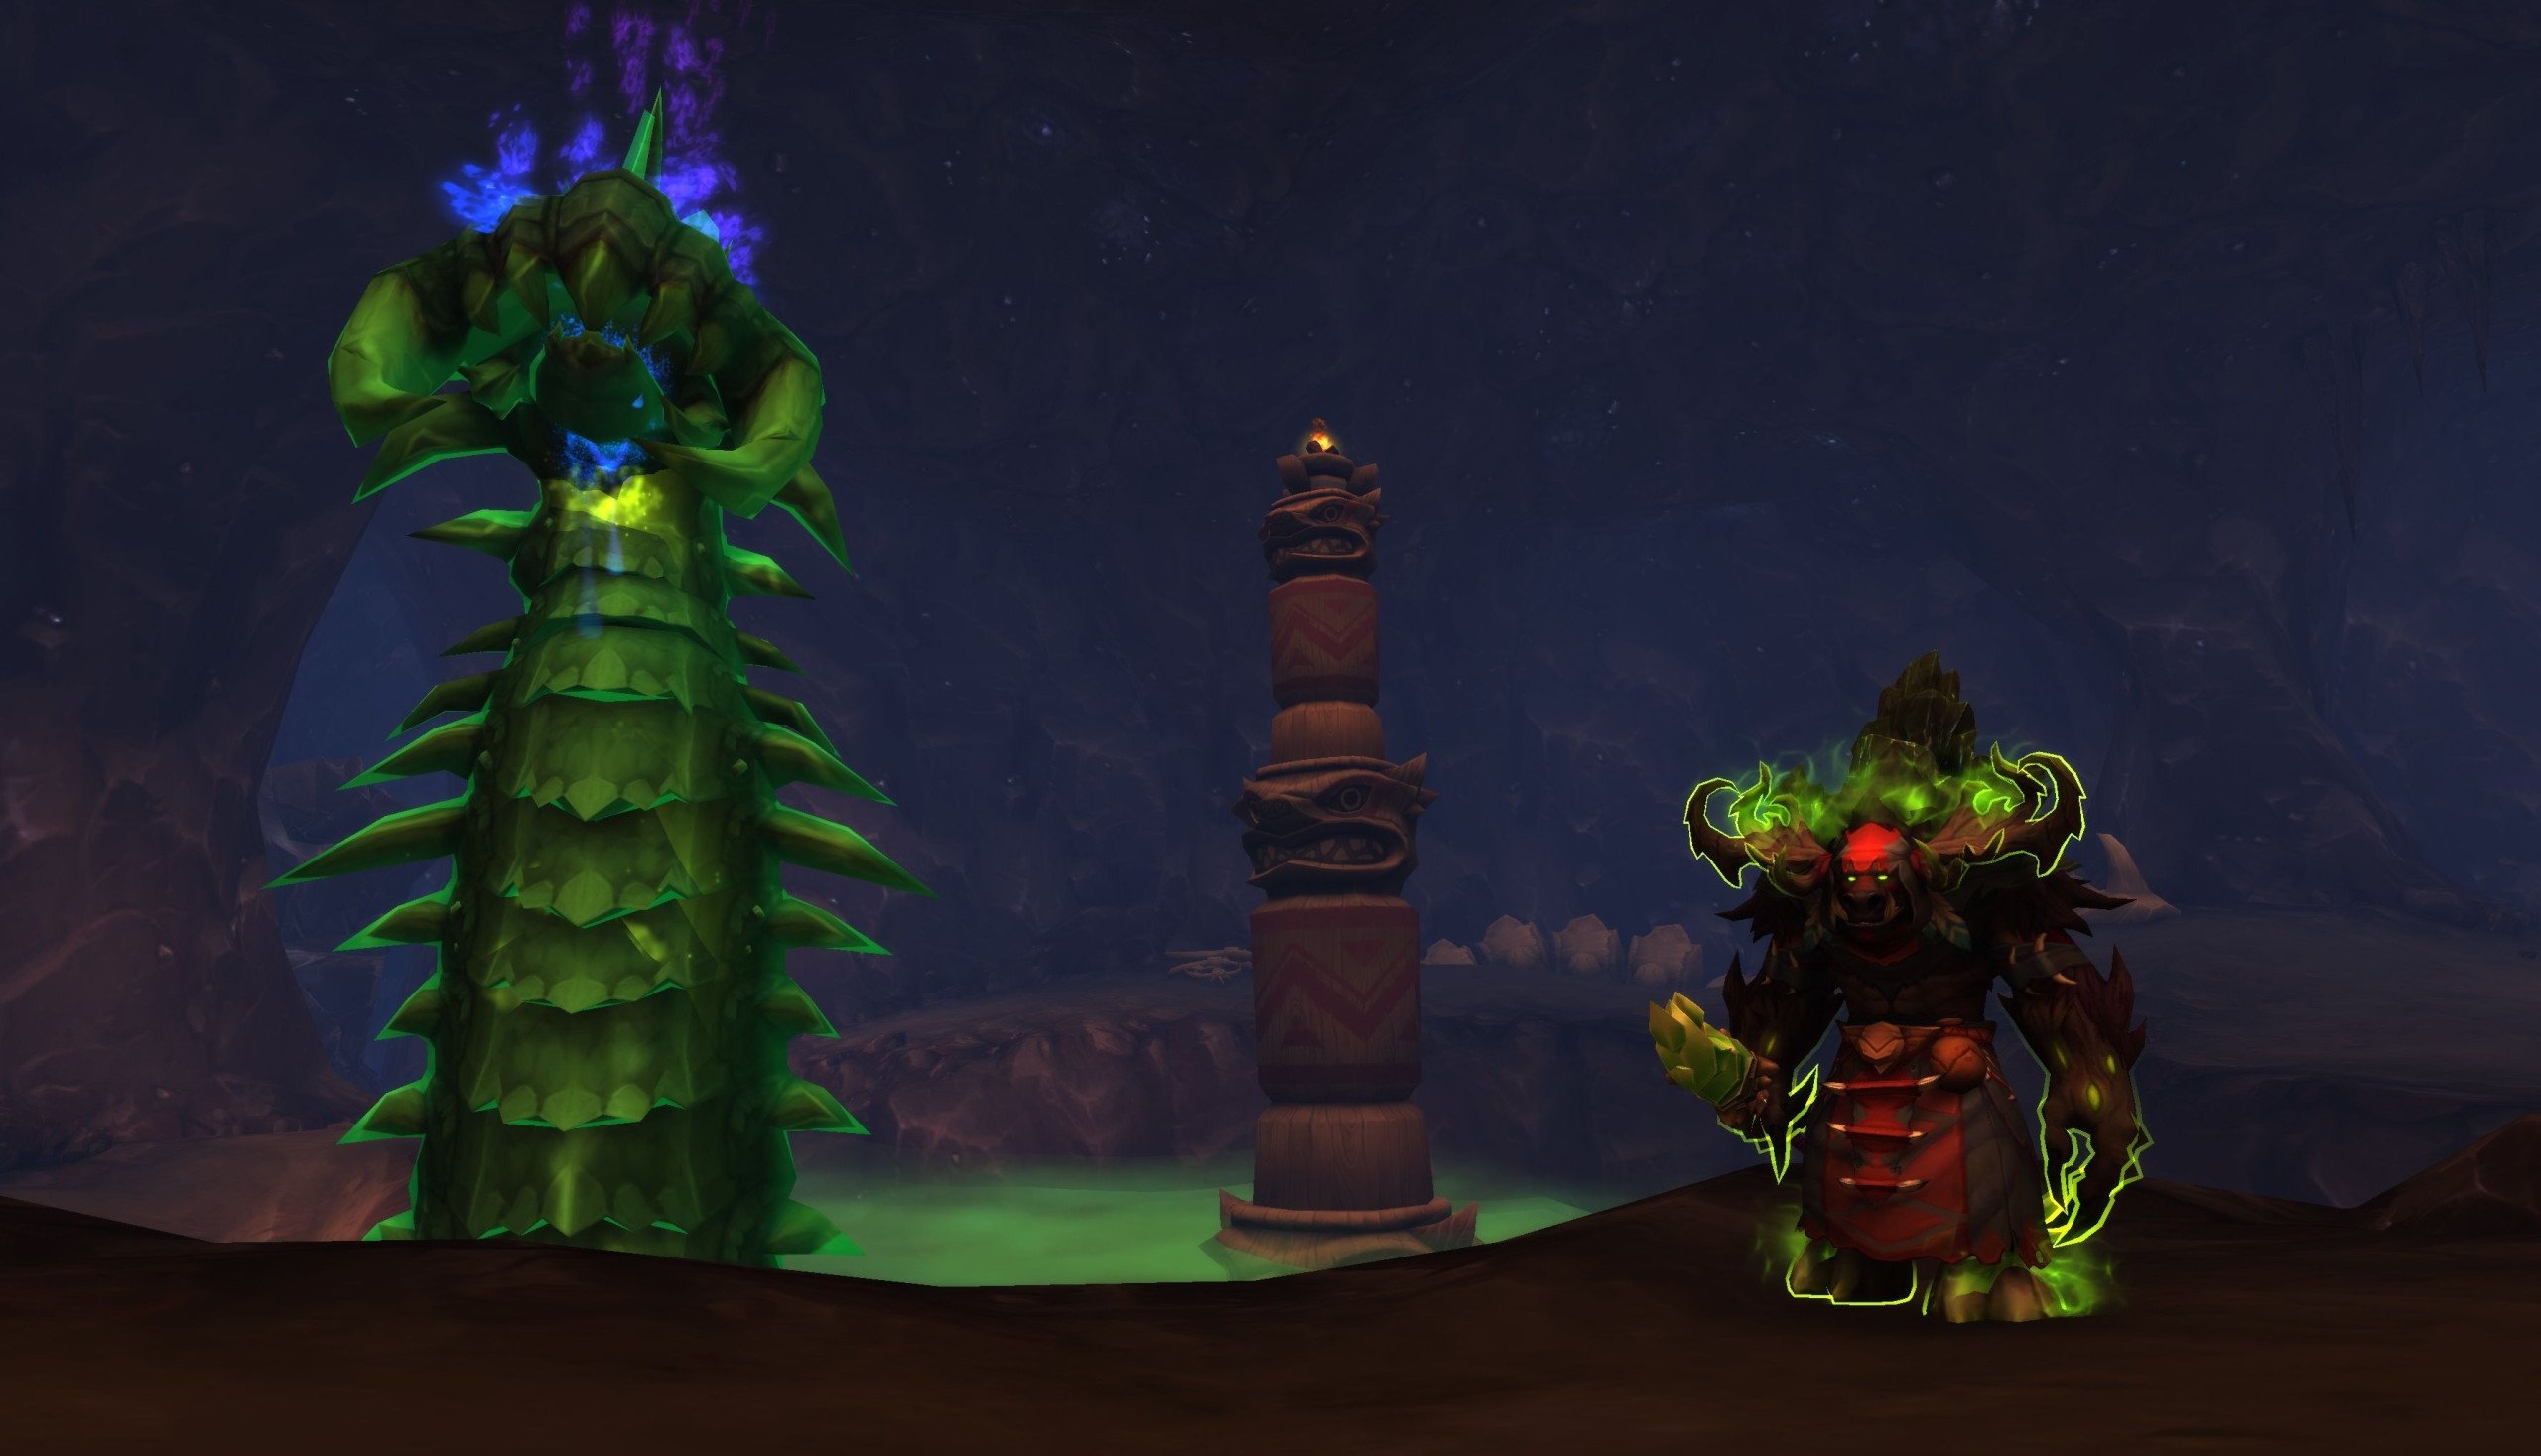
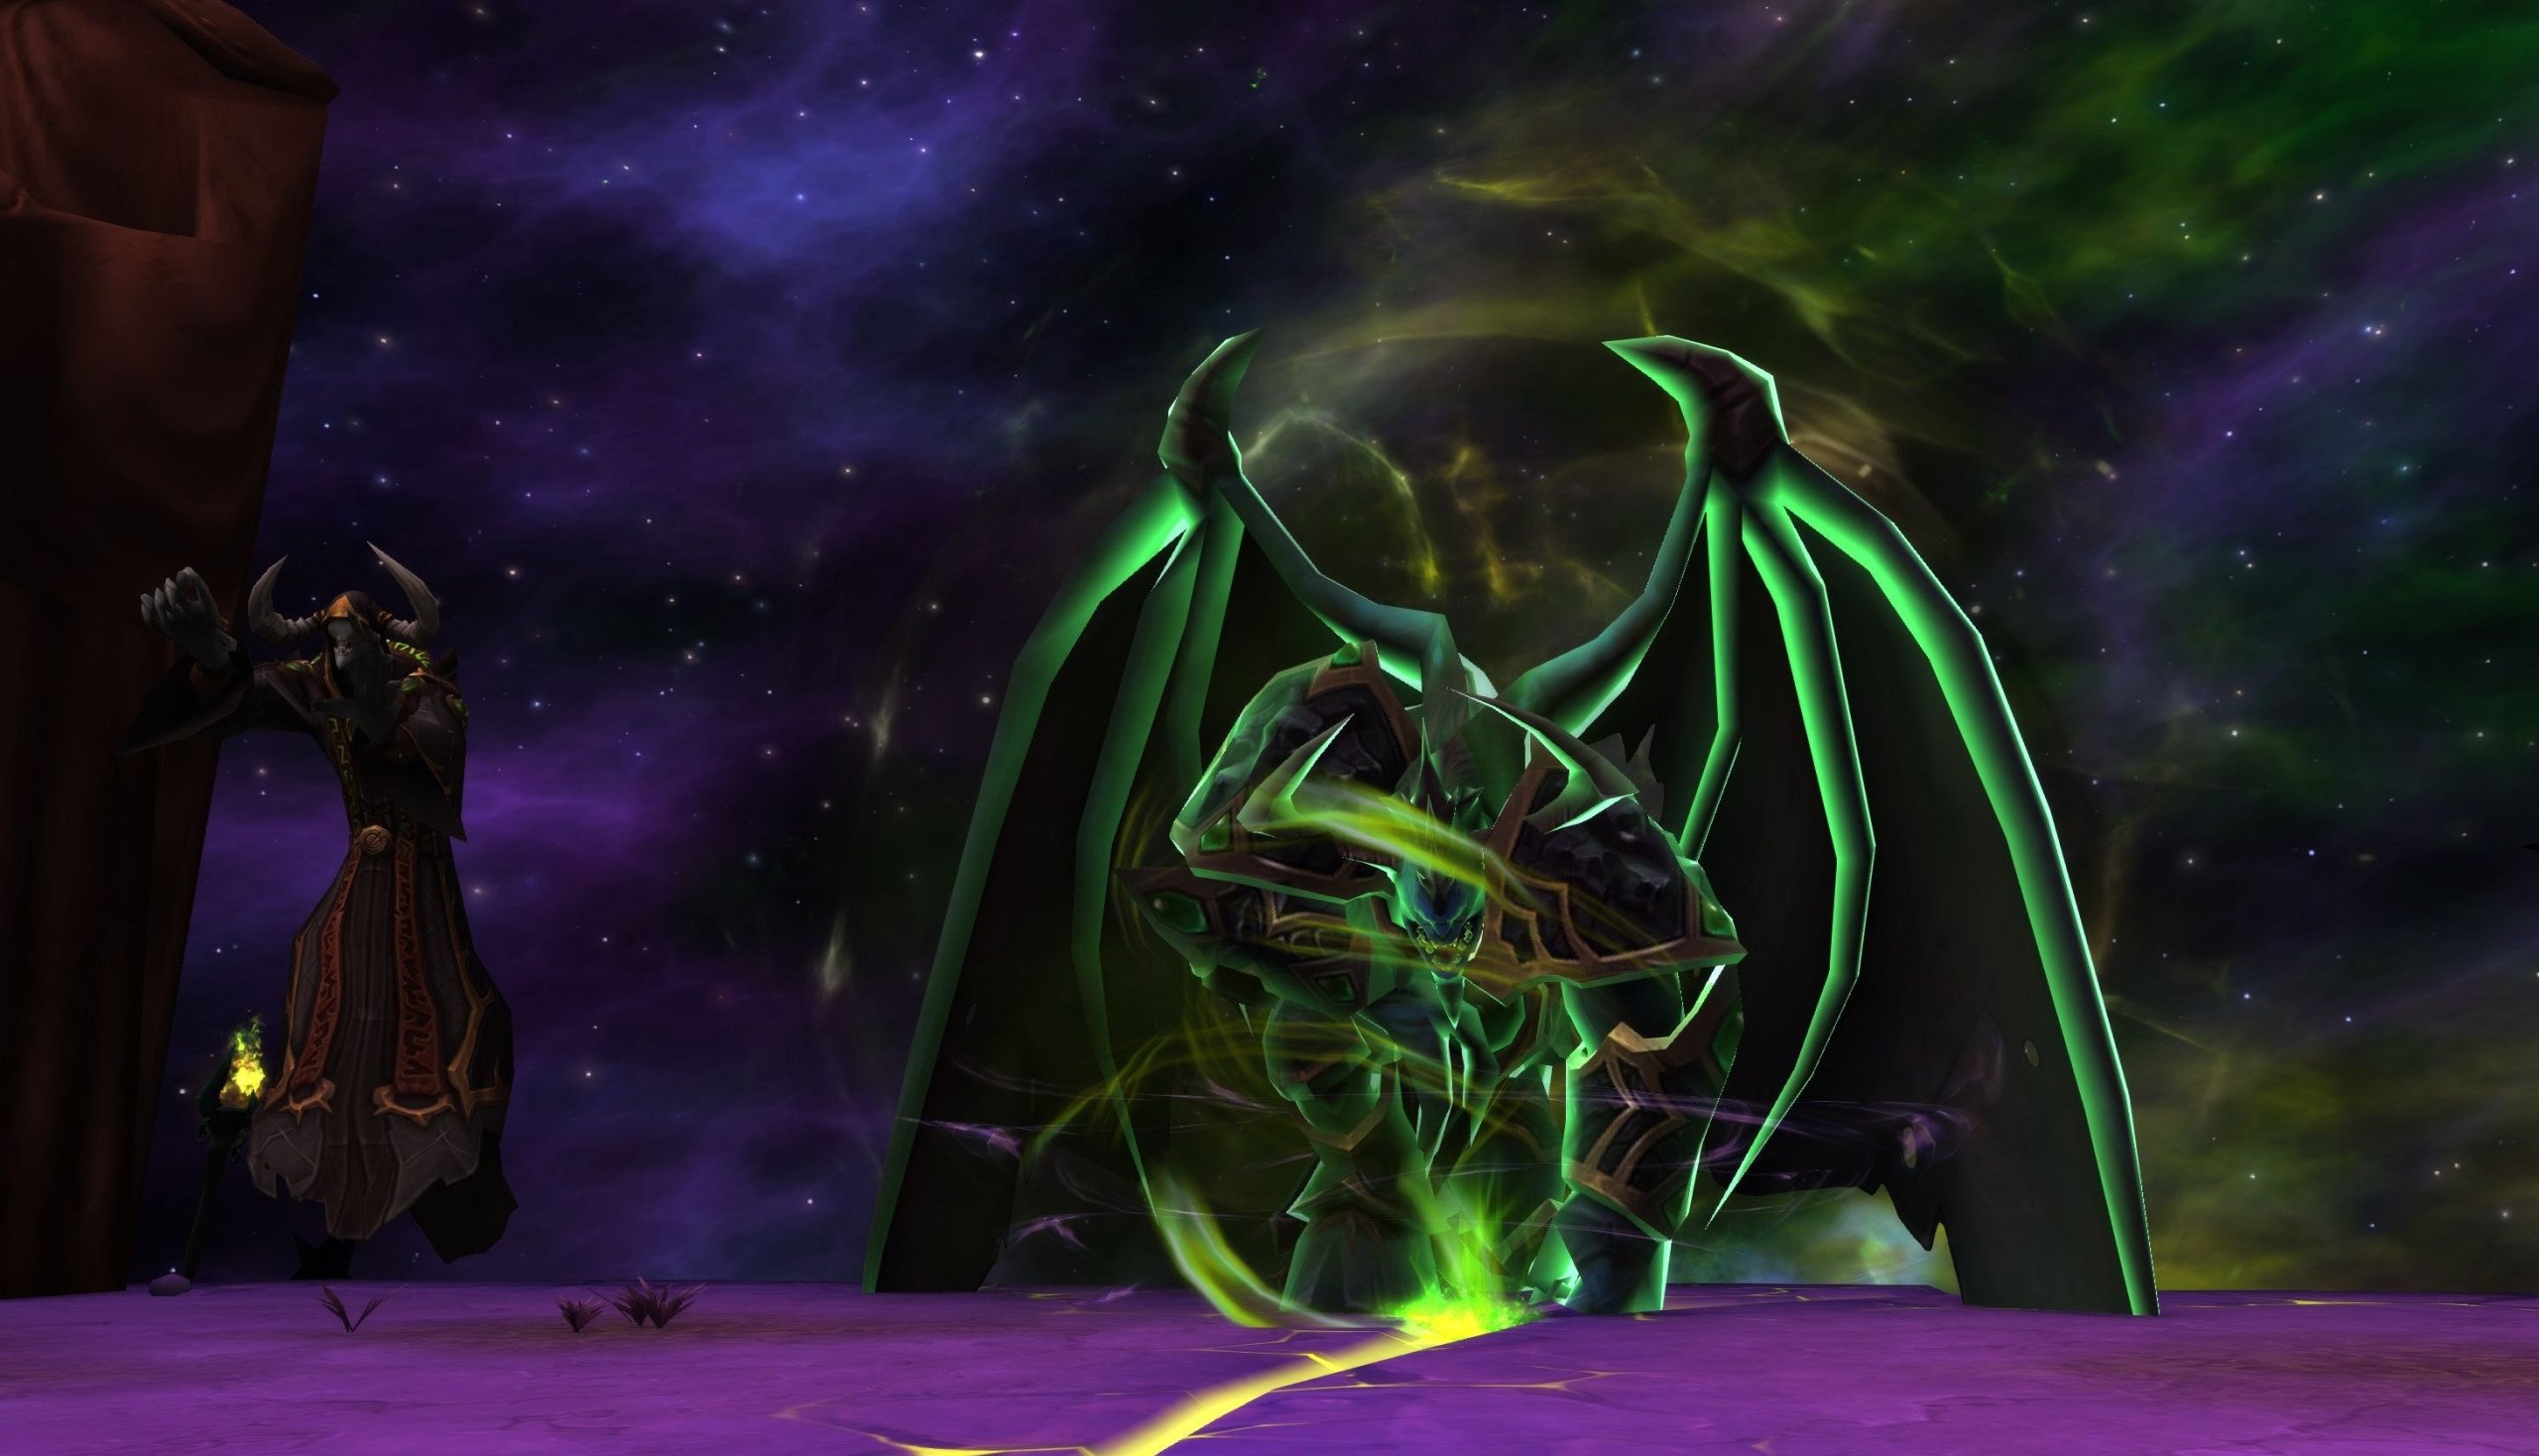
Those of you who have some Mage Tower experience from previous expansions should remember that unique Legion-themed WoW Mage Tower appearances are available as rewards for the completion of this ultimate challenge. As stated above, all classes will have a different set of transmogs. You can find the list of possible Mage Tower rewards in the table below:
| Class | Reward's Name | Picture |
|---|---|---|
| Mage | Regalia of the Arcane Tempest | 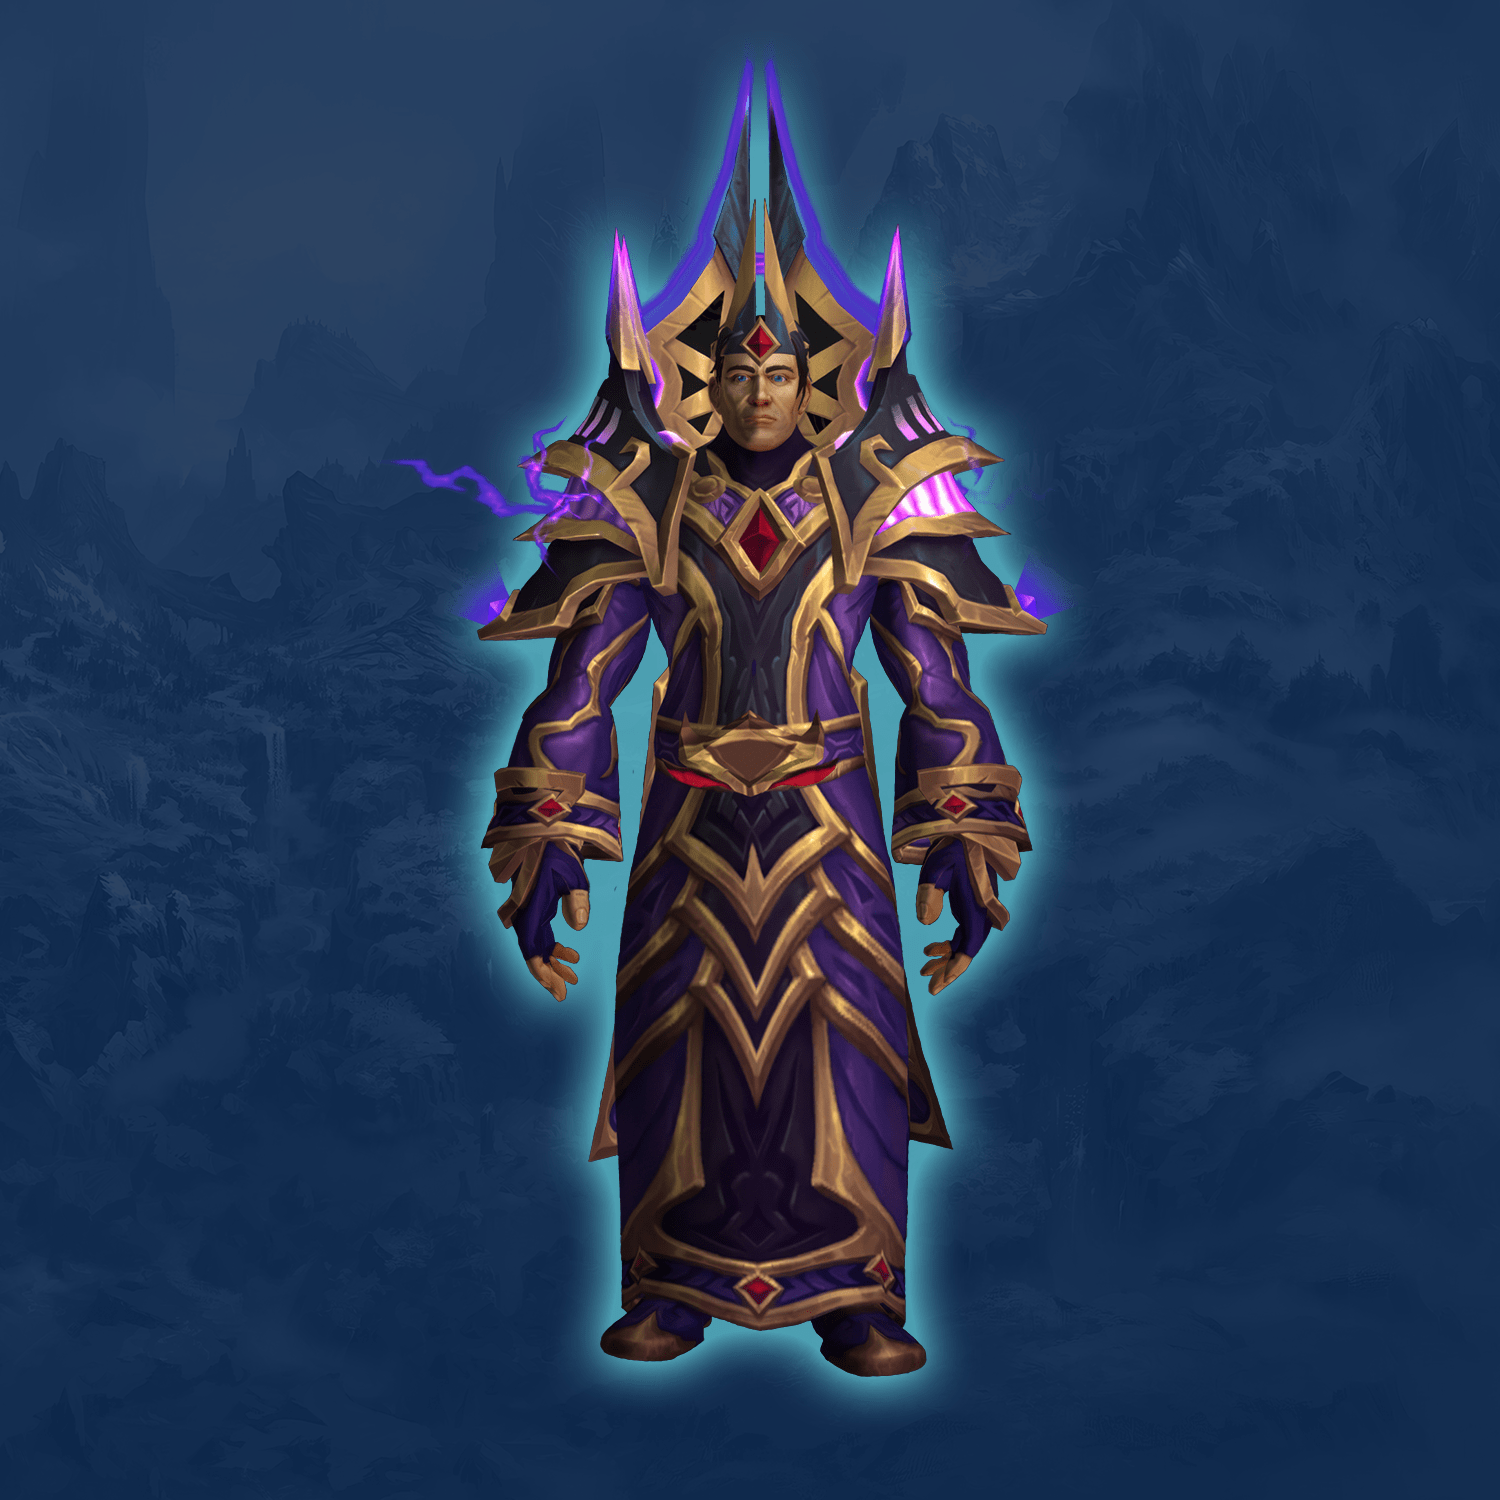 |
| Warlock | Diabolic Raiment | 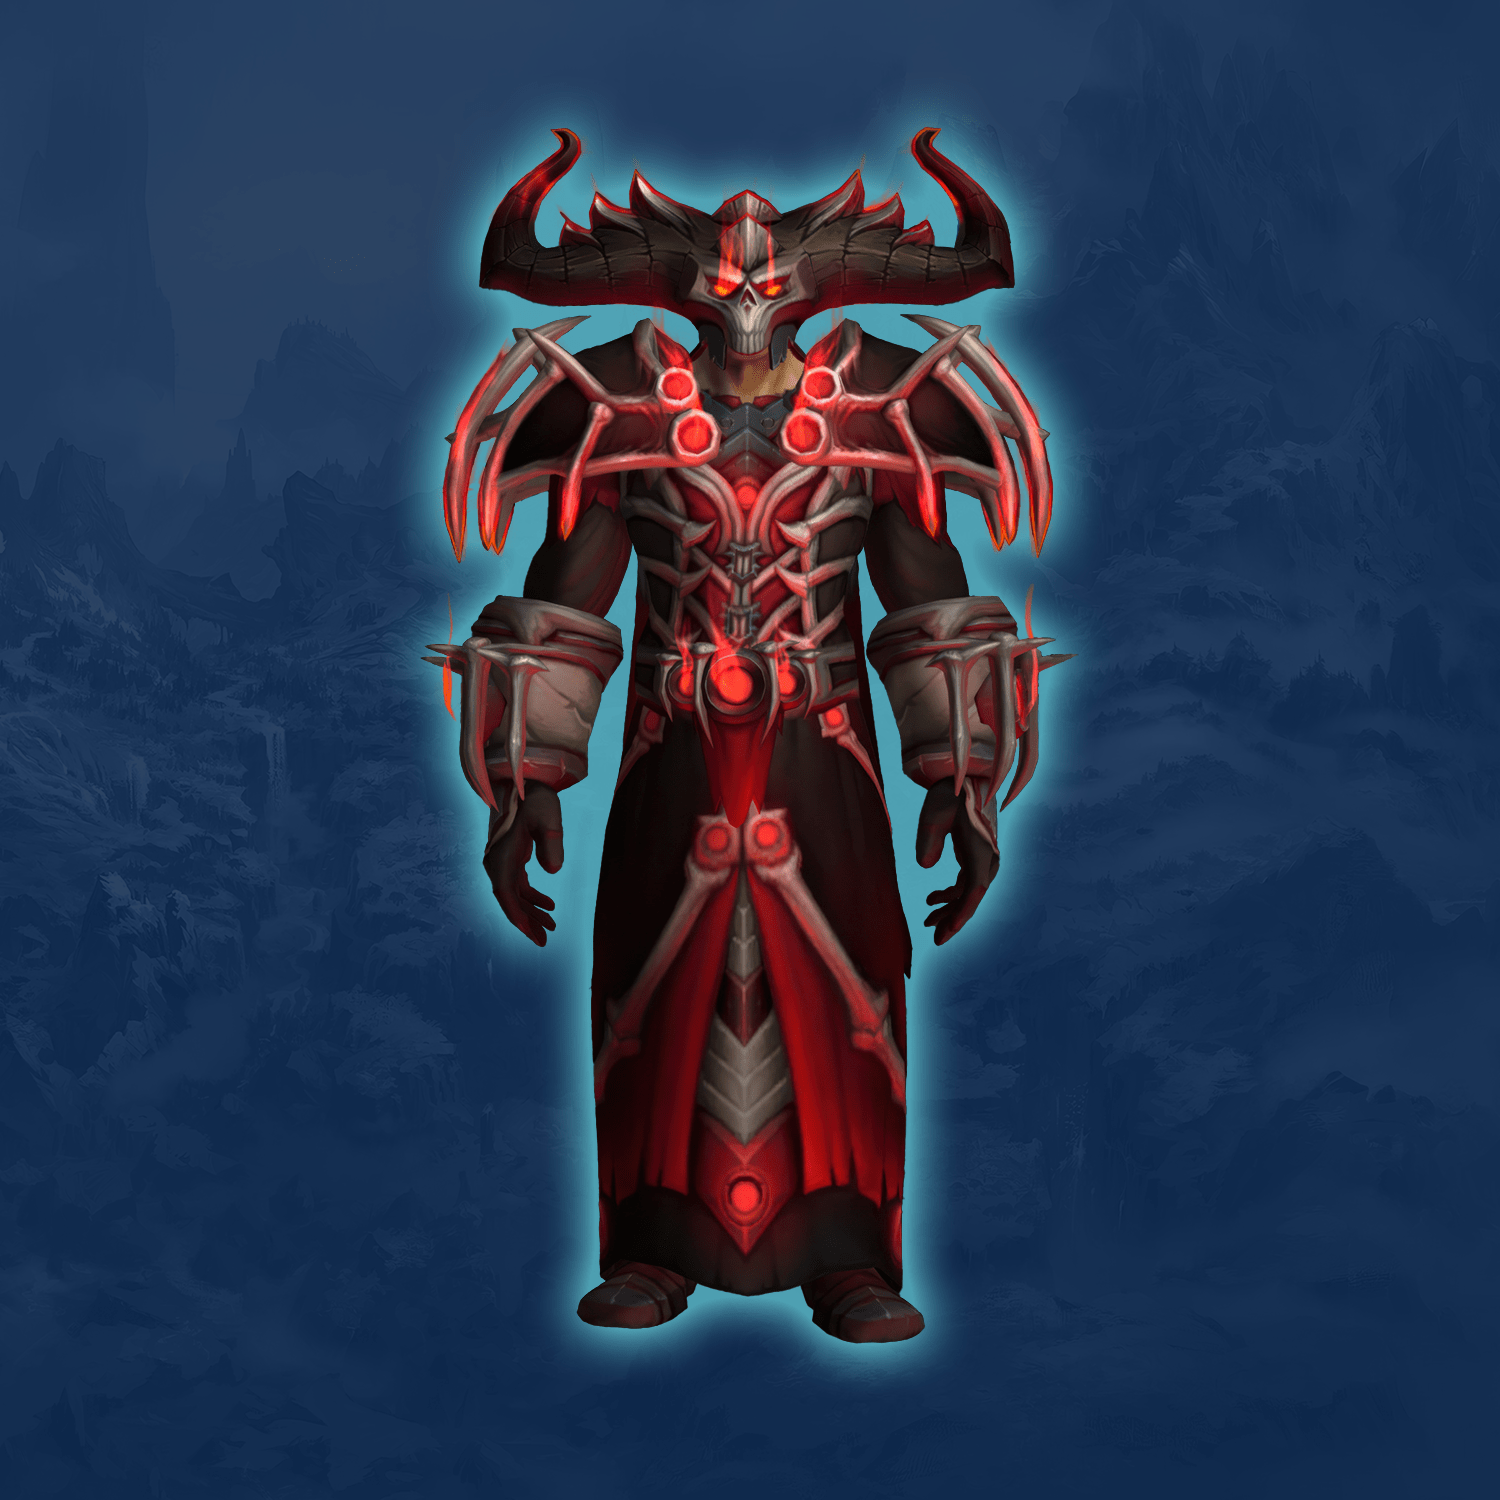 |
| Warrior | Titanic Onslaught Armor | 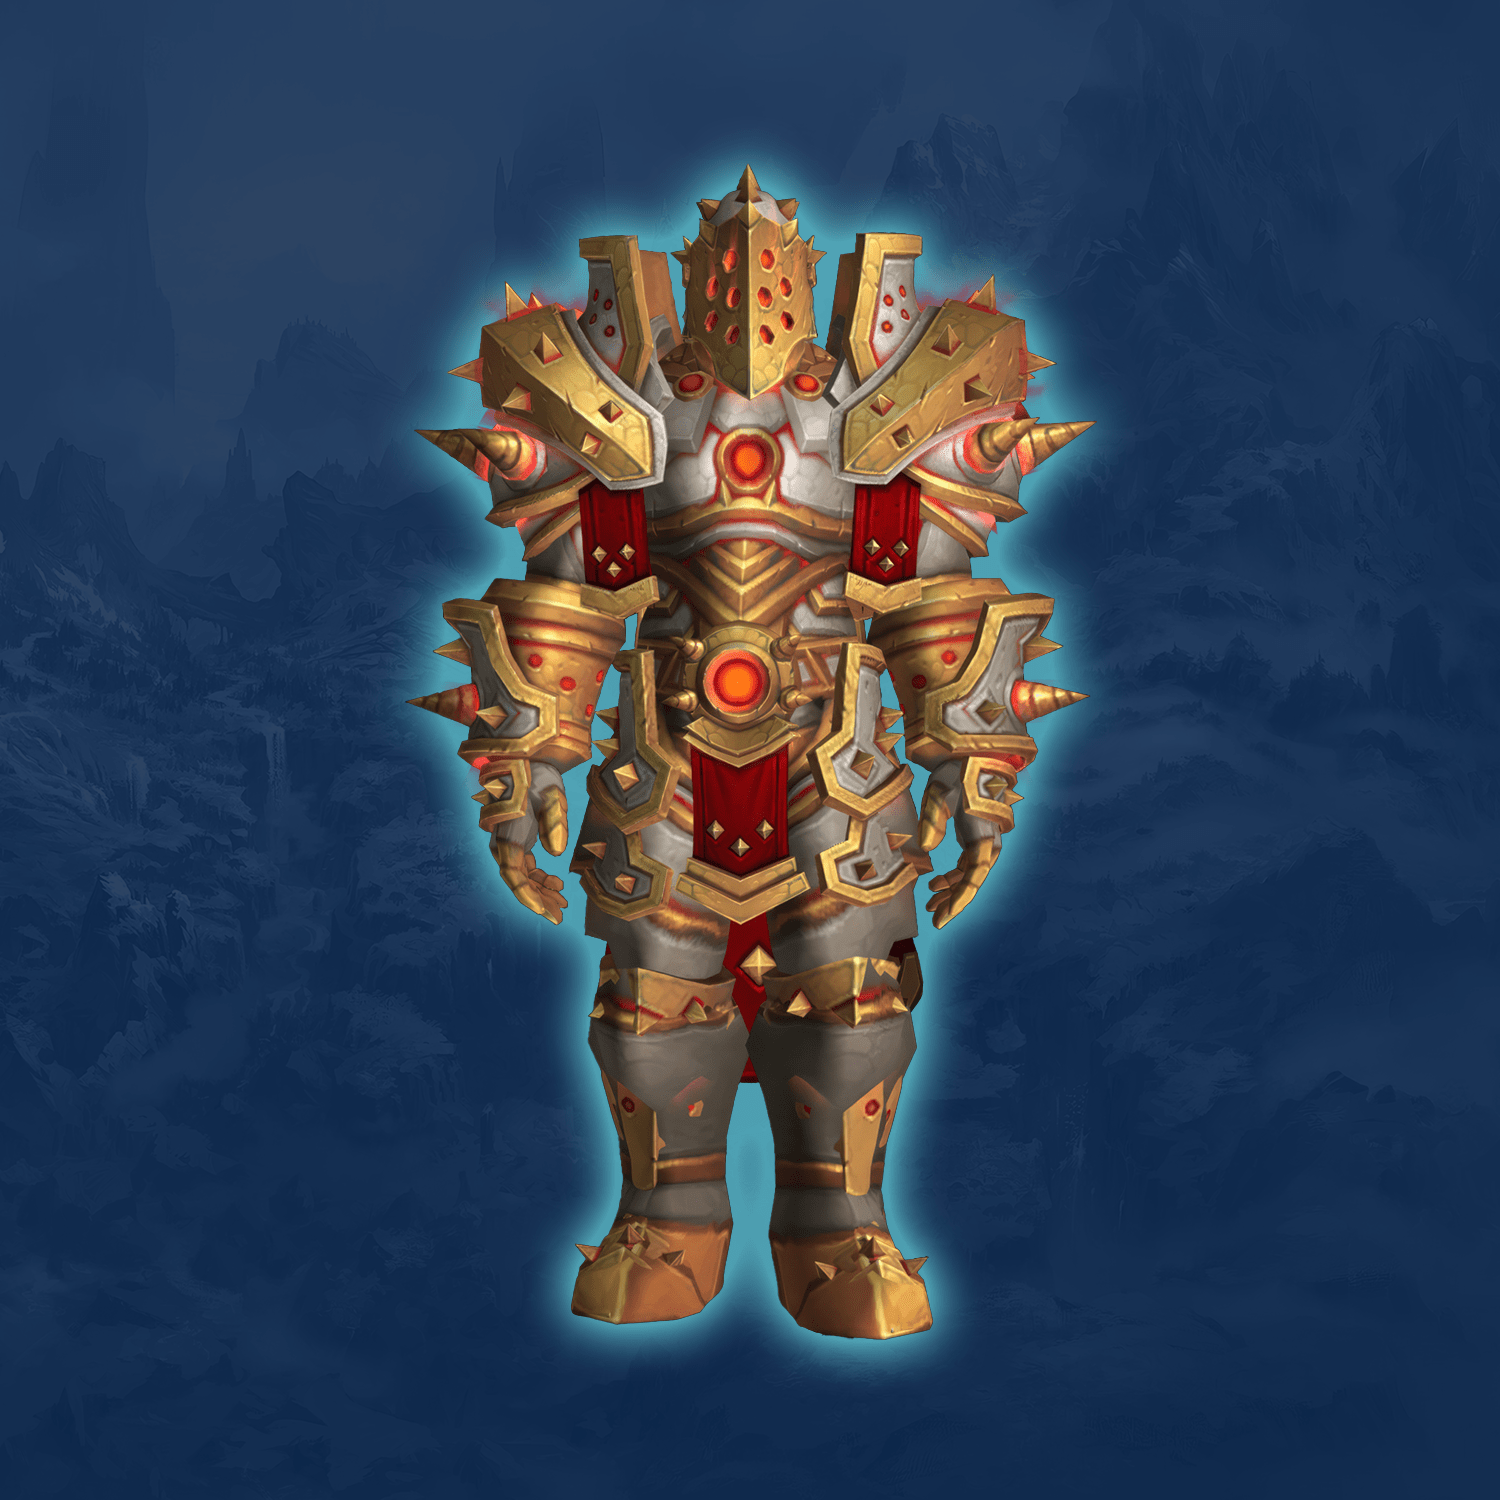 |
| Shaman | Regalia of the Skybreaker | 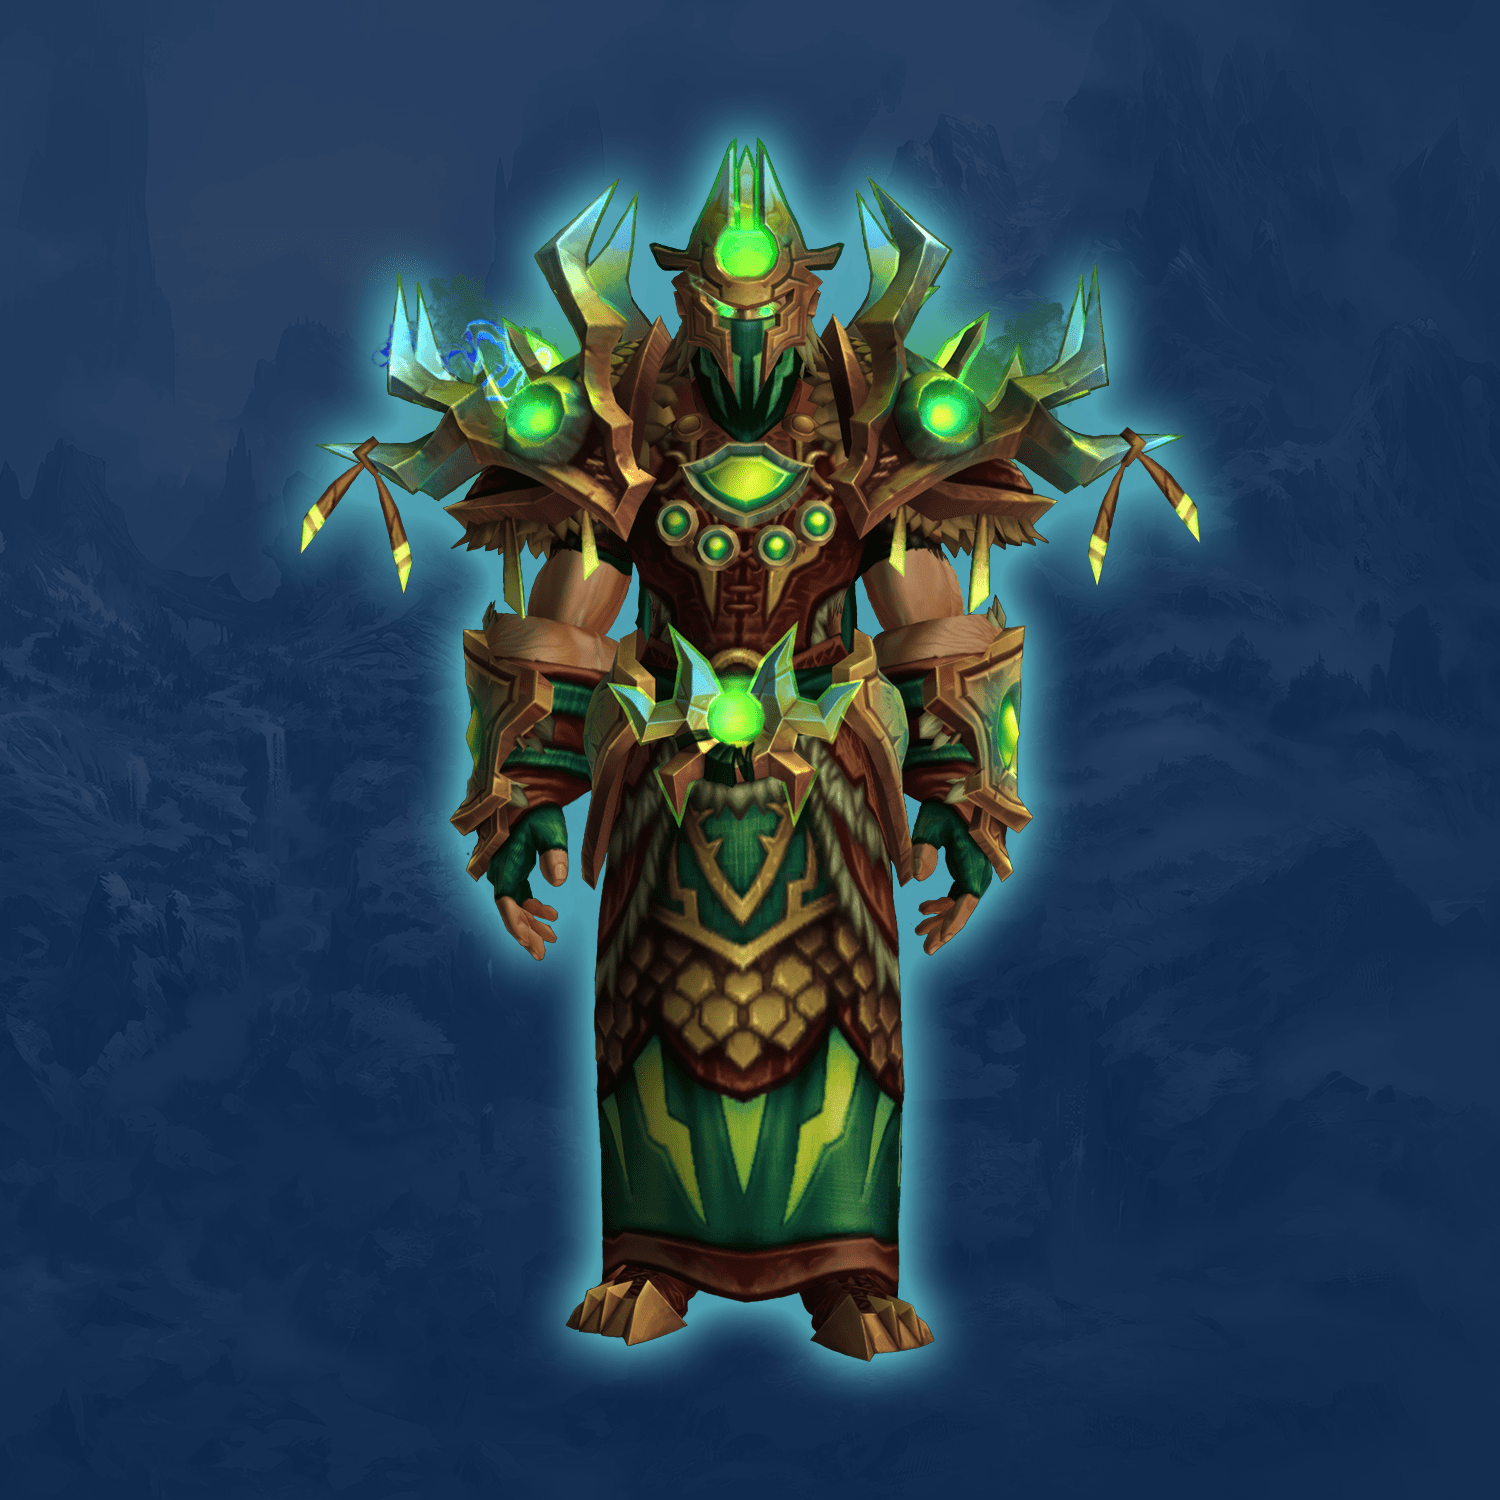 |
| Rogue | Fanged Slayer's Armor | 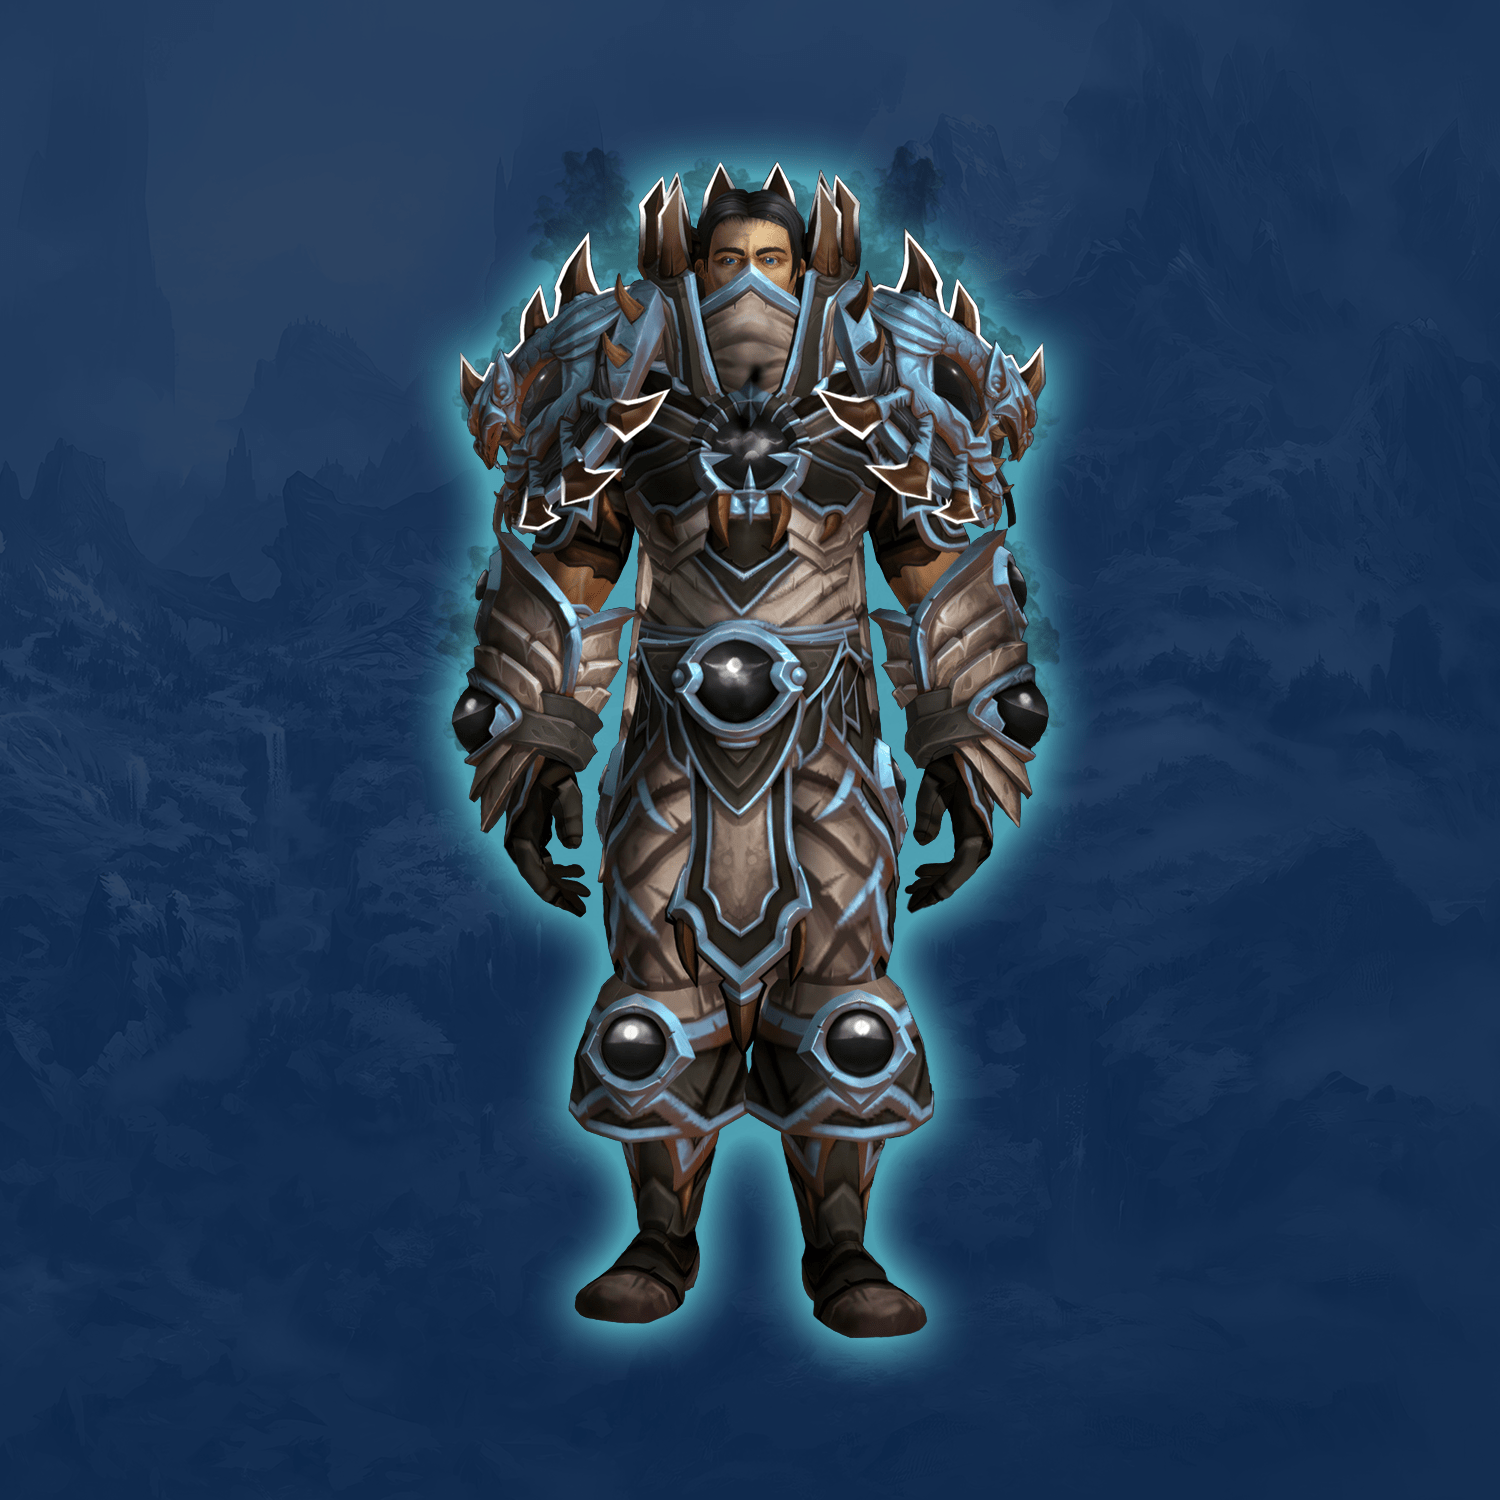 |
| Priest | Vestments of Blind Absolution | 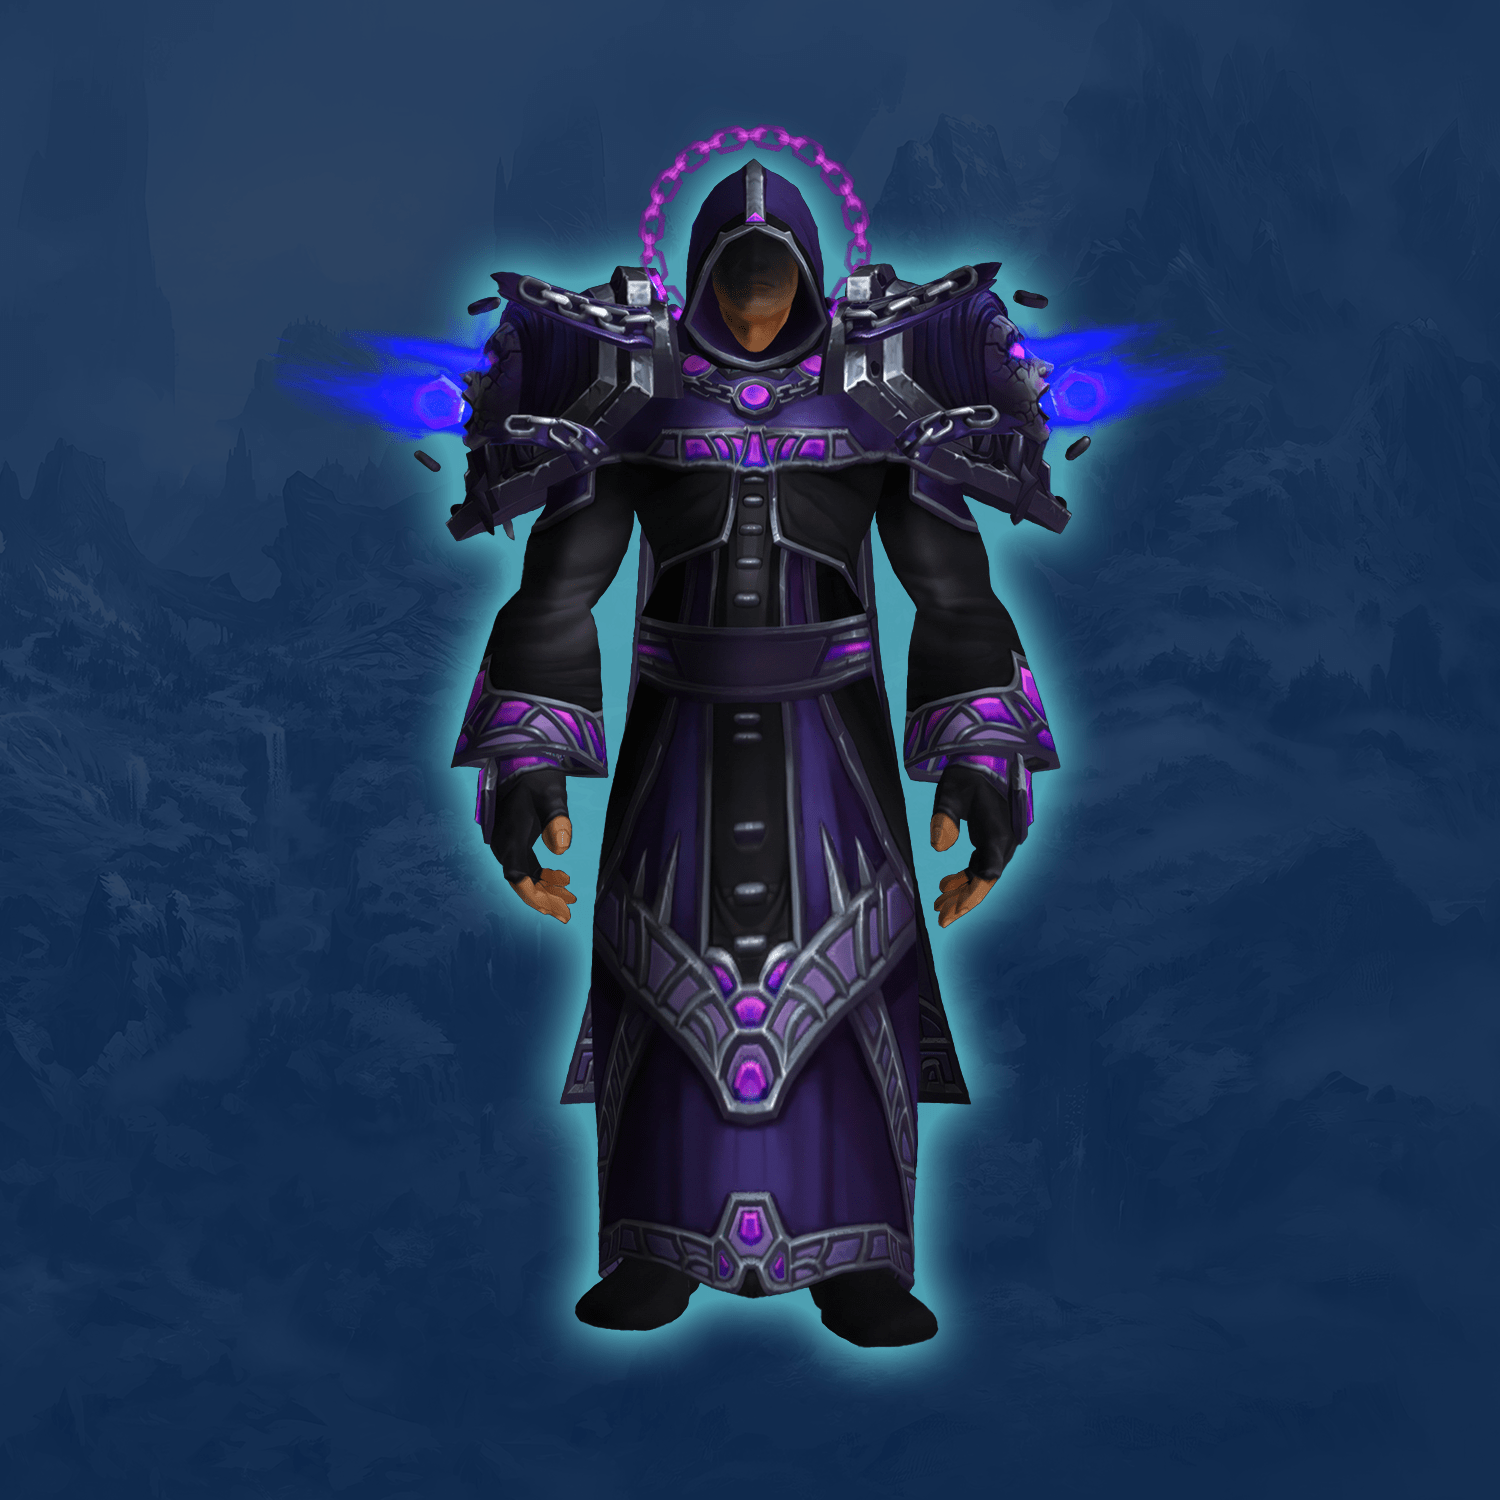 |
| Paladin | Radiant Lightbringer Armor | 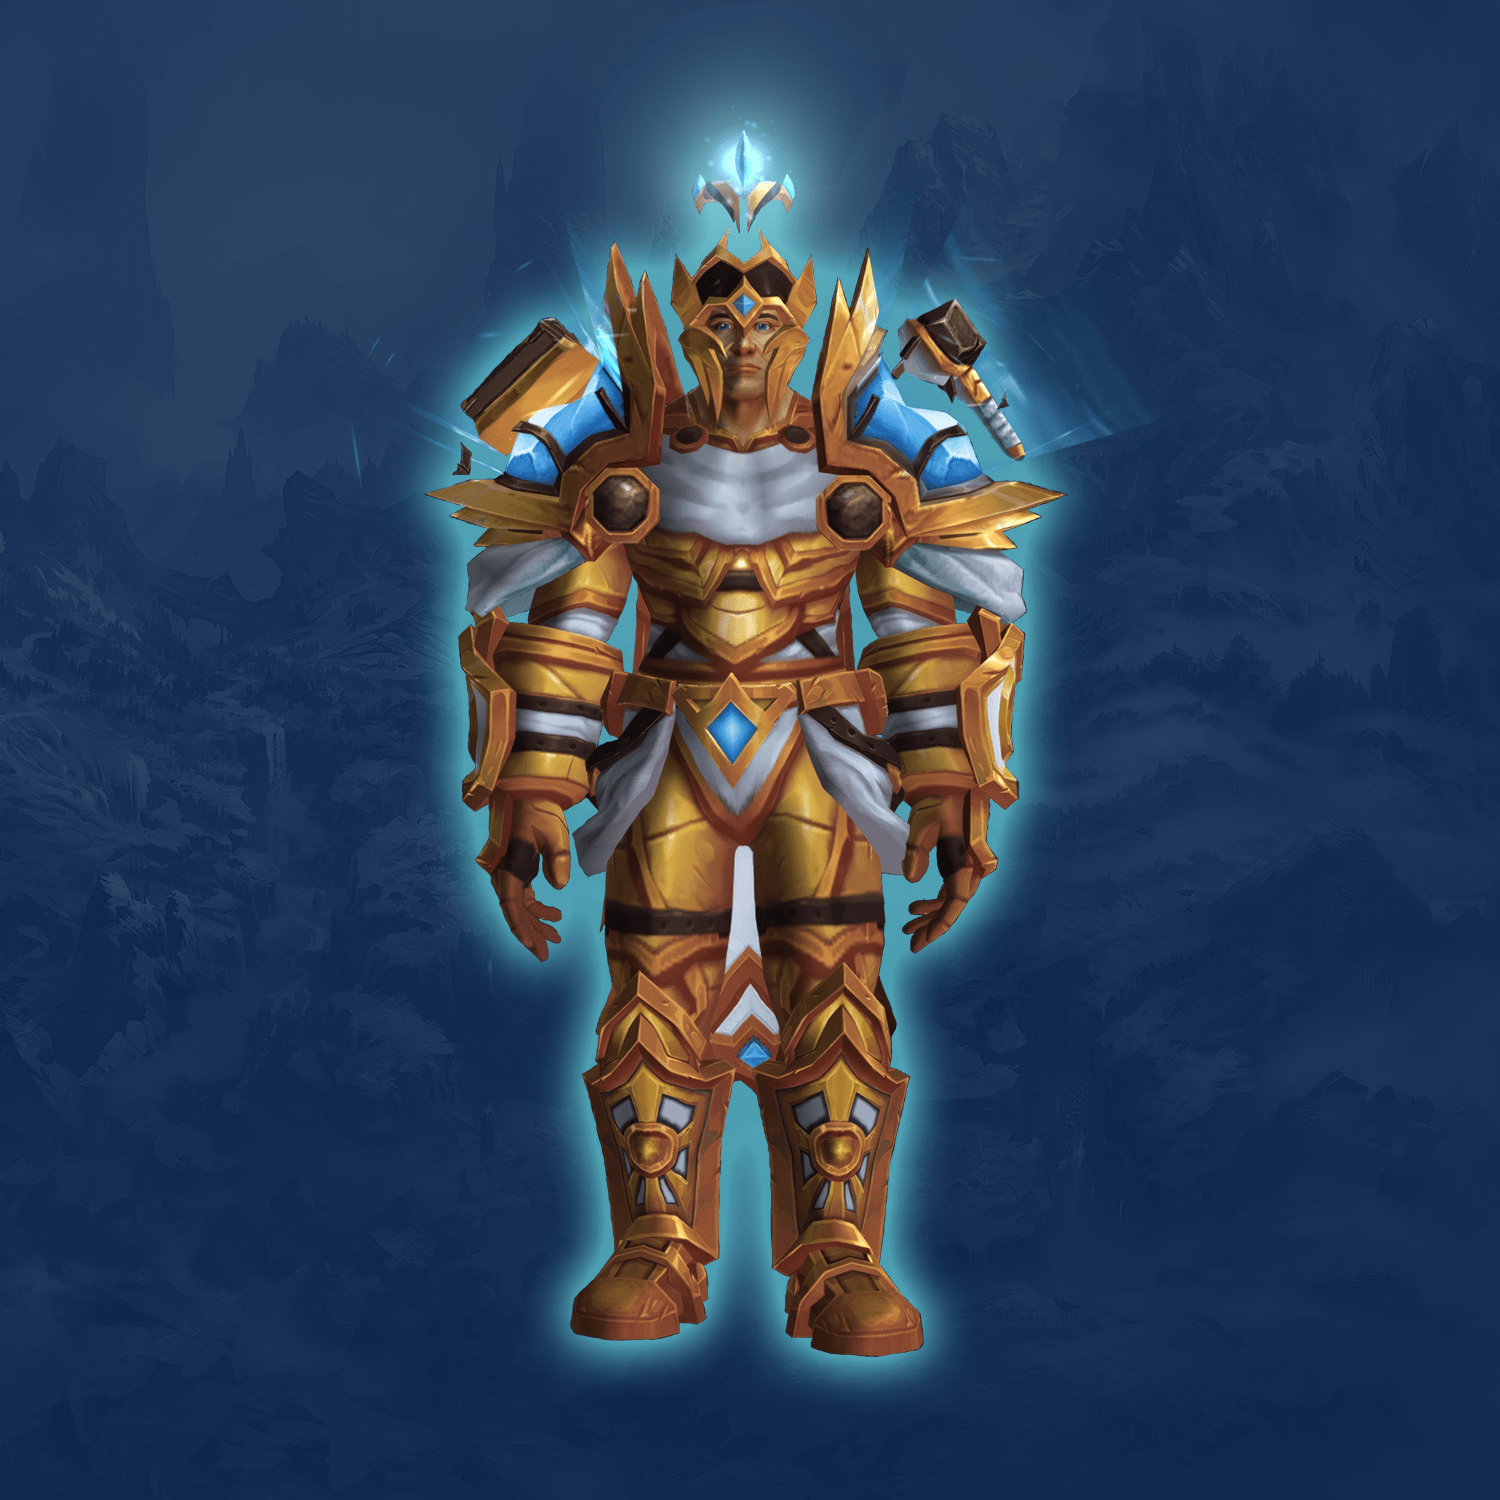 |
| Monk | Xuen's Battlegear |  |
| Hunter | Wildstalker Armor | 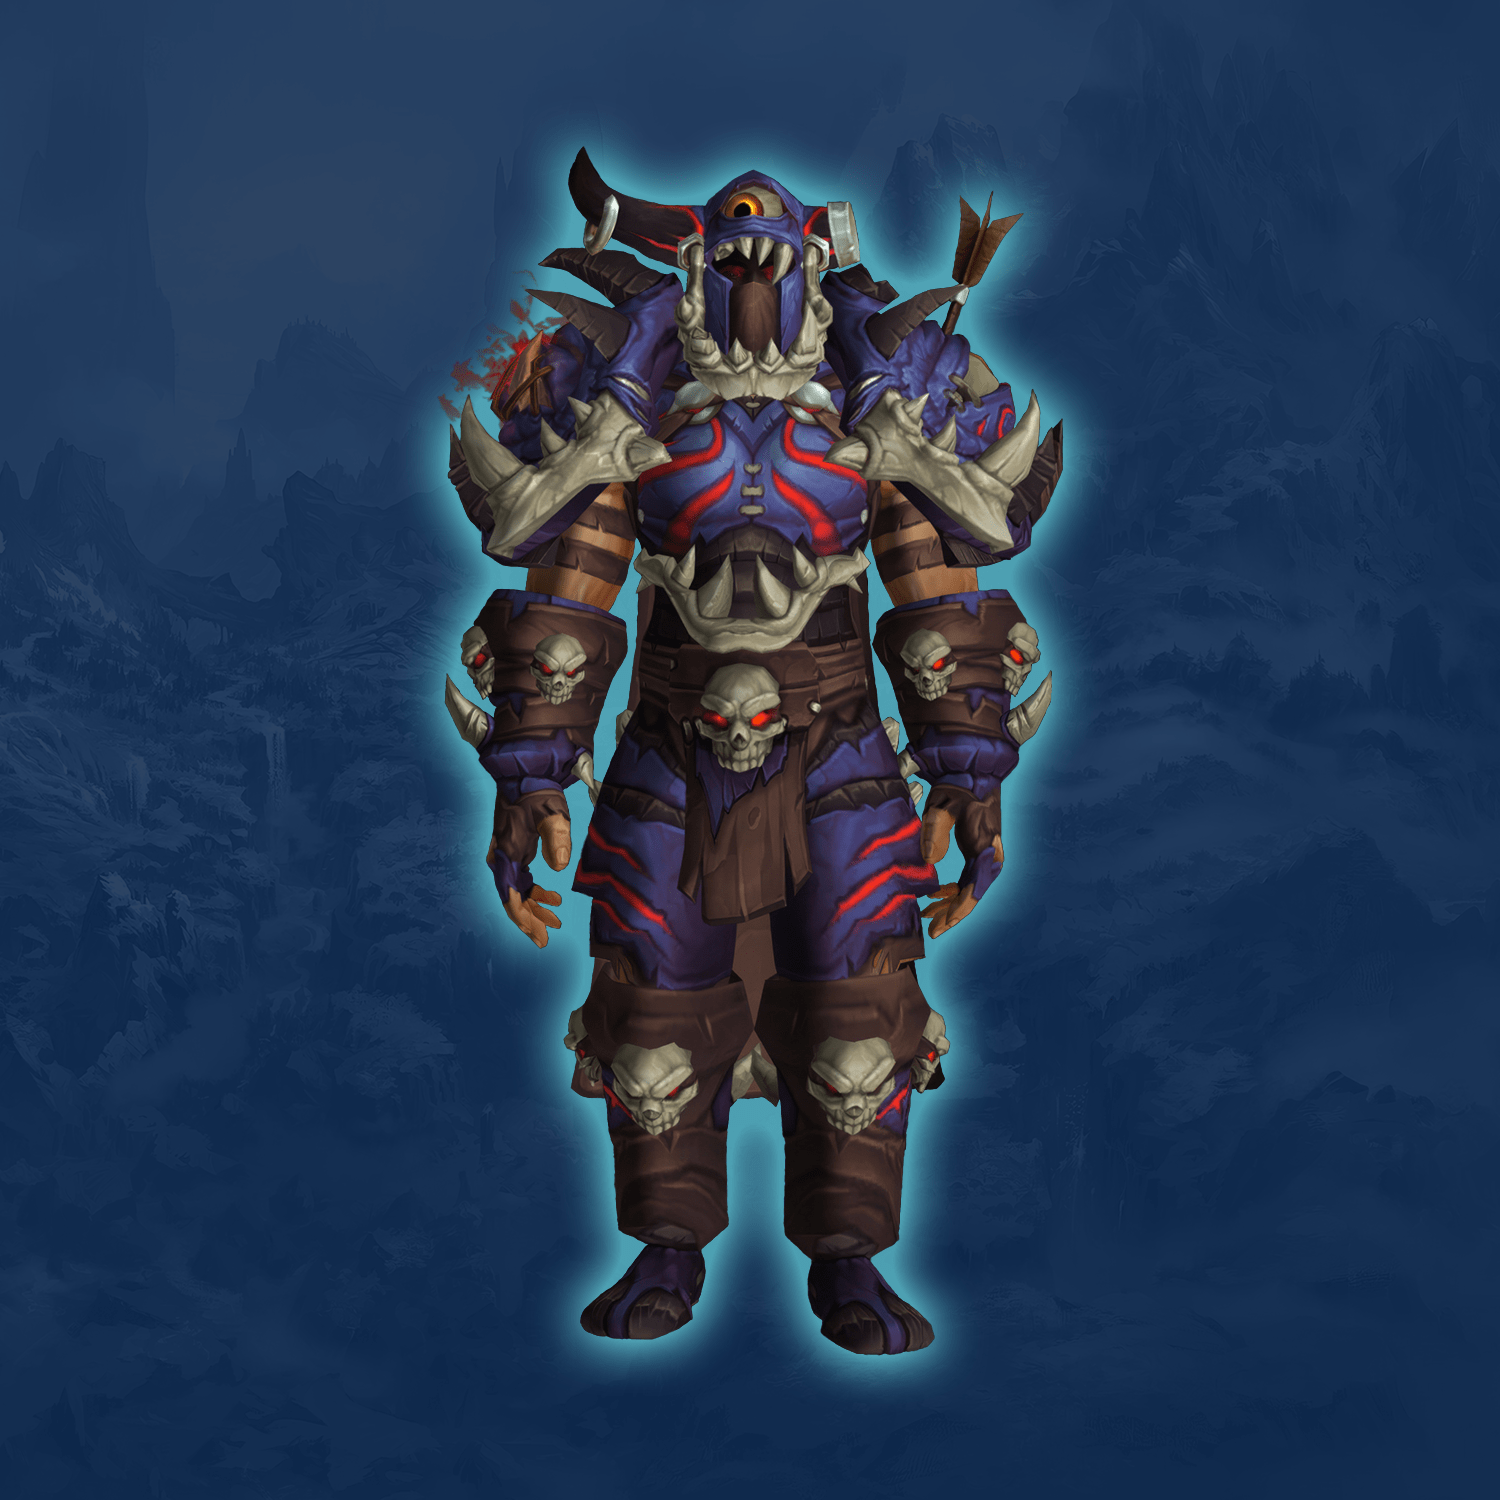 |
| Druid | Stormheart Raiment | 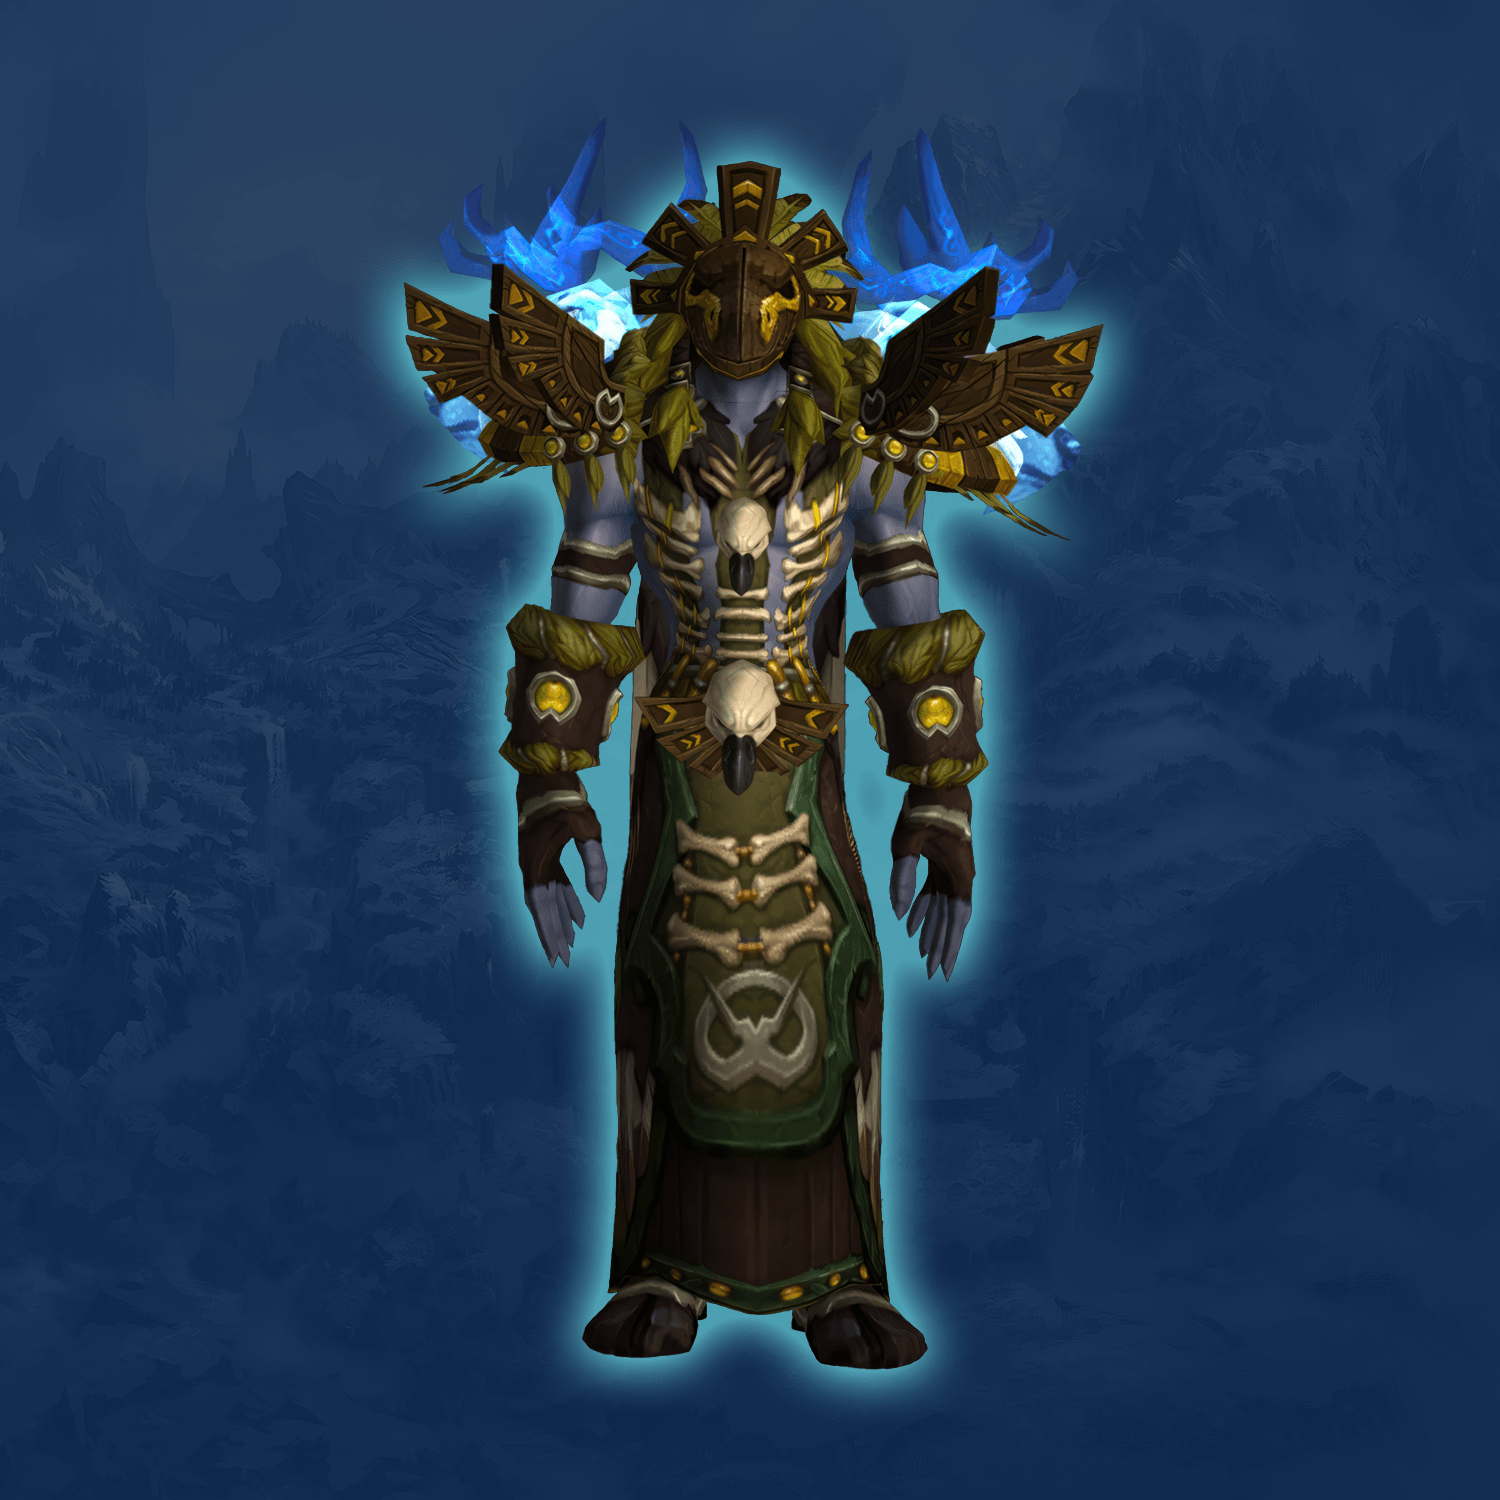 |
| Fel Werebear Form | 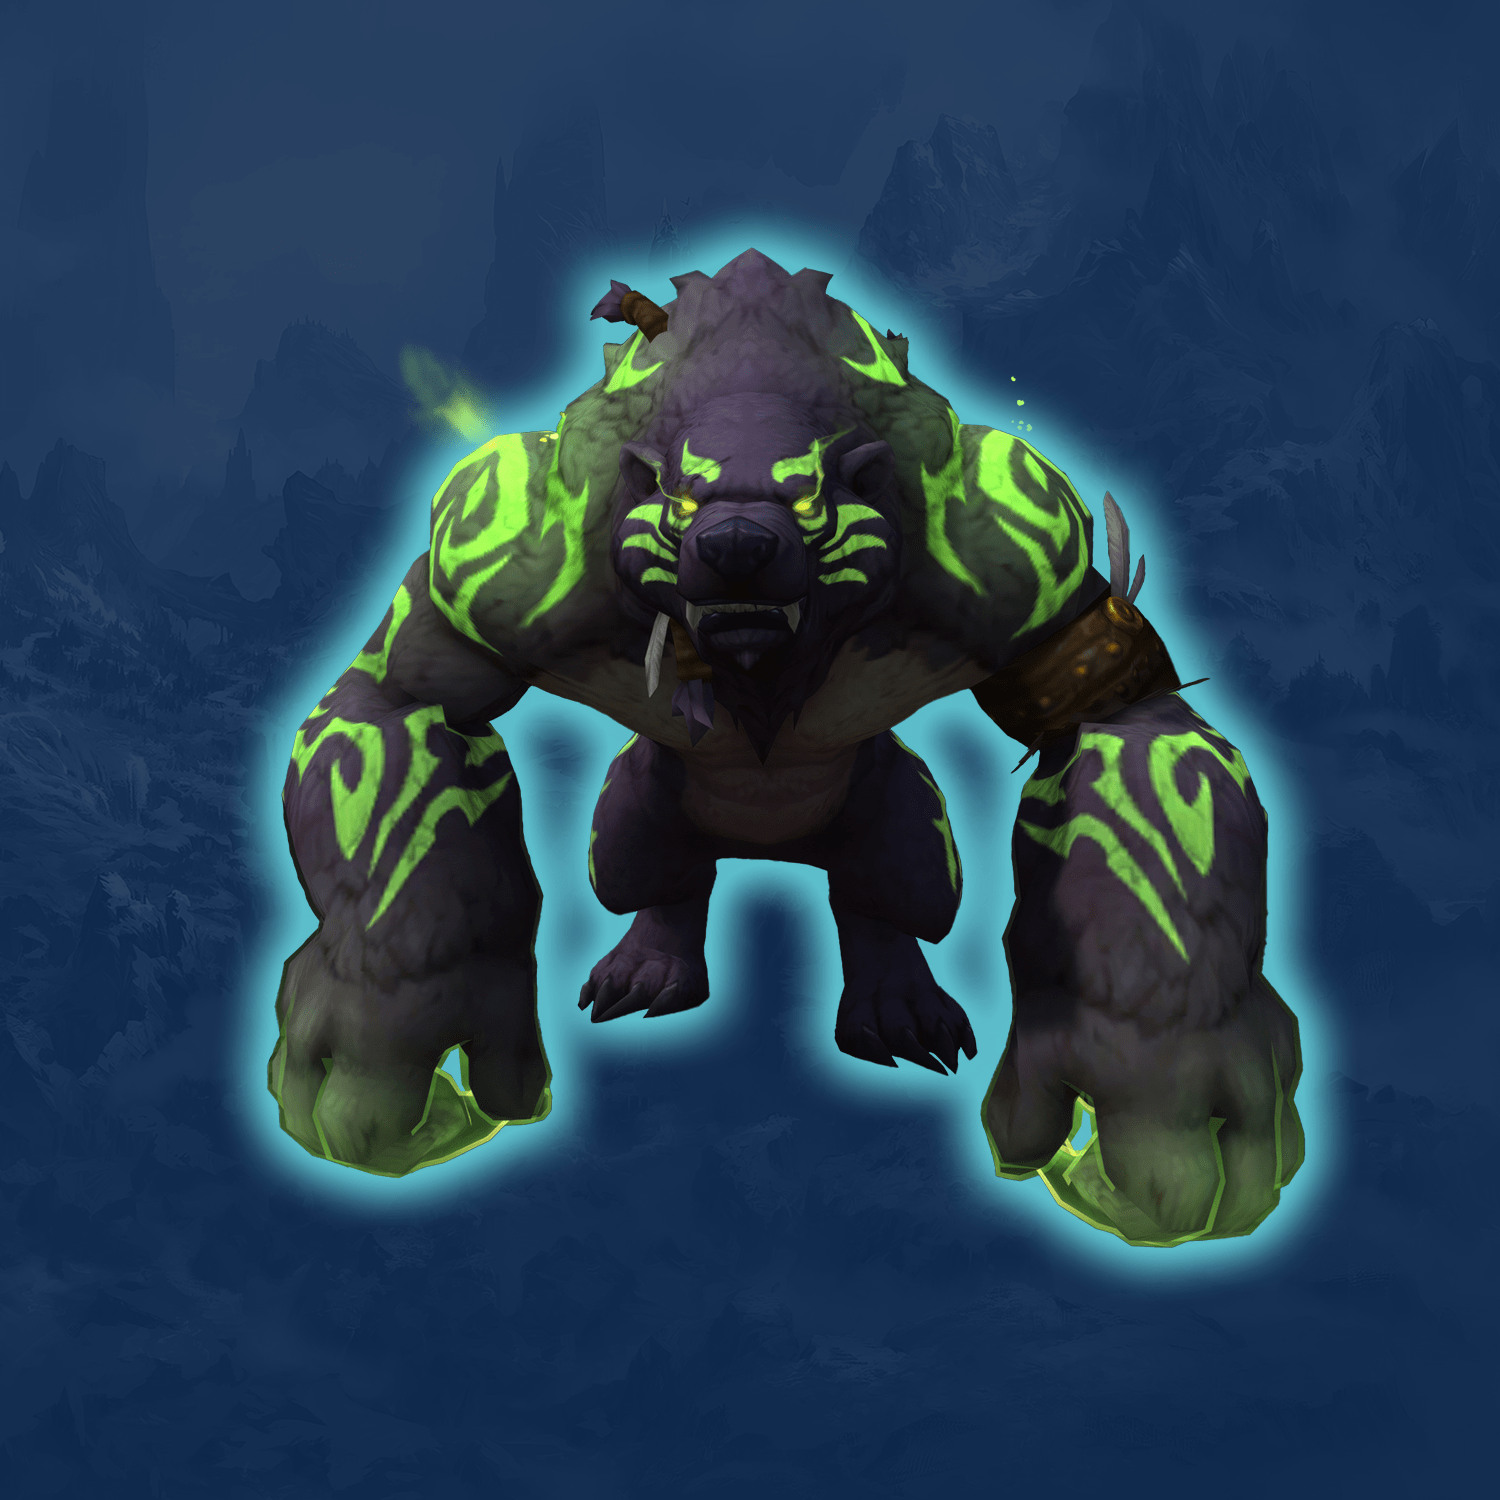 |
|
| Demon Hunter | Demonbane Armor | 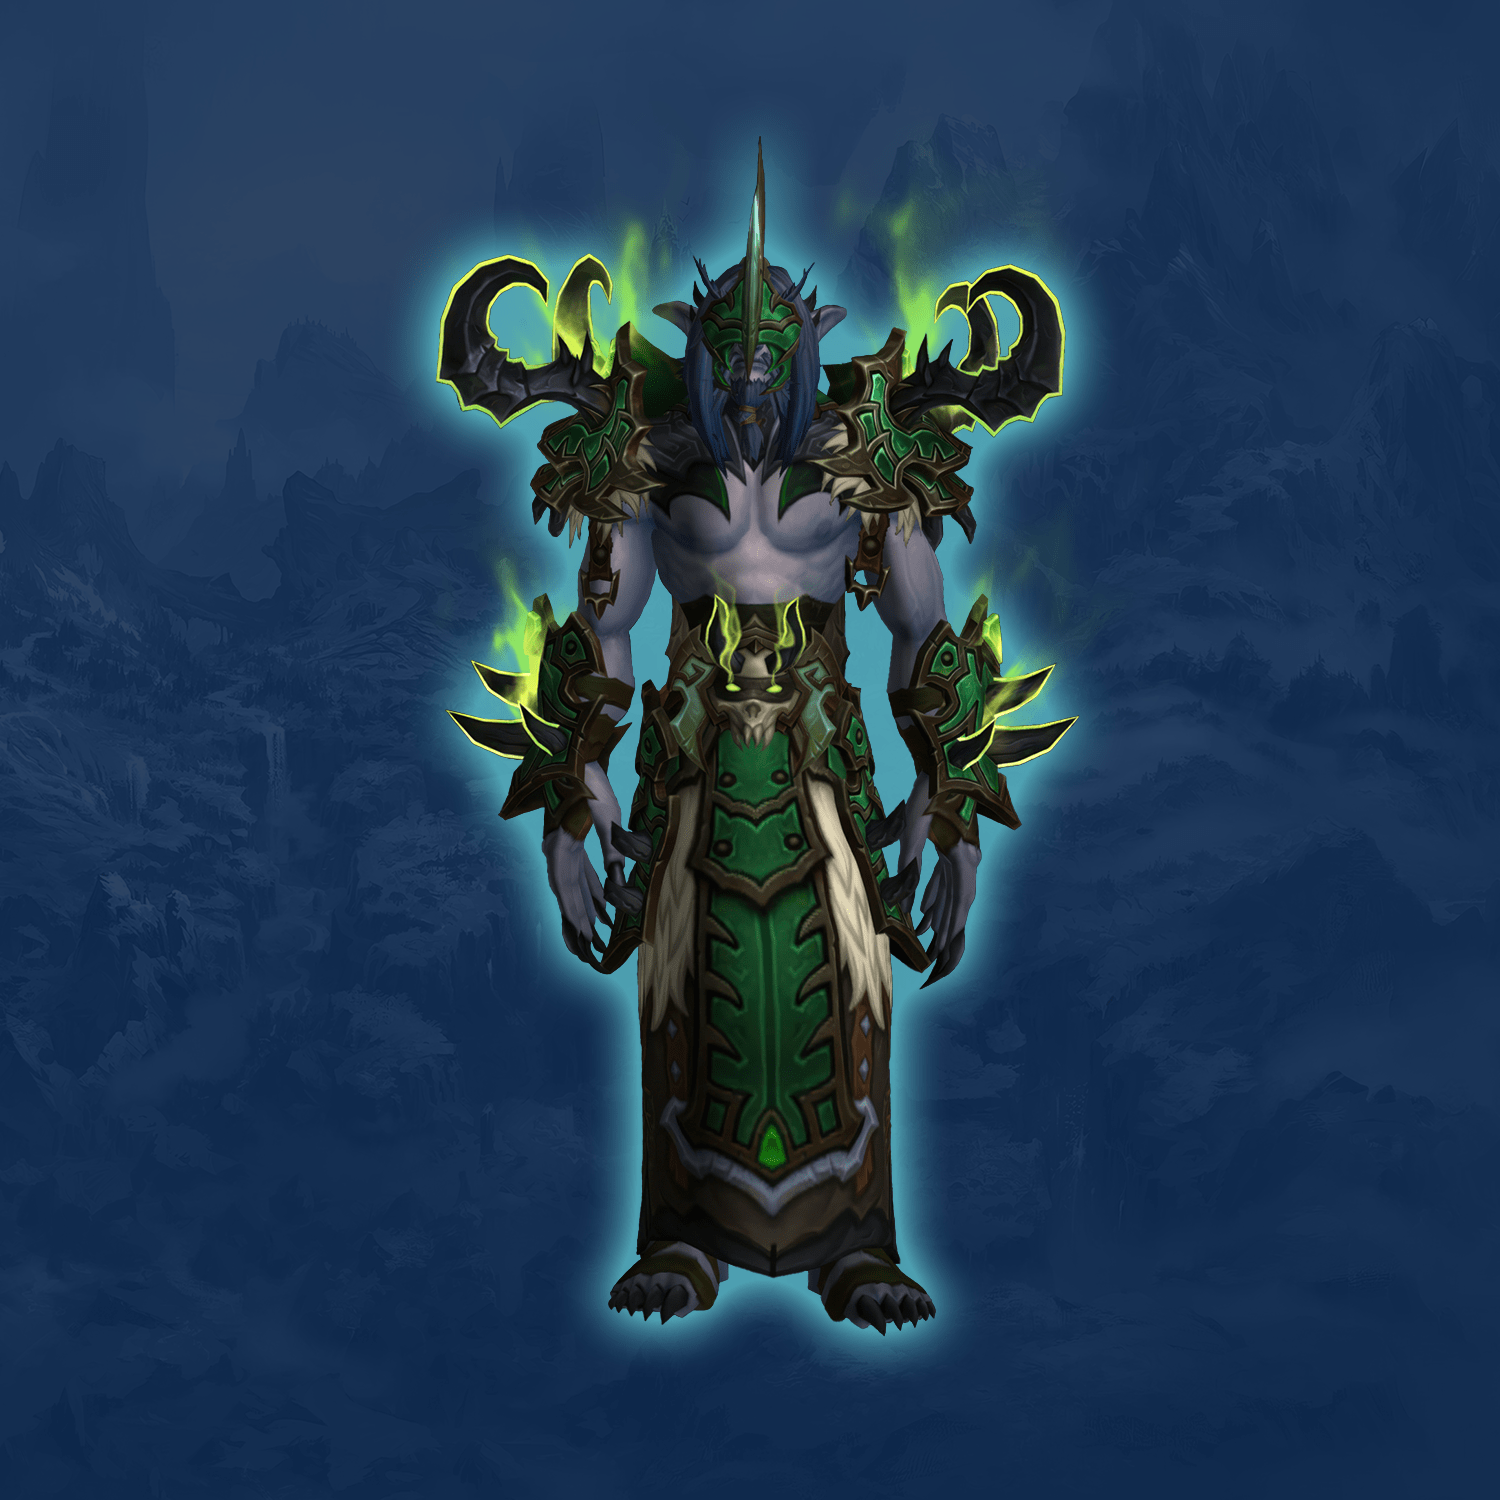 |
| Death Knight | Gravewarden Armaments | 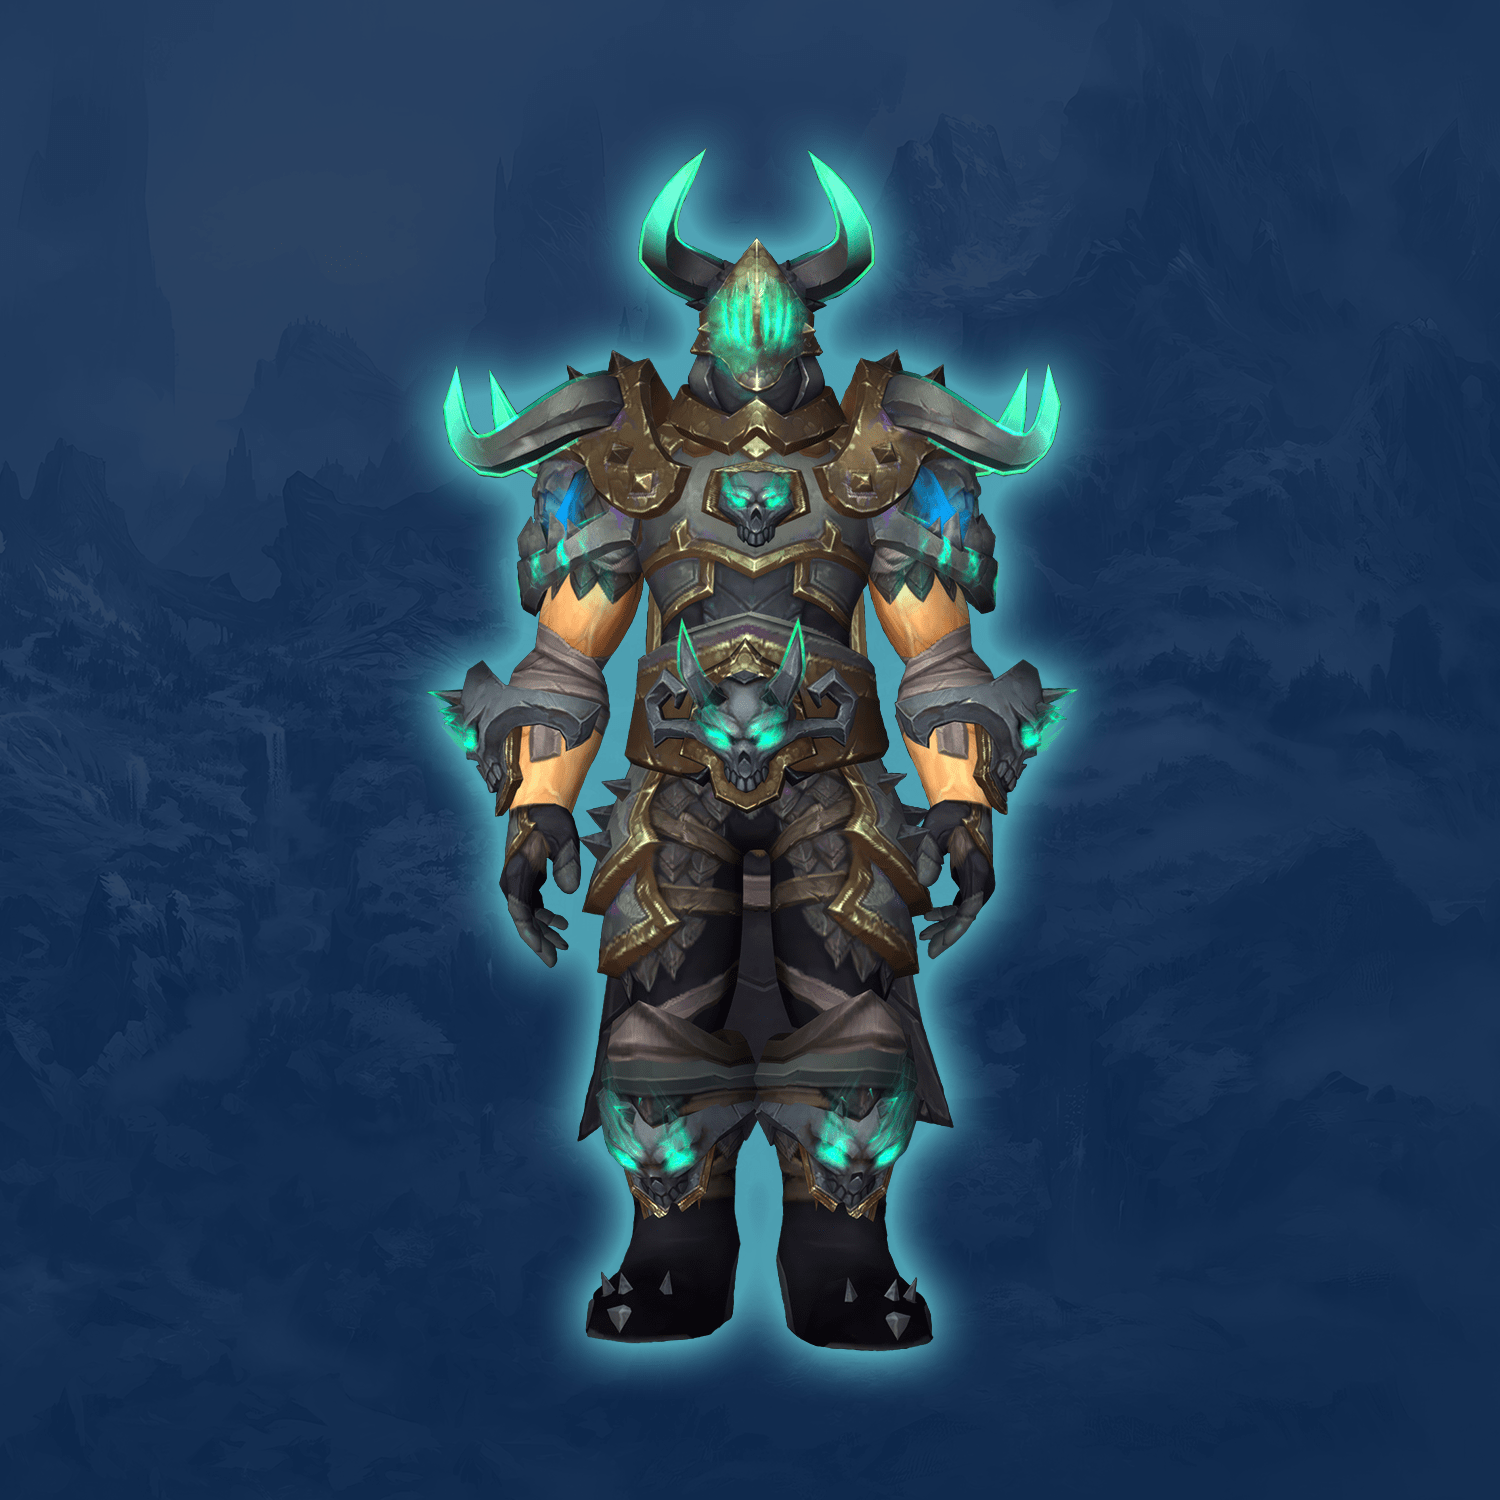 |
Speaking about new Mage Tower appearances, we have a whole new class - Evoker, which will definitely have its own Mage Tower rewards.
Aside from those cool appearances, you can also get a unique Mage Tower mount - Soaring Spelltome. You can receive this mount as a reward for A Tour of Towers achievement. This achievement is pretty hard to complete because you will need to fight your way through all Mage Tower challenges on one account. So, you will definitely need more than one character. No wonder so few players got this achievement. Luckily ,we can help you with that, as well as with pretty much everything else within the game. Check out our WoW Boosting services or contact our Customer Support team.
F.A.Q.
Is Mage Tower still available?
The last time we had access to this PvE challenge was Mage Tower 9.2, however, as stated above, the developers finally decided to once again make it available. Most of the player base remembers how much fun Mage Tower was in Shadowlands and we are sure to expect it to be as much fun in WoW The War Within.
Do you have to be level 80 to do Mage Tower?
As in the previous expansions, you do not have to be max level to try to complete Mage Tower encounters. Much like in Legion Timewalking dungeons, in the Mage Tower your character’s characteristics will be significantly lowered, so you can at least try to complete the challenge starting from level 50. However, on the max level you will have way more talent points and better gear with unique mechanics (like Vault of the Incarnates Tier Set, for example), so it will be way easier to complete Mage Tower on max level.
Is the Mage Tower solo?
Yes. All Mage Tower challenges are single-player.
Did developers nerf Mage Tower?
Quite obviously, the developers did plenty of tuning for Mage Tower to make it challenging but doable with the current talent system. Should we call those changes a nerf? It is hard to say, considering how significantly classes were changed in the The War Within expansion.
Will developers bring back Mage Tower?
Currently, the developers have not stated exactly whether Mage Tower will be available in WoW The War Within.
Is it possible to do Mage Tower at lvl 50?
It is possible, however, at level 50 your talents and gear options will be significantly limited, which will increase the difficulty of the challenge. And, believe us, you do not want that.
Which Mage Tower is the easiest?
The God-Queen's Fury Mage Tower challenge is widely considered to be the easiest to complete. This does not mean that it is easy, it is just easier than other Mage Tower challenges.
What gear is the best for Mage Tower?
Because in Mage Tower characteristics on your gear will be scaled down to level 120, you will need not the strongest gear of the current content, but the gear with the most utility and unique mechanics. You can even use the gear from previous expansions, like Shadowlands Legendaries or unique raid trinkets. See more about that in our Mage Tower Class Guides.
When does Mage Tower end?
For now, we do not have exact information about when Mage Tower will become unavailable for players. You will find an answer to this question here when any official announcement is released.


