 Crispy Jackie
Welcome to our full Shado-Pan Monastery Challenge Mode guide for MoP Classic. This dungeon pushes your group harder than most. This instance is long, punishing, and packed with danger from start to finish. Every boss has mechanics that punish mistakes, and the trash pulls can end your run fast if you lose focus.
You will need tight control, clear movement, and smart cooldowns to survive. The gold timer is not generous, so every second counts. Clean execution matters more than big damage. Once it all clicks, beating the timer feels amazing. This guide shows you how to keep your pace strong and get that gold with confidence.
Tired of grinding? At Skycoach, we can Complete Challenge Mode for you and earn the best rewards. We offer the best market price and the fastest completion time for your order.
Read our other Mists of Pandaria Classic guides:
- Leveling Guide
- Gold Farming Guide
- Class Tier List
- Mogu'shan Palace Challenge Mode Guide
- Temple of the Jade Serpent Challenge Mode Guide
- Siege of Niuzao Temple Challenge Guide
- Gate of the Setting Sun Challenge Mode Guide
- Scarlet Halls Challenge Mode Guide
- Scholomance Challenge Mode Guide
- Scarlet Monastery Challenge Mode Guide
- Stormstout Brewery Challenge Mode Guide
Note: At Skycoach, you can Buy MoP Classic Boost at the best prices with fast delivery. Use our special PROMO CODE (in green) hidden in this article for a 20% DISCOUNT.
Browse our hottest MoP Classic Boosting services


Shado-Pan Monastery Location
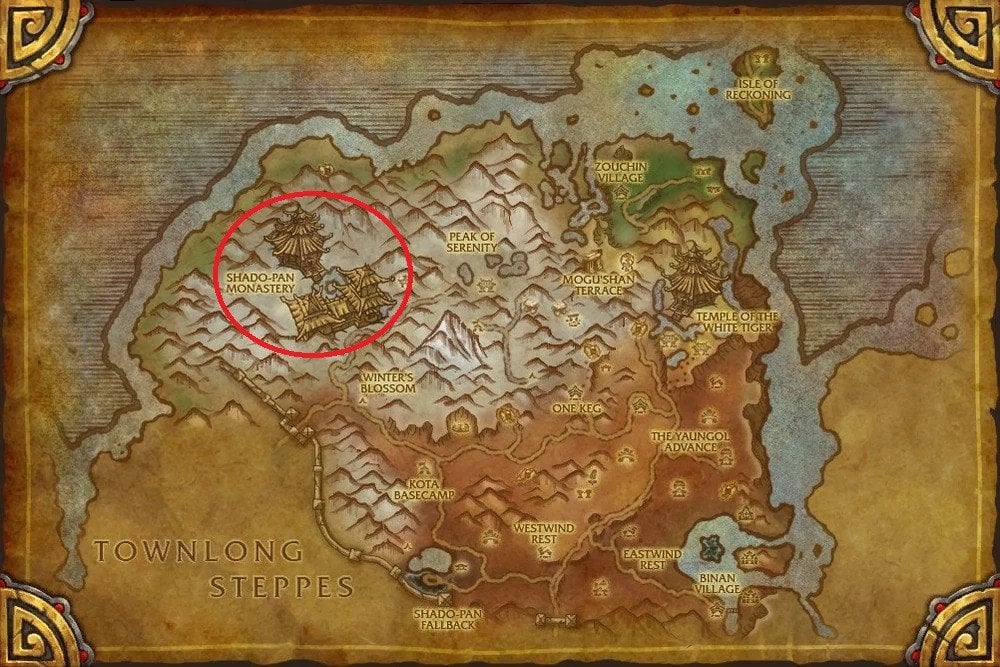
Shado-Pan Monastery location in WoW MoP Classic is in Kun-Lai Summit, near the northwest mountains. The exact entrance is just outside the Shado-Pan Monastery itself. The closest flight path is Winter’s Blossom. It works for both Horde and Alliance players.
To get there fast, fly straight from the flight point toward the large temple structure. Head through the main gate and move toward the base of the stairs. You’ll find the instance portal just ahead. The area is quiet, but you’ll still want to go in prepared. There’s no one to save you if you mess up your invis potion path.
Shado-Pan Monastery Challenge Mode Gold Medal
Gold in Shado-Pan Monastery is not easy. This dungeon is long, and there’s not much room for mistakes. Your group needs to stay sharp from the first pull to the final Defender. The timer is tight, but not impossible if you stick to a smart route and keep your cooldowns ready. The route matters, but your execution matters more. See what requirements you have for Shado-Pan Monastery Challenge Mode Gold medal in MoP Classic:
- Complete the run in 21 minutes or less
- Defeat all four bosses: Gu Cloudstrike, Master Snowdrift, Sha of Violence, and Taran Zhu
- Kill at least 32 enemies
- Purify all 4 Defenders between Sha of Violence and Taran Zhu
You don’t need to kill every trash pack. In fact, that wastes time. But skipping the wrong ones can lock you out of your Defender objectives. You must also be careful not to die during any purifying. One failed channel can cost the run. Most groups kill Taran Zhu, then go back to finish the last Defender with kiting and clever movement.
Shado-Pan Monastery Challenge Mode Bosses

Shado-Pan Monastery is packed with pain. Every boss brings something dangerous, and most mistakes will wipe the group fast. This is one of the longer dungeons in Challenge Mode, and the bosses feel like checkpoints in a brutal endurance test. The layout is open, the enemies are everywhere, and once the fights start, they don’t slow down. Each boss has phases, high damage, and tight movement checks. Here’s a list of all Shado-Pan Monastery Challenge Mode bosses in MoP Classic:
They’re spaced far apart, with a lot of pressure in between. Some areas look quiet, but almost everything is bait. If you rush or split the group, you’re in trouble. Boss fights are punishing, especially if you ignore mechanics. This dungeon rewards clean movement, proper cooldown use, and good timing. You’ll need to plan each boss phase, and then execute without panic. When done right, it feels smooth. When it goes wrong, it falls apart fast.
Gu Cloudstrike

Gu Cloudstrike is a flashy start to the boss fights here. He looks calm at first, then starts tossing lightning and calling in his dragon. The fight has three phases, and each one gets louder, faster, and harder to manage. Most groups wipe here because they don’t expect the healing check, or they stand in bad spots. The boss doesn’t move much, but everything around him does. When the Azure Serpent joins in, the whole room lights up with pain.
Abilities during Stage 1:
- Invoke Lightning: Gu zaps a random player with lightning. If others are too close, they get hit too. Players need to stay spread, or the damage spikes out of control.
- Static Field: The Azure Serpent drops a big electric field where a player stands. It deals heavy Nature damage over time. You have seconds to move before it melts you. The field stays for 15 seconds, so space gets tight.
Abilities during Stage 2:
- Charging Soul: The serpent shields Gu, making him immune to damage. This starts Phase 2 and gives you a short break to reposition. You’ll need it.
- Magnetic Shroud: Every player gets a healing absorb shield that ticks for damage. The shield vanishes when healed fully, and that burst healing splashes to nearby players. If your healer panics or runs out of mana, the group will fall apart.
- Lightning Breath: The serpent blasts a cone of lightning at the tank. It hits hard and often. Tanks need to angle it away from the group. Bad breath equals dead melee.
Abilities during Stage 3:
- Overcharged Soul: Once Phase 3 begins, Gu starts pulsing AoE damage that ramps up fast. It gets worse the lower his health drops. It’s a pure burn phase.
Start with good spacing. Ranged players need to spread but stay in healing range. Keep the area clean and predictable so movement is safe. Pop Heroism or Bloodlust during Phase 2. This helps healers break the Magnetic Shrouds before health drops too far.
Coordinate healing cooldowns. Phase 2 is where runs usually fall apart. You need strong heals ready. Tanks should pull the boss near the railing before Phase 2. This gives space for Lightning Breath to miss the group. In Phase 3, focus on survival. Use personal defensives and push damage hard. The fight ends fast once this phase starts, one way or another. Gu punishes panic. If your team stays cool and clean, this boss won’t block your Gold.
Master Snowdrift

First, Master Snowdrif throws students at you in waves. Then he steps in himself. It’s a long encounter with lots of movement and some nasty tricks. This isn’t a brutal damage check. It’s a focus test. The fight is split into three parts, and the second is where most groups lose control. Clean execution and sharp awareness make the difference here.
Abilities during Stage 1:
- Fists of Fury: Snowdrift throws rapid punches in a cone. It deals Fire damage to everyone in front of him. Tanks need to face him away from the group. Anyone caught in it takes serious damage and probably dies.
- Tornado Kick: He spins in place and kicks all nearby players. It deals heavy Physical damage and knocks people back. If you’re in melee, you move or die. This can mess up positioning fast.
Abilities during Stage 2:
- Ball of Fire: During Phase 2, he splits into three copies. Each one throws fireballs that cross the room. These projectiles hurt a lot. The room fills with chaos fast. Standing in the wrong spot is a death sentence.
Abilities during Stage 3:
- Tornado Slam: Back in Phase 3, Snowdrift picks a random player and chases them. If he reaches you, you get slammed for 60% of your max health. Don’t run too far. Healers can handle the damage if you stay close.
- Parry Stance: Snowdrift goes fully defensive. All attacks miss him. If you hit him in melee, he stuns you with a palm strike. If you hit from range, he flies at you with a kick. Either way, it’s bad.
- Unleash Vibrations: After stunning a player in Parry Stance, he explodes with AoE damage. If multiple players attack him during this phase, expect chain stuns and heavy group-wide damage.
Assign one DPS to each clone before Phase 2. This lets you kill the fake ones fast and cut down the fireballs. Use AoE stuns or slows on the novices in Phase 1. It speeds things up and keeps melee safer. Don’t panic when he chases someone in Phase 3. That player just needs to stay nearby and get healed. Stop all attacks during Parry Stance. Watch his posture closely. Triggering a stun wastes time and risks wipes. Use movement cooldowns like Tiger’s Lust or Stampeding Roar to dodge Ball of Fire paths. This fight is all about discipline. It’s long, it’s flashy, but if your group stays focused, Snowdrift falls clean.
Sha of Violence
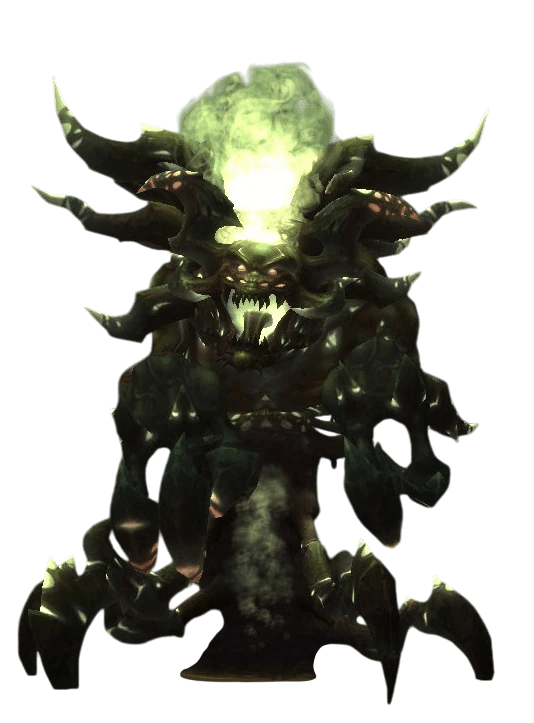
Sha of Violence is the third boss packed into a tight arena. It feeds on aggression and throws it right back at you. Every crit powers up your damage but also burns your health. The fight is full of distractions. Adds spawn constantly, random spikes fly at your feet, and the tank gets stunned out of nowhere. There’s no rest here. You move, react, and dodge while staying on target. If your group panics, this fight snowballs into disaster fast.
Sha of Violence Abilities:
- Disorienting Smash: Sha slams the tank, dealing Shadow damage and forcing them to wander around confused. If you don’t dispel it fast, he turns and punches someone else. That usually means a dead DPS. Priority dispel every time.
- Smoke Blades: A swirling cloud covers melee. Their crit chance drops to zero, and the only way to remove it is to keep attacking. After enough swings, it wears off and gives a massive crit buff for one hit. Manage this right, and you burst hard.
- Parting Smoke: When Smoke Blades ends, your next attack crits for double damage. This window is short. Time your big hitter. It's the core mechanic for stacking damage and pushing the boss quickly.
- Sha Spike: Random spikes shoot out under players. They knock you back and summon a Volatile Energy add. These things explode when they die. You don’t want five of them chasing you. Always move preemptively.
- Enrage: At low health, the Sha freaks out. His attack speed jumps by 50% for 30 seconds. He starts shredding the tank. Use a Tranq Shot or similar to remove it, or pop defensives and hold on.
Never dispel Destructive Influence, the crit damage buff. It stacks, and every crit feeds your DPS. Watch the tank. If they’re stunned, dispel fast before the boss turns around and punches your healer. Spread out, but stay mobile. You need to dodge spikes and avoid surprise knockbacks. Only kill Volatile Energy away from allies. Stun and drag them before finishing them off.
Bloodlust in the second half to take advantage of high Destructive stacks. Burn him before things fall apart. This is one of the trickiest fights in the dungeon. It punishes lazy play and slow reactions. But once your group learns how to control the chaos, it becomes a smooth burn to the finish.
Taran Zhu

Taran Zhu is a mental fight as much as a physical one. The Sha of Hatred twisted him, and now his battlefield is filled with poison, illusions, and pure rage. This fight is messy, movement-heavy, and relentless. There's poison on the floor, orbs pulling you in, and constant pressure on your healer. If your group doesn’t stay sharp, the fight falls apart fast.
Hatred:
- Haze of Hate: Everyone builds up Hatred over time. At full stacks, your screen darkens, your healing is almost gone, and your hit chance drops to zero. You hit harder, but you’re blind. You need to stop and meditate before it gets out of control. Use it early and often, not just when it’s full.
- Meditate: A five-second channel that clears your Hatred stacks. You can’t move or act while doing it. You can also cancel it early if you just need to dip under the danger threshold. Smart use of this saves lives and keeps DPS rolling.
Taran Zhu Abilities:
- Rising Hate: He shoots bolts of Sha energy at random targets. Moderate Shadow damage, nothing too crazy. Can be interrupted. Should always be interrupted. It’s free group damage otherwise.
- Ring of Malice: Zhu surrounds himself with a slow-moving shadow ring. It ticks fast if you stand in it and slows movement. Getting caught in it while running from other mechanics is how people die. Treat it like lava and move early.
- Sha Blast: A knockback and Shadow nuke that targets whoever is a threat. Happens during Ring of Malice. Tanks need to plant their feet and pop a cooldown if they’re low. Healers, be ready.
- Gripping Hatred: A big orb spawns and starts pulling everyone toward it. While doing that, it lays a shadow pool under your feet. If you don’t escape, you melt in seconds. Range needs to kill it fast. If you’re a healer and can’t reach people through the pull, someone’s going to die.
- Pool of Shadows: Damage zone left behind by Gripping Hatred. Ticks hard every second. Don’t stand in it. If you get pulled into one, pop a movement skill or meditate fast.
Meditate early. Don’t wait until you’re blind and useless. Keep range players on different sides of the arena so one of them always has a line of sight on Hatreds. Never stand near the boss during Ring of Malice. It’s a death trap. Interrupt Rising Hate every time. It’s free damage if you don’t. Kill Gripping Hatreds quickly. Range needs to be alert, and melee needs to move fast if one spawns nearby.
This fight gets hectic fast. It’s easy to feel overwhelmed. But if your group stays calm, clears their Hatred early, and keeps pressure on the Hatreds, it’s very winnable. Taran Zhu is a rough closer, but he’s beatable with clean play and good habits. BLOG20
Shado-Pan Monastery Challenge Mode Strategy for Gold
This dungeon is long and demanding. Getting Gold means staying sharp for nearly 20 minutes without slipping. The route has some tight pulls and rough mechanics, but with a solid plan, it’s very doable. Each boss tests a different part of your group, and mistakes near the end can still wipe the run. We’ve got the best Shado-Pan Monastery Challenge Mode strategy for Gold in MoP Classic:
| Boss | Strategy |
| Gu Cloudstrike | He is a fast-paced opener. His mechanics aren’t hard, but he drains your healer fast with Magnetic Shroud. It’s more of a healing stress test than anything else. Clean footwork makes it easier. |
| Master Snowdrift | This boss throws a lot of damage around, but his clone phase is the real danger. If your group handles the fireballs and splits efficiently, he’s not too bad. One of the more forgiving bosses if you know what’s coming. |
| Sha of Violence | He is the most technical fight in the dungeon. It’s easy to lose control here. Players can get disoriented, DPS need to hold their crit buff, and healers are under constant pressure. This is the most likely wipe spot. If you beat him clean, the rest of the run feels smoother. |
| Taran Zhu | The Hatred mechanic makes your group weaker the longer the fight goes. Gripping Hatreds, pools, and rings force constant movement. It’s not mechanically deep, but it’s intense. Positioning is everything. |
Gold strategy here focuses on keeping control. Plan your cooldowns, keep moving, and don’t panic. The real challenge is consistency from start to finish. Mistakes hurt more because of how long the dungeon is. But if your team learns the rhythm, the Gold timer is well within reach.
Browse our hottest MoP Classic Boosting services


Best Classes for Shado-Pan Monastery Challenge Mode
Specific classes fit this dungeon better due to their abilities and the way they counter certain boss mechanics. Their strengths make the hardest parts feel easier. Movement, control, and survivability matter more here than raw damage. These five classes bring tools that save time, fix mistakes, and carry fights when things get messy. Here are the best classes for Shado-Pan Monastery Challenge Mode in MoP Classic:
- Death Knight: Great at locking down dangerous trash. Death Grip pulls key mobs into group stuns. Anti-Magic Shell helps survive Gu Cloudstrike’s damage spikes. Army of the Dead can soak early packs or buy time in emergencies. They also bring solid interrupts and self-healing to stay alive under pressure.
- Druid: They have everything and more. Stampeding Roar is huge for the invisibility potion route and crossing the arrow field. Shapeshift removes roots if you get frozen. Their healing is strong for fights like Cloudstrike or Sha. Balance and Feral both bring solid DPS, and Restoration has great group utility.
- Monk: Mobility helps a lot here. Roll and Tiger’s Lust make repositioning easy. Mistweavers shine on Magnetic Shroud healing. Windwalker has good cleave for trash. Monks also have Paralysis for crowd control and Leg Sweep for AoE stun, both perfect for packs near Defenders.
- Hunter: A strong pet class that brings great control and burst. Freezing Trap can help with trash. Primal Rage gives your group Bloodlust. Hunters shine in the Gripping Hatred part of the Taran Zhu fight because they can move and shoot easily. Dismiss the pet before using Invisibility Potion, or you’ll get caught.
- Mage: Time Warp gives Bloodlust. They have fast AoE damage for trash waves and strong mobility for dodging Sha mechanics. Ice Block saves lives, and Blink helps avoid bad pulls. They also burn down Snowdrift clones fast during Phase 2.
These five bring power, safety, and smart tools. Build your comp around movement, burst, and ways to reset mistakes. However, the answer to how to win Shado-Pan Monastery in Challenge Mode MoP Classic is straightforward – know the class and spec you’re playing. This is more important than blindly following the meta.
Shado-Pan Monastery Challenge Mode Rewards
Finishing Shado-Pan Monastery on Gold feels good, but the rewards make it better. You don’t just walk away with an achievement, you get tools that actually matter in-game. See what Shado-Pan Challenge Mode rewards in World of Warcraft MoP Classic you have:
A teleport spell that sends you straight to the dungeon. It’s got an 8-hour cooldown, but it’s perfect for quick access or when you’re chasing a better time. You also get Challenge Mode points that help unlock unique transmog sets. These aren’t basic recolors. They stand out and look earned.
Shado-Pan Monastery Challenge Mode Tips
We’ve got several smart, weird, and very real tricks that separate a clean Gold run from a failed one. All of them come straight from actual Gold medal practice and runs. They might be really useful if you’re stuck at a certain point or can’t defeat a specific boss. Here are Shado-Pan Monastery Challenge Mode tips in MoP Classic:
- Don’t DPS Master Snowdrift’s real clone first: During his split phase, many groups rush the real one. Don’t. Kill the two fake clones fast. Their fireballs hurt more than the boss himself. Clear the room, then handle the real one. You’ll avoid unnecessary deaths and keep the healer sane.
- Abuse simultaneous Defender clicks: There’s a trick with the Defender purification mechanic. If two players click the statue at the same time, you can sometimes get credit twice. It’s hard to pull off consistently, but if your group practices it, you can skip an entire trash pack before Taran Zhu.
- Let a player die on purpose before invis pot: If someone used their potion early by mistake, it’s not a wipe. Have them die right before the invisibility potion section, then rez them after the group skips. It resets their potion cooldown and saves the run.
- Don’t dispel Destructive Influence from DPS: Sha of Violence gives DPS a stacking damage buff when they crit. It also puts a light DoT on them. Never dispel this unless it’s on the tank during a disorient. You want that damage buff to stay up as long as possible.
- Use Meditate to ignore Gripping Hatred pulls: Taran Zhu’s Gripping Hatred will drag you through shadow pools and get you killed. But if you time Meditate right before the pull hits, you won’t move at all. You can even cancel the buff right after to get back in the fight. It’s a clean dodge if used well.
Conclusion
This brings us to the end of our Shado-Pan Monastery Challenge Mode guide for Mists of Pandaria Classic. This dungeon is long, brutal, and full of moments where one mistake ruins everything. But when it all clicks, this dungeon becomes one of the most satisfying runs in MoP Classic. Each boss has sharp mechanics that punish lazy play. Every pull needs planning. Every second counts.
But Gold is possible. With the right group, smart tricks, and a solid route, you can get through clean. Use the invis skips. Time your cooldowns. Think ahead. Then flex that Gold medal and teleport like a champion. The monastery won’t beat you if you stay sharp and play tight.
F.A.Q.
How to get gold in Shado-Pan Monastery Challenge Mode in MoP Classic?
Finish the dungeon in under 21 minutes, kill all four bosses as well as enough trash, and purify four Defenders.
What are the Shado-Pan Monastery Challenge Mode bosses?
These are the bosses you’ll face in Shado-Pan Monastery:
- Gu Cloudstrike
- Master Snowdrift
- Sha of Violence
- Taran Zhu
Where is Shado-Pan Monastery Challenge Mode in MoP Classic?
It's in Kun-Lai Summit with a portal at the end of the road.
What is the best strategy for Shado-Pan Monastery Challenge Mode?
Plan every pull, use invisibility skips, handle boss mechanics tightly, and time cooldowns well.
Is Shado-Pan Monastery Challenge Mode hard in Pandaria Classic?
Yes, it’s one of the longest and most punishing Challenge Modes in MoP Classic.


