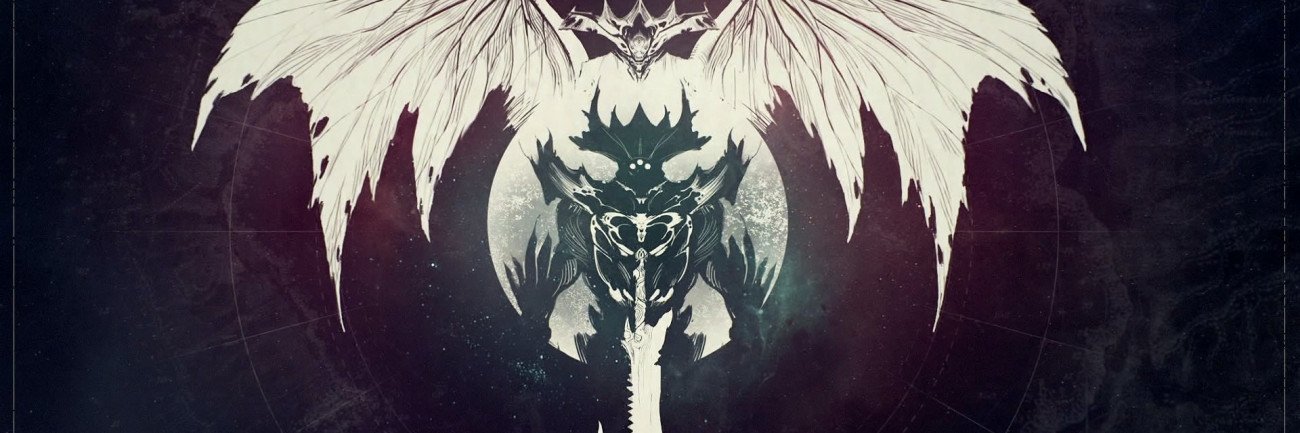
The krill, a race known for their extreme dedication to darkness and Sword Logic, lived in a harsh and hazardous land, destined to live and die quickly and miserably.
But then, the three daughters of the Krill’s king ventured within their world’s ocean, looking for something better than the Krill’s home world. The sisters encountered The Worms - ancient gods, wielders of dark powers. The sisters agreed to be transformed into a vessel for the worms’ offsprings in exchange for immortality and the ability to wield unimaginable force.
IMPORTANT NOTE: At Skycoach, you can also Buy Destiny 2 Boost at the lowest prices and with the fastest delivery. You can make your first purchase even CHEAPER if you find our special PROMO CODE (highlighted in green) hidden in this article and get a 20% DISCOUNT.
Check out our most popular Destiny 2 Boosting services offered at the best market price:


And so, The Hive was born, with the sisters transformed into Xivu Arath, the Knight; Savathun, the Witch Queen; and Oryx, the Taken King.
Throughout the original game and its sequel, The Hive remained powerful and probably one of the most common enemies encountered throughout the games. Thus, the Witch Queen chapter told us the terrifying story of Savathun’s relationship with Light and Darkness and foreshadowed some bigger threat that we, The Guardians, would soon face.
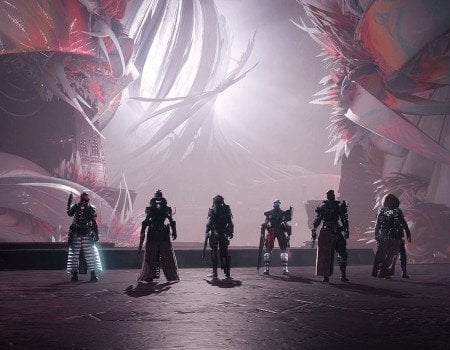
This of course is an oversimplification of the whole “oldest and most powerful race known to the universe” ordeal, but it does highlight how important Oryx is to the lore of Destiny. It is not the biggest enemy of Destiny 2, but quite significant, nonetheless. This Destiny Oryx Raid guide breaks down most of the mechanics, with a few notes our boosting team made during their first expedition. This king's fall oryx guide breaks things up for your convinience.
Legacy King’s Fall and how it Works
So yes, the authentic King’s Fall was released in 2015. 7 years ago, huh. Whatever you think of Bungie’s habit of reusing content taken from the original game, it has worked so far. We have a privilege to relieve 2015’s “The Taken King,” the most mind-blowing engagement with an improved, sparkling next-gen tint. And whereas we slightly missed the boat with writing “destiny taken king raid guide” or “the taken king strategy guide,” the redesigned and upgraded version could likewise use some explaining.
This is what “Legacy” means - we already experienced it in the forerunner game, and with the current “Season of Plunder” we can do it once again. Versions are not exactly a carbon copy of each other, though, and there are, in fact, differences, including new mechanics and enemy placement. Original Destiny’s King’s Fall raid walkthroughs will be of no help to you, sadly.
All of which we will look into further, explaining every stage and mechanic. We will also write a few paragraphs about the potential rewards you can get, their advantages, disadvantages and usefulness in general. Let’s start with a few pieces of advice on your setup. This King’s Fall raid guide is here for you.

Getting Hot and Ready
Classes
Whatever anyone says - classes matter. Sure, YouTube gets filled up with “I Passed King’s Fall with only one warlock and half of a titan” videos pretty fast. However, if you are looking for a good time and not a rage inducing run with dozens of wipes, these recommendations will help you achieve success.
Warlock’s Well of Radiance is the best choice for survivability and increased overall damage. In later engagements where things go awry, this may be the only thing keeping your team alive. Chaos Reach is also an option for those looking to deal extra damage. BLOG20
Thundercrash is the best pick for titans, by the same logic. Ward of Dawn could also work, but hey, launching like a missile into Oryx’s chest cavity is a one in a million experience.
While hunters are best at debuffing with Deadfall Tether or straight up shooting through things with Golden Gun.
And remember, it is necessary to have a character with at least 1580 Power. Even with this King’s Fall guide, you still need to have some gear and skill to fly through.
King’s Fall checkpoints are rare and placed far in between bosses and encounters, so stay alert at all times.
Guns
Weapon recommendation are rarely different for a specific raid. If you are into that kind of stuff, you will see nothing new here.
- Izanagi’s Burden for midrange enemies and minibosses. Aim for their crit spots and see damage numbers fly.
- Arbalest for Golgoroth’s stage, where accuracy paired with a lot of damage will save you quite a few runs.
- Lament and Divinity for everything with shields, including some of the bosses, minibosses, and champions.
Stages Step by Step: Tactics and Recommendations. King’s Fall Raid walkthrough.
Starting Area: Court of Oryx Map and Walkthrough.
This area is basically your own shooting ground and warm-up. It exists purely to introduce you to some of the raid’s mechanics.
Upon arrival, split your team into three separate groups:
- Lefties: Enter from (you guessed it) the left room. Collect the relic and bring it back to the central area.
- Righties: Same as the Left Room Group.
- Centrals: Hold the central chamber, kill everything that spawns in there, and assist Lefties and Righties.
The whole concept is pretty clear here. Righties and Lefties grab relics from their rooms, and then deliver them back to the center. Repeat several times for every statue in the central chamber. Meanwhile, the Centrals keep the entire thing smooth and clear, kill adds, and destroy Blights blocking the doors.
After a certain amount of deposits, Hiveish mist will disappear, and the Fireteam will be allowed to proceed.
Notes: Centrals should definitely spawn rifts and Well of Radiance as much as possible. It will make dealing with the Court of Oryx champions much easier.
Crux
Ah, sweet memories. You will see several pendulums that you must cross. Old-timers remember how in an original raid these things actually swung, leading to a course of events where your flawless run was ruined because of a single jump, one very unpleasant possibility.
Now it is a walk in the park. One very dark, scary park.
Portico
Yay, jumping again. Having fun yet? This area is a sort of hangar. Traverse the ships , but be careful - they disappear sometimes. Reach the tower at the end of the “hangar,” and press two slabs on the opposite sides of said tower. Pretty easy, right?
Secret Chest #1: Check the left side of the gate for some holes. When you find it, send two other players to the aforementioned slabs. A door in the hole will become accessible and there is your chest!
Basilica and Deadly Relay Race
No jumping required here, thank god. But there is one hell of a confusing mechanic. Worry not, though, we will try to break it down.
Assemble your lovely teammates and split them into two squads, with a number assigned to each squamate:
Squad One:
- Player One;
- Player Two;
- Player Three.
Squad Two is created in a similar manner. Now, for your understanding’s sake, let’s slowly break down everything you will need to watch out for in this confrontation. It is easier than first impressions imply.
Player One grabs the orb on the chosen side of the room. Gets buffed with a Brand;
Player One then proceeds to kill the living hell out of some ads in the area until they receive Deathsinger’s Power buff;
Player One then goes all the way back to their chosen room and activates the Totem of Annihilation (spend more time than needed, and this very totem will annihilate your entire team, hence the name);
Player Two then slays the Hive Wizard, summoning the Taken Knight with a fancy “Blightguard” name. Slays him too, duh.
Player Two grabs Blightguard’s orb and gets buffed with a Brand.
Player Two then runs to Player One and sends them to deposit their buff stack, replacing them.
Player Three then does this entire “killing Blightguard and replacing Player Two” thing again.
Told ya, a Relay Race! All Three Players repeat the process until the stage is completed and the doors to the next chamber unlock.
Notes: Two Unstoppable Knights will appear during the fight, so make sure to feed them some lead.
War Priest Fight

No more acrobatics and overcomplicated Brand mechanics. You have reached your first boss, congrats. No sarcasm, our first team rage-quit before we even started the run.
This fight is your first real challenge. Skycoach recommends splitting your team 3/3. This chamber has three usable slabs: the central one, the left one, and the right one. Your squads will have to hold each. But let’s spice things up and give them nicknames, because nicknames are fun. Our blog team is such a blast at parties (no).
Player One holds their slab of choice when necessary, so let’s call them Clench. You are going to do a lot of clenching here, Skycoach guarantees.
Player Two will hunt for Taken Knights, similarly to the “Basilica” stage. These fellas are our “Hounds” - they do the hunting.
A whole new concept you need to grasp during this fight is called the “Glyph Sequence”. Basically, Central Clench stands on their slab and observes which big rock around the platform is shiny. The shiny rock indicates to the first Clench to start the Sequence. For us, it was Right Clench, so they start the Sequence, doing the same thing with locating the needed shiny rock and relaying it back to the team. Repeat this process until every Clench is on their platform and in the correct order.
After that, our last Clench (the left one, in our case) gains the Brand Initiative buff. While the buff is active, your Fireteam can blast War Priest into oblivion. Throw everything you have at him at this point, because after 15 seconds our Clench will lose the buff, dying in the process. UNLESS, our “Hunters” do some legwork.
Now, the First Hunter’s job is to prolong the damage phase, so after first Brand Initiative appears, Hunters leave their blasting colleagues and start looking for Taken Knights. These mobs will grant Hunters another Brand buff, which, upon arriving at our Initiative, will prolong their buff for a few more seconds.
Second Hunter does the same looking for Knights thing, but with a 5-second delay. The process repeats until the War Priest is priesting no more.
Note: If your Hunters are bad at their job, the Priest summons a huge Taken-Killing-Your-Entire team spell, which can potentially wipe your entire team. If summoning takes place - hide behind one of the pillars, but hide together - this will help you prolong this fight as long as possible.
Gather your team members and proceed to the next location.
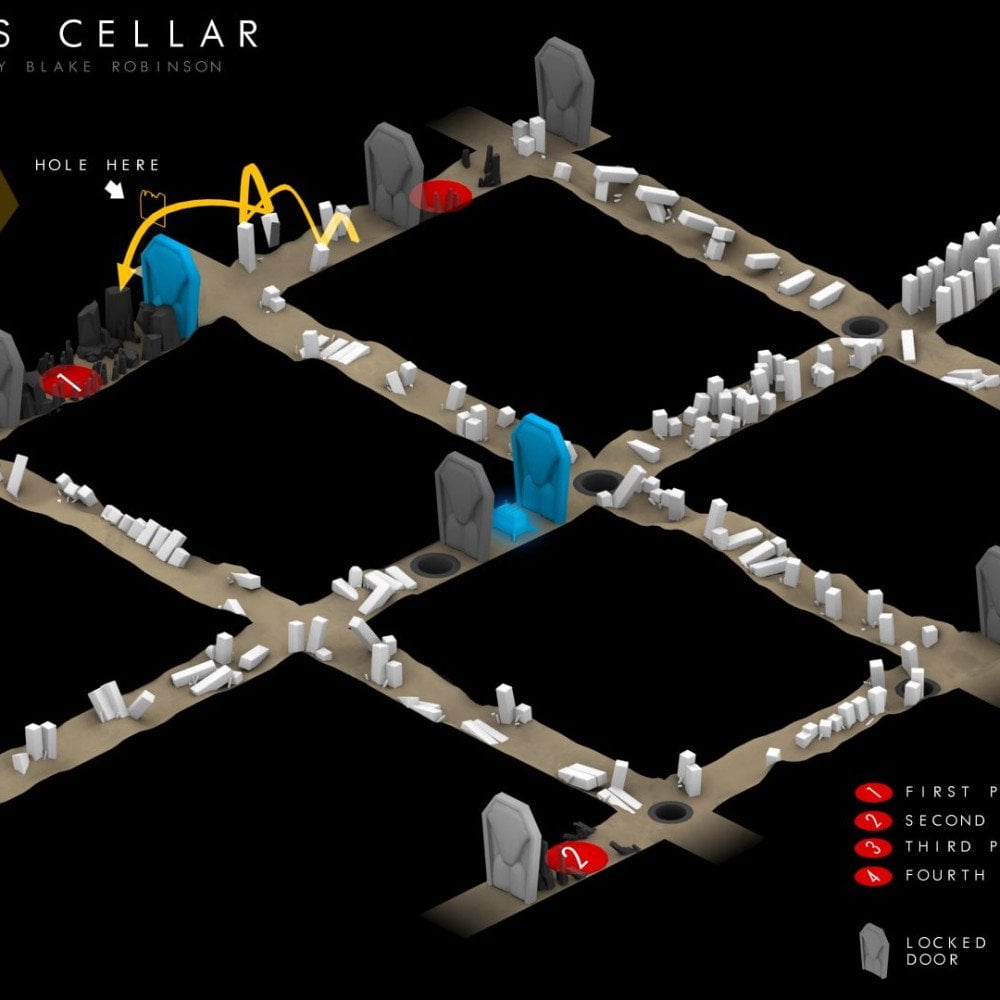
Golgoroth’s Maze
For once, this location is an actual maze and not just a fancy name. Without the proper map, getting lost is an incredibly easy thing to do here. Good thing you have this King’s raid guide to help you. Pressing the plates hidden deep inside the maze also gives you a chance to collect the Second Secret Chest.
To reach the next encounter, find a huge glowing thing, a Lantern-shaped one. From there follow our directions: left, left again, right, and then forward. It is good to have someone experienced in your squad - every old-timer probably knows this path as a back of their hand.
Sooner or later, you will stumble upon a door. When everyone is ready, proceed to the next chamber.
Secret Chest #2: Use Blake Robinson’s King’s Fall raid map to locate the plates you need. The maze itself has not changed, but the order of plates itself is slightly different:
- 2;
- 5;
- 3;
- 1;
- 4.
Golgoroth and his Bubble Cave
The second big boss and our third splitting into squads. I know it sounds like some try-hard technique, and it is true that it is possible to get through the confrontation with minimal beforehand planning, but trust us and our boosting team - stuff is much easier when every team member knows exactly what to do.
You will need two squads this time. Skycoach recommends splitting your Fireteam 4/2.
Four guys, the ones with the best toys, are your DD’s. Throw some warlocks with their novas and some hunters with their debuffing bows in there , and you are good to go. The rest of your team will be tanks, and these guys better be some really fat titans with their resilience stat maxed out.
Tanks are tasked with taking Golgoroth’s gaze away. This is a pumped-up traditional ogre’s long-range attack. You have probably died from a couple of those before. We all have. Here though, it is much stronger and can potentially insta-kill you.
When the tanks distract Mirin Ogre, the DD’s should destroy the white bubble at the cave’s left side. Once it is dealt with, a slimy pool will appear under it. Similarly to Gambit power pools left after Envoys’ death, it boosts your damage numbers and allows you to take the Ogre out much faster. While in this pool, your team can shoot Golgoroth in his torso.
The whole “distracting Golgoroth” thing is done through shooting a huge tumour on the back of ogre’s head. Tanks should at all times keep the DD’s updated on whether Gol is distracted, and it is allowed to start blasting him.
Repeat the entire thing a couple of times till the Ogre is no more. Pretty easy stuff in comparison with previous encounters, but there is one thing that the DD’s should keep in mind at all times - RNG debuff.
From time to time, a random player in the power pool will turn into a living bomb and should leave their comrades for a time being, allowing the bomb to safely detonate away from their teammates.
Note: If EXTRA and RISK are your last names (yes, both of them), then you should try damaging the Ogre with the bomb debuff. It deals some hefty damage and may speed up the boss killing. Not every "King Fall raid walkthrough" is aware of that.

Transept
Oh wow, ANOTHER JUMPING SECTION, HOW NICE. Your best bet here is to keep to the left side of the opening, dodging dead beams, and slowly traversing through. However, also keep your eyes peeled to the right side of the chasm. Eventually you will see a few distinct ledges.
Secret Chest #3: Jump on those ledges. Summon your Ghost pal and observe - secret invisible platforms! Jump onto them till you reach a distinct vertical column. The chest is right behind it.
Once you are done collecting, jump back and reach the bottom of the chasm. After interacting with some pressable platforms - you are good to go. Now let’s proceed to our Oryx Daughters guide.
Oryx’s Offspring: Ir Halak and Ir Anuk, the Deathsingers.
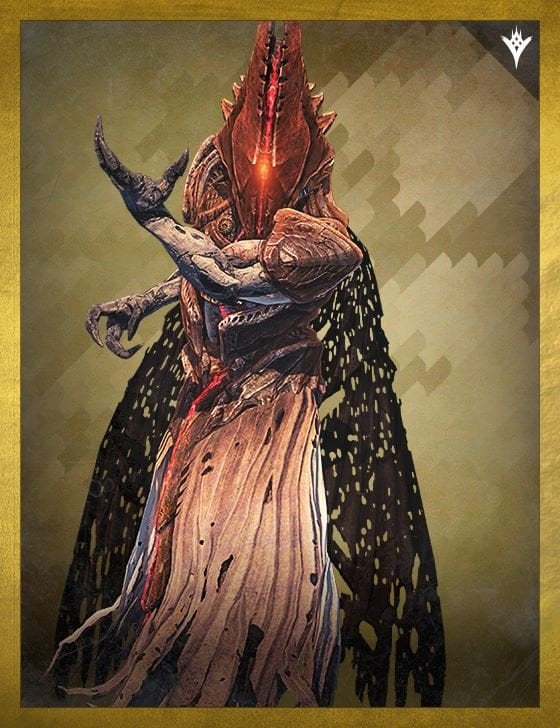
Now, Oryx will not allow you to just waltz into his personal chamber and blast him into Saturn’s orbit. Not yet, at least. First, you have to deal with his daughters, and they are as tough as their old man. Also known as the King’s Fall daughters or the Deathsingers, these two are arguably the most difficult confrontation in the entire raid. This Daughters of Oryx guide will break things up for you.
So, let’s go through the basics first. The King’s chamber looks like an enormous square, with two columns in front and two in the back. The first two will be occupied by the daughters, so forget about those for a time being. These columns are the key to your success in this confrontation, so let’s give them some call signs: Right Pillar One (RP1), Right Pillar Two (RP2), Left Pillar 1 (LP1), and Left Pillar Two (LP2) respectfully.
That was a funny thing we did a while ago with “Clutches”, right? Don’t answer that and let’s do it again. Doing the same funny thing twice is twice as funny. This time we will need four Clutches. Every Clutch will be clutching their own personal slab.
For starters, pick a slab with a Taken Knight on top of it. This is the one you need - kill the Knight and put your first Clutch on top. When it is done, one of the players will become Torn Between Dimensions and should jump right next to our First Clutch. Both players then should locate an orb hovering next to the consequent slab. Once it is done, send Clutch Two to occupy said slab. A path, visible only to the Torn Between Dimensions player, will appear then, which they should follow. When they reach the end and pick up the sphere at the end, a related notification will appear. When it happens, all Clutches should IMMEDIATELY leave their designated slabs. There are lots of “oryx raid walkthroughs” that fail to mention that crucial detail.
Do this a couple more times until the Torn player receives the Brand buff. This very buff will allow the very same player to violently blast Ir Halak or Ir Anuk and begin the damage phase. Start with the one constantly throwing projectiles at you (honest to god, we do not remember which one is it, no one calls them by their names). It will make things easier down the line.
Note: Divinity is your go-to Exotic weapon for both the Daughters’ fight and Oryx. Its crazy amount of DMG per second will make both fights a breeze.
Repeat for each daughter until both are gone and our favourite guy (gender-neutral type of guy) - Oryx, appears in the room, miring the killer of his offspring.
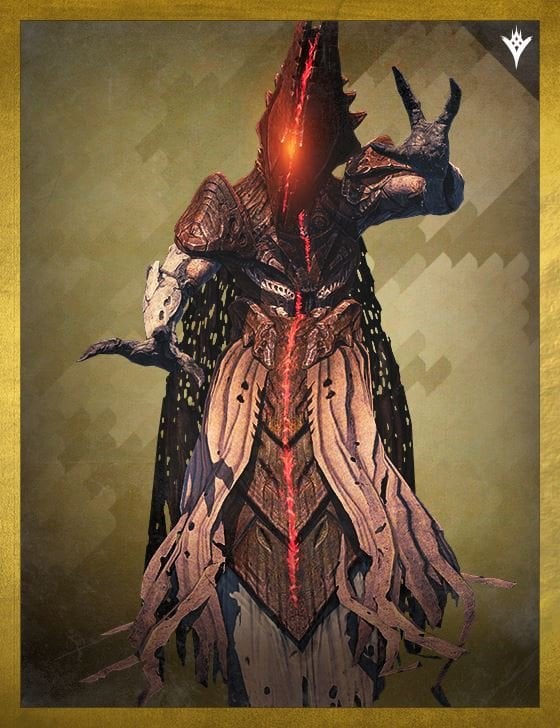
King’s Fall last boss, Oryx, the Taken King

Good news is - there is no jumping section here.Follow this Oryx raid walkthrough and you will be fine. Thematically fitting - Oryx’s confrontation is very similar to his daughters’. Send your Clutches to their designated slabs and watch his majesty himself emerge from the depths of the space. His loyal guard of four Taken Knights will also appear. Take them out and get on with the fight.
The position of the first Taken Knight showed which slab is the first one to activate was a go-to tactic in a previous onslaught. This time we are observing the mighty King’s fists and where they are fisting. One after another, he will strike every slab (yep, you guessed right - it is a one hit death). Some slabs will light up in a fancy green light - you need exactly them. Your Dimension Jumping team member should dash towards the green lit slab and preform the same tactic as in the previous clash.
Now, to the more innovating stuff - Light-Eater Ogres. There will be four of these fellas making their way to each slab. Every Clutch is pledged for taking their Ogre out. On death, these jolly greens will drop Taken Blight Bombs. Steer clear of those for a time being.
Immediately upon Ogre stopping breathing (we are actually not sure if they breathe) - his buddy Light-Eater Knight spawns in. These fellas will try to dash towards bombs and consume them. You and your team are expected to stop them as soon as possible.
As time’s arrow marches forward, your Torn member of the team will become the “Blight Stealer”. When it occurs, all Clutches should move into the bomb’s AoE. Remember, area of effect, not the bomb itself. Do not. Touch. The Bomb.
At some point, a notification will pop-up - “Oryx calls upon the darkness”. This basically means that bombs are going nova at any second and that you absolutely should consider running towards your Brand buffed friend as fast as you possibly can. Otherwise, Oryx’s next attack will instantly kill you.
If Oryx’s initial attacks were not enough to take down you and your other guardians up to this point - you and your team members are some tough bastards, we will give you that. Now it is your chance to pay the big bad some of his damage back. Oryx’s chest cavity is now open, with a heart-looking thing (aawwww, they do have a heart) in the center. Scratch that “aaaawww” - shoot the thing. Your Fusion Rifles, Divinities, and other heavy-hitting guns were put in your arsenal specifically for this moment.
Chances are that one damage phase was not enough for your team to finish the encounter. Two of two quite horrifying outcomes are available to you right now:
- Get thrown into upside-down and fight Oryx’s shadow to escape or die horribly.
- Dodge the King’s royal missile barrage and run in circles like it is your last day alive, or it just might become it. Alternatively, kill the spawning Taken Kings.
Wow, you survived again? Good. FINAL PHASE. Oryx changes his position and spawns two jolly greens. Your Brand induced team member again becomes the Blight Stealer, so you better repeat that entire bomb mumbo-jumbo and reach one last damage phase. Seal the deal!
Note: When we say “one last damage phase” - we mean that. Fail to finish off Oryx during that time, and your entire team is done for. We really hope that this “The Taken King” guide helped you out.
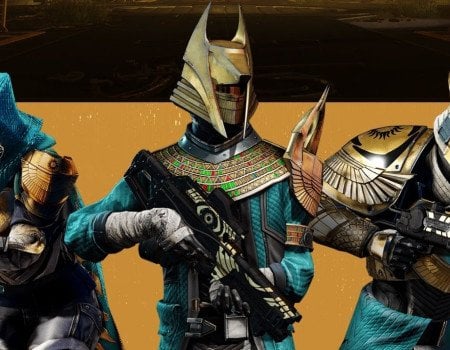
King’s Fall Loot Pool
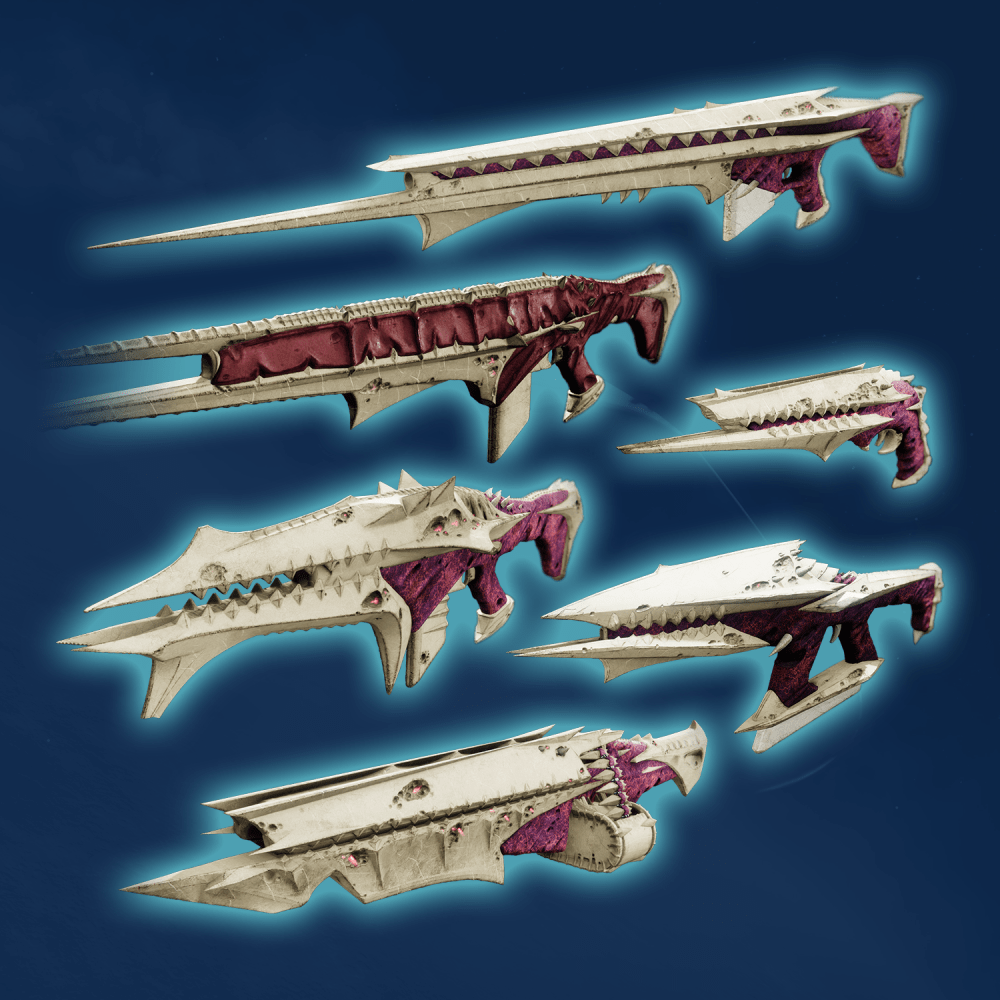
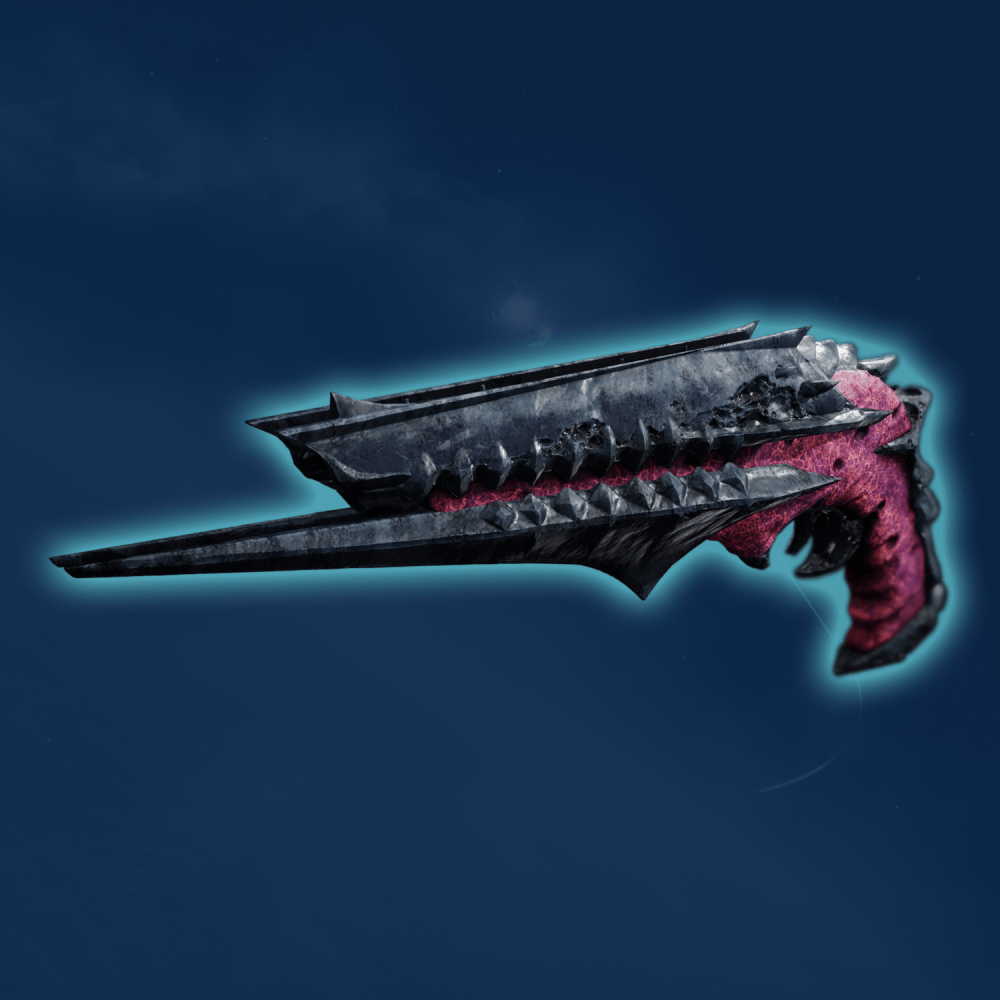
King’s Fall weapons quickly became PvE meta, with Doom of Chelchis holding on top of Light.gg chart weeks after the raid’s release. All weapons are nicely stylized after Hive thematic. The Loot Pool includes armor too, as well as a sparrow and a glider for some of the most challenging achievements. Here you can check a full list of all the loot available in the raid, with quick links to our offers if you fancy getting stuff without trying all that hard.
King’s Court:
- Doom of Chelchis - This void scout rifle is amazing at PvE when paired with Firefly and Dragonfly perks;
- Class Item.
First Encounter:
- Doom of Chelchis;
- Quilim’s Terminus - A stasis machine gun - a good boss melter and add killer if it comes with Stats for All + Killing Tally;
- Class Item, Chest Armor, Leg Armor.
Second Encounter:
- Smite of Merain - A kinetic pulse rifle out of your dreams. Demolitionist + Adrenaline Junkie can make it an absolute beast both in PvE and PvP;
- Defiance of Yasmin - Another all-rounder. This kinetic sniper rifle can rip and tear in PvE if paired with Ensemple + Firing Line. While Snapshot Sights and Opening Shot perks can make you a god in Crucible;
- Arms Armor, Chest Armor.
Third Encounter:
- Quilim’s Terminus;
- Midha’s Reckoning - This arc fusion rifle will come nicely with the new Arc class system added. Backup Plan and Reserviour Burst perks will only make it better;
- Zaouli’s Bane - A new trendy thing among solar hand cannons. Explosive Payload, Incandescent, Firefly - all these perks can make this baby destroy absolutely everything in PvE and PvP;
- Helmet Armor, Legs Armor.
Fourth Encounter:
- Smite of Merain;
- Defiance of Yasmin;
- Zaouli’s Bane;
- Arms Armor, Chest Armor.
Final Encounter:
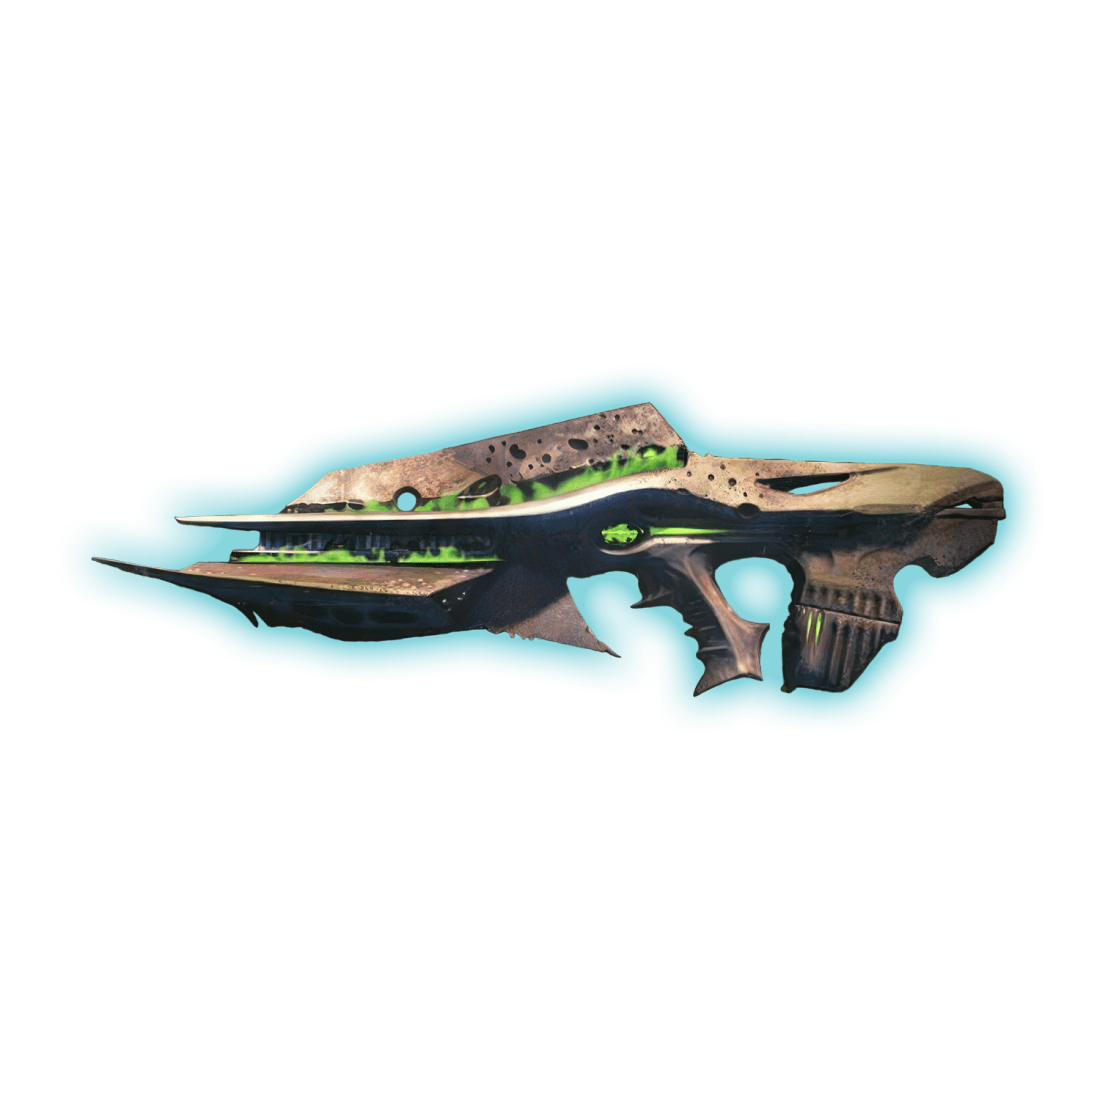
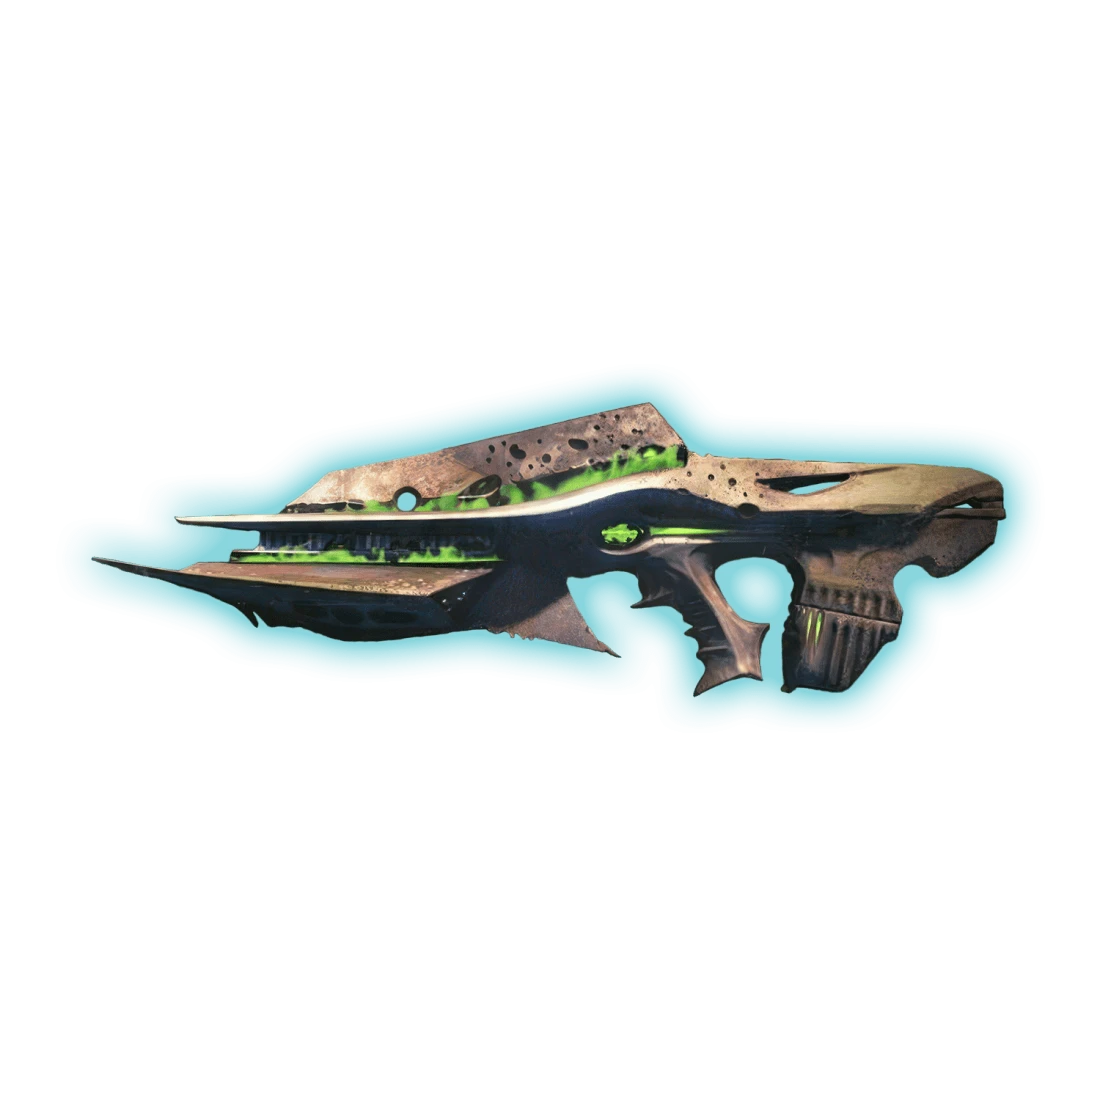
- Touch of Malice - Now this is absolutely spicy. This kinetic Exotic pulse rifle drains health for increased damage, before regenerating that fired shot. Rapidly defeating things with this gun also grants you additional health regeneration. In combination, these abilities make this gun a perfect choice for PvE activities, and a formidable foe in PvP.
- Any Legendary Drops from previous encounters.
Vehicles:
- Ossified Skycarver - Hive-looking ship, given for completing a raid.
- Ossein Earthcarver - Another thematic vehicle, this time a sparrow, available after completing all Master challenges.
Master King’s Fall Raid
The master version usually means a similar experience. A few difficult spikes there and there, more champions, more complicated mechanics, and so on. However, with enough time on your hands, you can fly through it as easily.
There is also a challenge related to each of the encounters completed on master difficulty. Completing them all will get you a major feeling of satisfaction and one fancy looking Ossein Earthcarver sparrow.
The list below breaks down how every encounter is different, although we could not add new champions and additional spawns to the list.
Totems
Pretty much the same, except teams now have to change sides each time, otherwise the Brand buff will not deposit.
Challenge: Grass is Always Greener
War Priest
Again, not much has changed. The time you have to prolong the damage phase, as it has shortened significantly. You now have to kill Taken Knight as fast as possible with a slight time window of 3 seconds.
Challenge: Devious Theivery
Golgoroth
One of the Tanks, while under Golgoroth’s Gaze, should jump into the pool with damaging players for a moment, before giving the gaze to another Tank.
Challenge: Gaze Amaze
Deathsingers
Clutches can not stand on one slab more than once and should constantly change each other.
Challenge: Under Construction
Oryx
Similar to “Under Construction”, players can not kill the same Ogre or Knight twice and should change each other.
Challenge: Hands Off
New versions of King’s Fall arsenal have also arrived, with Harrowed versions available for farming. Drop rates are still the same, though.
- Harrowed Zaouli’s Bane;
- Harrowed Midha’s Reckoning;
- Harrowed Doom of Chelchis;
- Harrowed Defiance of Yasmin;
- Harrowed Quilim’s Terminus;
- Harrowed Smite of Merain.
And do not forget about the Ossein Eartcraver Sparrow. It sure looks nice.
FAQ
Q: How to start the King's Fall raid?
A: Once you have met all the requirements, the road to King’s Fall raid is pretty simple. You can access the raid at any time through your Director. The Light Requirement is pretty much only one hard cap for this activity, all the other things just alter how much time you spend in the raid.
Q: Where is the King's fall raid located?
A: The King's Fall raid is located on the orbit of Saturn, in the rings of the gas giant. Action takes place on the Dreadnought, The Taken King’s flagship.
Q: Is Golgoroth taken or hive?
A: Hive. Golgoroth was created by Worm God Xol to trick Oryx into submission. His plan failed, though, and Golgoroth was reformed and made a Hive champion.
Q: What light level is the King’s fall?
A: 1580 + for normal version and 1600 + for Master version.
Q: Who is the final boss of the King’s Fall?
A: One of the Hive founders - The Taken King, Oryx.
Q: Is Touch of Malice a random drop?
A: Yes. The chance is approximately 5%, like other raid exotics at launch.